In this guide, I am going to show you how to set up a Github Actions self-hosted runner on the AWS EKS Cluster.
Prerequisites
- GitHub repository with access to create Personal Access Token (PAT)
- EKS Cluster
- Helm Installed in your system
Configuring Runner on AWS EKS Cluster
Follow the below steps to set up a self-hosted runner on EKS.
Step 1: Install Cert Manager on EKS Cluster
Run the below commands to install cert-manager on the EKS cluster using helm.
kubectl apply -f https://github.com/cert-manager/cert-manager/releases/download/v1.13.2/cert-manager.yamlThis command will install cert-manager on the cert-manager namespace as default.
You can check if cert-manager is installed properly using the command below
kubectl get pods --namespace cert-manager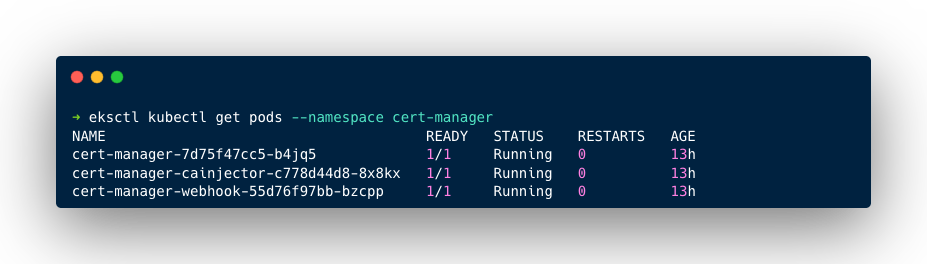
Step 2: Create Authentication Token
To authenticate the EKS cluster as a runner to GitHub Actions we are going to use the Personal Access Token (PAT) of GitHub.
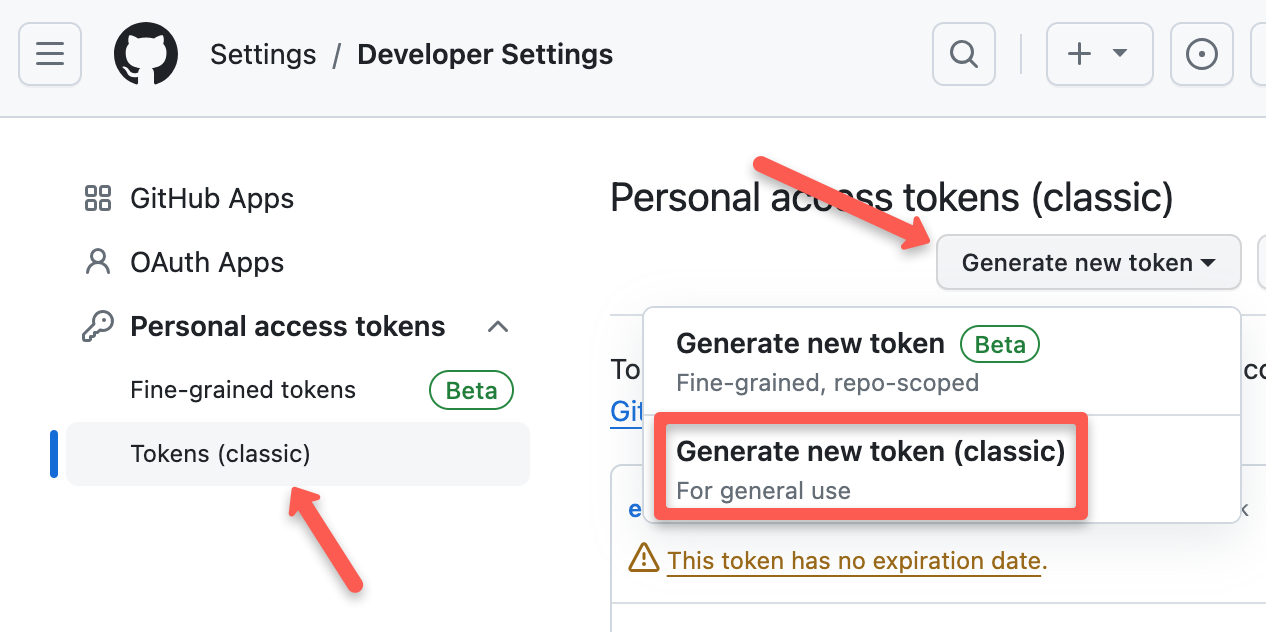
To create the token go to Settings->Developer settings->Personal access tokens, then select tokens and press the generate new token button as shown in the below image
Select Generate New token and a new page will open, give a name for your token and select the repo access as shown in the below image.
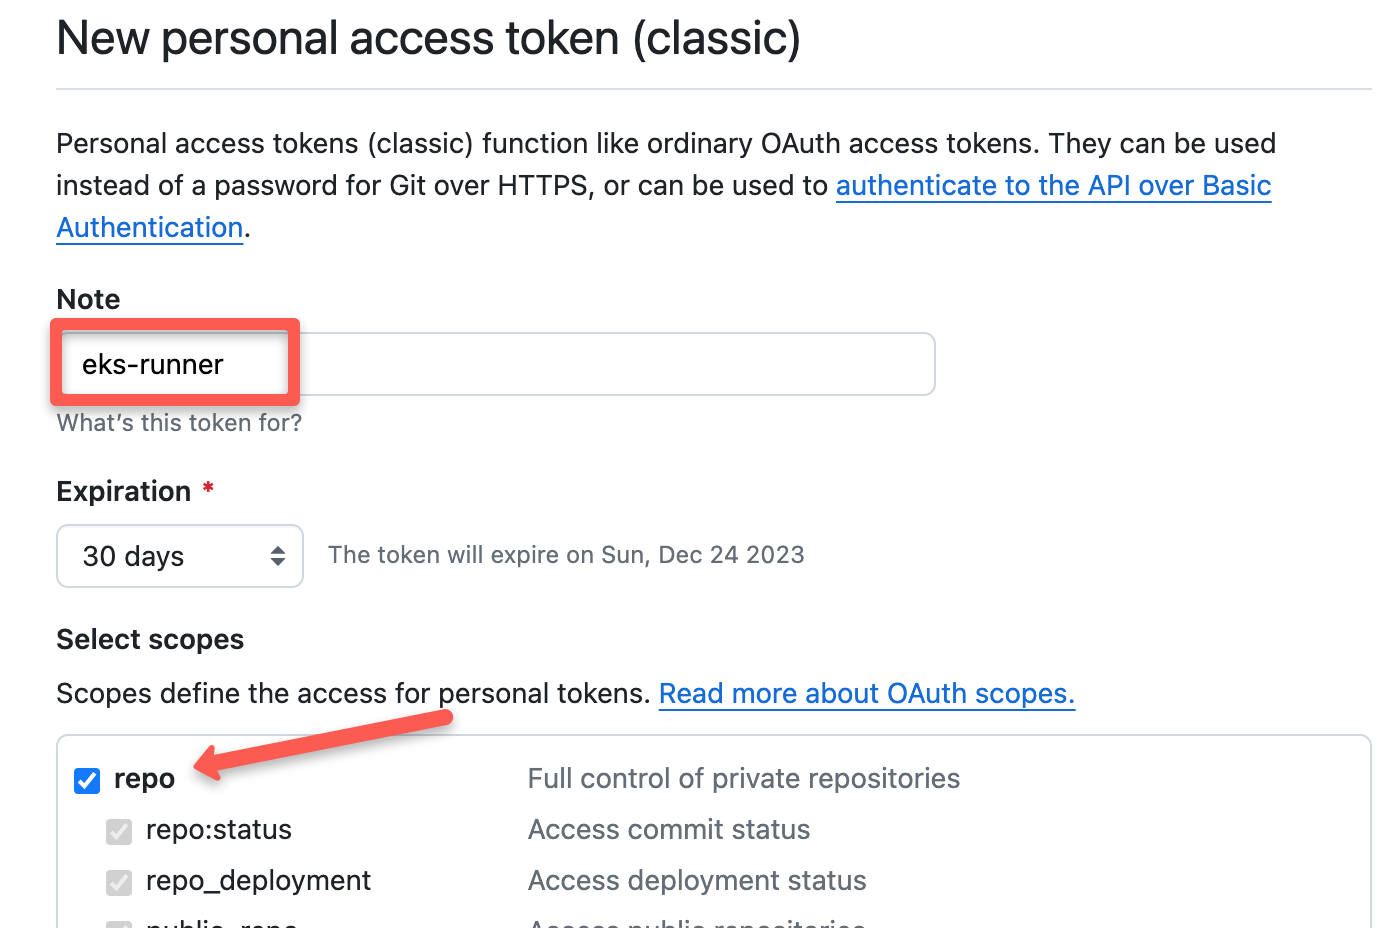
Now, generate the token by pressing the Generate token button at the bottom.
Copy the access token and create a Kubernetes secret using the below command, the secret containing the access token will be used by the actions runner controller.
Create a namespace and secret for actions-runner-controller using the command given below
kubectl create ns actions-runner-system

kubectl create secret generic controller-manager -n actions-runner-system --from-literal=github_token=xxxxxxxxxxxxxxxxxx43rw
Make sure to specify your access token in the above command.
Step 3: Install Actions Runner Controller (ARC) on EKS Cluster
Actions Runner Controller is an operator of Kubernetes that manages the self-hosted runners of GitHub actions.
It makes sure that the required resources to run a workflow in available by automatically deploying, scaling, and monitoring the runners on the cluster according to the needs.
To install Actions Runner Controller on your EKS cluster run the following commands
helm repo add actions-runner-controller https://actions-runner-controller.github.io/actions-runner-controller
helm repo update
helm upgrade --install --namespace actions-runner-system \
--create-namespace --wait actions-runner-controller \
actions-runner-controller/actions-runner-controller \
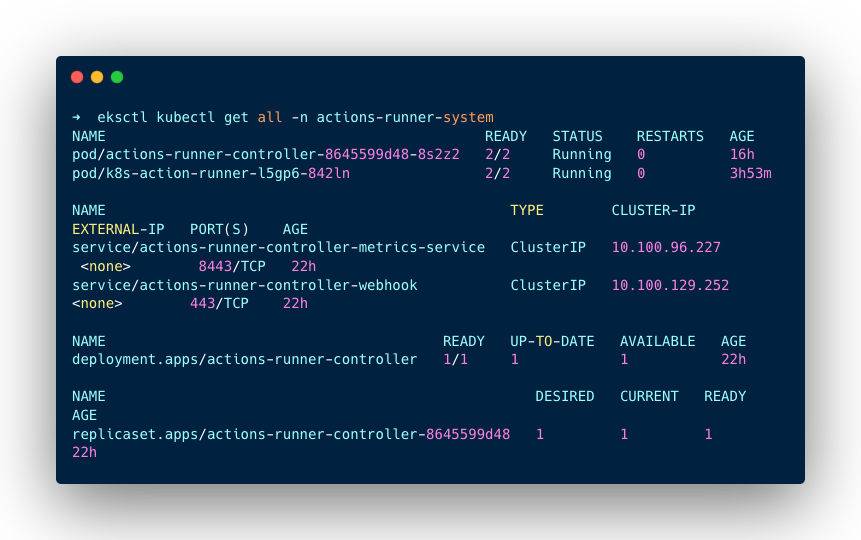
--set syncPeriod=1mOnce the installation is done, run the command given below to verify if the action runner controller is installed properly.
kubectl get all -n actions-runner-systemYou will get the following output
Step 4: Deploy Runner
To deploy a self-hosted runner for GitHub Actions, create a YML file runner.yml and copy the below content
apiVersion: actions.summerwind.dev/v1alpha1
kind: RunnerDeployment
metadata:
  name: k8s-action-runner
  namespace: actions-runner-system
spec:
  replicas: 1
  template:
    spec:
      repository: pet-clinic-project/github-actions
      labels:
        - "eks_runner"
Make sure to replace the repository name and label of your runner.
Run the below command to deploy the runner
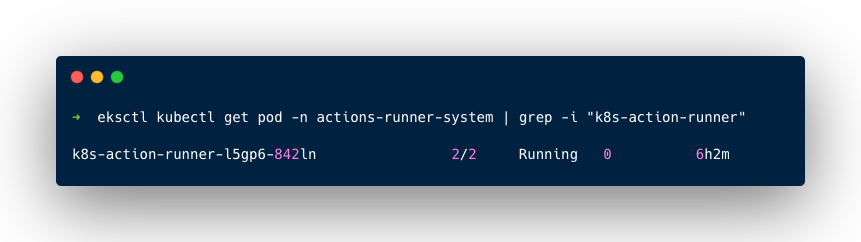
kubectl create -f runner.ymlCheck if the pod for the runner is created and running using the command
kubectl get pod -n actions-runner-system | grep -i "k8s-action-runner"You will get the following output while running the above command
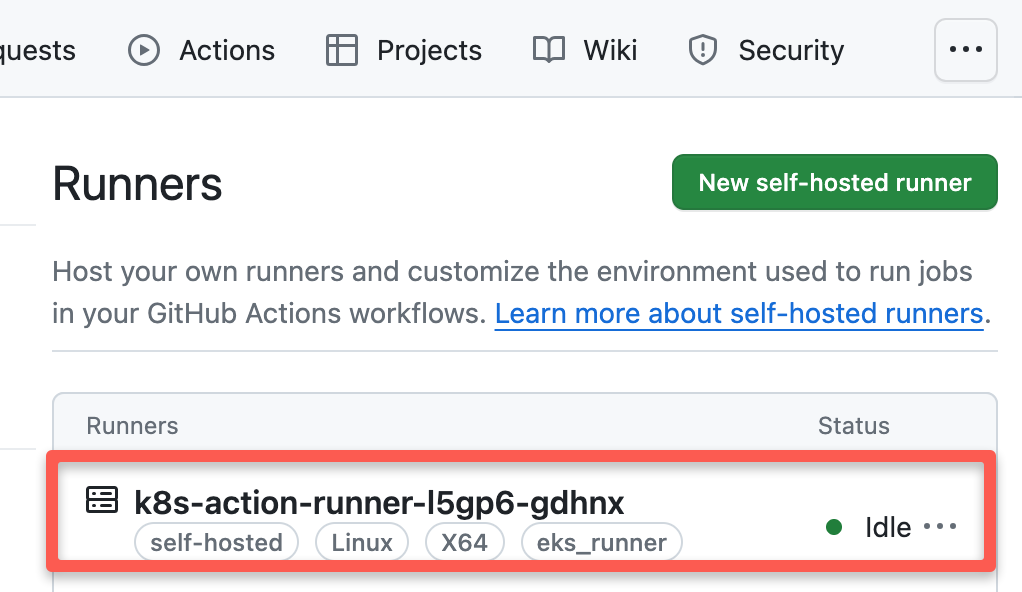
Now you can see your runner has been registered on GitHub in Settings -> Actions -> Runners as shown below
Test GitHub Actions Workflow
I am going to run the workflow with simple steps to check if the self-hosted runner is working properly. Create a YML file and your repository structure should be like given below
.
├── README.md
└── .github
    └── workflows
        └── test.yml
In GitHub Actions a YML file will be used to run the workflow which will be placed under the .github/workflows directory as shown in the above structure. Copy the below contents and paste them into your YML file.
name: Testing
on:
push:
branches:
- main
jobs:
build:
runs-on: eks_runner
container:
image: ubuntu:latest
steps:
- name: Checkout Repository
uses: actions/checkout@v2
with:
ref: main
- name: Echo Message
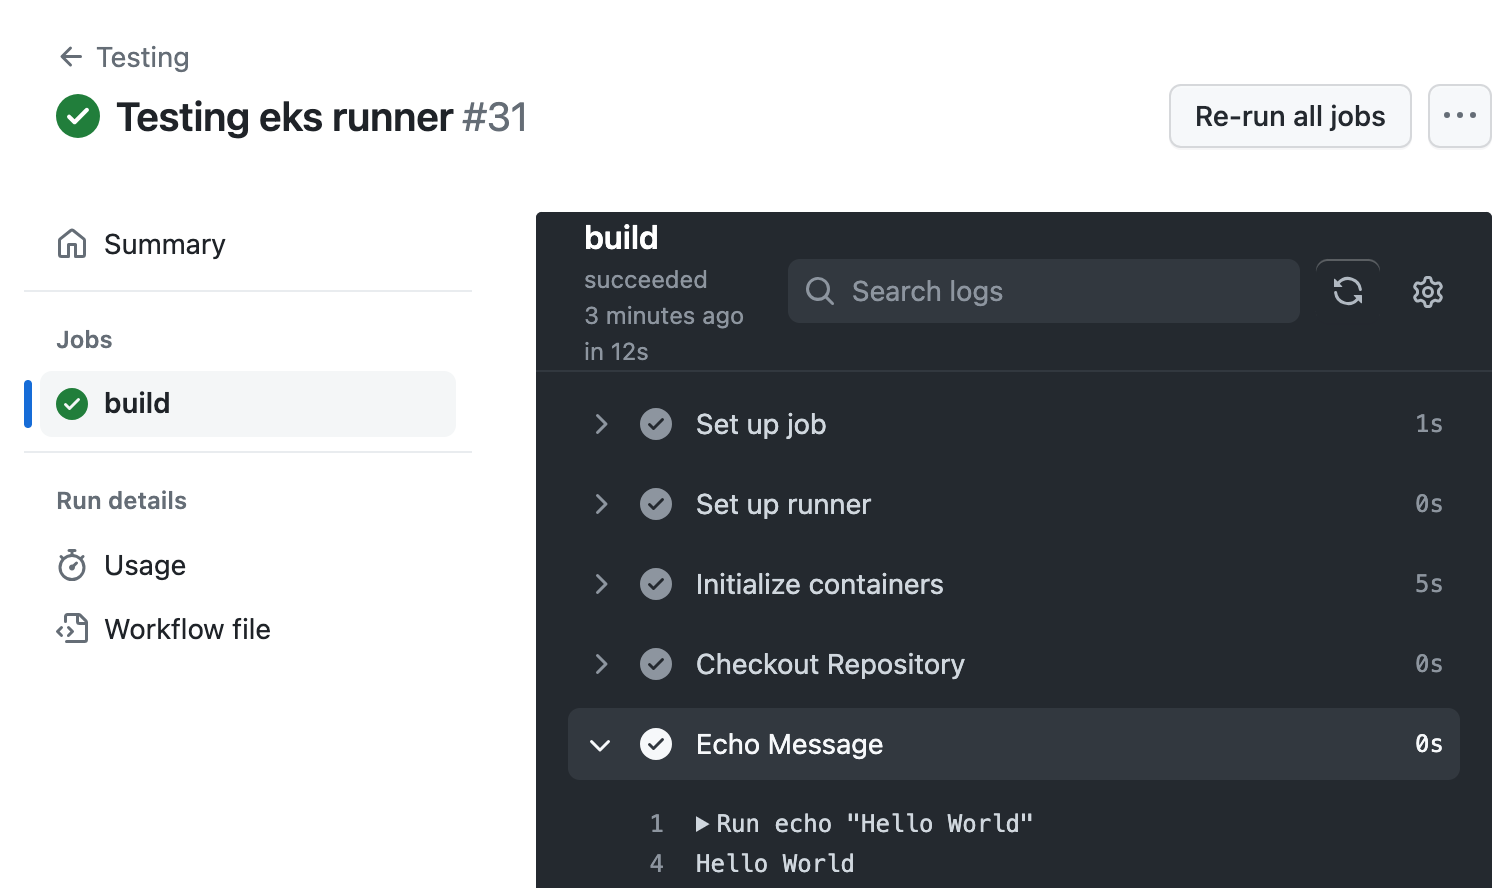
run: echo "Hello World"This YML file is configured like the workflow gets triggered whenever a change is pushed to the main branch and runs the build job on your GitHub Actions self-hosted runner.
Make sure to specify your runner's name in the above YML file.
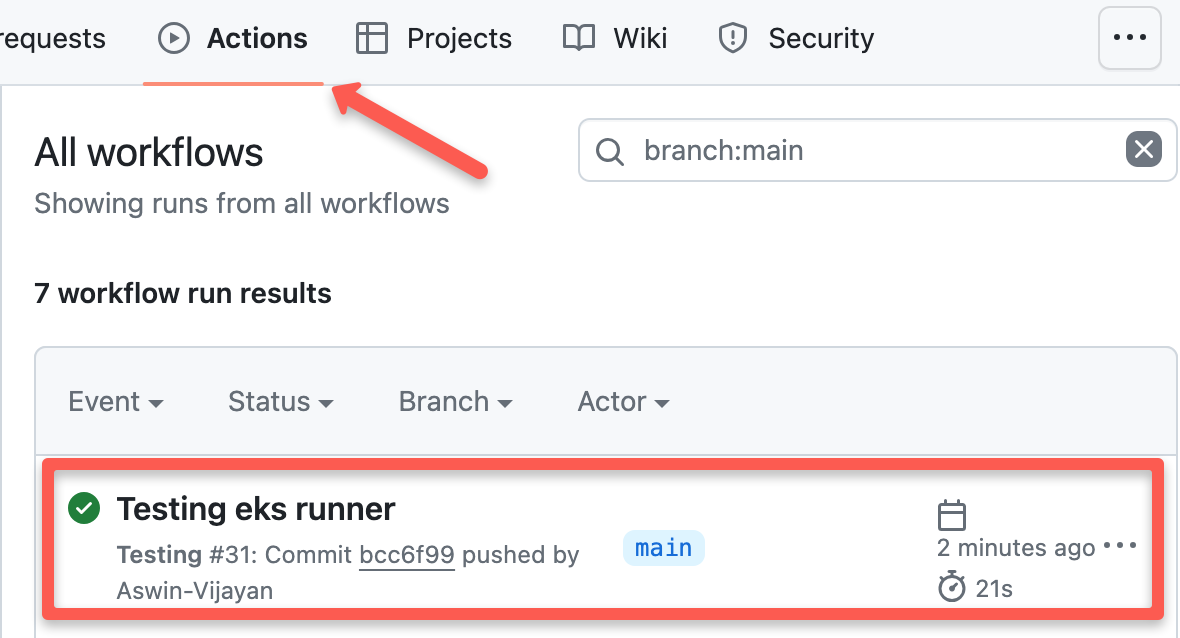
After creating the YML file, push the changes to your repository that will trigger the workflow.
You can see if the build process has started by going to your GitHub repository and selecting the Actions tab as given below.
Once your job has been finished, you can view the summary of the workflow as shown below.