

In this tutorial, you will learn to build Java application AMI using Packer. We will also validate the application by deploying a ec2 server using created AMI.
Here is what we will do in this tutorial.
- Create a Packer configuration file for Java
- Create the Java AMI Image With the application jar.
- Deploy ec2 with created AMI and validate the AMI by starting the application jar using the user data shell script.
If you are new to packer, I would recommend reading the packer tutorial first.
Prerequisites
- Java application: jar artifact of java application that you want to bake with the AMI. You can ignore this you just want java JDK/JRE in the AMI. Or you can use the java application build using maven guide to create a jar file.
- The Latest Packer binary installed
- AWS CLI configured with user permission to create an ec2 server.
Packer Java AMI GitHub Repo
The packer configuration and scripts used in this guide are hosted on the Packer Templates GitHub Repository under /aws/java directory. You can clone the repo to follow this guide.
git clone https://github.com/techiescamp/packer-templatesCreate Java Packer Configuration Files
Here is our folder structure to build Java application AMI.
java
    ├── java.pkr.hcl
    └── scripts
        └── java.sh
└── user-data.shjava.pkr.hclis the Packer configuration file (HCL format).java.shshell script in the scripts folder has the commands to install the latest JRE.user-data.shshell script contains the java application startup command that will be used as an ec2 user data script when deploying the ec2 instance.
Step 1: Create a folder named scripts and create file named java.sh inside it with the following contents. It is debian based script. If you are using Amazon Linux or Redhat, update the commands accordingly.
Here are installing JRE and creating /opt/deployment folder for jar file and /var/log/apps folder to write the application log file.
#!/bin/bash

set -e, -u, -x, -o pipefail

sudo apt update -y

sudo apt install openjdk-17-jre-headless -y

sudo mkdir /opt/deployment
sudo mkdir /var/log/apps

sudo chown -R $USER:$USER /opt/deployment
sudo chown -R $USER:$USER /var/log/apps
Step 2: Create a file named java.pkr.hcl and copy the following contents.
variable "ami_id" {
  type    = string
  default = "ami-017fecd1353bcc96e"
}

locals {
  app_name = "pet-clinic-java"
}

source "amazon-ebs" "java" {
  ami_name      = "packer-${local.app_name}"
  instance_type = "t2.micro"
  region        = "us-west-2"
  source_ami    = "${var.ami_id}"
  ssh_username  = "ubuntu"
  tags = {
    Env  = "dev"
    Name = "packer-${local.app_name}"
  }
}

build {

  sources = ["source.amazon-ebs.java"]

  provisioner "shell" {
    script = "scripts/java.sh"
  }

  provisioner "file" {
    source      = "/path/to/app.jar"
    destination = "/opt/deployment/app.jar"
  }

  post-processor "manifest" {
    output     = "manifest.json"
    strip_path = true
  }
}
Here is the script explanation.
- Here we are using a ubuntu base image with the official Ubuntu AMI id
ami-017fecd1353bcc96e. Replace it with the required base image AMI ID. - Replace
pet-clinic-javawith your app's name. - If you are using amazon Linux or Redhat AMI, replace
ssh_username = "ubuntu"withssh_username = "ec2-user" - In the file provisioner block, we are copying the local jar file to the
/opt/deployment/app.jarlocation. Replace/path/to/app.jarwith the absolute path of the jar location. - The shell provisioner block executes the
java.shshell script from the scripts folder.
Create Java Application AMI Using Packer
Now that we have all the Packer configurations ready, we can create the custom Java AMI using Packer.
Ensure you are in the directory where you have the java.pkr.hcl file.
First, let's format and validate the packer template. So if there are any configuration issues, it will throw an error.
packer fmt java.pkr.hcl
packer validate java.pkr.hcl
Now that we have a valid packer configuration file, let's execute the following packer command to build the AMI.
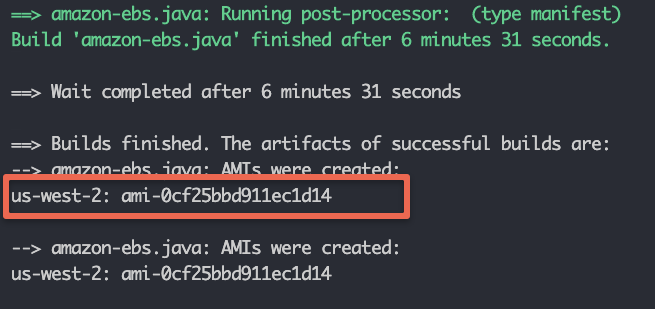
packer build java.pkr.hclOn successful execution, you will see the created AMI Id output as shown below.
Also, the AMI Id gets stored in the manifest.json file in the same directory. It gets created as part of the post-processor block. This is useful in CI/CD pipelines where you want to parse the output AMI id to be used in the next pipeline state.
{
  "builds": [
    {
      "name": "java",
      "builder_type": "amazon-ebs",
      "build_time": 1669270824,
      "files": null,
      "artifact_id": "us-west-2:ami-0cf25bbd911ec1d14",
      "packer_run_uuid": "2ed4531c-c0c6-2821-6448-e1e5791a238a",
      "custom_data": null
    }
  ],
  "last_run_uuid": "2ed4531c-c0c6-2821-6448-e1e5791a238a"
Test & Validate Java AMI
Now that we have created the Java AMI, we can validate it by deploying a ec2 server with the newly created AMI.
I will pass a user data shell script to start the application jar that is backed into the AMI. Here is the minimal java startup command. Save it in a file namesd user-data.sh
#!/bin/bash
nohup java -jar /opt/deployment/app.jar > /var/log/apps/app.log 2>&1 &
Following is the AWS Cli command to create ec2 server. You need to replace the parameters highlighted in bold. scripts/user-data.sh is the path of the user data script. Replace it with the path of your script file location.
aws ec2 run-instances \
    --image-id ami-0daa89240da066fe5 \
    --count 1 \
    --instance-type t2.micro \
    --key-name techiescamp \
    --security-group-ids sg-023b5f8e016ce08e1 \
    --subnet-id subnet-0782c73ff7b32d7c2 \
    --block-device-mappings "[{\"DeviceName\":\"/dev/sdf\",\"Ebs\":{\"VolumeSize\":30,\"DeleteOnTermination\":false}}]" \
    --tag-specifications 'ResourceType=instance,Tags=[{Key=Name,Value=java-app-server}]' 'ResourceType=volume,Tags=[{Key=Name,Value=java-app-server-disk}]' \
    --user-data file://scripts/user-data.sh
Once the instance is launched, Java applications will take 2-3 minutes for startup. You can verify the application by visiting to http://IP-ADDRESS:8080.
Conclusion
With Packer you can follow Immutable infrastructure model for applciation deployments. By building Java images backed with application jar file, you can easily deploy Java application son AWS ennvironents with the flexibility to change the Java startup parameters using ec2 user data.
If you are using Java applciation on AWS autoscalaing groups, packer is a great tool tp package the application jar in to AMI artifact in the CI/CD process.
Also, check out the devops engineer guide if you are starting your DevOps journey.
