

In this blog we will look at Kubernetes External secrets operator setup on AWS EKS and integrate with AWS secrets manager for fetching secrets.
External Secrets Operator is an operator for Kubernetes that manages Kubernetes Secrets on external secrets managers like AWS Secrets Manager, Google Secrets Manager, Azure Key Vault, etc.
External Secrets Operator Workflow
Given below is the diagrammatic workflow of the External Secrets Operator, which gets secrets from the AWS Secrets Manager and saves them as a secret in the EKS cluster.
Here is how it works.
- An External Secrets Object is created in a namespace you want to use the secret.
- The External Secrets Object contains information such as the refresh interval, the secret store to refer to, the target where the secret needs to be stored, and the AWS Secrets Manager name and secret key.
- The SecretStore contains the authentication details for the External Secrets Managers, which helps the External Secrets Operator to access the secret.
- External Secret Operator fetches the secrets stored in AWS Secrets Manager and saves them as Kubernetes Secrets on the EKS cluster.
- The Kubernetes Secrets created by the External Secrets Operator get the required secrets from the AWS Secrets Manager and refresh the Secrets with a time period to keep it up to date.
- After the Kubernetes Secret is created you can use the secrets in the application by specifying the Secret name and Secret key in which the secret values are mapped.
Prerequisites
The prerequisites are given below.
- AWS CLI with access to IAM and EKS
- EKS cluster with Amazon EKS Pod Identity Agent addon
- Helm
- kubectl
- eksctl
Steps to Setup External Secrets Operator on EKS
If you are ready with the prerequisites, follow the steps below to set up an External Secrets Operator on EKS.
In this setup, we will get the secrets on AWS Secrets Manager and save them as a Kubernetes secret using External Secrets Operator and keep them in sync.
Step 1: Create an IAM Policy for the External Secrets Operator
Let's start with creating a policy for assigning permission to the external secrets operator to get secrets from the AWS Secrets Manager.
The policy we are going to create only gives read permission of AWS Secrets Manager to the external secrets manager.
Use the policy command to create a JSON file with permission for the policy.
cat << EOF > policy.json
{
    "Version": "2012-10-17",
    "Statement": [
        {
            "Sid": "AllowAccessToSecretsManager",
            "Effect": "Allow",
            "Action": [
                "secretsmanager:ListSecrets",
                "secretsmanager:GetSecretValue",
                "secretsmanager:DescribeSecret",
                "secretsmanager:ListSecretVersionIds"
            ],
            "Resource": "arn:aws:secretsmanager:$Region:$Account-ID:secret:*"
        }
    ]
}
EOF
Update the region where you have the secret and your account ID in the above command.
Note: As a best practise, use the specific secret name instead of ‘*’, to avoid giving permission for all the secrets.
For example: "Resource": "arn:aws:secretsmanager:$Region:$Account-ID:secret:testing-secrets-manager"
Run the following command to create the policy with the policy.json file.
aws iam create-policy \
    --policy-name external-secrets-policy \
    --policy-document file://policy.json
Once the policy is created, run the following command to get the ARN of the policy and save it as a variable. This will be useful when associating the policy to a role.
export POLICY_ARN=$(aws iam list-policies --query "Policies[?PolicyName=='external-secrets-policy'].Arn" --output text)Now, run the following command to check if the ARN is saved as a variable.
echo $POLICY_ARNThis command will show the policy's ARN.
Step 2: Create an IAM Role for the Service Account
We will be using pod identity mapping to attach a role to a service account.
Using the following command, write a trust relationship for pod identity in a JSON file.
cat <<EOF > trust-policy.json
{
  "Version": "2012-10-17",
  "Statement": [
    {
      "Effect": "Allow",
      "Principal": {
        "Service": "pods.eks.amazonaws.com"
      },
      "Action": [
        "sts:AssumeRole",
        "sts:TagSession"
      ]
    }
  ]
}
EOF
Now, run the following command to create a role with the trust relationship in the trust-policy.json file.
aws iam create-role \
    --role-name  external-secrets-role \
    --assume-role-policy-document file://trust-policy.json
Once the role is created, run the following command to associate the policy with the role.
aws iam attach-role-policy \
    --role-name external-secrets-role \
    --policy-arn $POLICY_ARN
Run the following command to get the role's ARN and save it as a variable. This will be useful when assigning the role to the service account.
export ROLE_ARN=$(aws iam get-role --role-name external-secrets-role --query "Role.Arn" --output text)Now, run the following command to check if the ARN is saved as a variable.
echo $ROLE_ARNThis command will show the role's ARN.
Step 3: Create a Service Account and Assign the Role
The next step is to create a service account and assign the role we created in the previous step using pod identity.
First, create a namespace, we will be creating every resource inside the external-secrets namespace.
kubectl create ns external-secretsNow, create a service account inside the namespace using the following command.
kubectl create sa external-secrets-sa -n external-secretsOnce the service account is created, run the following command to assign the role to the service account using pod identity.
eksctl create podidentityassociation \
    --cluster $Cluster-Name \
    --namespace external-secrets \
    --service-account-name external-secrets-sa \
    --role-arn $ROLE_ARN
In the above command, update the name of your cluster.
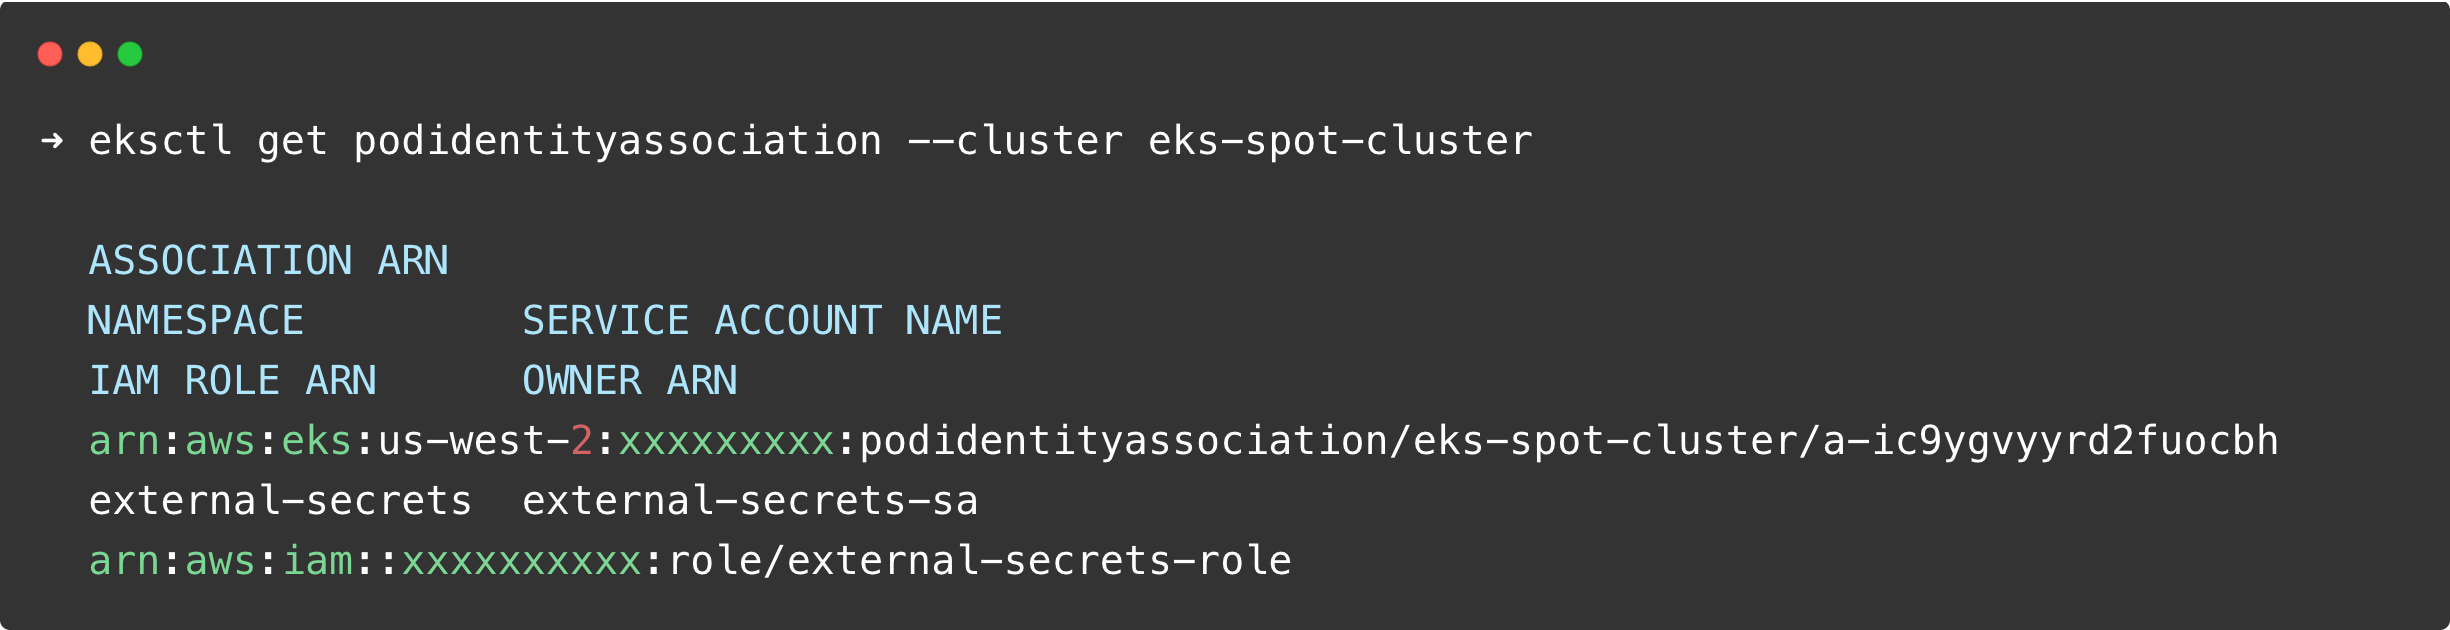
To check if the role has been attached to the service account, run the following command.
eksctl get podidentityassociation --cluster $Cluster-Name If the role is successfully attached to the service account, you will get the following output:
Step 4: Install External Secrets Operator
Now, we are going to install External Secrets Operator using Helm.
Add the repo for External Secrets Operator on your system using the command given below.
helm repo add external-secrets https://charts.external-secrets.ioAfter adding the repo, get the values.yaml file of the helm chart so that we can specify the service account we created in the previous step.
helm show values external-secrets/external-secrets > values.yamlOpen the values.yaml file set the create a service account to false because we have already created it and specify the name of the service account as shown below
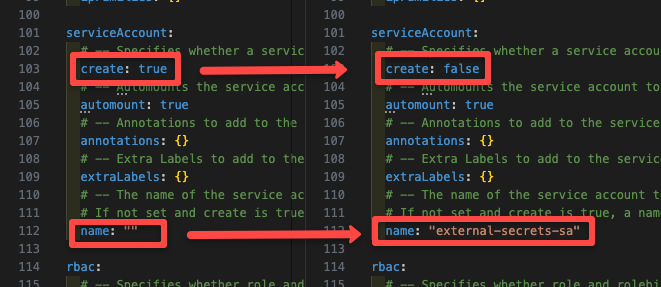
This makes the service account we created earlier the default service account of the External Secrets pod.
Now run the following command to install External Secrets Operator with the values.yaml file
helm install external-secrets external-secrets/external-secrets \
  --namespace external-secrets \
  --set installCRDs=true \
  -f values.yaml
This command installs the External Secrets Operator on the external-secrets namespace.
The CRDs are set to true so that the Helm can install the required custom resources for the External Secret Operator on the cluster.
Use the following command to check if the pods of external secrets operator are up and running.
kubectl get po -n external-secretsYou will get the following output.

Step 5: Create a SecretStore
To create a SecretStore, create a YML file secretstore.yml and copy the below content
apiVersion: external-secrets.io/v1beta1
kind: SecretStore
metadata:
  name: aws-secret-store
  namespace: external-secrets
spec:
  provider:
    aws:
      service: SecretsManager
      region: $Region
Make sure to update the region where you have the secret.
Run this YML file to create a SecretStore aws-secret-store on the namespace external-secrets.
The SecretStore is the resource that tells the External Secrets controller how to access external resources.
It uses the role we attached to the Service Account external-secrets-sa for authentication.
You may have doubts about how it knows the correct service account to use.
Since we are using pod identity, we cannot specify the service account with serviceAccountRef; it only works when using OIDC.
Without serviceAccountRef, it will make use of the default service account of External Secrets pod, which is external-secrets-sa that we created in Step 3.
Now, run the following command to create the secret store.
kubectl apply -f secretstore.yamlRun the following command to check if the secret store has been created successfully.
kubectl get secretstore -n external-secretsYou will get the following output as shown below.
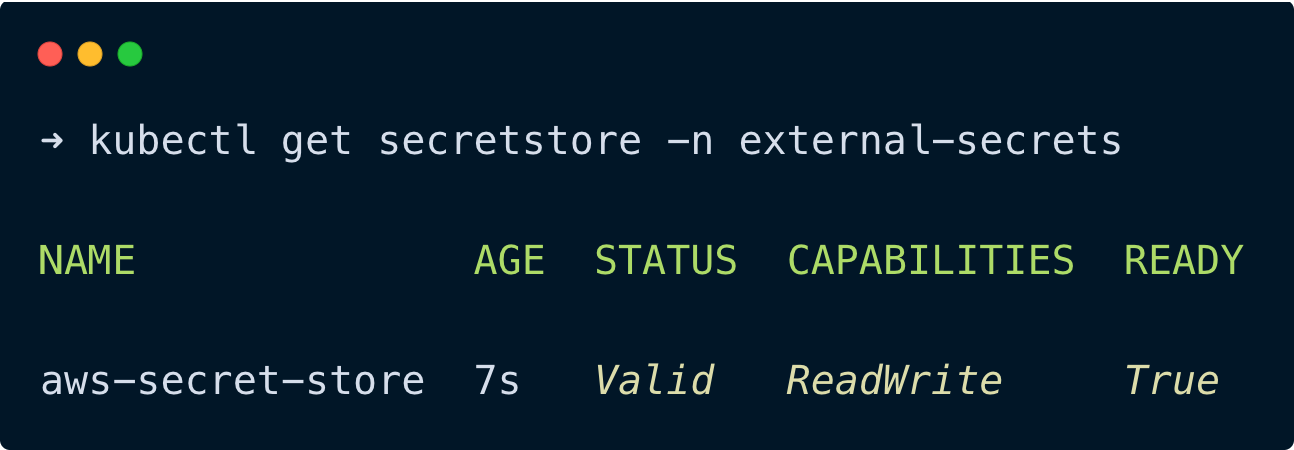
You can see in the above image, the status of the secret store is valid and it is ready to use.
Step 6: Create an External Secret
To create a Secret, create a YML file externalsecret.yaml and copy the below content
apiVersion: external-secrets.io/v1beta1
kind: ExternalSecret
metadata:
  name: external-secret
  namespace: external-secrets
spec:
  refreshInterval: 1h
  secretStoreRef:
    name: aws-secret-store
    kind: SecretStore
  target:
    name: aws-secret
    creationPolicy: Owner
  data:
  - secretKey: aws-secrets-manager
    remoteRef:
      key: {secret-name}
      property: {secret-key}
Make sure to replace secret-name and secret-key with your Secrets Manager Secrets name and key of the value you want to fetch.
The above YML file stores the secret on the target aws-secret on the namespace external-secrets.
For every 1hr, it refreshes and updates the secrets from the SecretStore.
It fetches the specific secret from AWS Secrets Manager and stores it in a Kubernetes secret as aws-secret.
Now, run the following command to create an External Secret to sync the secret between AWS Secrets Manager and Kubernetes secret in the Cluster.
kubectl apply -f externalsecret.yamlRun the following command to check if the external secrets have been created.
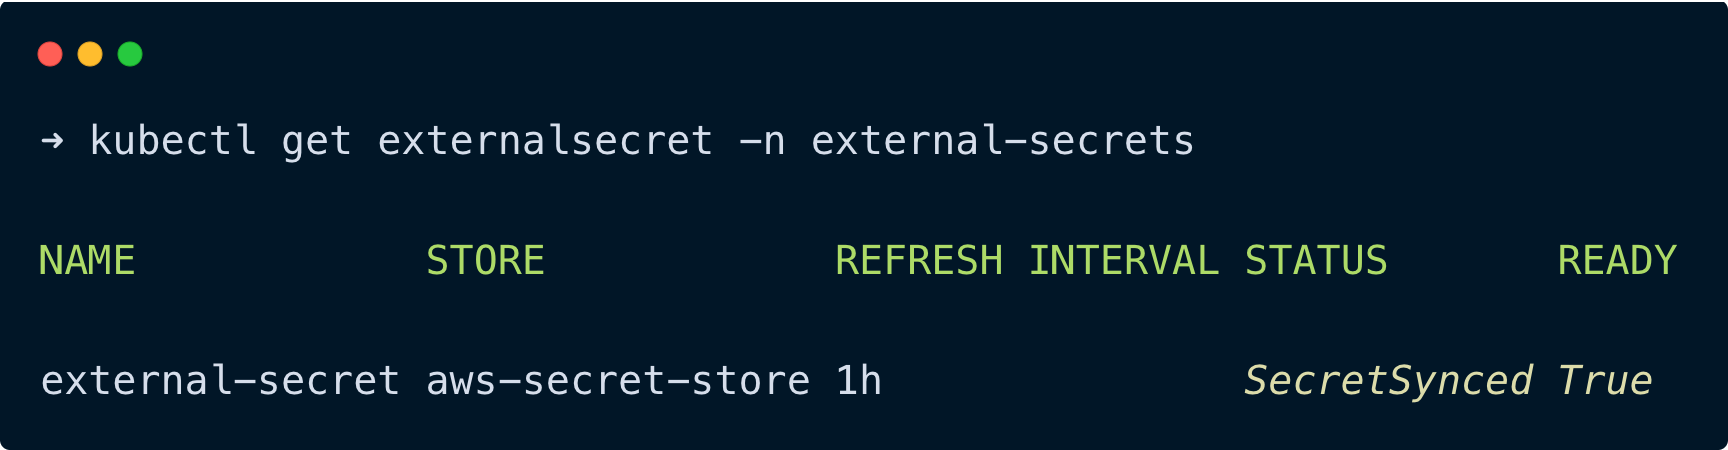
kubectl get externalsecret -n external-secretsYou can see the external secret is ready, and the secret is synced.
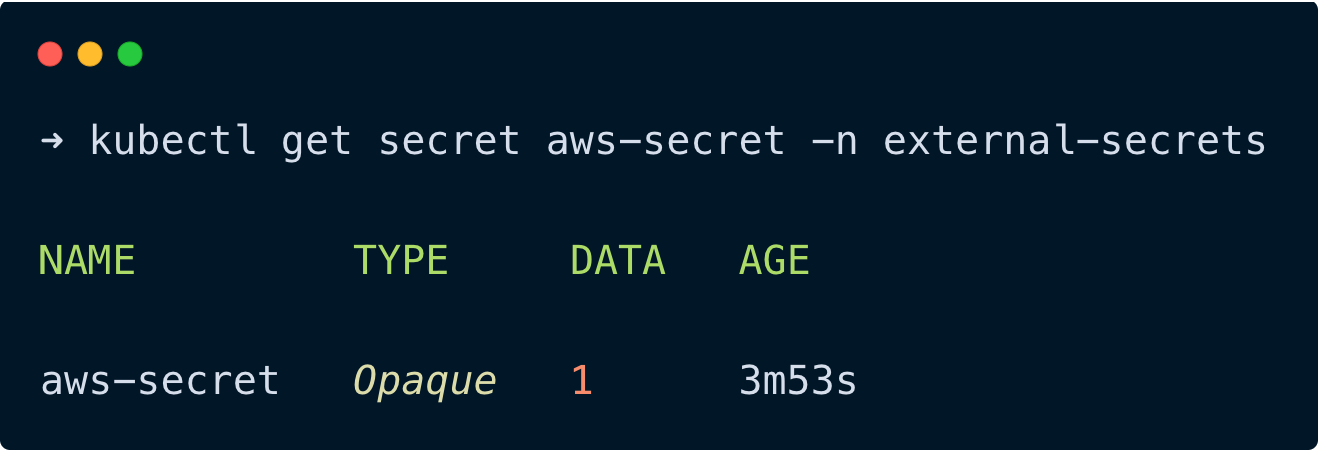
Run the following command to check if the secret has been created successfully.
kubectl get secret aws-secret -n external-secretsYou will get the following output.
Step 7: Verify the Secret
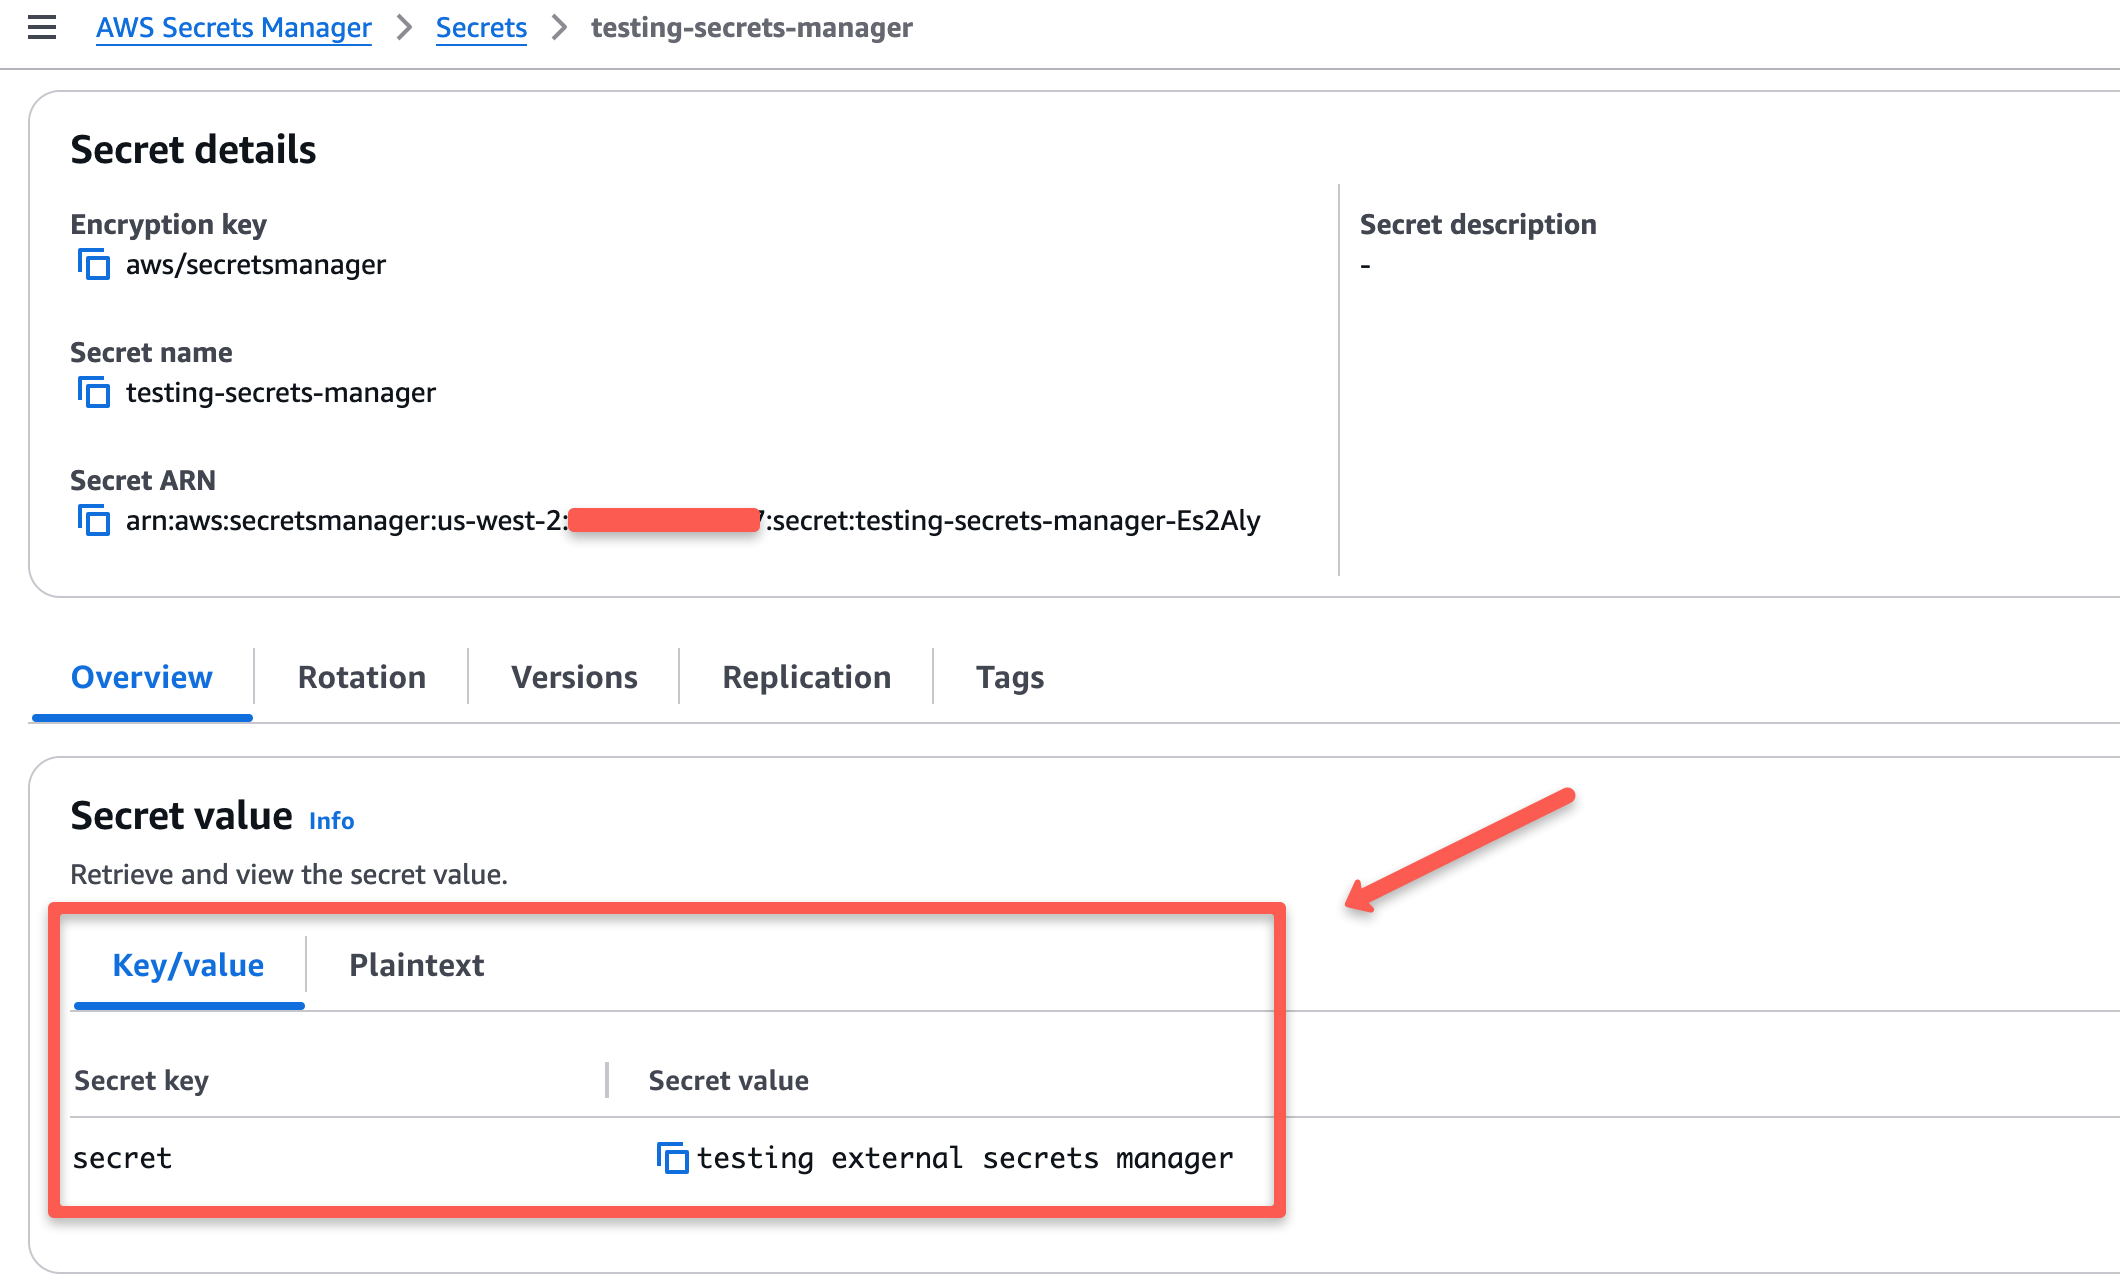
Now, verify if the secret in the Kubernetes secret aws-secret and the secret in AWS Secrets Manager are the same.
The secret in my Secrets Manager is given below.
Run the following command to get the secret aws-secret in YAML format.
kubectl get secret aws-secret -n external-secrets -o yamlYou will get the output as below
apiVersion: v1
data:
aws-secretsmanager: dGVzdGluZyBleHRlcm5hbCBzZWNyZXRzIG1hbmFnZXI=
immutable: false
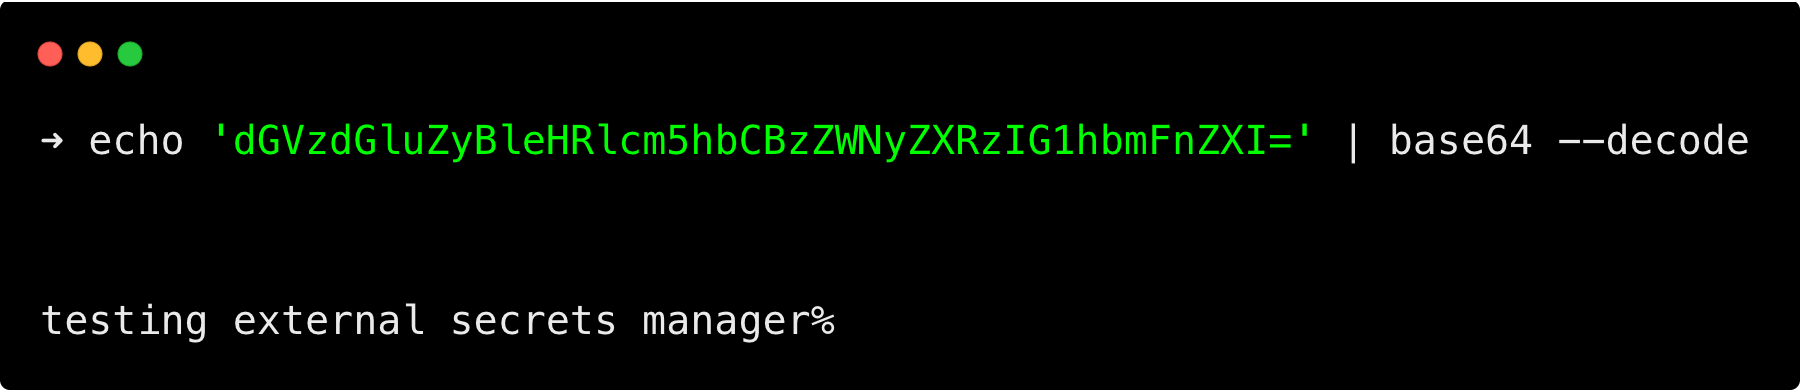
kind: SecretLet's decode the secret dGVzdGluZyBleHRlcm5hbCBzZWNyZXRzIG1hbmFnZXI= and see if the secret is the same as AWS Secrets Manager.
To decode the value, run the following command.
echo 'dGVzdGluZyBleHRlcm5hbCBzZWNyZXRzIG1hbmFnZXI=' | base64 --decodeYou can see the secret is the same.
Step 8: Cleanup
If you no longer need to use the setup and want to clean it up, run the following commands.
helm uninstall external-secrets -n external-secrets

kubectl delete ns external-secrets
Conclusion
In this blog, we explored how to set up an External Secrets Operator on AWS EKS to fetch secrets from AWS Secrets Manager and keep them in sync.
We also covered how to verify that the secrets are correct and provided commands to clean up the setup when it is no longer needed.
If you’re looking for native methods to integrate Secrets Manager with EKS, check out the Secrets Store CSI Driver integration with EKS.
