


In this guide, you will learn how to mount OCI container images as volumes in Kubernetes Pods using the ImageVolume feature.
This feature is useful in ML projects that work with LLMs, as it allows you to package model data in OCI images and easily switch between different models.
What is ImageVolume
The Image Volume feature allows you to use OCI images as volumes directly within Kubernetes pods.
In Kubernetes version 1.31, the Image Volume feature was introduced, and in Kubernetes version 1.36, the image volume feature was marked as a stable release and enabled by default.
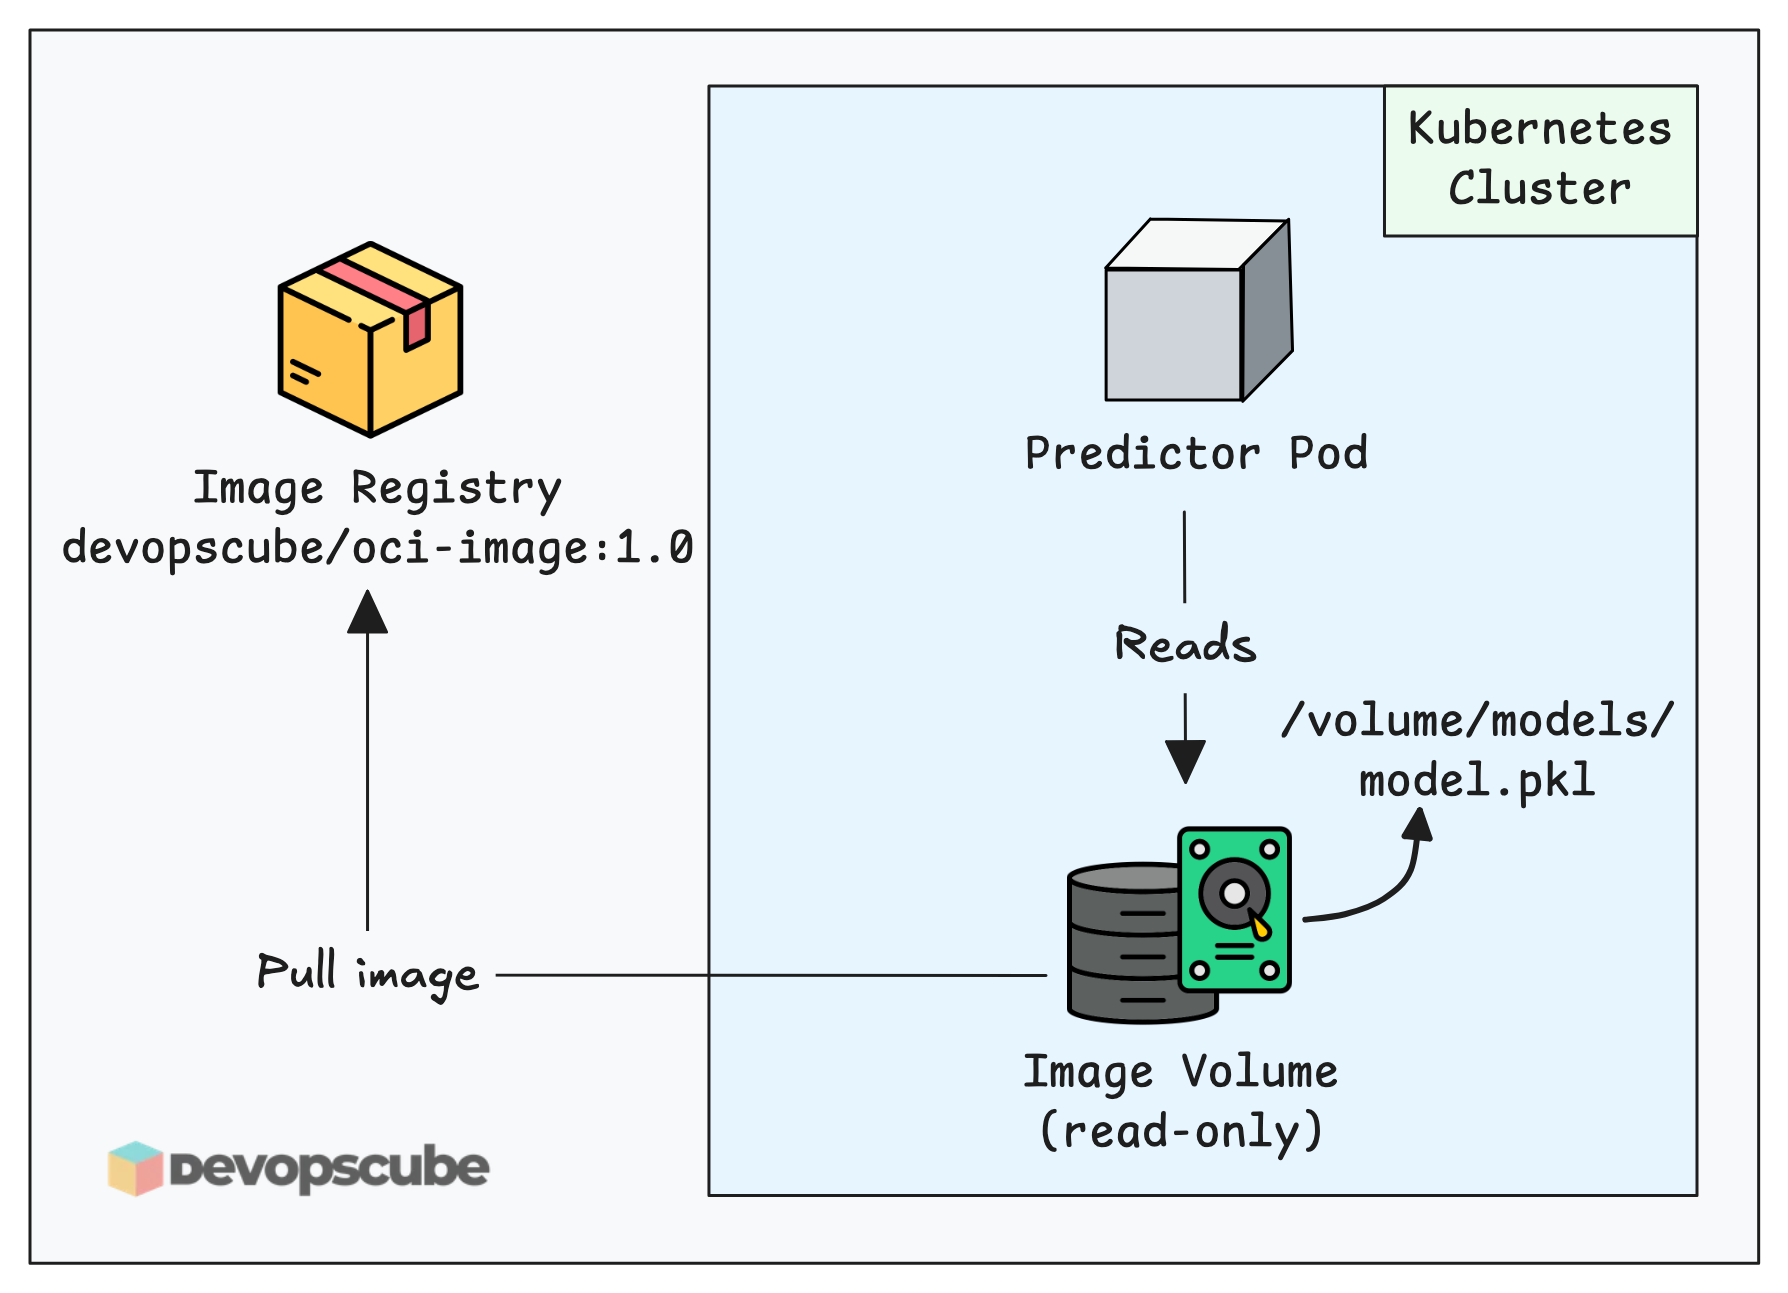
The below image gives you a high level overview of how OCI images are mounted to pods using the image volume feature.
So what are OCI images?
OCI images follow the rules set by Open Container Initiative. For example, Docker, Podman, and container runtimes like containerd and CRI-O use OCI image rules.
You can use the ImageVolume feature to store model files, binary files, configuration files, or other data in images which can be mounted to pods.
Also, a key thing about this feature is that it is a read only Volume.
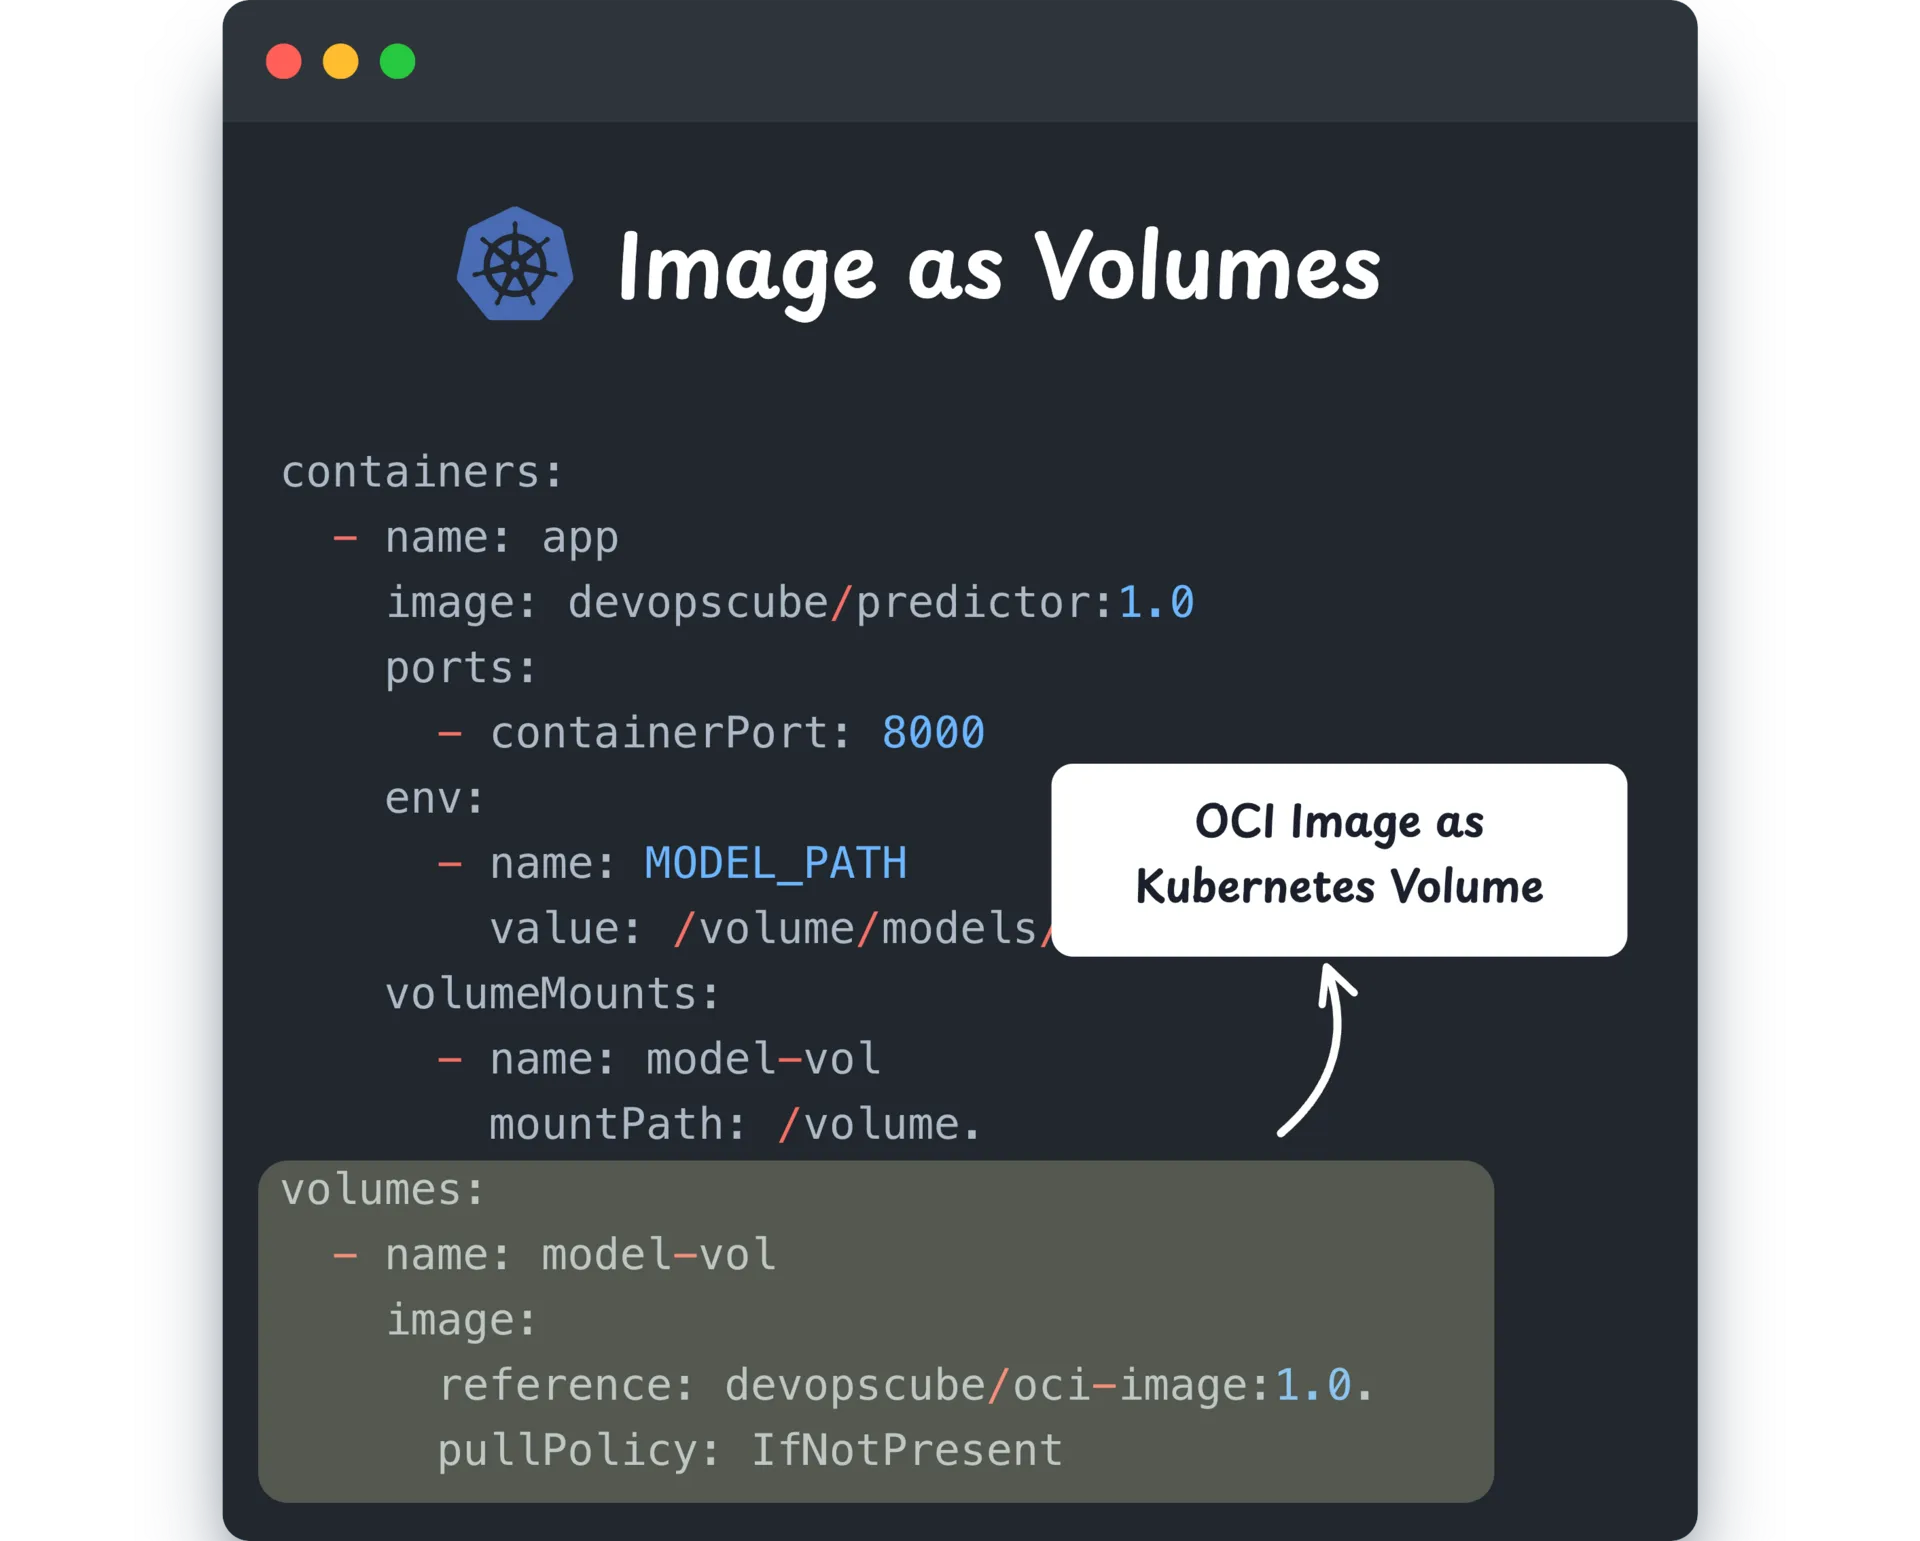
Now, lets get started with the practical example.
How to Mount OCI Image as a Volume in Kubernetes Pods
In this section, we will build an OCI image and a sample predictor application, then deploy them in the Kubernetes cluster to test the ImageVolume feature.
Follow the below steps to mount an OCI image as a volume for a Kubernetes pod.
Step 1: Build an OCI Image
The first step is to build an OCI image.
For this example, I am using a prediction model that I have locally. You can replace the model file with any file for testing.
Here is the Dockerfile.
FROM scratch
COPY model.pkl /models/model.pkl
You can see, unlike other Dockerfiles that build images on top of a base images, the OCI image is built using FROM scratch.
devopscube/oci-image:1.0.You can use it directly for testing.
Step 2: Build a Sample Predictor Application
To test the ImageVolume, we will build a simple Python predictor application. This application loads the model.pkl file directly from the mounted image volume.
devopscube/predictor:1.0, which you can use for testing.Here is the Python code that is part of the predictor image.
import os
import joblib
import numpy as np
from fastapi import FastAPI
from pydantic import BaseModel

MODEL_PATH = os.environ.get("MODEL_PATH", "/models/model.pkl")
model = joblib.load(MODEL_PATH)

app = FastAPI()

class PredictIn(BaseModel):
    instances: list

@app.get("/healthz")
def healthz():
    return {"ok": True, "model_path": MODEL_PATH}

@app.post("/v1/models/model:predict")
def predict(p: PredictIn):
    X = p.instances
    try:
        X_arr = np.array(X, dtype=float)
        preds = model.predict(X_arr).tolist()
    except Exception:
        preds = model.predict(X).tolist()
    return {"predictions": preds}
Step 3: Mount the ImageVolume With Deployment
Now, lets create a deployment with the predictor container image and the OCI volume image to test the image volume.
Here are the Deployment and Service manifests.
apiVersion: apps/v1
kind: Deployment
metadata:
  name: predictor
spec:
  replicas: 1
  selector:
    matchLabels:
      app: predictor
  template:
    metadata:
      labels:
        app: predictor
    spec:
      containers:
      - name: app
        image: devopscube/predictor:1.0
        ports:
        - containerPort: 8000
        env:
        - name: MODEL_PATH
          value: /volume/models/model.pkl
        volumeMounts:
        - name: model-vol
          mountPath: /volume
      volumes:
      - name: model-vol
        image:
          reference: devopscube/oci-image:1.0
          pullPolicy: IfNotPresent
---
apiVersion: v1
kind: Service
metadata:
  name: predictor-svc
spec:
  selector:
    app: predictor
  ports:
  - port: 80
    targetPort: 8000
Deploy the above manifest and check if the pod is running without issues.
$ kubectl get po

NAME                        READY   STATUS    RESTARTS   AGE

predictor-5f8bb486d-jd7k2   1/1     Running   0          64s
Now, exec into the pod and check if the model.pkl file is inside the volume.
$ kubectl exec -it predictor-5f8bb486d-jd7k2 -- ls /volume/models

model.pkl
Now run the following command to port-forward the predictor service so that we can test the prediction endpoint.
kubectl port-forward svc/predictor-svc 8080:80Now, use the following curl command from your workstation to send a prediction request to the predictor application. This will validate whether the application is able to access the model.pkl file from the ImageVolume.
curl -X POST \
  -H "Content-Type: application/json" \
  -d '{
        "instances": [
          "sparrow",
          "elephant",
          "rose"
        ]
      }' \
  "http://127.0.0.1:8080/v1/models/model:predict"
You will get the following output.

This is the expected output, 0 means animal, 1 means bird, and 2 means plant.
ImageVolume With subPath
Lets say you have multiple models in different folders of the OCI image and you want to mount a specific model or want to mount multiple models to the pod.
This is why subPath was introduced for ImageVolumes in Kubernetes v1.33.
The image below shows how the subPath mounts a specific model to the pod.
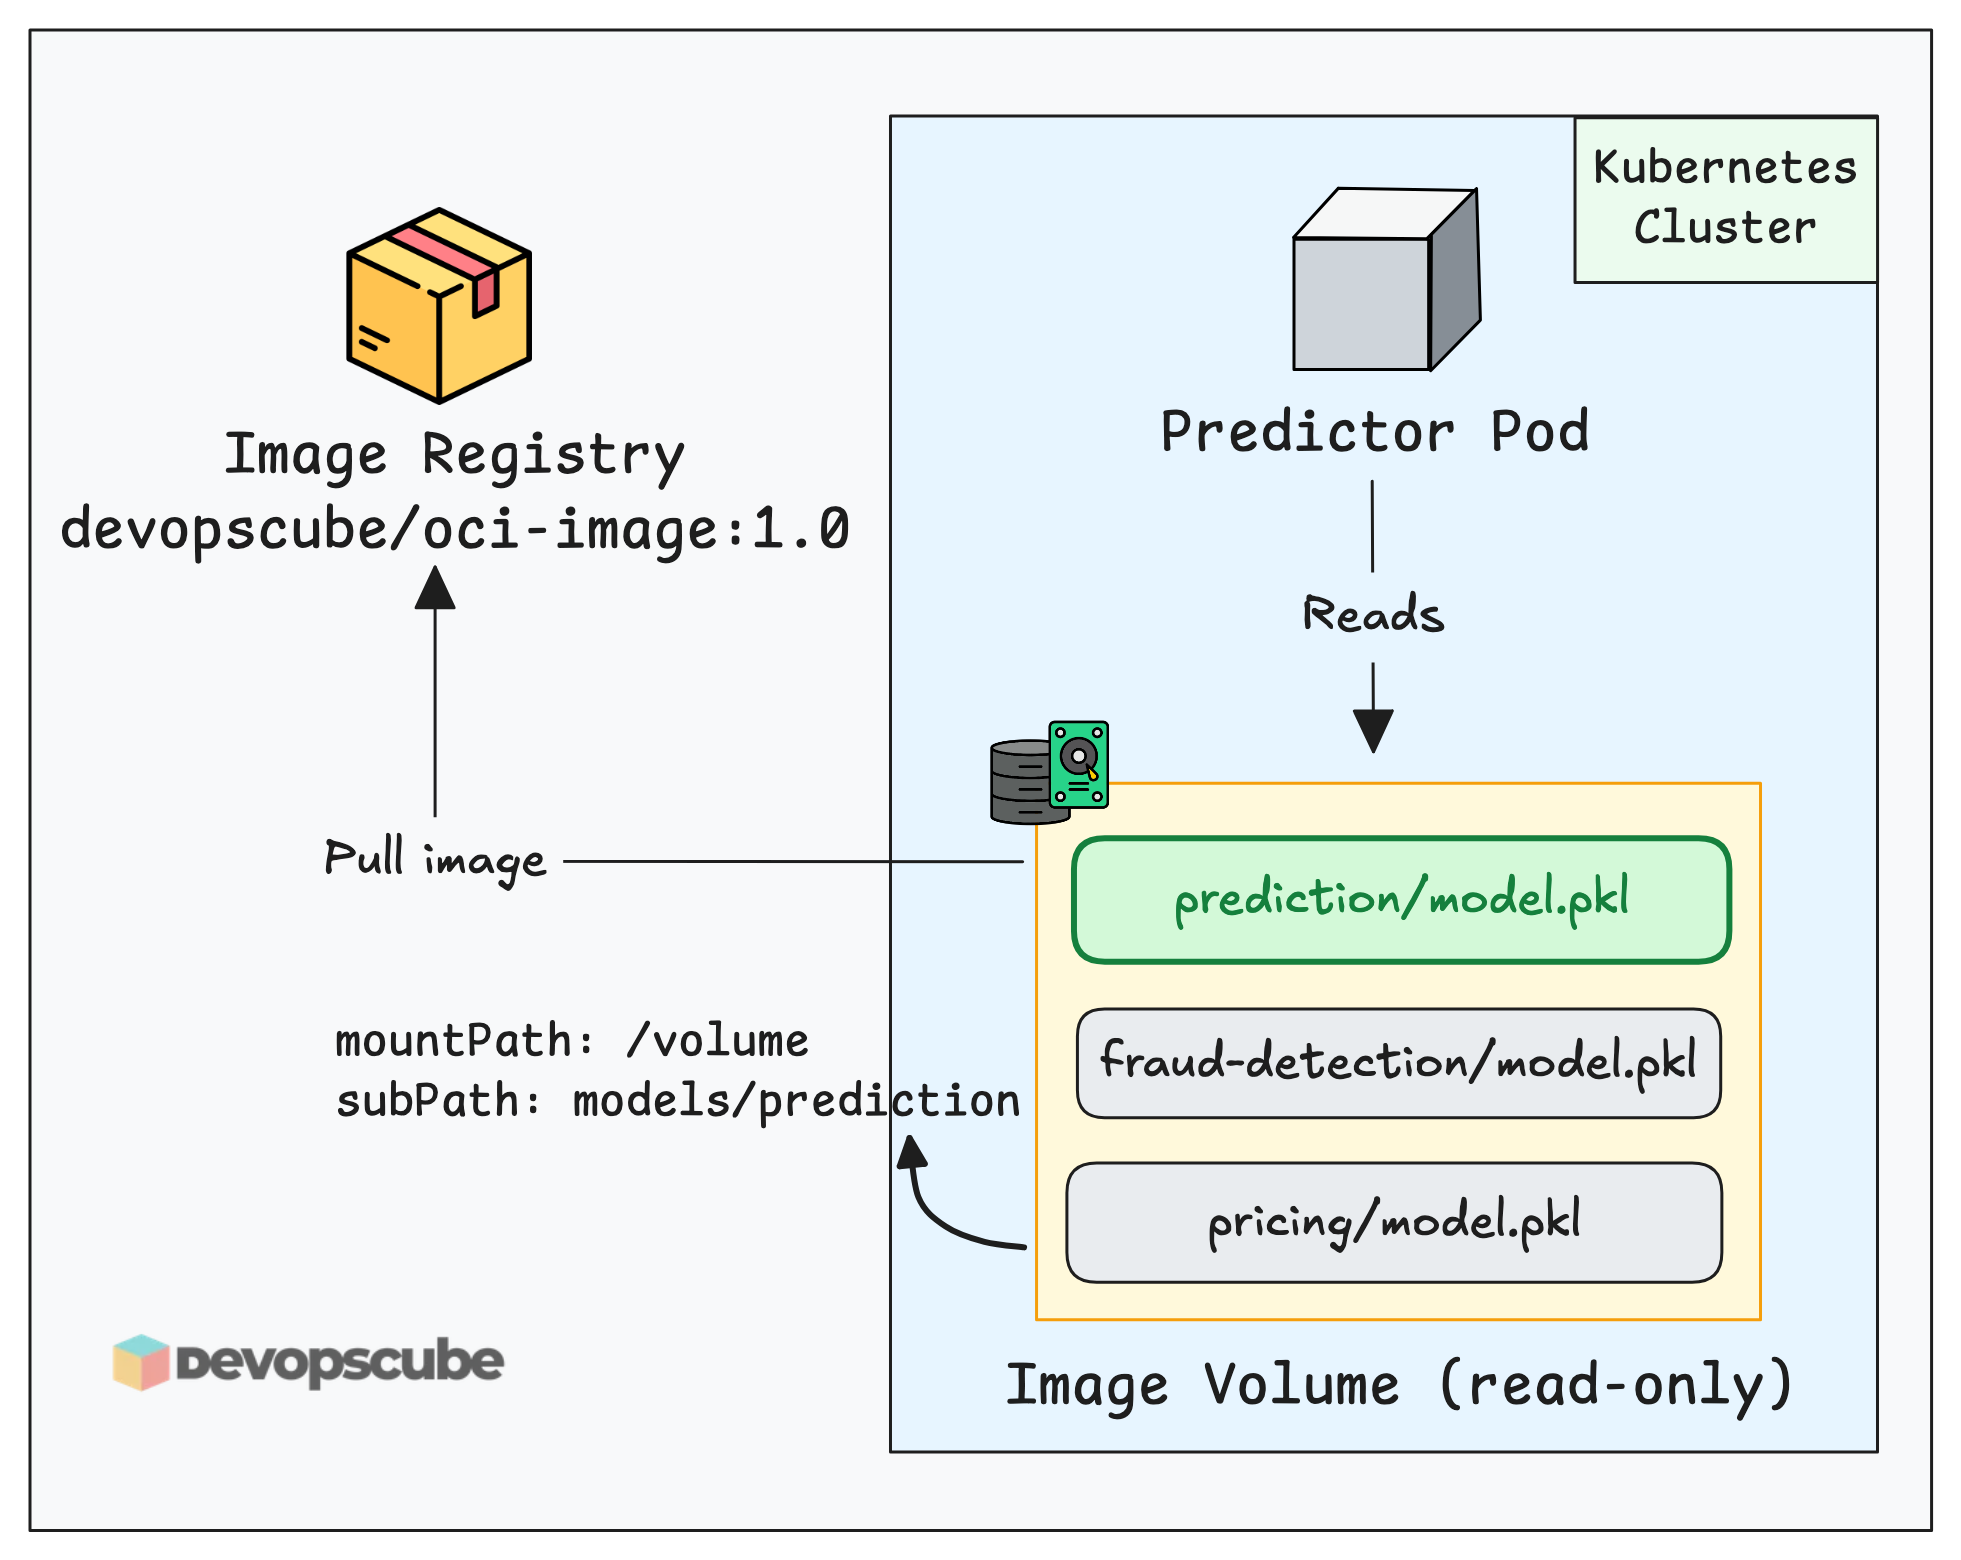
And the volumeMounts section in the manifest will look like below.
  env:
  - name: MODEL_PATH
    value: /volume/model.pkl
  volumeMounts:
  - name: model-vol
    mountPath: /volume
    subPath: models/prediction
volumes:
- name: model-vol
  image:
    reference: devopscube/oci-image:1.0
    pullPolicy: IfNotPresent
In this way, you can use same image for multiple models and choose model path in the subPath.
That’s a wrap! 🎉
Conclusion
In this post, you learned about the ImageVolume feature in Kubernetes, built an OCI image, and tested it with a sample predictor ML application.
This feature makes it easy to package data, tools , or models and switch between models without managing complex storage setups.
Refer the Kubernetes ML features blog to know more about native ML support in Kubernetes.
If you want to learn more Kubernetes concepts, look at our Kubernetes tutorial blog.
Try this feature and let me know how it goes!
