

In this guide, I have covered Kubernetes pod core concepts in detail using practical examples and use cases.
So if you want to understand,
- Understand core Kubernetes Pod concepts
- Learn the anatomy of a Pod
- How to create a pod step by step
- Ways to access and troubleshoot Pods
- Understand Pod associated objects
This guide is for you.
The aim of this guide is to make you understand the building blocks of the pod and do a practical implementation of deploying a pod and accessing the application running on it.
Also, there are many concepts associated with a Pod object. So I have given all the information and concepts related to a Pod to further build on the basics you have learned.
What is a Kubernetes Pod?
Before getting into Kubernetes Pod concepts, let's understand containers.
A container as we all know, is a self-contained environment where we package applications and their dependencies. Typically, a container runs a single process (Although there are ways to run multiple processes). Each container gets an IP address and can attach volumes and control CPU and memory resources, among other things. All these happen via the concepts of namespaces and control groups.
Kubernetes is a container orchestration system for deploying, scaling, and managing containerized applications, and it has its own way of running containers. We call it a pod. A pod is the smallest deployable unit in Kubernetes that represents a single instance of an application.
For example, if you want to run the Nginx application, you run it in a pod.
So how does it differ from a container?
A container is a single unit. However, a pod can contain more than one container. You can think of pods as a box that can hold one or more containers together.
Pod provides a higher level of abstraction that allows you to manage multiple containers as a single unit. Here instead of each container getting an IP address, the pod gets a single unique IP address and containers running inside the pod use localhost to connect to each other on different ports.
It means containers inside the Kubernetes pod share the following
- Network namespace - All containers inside a pod communicate via localhost.
- IPC namespace: All containers use a shared interprocess communication namespace.
- UTS namespace: All containers share the same hostname.
What is not shared between containers inside a pod?
- By default, the PID namespace is not shared however kubernetes provide options to enable process sharing between containers inside the pod using
shareProcessNamespaceOption. - The mount namespace is not shared between containers. Each container has its own private filesystem and directories. However, the pod mount volumes are shared between containers.
In a nutshell, here is what you should know about a pod:
- Pods are the smallest deployable units in Kubernetes.
- Pods are ephemeral in nature; they can be created, deleted, and updated.
- A pod can have more than one container; there is no limit to how many containers you can run inside a pod.
- Each pod gets a unique IP address.
- Pods communicate with each other using the IP address.
- Containers inside a pod connect using localhost on different ports.
- Containers running inside a pod should have different port numbers to avoid port clashes.
- You can set CPU and memory resources for each container running inside the pod.
- Containers inside a pod can share the same volume mount if you mount the same volume into each container.
- All the containers inside a pod are scheduled on the same node; It cannot span multiple nodes.
- If there is more than one container, during the pod startup, there is no guaranteed start order for regular containers. Whereas the init containers inside the pod run in sequence.
Pod YAML (Object Definition)
Now that we have a basic understanding of a Pod, let's have a look at how we define a Pod. Pod is a native Kubernetes Object and if you want to create a pod, you need to declare the pod requirements in YAML format. You can also create a pod using the kubectl imperative command. Which we will see in a later topic.
Here is an example Pod YAML that creates an Nginx web server pod. This YAML is nothing but a declarative desired state of a pod.
apiVersion: v1
kind: Pod
metadata:
  name: web-server-pod
  labels:
    app: web-server
    environment: production
  annotations:
    description: This pod runs the web server
spec:
  containers:
  - name: web-server
    image: nginx:latest
    ports:
    - containerPort: 80
Let's understand this pod YAML. Once you understand the basic YAML it will be easier for you to work with pods and associated objects like deployment, daemonset, statefulset, etc.
As we discussed in the Kubernetes Object blog, every Kubernetes object has some common set of parameters. The values change as per the kind of object we are creating.
Let's take a look at the Kubernetes pod object.
| Parameter | Description |
|---|---|
| apiVersion | The API version of pod. In our case its v1 |
| kind | Kind of the object. Its pod |
| metadata | metadata is used to uniquely identify and describe the pod – labels (set of key-value pairs to represent the pod). This is similar to tagging in cloud environments. Every object must be labeled with standard labels. It helps in grouping the objects. – name (name of the pod) – namespace (namespace for the pod) – annotations (additional data in key-value format) |
| spec | Under the ‘spec’ section we declare the desired state of the pod. Those are the specifications of the containers we want to run inside the pod. |
| containers | Under containers, we declare the desired state of the containers inside the pod. The container image, exposed port, etc. |
We have now looked at a basic Pod YAML manifest. It's important to note that this manifest supports many parameters. We will gradually explore these additional parameters with a hands-on, practical approach.
Now that we have some basic understanding of a Pod, let's create a pod.
Creating Pod (Practical Examples)
You can create a pod in two ways
- Using the kubectl imperative command: Primarily used for learning and testing purposes. The imperative command comes with its own limitations.
- Declarative approach: Using YAML manifest. When working on projects, the YAML manifest is used to deploy pods.
Let's look at both options. We are going to create an NGINX pod with the following
- The name of the pod is web-server-pod
- It should have labels app: web-server and environment: production
- Add an annotation to describe the pod.
- Use nginx:1.14.2 container image.
- Expose Container port 80.
Method 1: Create Pod Using Kubectl Command
For the discussed pod requirements, here is the kubectl command.
kubectl run web-server-pod \
--image=nginx:1.14.2 \
--restart=Never \
--port=80 \
--labels=app=web-server,environment=production \
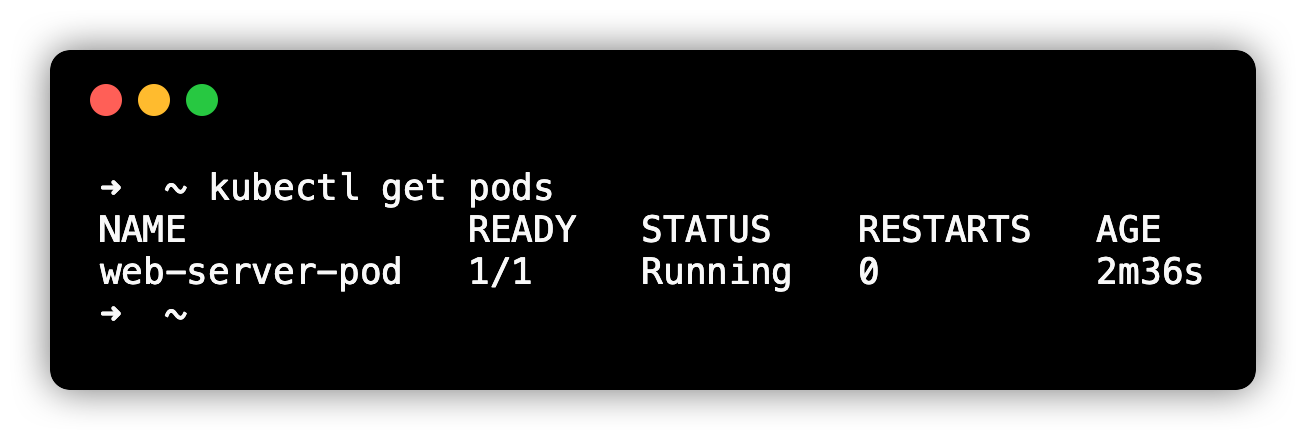
--annotations description="This pod runs the web server"Here the pod gets deployed in the default namespace. You can get the status of the deployed pod kubectl.
kubectl get podsOnce the pod is deployed you will see the pod Running status as shown below. In our example, we have only one container inside the pod. So it shows 1/1 ready and running.
Describe a Pod
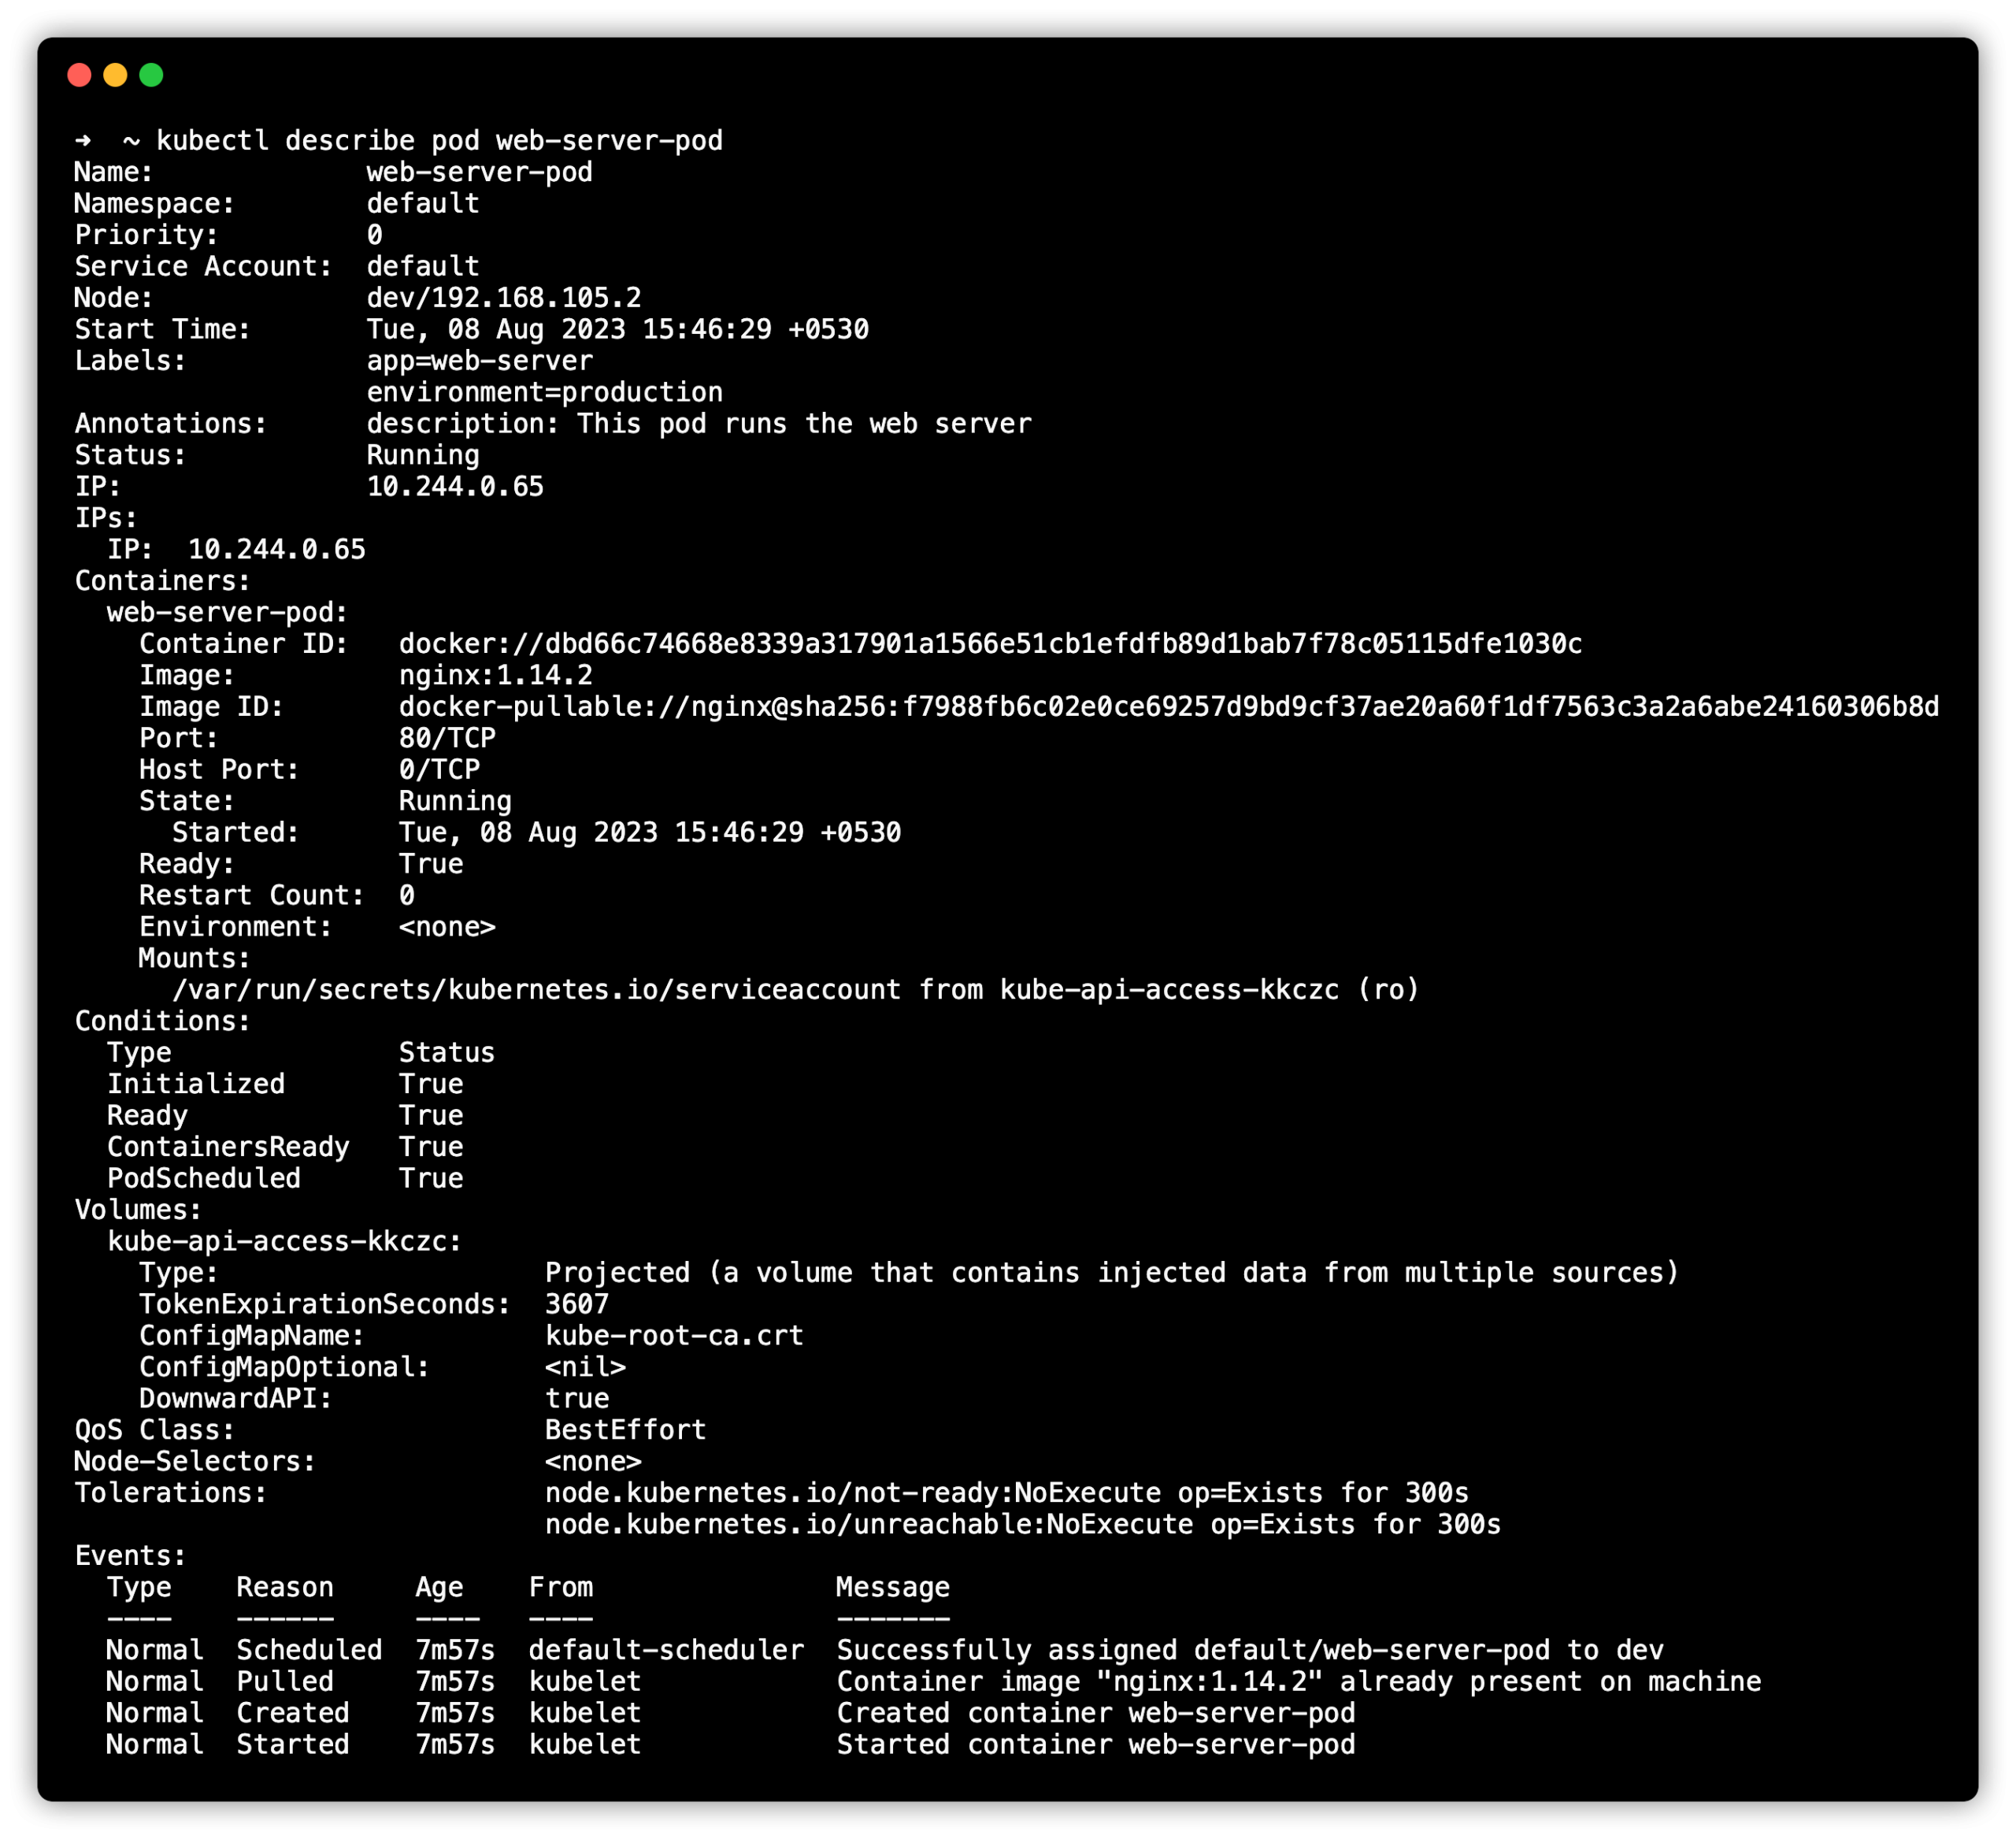
If you want to know all the details of the running pod, you can describe the pod using kubectl.
kubectl describe pod web-server-podIn the following output, you can see all the details about the pod. Its IP address, namespace, container details, QoS class, etc.
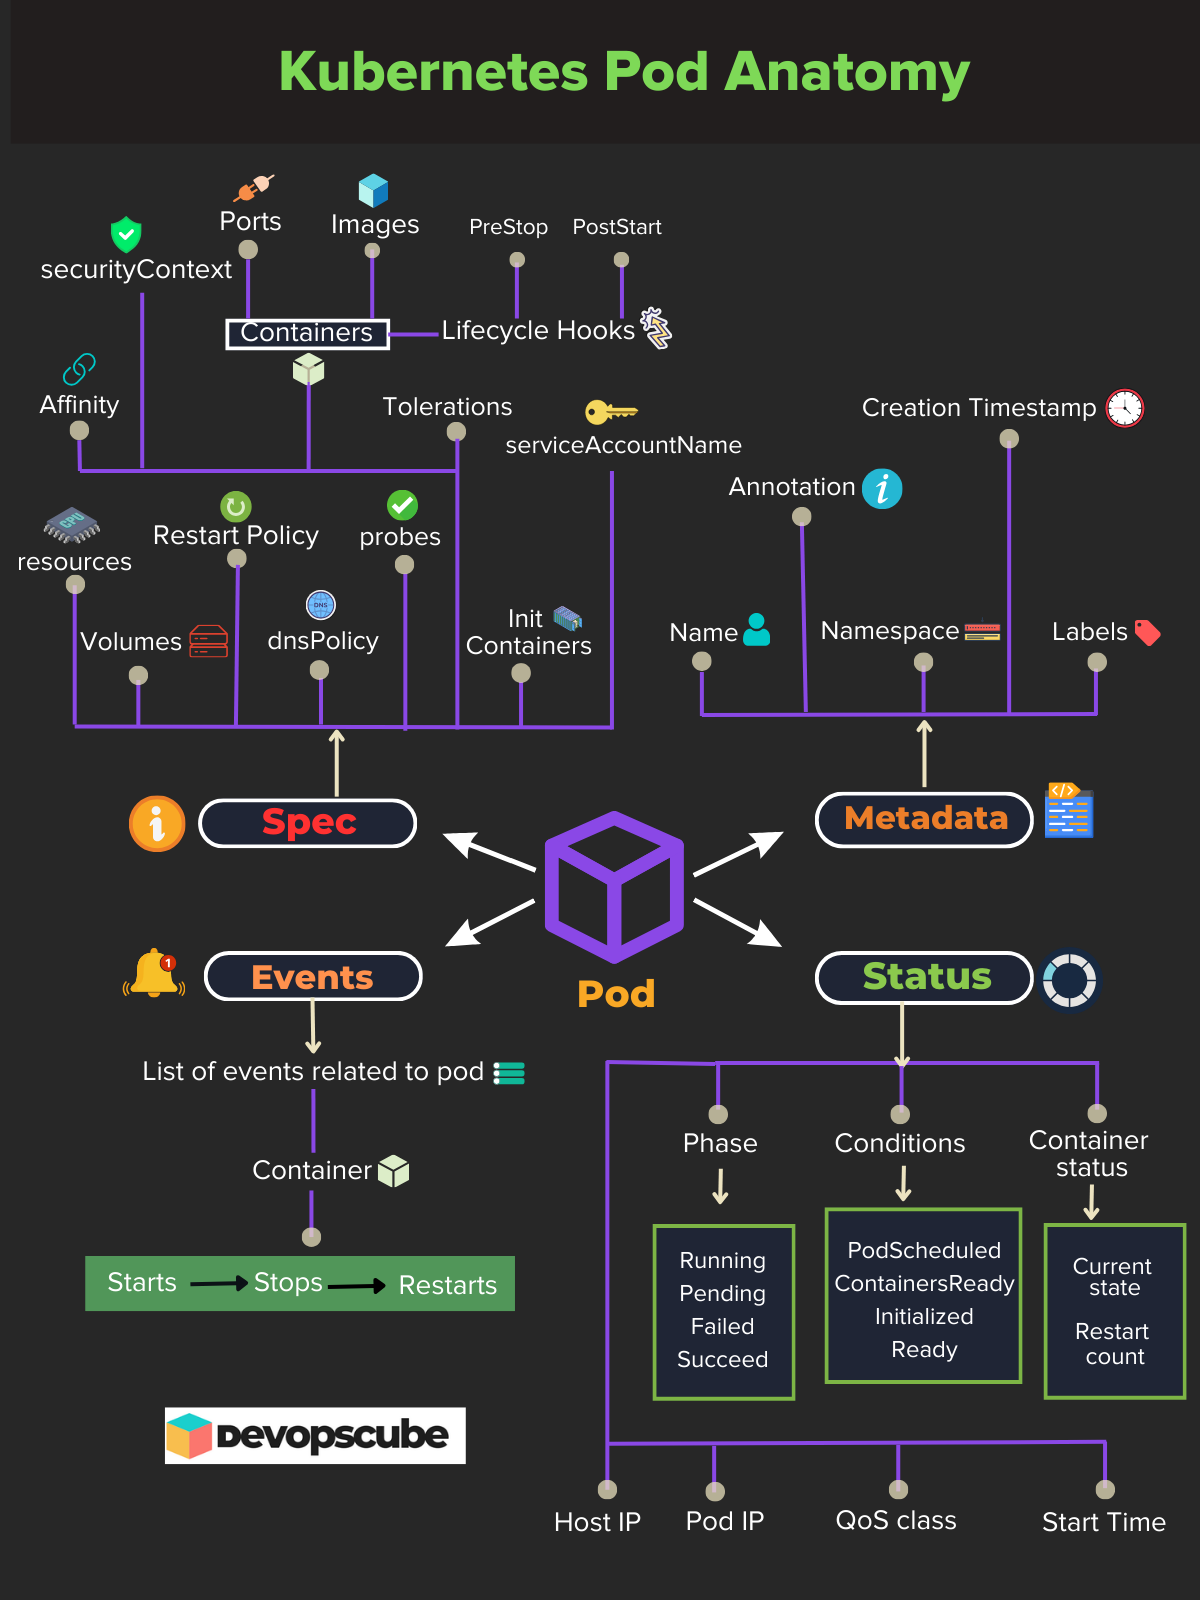
The following image shows the complete pod anotomy.
Now let's delete the pod using the following command.
kubectl delete pod web-server-podMethod 1: Create Pod Using Declarative YAML
When working on real projects, you will have to create pods mostly through a declarative approach.
Let's see how we can create a pod using the YAML manifest.
Create a file named nginx.yaml with the following contents.
apiVersion: v1
kind: Pod
metadata:
  name: web-server-pod
  labels:
    app: web-server
    environment: production
  annotations:
    description: This pod runs the web server
spec:
  containers:
  - name: web-server
    image: nginx:1.14.2
    ports:
    - containerPort: 80
Now, to deploy the manifest, you need to execute the following kubectl command with the file name.
kubectl create -f nginx.yamlShould we remember each parameter to create the YAML? No. You can use the --dry-run flag to create the YAML file.
Here is an example.
kubectl run nginx-pod --image=nginx:1.14.2 --dry-run=client -o yamlYou can save the YAML output by redirecting the dry-run output to a file.
kubectl run nginx-pod --image=nginx:1.14.2 --dry-run=client -o yaml > nginx-pod.yamlAccess Application Running In a Pod
Now we have a running pod with the Nginx web server. The whole idea is to deploy and access the application running inside the pod.
Kubectl offers a port-forward command to access running pods in the Kubernetes cluster from the local workstation.
We have a running pod named web-server-pod. Let's access it via the port-forward command.
kubectl port-forward pod/web-server-pod 8080:80You should see an output as shown below.
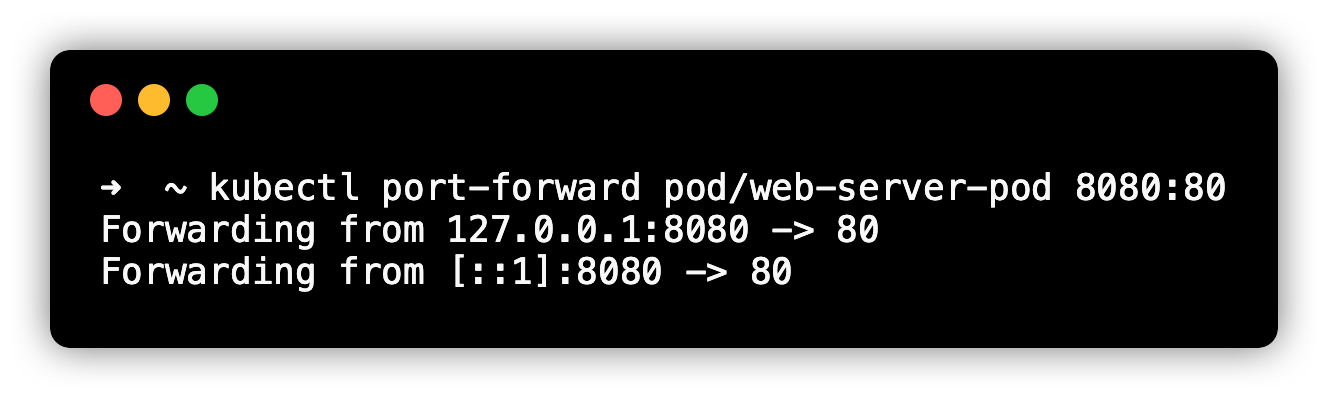
Now if you go to the browser and access http://localhost:8080, you should see the Nginx homepage as shown below. The webpage is served by our Nginx web server pod.

Now you can disconnect port forwarding by pressing CTRL+C.
Here is what happens when you run kubectl port-forward
- Kubectl binds the specified port in your local system. In our case, it's
8080. - It then communicated with the Kubernetes cluster API to establish a tunnel (a single HTTP connection) to the required node and then to the specified pod and container port, ie 80.
Access Pod Shell
We have learned how to access the application running inside the pod.
Now what if you want to get access to the pod shell?
There are many use cases where you need terminal access to the pod. One main use case is debugging and pod troubleshooting.
Here is where kubectl exec command comes in handy.
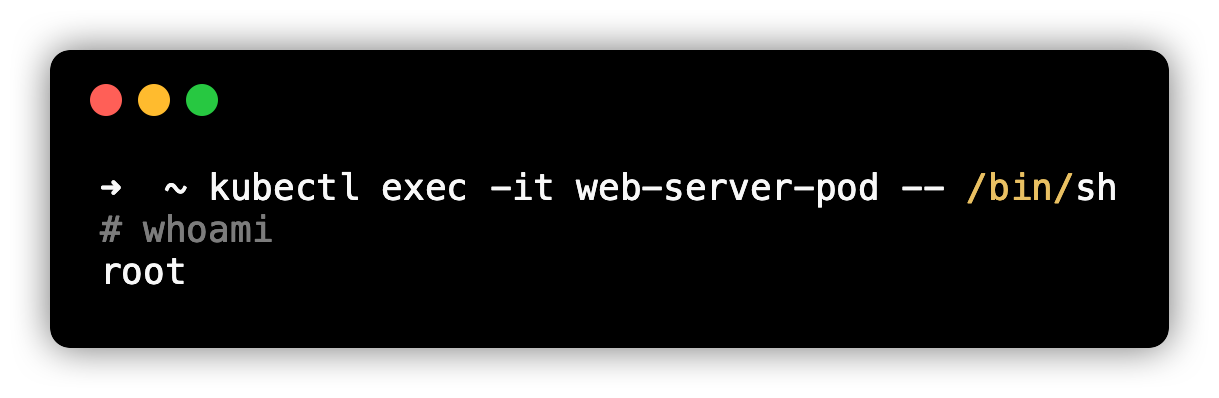
You can access the shell of web-server-pod using the following command.
kubectl exec -it web-server-pod -- /bin/shIn the following output, I am executing whoami command inside the pod.
Pod Lifecycle
Another important concept you should know about a pod is its lifecycle.
A pod is typically managed by a controller like ReplicaSet Controller, Deployment controller, etc. When you create a single pod using YAML, it is not managed by any controller. In both cases, a pod goes through different lifecycle phases.
Following are the pod lifecycle phases.
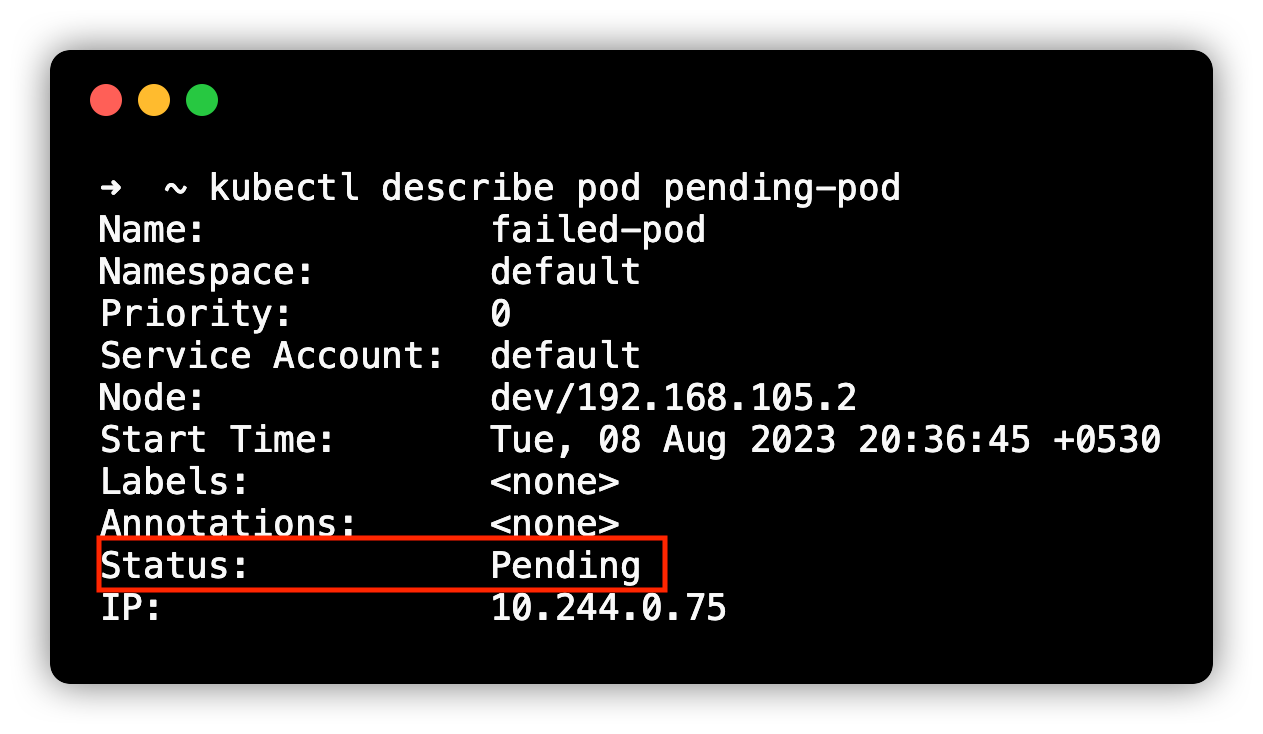
- Pending: It means the pod creation request is successful, however, the scheduling is in process. For example, it is in the process of downloading the container image.
- Running: The pod is successfully running and operating as expected. For example, the pod is service client requests.
- Succeeded: All containers inside the pod have been successfully terminated. For example, the successful completion of a CronJob object.
- Failed: All pods are terminated but at least one container has terminated in failure. For example, the application running inside the pod is unable to start due to a config issue and the container exits with a non-zero exit code.
- Unknown: Unknown status of the pod. For example, the cluster is unable to monitor the status of the pod.
If you describe the pod, you can view the phase of the pod. Here is an example.
If you want to know more information, check out the detailed blog on pod lifecycle.
Pod Features
We have deployed a simple Nginx pod with very minimal configurations. However, a pod had a lot of features for resource management, configuration, secrets, availability, security, etc.
If you are a beginner, learning all these concepts in one go will be overkill. It makes more sense to learn all these concepts when working with pod-related objects like Deployment with practical use cases.
Also, you need to understand every feature in detail with a practical use case.
Following are the key features related to the pod.
- Resource Requests and Limits: Pod CPU/Memory Allocation
- Labels: key-value pairs attached to pods to categorize resources.
- Selectors: To group resources based on labels.
- Liveness, Readiness, and Startup Probes: Container Health Checks
- ConfigMaps: For Config Management
- Secrets: For Secret management
- Volumes: Persistent Data Storage
- Init Containers: Containers that run before main containers.
- Ephemeral Containers: Temporary containers added to the pod for debugging or troubleshooting purposes.
- Service Account: To restrict access to Kubernetes objects & resources.
- SecurityContext: Host permissions and Privileges.
- Affinity and Anti-Affinity Rules: Pod Placement Control across nodes
- Pod Preemption & Priority: Setting priorities for pod scheduling & eviction.
- Pod Disruption Budget: The minimum number of pod replicas that need to be running during a voluntary disruption.
- Container Life Cycle Hooks: Executing custom scripts based on the pod’s lifecycle phase changes.
- dnsConfig: For custom DNS settings
- dnsPolicy: Defines how DNS resolution works inside the Pod.
Comprehensive Pod YAML Configuration
If you add the pod features I listed above, you will get a comprehensive pod YAML configuration as given below. Also, these options will be used along with objects like Deployment, Statefulset, etc.
apiVersion: v1
kind: Pod
metadata:
  name: web-server-pod
spec:
  initContainers:
  - name: init-myservice
    image: busybox:1.28
    command: ['sh', '-c', 'echo "Init container started!"']
  containers:
  - name: web-server
    image: nginx:latest
    ports:
    - containerPort: 80
    volumeMounts:
    - name: shared-data
      mountPath: /usr/share/nginx/html
    - name: secret-volume
      mountPath: /etc/my-secret
    - name: configmap-volume
      mountPath: /etc/config
    securityContext:
      capabilities:
        add: ["NET_ADMIN", "SYS_TIME"]
    resources:
      requests:
        memory: "64Mi"
        cpu: "250m"
      limits:
        memory: "128Mi"
        cpu: "500m"
    readinessProbe:
      httpGet:
        path: /index.html
        port: 80
      initialDelaySeconds: 5
      periodSeconds: 5
    livenessProbe:
      httpGet:
        path: /index.html
        port: 80
      initialDelaySeconds: 15
      periodSeconds: 20
    startupProbe:
      httpGet:
        path: /index.html
        port: 80
      failureThreshold: 30
      periodSeconds: 10
    lifecycle:
      postStart:
        exec:
          command: ["/bin/sh", "-c", "echo 'PostStart'"]
      preStop:
        exec:
          command: ["/bin/sh", "-c", "echo 'PreStop'"]
  serviceAccountName: nginx-service-account
  securityContext:
    runAsUser: 1000
    runAsGroup: 3000
    fsGroup: 2000
  shareProcessNamespace: true
  volumes:
  - name: shared-data
    emptyDir: {}
  - name: secret-volume
    secret:
      secretName: nginx-secret
  - name: configmap-volume
    configMap:
      name: nginx-configmap
Pod Associated Objects
When it comes to running applications on Kubernetes, we don't run an individual pod. Because Kubernetes is all about scaling and maintaining the availability of pods.
So if you run a single pod, it will be a single point of failure. Because the Pods themselves cannot be directly scaled.
As we discussed in the Kubernetes Architecture, we need controllers like Replicaset to ensure the desired number of pods are running at all the time.
Kubernetes has different types of objects associated with pods for different use cases.
The following are important pod-associated objects.
- Replicaset: To maintain a stable set of Pods replicas running at any given time.
- Deployment: To run stateless applications like web servers, APIs, etc
- StatefulSets: To run stateful applications like distributed databases.
- Daemonsets: To run agents on all the Kubernetes nodes.
- Jobs: For batch processing
- CronJobs: Scheduled Jobs
Note: Sidecar container is a secondary container, works with a main container to get information like logs or inject information like configuration to the main container.
Note: Static Pods are system pods (etcd, kube-apiserver, kube-controller and kube-schedular) which are directly manged by Kubelet. We can't delete them until we move them from path /etc/kubernetes/manifests.Conclusion
In this guide, we looked at all the core concepts of a Kubernetes Pod. As I mentioned in the introduction, a pod has a lot of features when it comes to kubernetes production level implementation.
In the next series of blogs, we will look at each pod feature and associated objects in detail.
Also, look at the Kubernetes tutorials, where I have listed comprehensive guides covering many concepts practically.