

In this guide, we will look at a step-by-step guide to Dockerize Flask Application.
I will cover everything from creating a basic Flask application to creating a production-grade Flask application Docker image that uses the Gunicorn server.
By default, Flask uses the built-in development server provided by Werkzeug that can be used for development and testing purposes.
So we will use Gunicorn, a production-grade server for Flask application that is capable of handling a higher volume of traffic, supporting multiple worker processes or threads, and provides better performance and scalability.
Also, we will look at some of the best practices you can follow in the image-building process for your image-building CI pipeline.
Prerequisites & Repository
Here are the prerequisites for Dockerizing the Python Flask application:
- Docker installed in your system.
- A Python Flask application file that has to be Dockerized.
All the code and configuration files used in this blog are hosted in the docker image examples repository.
Clone/Fork the repository to make use of it.
git clone https://github.com/techiescamp/docker-image-examplesHow to Dockerize Python Flask Application?
Follow the steps given below to build a Docker image for a Flask application.
Step 1: Build a Flask Application
Note: Ignore this step if you have an existing Flask application.
For demonstration purposes, I am going to use a simple Hello World Flask application. The Python file is given below
from flask import Flask, render_template

app = Flask(__name__)

@app.route('/')
def hello_world():
    return render_template('index.html')

if __name__ == '__main__':
    app.run(host='0.0.0.0')
This file creates a Python Flask application that will display a custom message in the Homepage.
Next, create a new HTML file named index.html in a directory named templates within your project directory. The templates directory is where Flask looks for HTML templates by default.
<!DOCTYPE html>
<html>
<head>
    <title>Hello DevOps Engineer</title>
    <link rel="stylesheet" href="https://maxcdn.bootstrapcdn.com/bootstrap/4.5.2/css/bootstrap.min.css">
    <style>
        body {
            background-color: #f8f9fa;
        }
        .header {
            background-color: #343a40;
            color: white;
            padding: 20px;
            text-align: center;
            margin-bottom: 20px;
        }
        .message-box {
            background-color: #fff;
            border-radius: 5px;
            padding: 20px;
            box-shadow: 0 2px 5px rgba(0, 0, 0, 0.1);
        }
    </style>
</head>
<body>
    <div class="header">
        <h1>Welcome to My Flask App</h1>
    </div>
    <div class="container">
        <div class="row justify-content-center">
            <div class="col-md-6">
                <div class="message-box">
                    <h2 class="text-center">Hello DevOps Engineer</h2>
                    <p class="text-center">This is a sample Flask application with Bootstrap styling.</p>
                </div>
            </div>
        </div>
    </div>
</body>
</html>
Create a requirements.txt file in the project directory.
#requirements.txt

flask
gunicorn
Step 2: Create Dockerfile
Now, create a Dockerfile with the following content. You can also use the docker init command utility to generate a Dockerfile.
ARG PYTHON_VERSION=3.11.6
FROM python:${PYTHON_VERSION}-slim as base

ENV PYTHONDONTWRITEBYTECODE=1
ENV PYTHONUNBUFFERED=1

WORKDIR /app

ARG UID=10001
RUN adduser \
    --disabled-password \
    --gecos "" \
    --home "/nonexistent" \
    --shell "/sbin/nologin" \
    --no-create-home \
    --uid "${UID}" \
    appuser

# Install the dependencies
RUN --mount=type=cache,target=/root/.cache/pip \
    --mount=type=bind,source=requirements.txt,target=requirements.txt \
    python -m pip install -r requirements.txt

USER appuser

COPY . .

EXPOSE 8000

# Run the application using Gunicorn
CMD ["gunicorn", "--bind", "0.0.0.0:8000", "hello:app"]
Here is the Dockerfile explanation.
- This Dockerfile builds a container image with Python Slim as its base image. Which is a minimal image.
- Then we set the /app directory as the working directory.
- Next, we setup a non-root user named appuser that the app will run under (security Best practice)
- --mount=type=cache,target=/root/.cache/pip: This option creates a cache mount for the pip cache directory at
/root/.cache/pip. By using a cache mount, the pip cache is stored outside the container's filesystem and can be reused across multiple builds. - --mount=type=bind,source=requirements.txt,target=requirements.txt: This option creates a bind mount that mounts the applications
requirements.txtfile from the host filesystem into the container at the same path. It allows thepip installcommand to access therequirements.txtfile without copying it into the container's filesystem. It ensures that the latest version of therequirements.txtfile is always used during the build. - python -m pip install -r requirements.txt installs the required python dependencies.
- Then we copy the hello.py (application code) to the working directory.
- Since we are using Gunicorn, we will expose port 8000. The default Flask app port is 5000.
- Finally using the CMD instruction, we run the gunicorn executable binding to 0.0.0.0.
Step 3: Build Docker Image
To create the Docker image, run the following command in the same directory where the Dockerfile is
docker build -t flask-application:1.0.0 .To view the docker image, use the docker images command as shown below
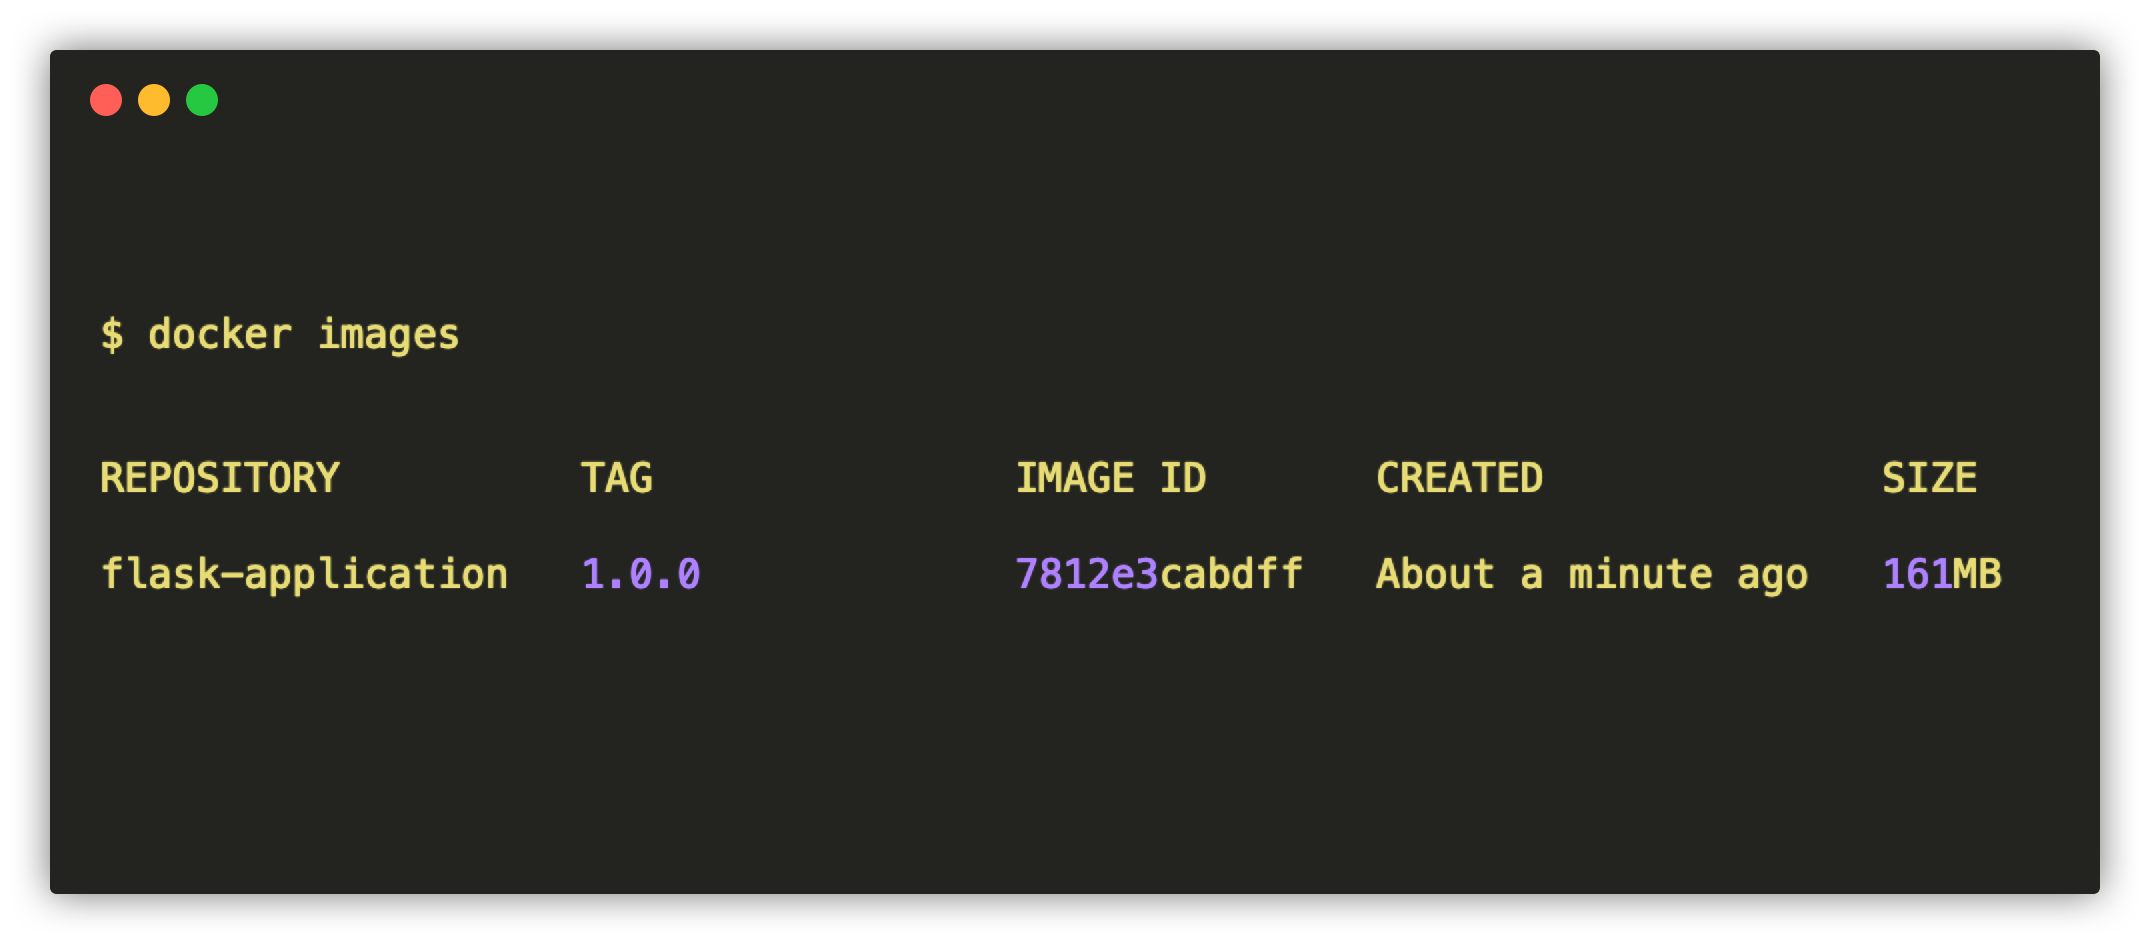
Step 4: Run the Docker Image
Once the Docker image build has been finished, run the Docker image using the command below.
docker run -d -p 8000:8000 flask-application:1.0.0Once you run the docker image, use the docker ps command to verify if the container is running properly.
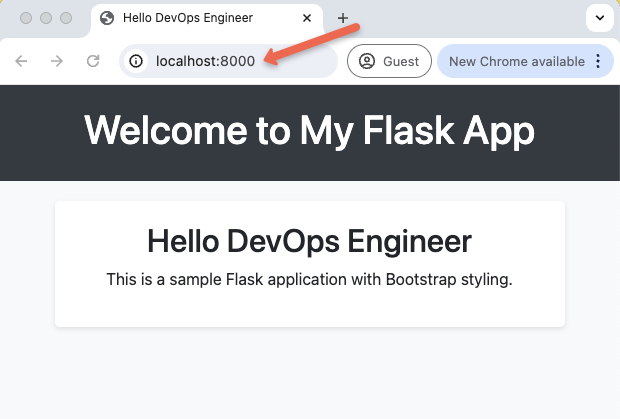
Now, check your application on the browser using localhost:8000. If you expose your application on a different port make sure to change the port number you exposed the application to.
You can also build a Docker image of any Python Flask application using these steps.
Best Practices for Optimizing Docker Images
When working with Docker images for production workloads, ensure you follow the Docker image best practices given below.
These are particularly required in the CI pipeline where you build the flask image for production use cases.
1. Lint Dockerfile
Use Hadolint to check your Dockerfile for possible errors, security vulnerabilities, and performance problems. Install Hadolint and use the below command to lint your Dockerfile
hadolint DockerfileMake sure to run this command in the same directory where your Dockerfile is and you will get the output as shown below to improve your Dockerfile

2. Scan for Vulnerabilities
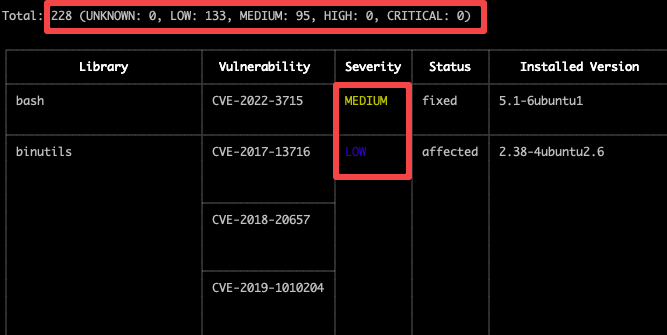
Use tools like Trivy or Docker Scout to scan the Docker images for vulnerabilities. Install trivy in your system and use the below command to scan your Docker image
trivy image flask-application:1.0.0Trivy will scan your Docker image and show the vulnerability in your Docker image as shown below
3. Optimize Docker Image Size
Optimizing Docker images is very much important in project environments, you can also use SlimToolkit to reduce the size of your Docker image.
First, create a preserved-paths.txt file with the file name or file path you don’t want to get removed during the slim process.
/app
/usr/bin/python3
/usr/local/bin/flask
In my Txt file, I have specified the path where my application and files needed to run the Flask application are present. Now, run the below command to slim the Docker image with the Txt file.
slim build --http-probe=false --preserve-path-file preserved-paths.txt --target flask-application:1.0.0 --tag slimmed-flask-application:1.0.0This command will slim the Docker images without affecting the file or file path mentioned in the txt file with a new name you specify in the --tag flag.
Now if you you check the docker image size, it will be considerably reduced as shown below.
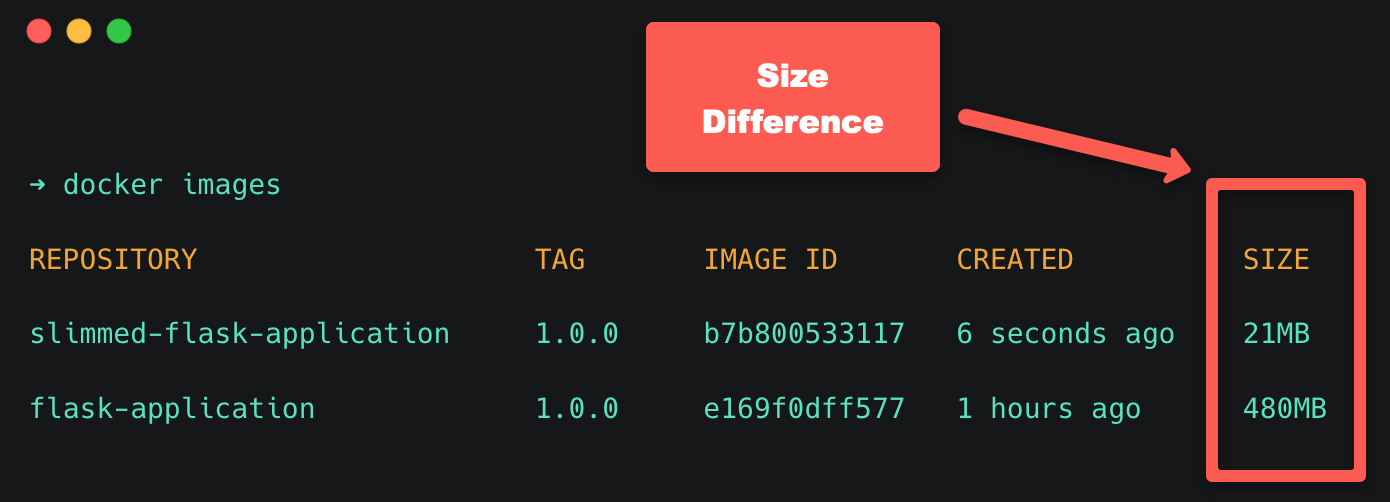
You can see the size of the Docker image has been reduced from 480MB to 21MB and it works properly without any issue.
4. Versioning Docker Image
Use Semantic Versioning when tagging Docker images to ensure clarity and consistency in versioning practices. An example is given below,
flask-application:1.0.0In the above example, 1.0.0 is the semantic version.
Conclusion
In this blog, we can see about the Dockerize Python Flask application and best practices for building secure Docker images.
Make sure to follow the best practices whenever you build Docker images.
If you need a tutorial blog to Dockerize Java Applications, refer this blog.
