
Managing GPU resources is a core challenge in MLOps. In traditional web services, when a web service runs out of CPU or RAM, you can add or swap the disk itself for cheap.
But VRAM on a GPU is different you cannot simply add, it has a fixed capacity. The model either fits or it doesn't.
At 16GB of weights for a llama 3 8B (FP16) model, on a 20 GB card, there is almost no room for anything else without experimenting.
Here is what this blog will cover.
- GPU Environment setup (Docker + NVIDIA runtime)
- Model deployment with llama & vLLM
- Three optimization experiments (memory tuning, FP8 quantization, and continuous batching)
Let's get started.
Prerequisites
The following are the prerequisites to follow this guide.
- A Linux VM with an NVIDIA GPU attached
- Docker Installed on the VM
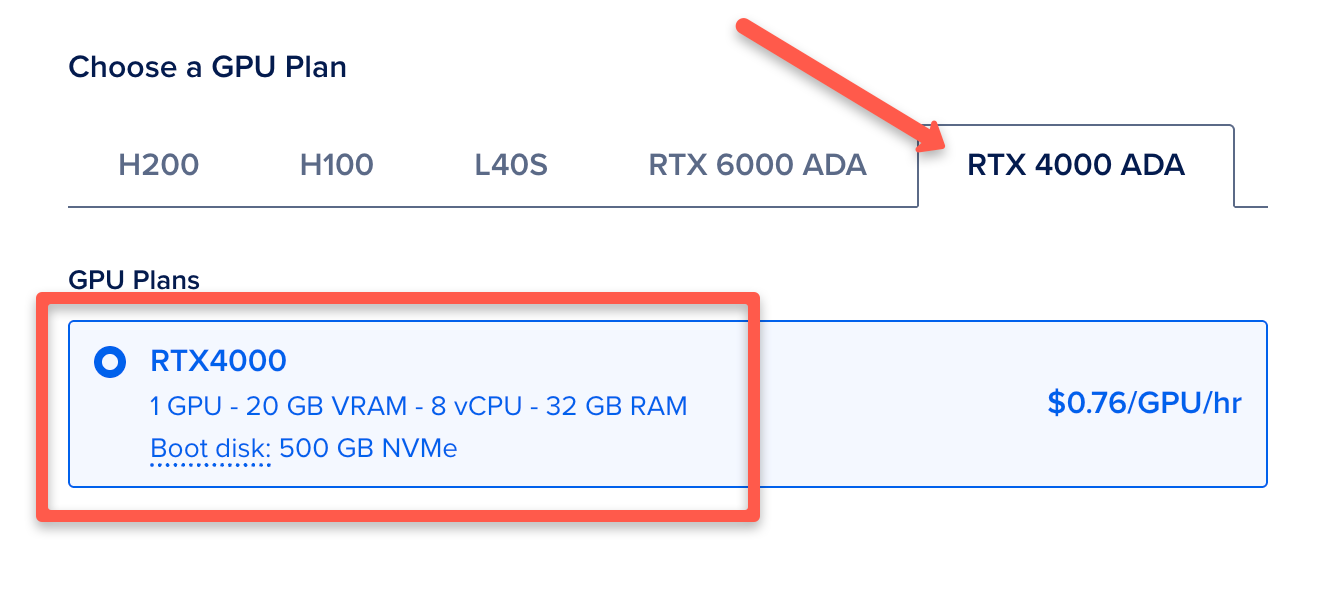
The GPU type used in this guide is NVIDIA RTX 4000 GPU provisioned on Digital Ocean.
Environment setup
Start by SSH into your VM. The following and confirming the driver is visible:
nvidia-smiYou will see a table as below.
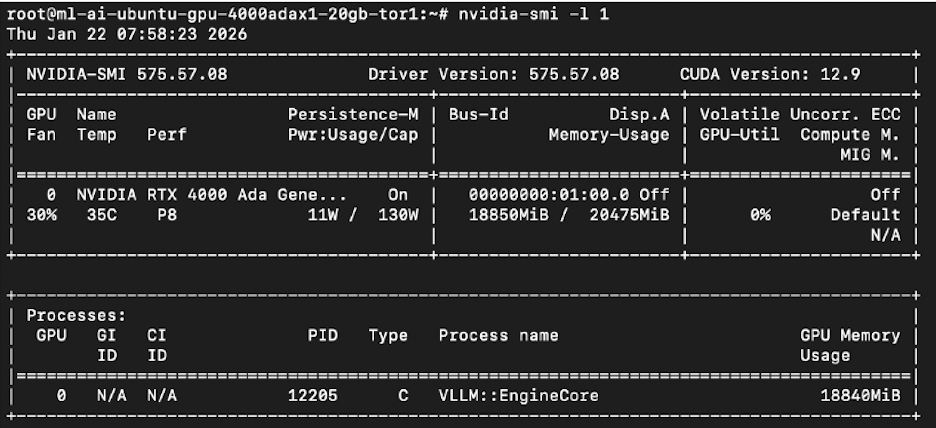
On my device it showed the RTX 4000 Ada with 20,475 MiB total VRAM which means the GPU is visible.
If you don't see your GPU details you need to fix or install the driver before doing anything else. Refer NVIDIA container toolkit page to install it.
Deploying the first model
I used vLLM because it has paged attention. Every other inference server like ollama, and llama.cpp preallocates the KV cache as one contiguous block of VRAM, and most of that block sits empty.
Paged attention breaks the cache into pages and allocates them only as needed. Cases like these where the model already takes up 16GB of the 20 GB VRAM available, this matters.
Lets get started with the setup.
Step 1: Configure NVIDIA as the Default Docker Runtime
When Docker is freshly installed, its default runtime is runc, not nvidia. vLLM needs the NVIDIA runtime to access the GPU inside the container.
nvidia-ctk runtime configure --runtime=dockerThis creates /etc/docker/daemon.json. Open it:
nano /etc/docker/daemon.jsonAdd the default-runtime line so it looks like this:
{
    "default-runtime": "nvidia",
    "runtimes": {
        "nvidia": {
            "args": [],
            "path": "nvidia-container-runtime"
        }
    }
}
Save, then restart Docker:
systemctl restart dockerVerify:
docker info | grep -i runtimeStep 2: Create a Directory to Store Model Weights
Llama 3 8B weights are over 15GB. Without this, every container restart re-downloads the entire model.
mkdir -p /opt/modelsThis directory will be mounted into the container, so weights are downloaded once and reused on every restart.
Step 3: Get a HuggingFace Token
vLLM pulls the Llama 3 weights directly from HuggingFace on first startup. Llama 3 is a gated model, meta required you to agree to their licence before you can download it. You will need a HuggingFace account and an access token.
Go to huggingface.co and sign in or create an account.
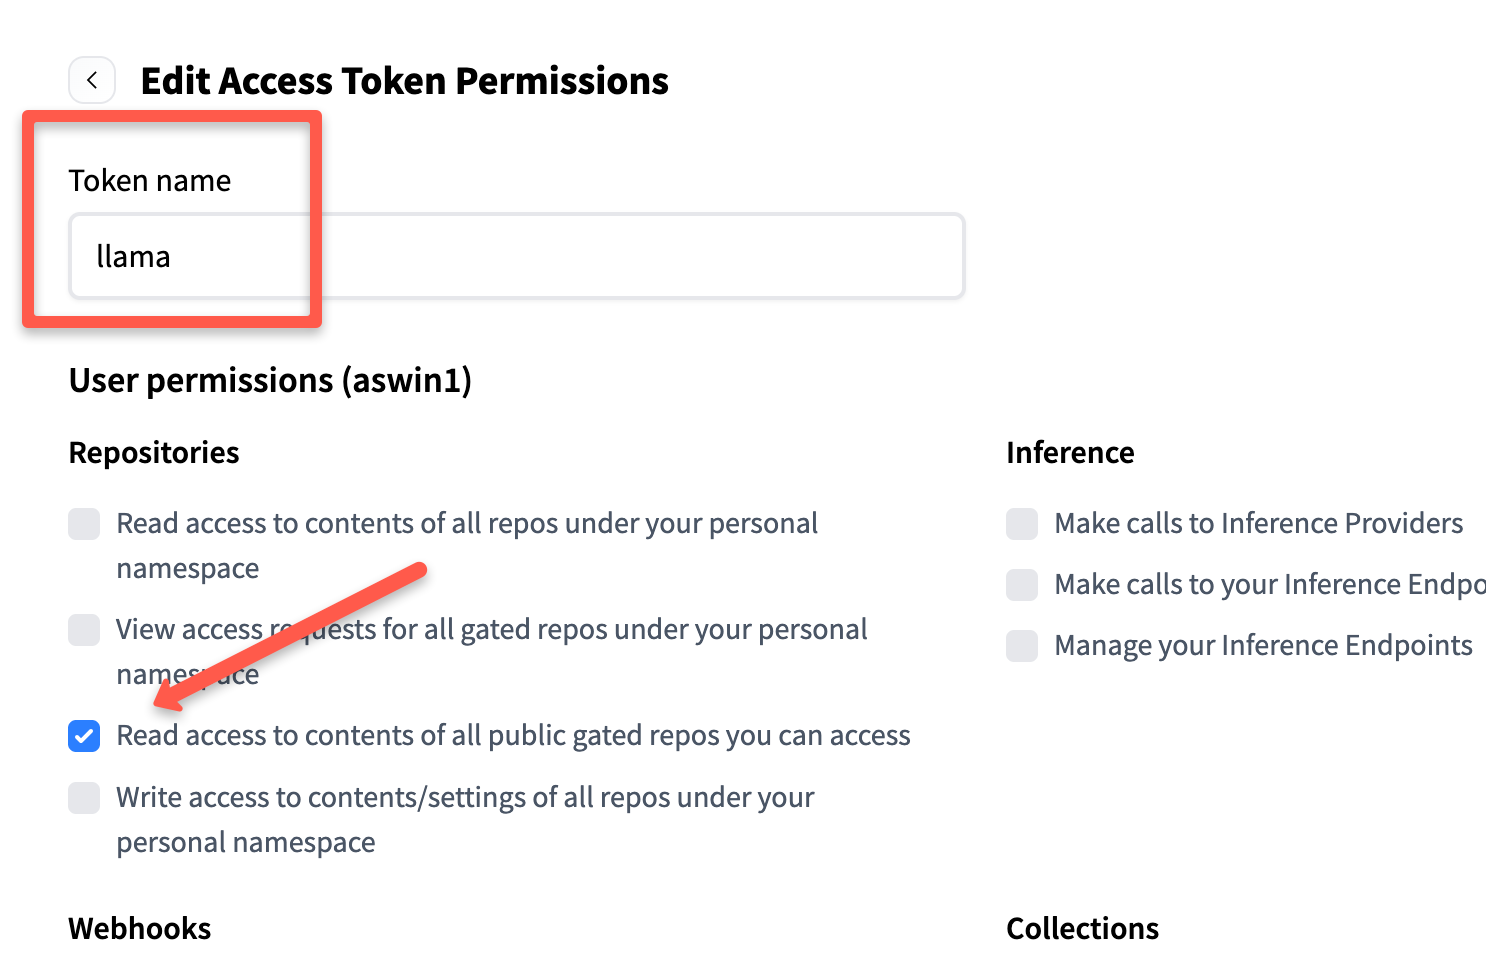
Click your profile -> Settings -> Access Tokens -> then click New token.

Then give it a name (eg llama,) and under permissions, enable only: "Read access to contents of all public gated repos.
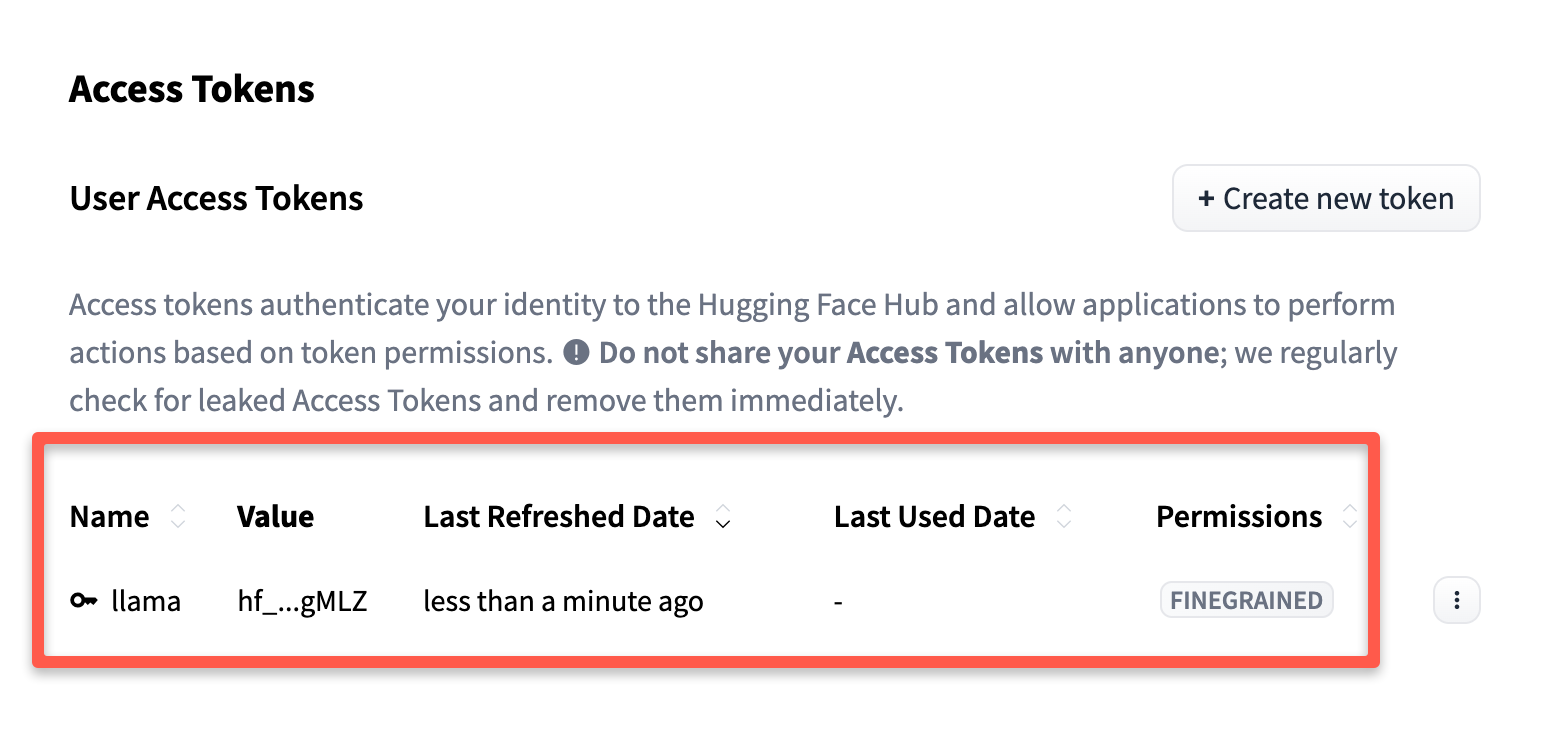
Scroll down and click Generate token. It will give you the token, keep it safe, we will use it during model deployment.
Once created, you can see your token as shown below.
Set it on your VM as a variable.
export HF_TOKEN=hf_your_token_hereStep 4: Request Access to Llama 3 on HuggingFace
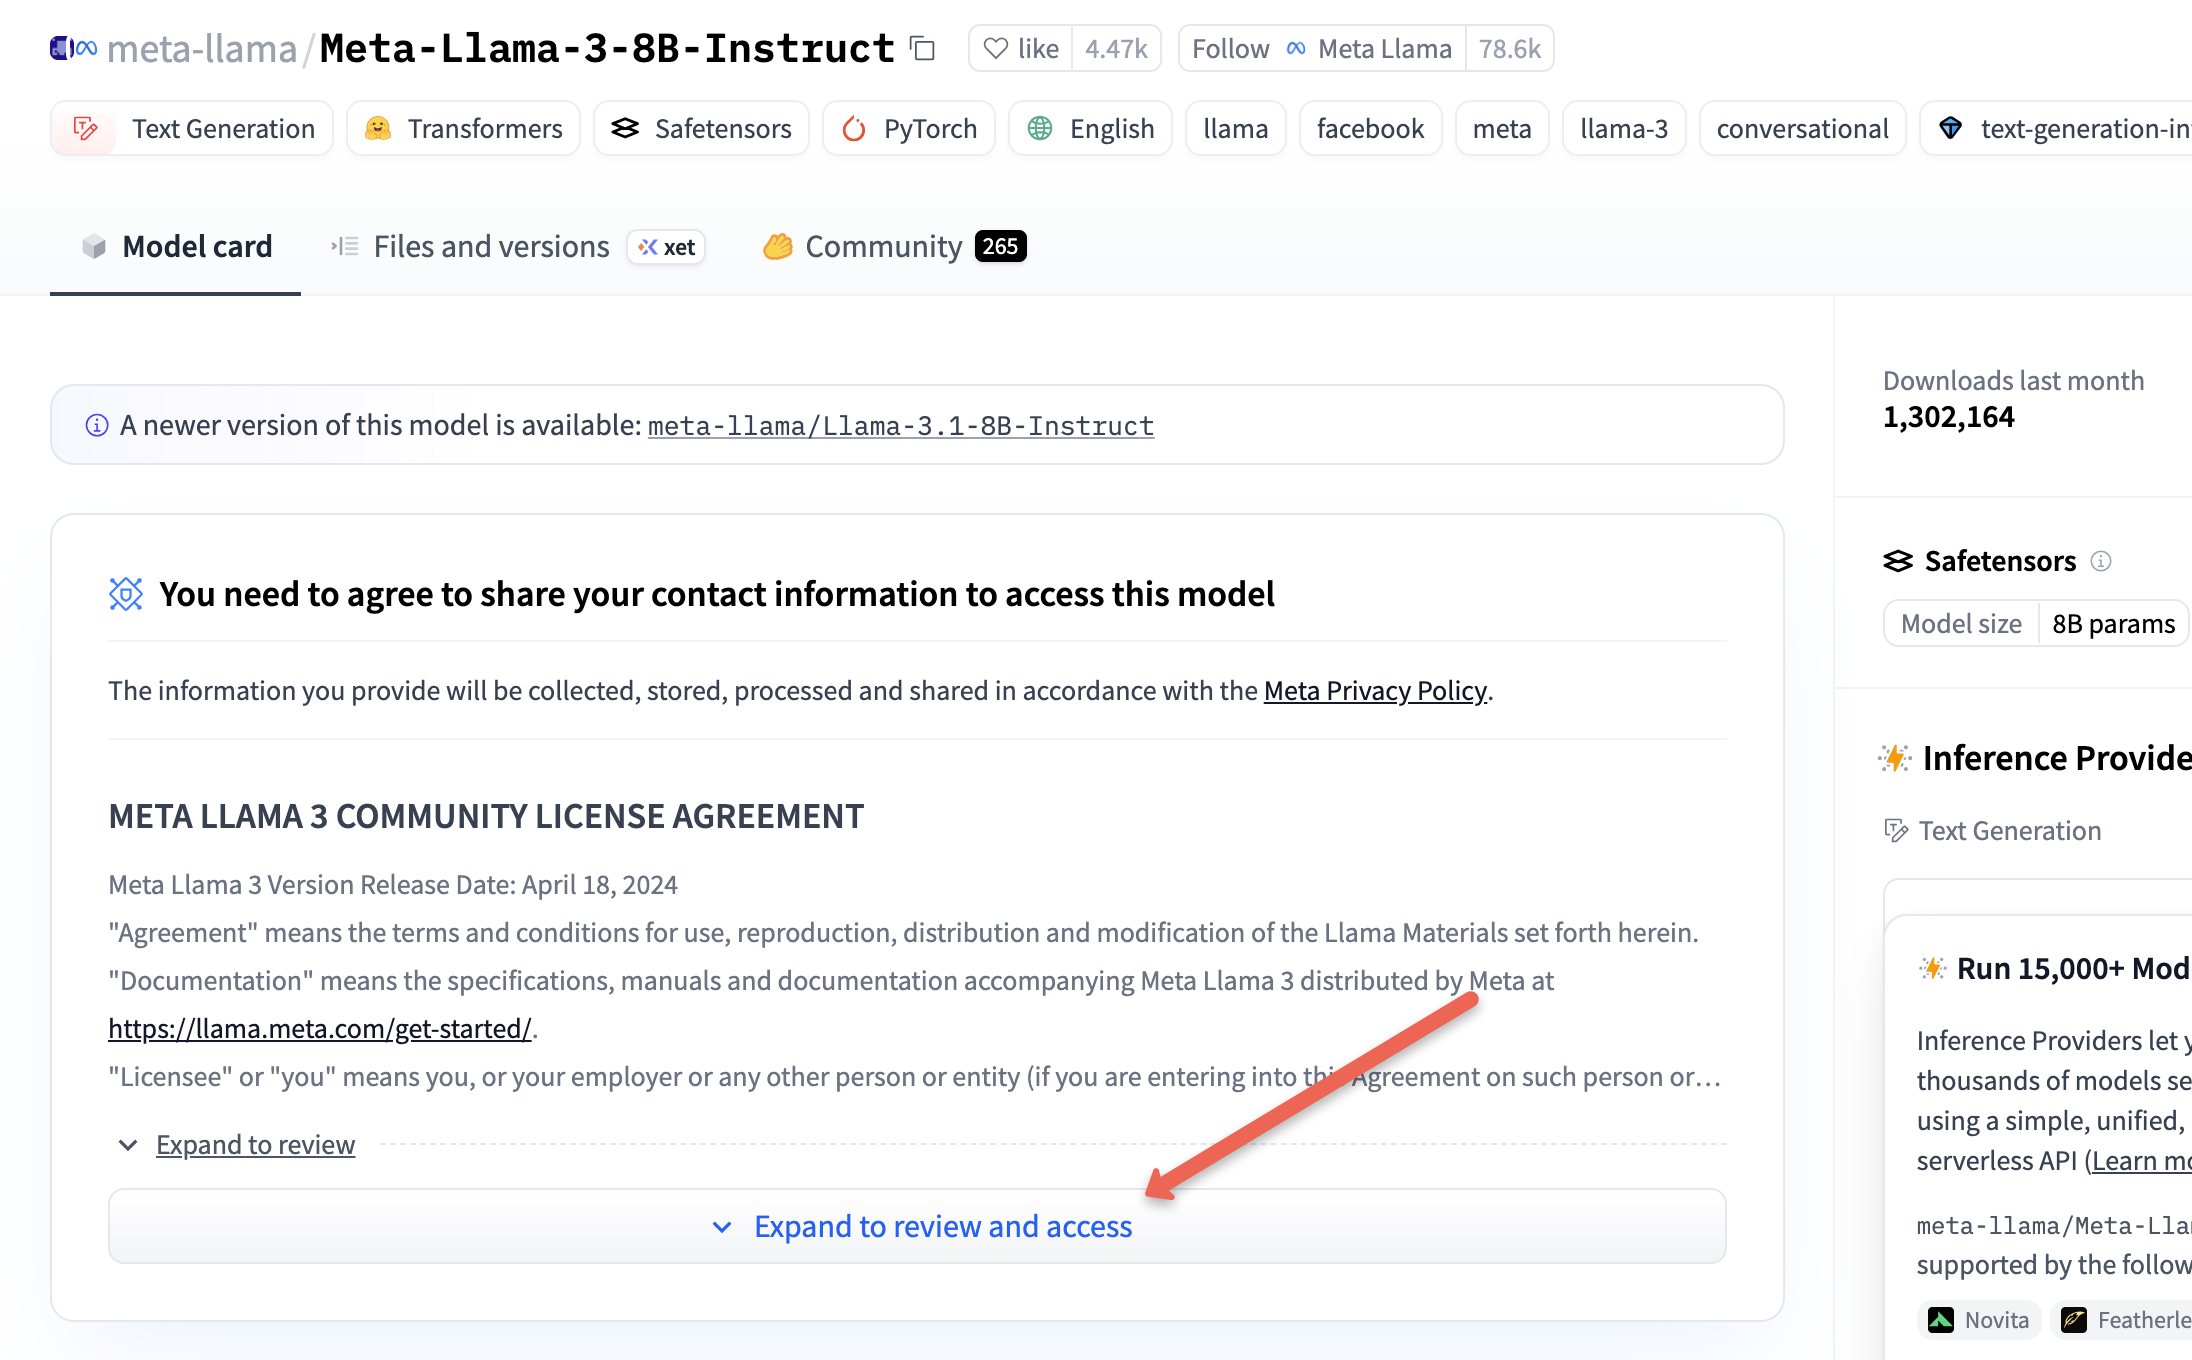
Even with a valid token, the model is gated. You must manually accept Meta's license, or the download will fail.
Visit Meta-Llama-3-8B-Instruct page.
Then, click on the "Expand to review and access" toggle button.
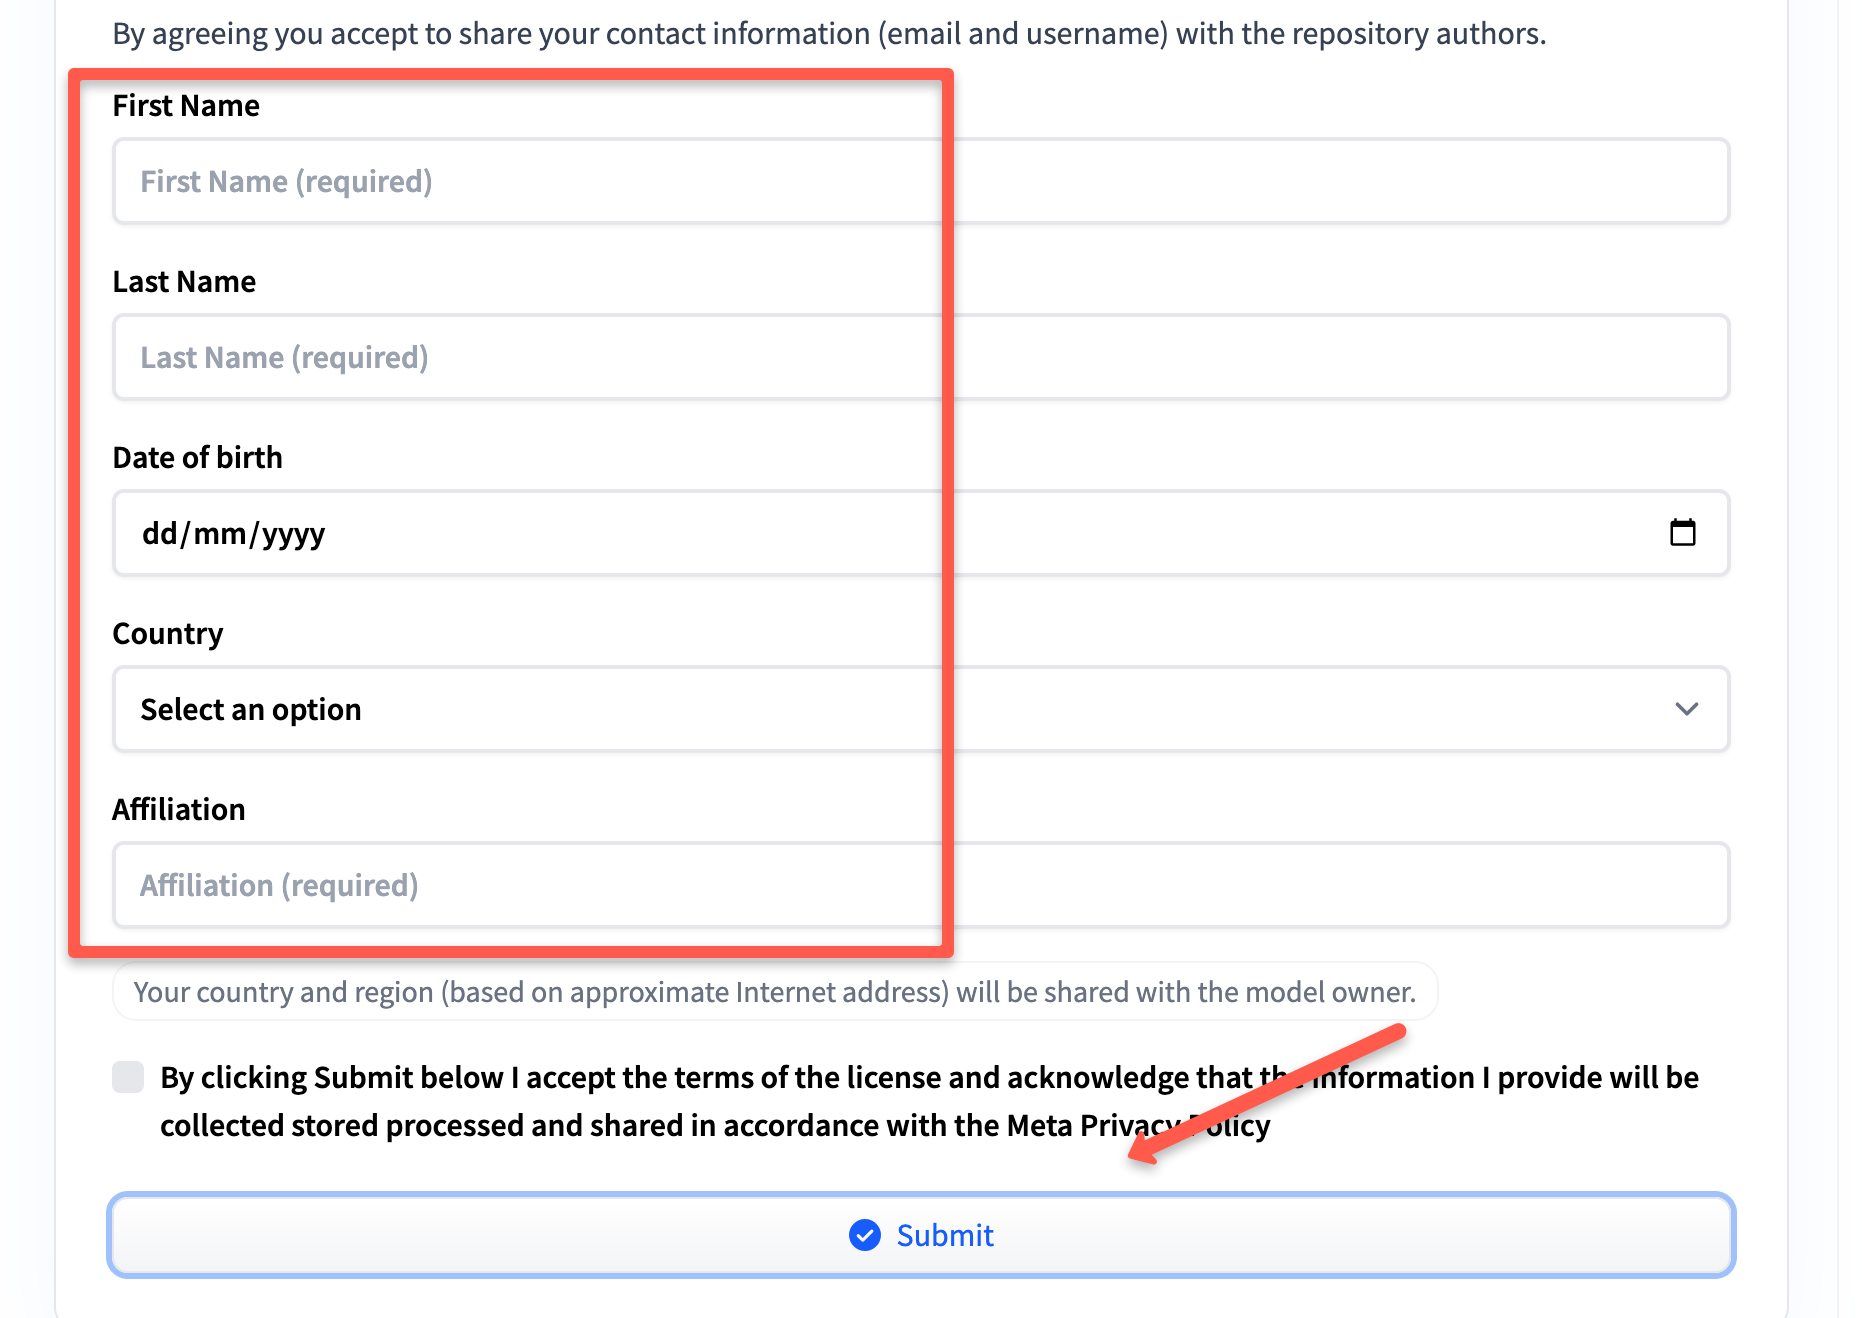
Scroll down and fill out the form to request.
Then go to settings to check the status of your request.
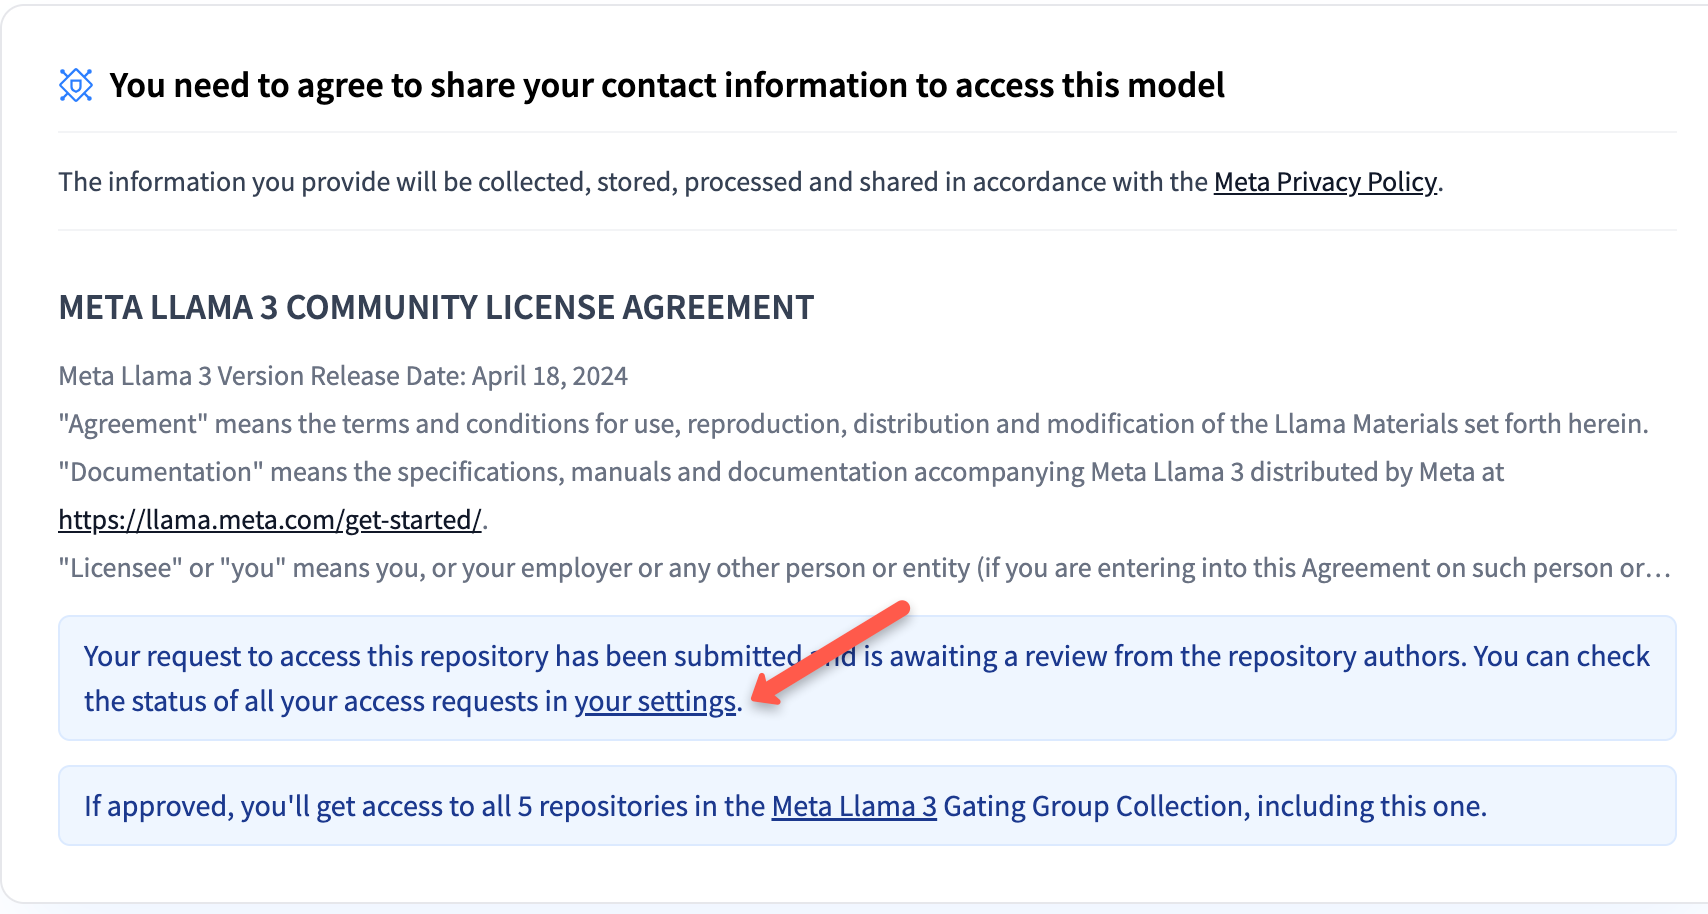
Once your request is approved, you will see your status as accepted.

Access is usually granted within 5 minutes.
Step 5: Run the vLLM Container
Now, run the following command to run the llama3 model.
docker run --runtime nvidia --gpus all \
  -v /opt/models:/root/.cache/huggingface \
  -e HF_TOKEN=$HF_TOKEN \
  -p 8000:8000 \
  --ipc=host \
  --name llama3 \
  -d vllm/vllm-openai:latest \
  --model meta-llama/Meta-Llama-3-8B-Instruct \
--gpu-memory-utilization 0.90/opt/models will be way faster.Here is what each flag does.
--runtime nvidia --gpus all : gives the container full access to the GPU.
-v /opt/models:/root/.cache/huggingface : lama 3 weights are over 15GB. Every time a container is restarted, the llama 3 weights are downloaded again, that is 15 GB for every restart.
So we store the model weights on the host system, in a specific directory (eg: /opt/models).
Now we can map the host directory to a directory inside a container that has started or restarted (eg: /root/.cache/huggingface) using the -v (volume) option.
This means that the container can access the model weights directly from the host systems storage.-p 8000:8000 : exposes the API on port 8000.
--ipc=host: vLLM creates multiple worker processes that communicate over shared memory. vLLM needs far more than the shared memory DockerDocker provides (64mb).
By setting the --ipc flag to host, vLLM uses the host machine's memory instead of the default shared memory provided by Docker. Without this flag, we get CUDA IPC errors that look like GPU failures but are actually a shared memory problem.
vllm/vllm-openai is the image we are using. It comes with vLLM pre-installed (An OpenAI-compatible API server)
Run the following command to check if the model starts running.
docker logs -f llama3Do not send requests until you see:
Application startup complete.
Step 7: Testing the Model
Before starting testing, make sure your VM has JQ installed, if not run the following command to install it.
sudo apt update && sudo apt install jq -yTo test the model, we will send a query using curl.
curl -s http://localhost:8000/v1/chat/completions \
  -H "Content-Type: application/json" \
  -d '{
    "model": "meta-llama/Meta-Llama-3-8B-Instruct",
    "messages": [{"role": "user", "content": "What is vLLM?"}],
    "max_tokens": 50
  }' | jq -r '.choices[0].message.content'
This gives an output similar to below.
vLLM stands for Virtual Large Language Model. It's a type of artificial intelligence (AI) model that's designed to mimic the capabilities of a large language model (LLM) but is trained on a virtual environment rather than a physical one.For me, the first response came back in 2.369 seconds. During the generation power draw went from 11 w (idle) to 105 w and GPU utilisation hit 100%.
Understanding resource utilization
With the model loaded and no requests running, the GPU was already at 18,850 MiB of 20,475 MiB. That is over 92% full. The weights are loaded into VRAM on startup and stay there. The GPU looks full the whole time, even when idle.
nvidia-smi
docker stats llama3 --no-stream
docker stats reports: CPU utilization less than 1%, RAM 4.55 GB of 31.34 GB, 95 active processes. CPU and RAM are nowhere near the limits. GPU is the only constraint in every test.
Interpreting utilization metrics
GPU utilization percentage in nvidia-smi is not as accurate as it looks. It measures a very small part of a sampling window during which any instruction is executed.
So a GPU showing 100% utilization doesn't necessarily mean the GPU is doing intensive work, it could just be idle loops or spin-wait instructions running to check the readiness of the data being provided by the upstream components like the CPU or memory.
The number that is more useful is the power draw. Around 130W with stable temperature means the GPU is actually computing, but 30W despite showing high utilization implies that the GPU is being starved of data or instructions.
Throttling
GPU's like the RTX 4000 automatically reduce the clock speeds when the hardware temperature reaches a certain threshold. In my case 83°C, to prevent overheating.
This process is called throttling, while this helps with the longevity of the hardware and stability during sustained workloads, it can lead to decreased performance such as slower processing speed and reduced tokens per second mid response with no error message.
VRAM breakdown Llama 3 8B instruct on a 20 GB card.
| Component | VRAM |
|---|---|
| Model weights (FP16) | ~16 GB |
| KV cache | ~3–4 GB |
| CUDA overhead | ~200 MB |
| Headroom at 0.90 util | ~200 MB |
Look at the last row, there is no room for anything else.
Optimisation Techniques
Lets look at some of the optimization techniques
Memory optimization:
The gpu-memory-utilization flag sets the amount of VRAM vLLM gets on startup. It reserves the memory immediately.
I tested 4 values for this flag:
| Utilization | VRAM Reserved | Max Concurrent | AVG Latency | Result |
|---|---|---|---|---|
| 0.50 | ~10,240 MiB | 0 | — | Crash on startup — weights don't fit |
| 0.70 | ~14 GB | 5 | ~450ms | Stable |
| 0.90 | ~18,432 MiB | 20 | ~120ms | Stable |
| 0.95 | 19,874 MiB | 50+ | ~90ms | Works, but dangerously thin |
| 1.00 | N/A | 0 | — | RuntimeError: Engine core initialization failed |
- Llama 3 8B's weights alone need around 15 GB, so the crash when the utilization flag is set to 0.5 is not surprising.
- When the flag is set to 1.00 (trying to reserve 100% of the VRAM) the engine fails to allocate small non paged memory blocks required by CUDA kernels. The system prevents full reservation to keep these small blocks free, showing a failure when you try to reserve 100%.
Values ranging from 0.70 to 0.85 are what most tutorials suggest you should set the gpu-memory-utilization flag to, the thought process being to leave enough headroom and be safe. But this leaves very little room for the KV cache.
After vLLM loads the weights, the remaining memory is automatically allocated to the KV cache. The KV cache is what lets the model track multiple conversations at a time.
Every user in an ongoing conversation occupies cache space directly proportional to how far along the conversation they are.
When the cache fills up the vLLM does not crash, it pauses one user’s generation, to process someone else’s, then resumes. This leads to latency spikes.
- At 0.70 , with weights themselves taking up all of the VRAM the effective cache available is extremely thin, which is why it can only support 5 concurrent users.
- At 0.90 with 2-3GB of cache available, 20+ concurrent users are supported.
You can observe that the latency reduces significantly with the increase in value of the gpu-memory-utilization flag.
To summarize, the gpu-memory-utilization flag sets the amount of VRAM vLLM grabs on startup.
After the model weights are loaded, the remaining VRAM is assigned to KV cache, the more memory assigned to KV cache, the more concurrent users it can support. The latency reduces as well because the users are less likely to be preempted.
Quantization
Switching from FP 16 to FP 8 version was a big improvement; the throughput increased 2.2x.
For Llama 3 8 B instruct, the FP 16 version uses 2 bytes per parameter which means that for 8 billion parameters the model weight would be 16 GB. The FP 8 model uses 1 byte per parameter so for 8 billion parameters the model weight would be 8GB.
We already know that after the model weights are loaded, the remaining memory would be assigned to KV cache.
The FP16 version will only have ~4 GB for cache but the quantized FP8 version will have over 12 GB. We know that the number of concurrent users or concurrent requests is constrained by the VRAM assigned to the KV cache.
FP 8 with over 12 GB of VRAM available for KV cache will allow more concurrent users or requests before memory runs out.
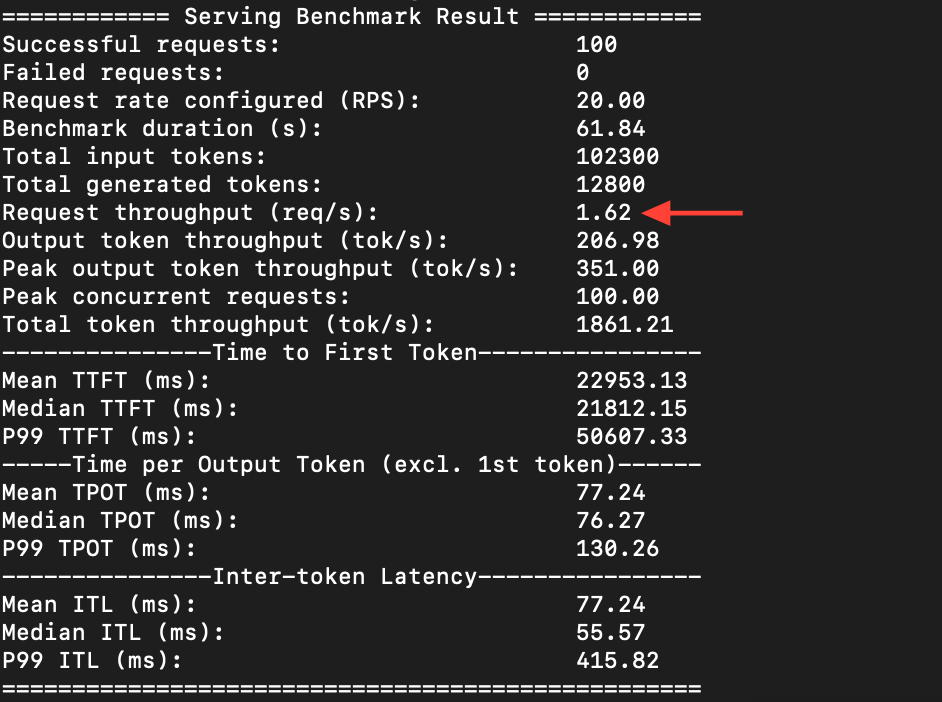
Test: 100 requests, 20 concurrent, against the standard FP16 model first
Then the same test on the FP 8 model.
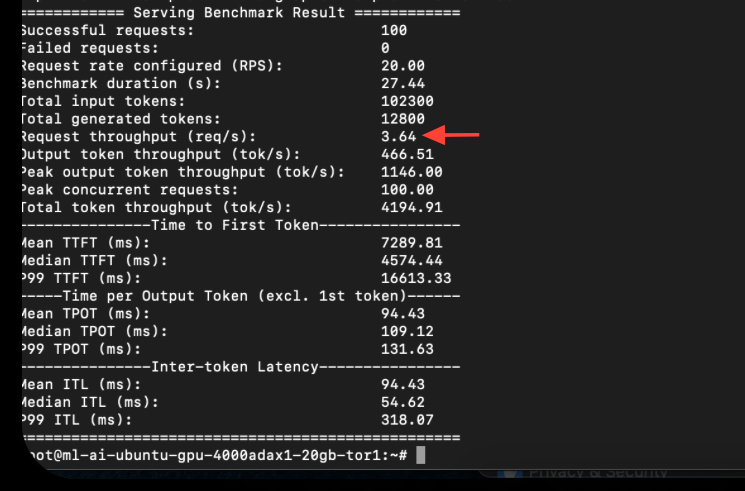
The FP 8 version was able to process 3.64 requests per second, while the FP 16 version could only do 1.62. The token generation speed also went from 206 to 466 per second.
Quantizing from FP 16 to FP 8 does not show any visible dip in quality because most model weights are concentrated in a small range of values, so even though
FP 8's precision is less than FP 16 (8-bit numerical representation over 16-bit), but it can still represent these weights accurately without losing important details.
Batching and throughput
In static batching, requests wait for the current batch to finish before the next one starts. So a user asking a simple query is stuck behind someone who is generating a 500-word essay.
With continuous batching, new requests fill the freed processing spots immediately at the token level rather than waiting for the whole batch to complete.
This means when a model finishes generating a token for one request, that slot in the batch becomes available immediately.
A new request can be inserted into that slot to generate its next token without waiting for the requests in the batch to complete first.
For example in the phrase "Pizza sauce", the token might be ["Pizza","sauce"] or something even smaller like ["Pi", "zz", "a", "sa", "uc", " e"] depending on the tokenizer.
Models generate text sequentially, producing one token at a time until the output is complete.
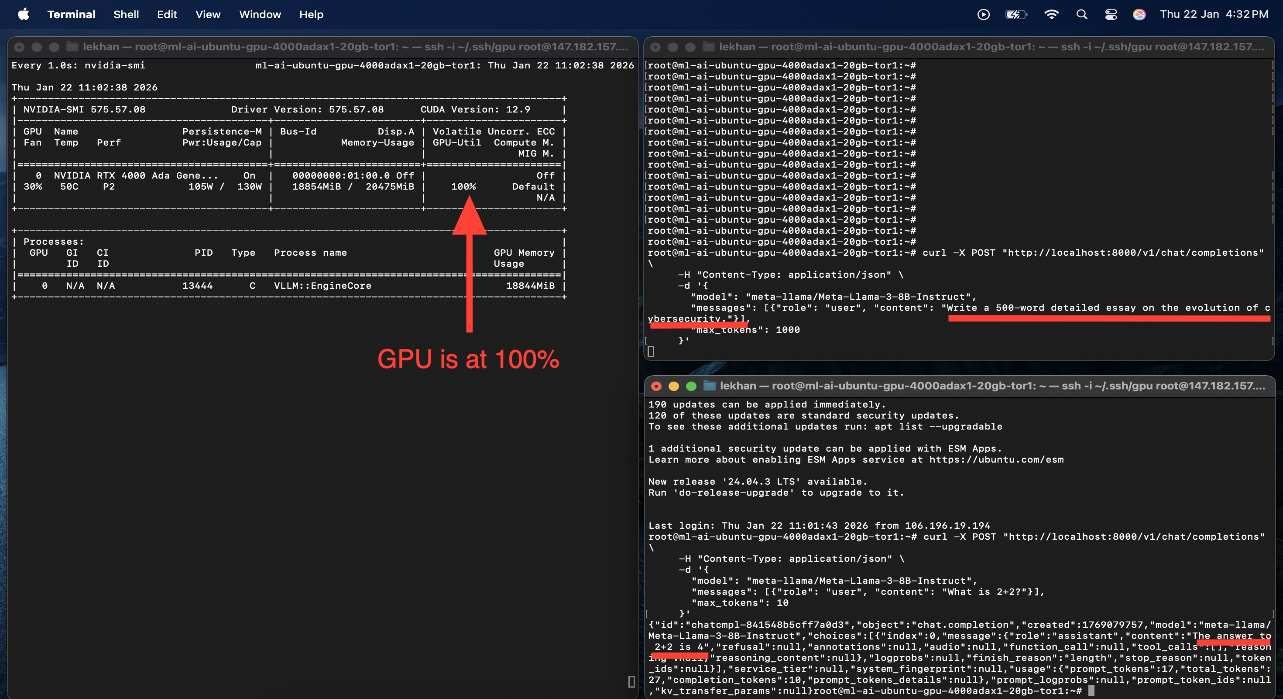
I tested this with two terminals simultaneously sending requests. One sent a long essay request. The other sent "what is 2+2". The math answer came back almost immediately while the essay was still being generated.
GPU stayed at 100% the whole time, both were processing at the same time.
Batching optimisation
The objective was to increase throughput through a batching configuration.
Benchmark results for different parameters of --max-num-sequence (100 requests, 20 concurrent).
| Configuration | Parameters | Throughput (req/s) | Mean Latency (ms) | Observation |
|---|---|---|---|---|
| Config A (Conservative) | max-seqs: 32 | 1.45 | 680 | Under-utilized |
| Config B (Moderate) | max-seqs: 128 | 1.62 | 850 | Best |
| Config C (Aggressive) | max-seqs: 256 | 1.63 | 1200 | Latency spike, no speed gain |
| Config D (Maximum) | max-seqs: 512 | 1.60 | 1800 | Diminishing returns |
--max-num-sequence" refers to the configuration parameter that controls the maximum number of sequences processed concurrently, mostly in the context of machine learning inference or data processing. This parameter is important because it directly affects the system's throughput and latency.128 is the best, beyond that throughput doesn't increase much but latency increases significantly.
Architecture overview
The following image shows the final deployment stack. Llama 3 8B instruct running inside a Docker container with NVIDIA runtime on an RTX 4000 ADA with 20 GB VRAM. vLLM has paged attention, and it manages VRAM allocation.
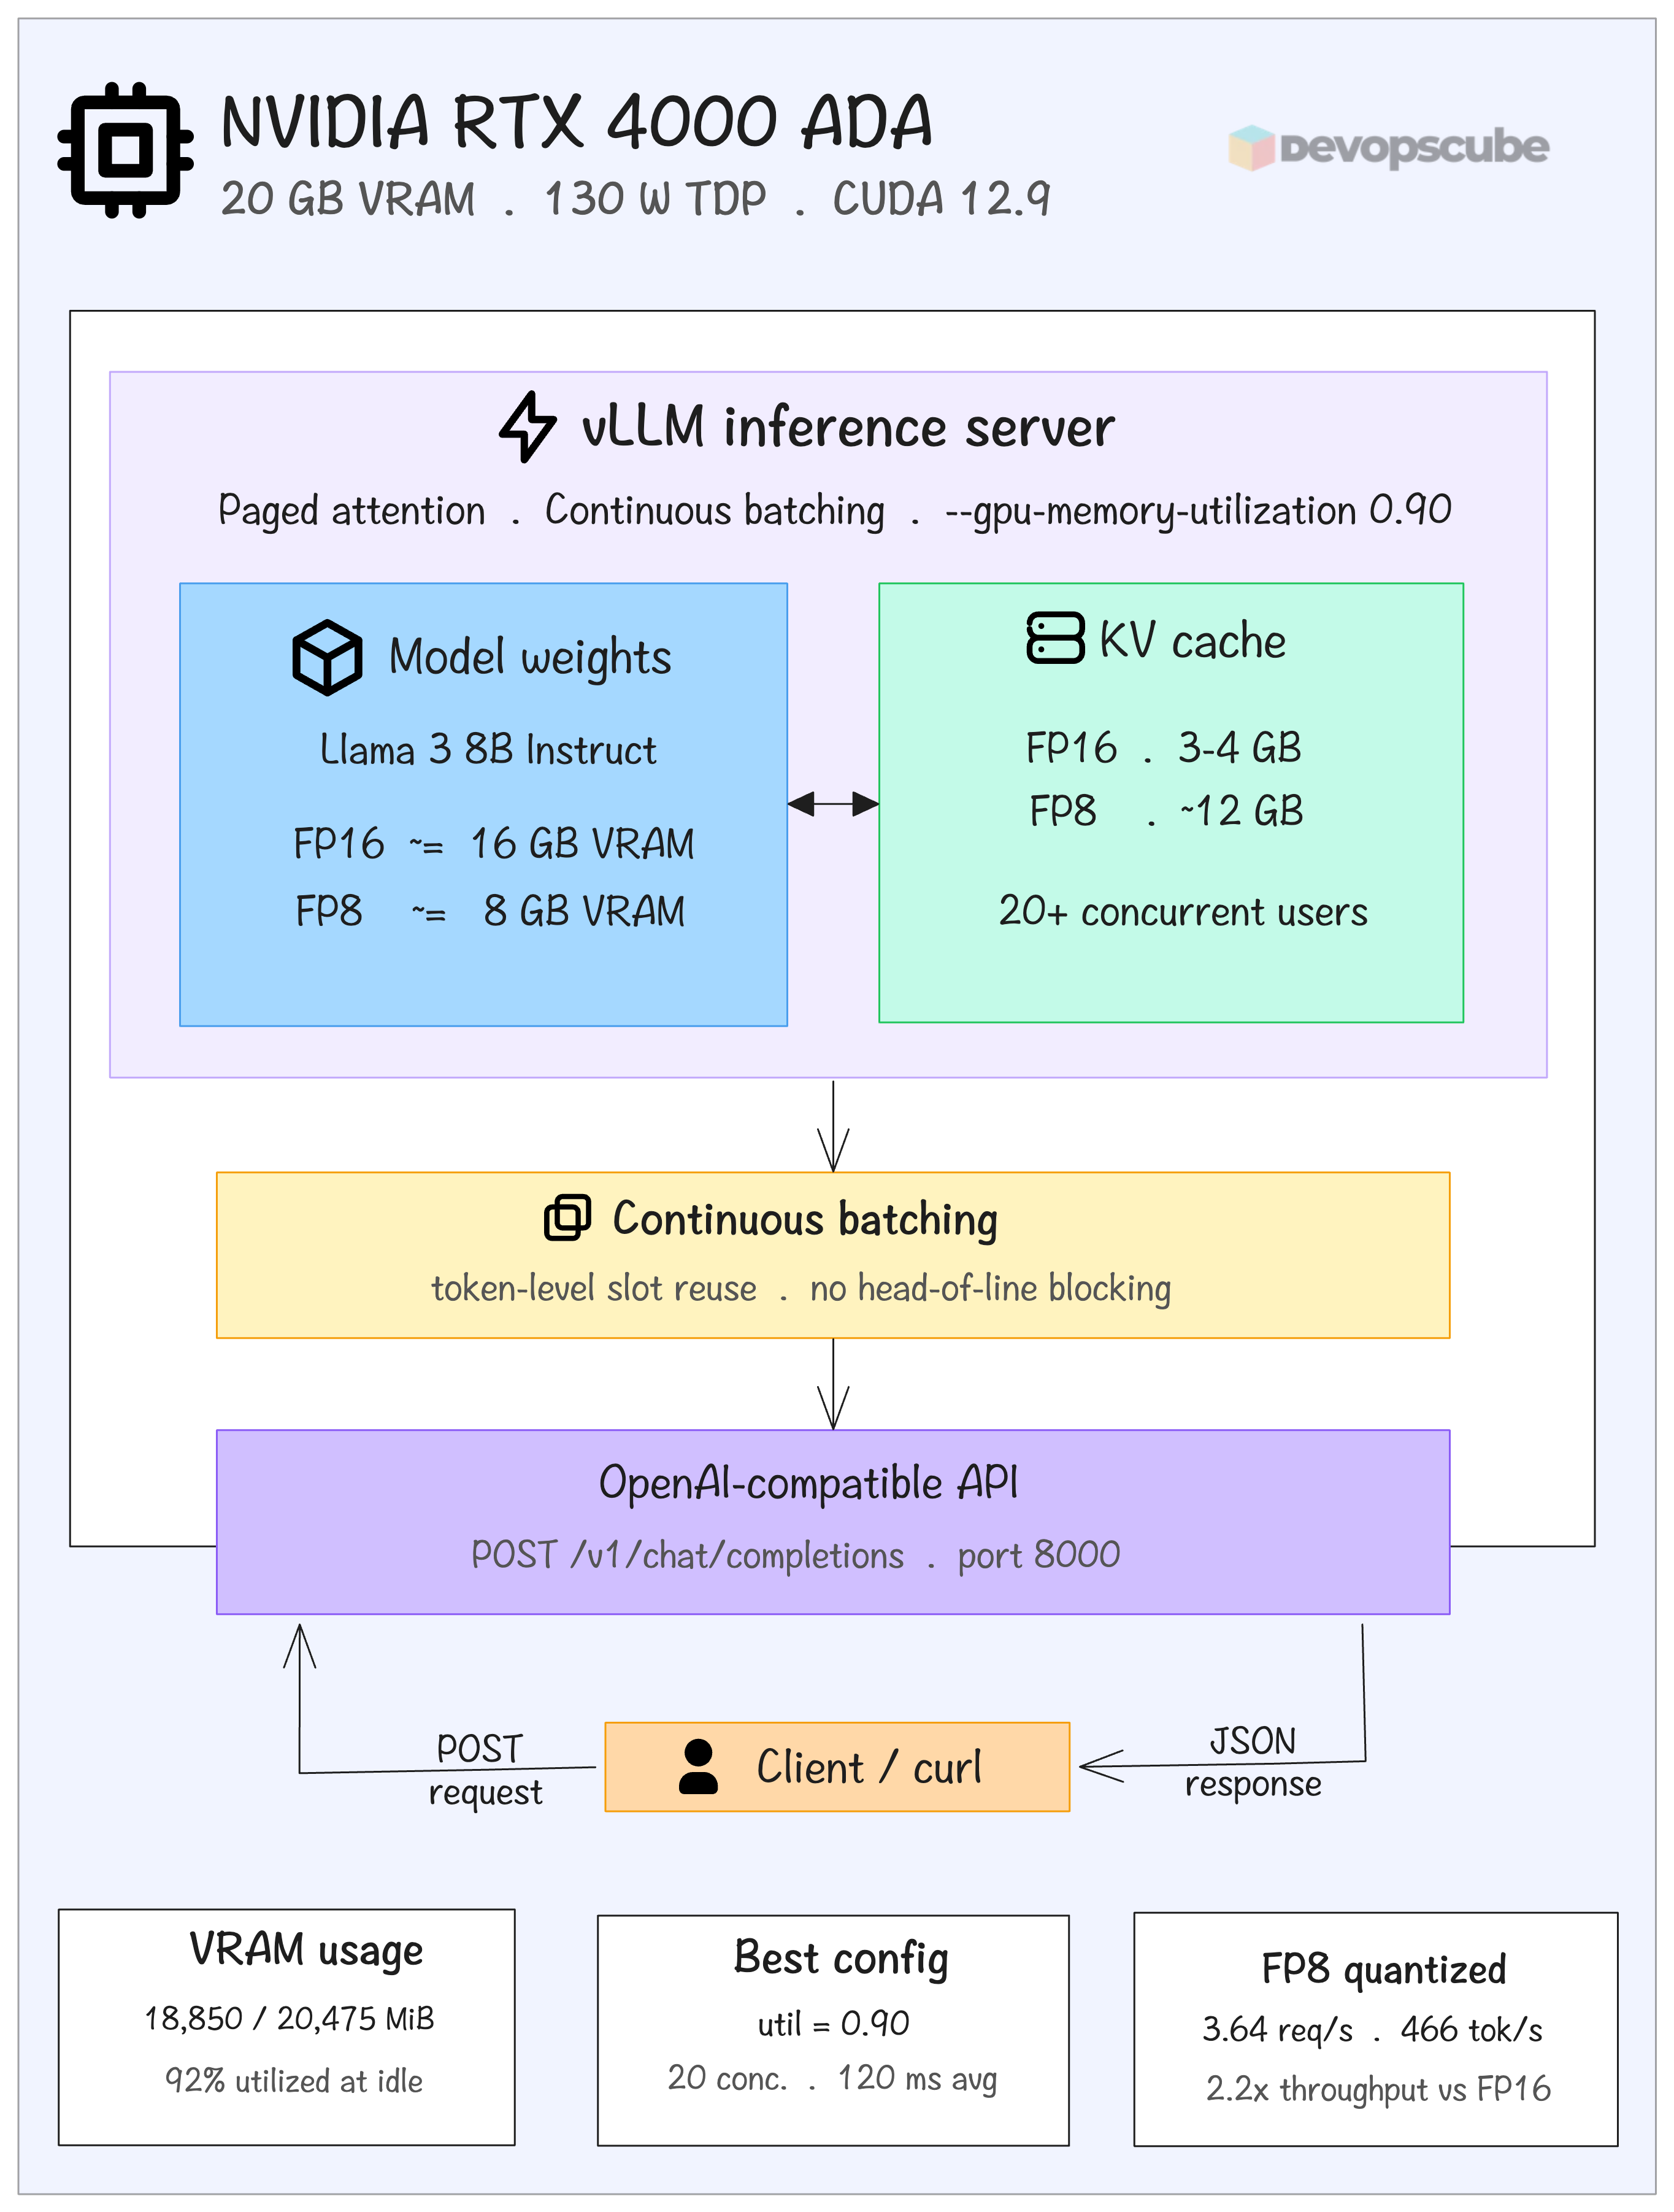
After quantising (to FP 8) the model occupies 8 GB VRAM leaving over 12 GB for KV cache, which allows 20+ concurrent users.
Continuous batching fills freed token slots immediately, preventing simple requests from waiting behind long ones. The whole thing is exposed on an Open-AI compatible API on port 8000.
Conclusion
The blog was more about what I found interesting while deploying Llama 3-8B instruct on a NVIDIA RTX 4000 ADA (20GB VRAM). I started with a 16 GB model on a 20 GB card, almost no room for anything else.
Three changes filled the gap. Quantising from FP 16 to FP 8 reduced the model weights by half and freed up around 8 GB, which went directly to KV cache.
Setting GPU memory utilization to 0.90 (90% VRAM utilization) instead of the suggested conservative values gave the cache some space to actually be useful.
Continuous batching handled the scheduling. New requests fill the freed up slots at the token level, so a simple query wont sit and wait behind a long essay generation.
128 sequences can be processed concurrently before latency climbs without any significant throughput gain.
The limits is the end. If a future model has heavier weights, you can either quantize further or get a bigger card. There is no way out.