

In this guide, you will learn to purchase the Bluehost hosting, setup WordPress website on Bluehost, create a website from scratch, and install the essential plugins for WordPress.
According to WordPress, WordPress holds around 61.4% of the CMS market share, and more than 65,000+ plugins are available.
Also, based on the Bluehost report, more than 5 million WordPress websites worldwide are hosted on Bluehost. In fact, Bluehost is officially recommended by WordPress.0rg, making it one of the best options for hosting a WordPress website.
That is why we are using Bluehost for one of our Wordpress websites and recommending it to you as well. We documented all the steps involved from purchasing a hosting plan to making it production-ready.
So by the end of this guide, you will have a fully operational production ready Wordpress website with recommended settings.
Lets get started.
Purchase a Bluehost Hosting Plan
The first step in getting started with Bluehost is purchasing a hosting plan for Wordpress website.
Follow these steps given below very carefully. If you miss any step, you may get confused.
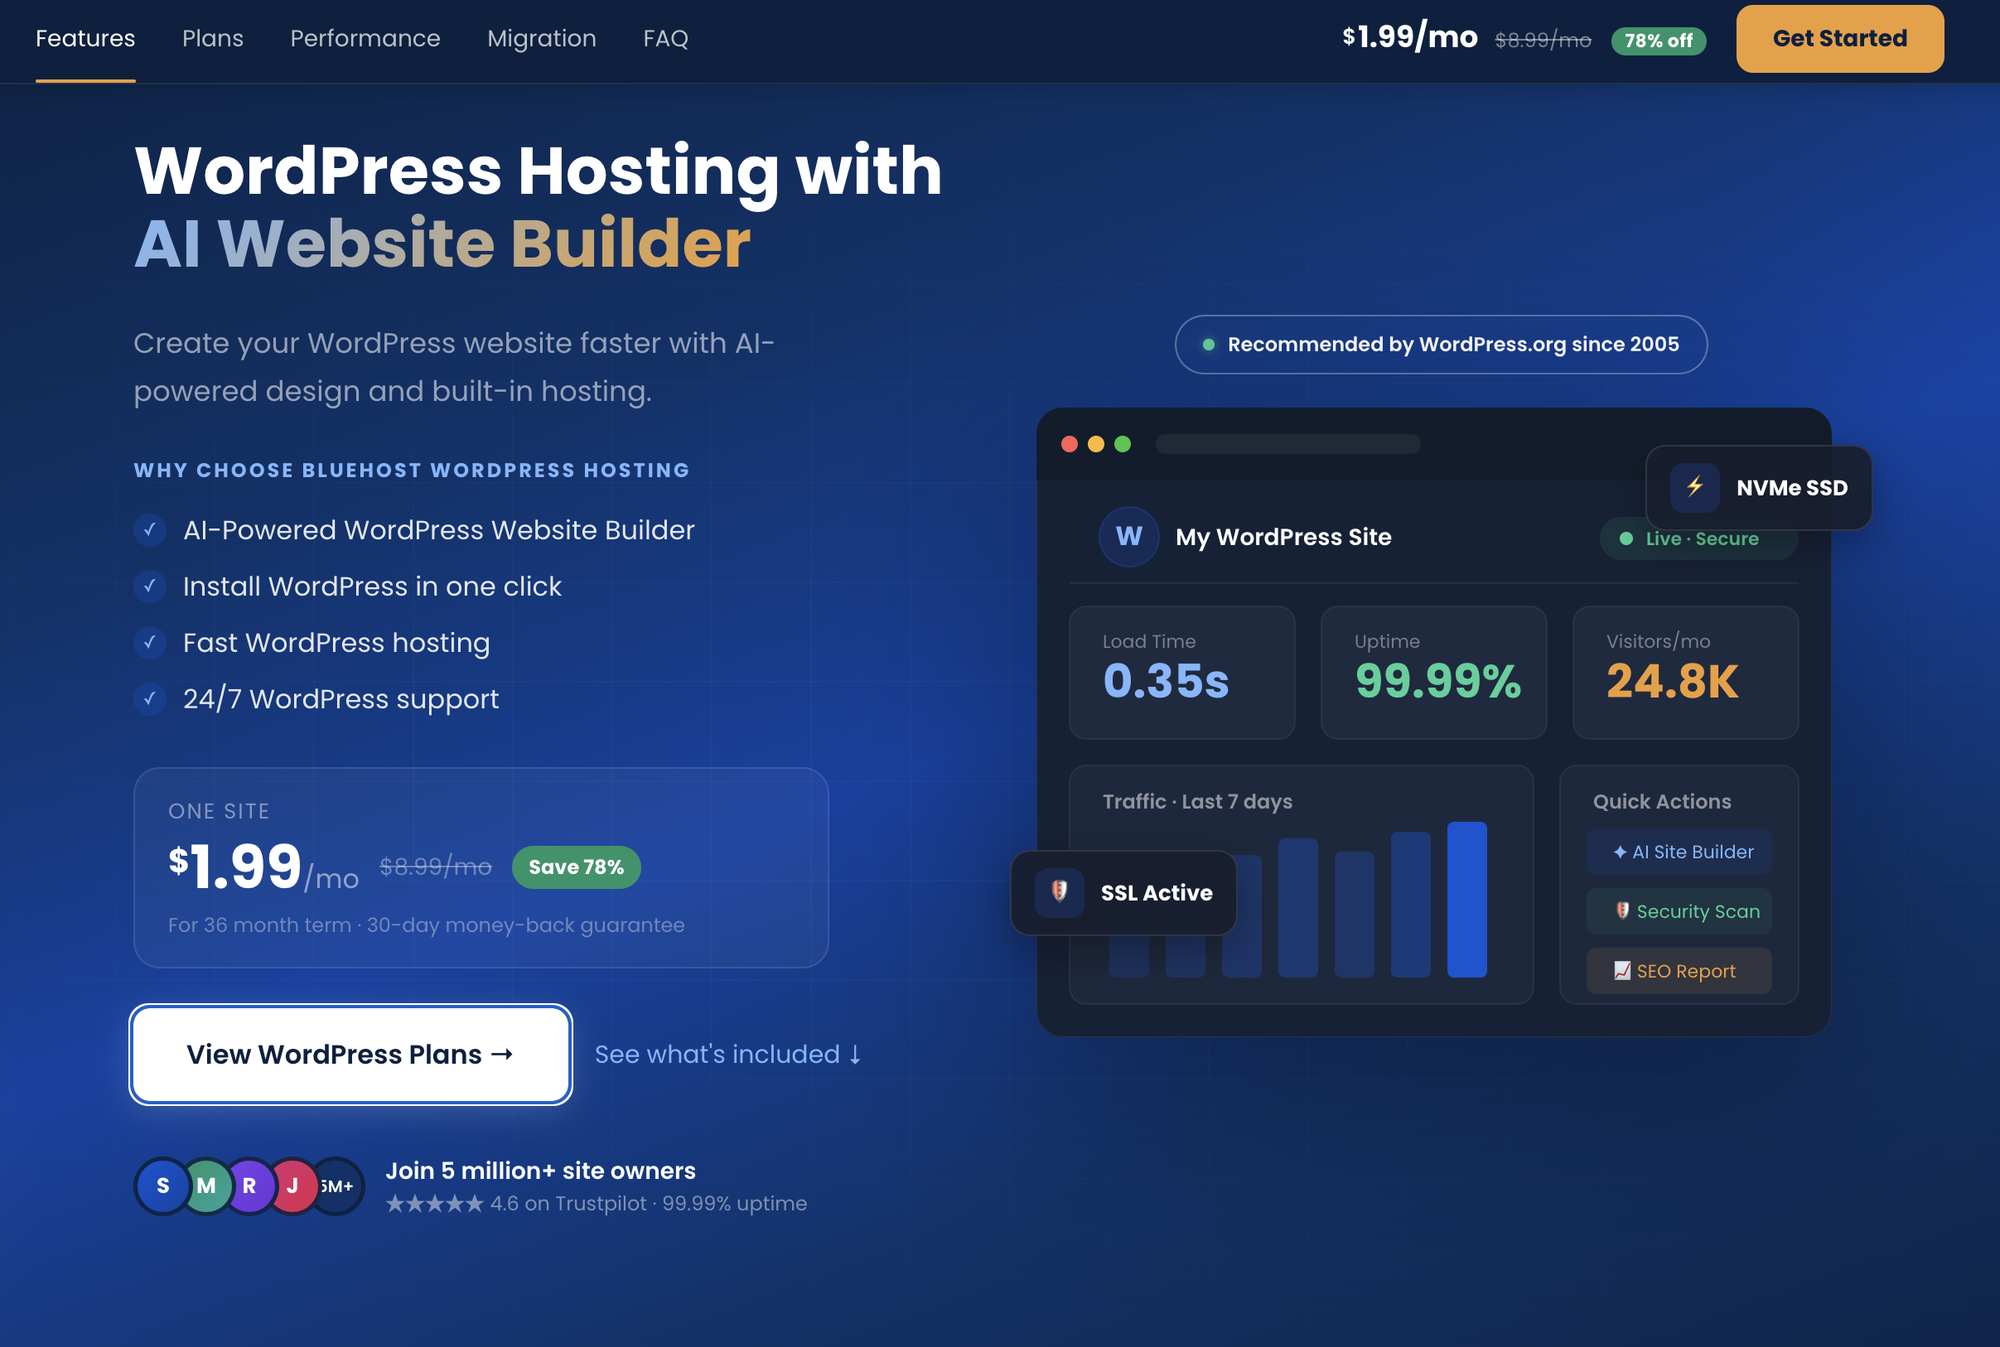
Step 1: Visit the Bluehost official site
First, go to the Bluehost official website. On the homepage, you will see the 'View WordPress Plans' option, click on it.
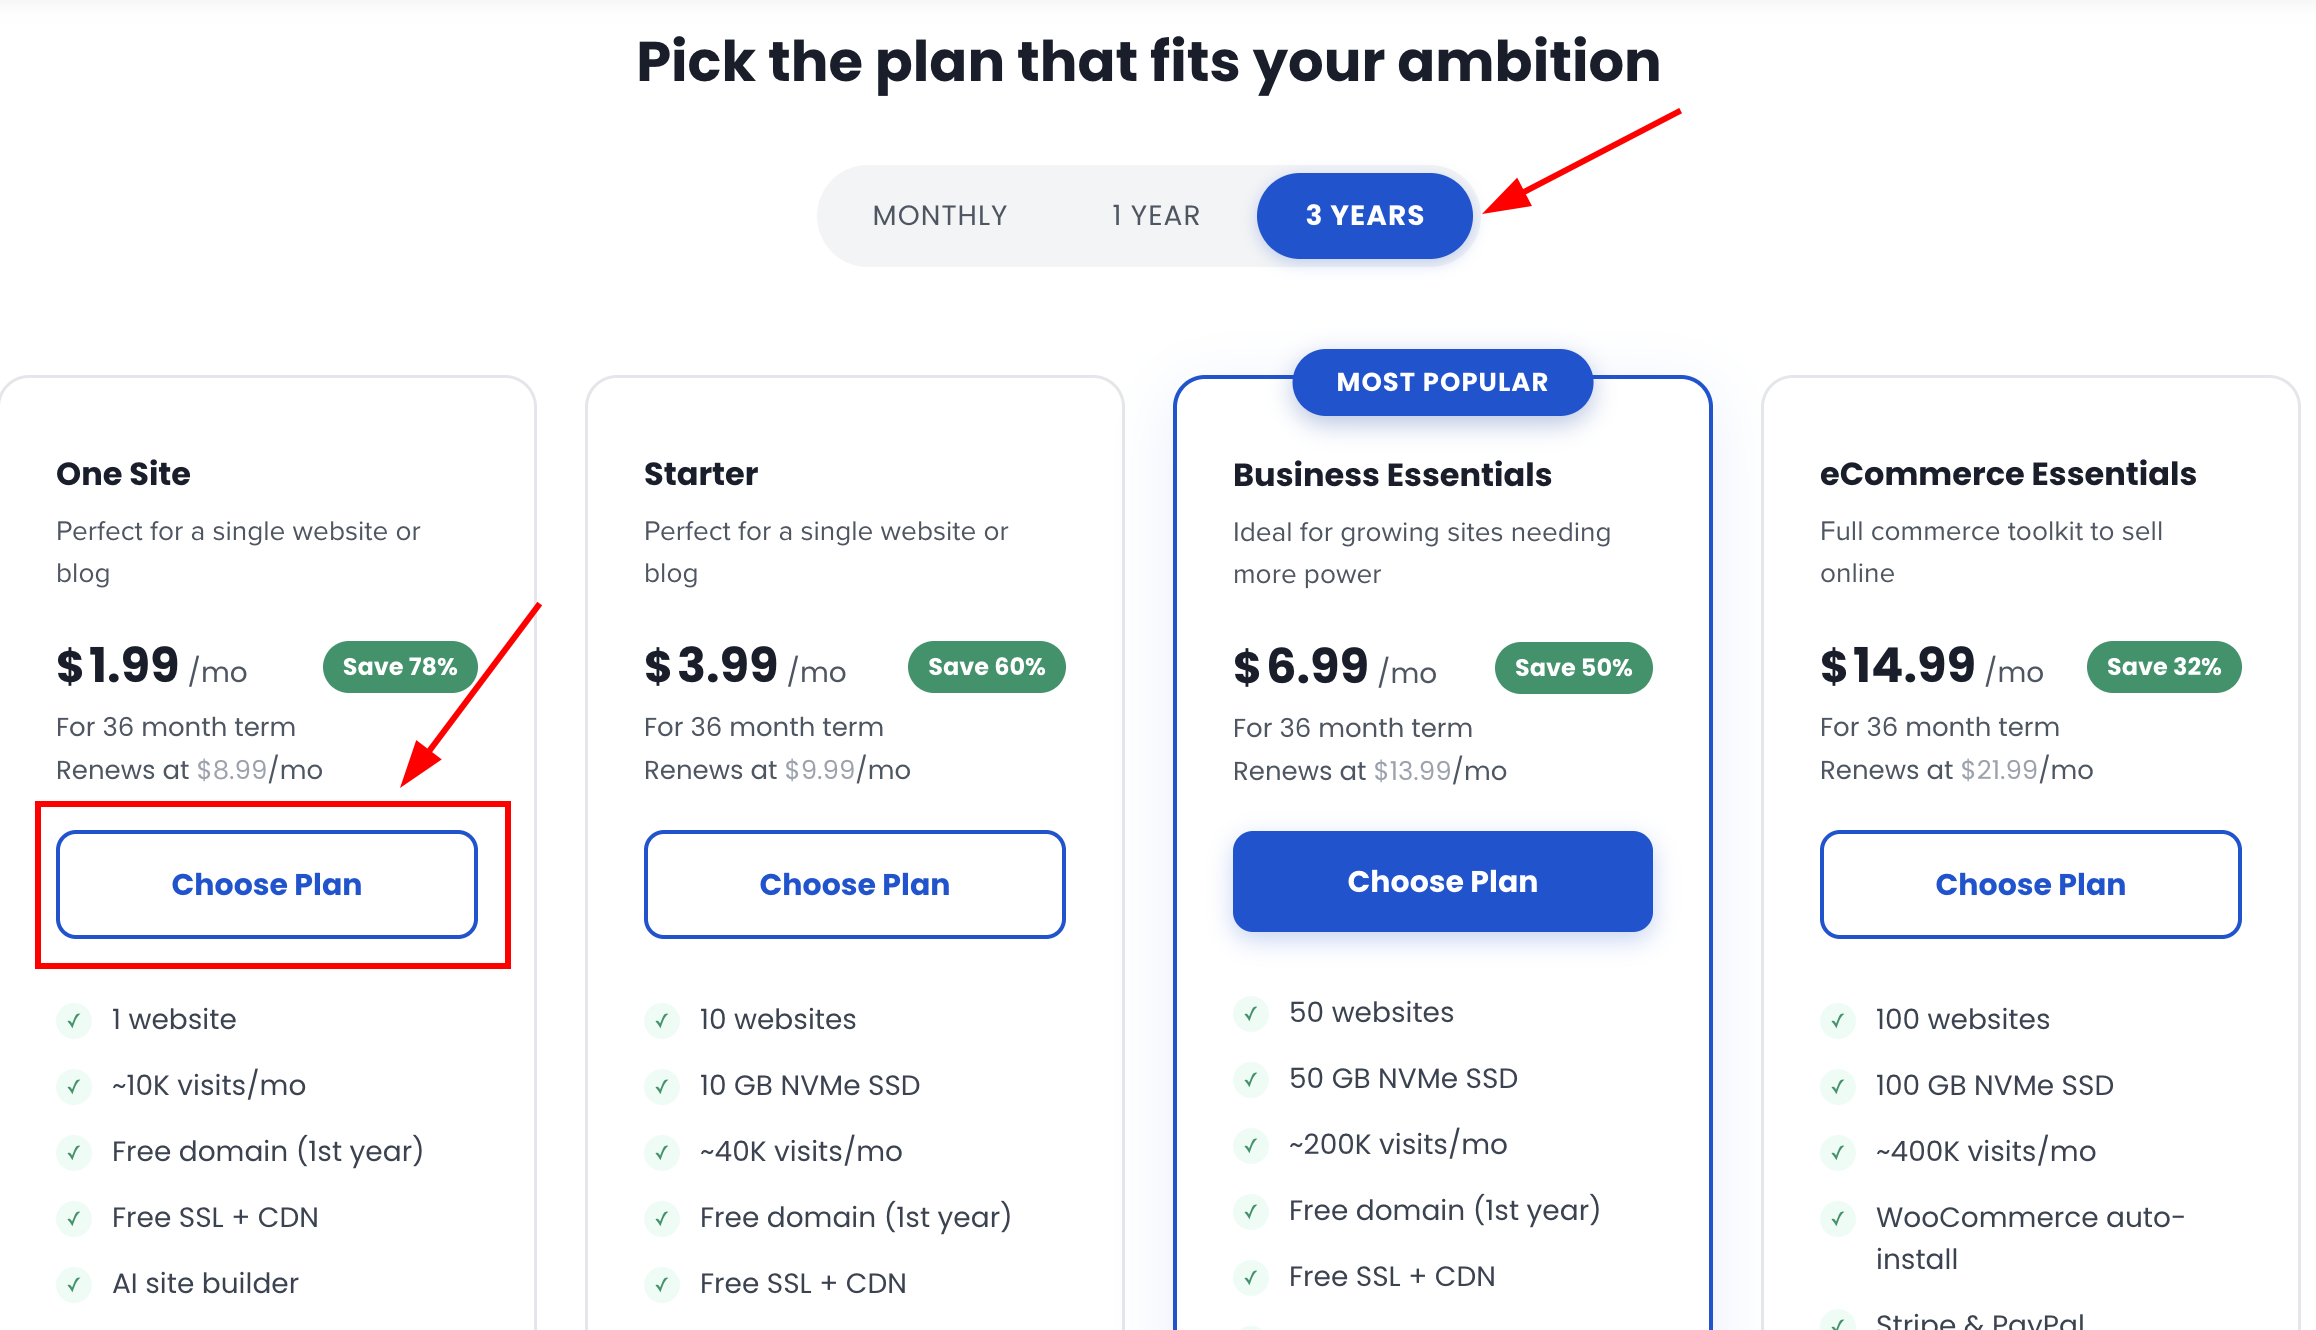
Step 2: Choose your Plan
Select a plan based on your needs. If you are confused about which plan is right for you, here is a simple breakdown to help you choose.
- One site - Best for beginners, personal blogs, or anyone creating their first website. If you are starting your first website, this is a great plan to begin with.
- Starter - Similar to the One Site plan, but it allows you to host up to 10 websites and provides more resources. If you are migrating from another hosting provider and your website gets around 40K monthly visitors, this plan is a better choice.
- Business essentials - It is for growing websites that need better performance, more power, and additional resources.
- eCommerce Essentials - It is best for online stores. If you want to sell products online, this is the best plan for you.
Now, lets continue the purchasing process.
In my case I am choosing the One Site plan. Click the 'Choose Plan' button to proceed.
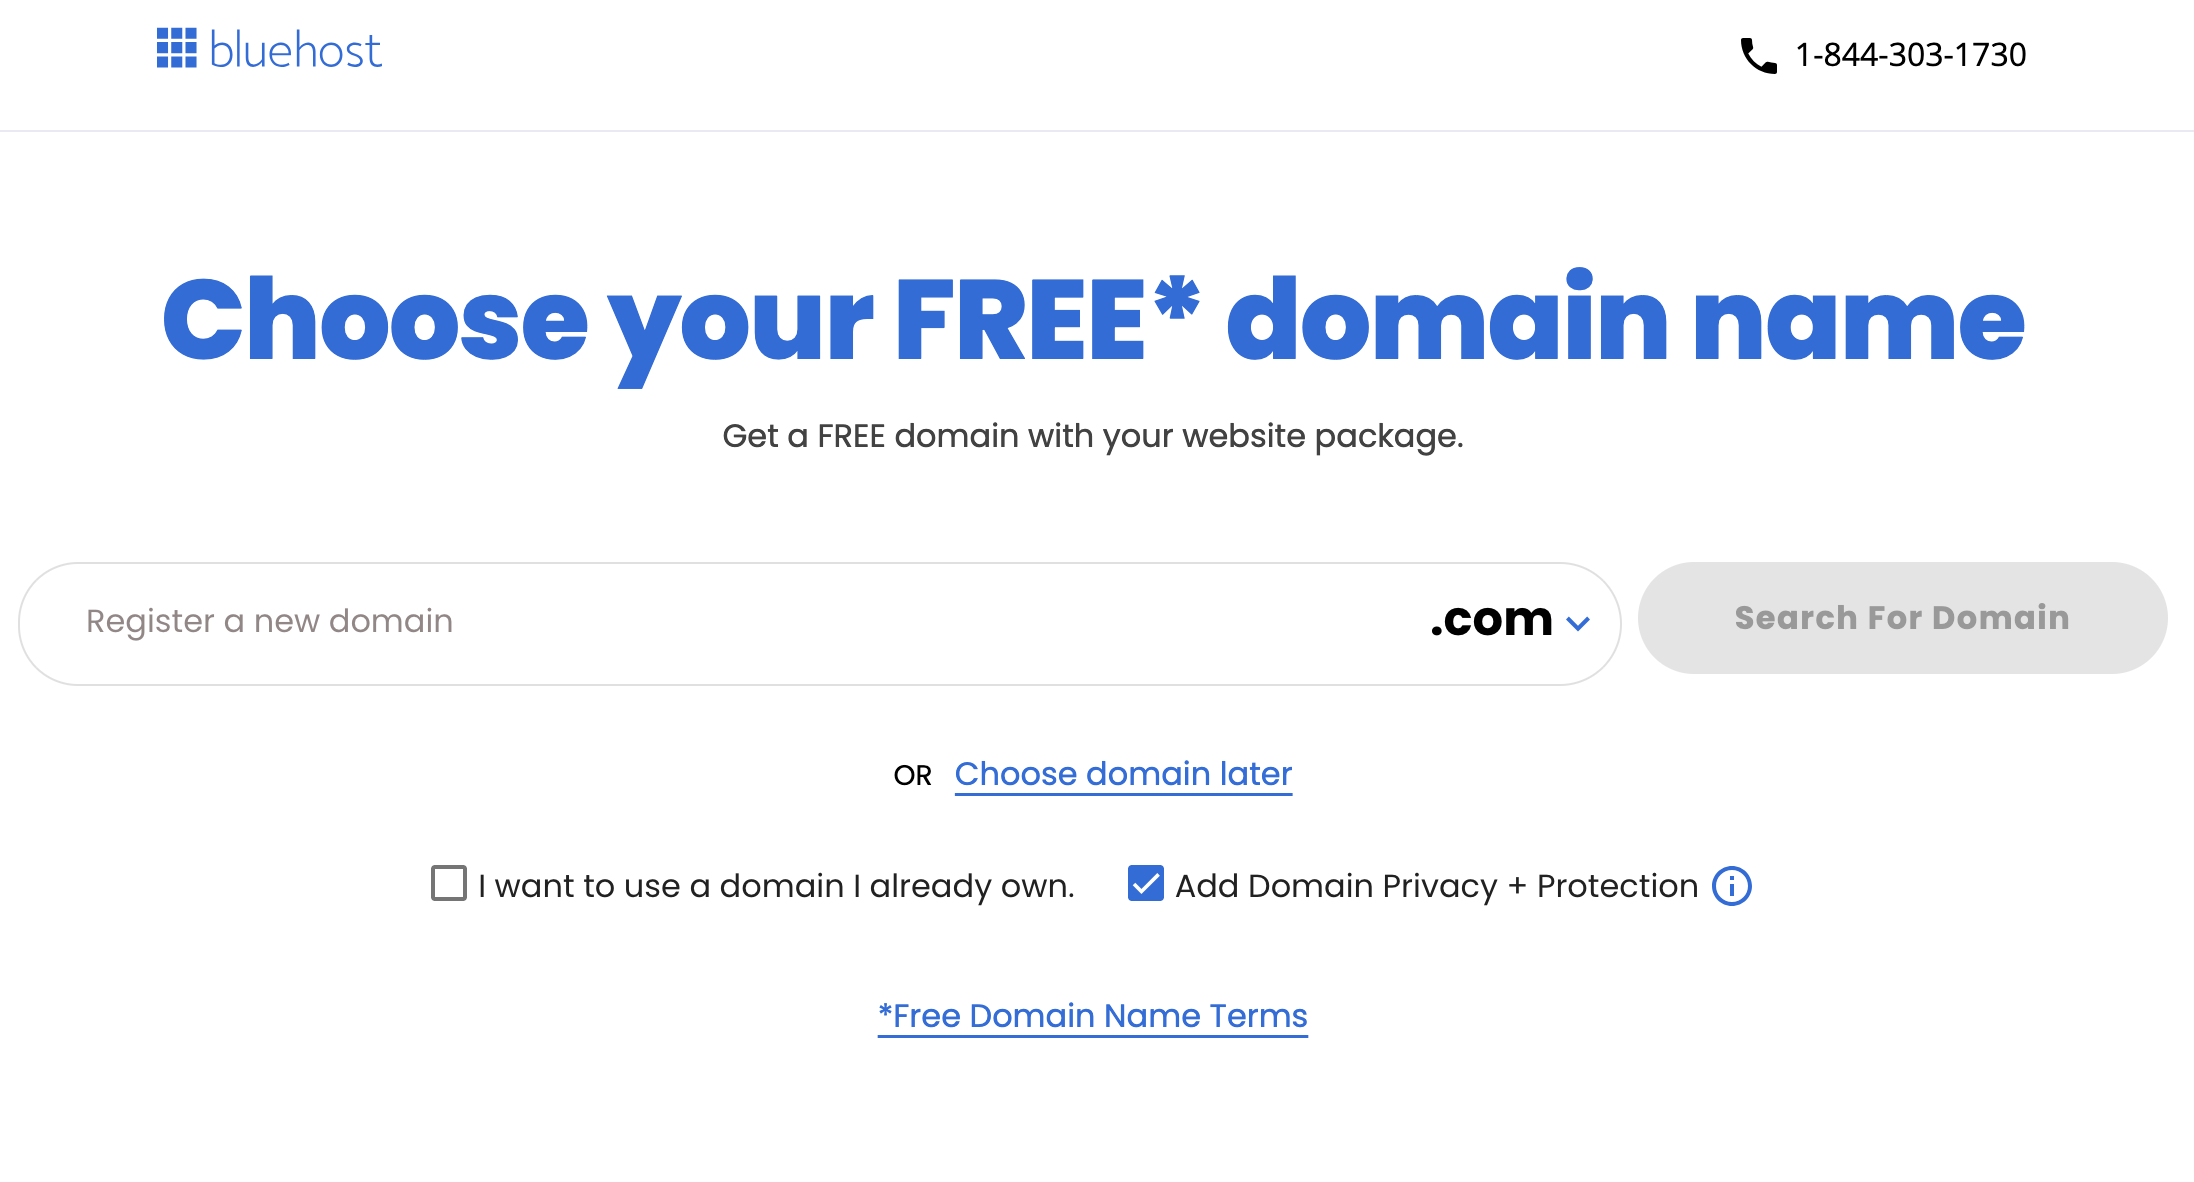
Step 3: Enter your domain
Bluehost offers free domain name with each hosting purchase.
So if you don’t have a domain yet, enter your preferred domain name and click Search for Domain. You will then see whether your desired domain is available.
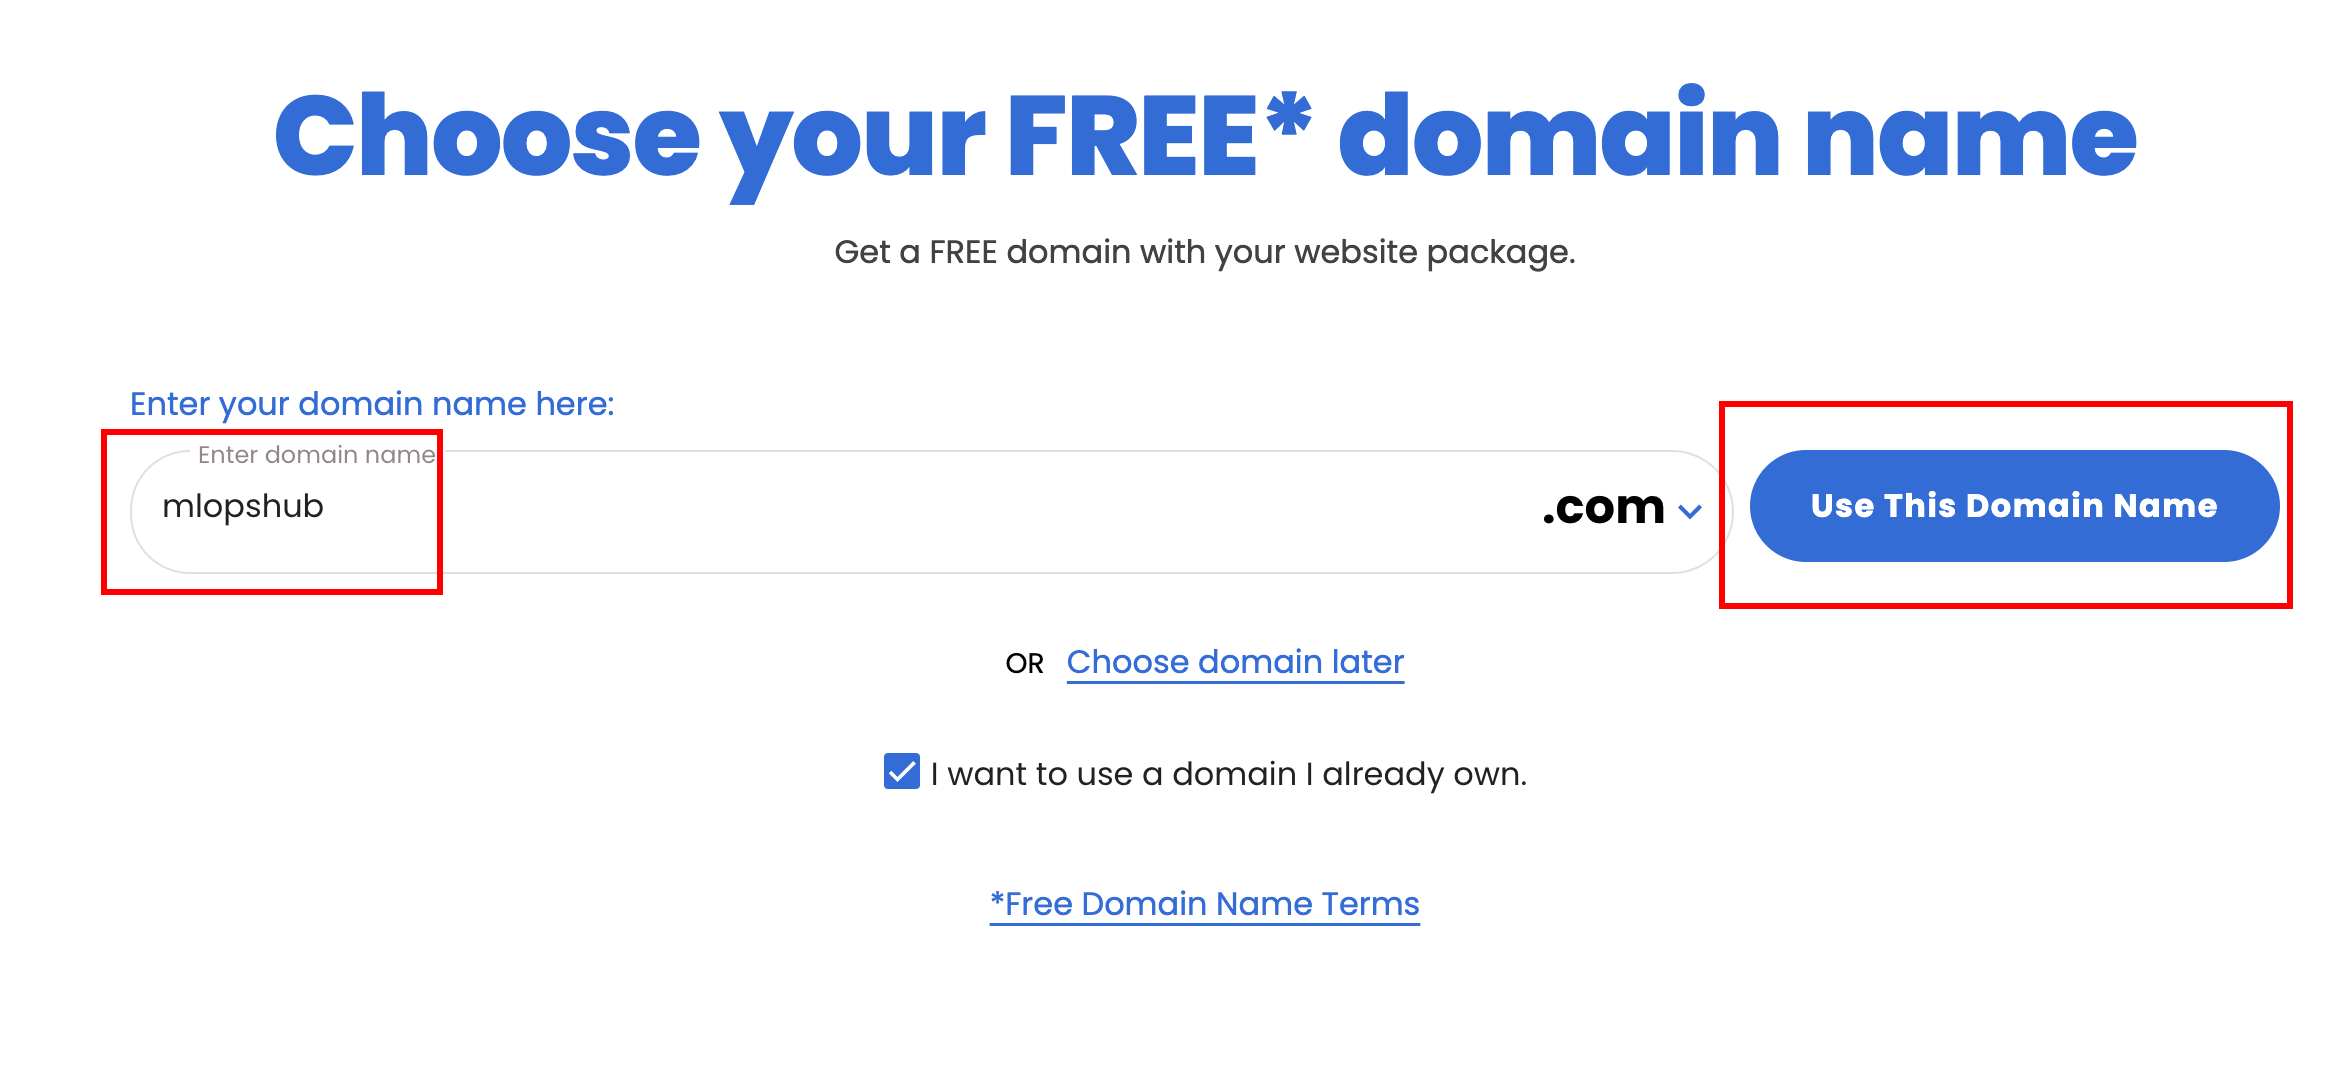
If you already have a domain, simply enter your domain name and click the Use this domain name button. In my case I already own the mlopshub.com. So am going ahead and using it.
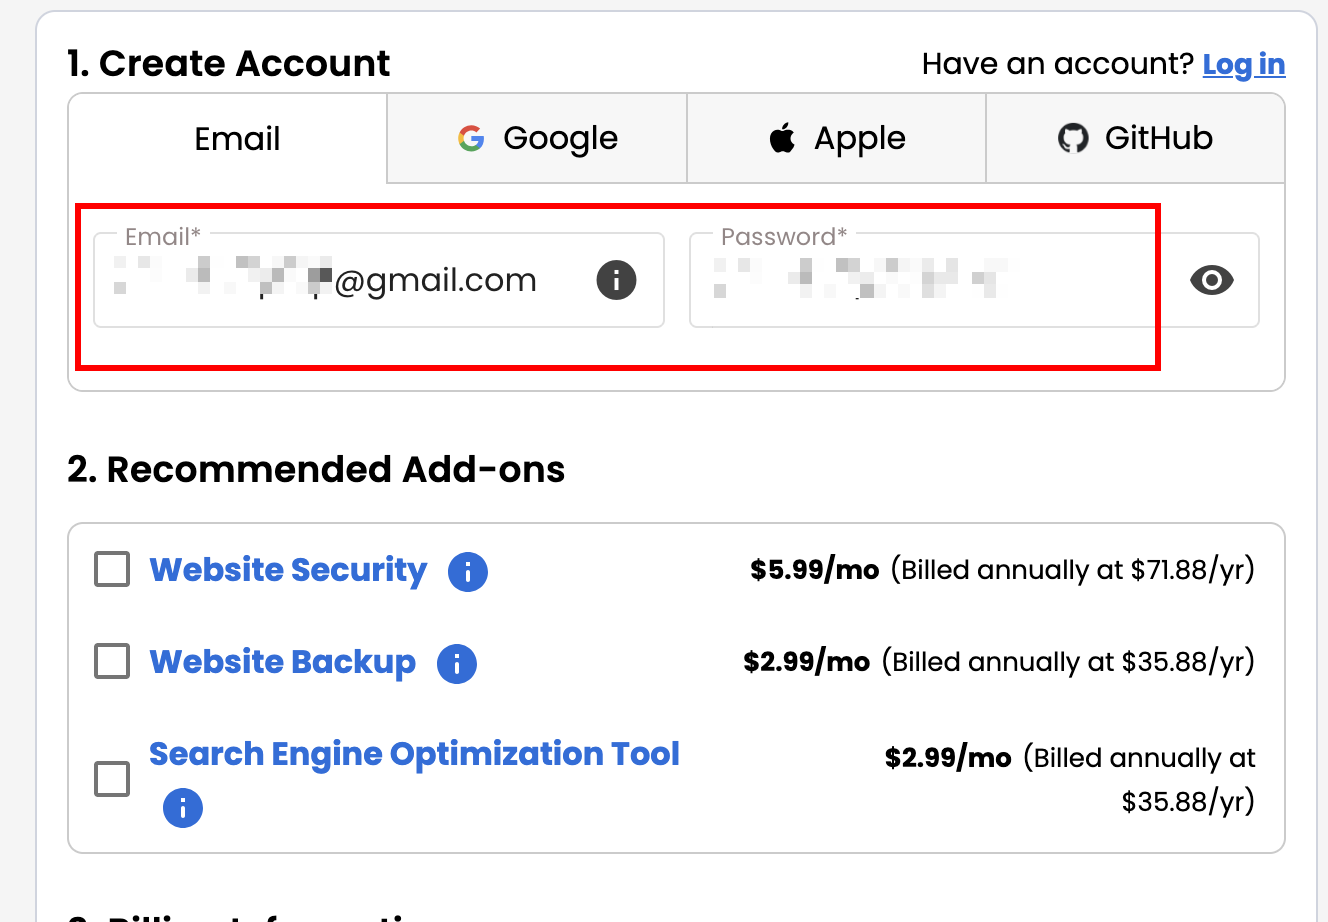
Step 4: Create your account
Next you need to create your account. For that you can sign up using your Email, Apple ID, or GitHub account.
You will also see some recommended add-ons. If you need them, you can select them. Otherwise, leave them unchecked, as they will add extra cost.
Then, scroll down.
Step 5: Enter billing address
Bluehost offers multiple payment methods, including credit/debit cards, PayPal etc..
For example, if you choose to pay using a credit card, enter your card details along with your billing address.
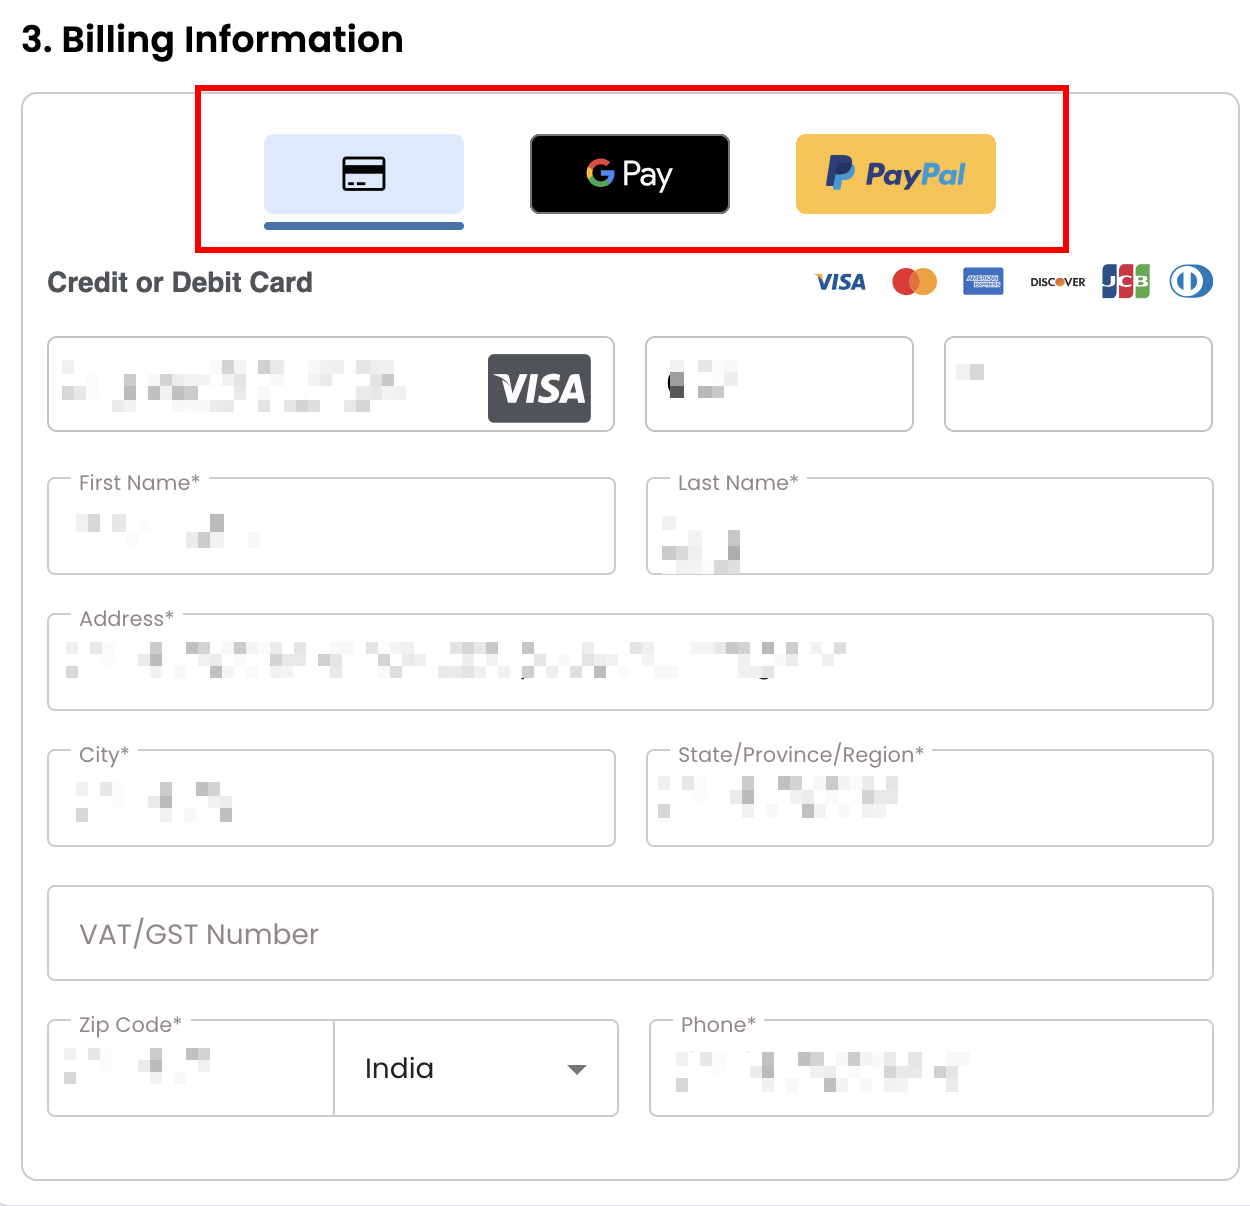
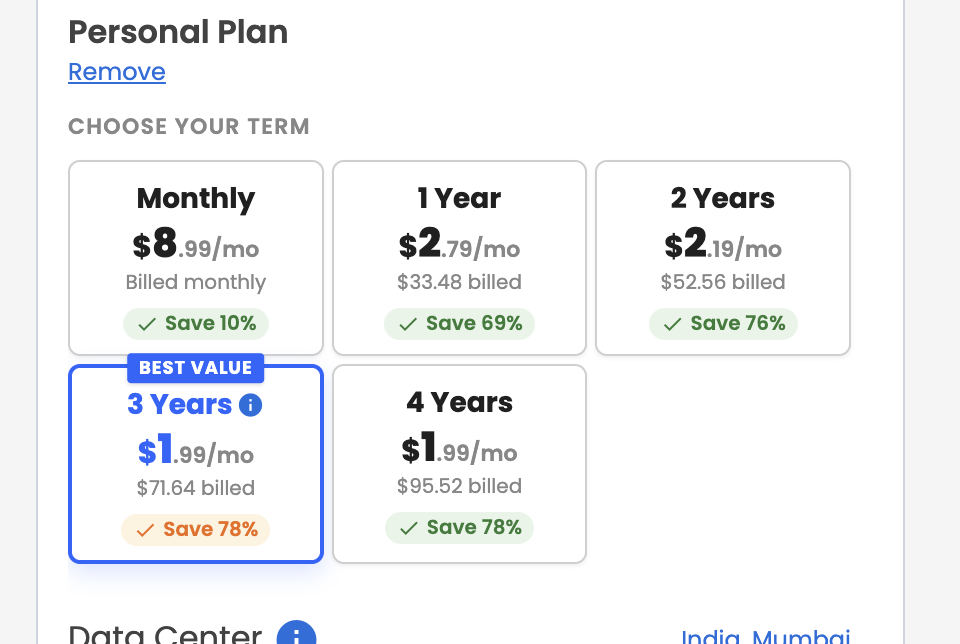
Once you are done with the billing address, next, choose your hosting term monthly, 1 year, 2 years, 3 years, or 4 years.
Step 6: Submit Payment
Tick the terms and conditions checkbox and click the Submit Payment button.
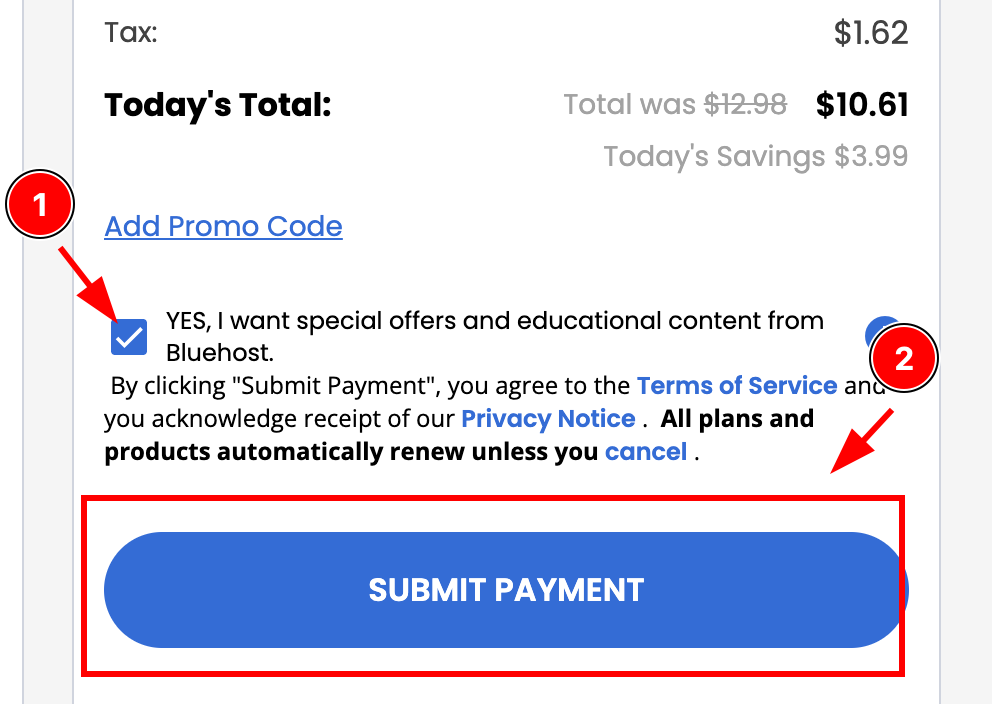
Thats it! Your Bluehost hosting purchase is complete, and your account is now ready.
The next Step is connecting your domain if you have the domain in different providers like GoDaddy, Cloudflare, or any other platform where you purchased your domain.
Dont skip this step, it is very important.
Steps to Map Bluehost Server To a Domain Name
No lets look at how to connect the Bluehost server to a domain name in a few steps.
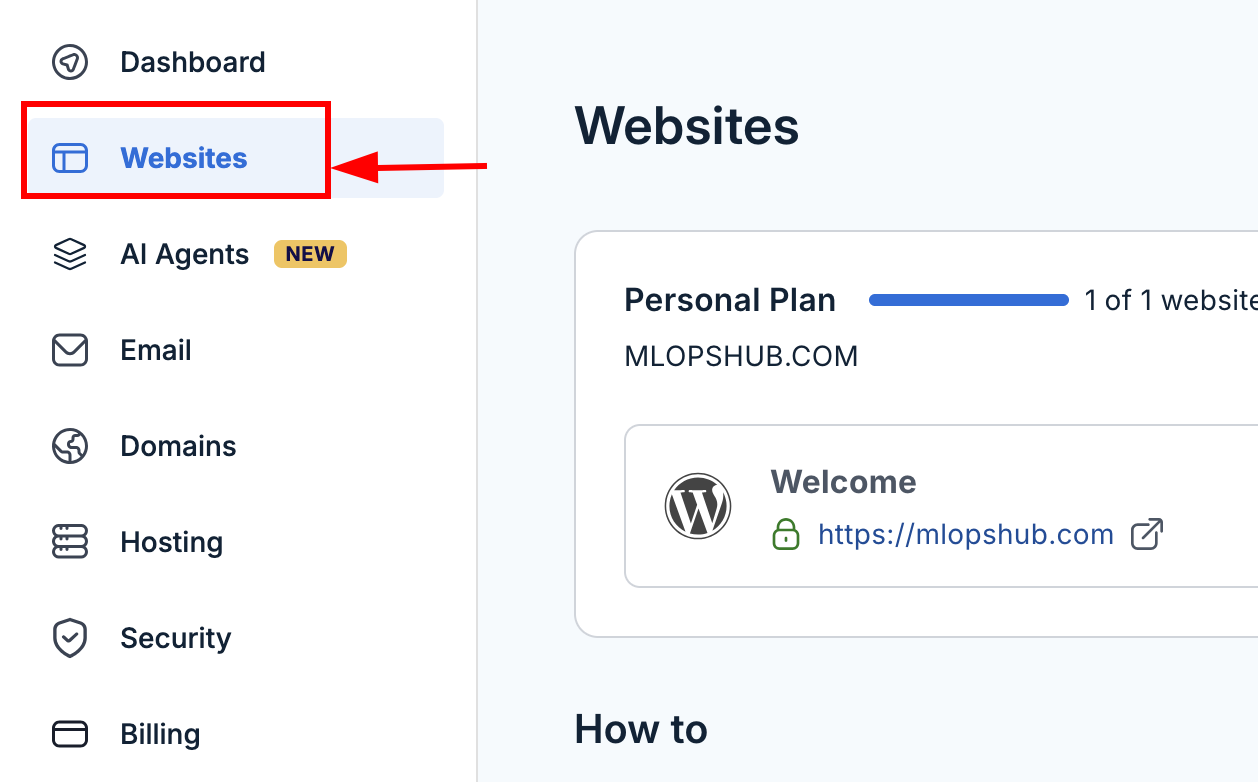
Step 1: Open the Bluehost dashboard
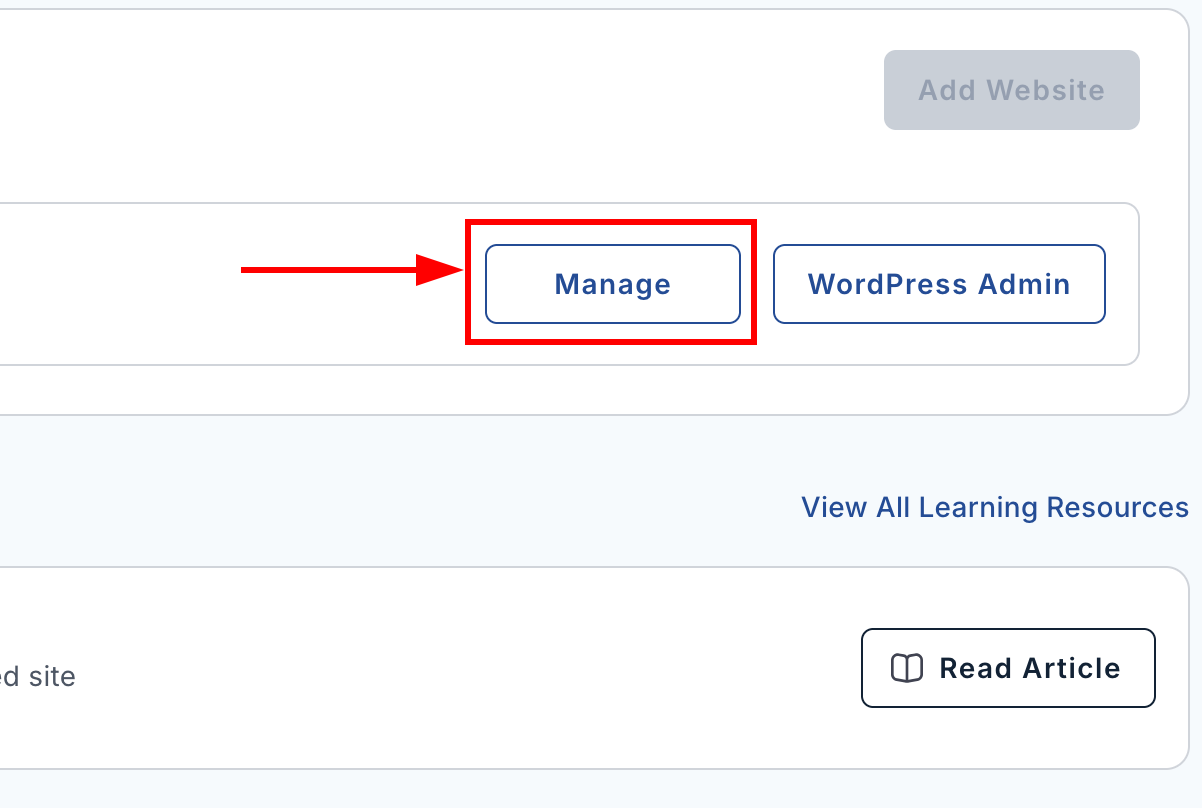
First, log in to your Bluehost account. Once you log in, on the left side menu, you will see the Websites option, click on it.
Now, click the Manage button on the right side.
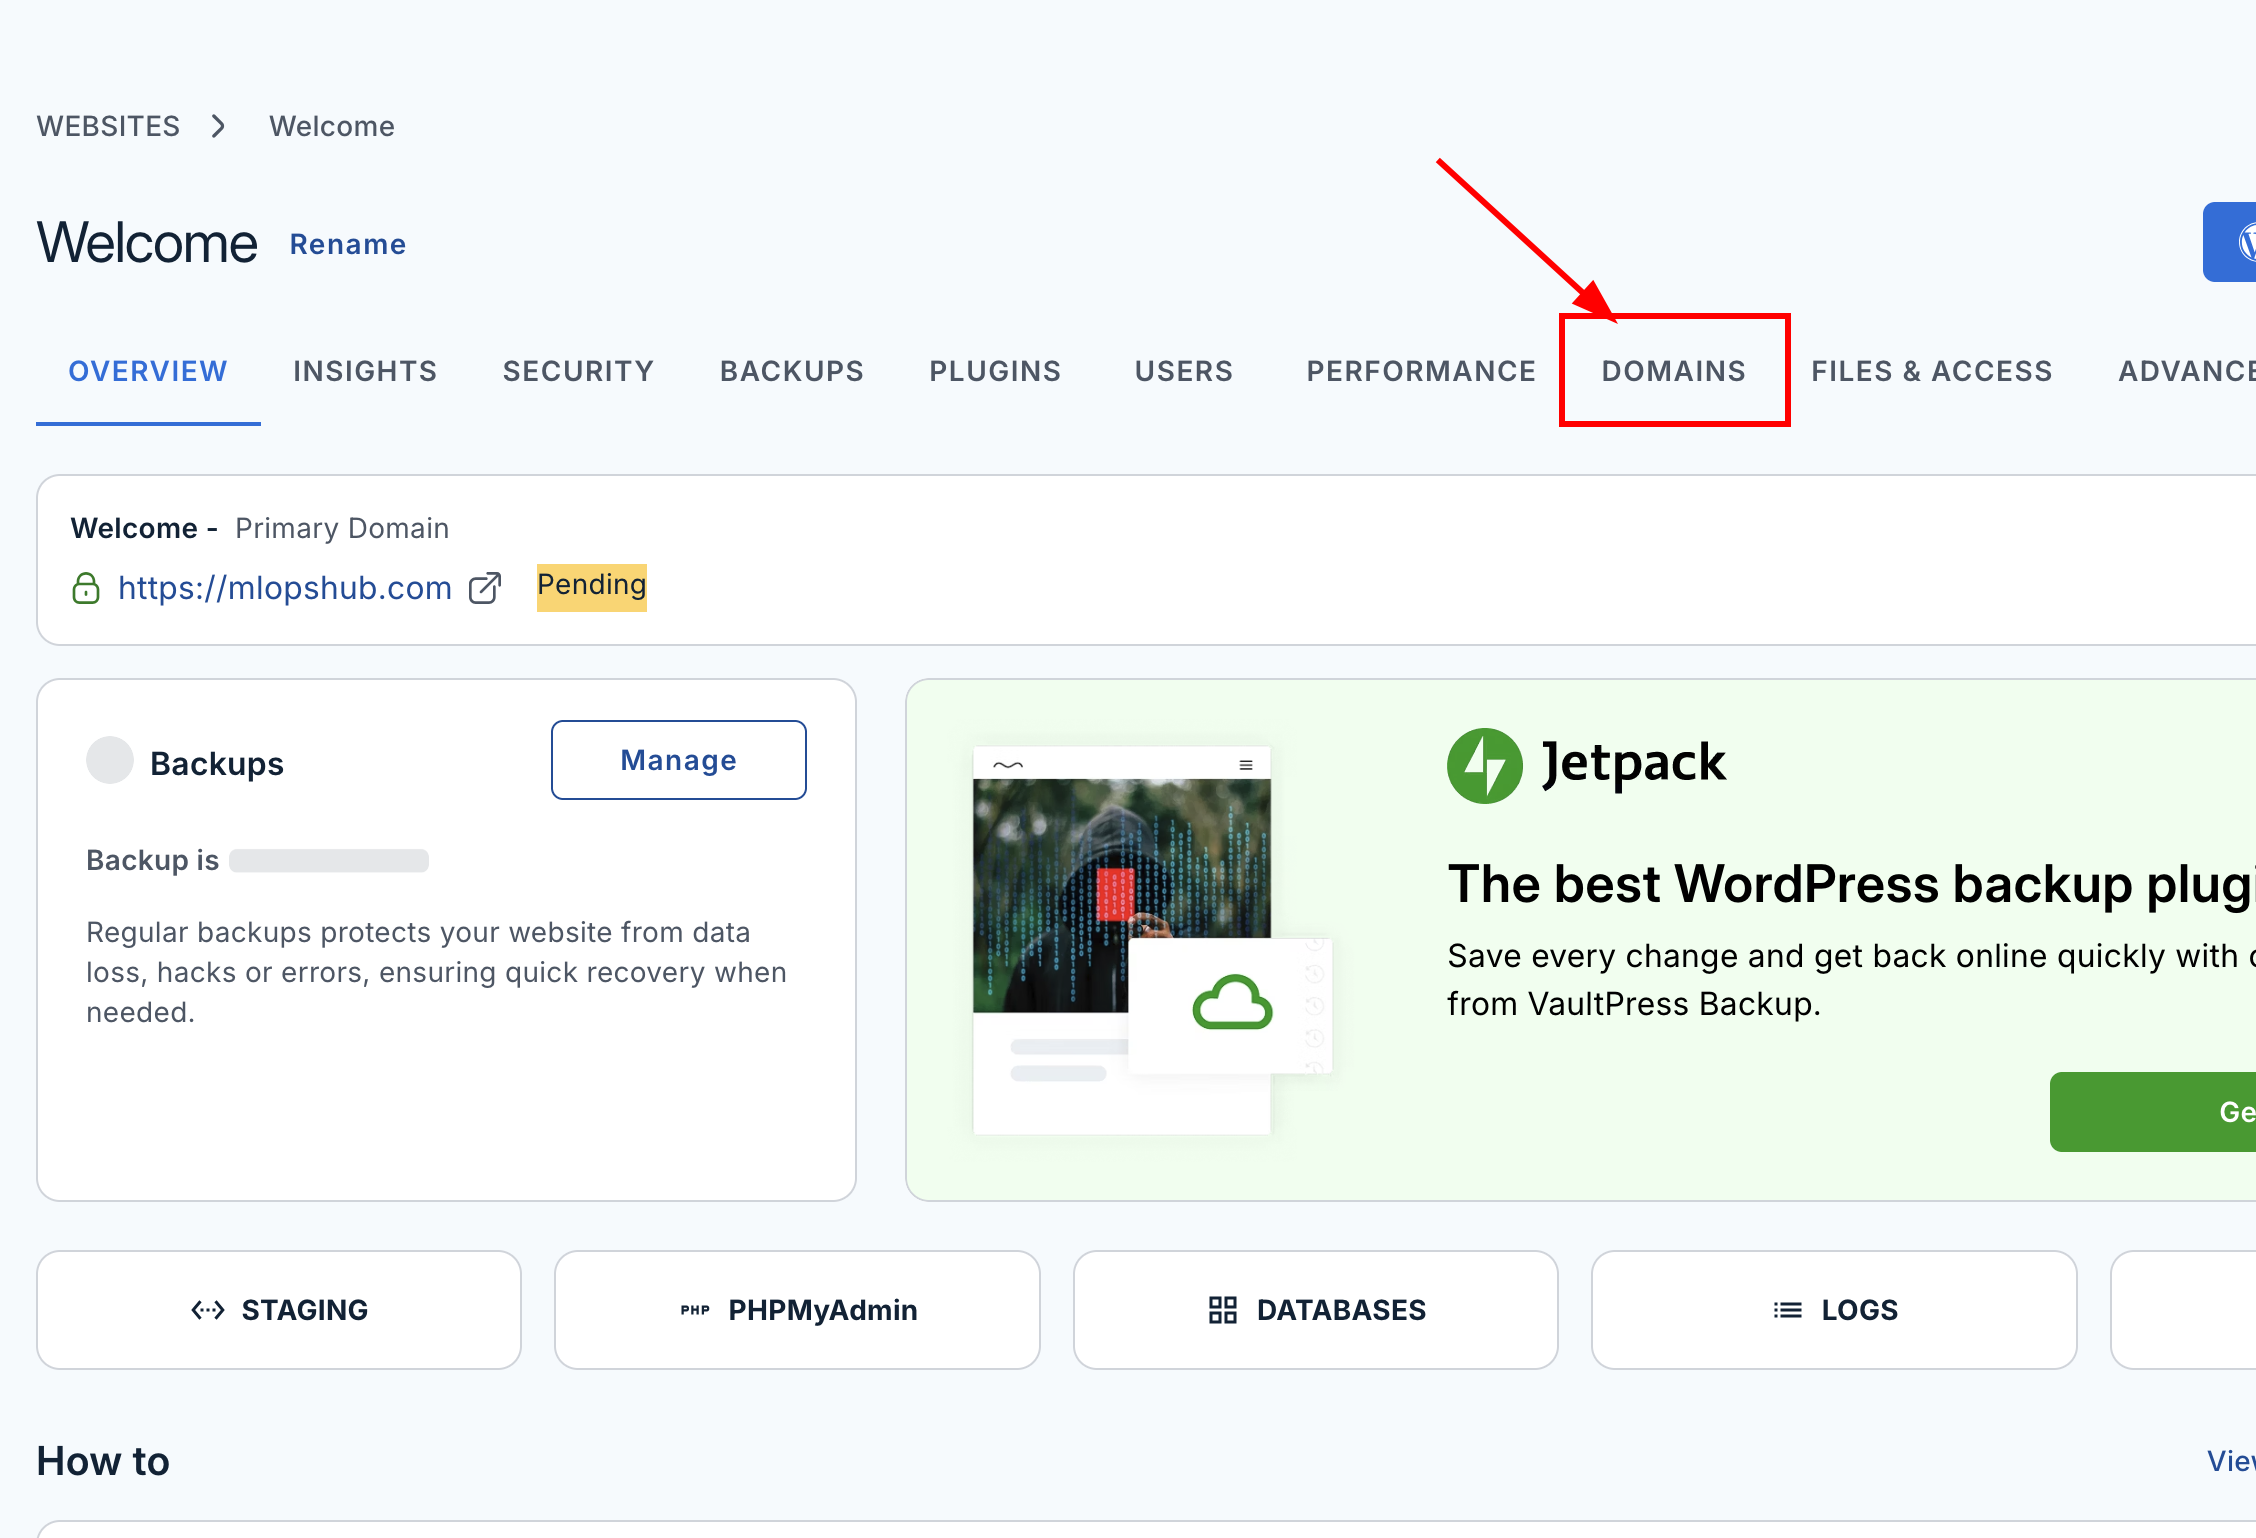
Step 2: Open the domains tab
On the website's page, click the Domain tab. This section allows you to connect a domain to your Bluehost hosting account.
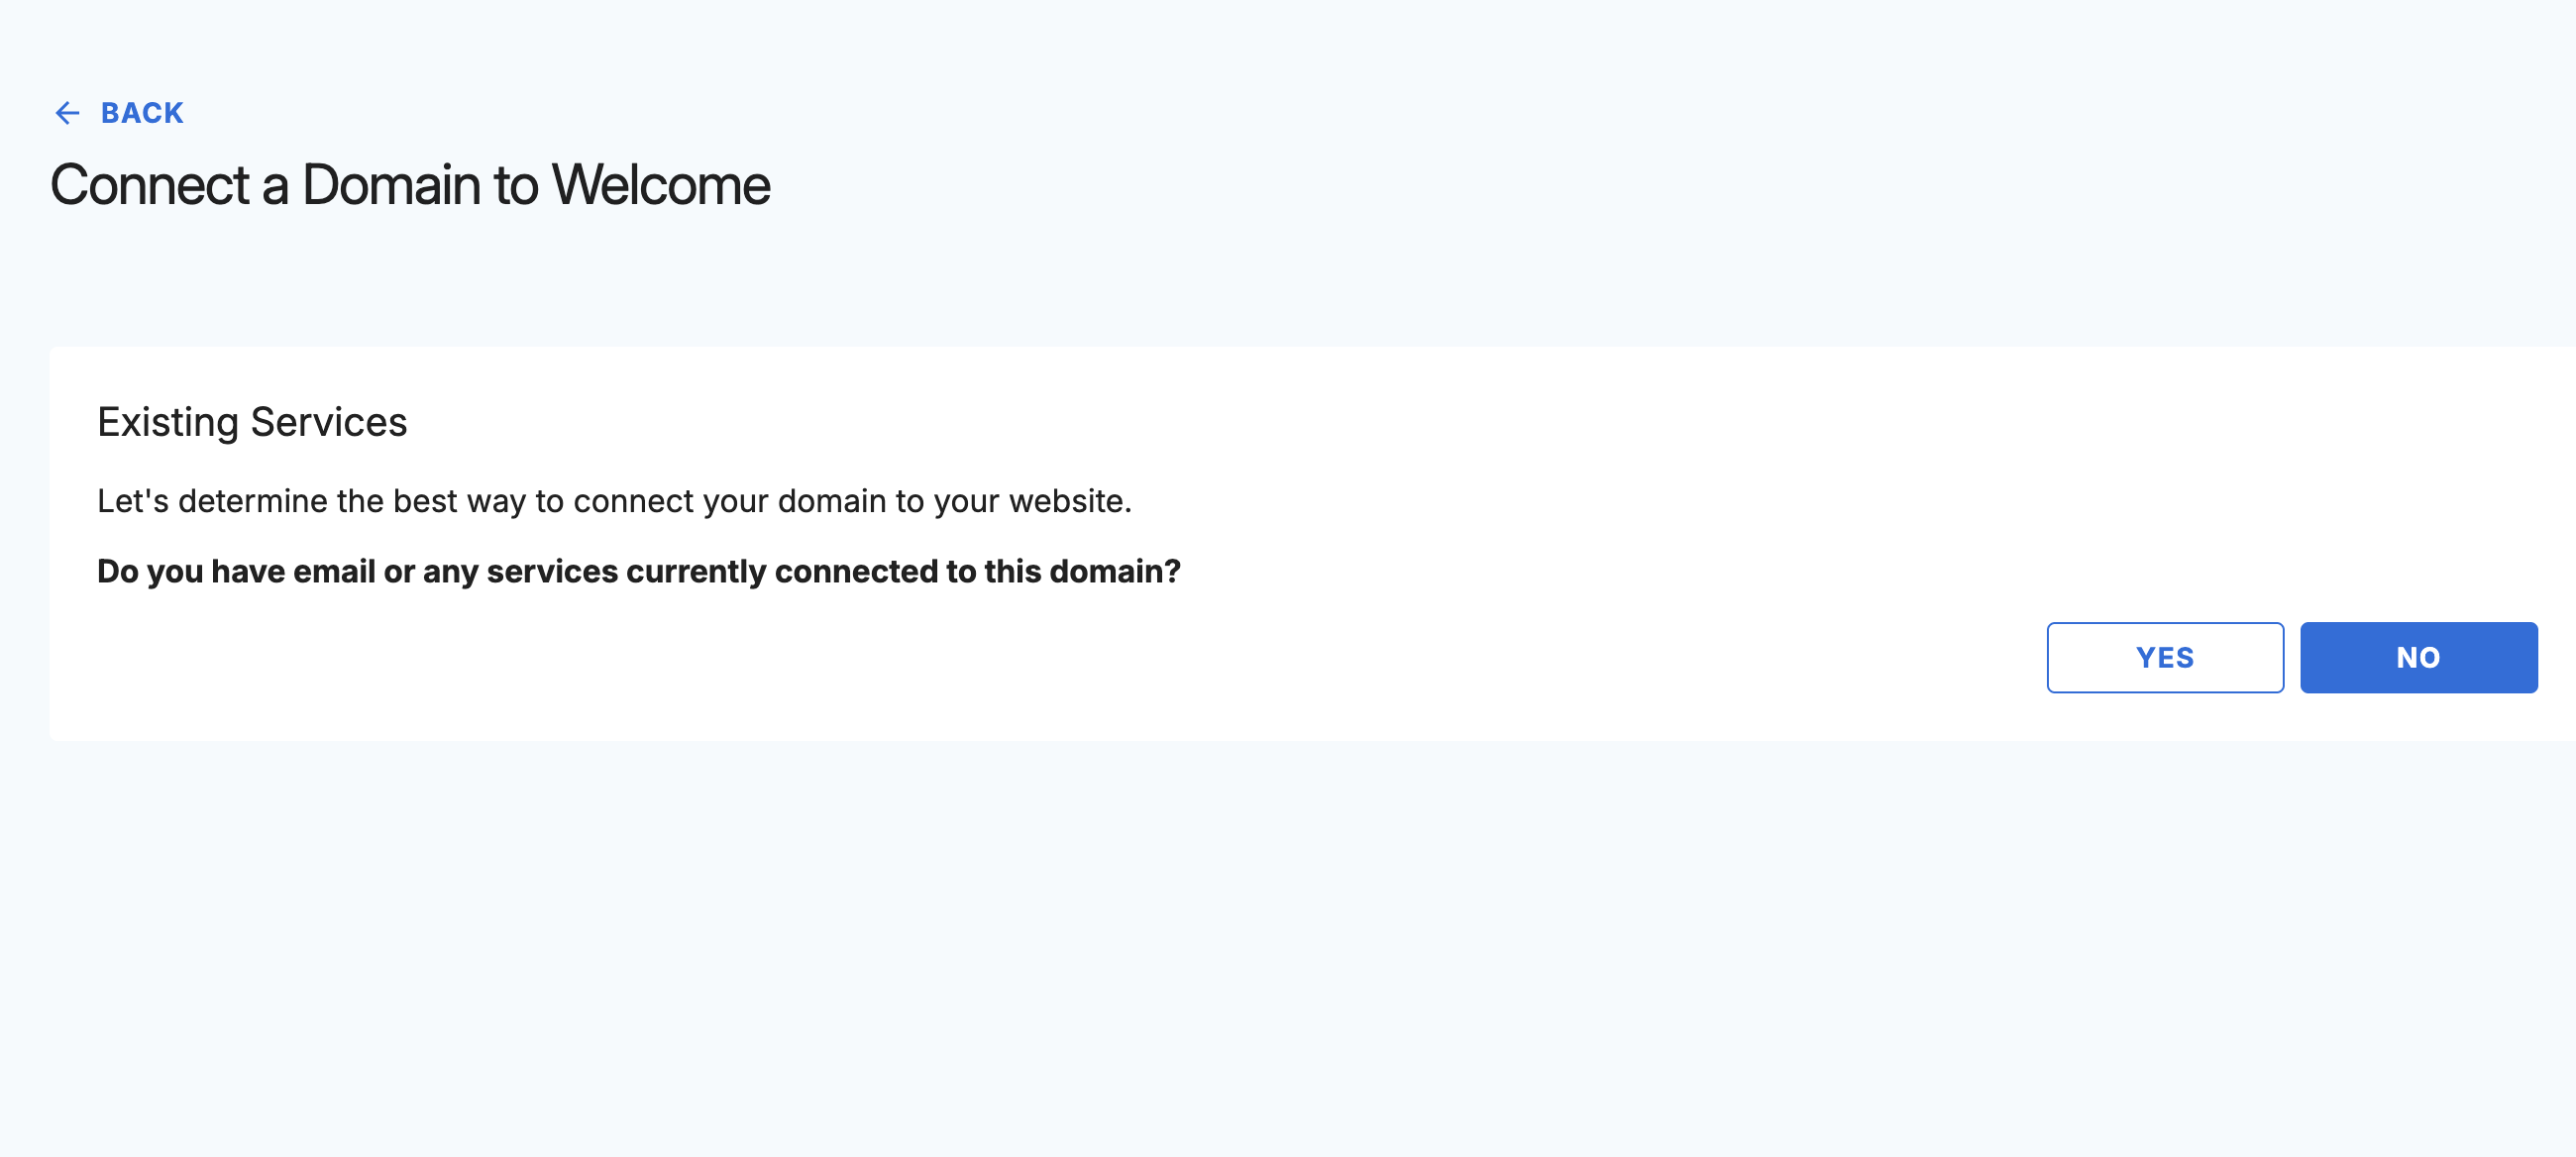
Step 3: Start the Domain Mapping Process
Now, under the domain section, you will see a button named Finish Connection. Click it.
Bluehost now starts to guide you through the domain mapping process step by step.

Next, Bluehost will ask the following question, answer it based on your configuration.
After answering the questions, Bluehost will show a warning popup which is shown in the image below.
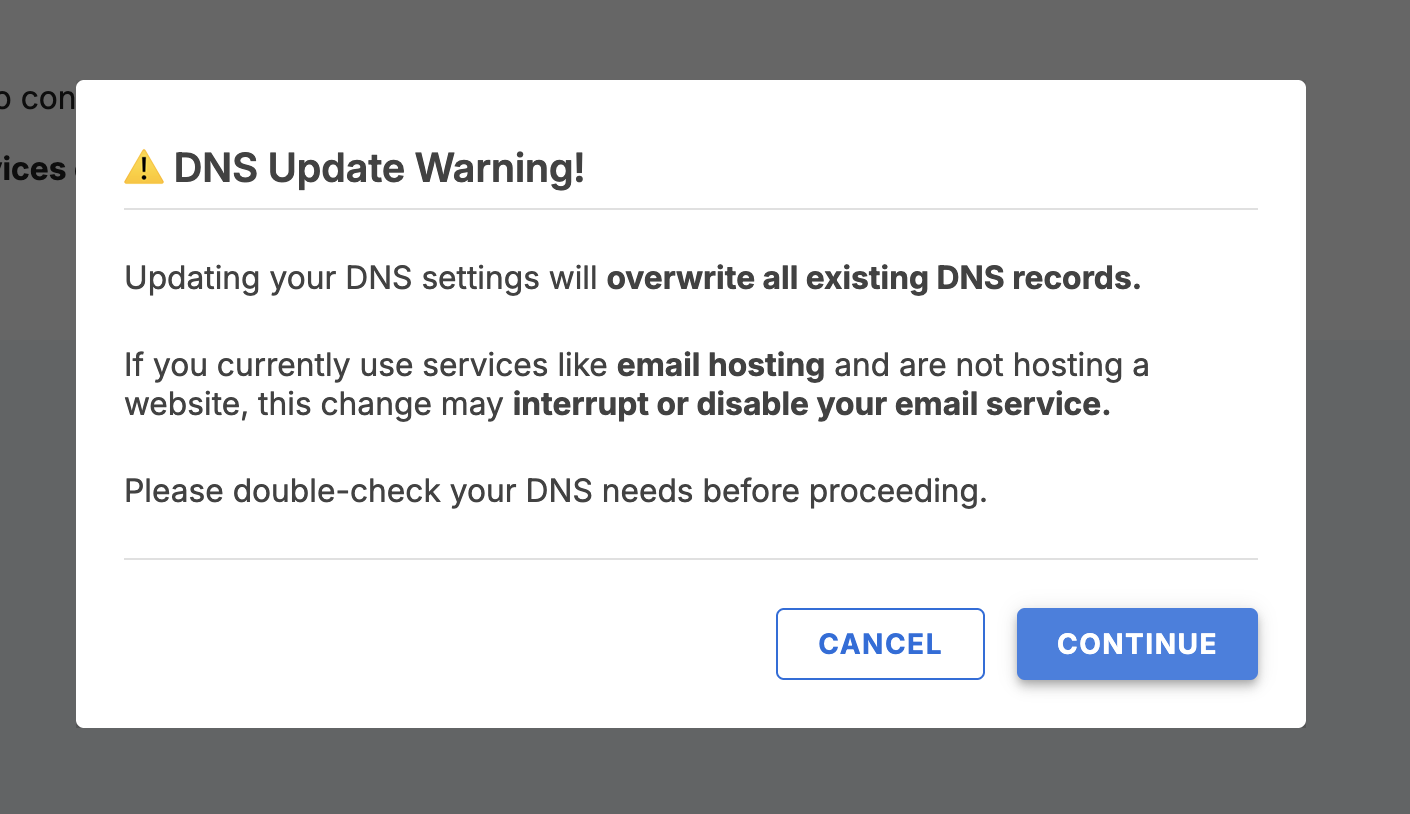
Basically, this warning is normal and explains that the DNS settings will be updated by Bluehost for you.
Click Continue to move to the next step.
Step 4: Choose your DNS provider
Next, Bluehost will ask you to select your DNS provider.
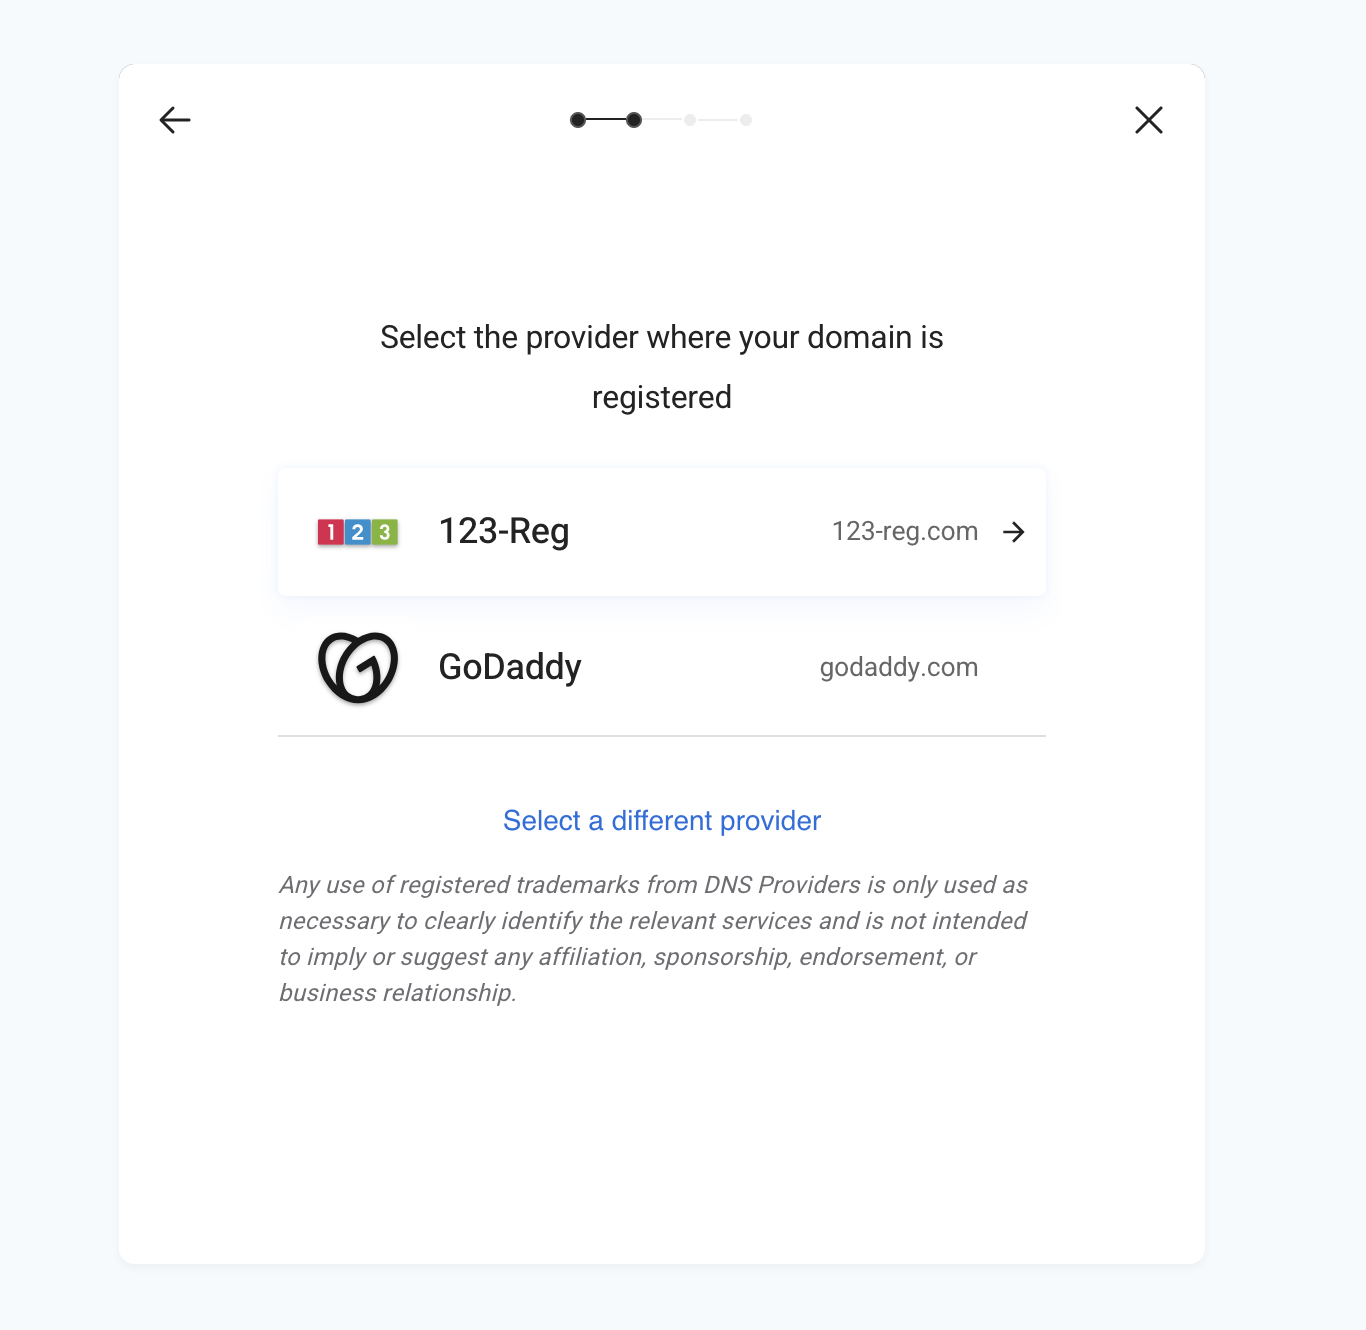
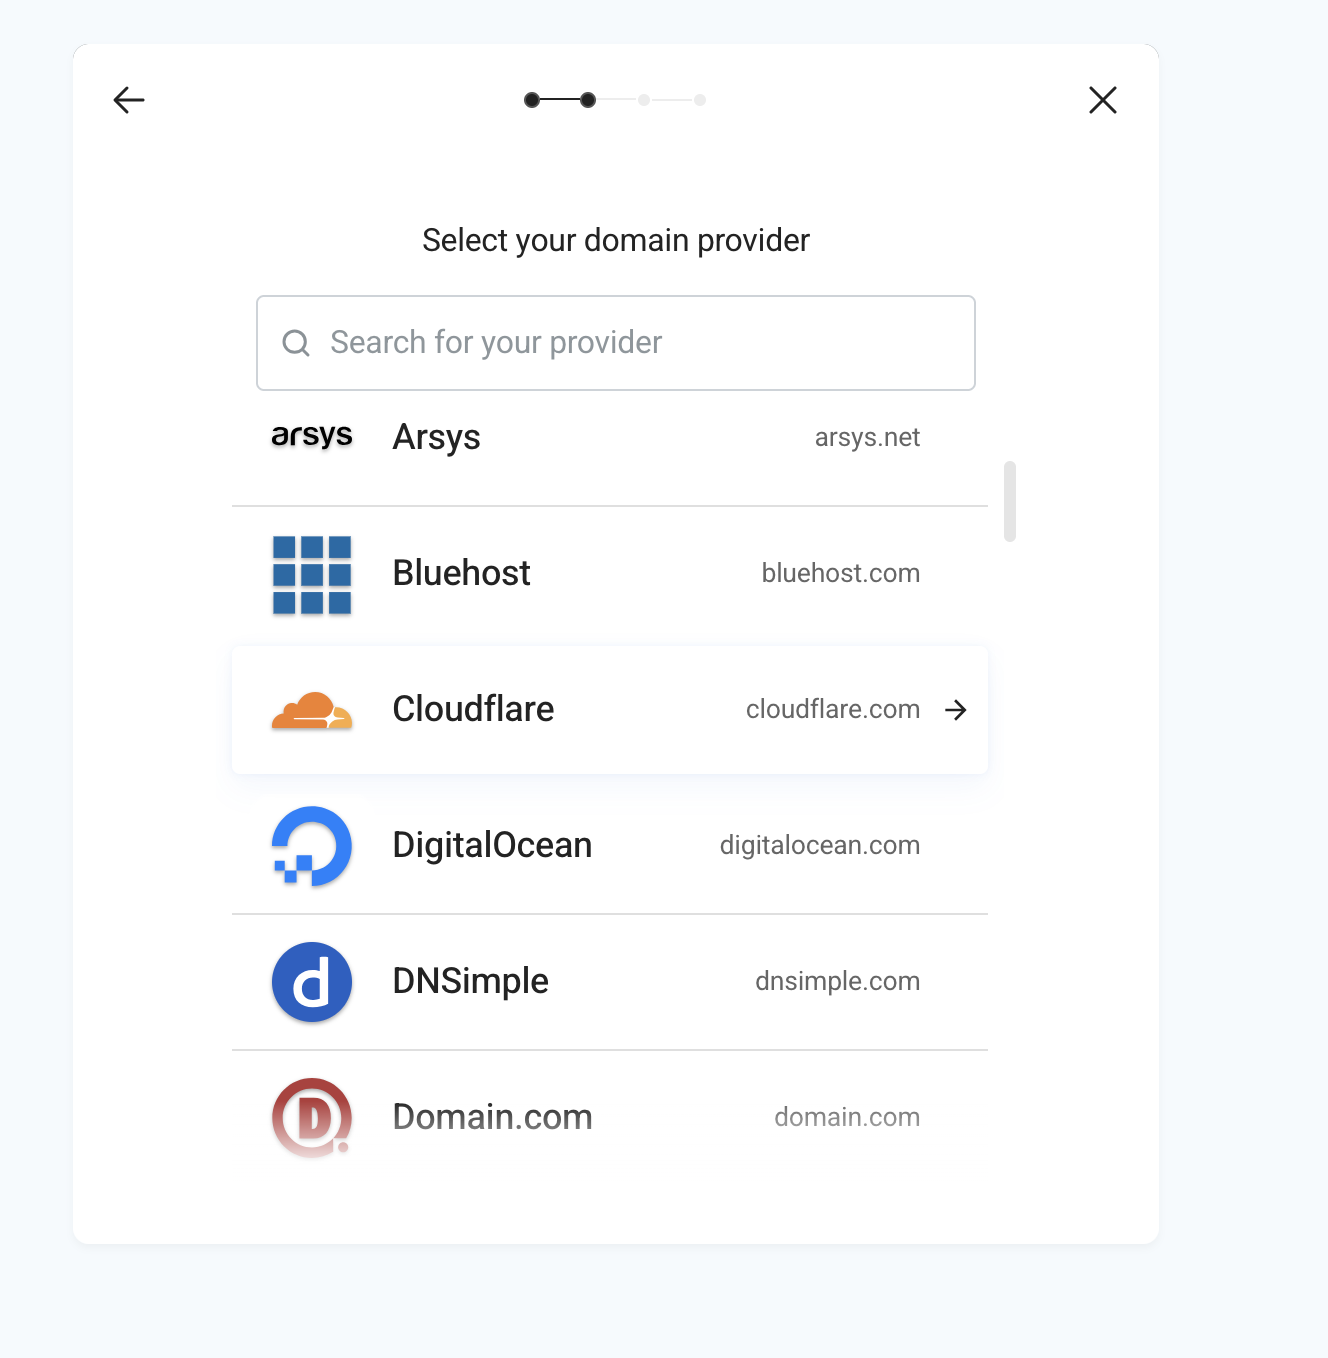
If your provider is not shown first, then click select a different provider, which will show more DNS providers, and choose the provider that you are using.
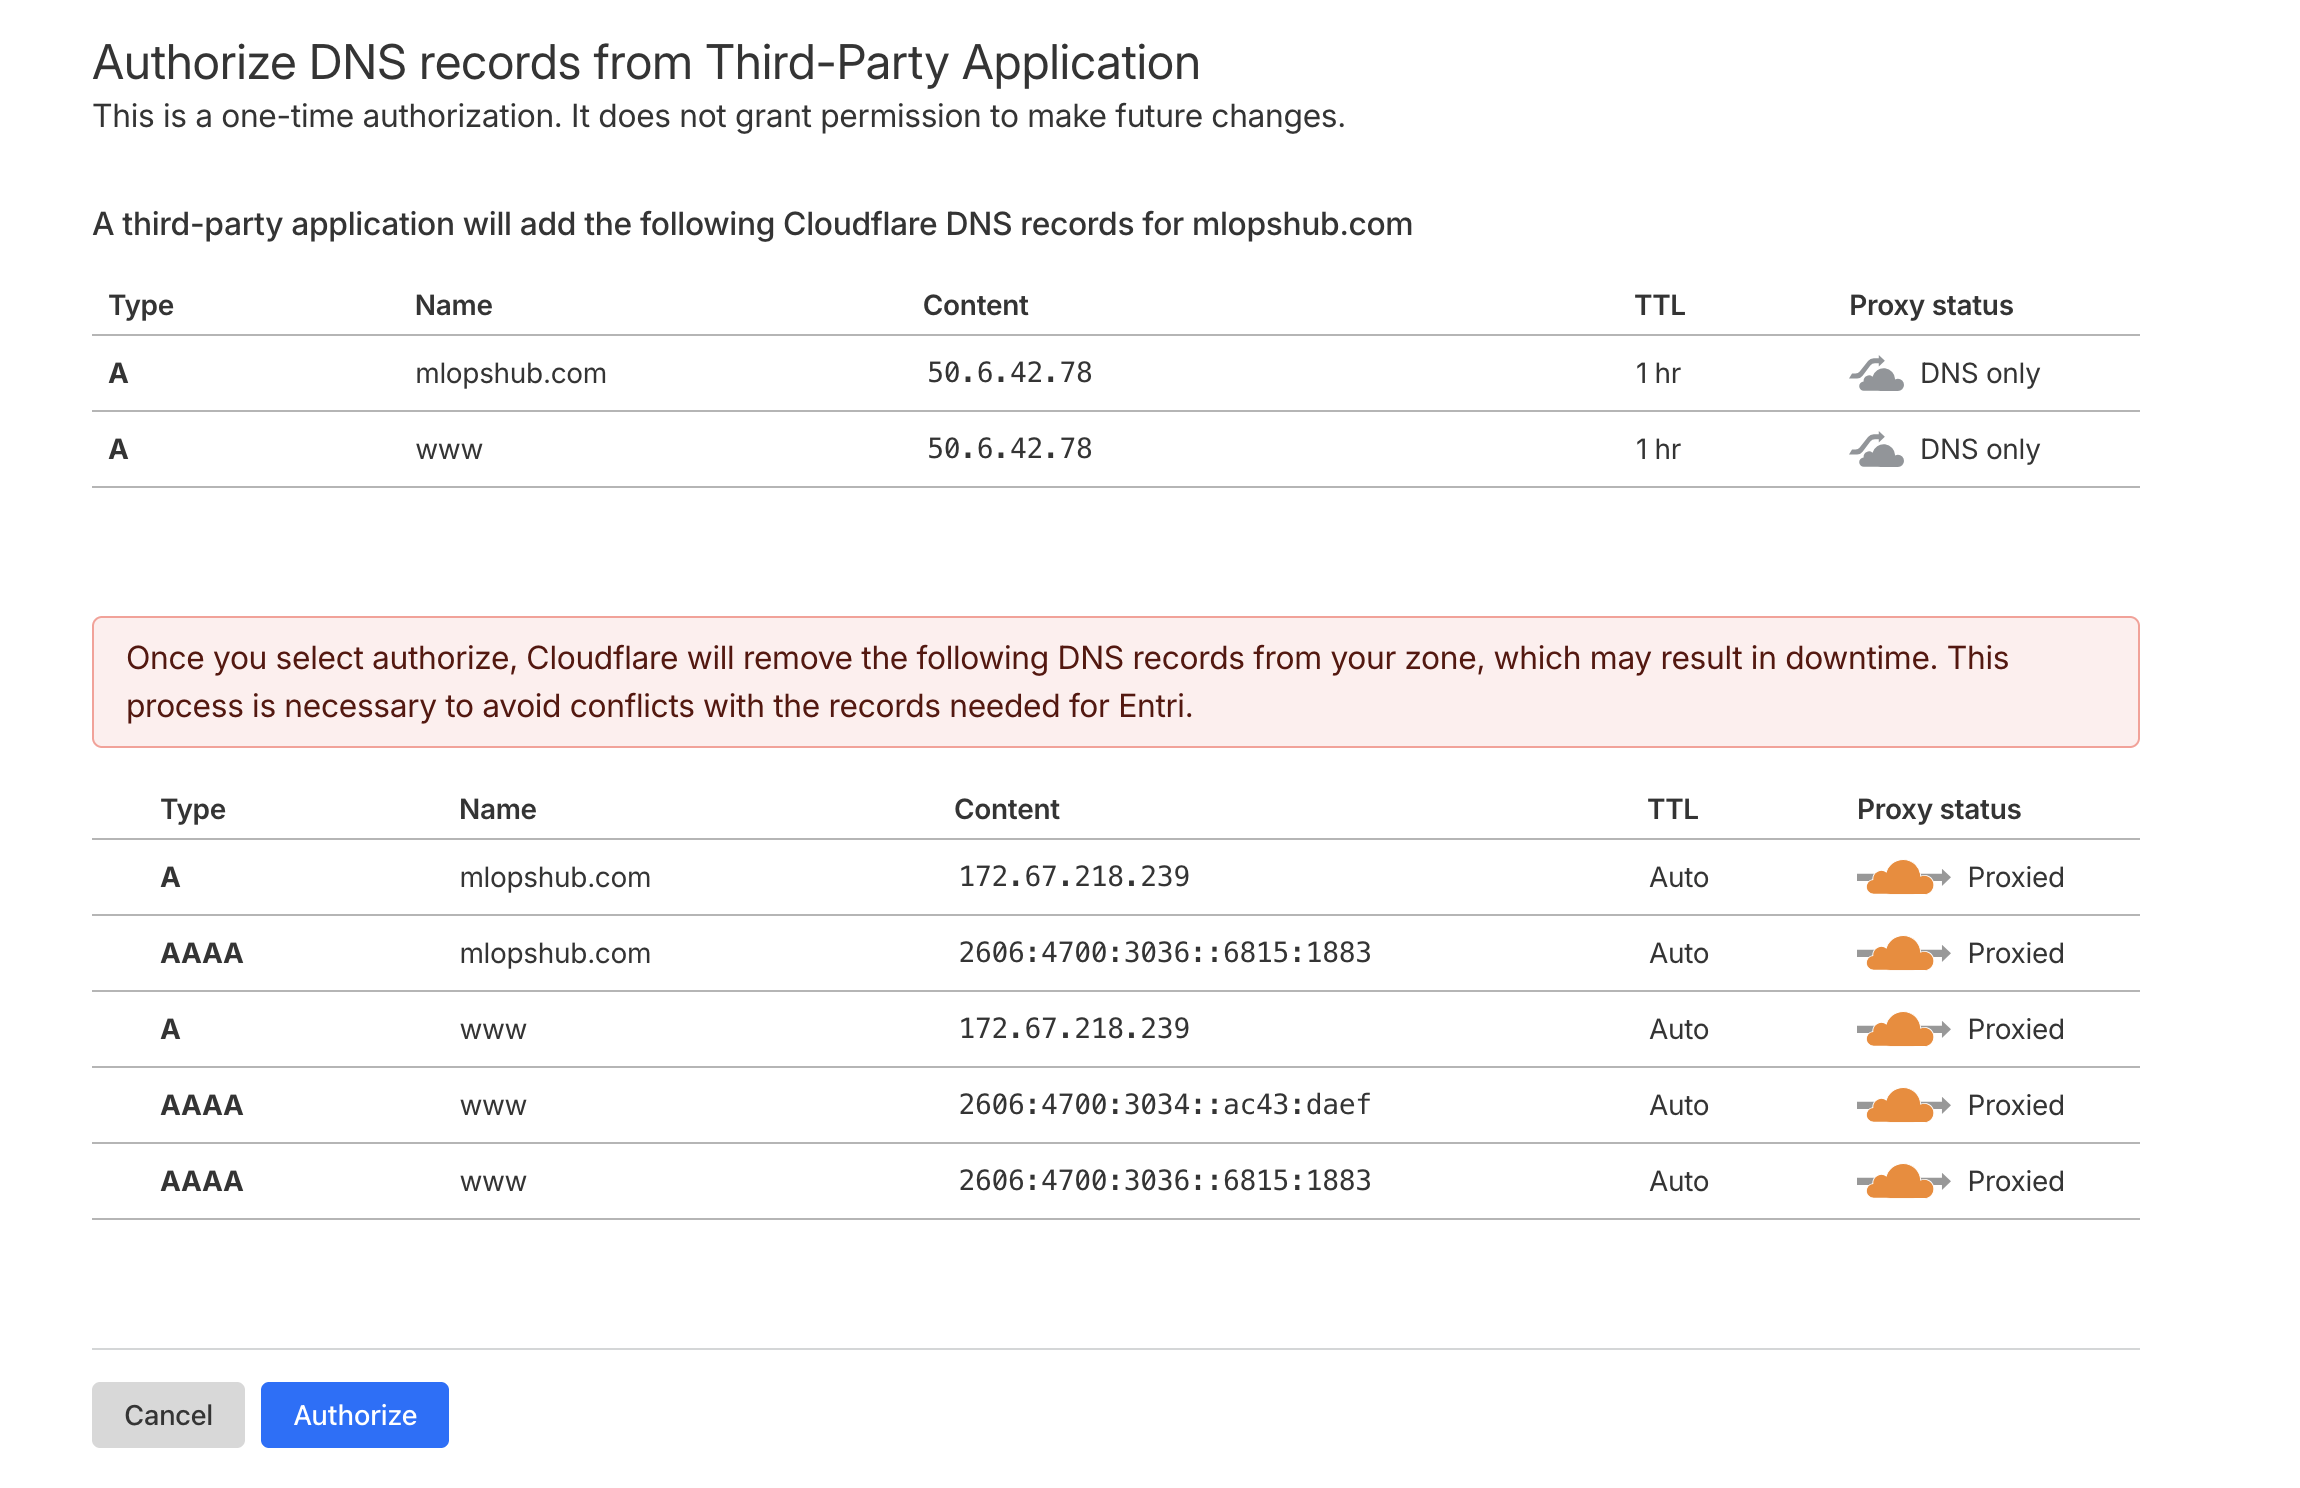
My DNS provider is CloudFlare, so I selected it, and Bluehost asked for authorization from Cloudflare to finish the domain mapping.
Step 5: Authorize DNS access
So, after selecting the DNS provider, it will ask permission to access your DNS, and it is a one-time process.
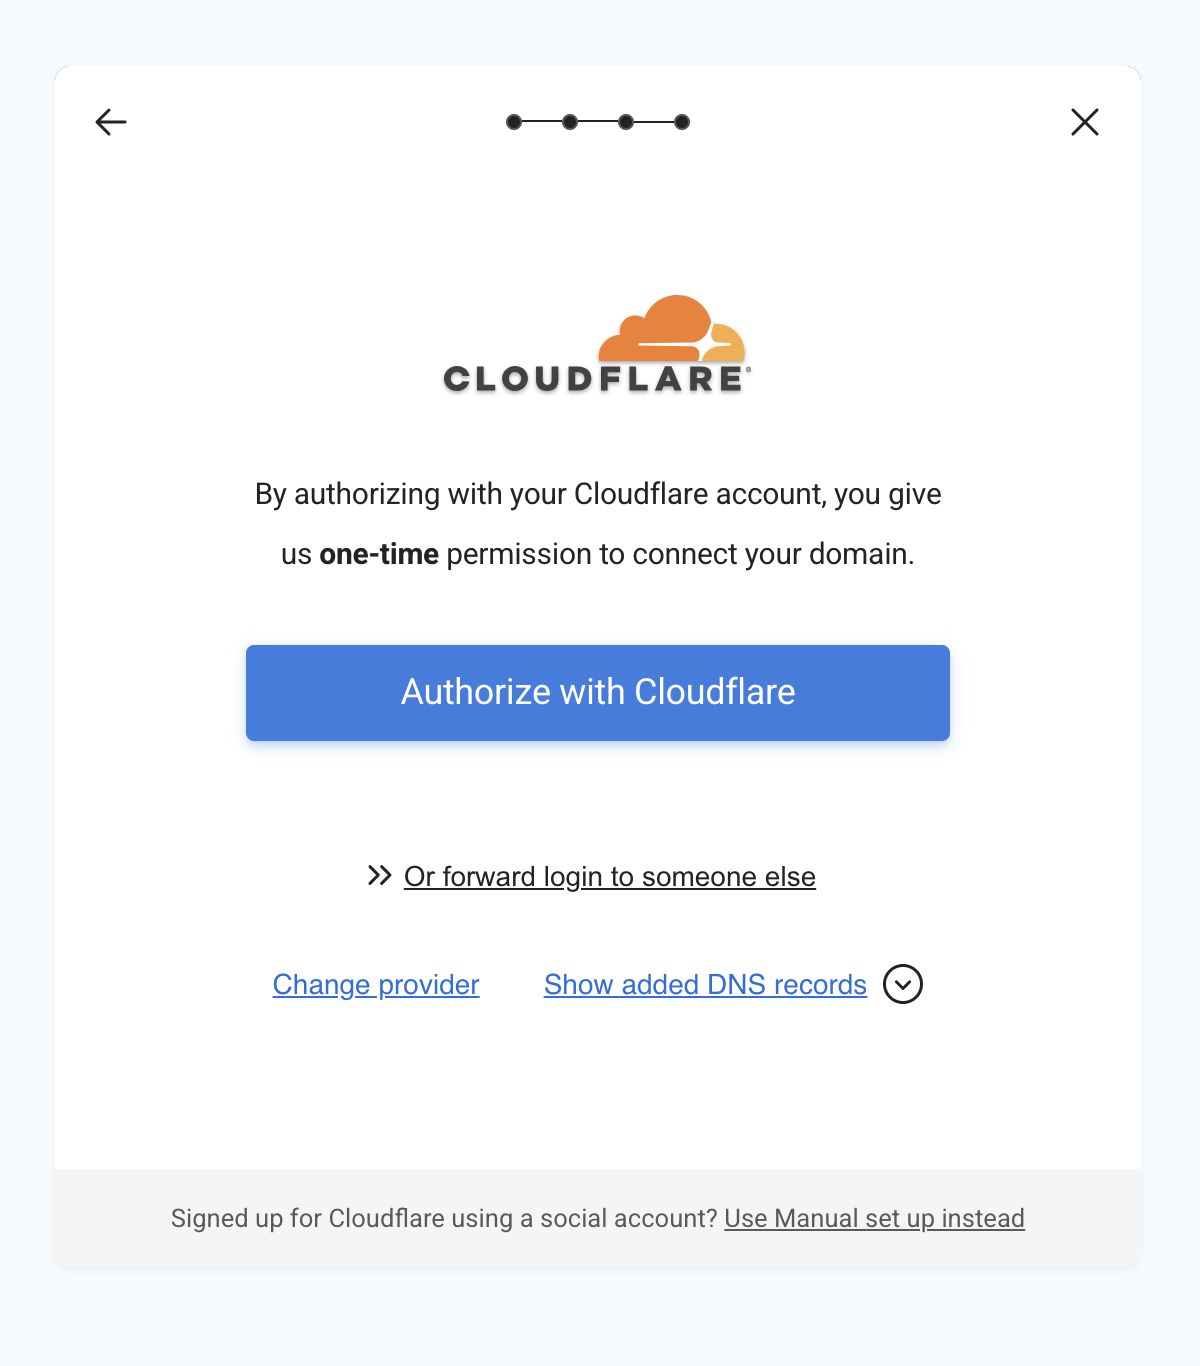
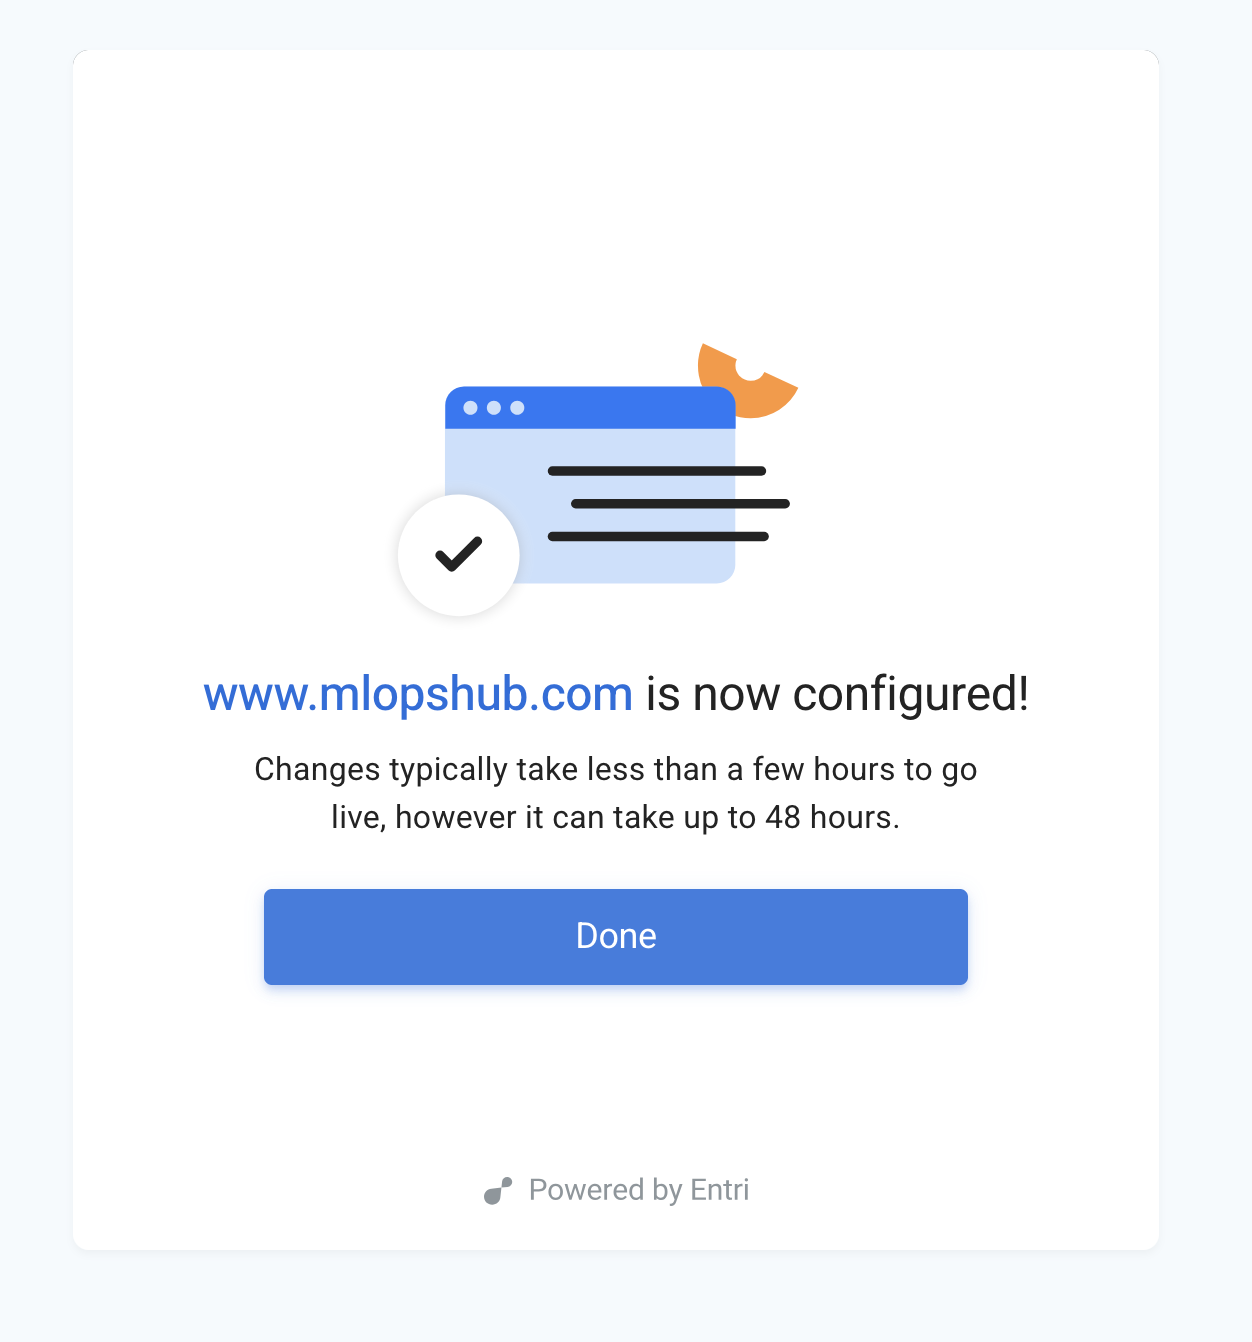
Once the authorization is completed, Bluehost will automatically configure the required DNS records.
After the setup is finished, you will see a message that your configuration is successful, which is shown in the image below.
Now, just go to the domain page, and you see your domain, type, DNS status, and SSL status, as shown in the image below.
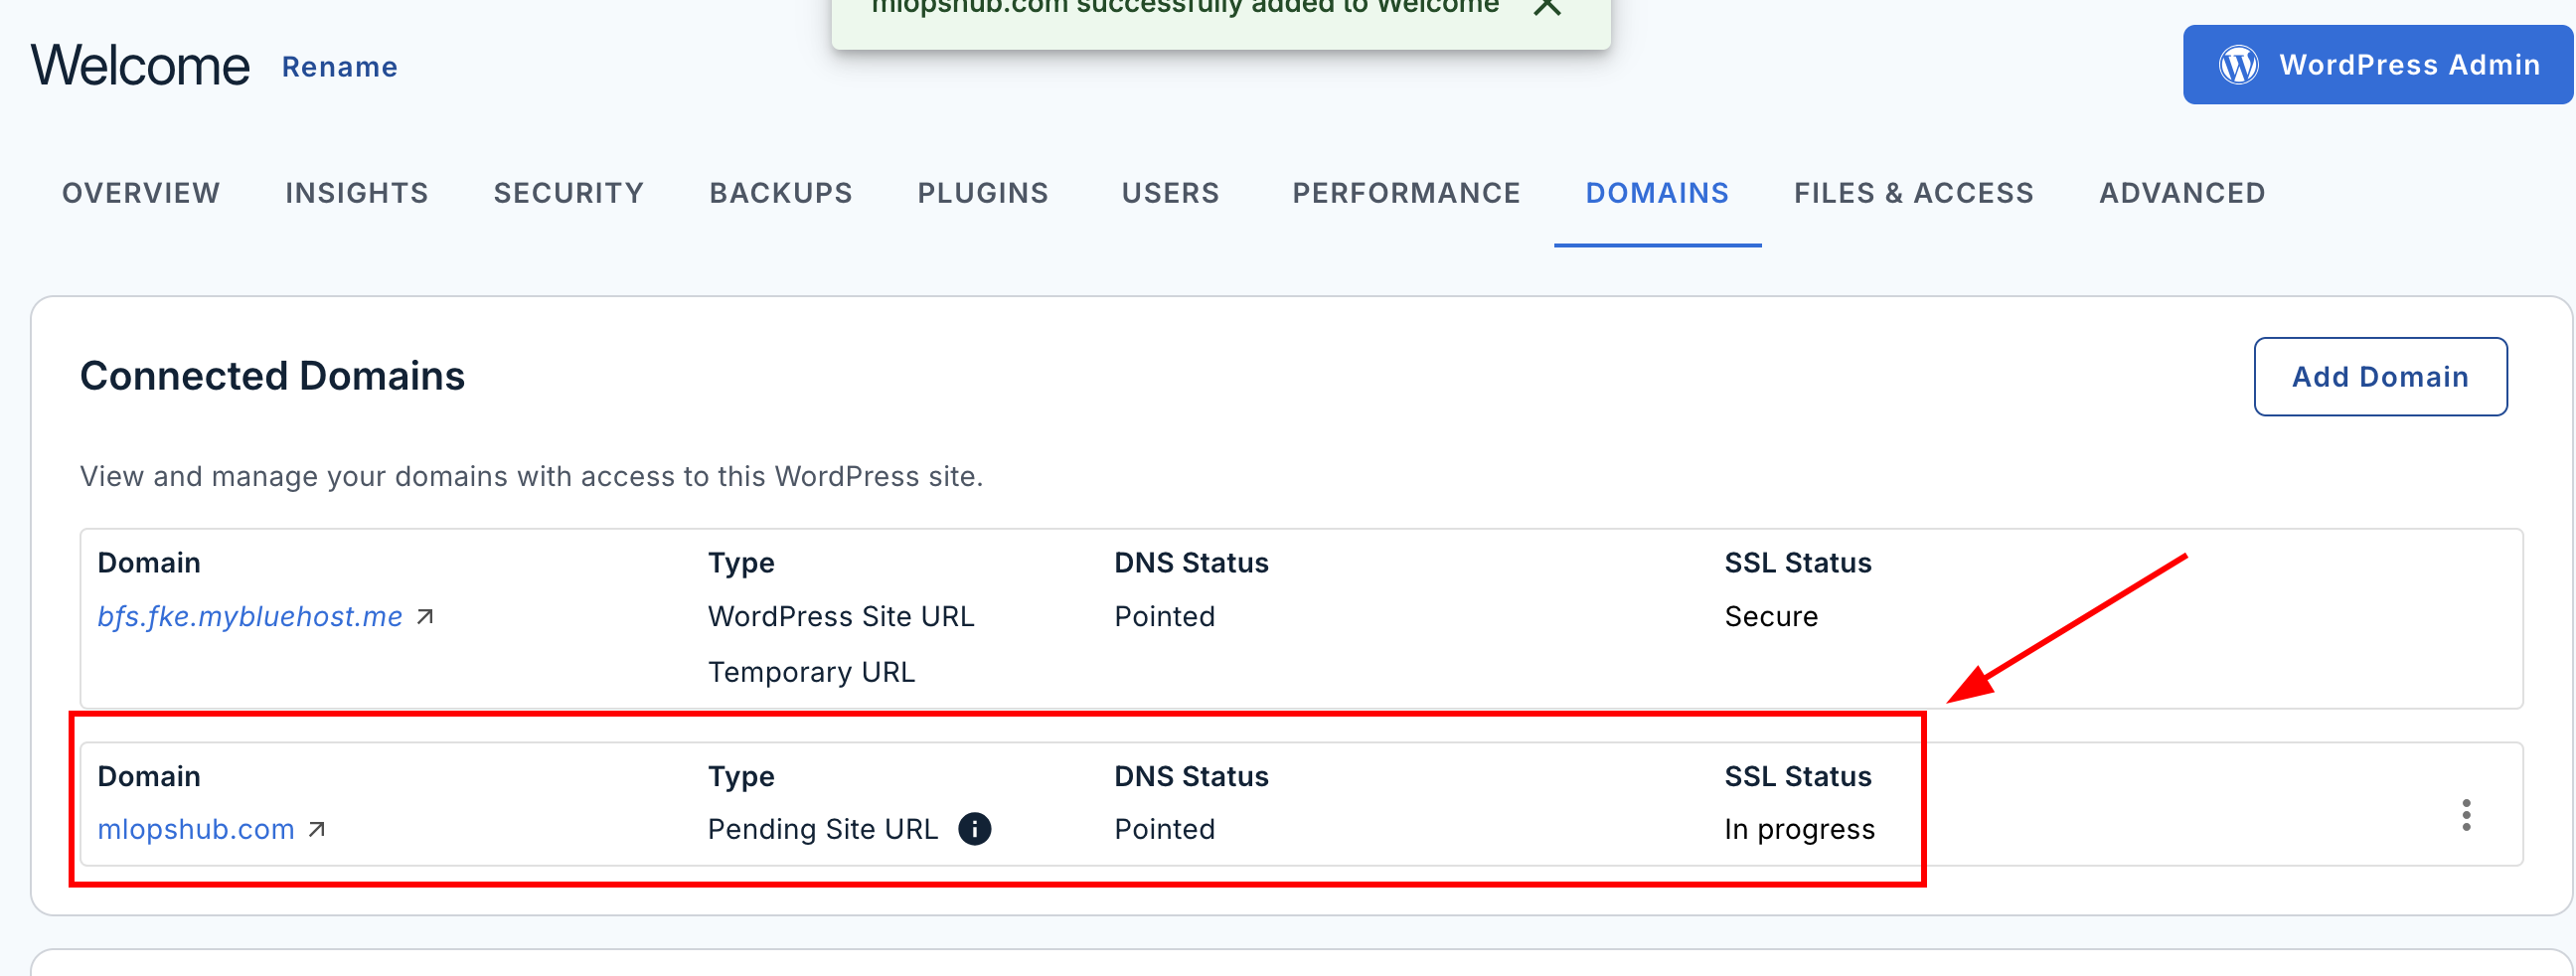
Thats it, the domain mapping is completed.
Create Your First Wordpress Website in Bluehost
Now, let me walk you through creating your website in Bluehost using WordPress.
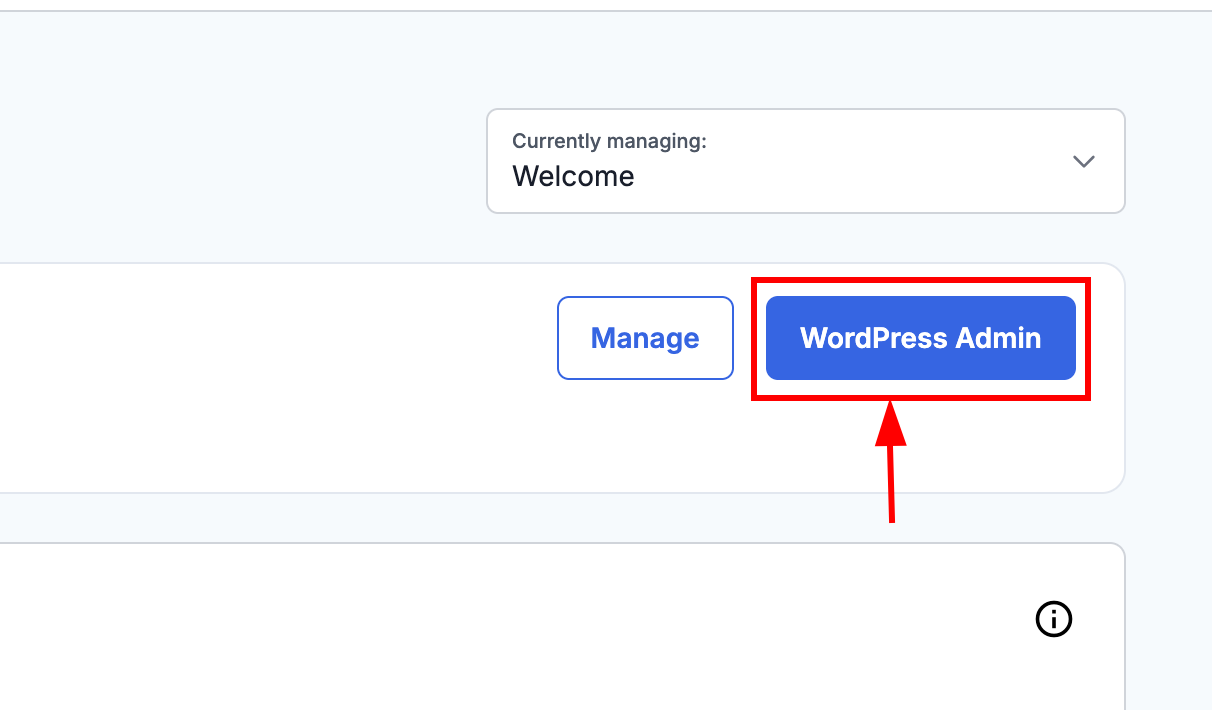
Step 1: Open the WordPress admin dashboard
In your Bluehost dashboard page, you will see a button called WordPress Admin that helps you login and setup a wordpress website. Click on it.
This will redirect you to the WordPress setup section.
Here, you can either import your existing WordPress site or create a new site in seconds with the help of AI in Bluehost.
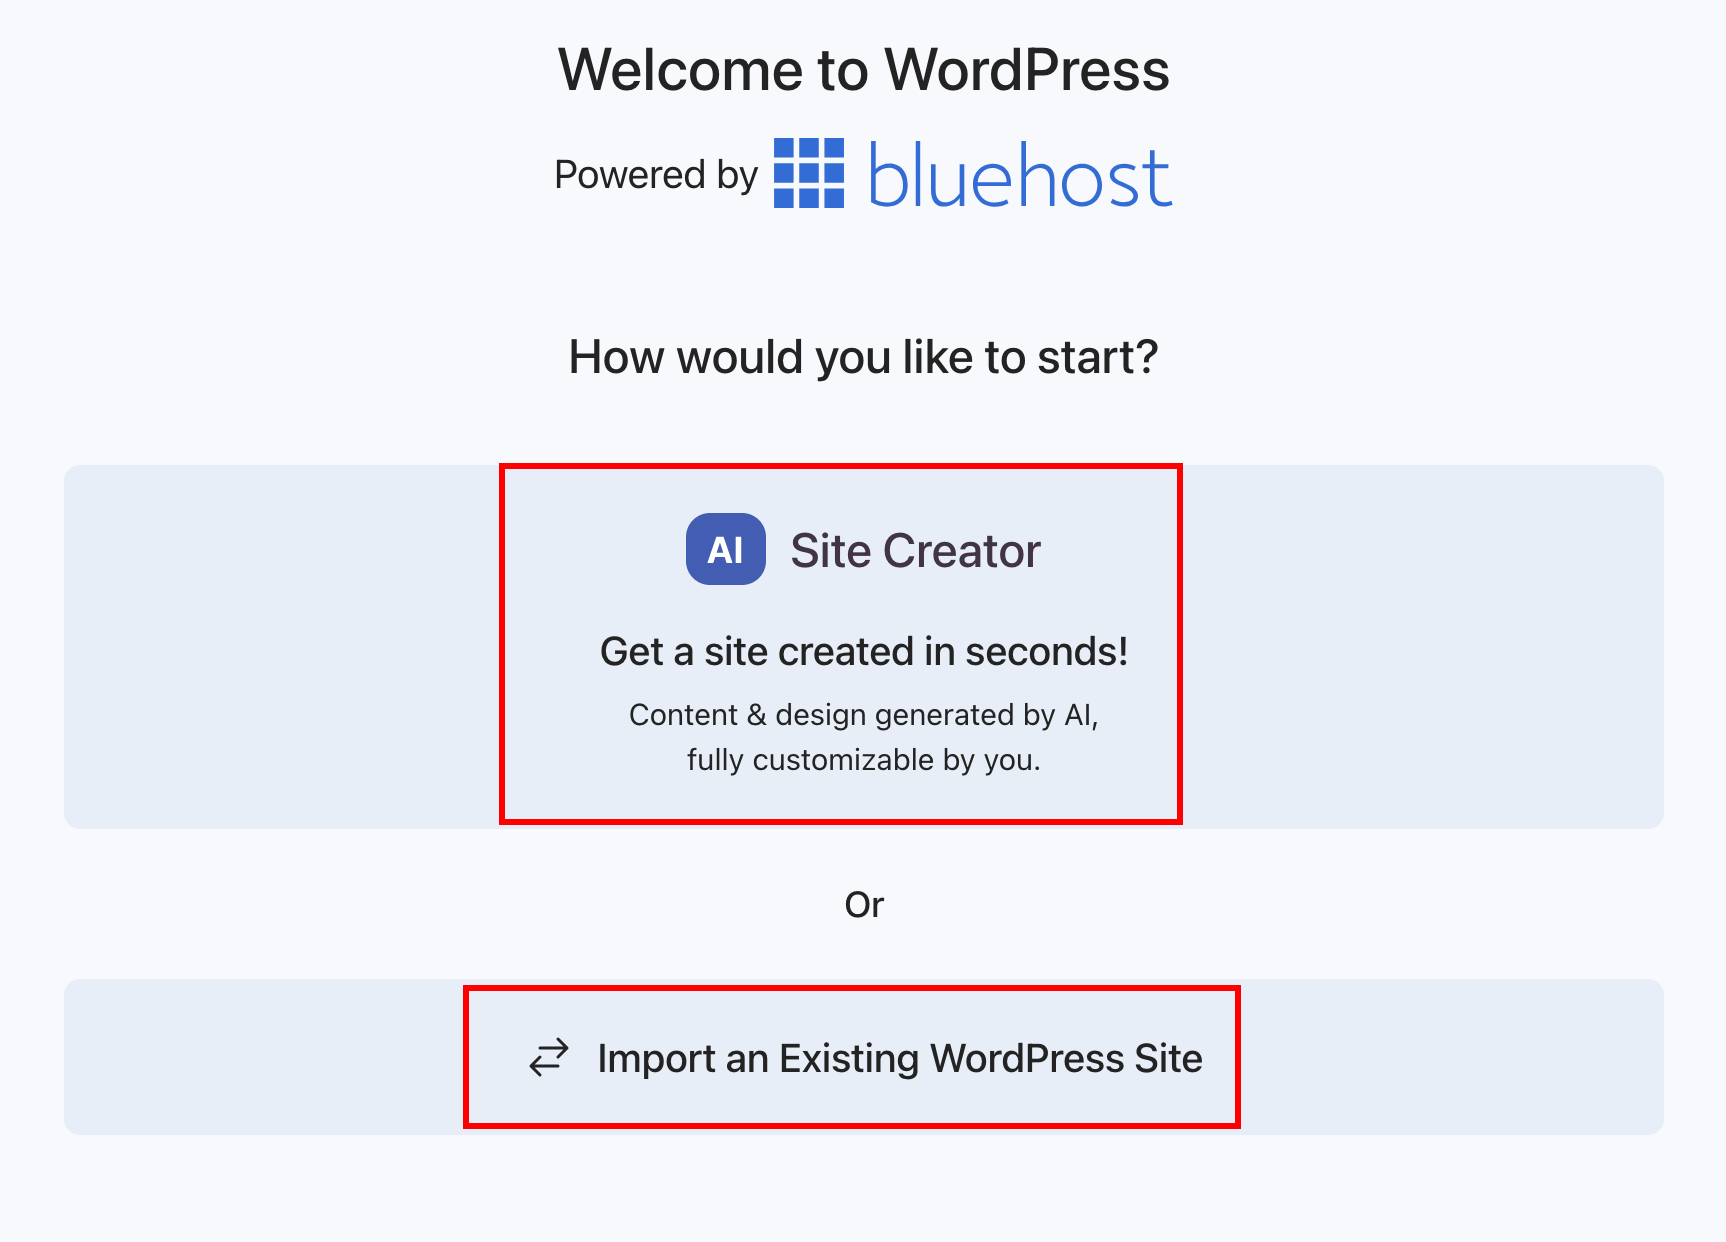
Since we are creating a new website from scratch, choose Site Creator.
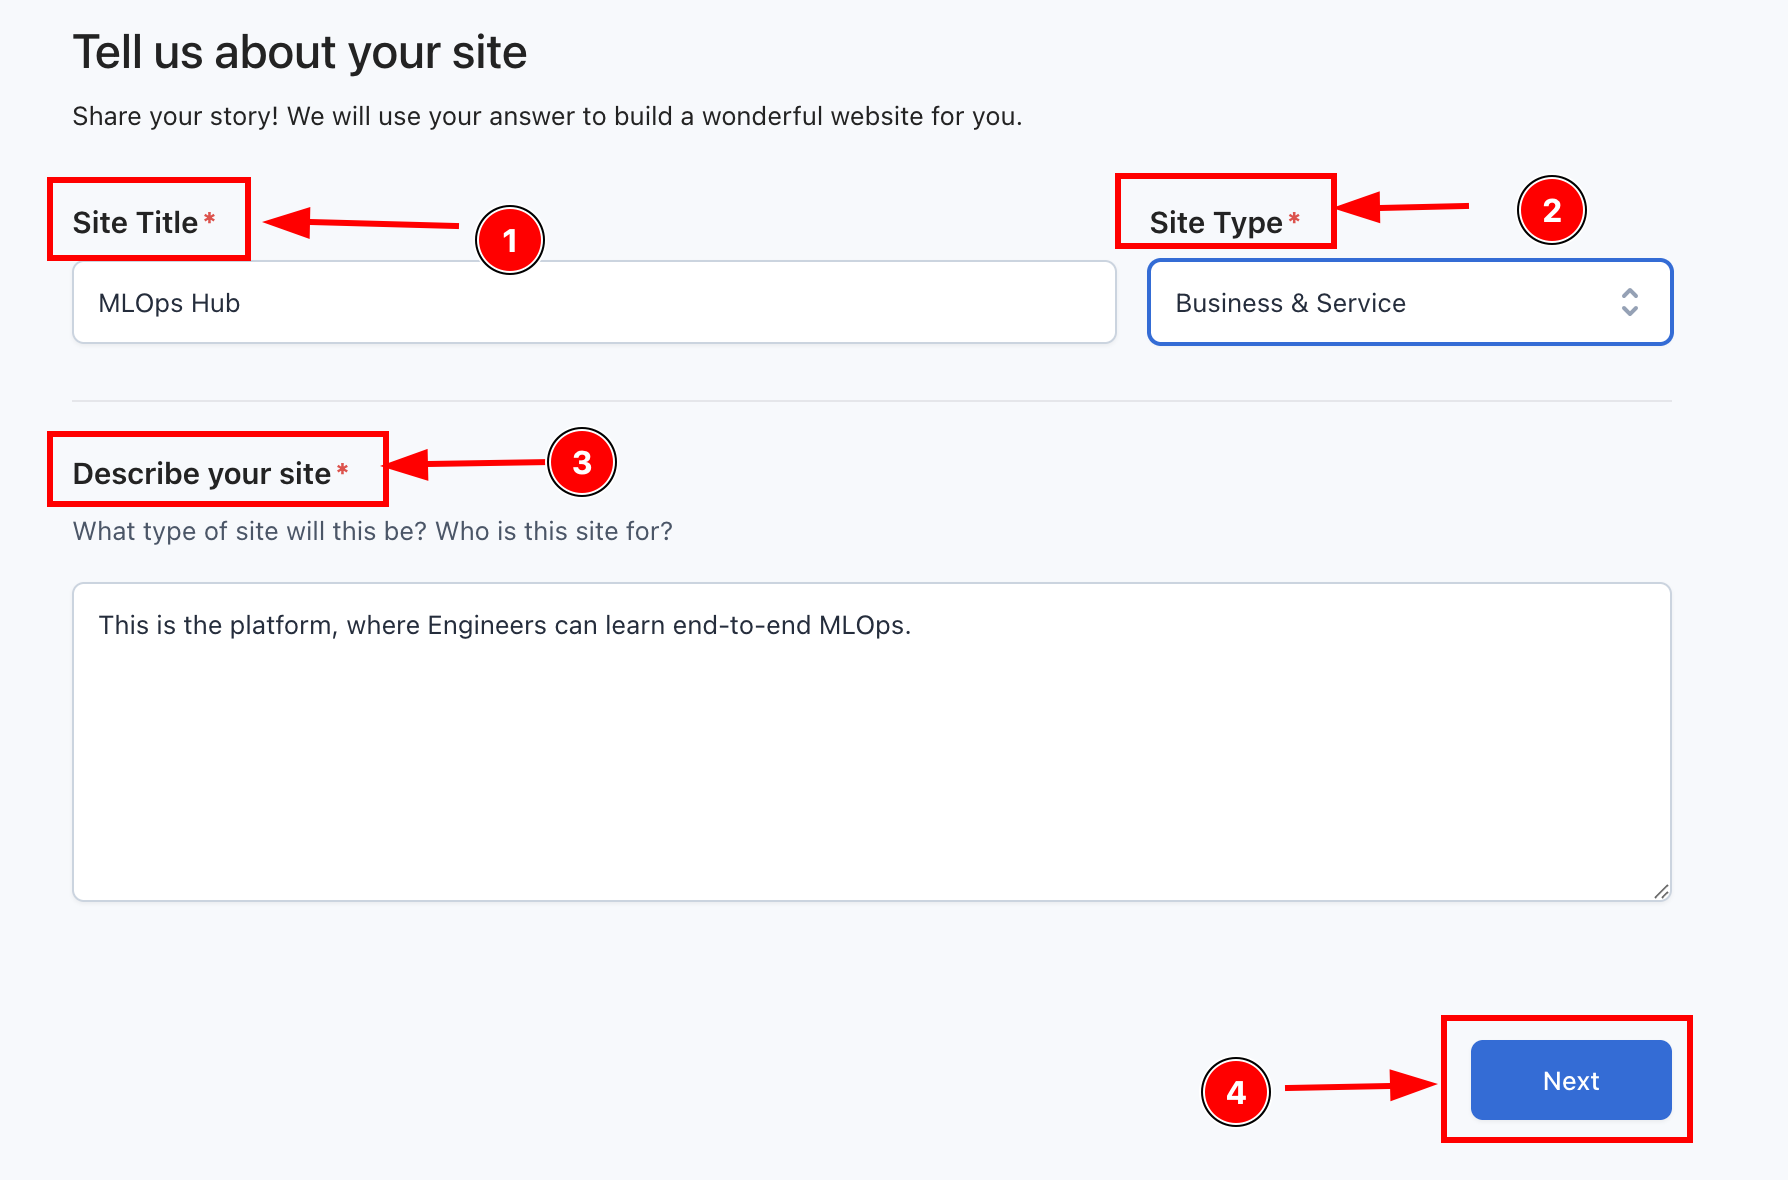
Step 2: Enter your website details
Bluehost will ask for your website information such as site title, site type, and description. Once it is completed, click the next button.
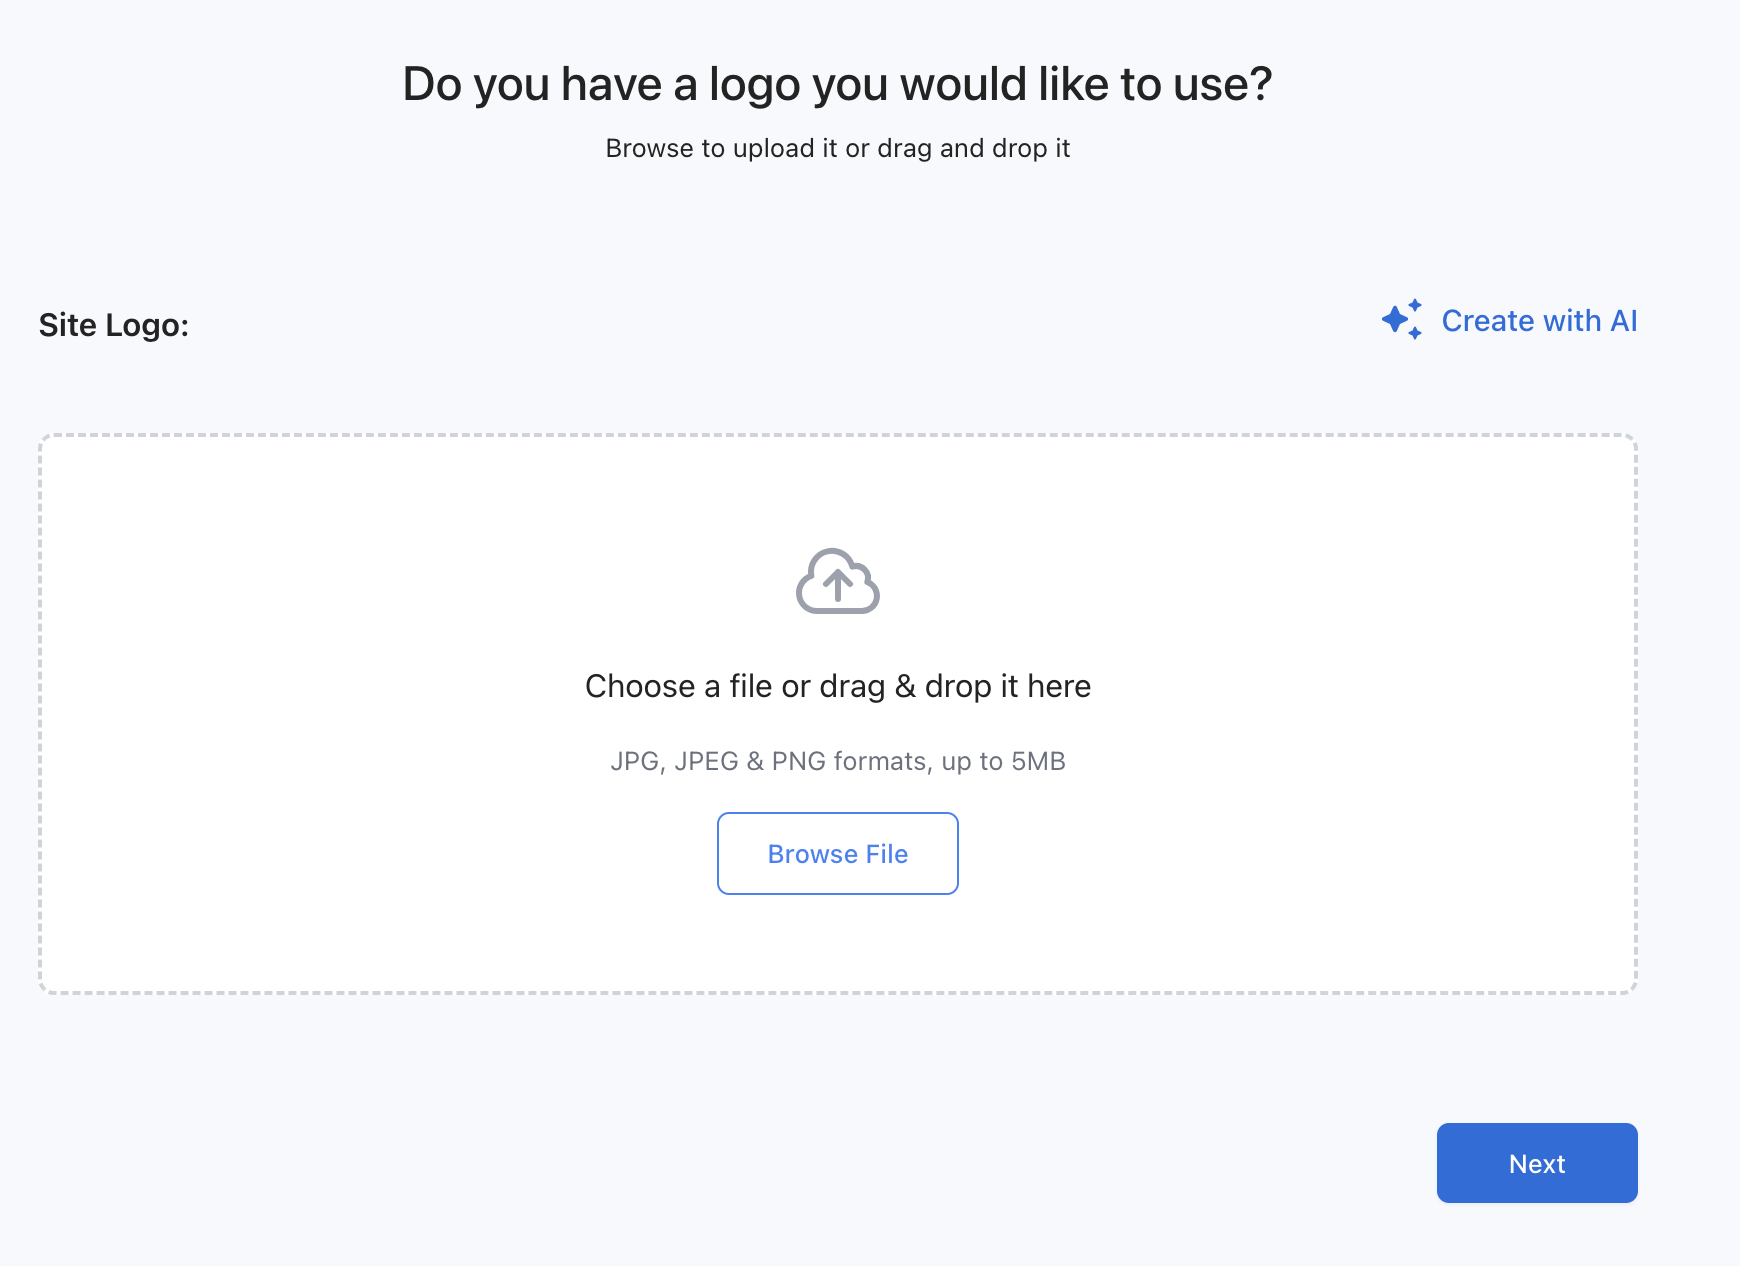
Step 3: Upload or create a logo
Now you have to upload the logo of your site or you can create with AI.
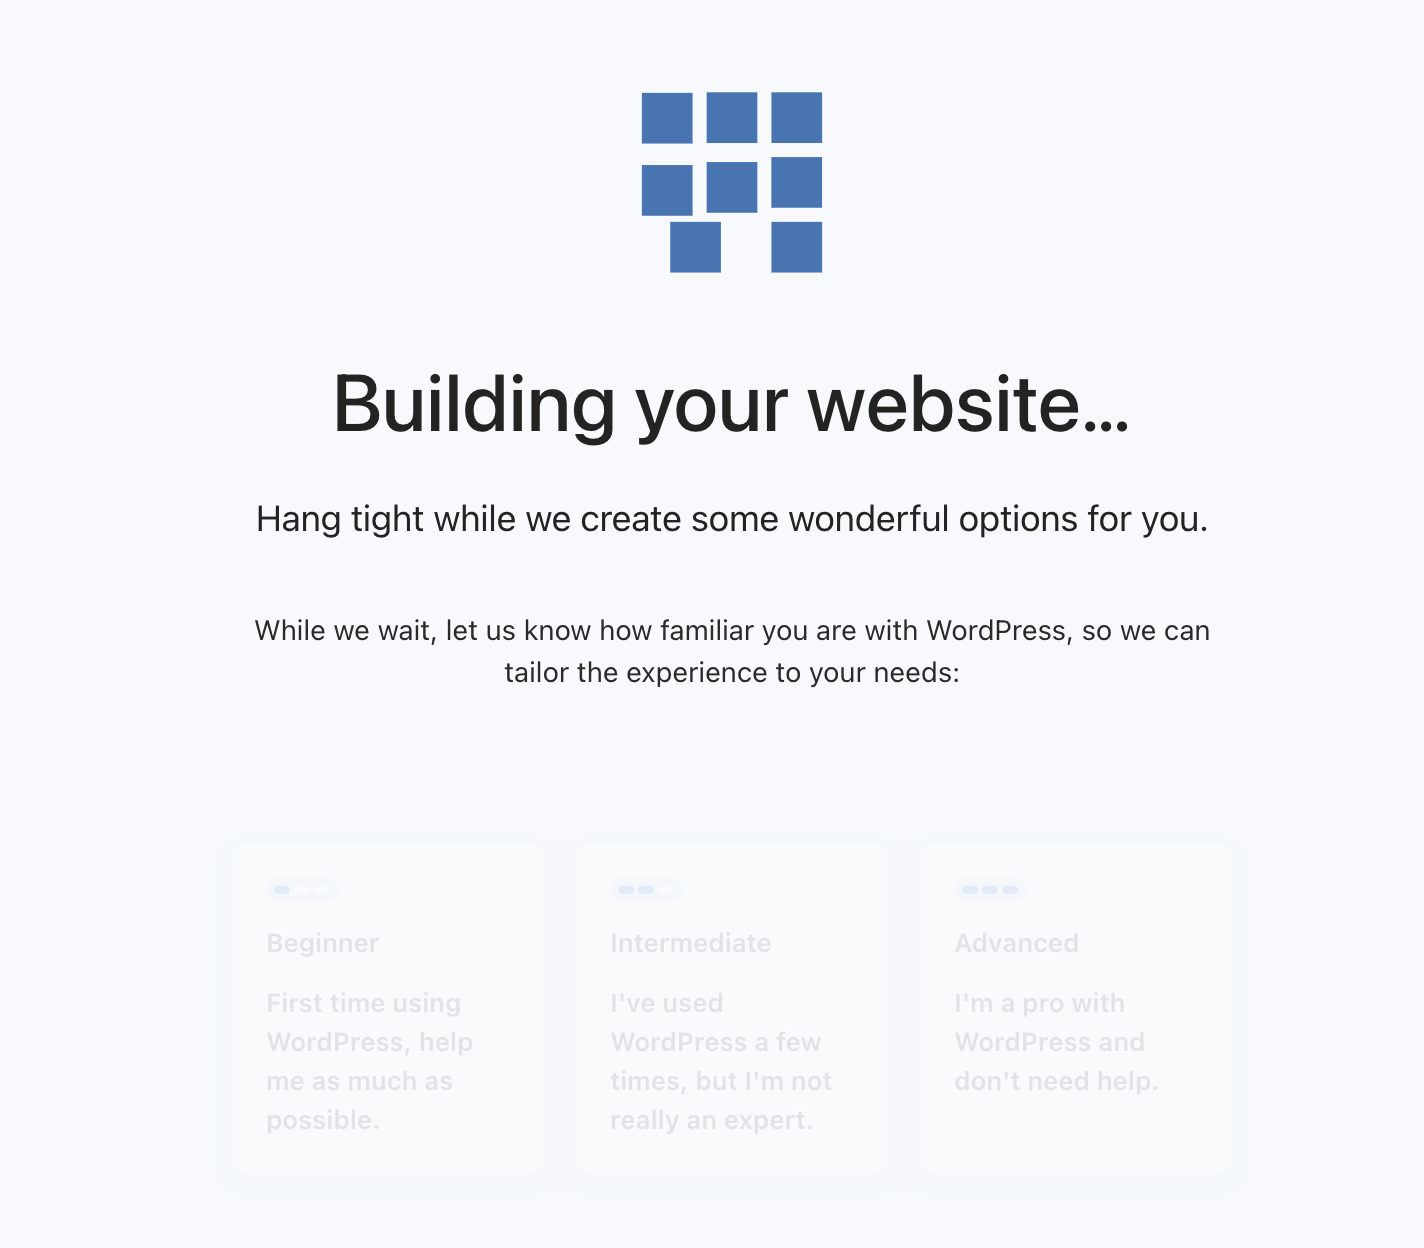
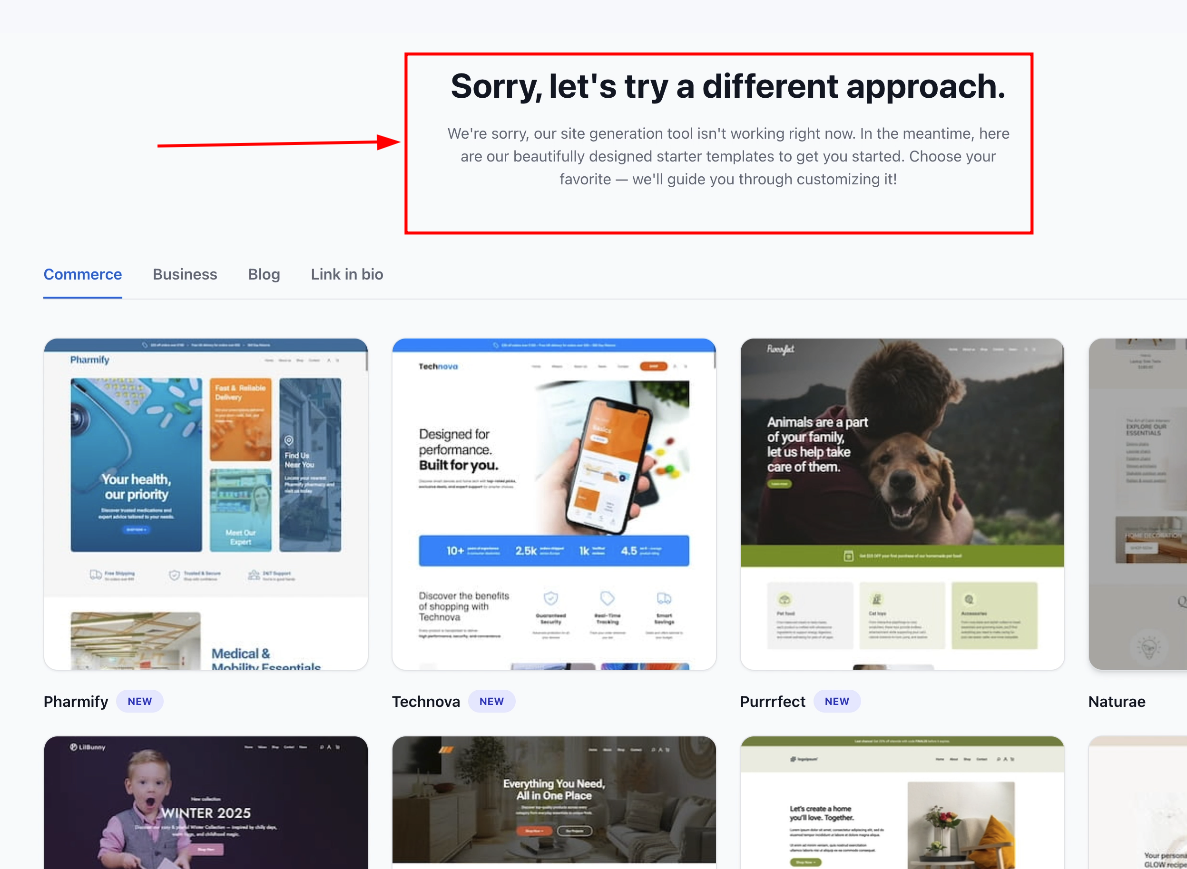
It will take a few minutes to create your website.
Oops! Something went wrong. If you something appear like this, no need to worry about this.
Just click the back button.
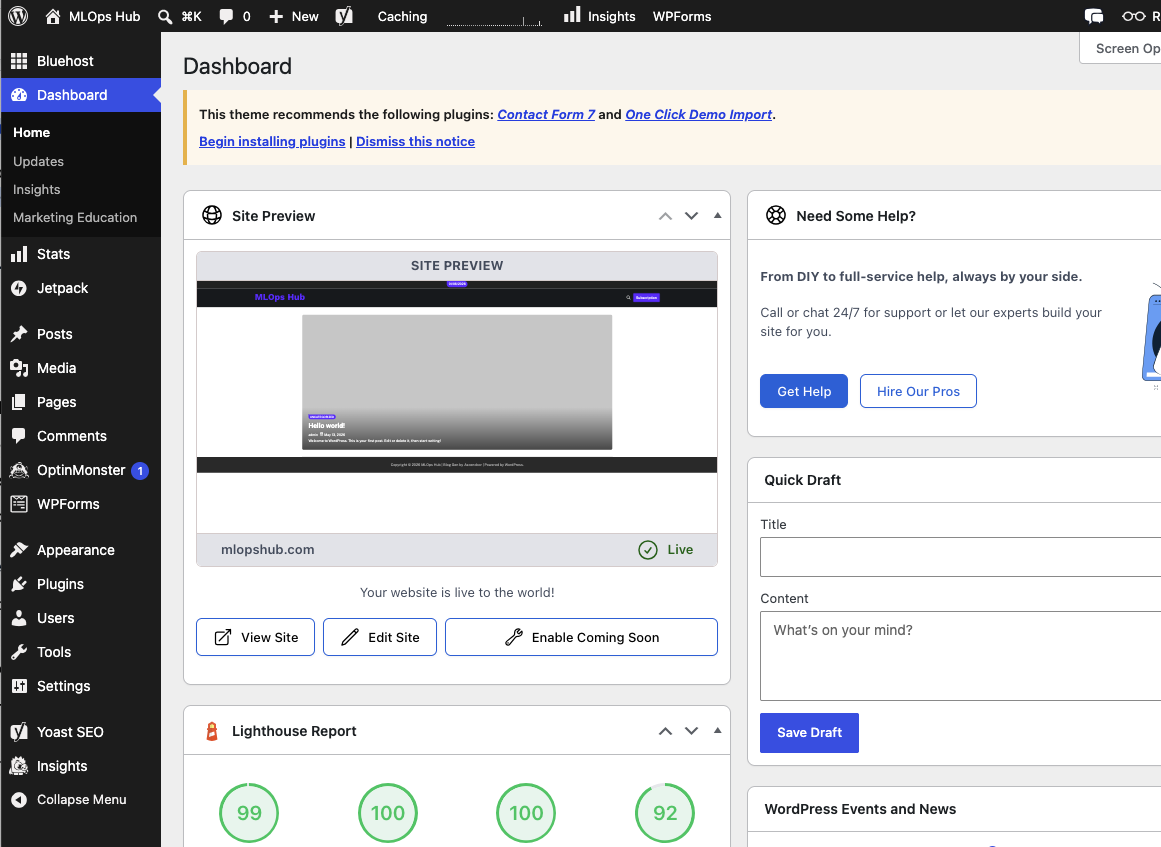
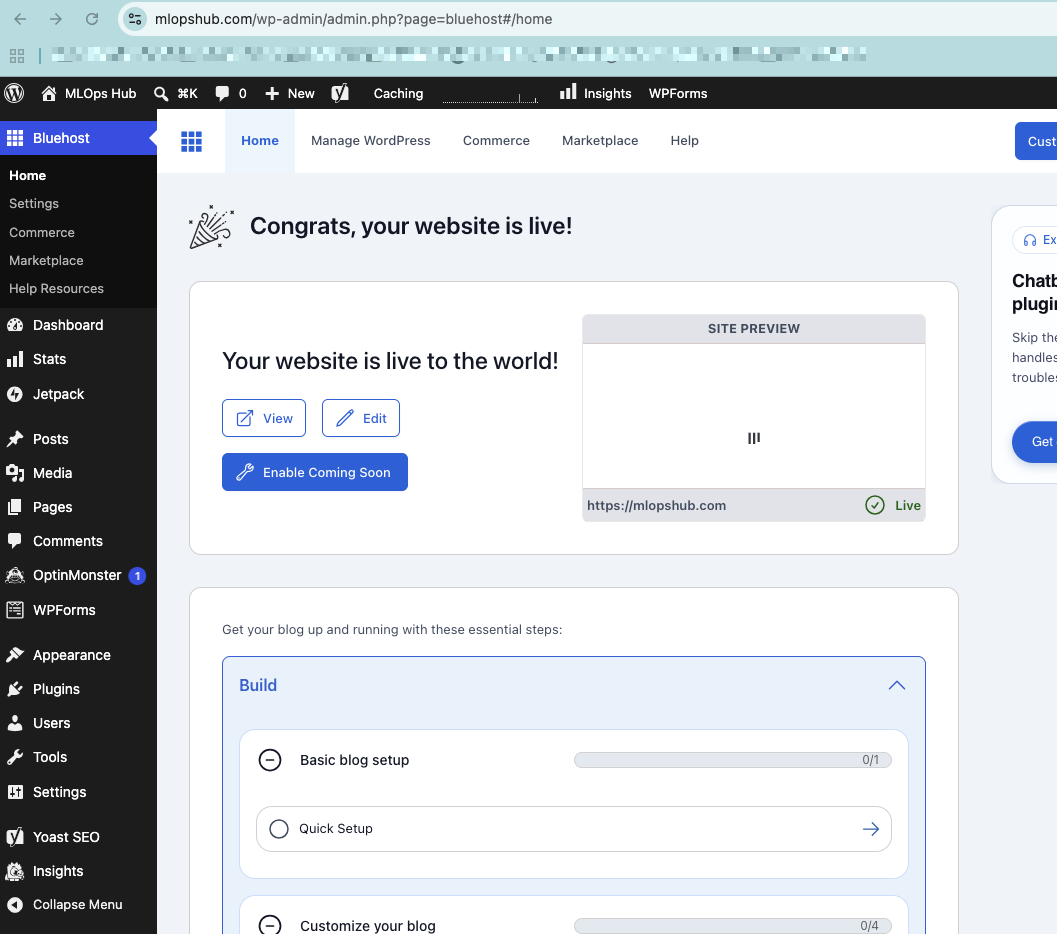
Step 4: Access the WordPress dashboard
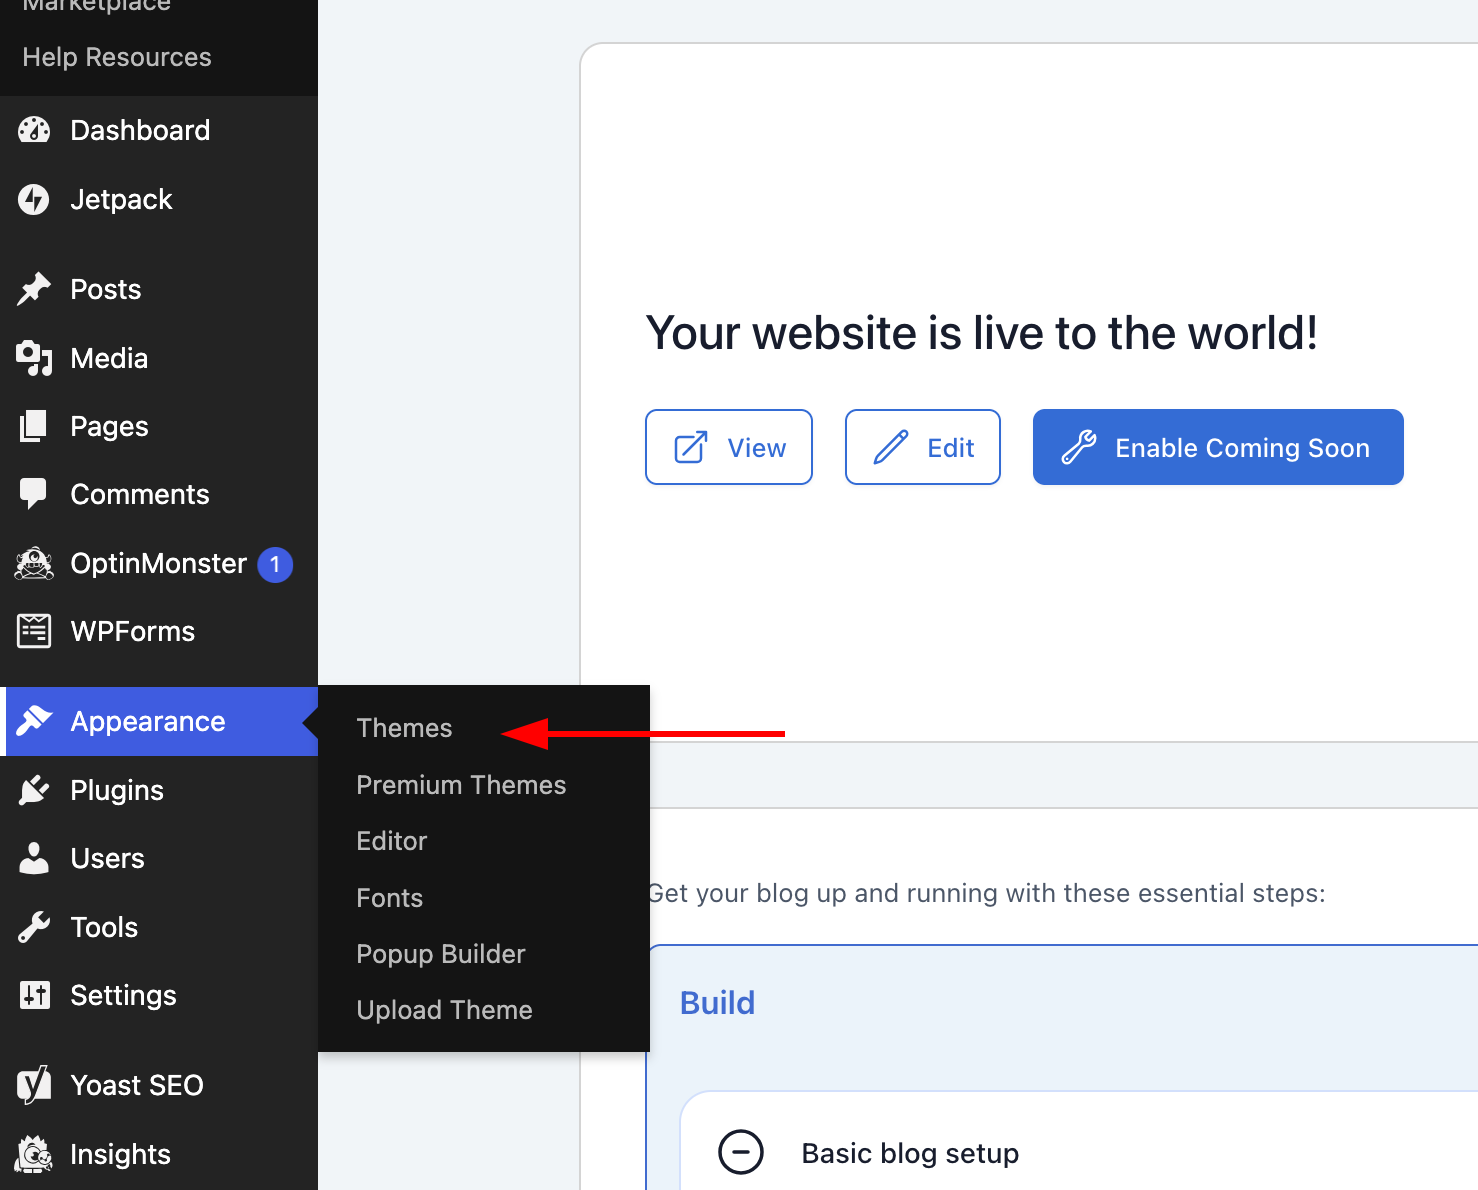
You will see your WordPress dashboard. This is the main control panel of your site, and you can start creating your website from here.
There are many pre-templates available, let me show you.
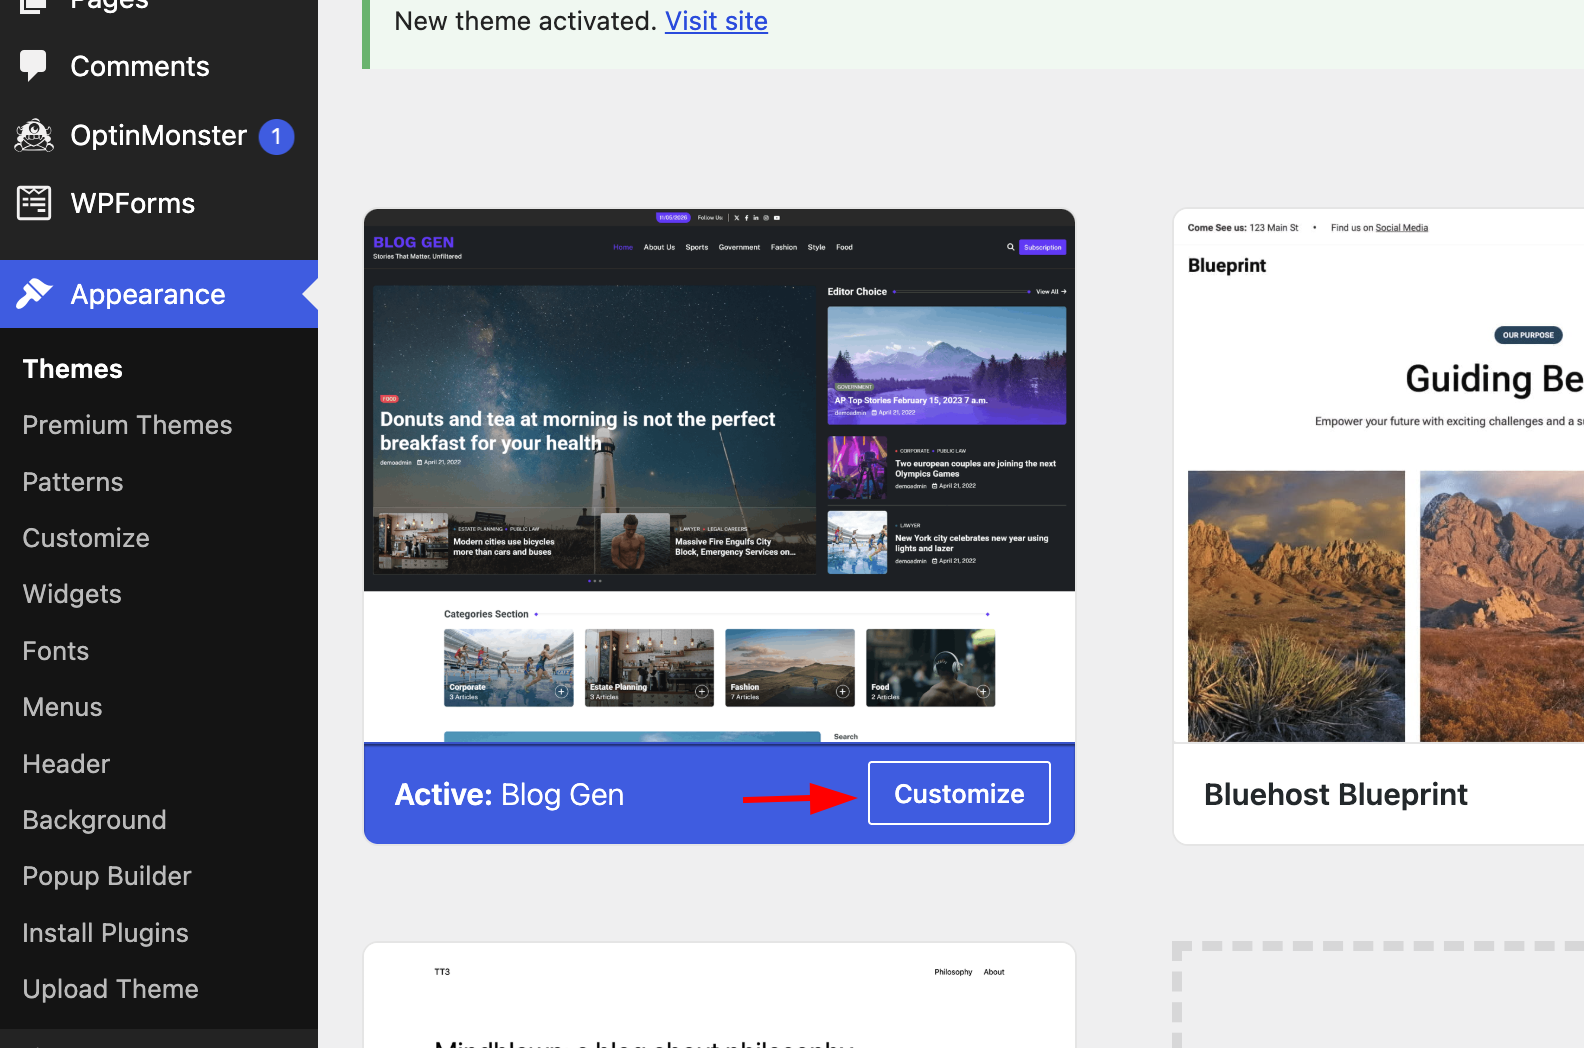
In the menu bar, go to Appearance and select themes.
There are four simple free templates available. If you are ok with this template, you can go with it.
If you want more premium templates, just click Add Theme as shown in the image below.
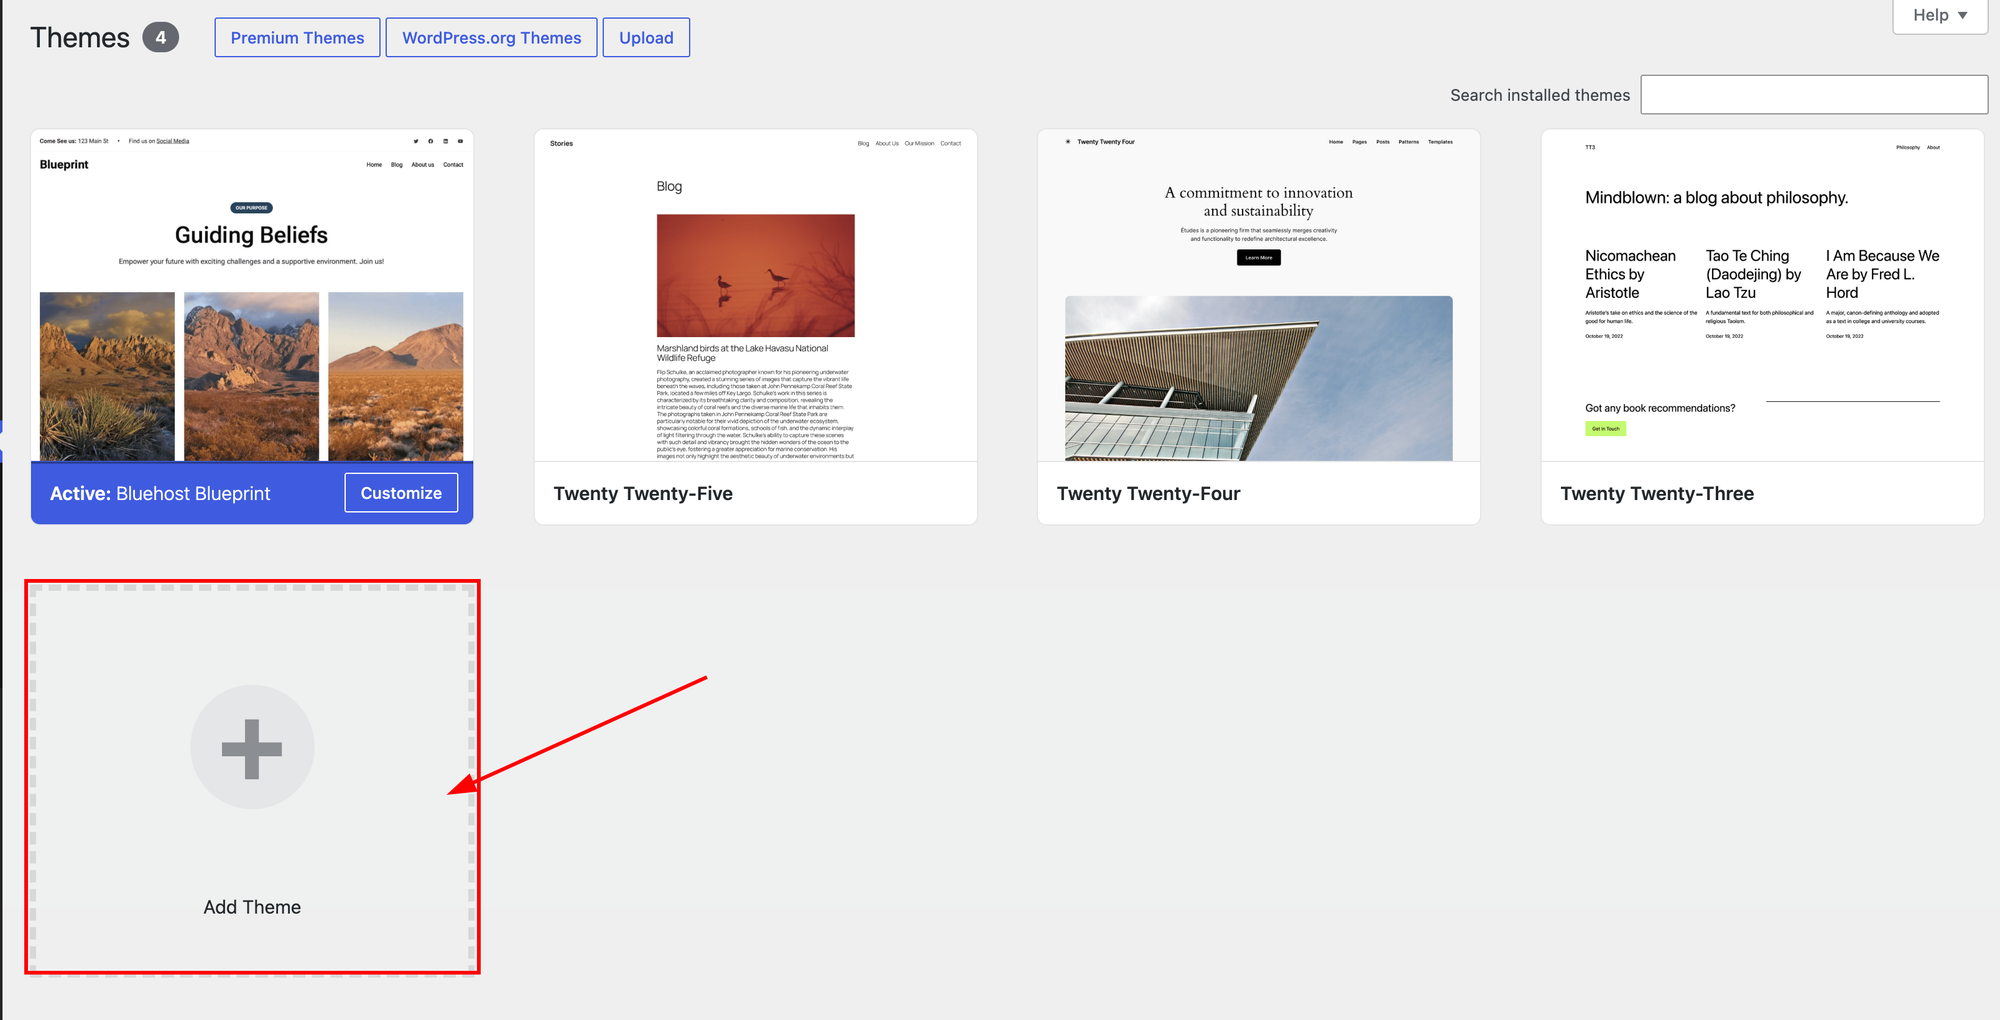
You will find 60+ free themes that you can use on your site based on your website category.
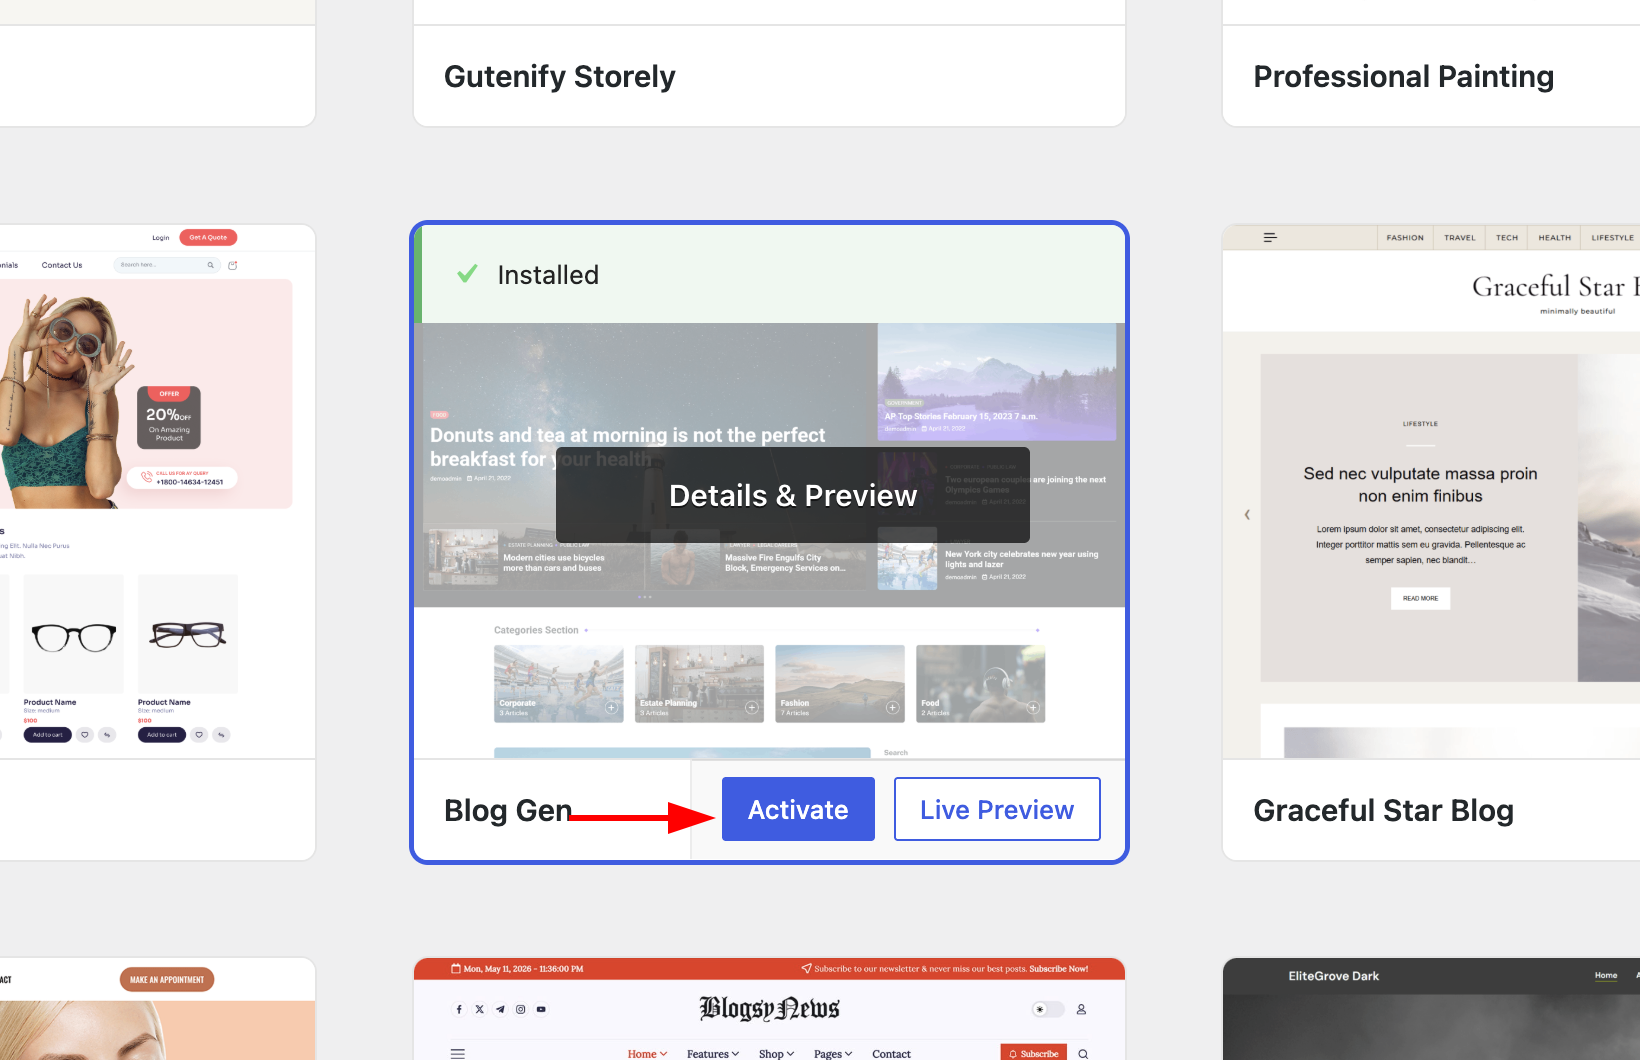
For example, if you want to create a blogging website, you can choose a blogging theme like Blog Gen or any similar blog-focused template.
Click the install button, to install the theme.

Once it is installed, it will show the activate button, click it.
Yes, now you have this template, and it is activated for my website.
Step 5: Customize your website
In the customization page, you can edit the site identity, colors, header image, widgets, and more.
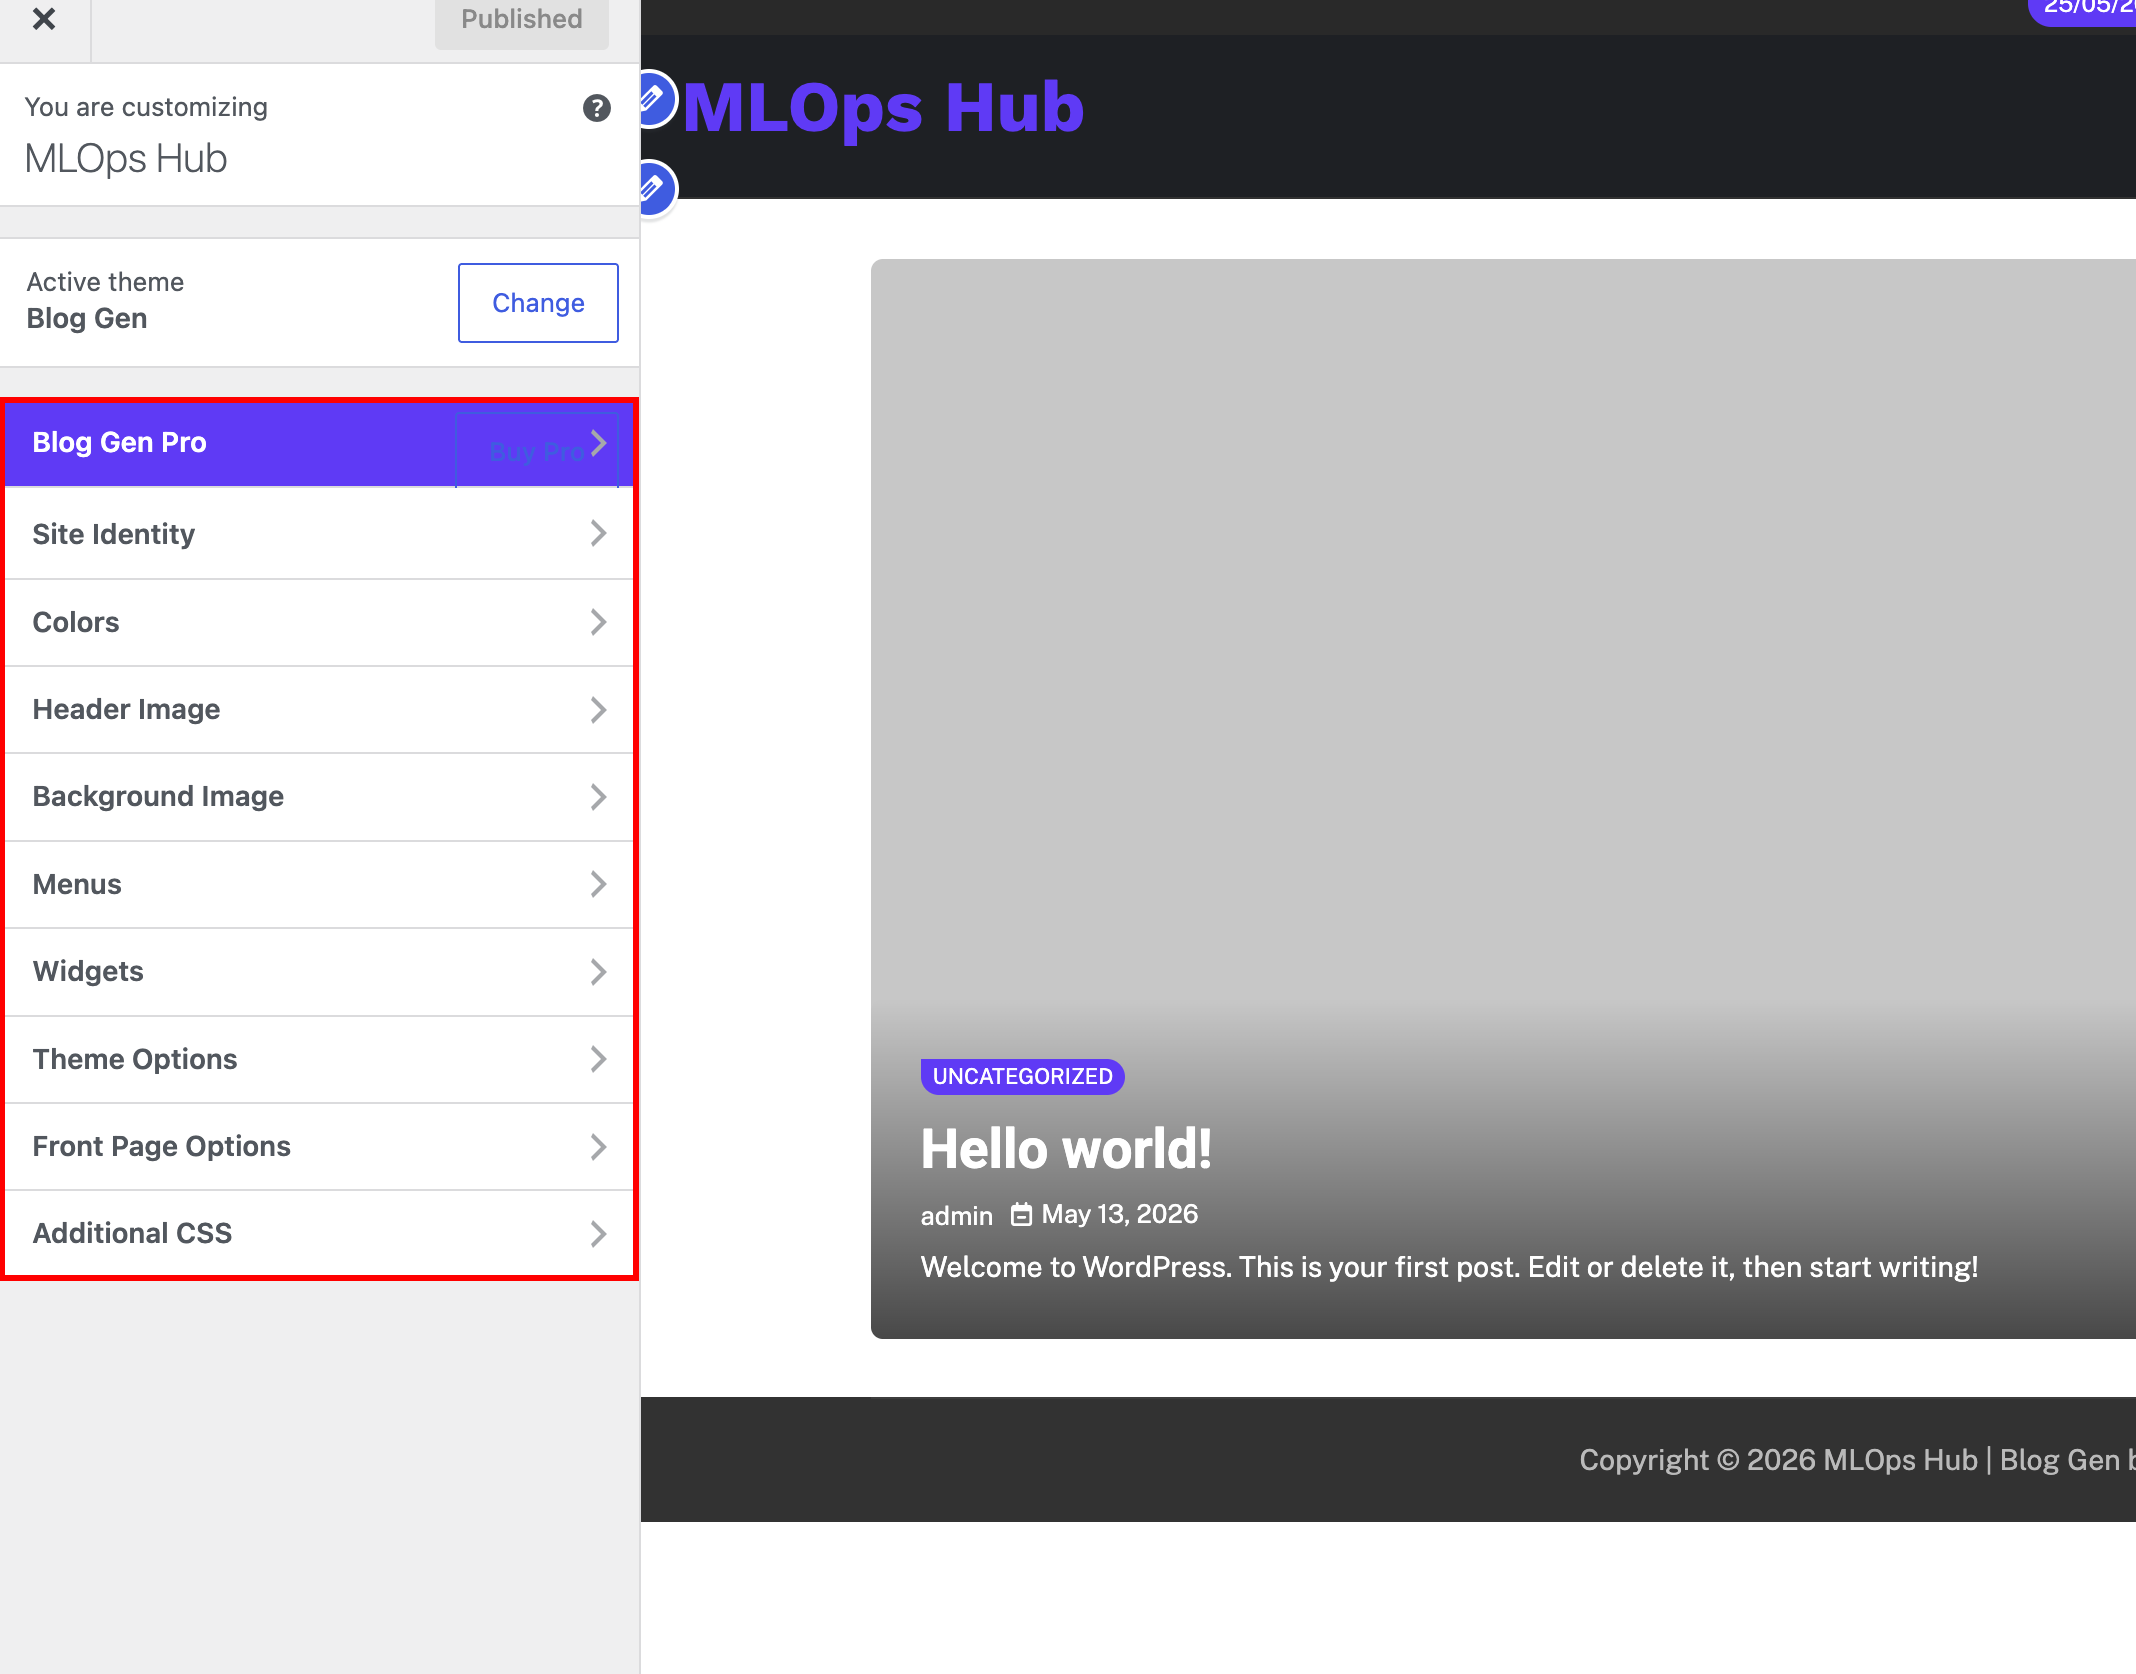
It is very simple, because it is just drag and drop.
So, this is how the site looks, once you start publishing the blog.

Thats it. Now you have to install a few plugins, which would be very helpful for your site, while writing blogs and all.
Step 6: Install the Required & Recomended Plugins
When it comes to Wordpress, there are essential plugins you should have in your website. For example, for SEO, spam protection, website security, website performance etc.
Here are the recommended free plugins.
- Rank Math SEO - This tool helps with SEO optimization. It is a must have plugin.
- WP Fastest Cache - It will handle caching, and database optimization, which will improve the website's performance. It is essential for passing the google core web vitals
- Akismet Anti-spam - Protects your blog from spam comments and spam contact form entries.
- WPForms - It is for creating contact forms, survey forms, and other types of forms.
- Jetpack - It is for website, analytics, security, performance, and marketing tools.
- WPS Hide Login - A very light plugin that helps you create custom login URLs and hide the default wp-admin login page.
To install a plugin follow the steps given below.
In the dashboard, go to Plugins, and click Add Plugin.
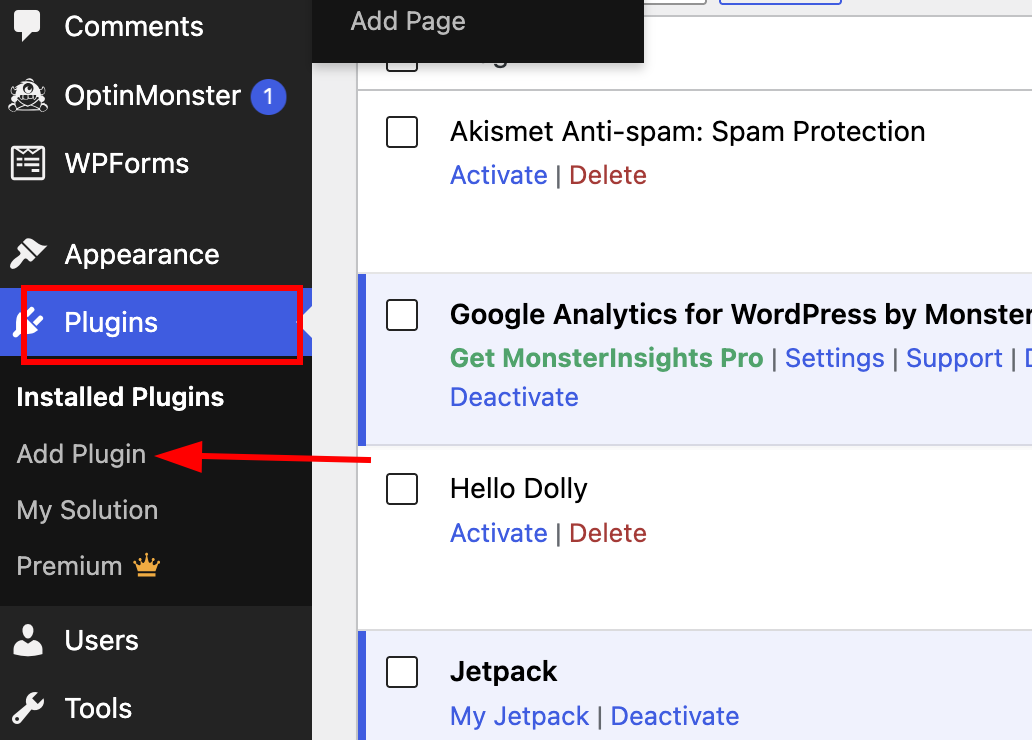
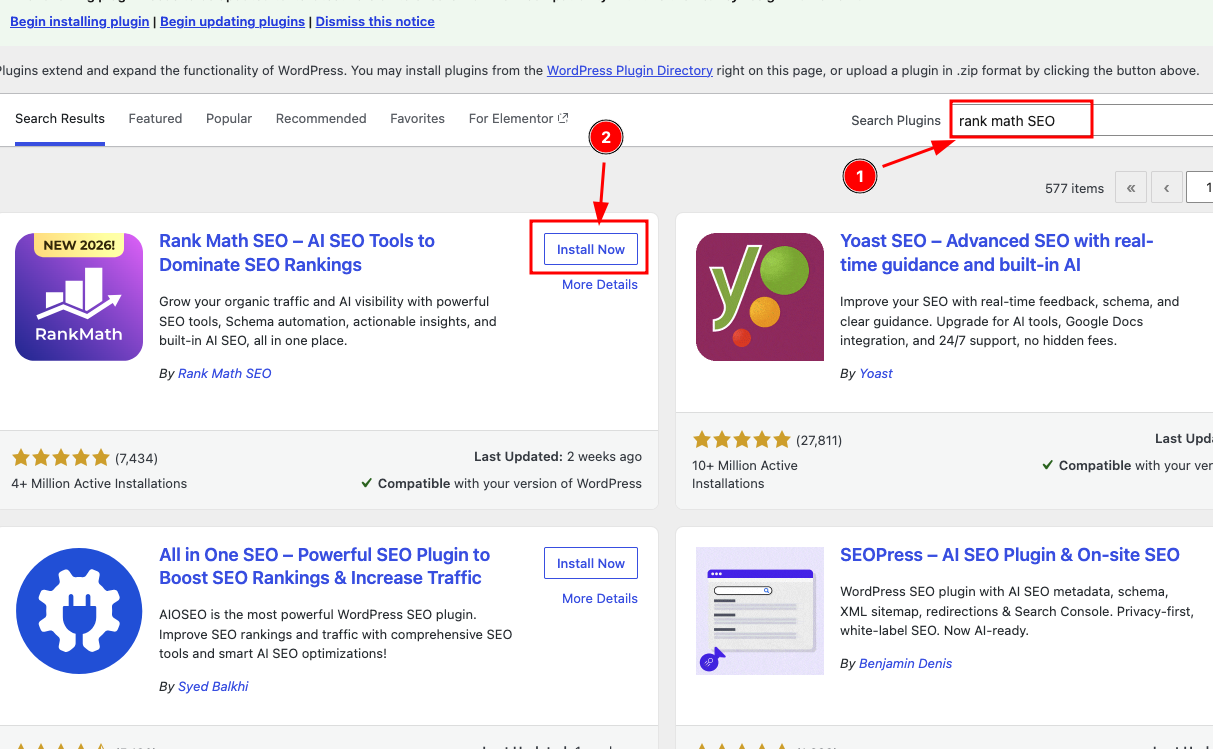
For example, if you want to install the Rank Math SEO plugin, simply type the plugin name in the search bar, and it will automatically appear in the results.
Now, click the install button.
Next, go back to the Plugins page. You will see the installed plugin there. Click the Activate button to enable it.
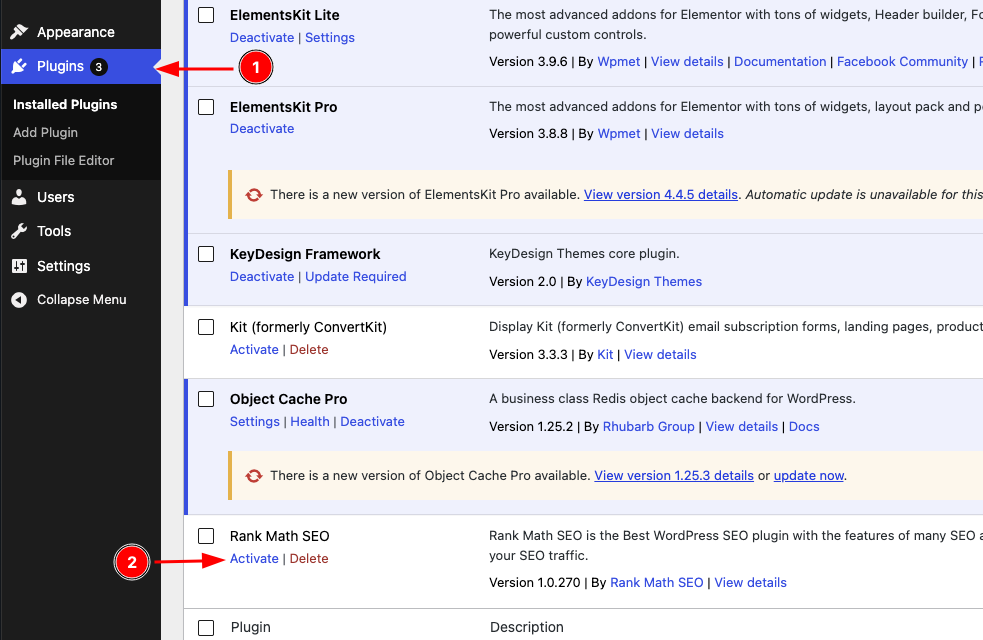
That’s it. The plugin is now activated on your website. The same steps apply to all the plugins you want to install.
Always verify if the plugin is light weight and if you really need it. See if the plugin is being updated by the developer. If not it could also introduce security vulnerabilities in your website.
Bluehost Wordpress Login
Once your entire setup is complete, there are two ways to log in to your Bluehost WordPress website.
Method 1: Using Wordpress Login URL
The login URL for the WordPress site is your domain name folllwed by /wp-admin
For example, in our case its mlopshub.com/wp-admin
So open your web browser and enter https://yourdomain.com/wp-admin, as shown in the image below.

It open up the admin login page. Enter your WordPress username and password. You can also check the Remember Me option so that you dont have to log in frequently.
Once you have entered your credentials, click the Log In button as shown below.
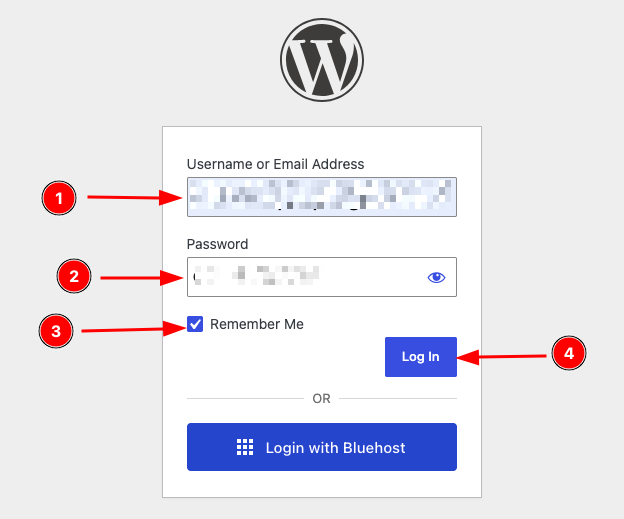
That's it! You have successfully logged in to your WordPress website directly without logging in to your Bluehost account.
Now, lets look into, how you can Login to WordPress using Bluehost.
Using Bluehost Wordpress Login
You can also login to Wordpress using the Bluehost account
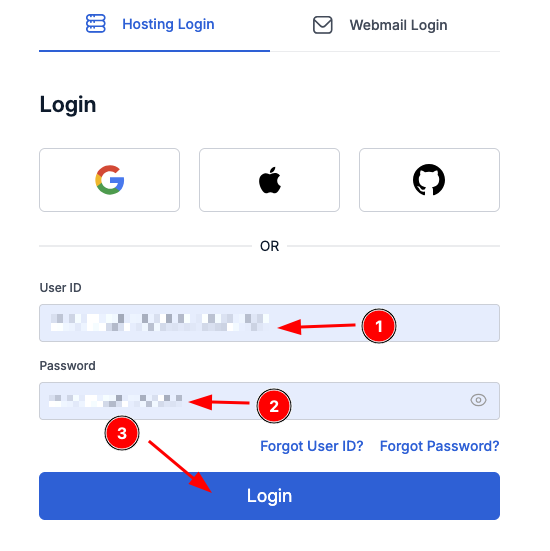
Open your web browser and search for Bluehost Login. Click the first result that appears in Google.
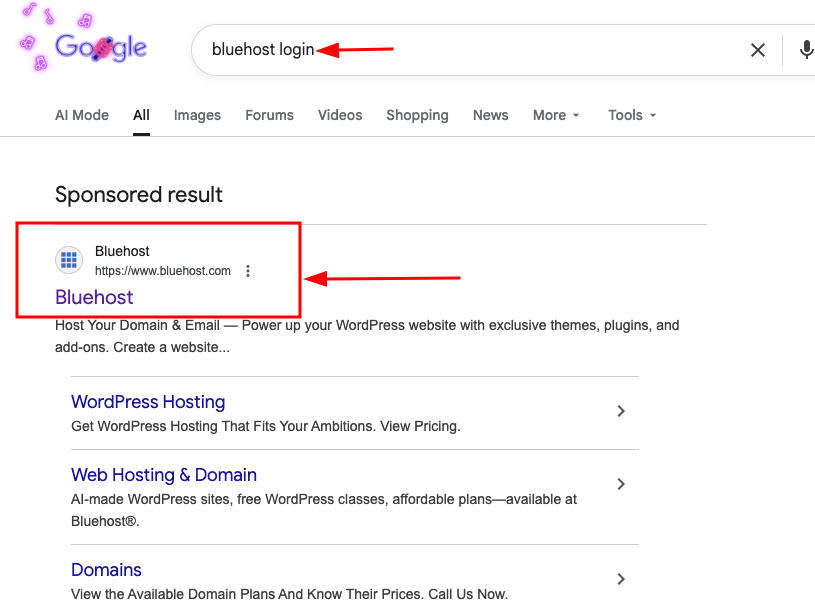
Once you are on the Bluehost website, click the Log In button located in the top-right corner.

Step 2: Enter your Bluehost credentials
Enter your Bluehost username and password, then click Log In.
Step 3: Go to Websites, and click WordPress Admin
After logging in to your Bluehost dashboard, click Websites from the left-hand menu.
You will see a WordPress Admin button next to your website. Click it to access your WordPress dashboard.
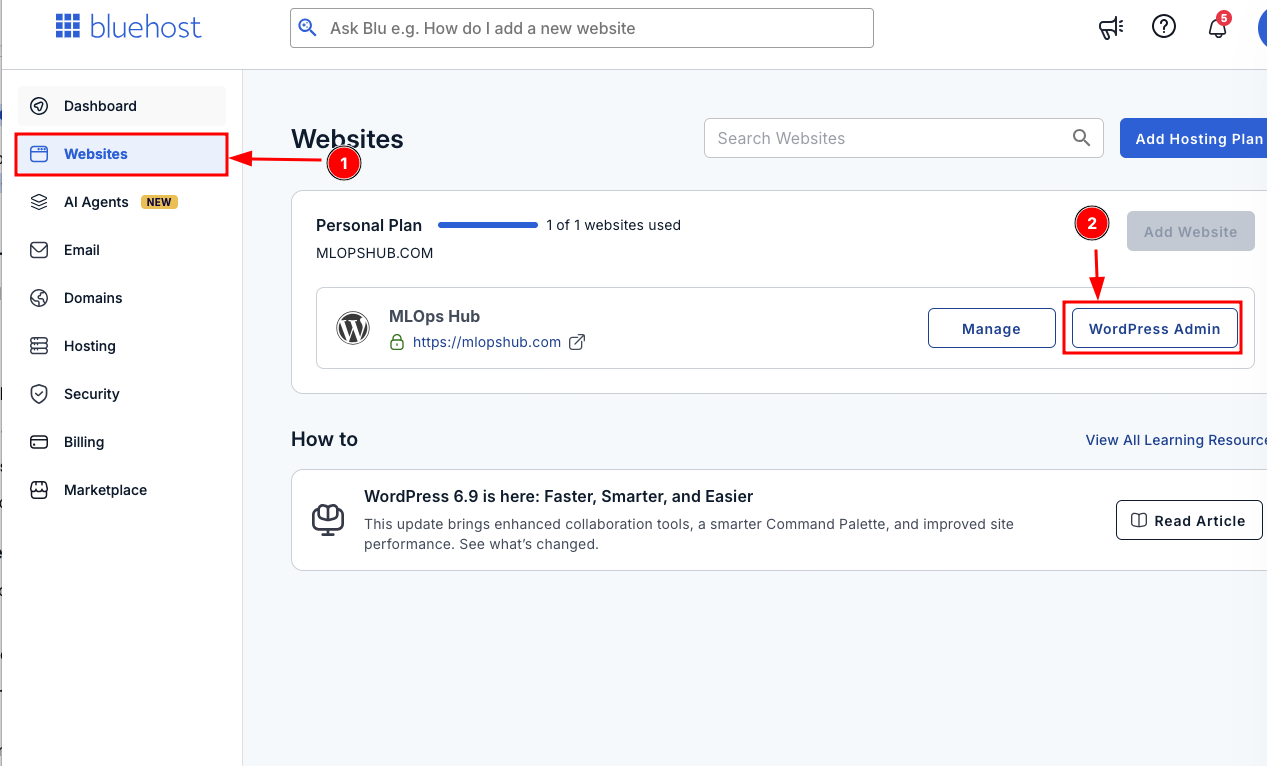
Thats it! This is another way to log in to your WordPress website through your Bluehost account.
Wordpress Backup & Restore
A key part in managing the production Wordpress website is backup and restore. You can call it "Day 2 Operations".
You need to perform timely backups so that you can restore the website in case something goes wrong.
We have a published a detailed guide that explains how to backup and restore Wordpress website on Bluehost.
Conclusion
In this blog, I have explained the complete end-to-end process of creating a WordPress website using Bluehost.
Whether you are a beginner or someone with experience, I would say this is one of the best and most budget-friendly options to get started with.
If you a small or medium business looking for cloud based scalable Wordpress hosting, you can look at Cloudways. You can read our detailed Cloudways review here.
If you have any doubts or questions about this guide, feel free to leave them in the comments section.
We will be happy to help you out.