

In this blog, you will learn how to backup a WordPress site on Bluehost and how to restore it.
I decided to write this guide because we have a WordPress website that is hosted on Bluehost. One day, the website's data, theme, content, pages, and everything else suddenly disappeared, and I couldn't figure out what had gone wrong.
It may have been caused by a plugin issue or something else, but I was never able to identify the exact cause. That experience made me realize how important website backups are even if you are on a managed hosting plan.
To avoid situations like this, you should always keep a backup of your WordPress site. If something goes wrong, you can quickly restore your website and prevent data loss.
In this guide, I will walk you through two methods for backing up your site. These are the same methods we now regularly use to create backups. Also I will provide the steps to restore the backups.
Let's get started.
Method 1: Create a Backup using Bluehost Dashboard
This is the easiest method you can use.
Follow each step below to generate a backup of your website.
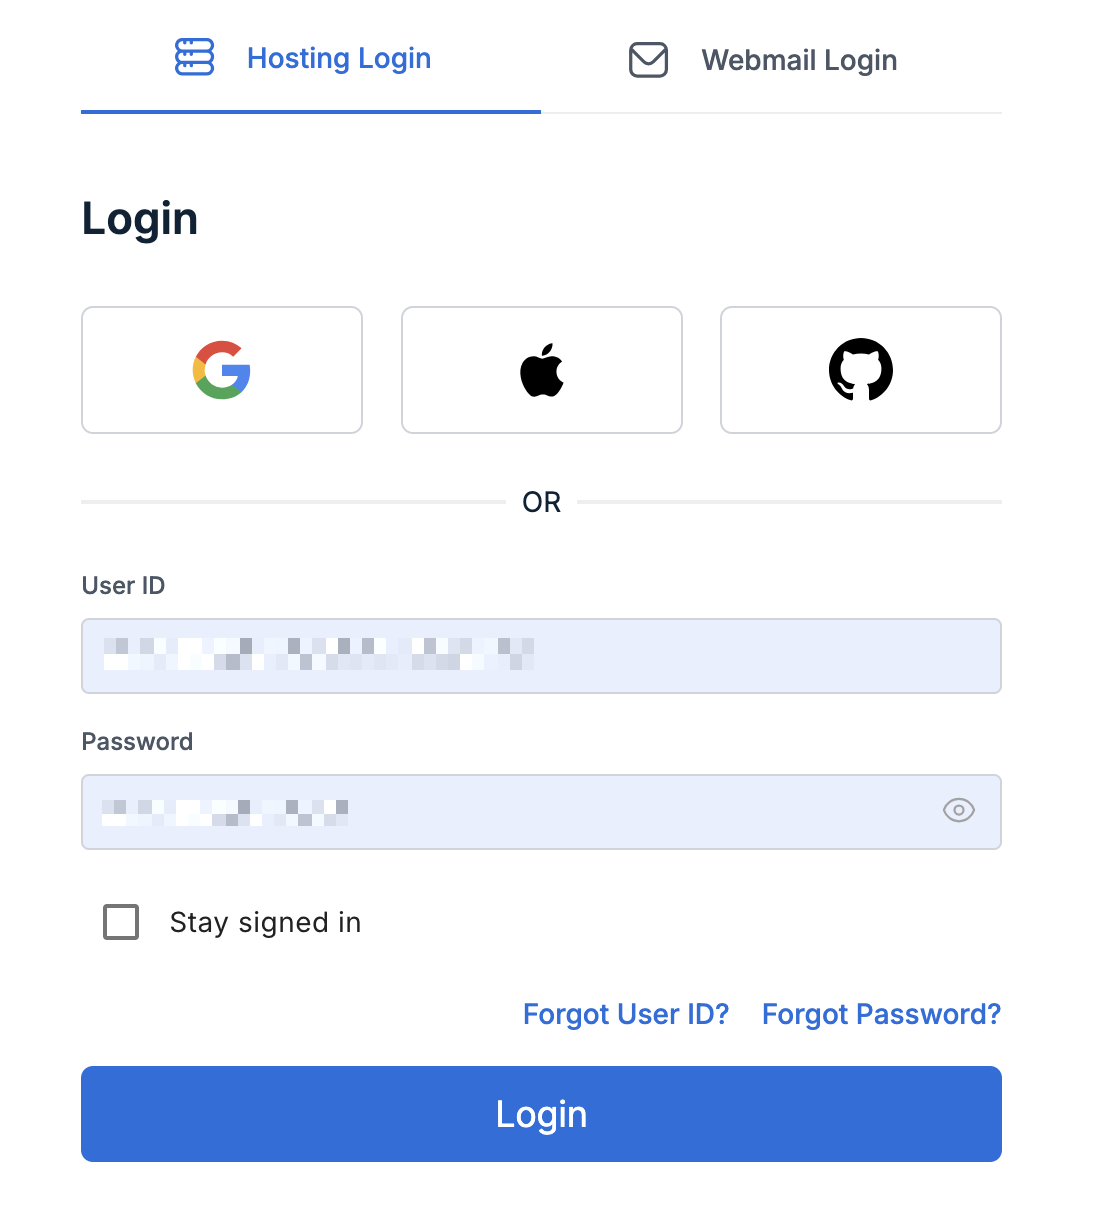
Step 1: Login to the Bluehost Dashboard
Use the login credentials you created when setting up your account. Enter them and click login.
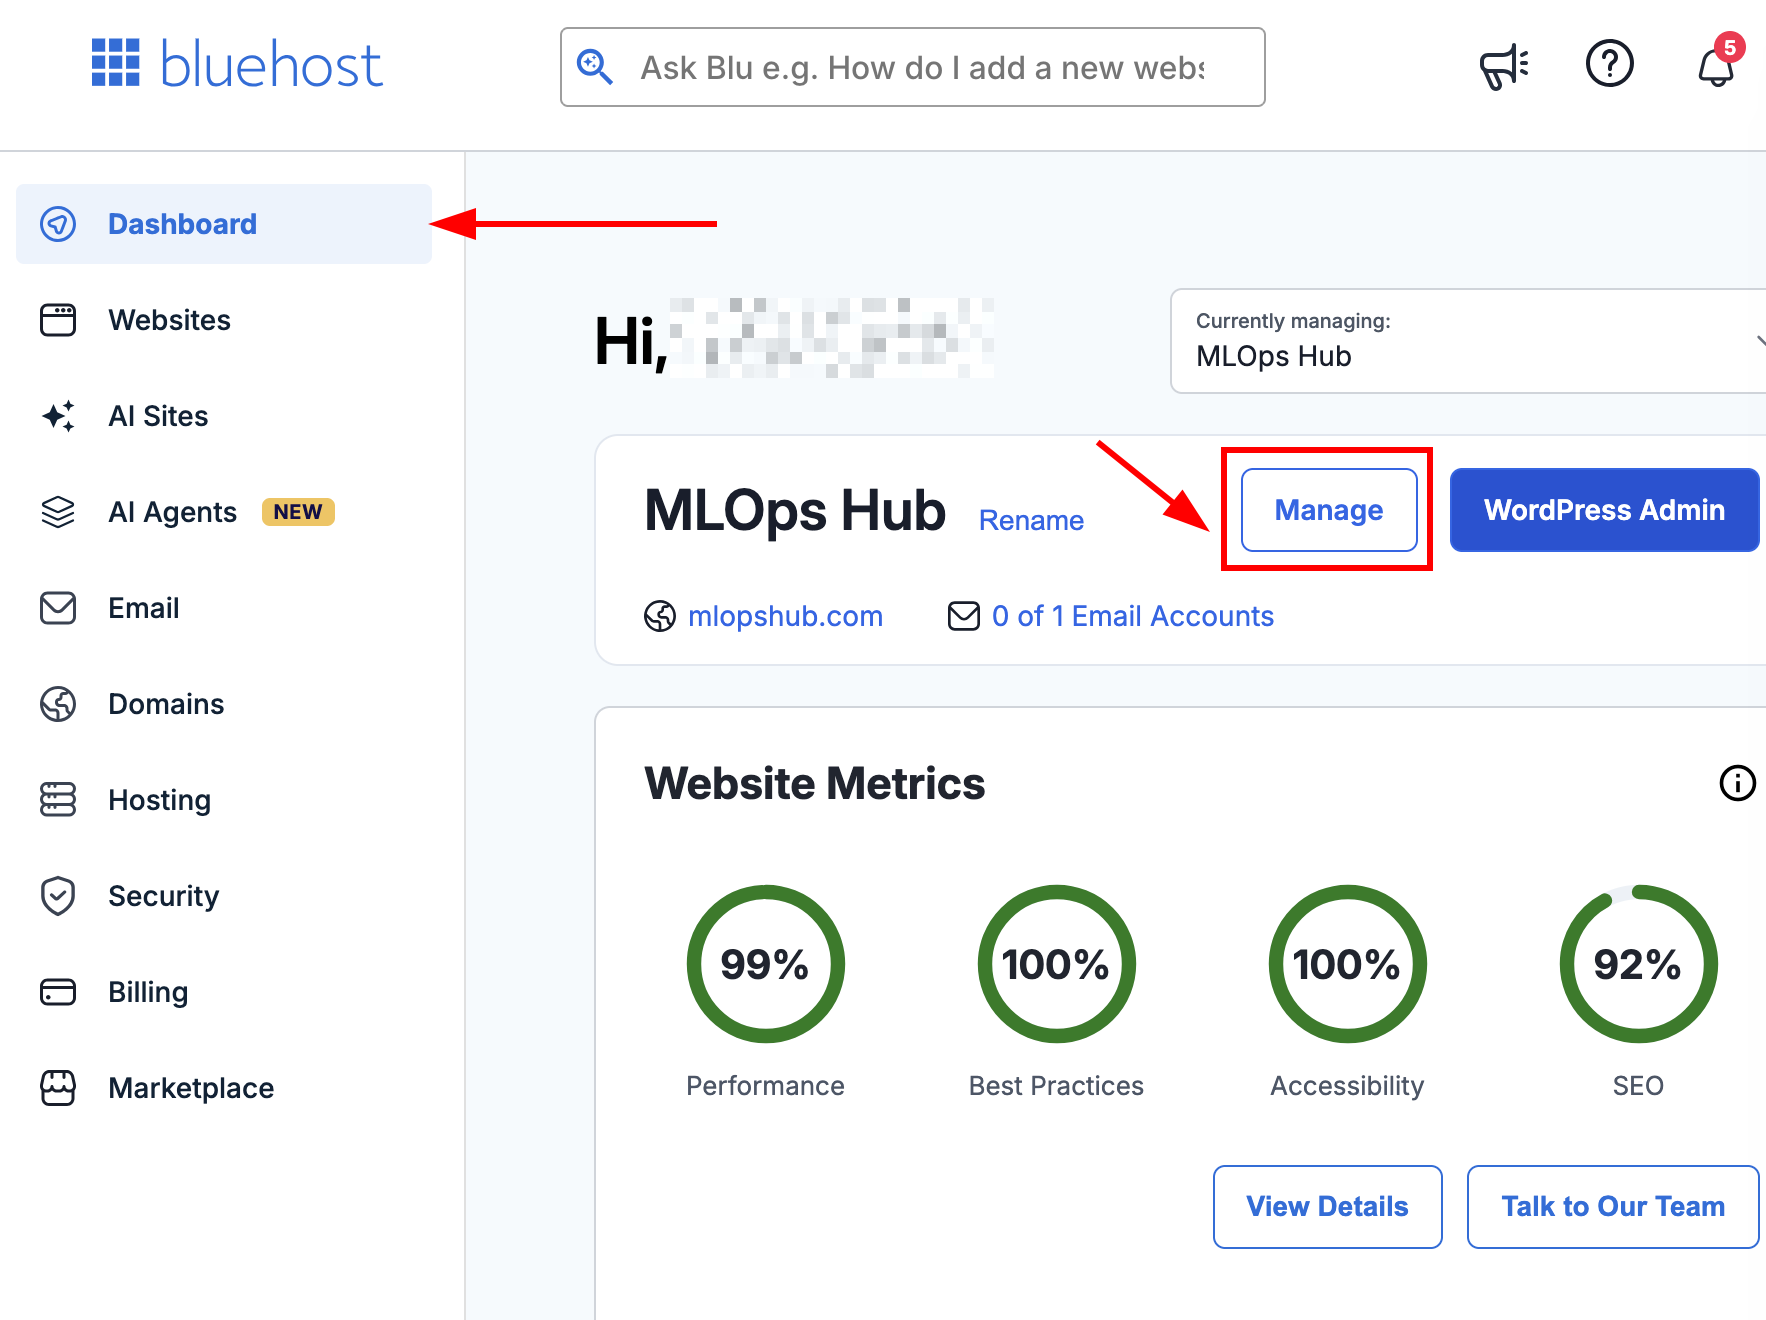
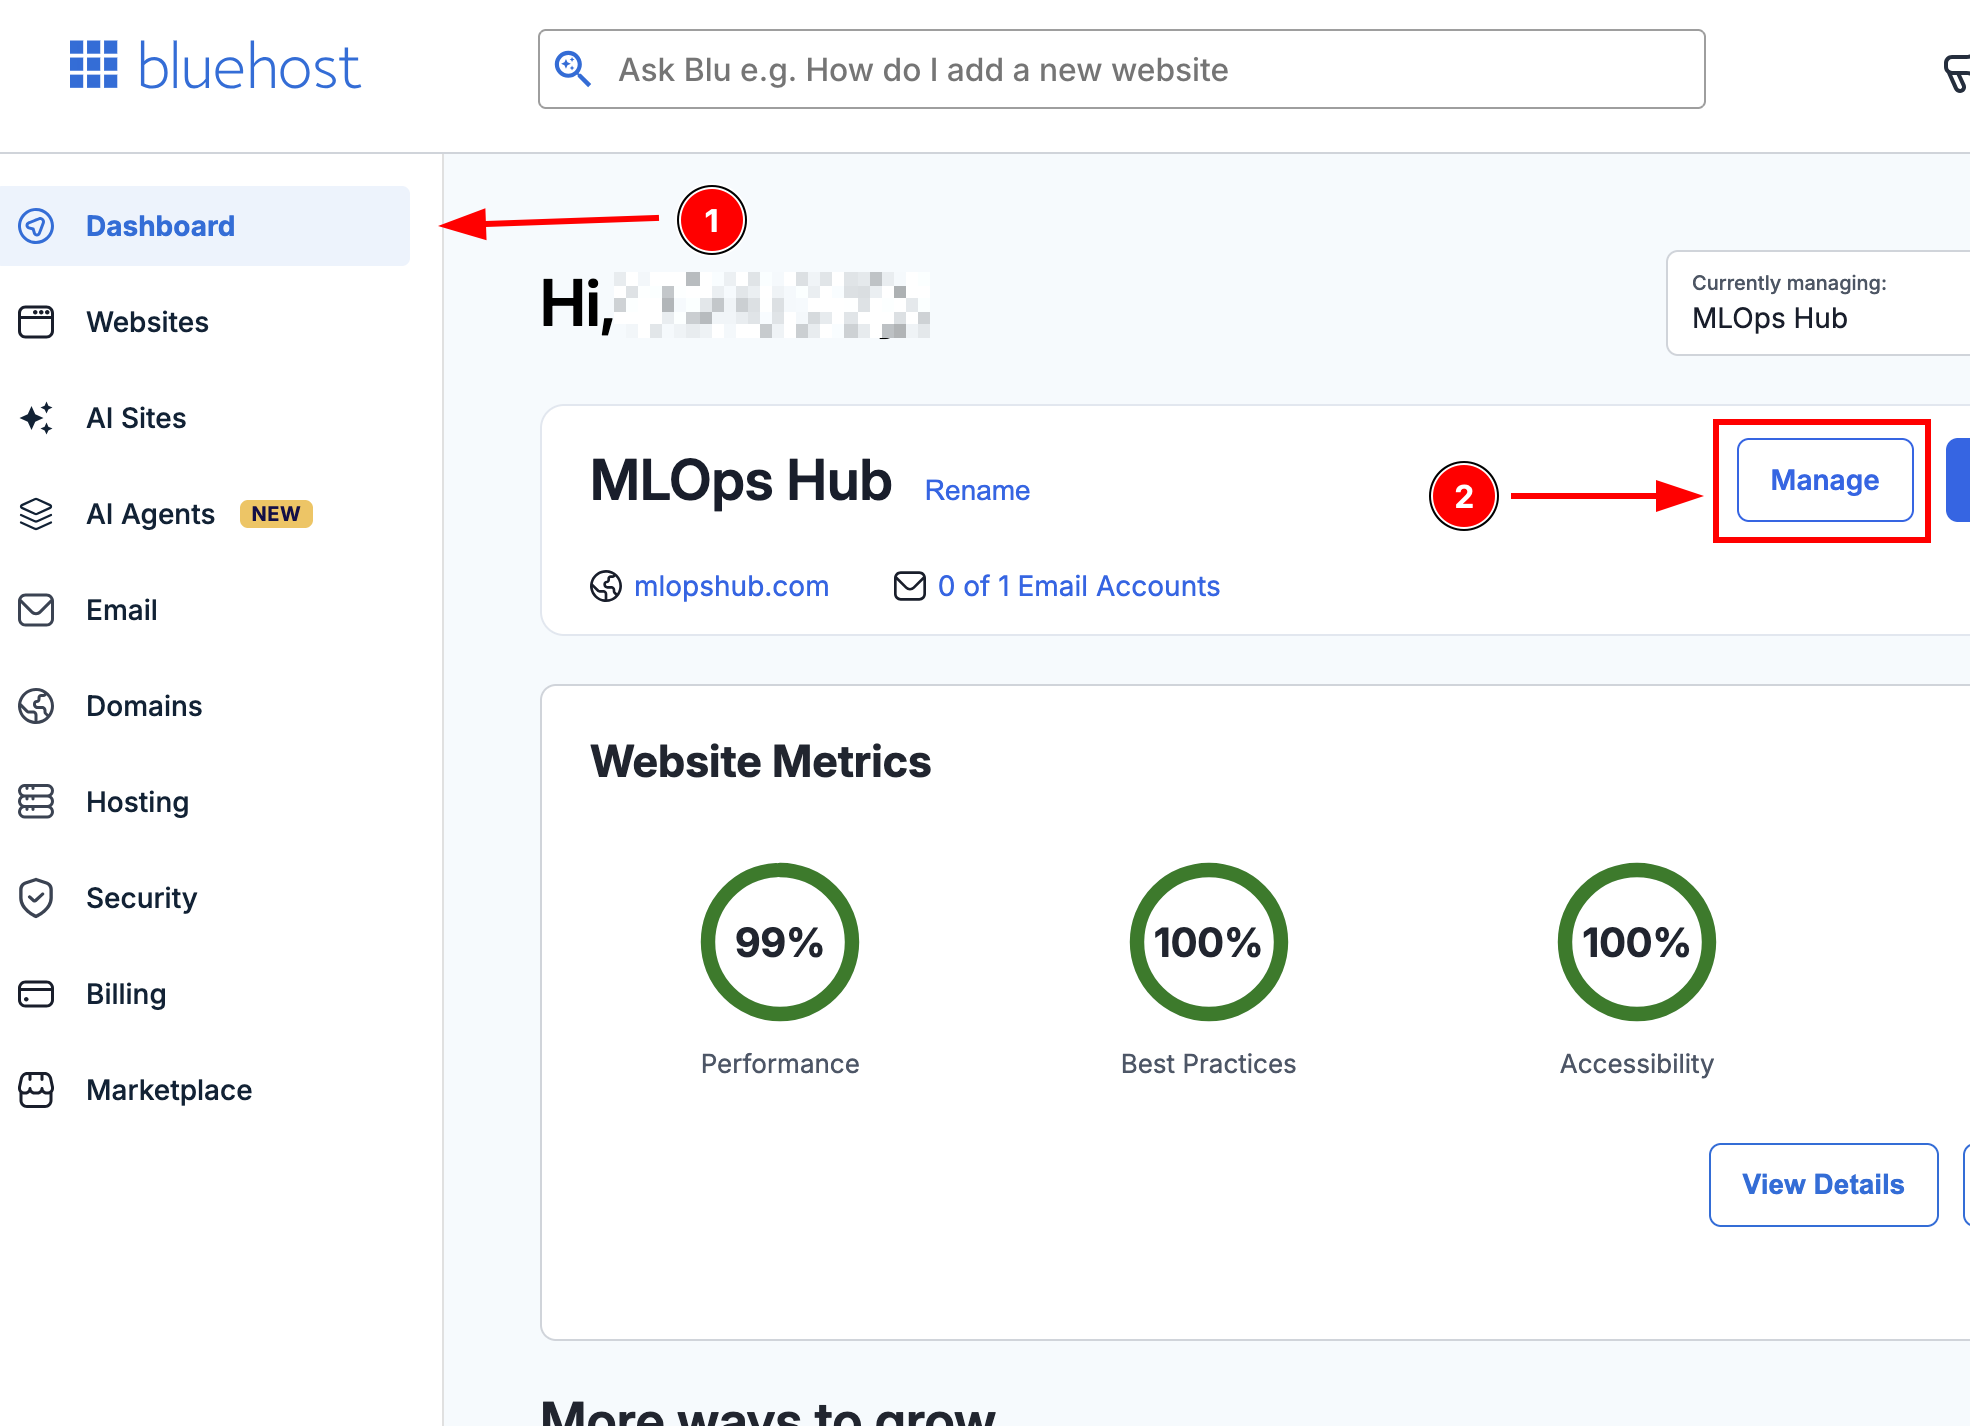
Step 2: Click the Manage button
In the dashboard, locate the Manage button, click on it.
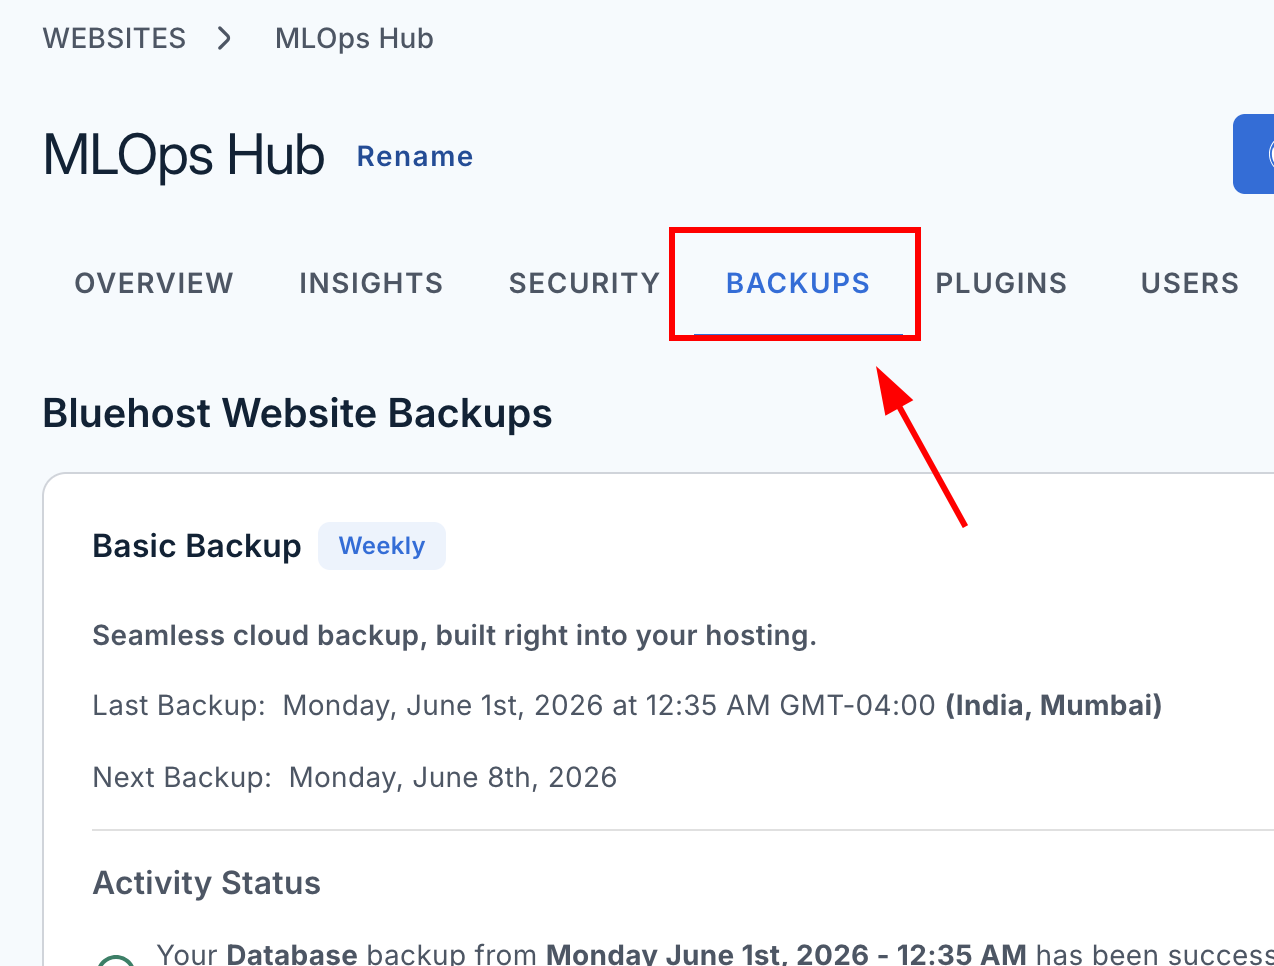
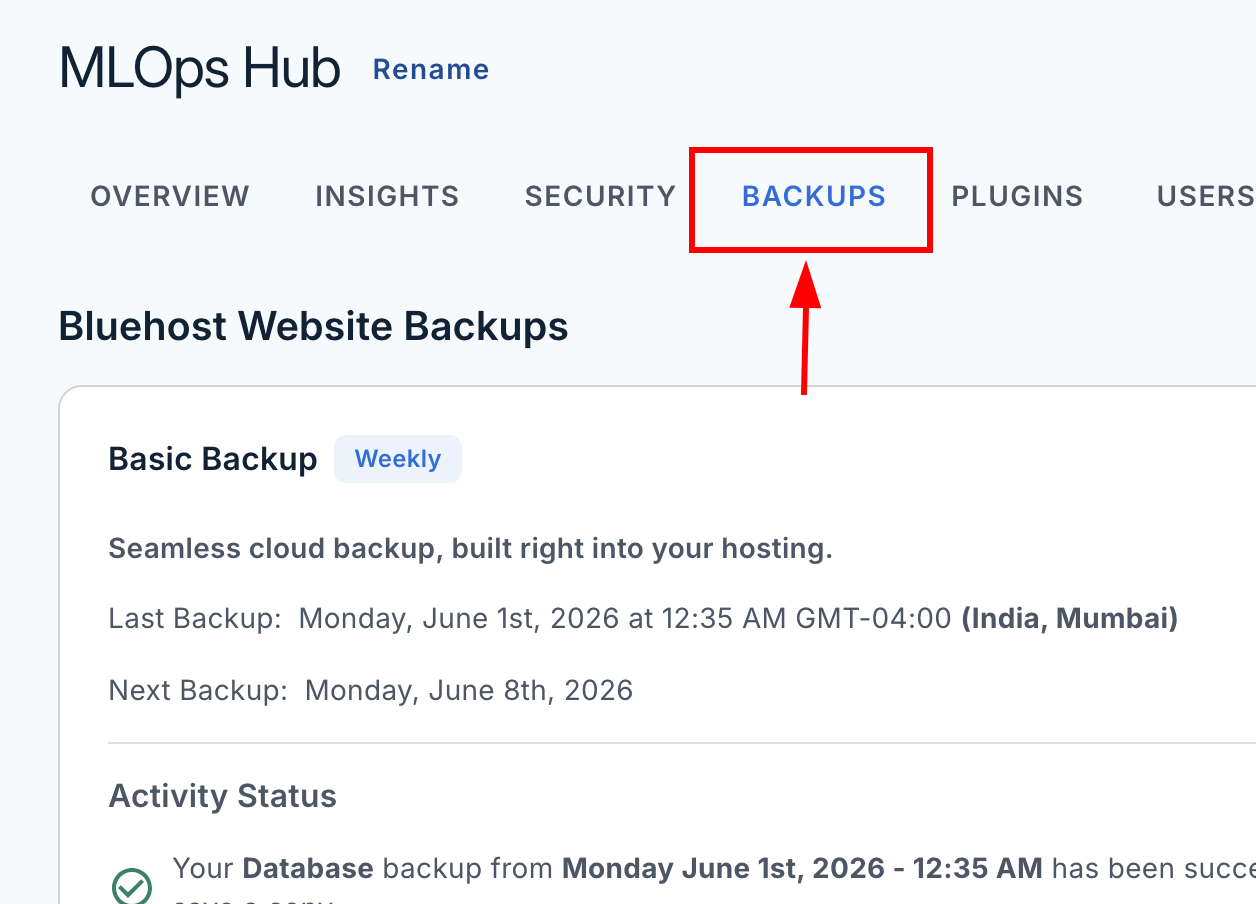
Step 3: Go to the Backups tab
Next, you will see several options. In that, click the Backups tab.
Step 4: Choose File Backups and Database Backups
You will see two backup options: File Backups and Database Backups.
Actually, it is important to download both backups. Let me tell you why.

- File Backups contain your WordPress files, themes, plugins, images, media uploads, CSS files, JavaScript files, and configuration files.
- Database Backups contain your posts, pages, comments, user accounts, settings, and other website data stored in the database.
Both backups are essential because they work together to fully restore your website.
Step 5: Download the Backups
Select the backup date you want to download. Next, select the Download option and click Continue.
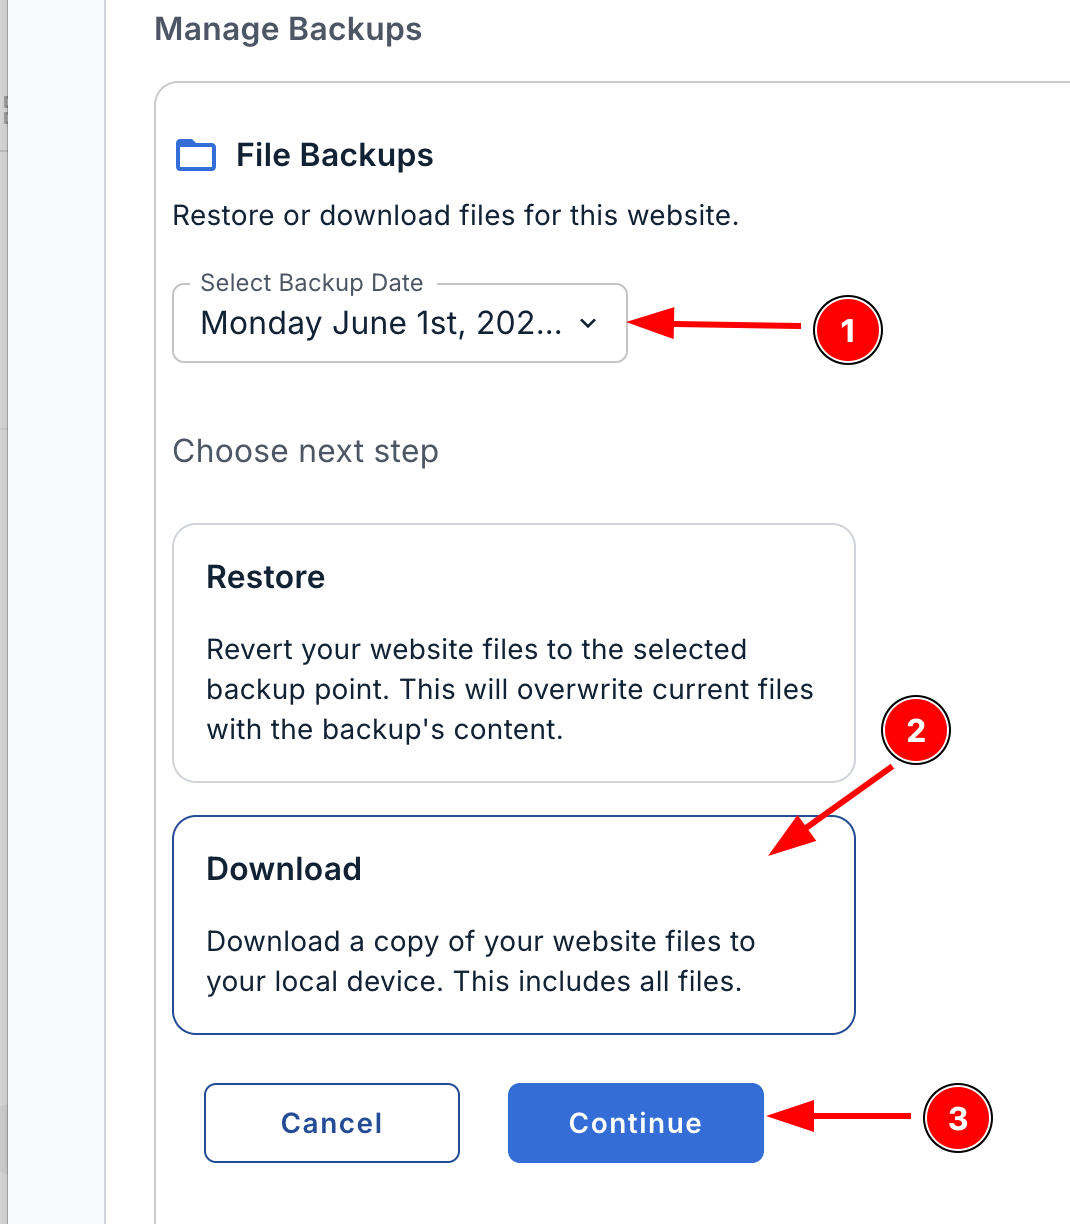
The backup file will be downloaded to your local computer. Repeat the same process to download the Database Backup as well.
Method 2: Create a Manual Backup using Bluehost cPanel
cPanel is a the a web-based control panel for Linux based server management. It provides easy to use graphical use interface to manage every aspect of your wordpress website.
You can access it via the Bluehost dashboard. Follow the steps carefully, and dont miss a single line. If you miss it, you will be confused.
Step 1: Go to the Bluehost dashboard
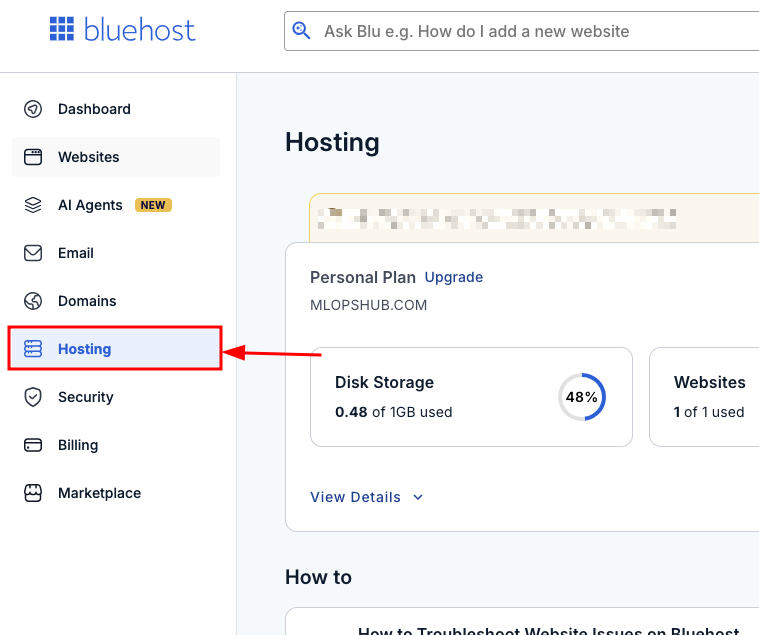
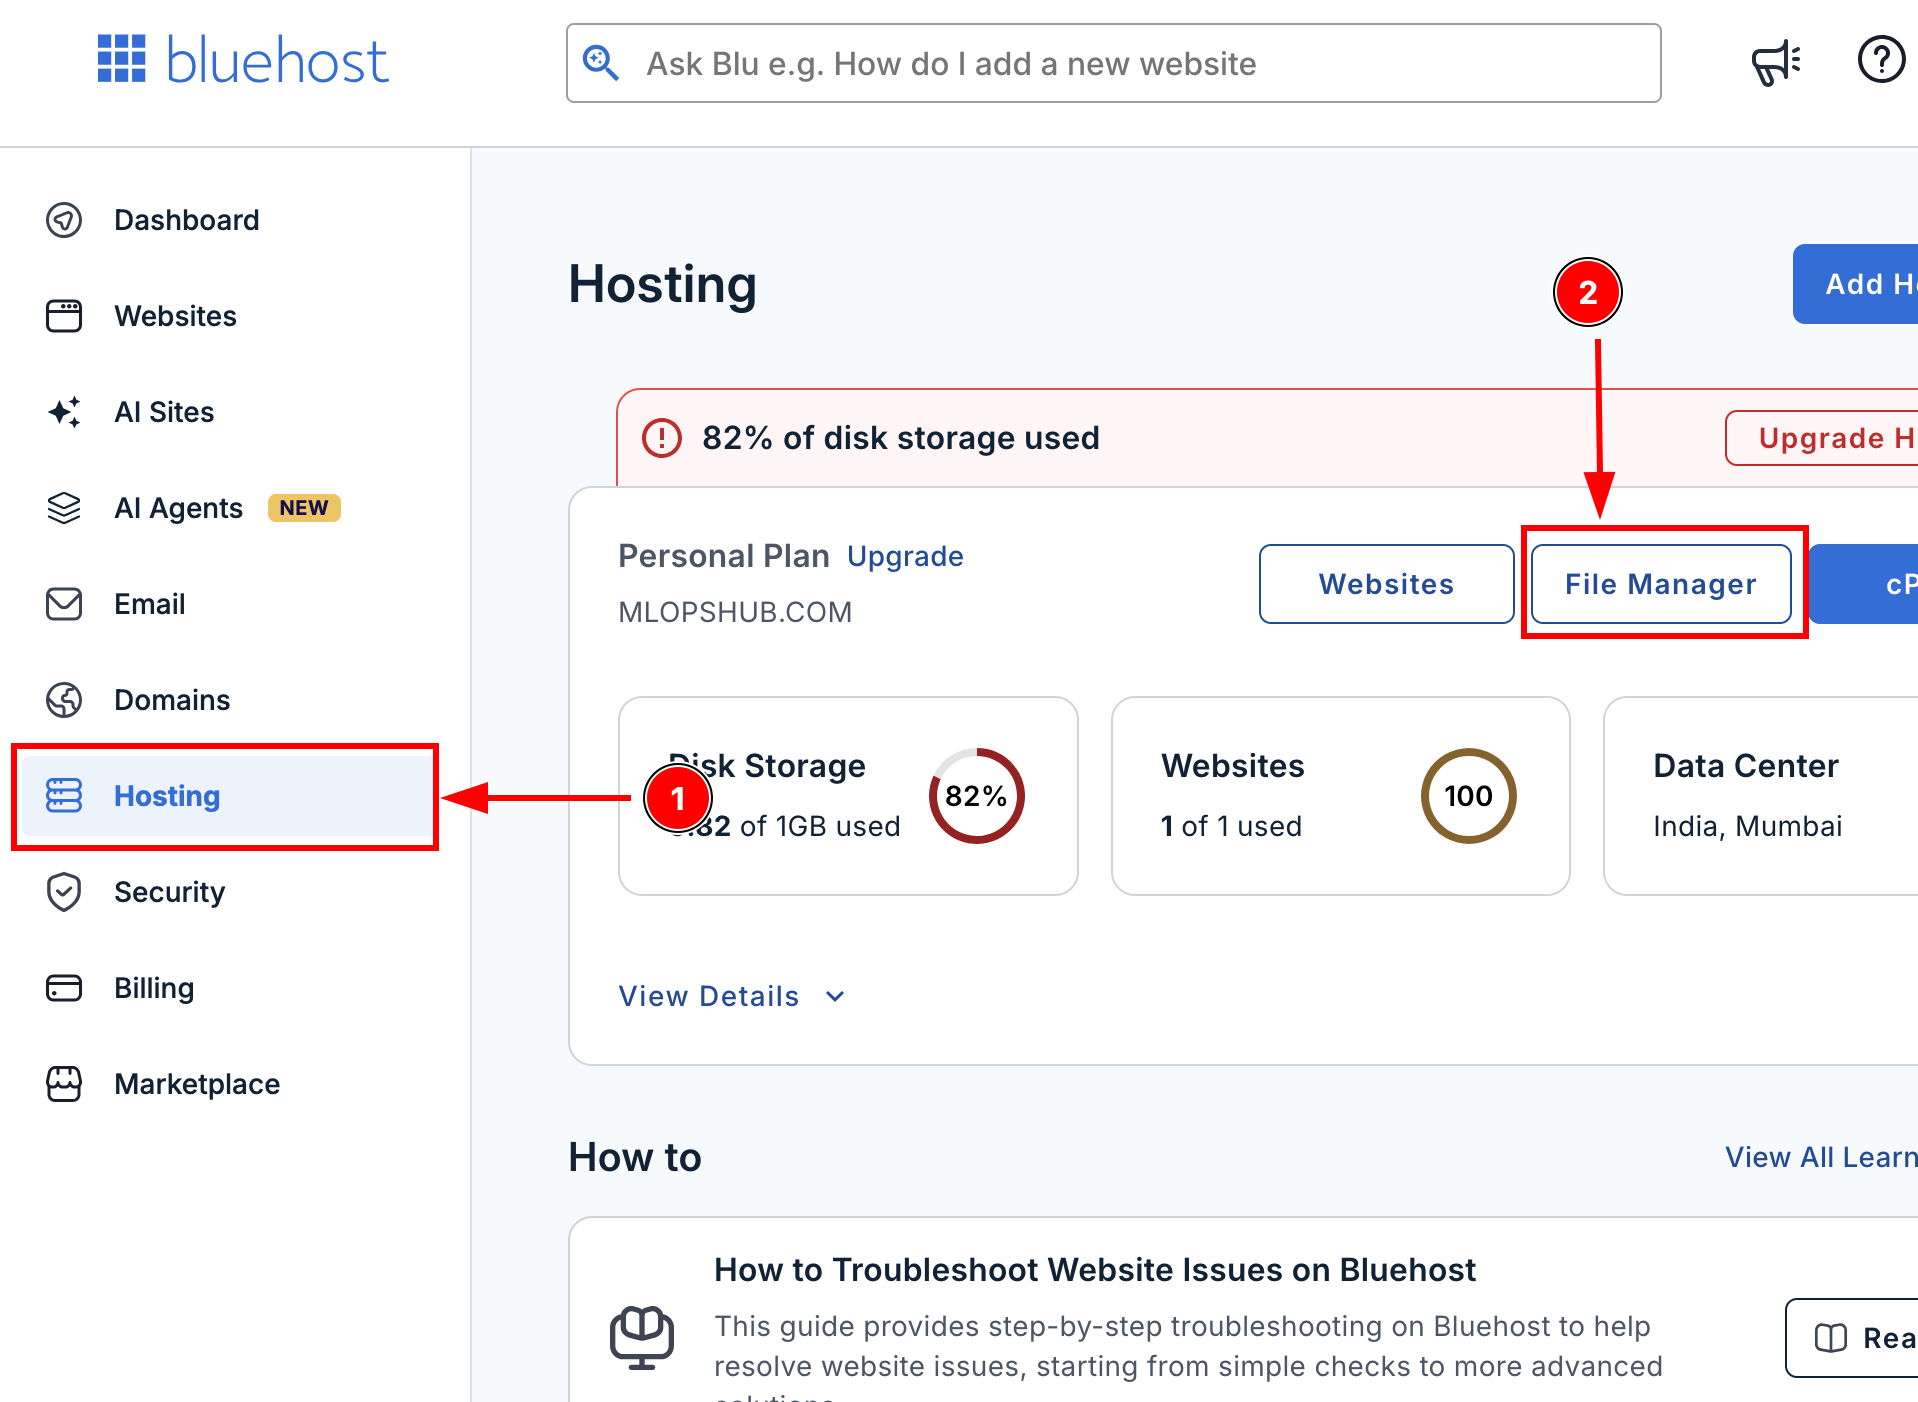
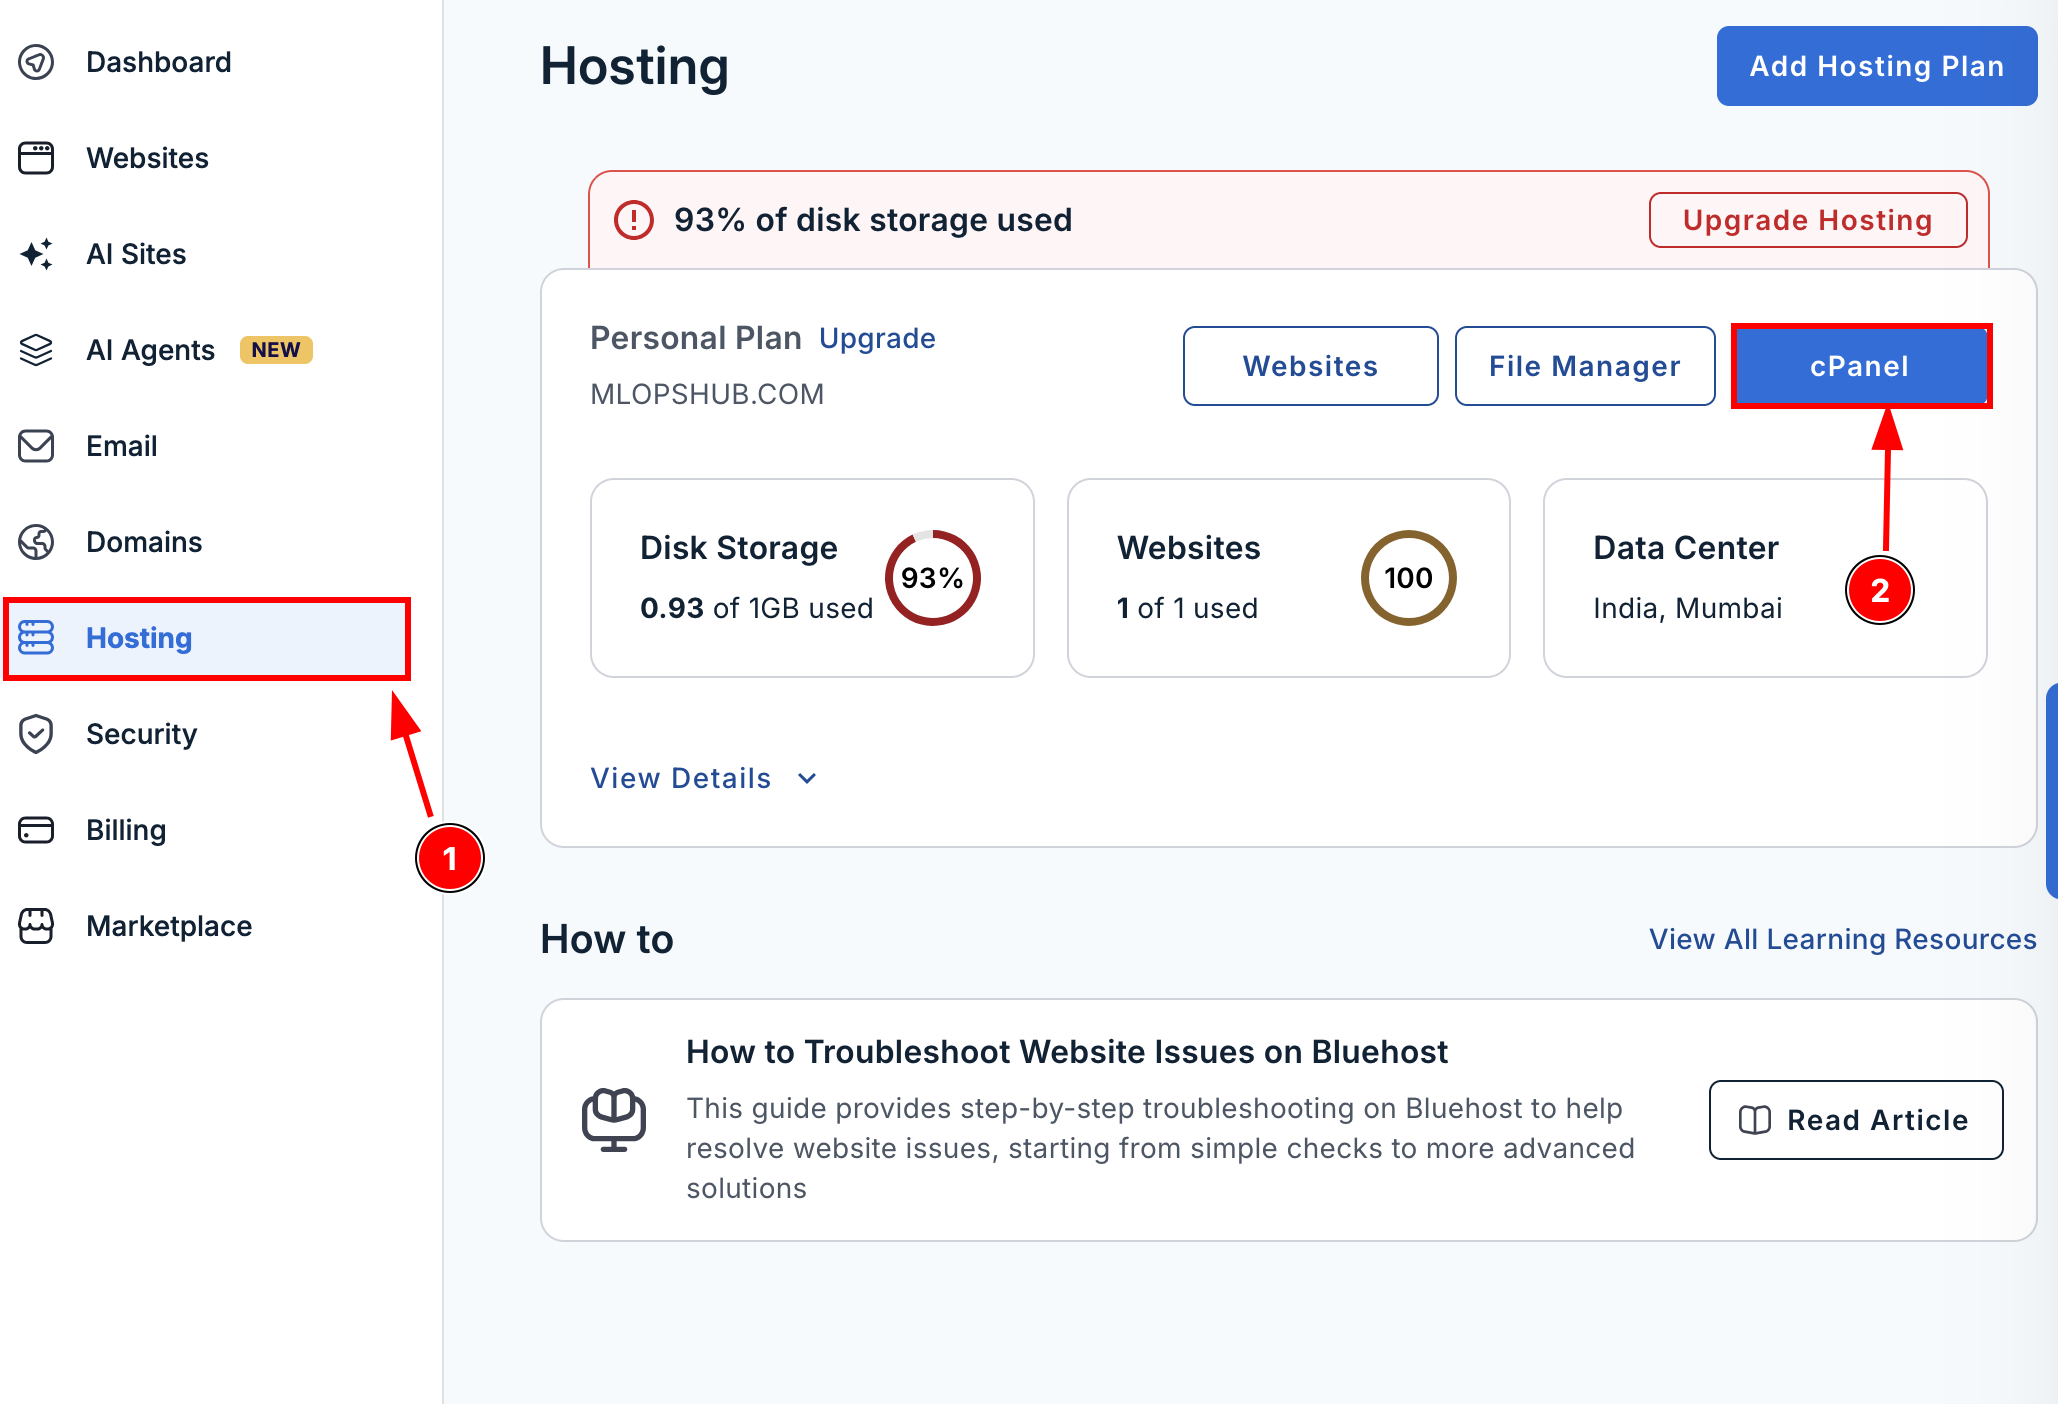
Log in to the Bluehost account. On the left side menu, you will see a Hosting option, click on it.
Step 2: Open cPanel
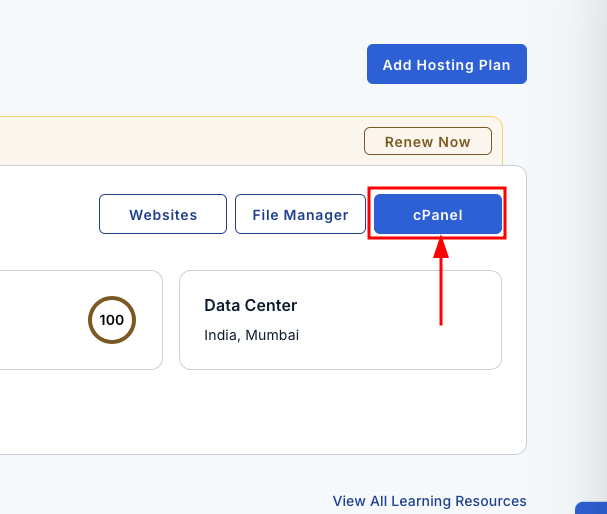
On the Hosting page, you will find the cPanel button. Click it. This will redirect you to the cPanel tools page.
Step 3: Click the backup option
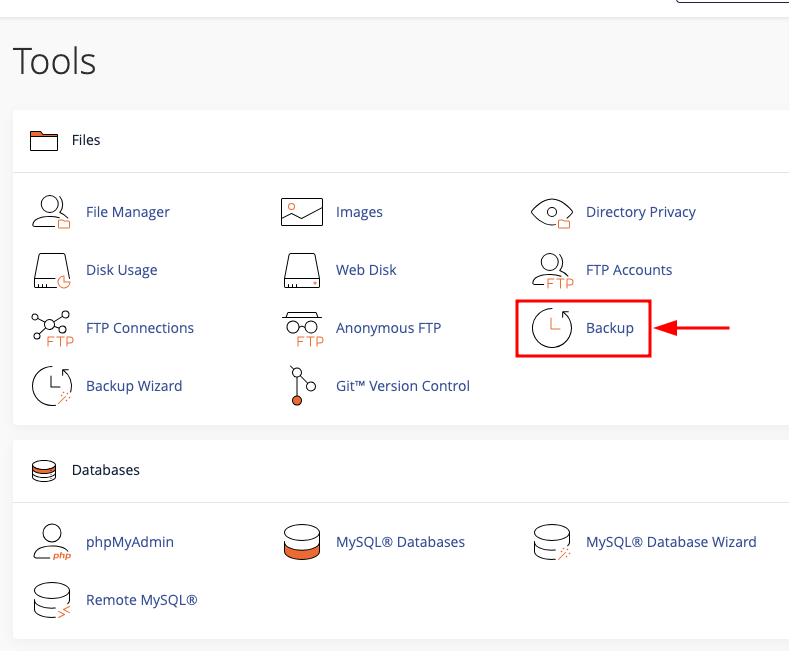
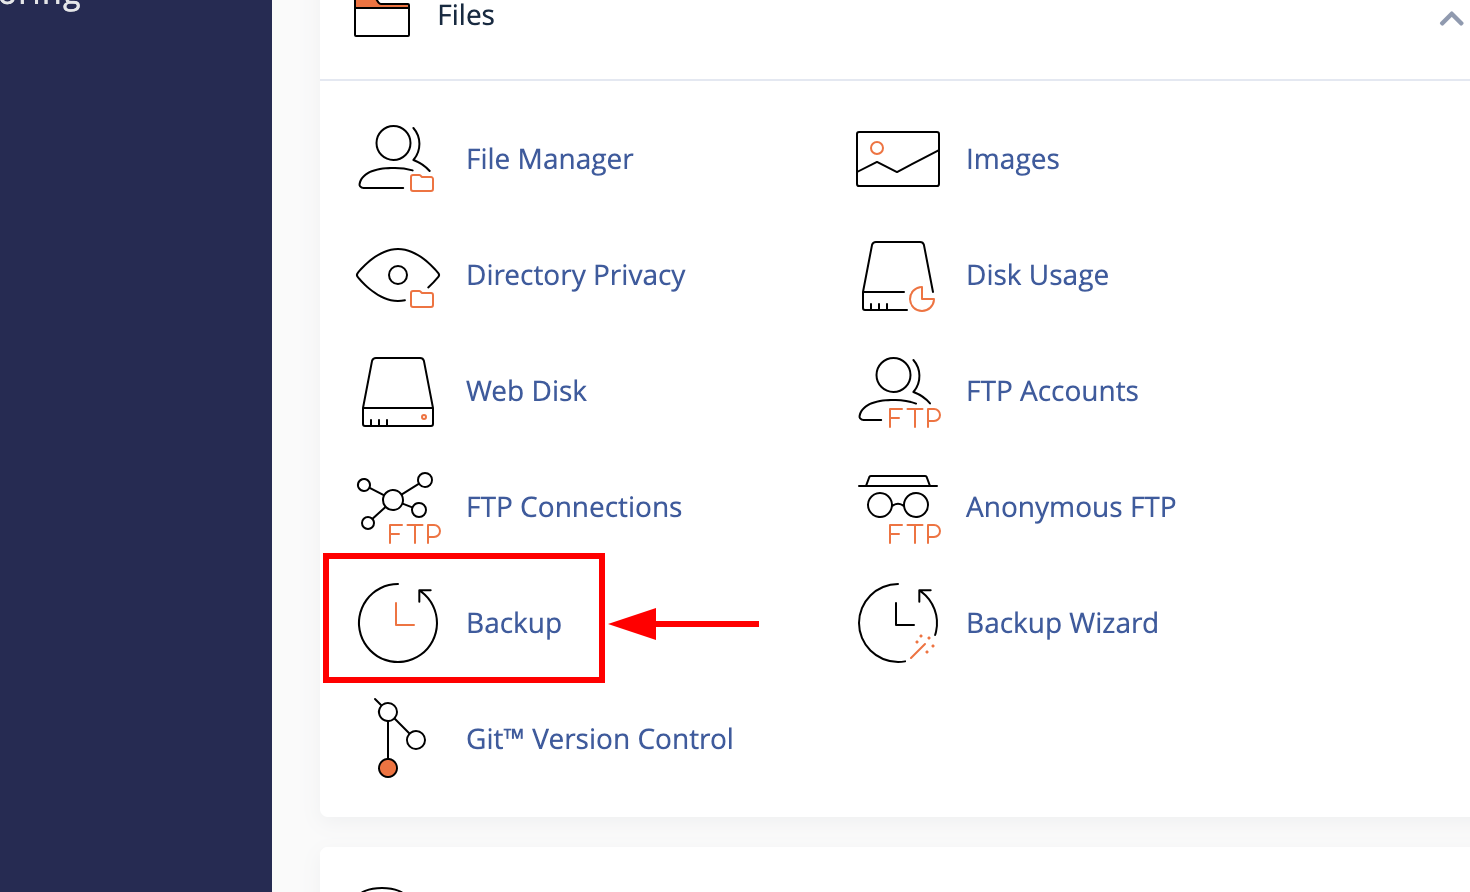
You will find many tools in the Bluehost cPanel. Locate the Backup option and click it.
You can find it under the Files section, as shown in the image below.
Step 4: Download a full account backup
Now, you will see a heading named Full Backup. Under that, you can see the Download a Full Account Backup button, click it.
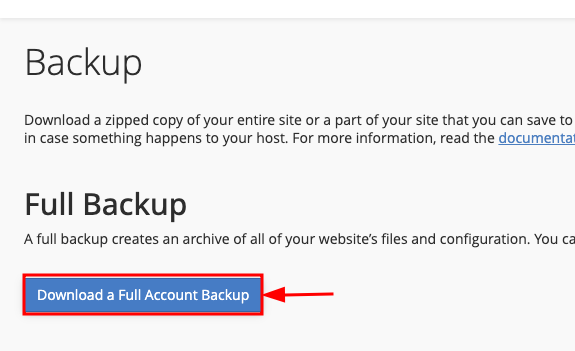
Next, select the Home Directory option, enter your email ID, and click Generate Backup.
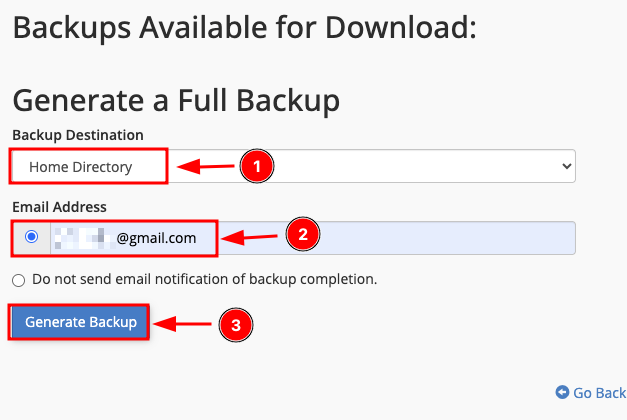
Once completed, Bluehost will create a backup that includes your website files, themes, plugins, configurations, pages, and more.
Next, lets create a manual backup of your website files.
Step 1: Go to the Bluehost dashboard, and click the websites option from the left-hand menu.
Step 2: Click the File Manager button, as shown in the image below.
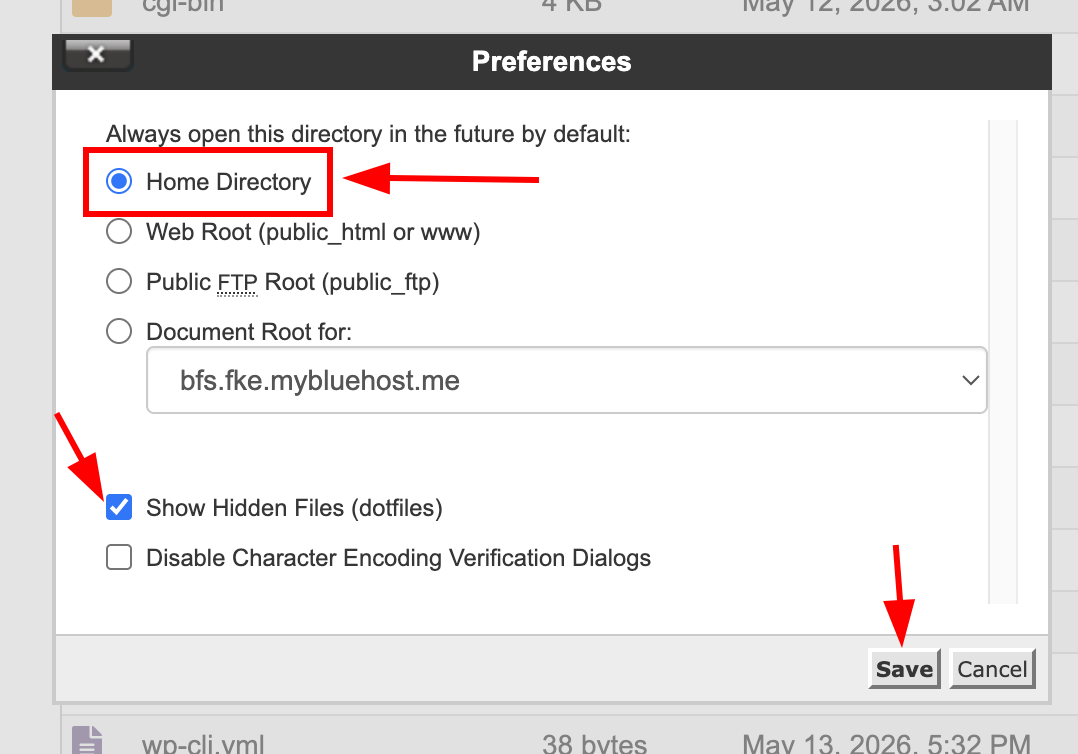
Step 3: Click Settings in the top-right corner of the page.

Also, select Home Directory, and make sure the Show Hidden Files (dotfiles) is enabled so you can view all website files.
Step 4: Select all files and folders, then click Compress.
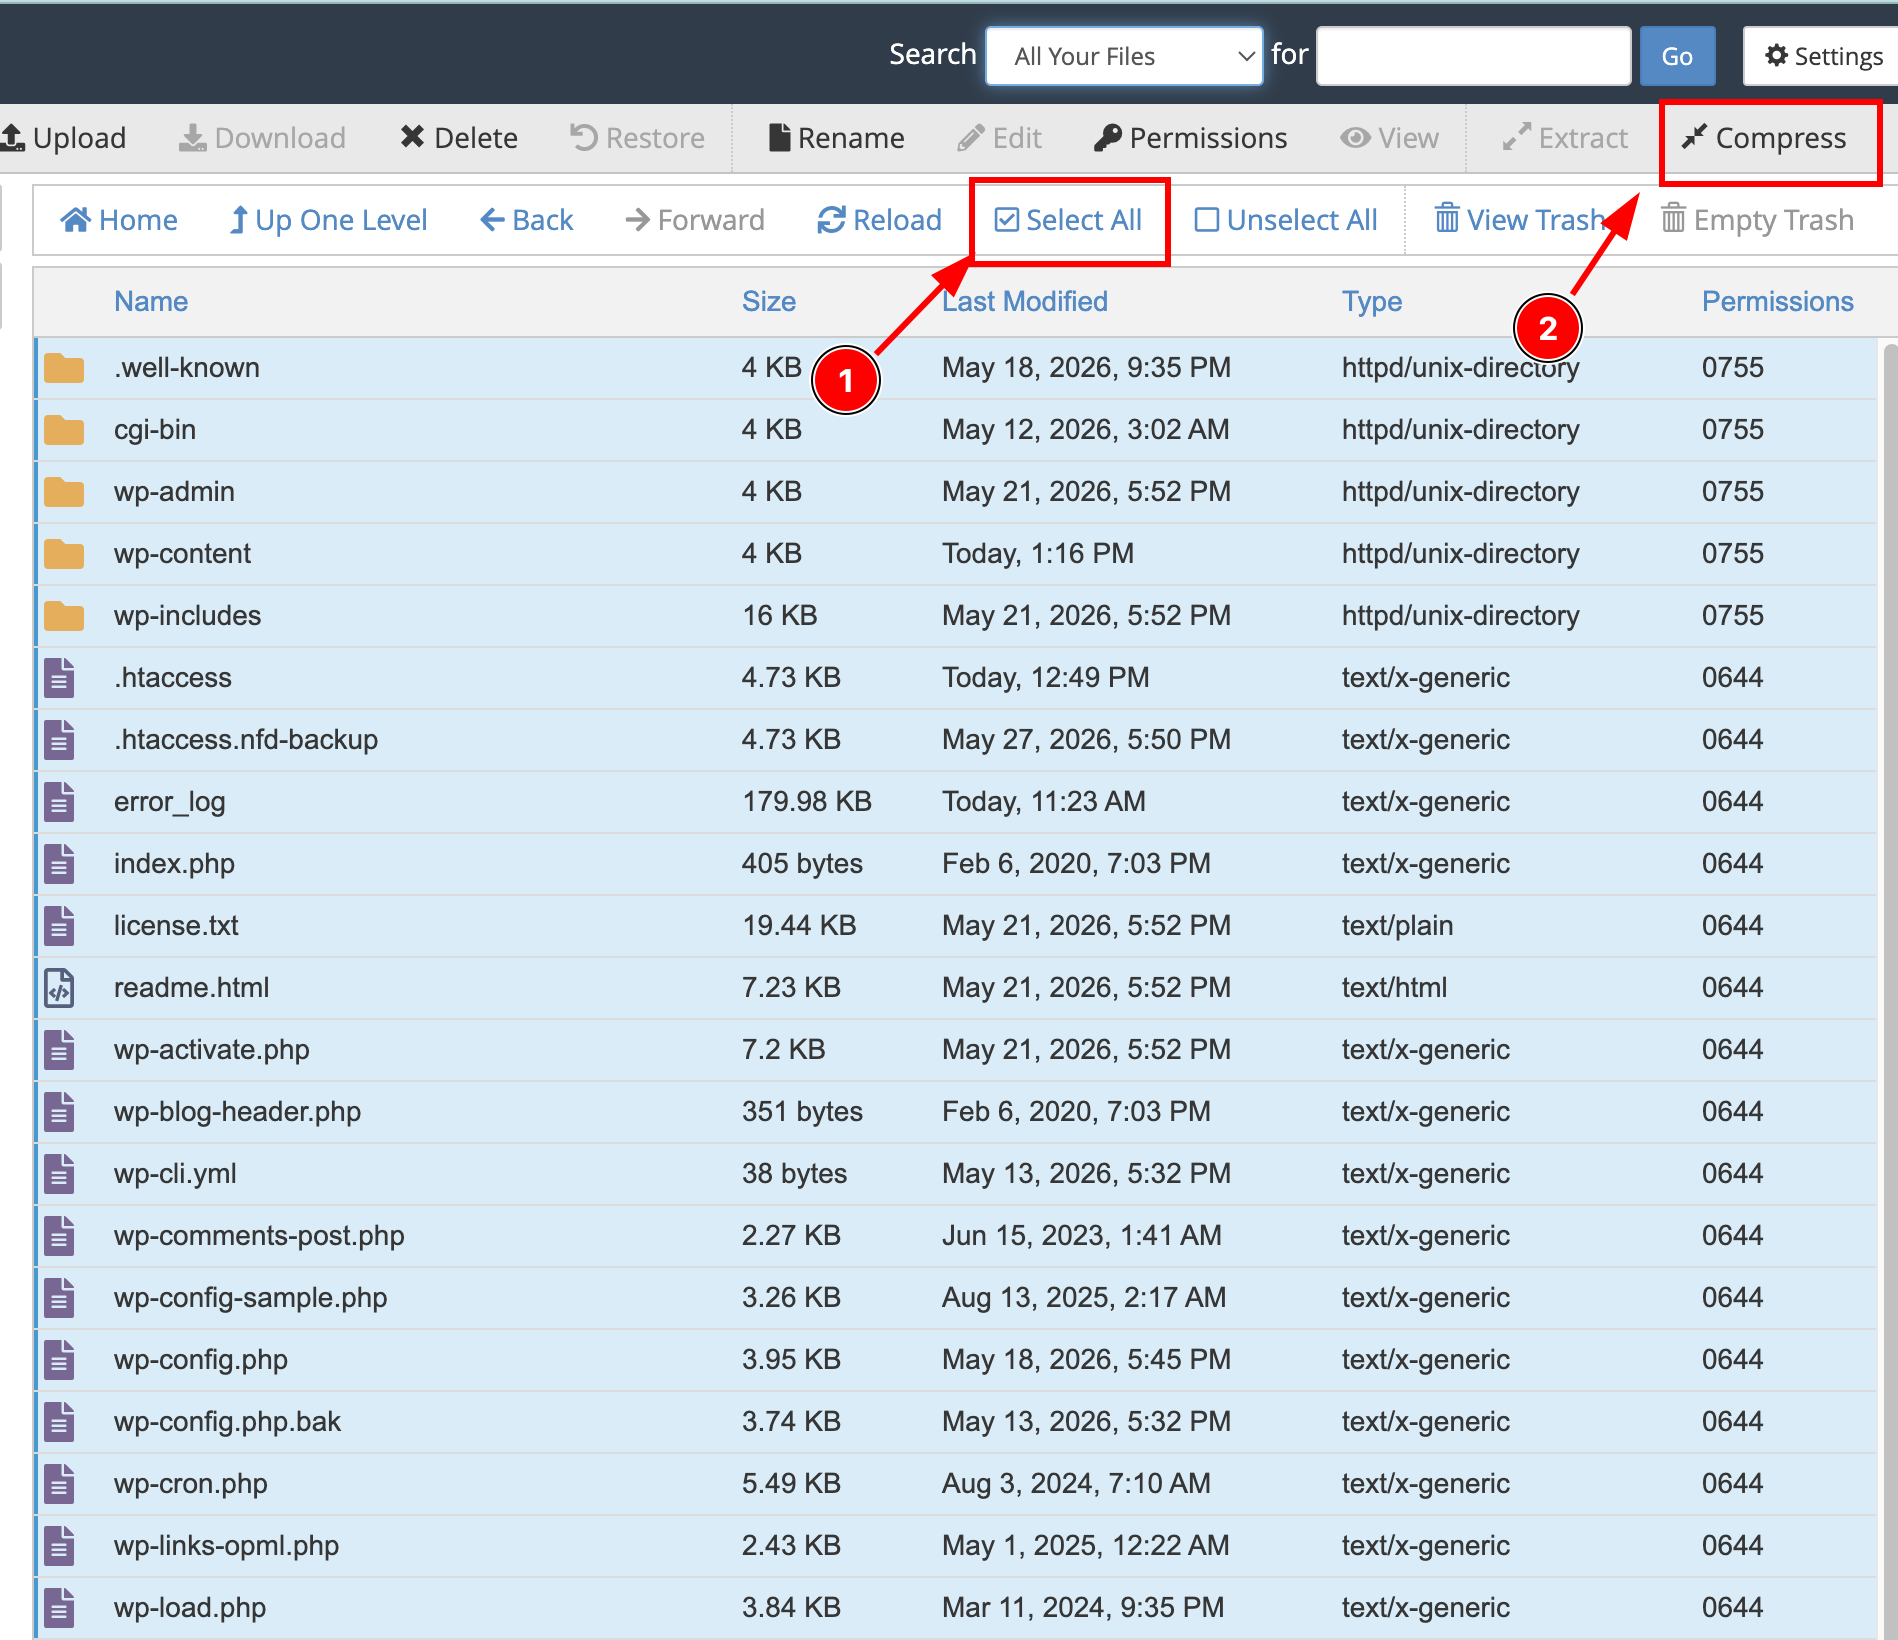
Step 5: Choose Zip Archive and click Compress Files to create the backup.
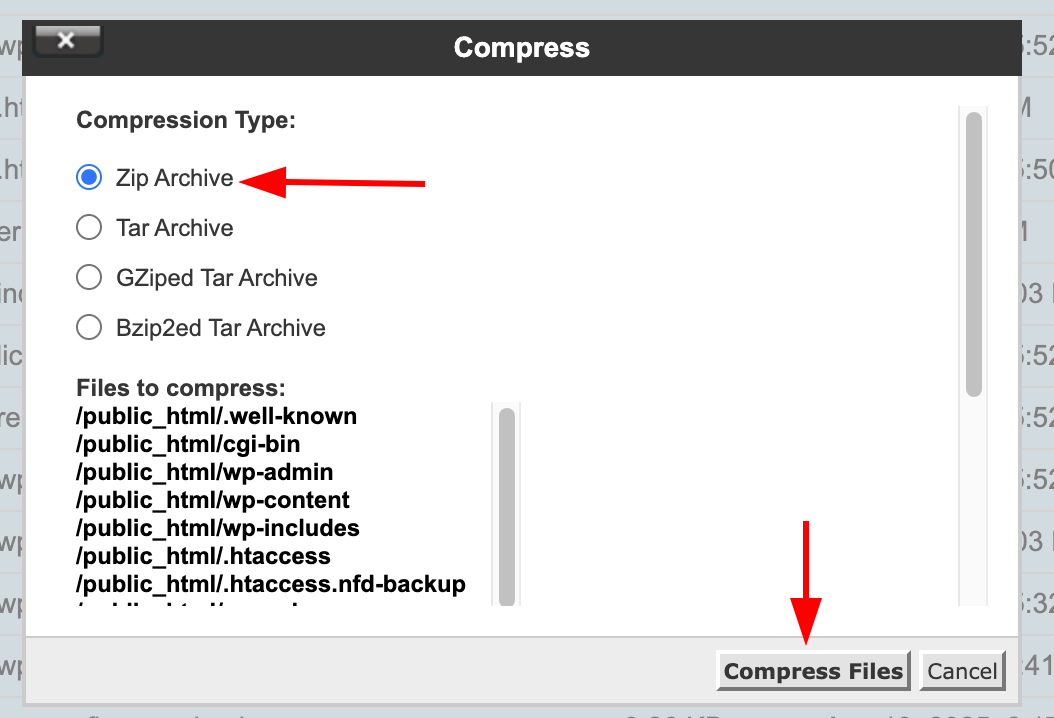
That's it. Once the compression process is complete, the backup ZIP file will be available in the location you selected.
Restoring Wordpress Website
Now, lets look at how to restore the backups you created.
Just like the backup process, there are two methods you can use to restore your website
Method 1: Restore a WordPress Site using Bluehost cPanel
Lets get started.
Step 1: Login to your Bluehost account, go to the Hosting page, and click the cPanel button.
Step 2: Click the Backup button under the Files section.
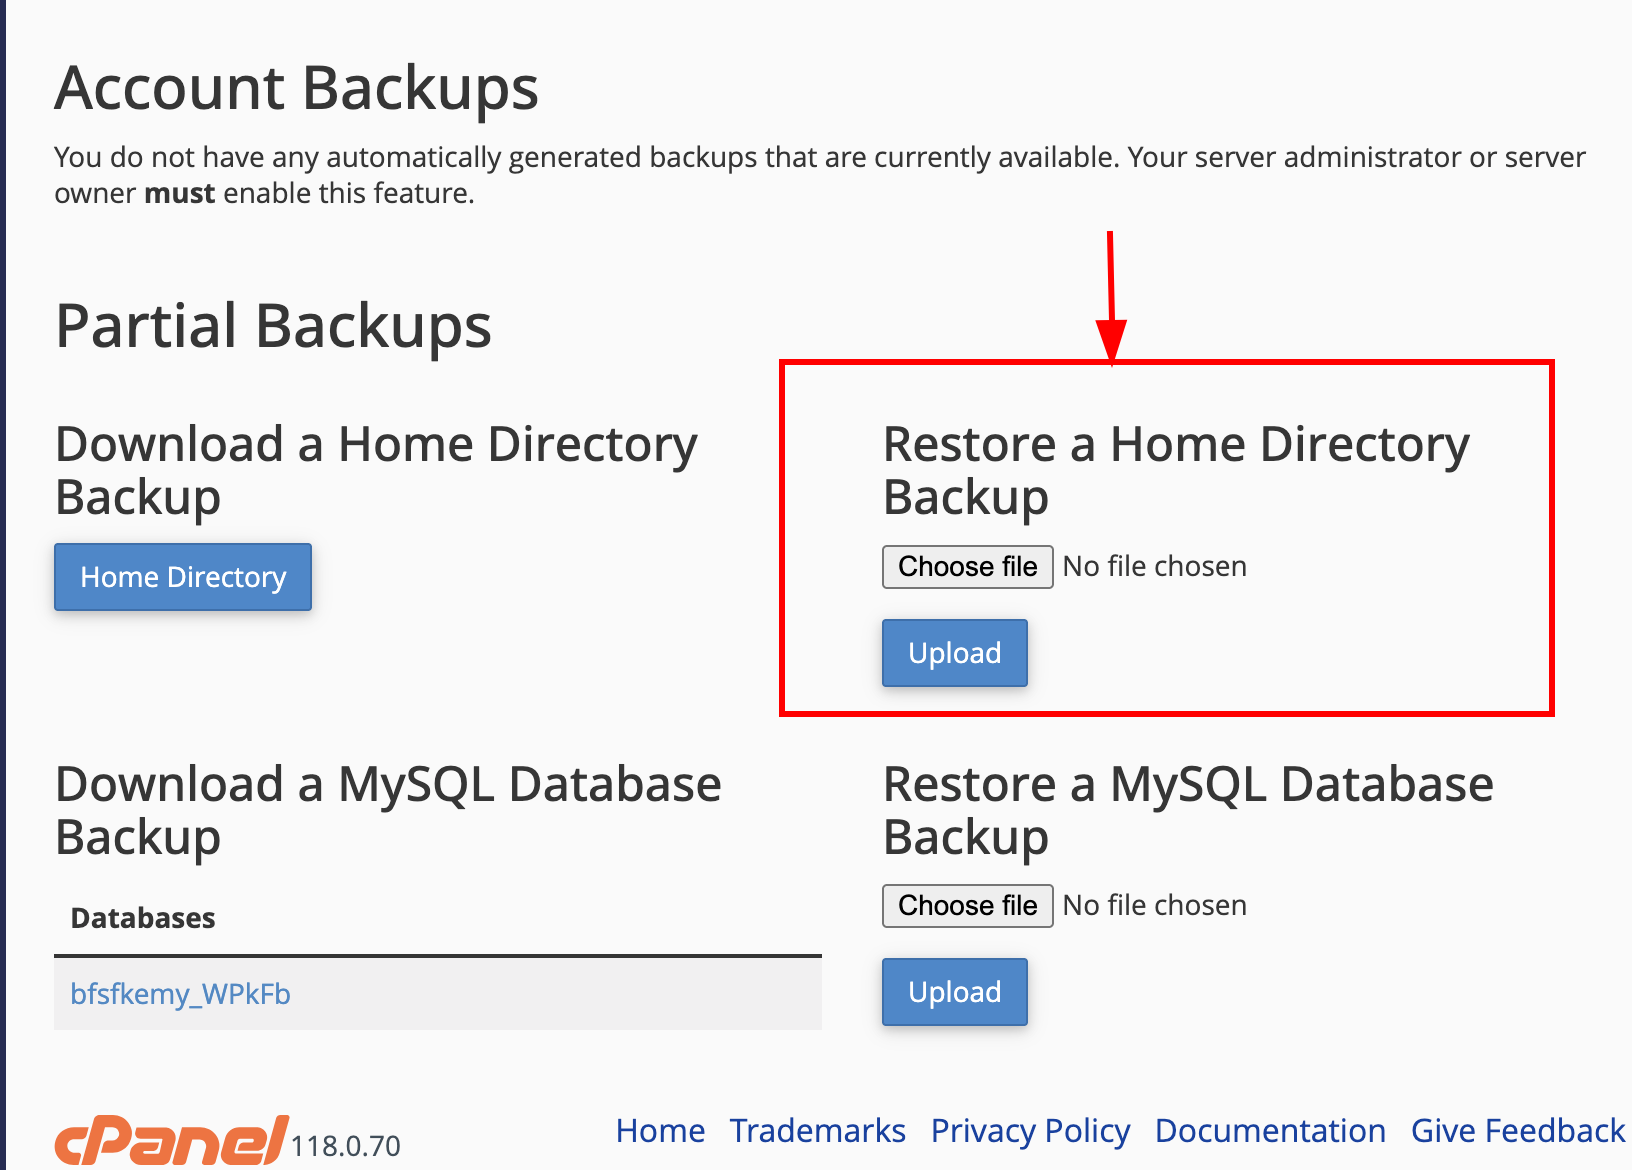
Step 3: Choose the ZIP file that you downloaded during the backup process.
Once the file is uploaded, click the Upload button to begin the restoration process.
That's it!
Now, let's look at the second method.
Method 2: Restore using Bluehost
Step 1: Go to the Bluehost Dashboard, and click the Manage button.
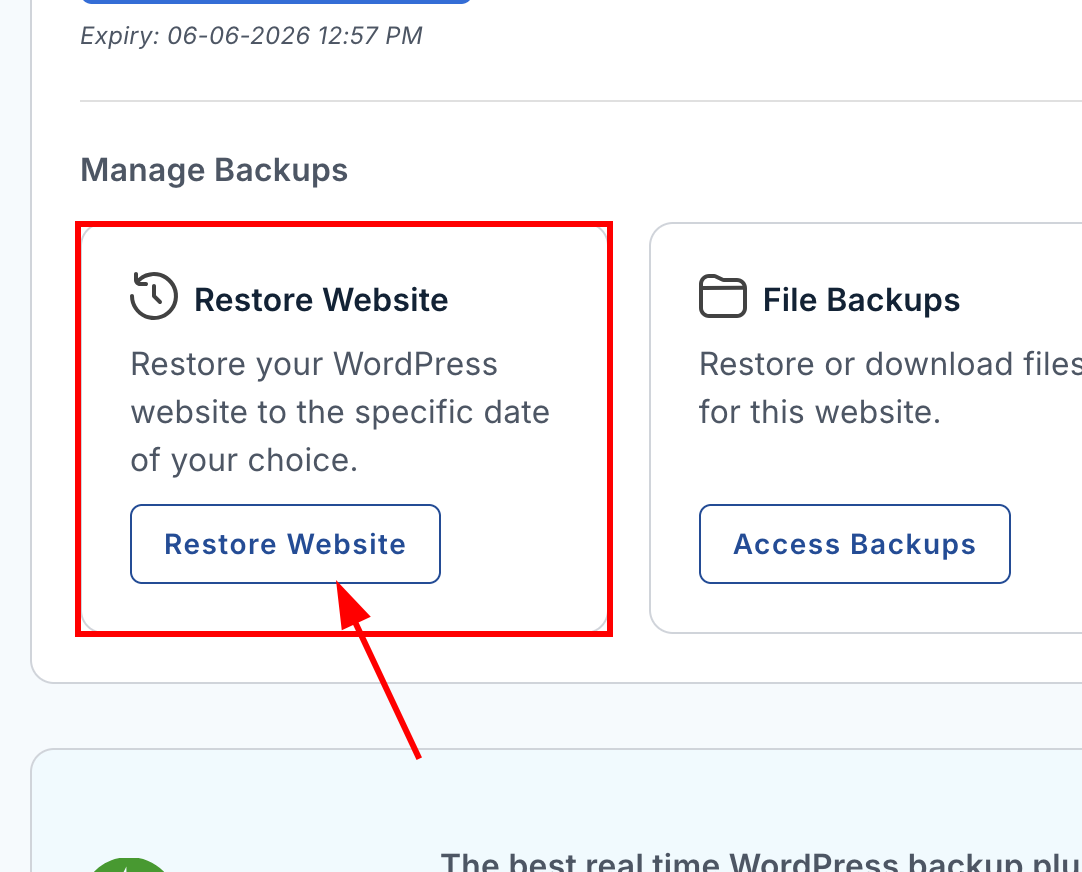
Step 2: Go to Backups on that page, and scroll down until you find the Restore option.
Step 3: Click on the Restore Website button to start uploading the backup file.
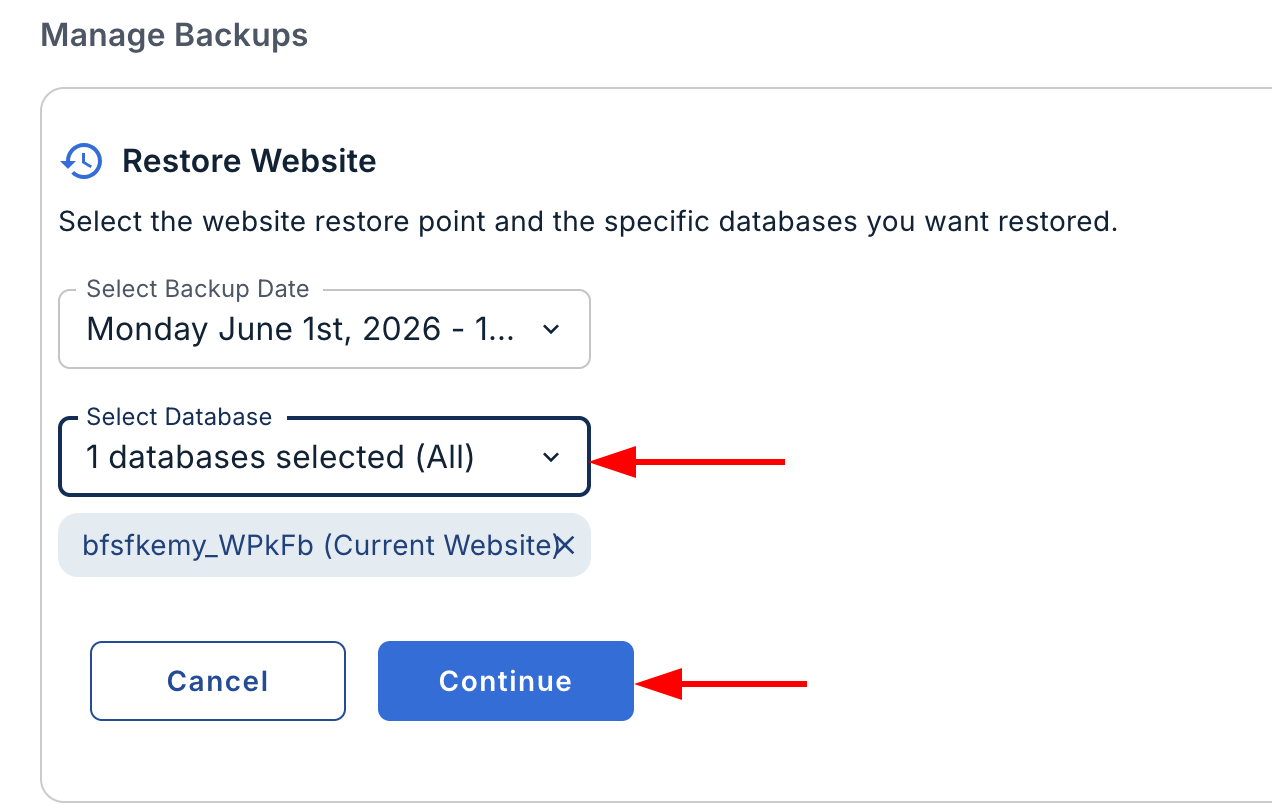
Step 4: Upload the backup file in ZIP format. Once the database has been updated, click Continue. Your website should be restored within a few minutes.
Step 5: Once the website is restored, ensure you all the website urls and images accessible are for end users. Also, keep an eye on Google search console for any website errors after restoration.
FAQs
Here are the frequently asked questions regarding backup.
1. Can I schedule automatic backups for my WordPress site on Bluehost?
Yes, you can schedule automatic backups for your WordPress site on Bluehost. Bluehost is offering a free weekly automatic backup.
2. Are there any Bluehost backup plugins recommended for WordPress users?
CodeGuard, Jetpack, UpdraftPlus, BackWPup, and Duplicator plugins are Bluehost backup plugins recommended for WordPress users.
Conclusion
In this guide, you learned two simple methods to back up a WordPress site on Bluehost hosting and two methods to restore it.
A Wordpress website can get corrupted for many reasons. It could be a bad plugin or a malware. So timely backups can help you restore the website without loosing the content.
If you have any questions about this guide or the backup methods, feel free to leave them in the comments below.
We will be happy to help!