

In this blog, you will learn how to set up a self-hosted linux based runner for Azure DevOps pipeline.
By the end of this blog, you will learn
- What is a self-hosted runner?
- How to set up a self-hosted Linux runner in Azure DevOps?
- How to test self hosted runner in Azure DevOps?
- Best practices for self-hosted runners.
Before we begin the setup, lets understand what is a self-hosted runner in Azure.
What is a Self-Hosted Runner ?
Self-hosted runners are servers or containers that we manage to run our Azure DevOps pipeline tasks.
Self-hosted means we control the environment where the pipeline runners execute. This setup is typically used for production-level projects, where we need more control over security, performance, and dependencies.
The following can be a self-hosted runner.
- Virtual machine
- Physical server
- Container
- Kubernetes
Organizations generally use self-hosted runners because they can control performance, cost, security, networking, compliance, and other aspects.
By having control over the runners, you can install all required security tools, logging agents, build tools, and packages that are needed to meet the organization’s compliance requirements.
Setup Prerequisites
The following are the requirements to setup a self hosted runner.
- Azure DevOps account with required permissions
- Azure DevOps project with a pipeline.
- A virtual machine (e.g., AWS EC2, Azure VM, etc)
Setting Up an Azure DevOps Self-Hosted Runner
Here, we are going to use a virtual machine as a runner.
Assuming you already have an Azure VM ready.
Now, we can start with the Personal Token creation.
Step 1: Generate a Personal Access Token (PAT)
The runner needs a Personal Access Token (PAT) to authenticate with Azure DevOps.
To create a PAT, open Azure DevOps --> login to the Azure DevOps organization --> Select Project.
On the project console, click the user icon on the right side corner and select the "User settings"
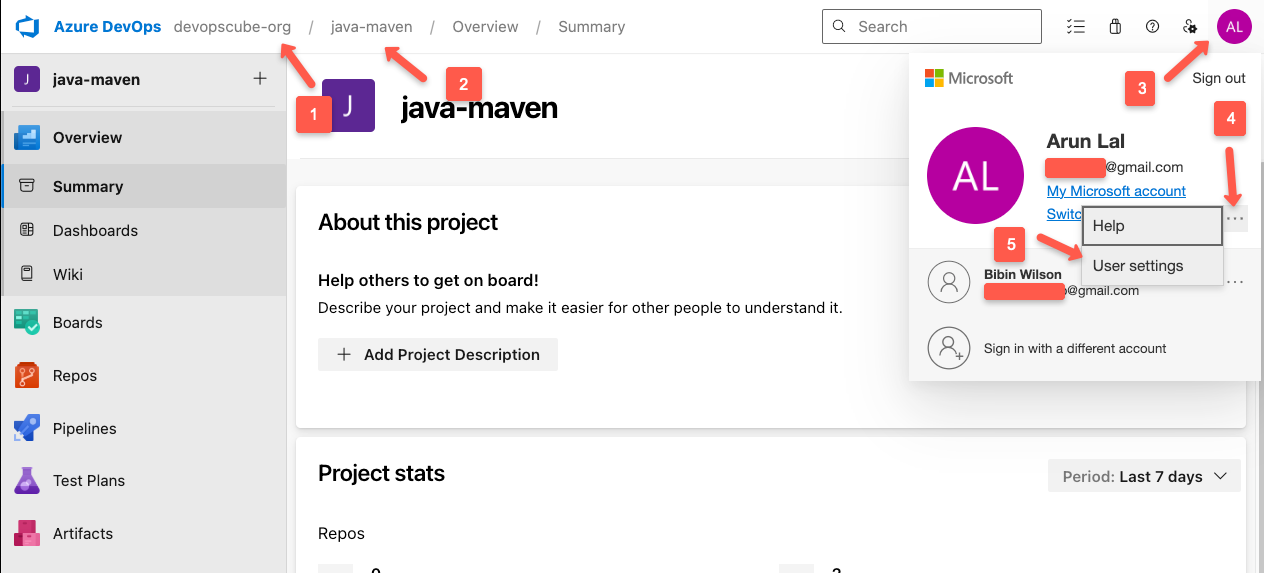
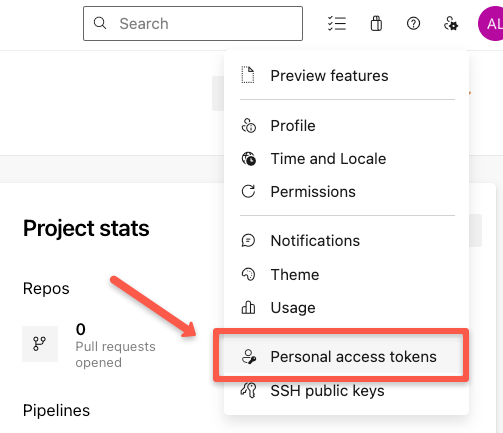
Select the "Personal access tokens" option to create a new one.
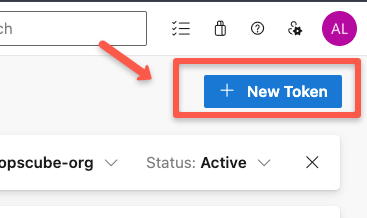
Click the "+ New Token" button.
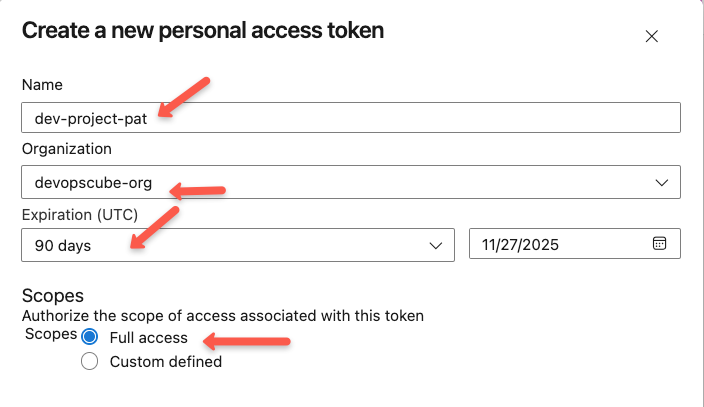
On the creation section, you need to provide a name for the PAT, select the organization, expiration date, and the permission level.
Once the creation is completed, you will see a success message and have a warning to save the generated PAT.
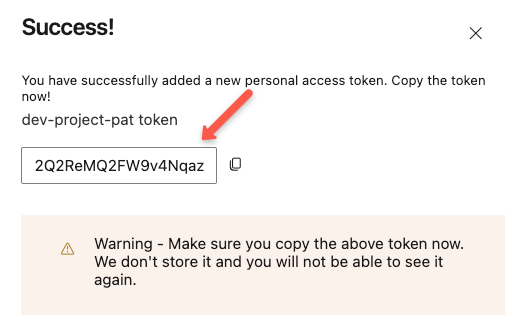
By default, the PAT will not be stored anywhere, so before closing the window, store the PAT.
In the next section, we will configure the runner.
Step 2: Create an Agent Pool on the Azure DevOps Project.
To configure the project-level runner, go to project settings and select the "Agent pools" then click the "Add pool" button.

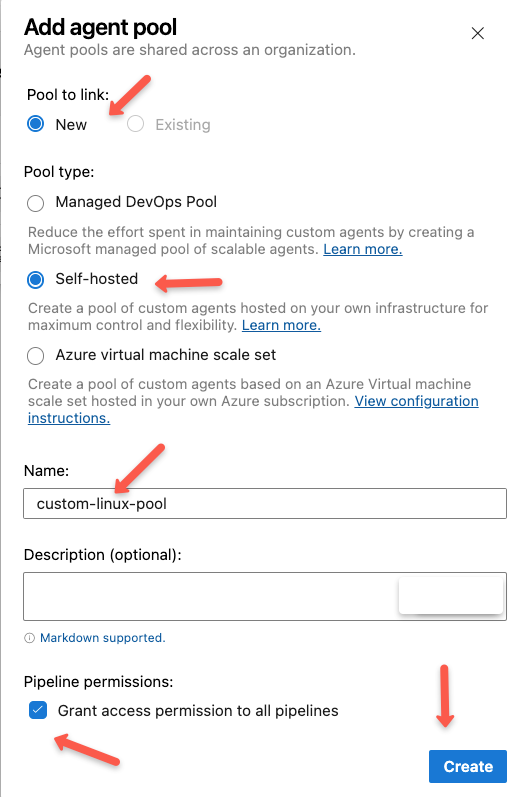
On the agent pool form, select the pool link as "New" and select the pool type as "Self-hosted", give a name, and select the permission, then click the "Create" button to create the new pool.
Select the created pool to add the agents.
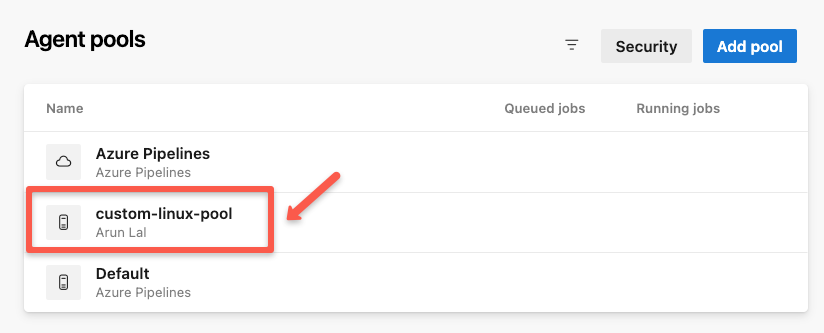
These runners can be used for all projects across the organization.
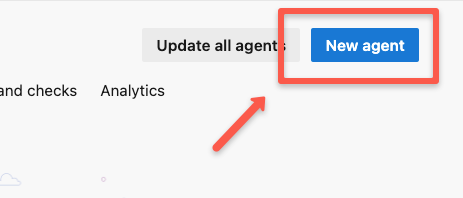
Step 3: Create Agent in Azure DevOps Project
Once open the pool, click the "New agent" to start the configuration.
The next page will give you the instructions and commands to run on the server to turn it into a runner.
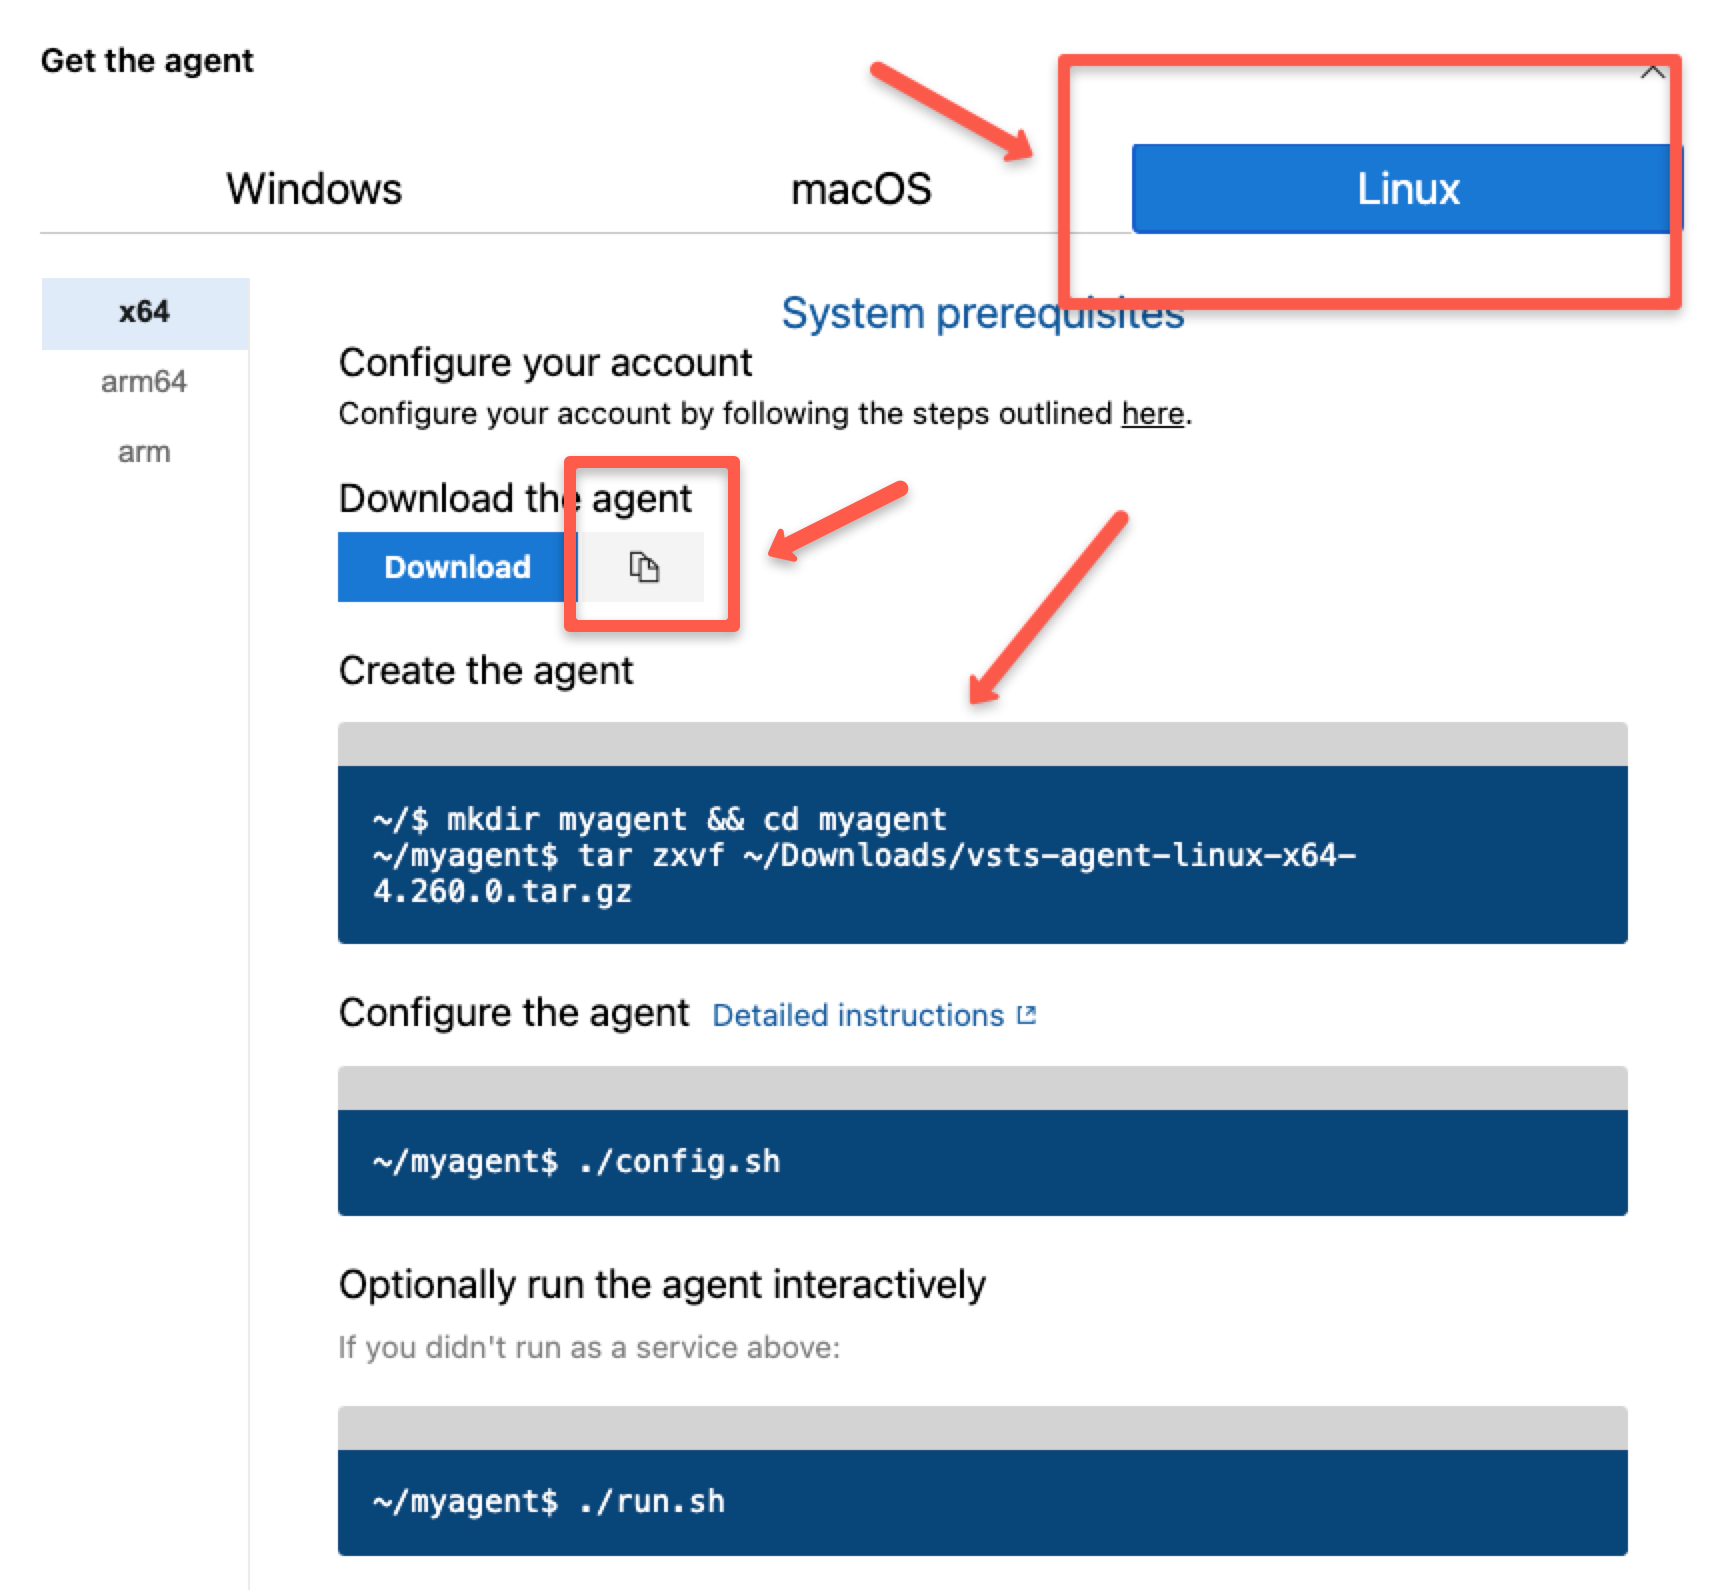
Here, I have selected the Linux OS because, we are going to use the Ubuntu server.
Before we execute the commands on the virtual machine, we need the following prerequisites.
- Server URL - E.g.,
https://dev.azure.com/<ORGANIZATION NAME> - PAT
- Agent Pool name
Now, SSH to the virtual Machine.
Create a directory
mkdir myagent && cd myagentDownload the runner setup package
wget https://download.agent.dev.azure.com/agent/4.261.0/vsts-agent-linux-x64-4.261.0.tar.gzExtract the package
tar zxvf vsts-agent-linux-x64-4.261.0.tar.gzConfigure the agent
./config.shOnce you reach the ./config step, it will prompt you to provide the following.
- License agreement - Type
y - Server URL -
https://dev.azure.com/<ORG NAME> - Authentication type - Press
Enterfor PAT and paste the PAT - Agent pool name
- Name for the Agent
azureuser@azure-runner-vm:~/myagent$ ./config.sh

  ___                      ______ _            _ _
 / _ \                     | ___ (_)          | (_)
/ /_\ \_____   _ _ __ ___  | |_/ /_ _ __   ___| |_ _ __   ___  ___
|  _  |_  / | | | '__/ _ \ |  __/| | '_ \ / _ \ | | '_ \ / _ \/ __|
| | | |/ /| |_| | | |  __/ | |   | | |_) |  __/ | | | | |  __/\__ \
\_| |_/___|\__,_|_|  \___| \_|   |_| .__/ \___|_|_|_| |_|\___||___/
                                   | |
        agent v4.261.0             |_|          (commit 45f3f01)


>> End User License Agreements:

Building sources from a TFVC repository requires accepting the Team Explorer Everywhere End User License Agreement. This step is not required for building sources from Git repositories.

A copy of the Team Explorer Everywhere license agreement can be found at:
  /home/azureuser/myagent/license.html

Enter (Y/N) Accept the Team Explorer Everywhere license agreement now? (press enter for N) > y

>> Connect:

Enter server URL > https://dev.azure.com/devopscube-org
Enter authentication type (press enter for PAT) >
Enter personal access token > ************************************************************************************
Connecting to server ...

>> Register Agent:

Enter agent pool (press enter for default) > custom-linux-pool
Enter agent name (press enter for azure-runner-vm) > linux-agent
Enter replace? (Y/N) (press enter for N) > n
Scanning for tool capabilities.
Connecting to the server.
Successfully added the agent
Testing agent connection.
Enter work folder (press enter for _work) >
2025-10-22 09:51:04Z: Settings Saved.
The configurations are ready now, so we need to make them run the agent.
./run.shYou will see the following output.
$ ./run.sh

Scanning for tool capabilities.
Connecting to the server.
2025-10-22 09:58:14Z: Listening for Jobs
This output ensures that the agent is configured and running. We can confirm this from the dashboard.
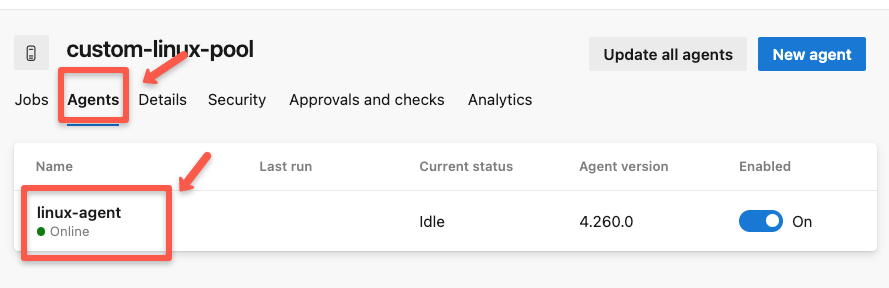
The console output also shows that the runner is active. So we can test now.
Testing the Self-Hosted Azure DevOps Runner
To test the self-hosted runner, we need to call it from a pipeline.
We create a fresh test pipeline. For that, navigate to Pipelines --> New pipeline --> Azure Repos Git --> [Select Repository] --> Starter pipeline.
Now, you can see a YAML file with some default configurations. Replace the entire contents with the following.
trigger:
- main

pool:
  name: 'custom-linux-pool'
  demands:
  - Agent.Name -equals linux-agent

steps:
- script: whoami
  displayName: 'Check current user'
Here,
custom-linux-poolis the custom pool name.linux-agentis the agent name inside the pool.
Then click "Save and run" and the pipeline will automatically start running.
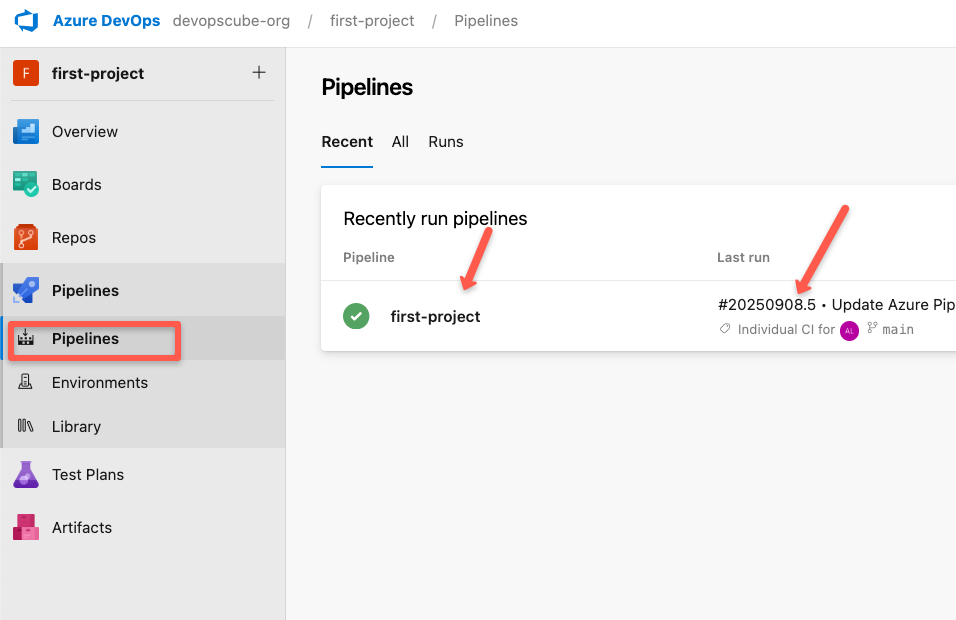
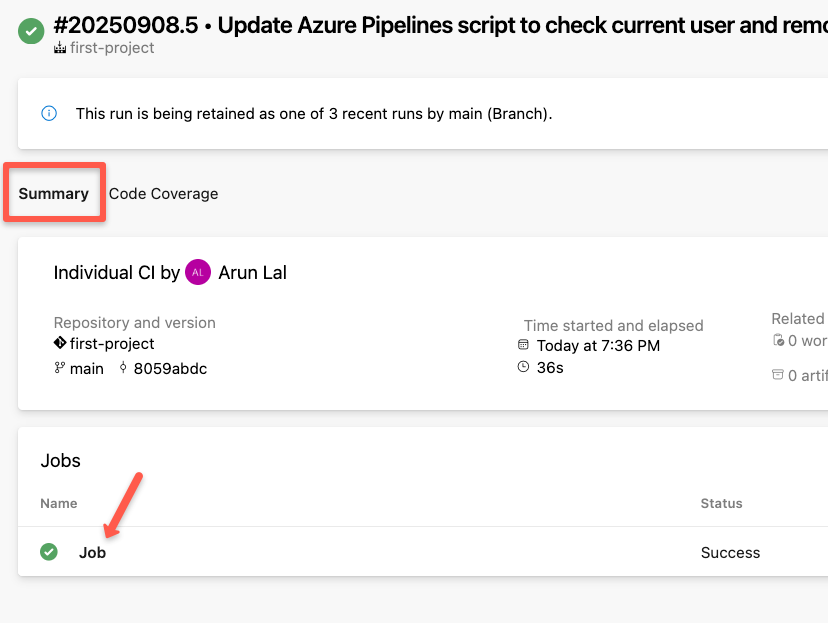
Once you select the specific run, we can see the summary.
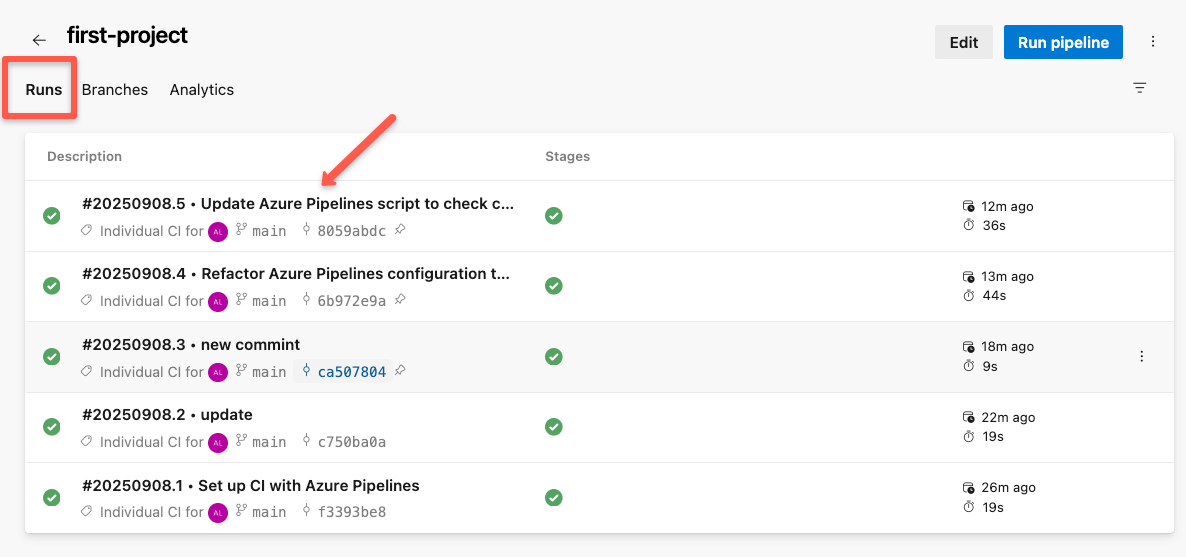
Once you select the specific job, we can see the logs.
Select the particular step to see the execution of the task.
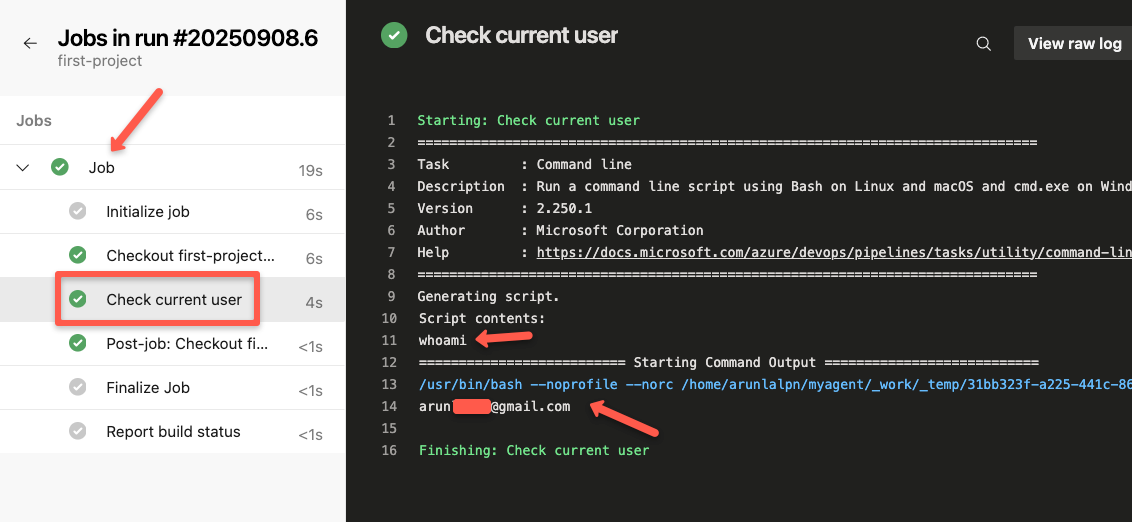
The output clearly shows that the jobs are run inside the self-hosted runner.
Now, you can install the required tools inside the VM so that you can use it for your real pipeline.
In the next section, we can see some of the best practices of the self-hosted runner.
Best Practices
Here are some of the best practices that you can follow
- Instead of using a single runner for each project, use dedicated runners to improve security.
- Set proper expiry and rotation for the PAT and give only necessary permissions to avoid any security threats.
- Create golden images using Packer so that when a new project requires a runner, we can easily spin up with all necessary tools.
- For production setup, using private instances as runners can increase security.
- Choosing the right size instance is very important to avoid any performance issues.
- Choosing the spot VMs can reduce the cost.
Conclusion
In this guide, I showed you how to setup a virtual machine as a runner for the CI/CD pipelines in Azure.
Self-host runners will give more flexibility than the built-in VMs, though choosing the right instances and following all the best practices only gives security and speed.
If you face any errors during the setup, let me know in the comments.
