


I migrated DevOpsCube from WordPress to Ghost Pro. In this guide, I have documented all the key steps in my migration from WordPress to Ghost.
I will show you exactly how to migrate your WordPress website to Ghost without losing any SEO traffic. I have covered the key migration steps you should take to avoid losing any website traffic.
Let's get started.
Before You Start: Scope of This Guide
This guide covers Ghost(Pro), the managed hosting from the Ghost team. It is what I have used for migration, as I do not want the administrative overhead of managing the platform.
If you are self-hosting Ghost, everything in this guide applies except the following two things
- You need to handle DNS, SSL, and the reverse proxy yourself
- The image fetch behavior during migration depends on your storage adapter
Sign up for a Ghost Pro Plan
The first thing you need to do is get a valid Ghost subscription.
Go to the Ghost pricing page and choose a subscription that fits your requirements.
In my case, I chose the publisher plan because I wanted features like custom themes, paid subscription options, and analytics.
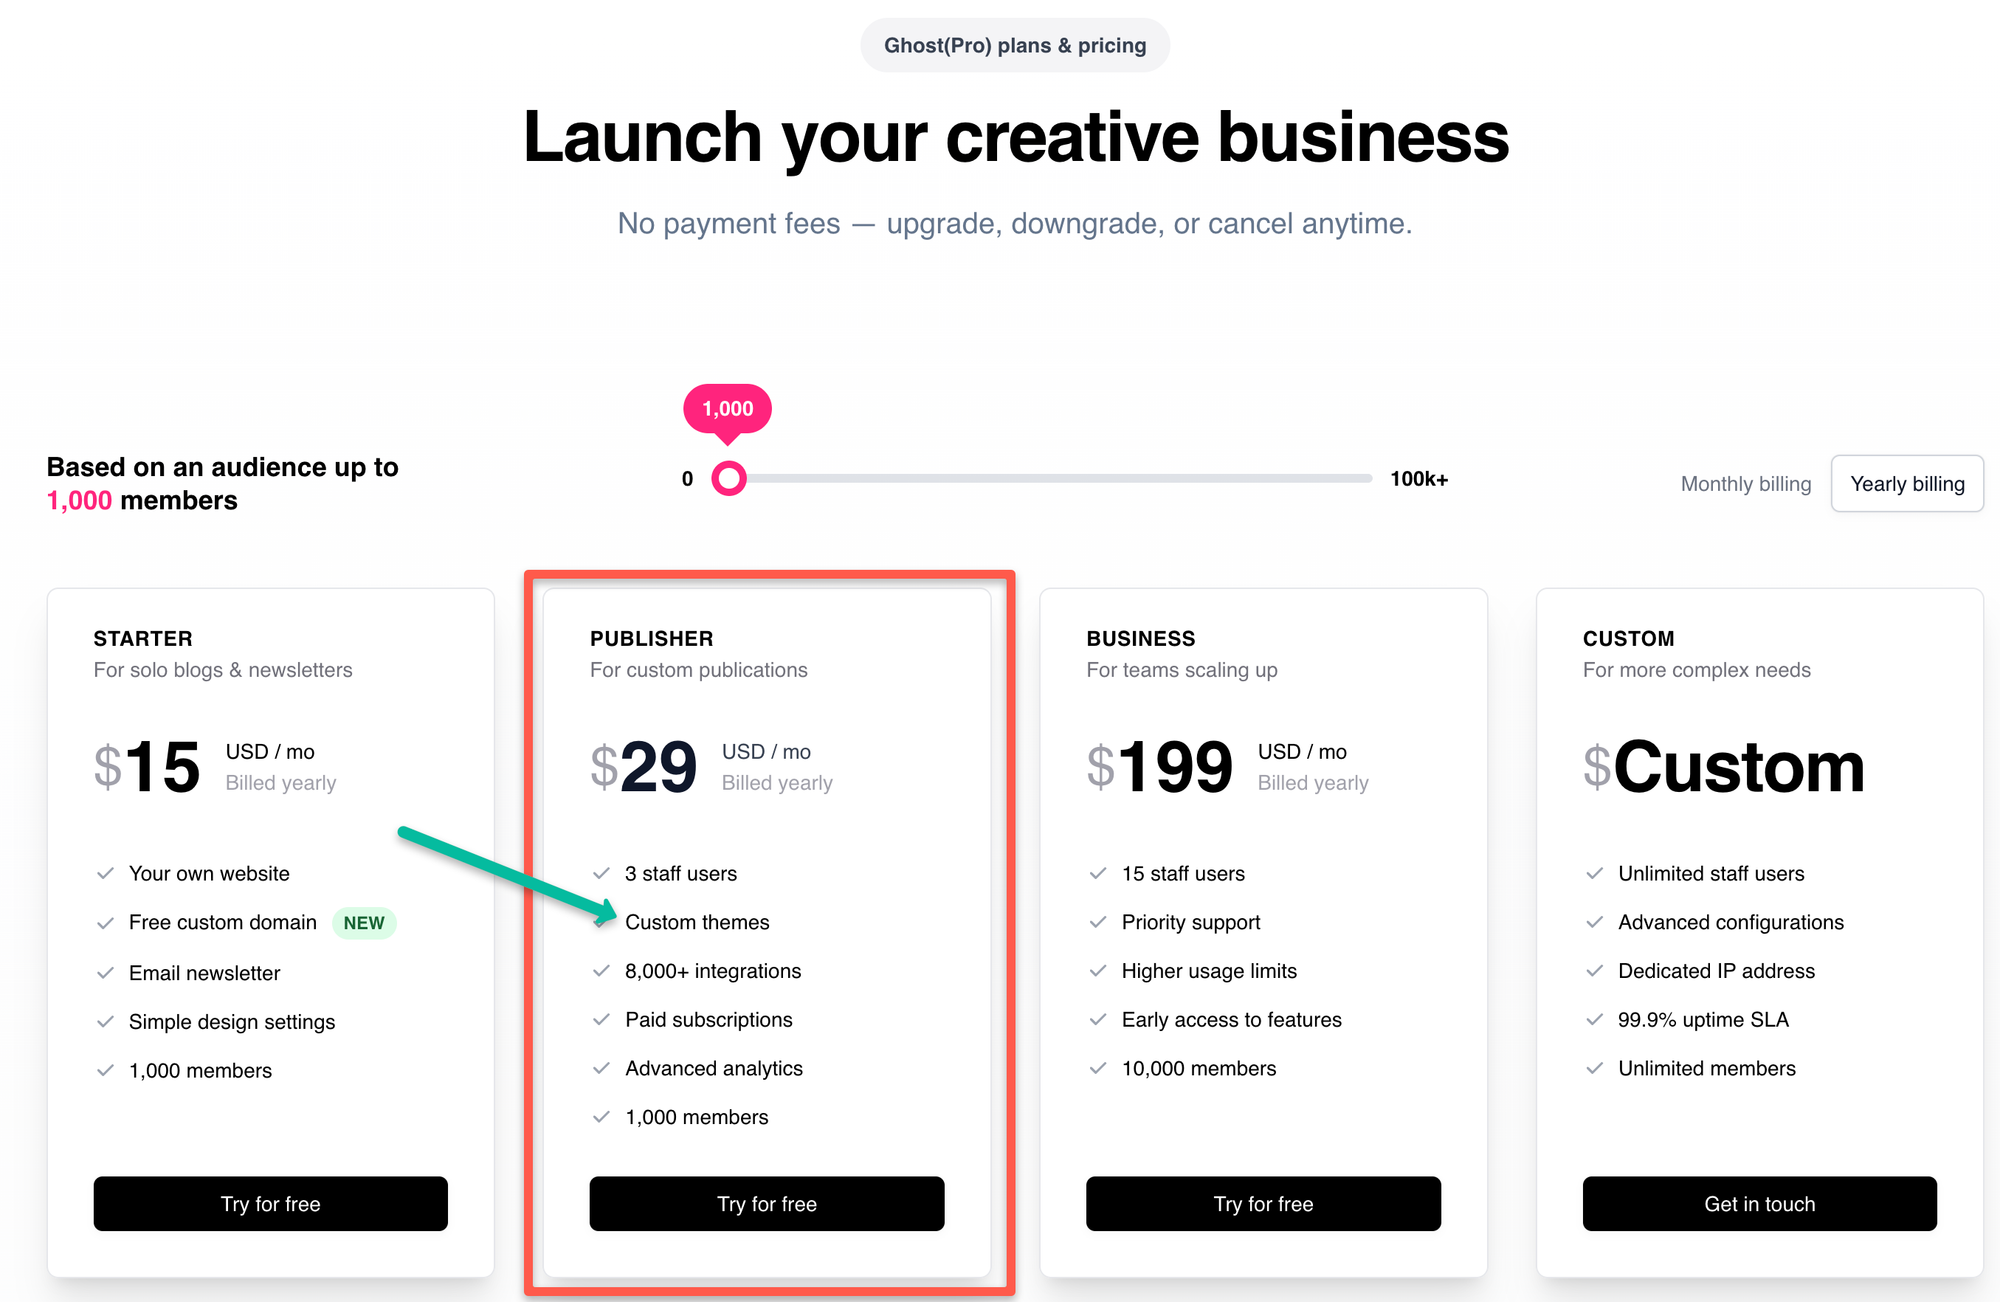
To understand the Ghost Pro platform, you can make use of the trial account. Once you are ready to move, purchase a plan to perform the migration.
Set up a Theme
The next step is to set up a theme for your Ghost account.
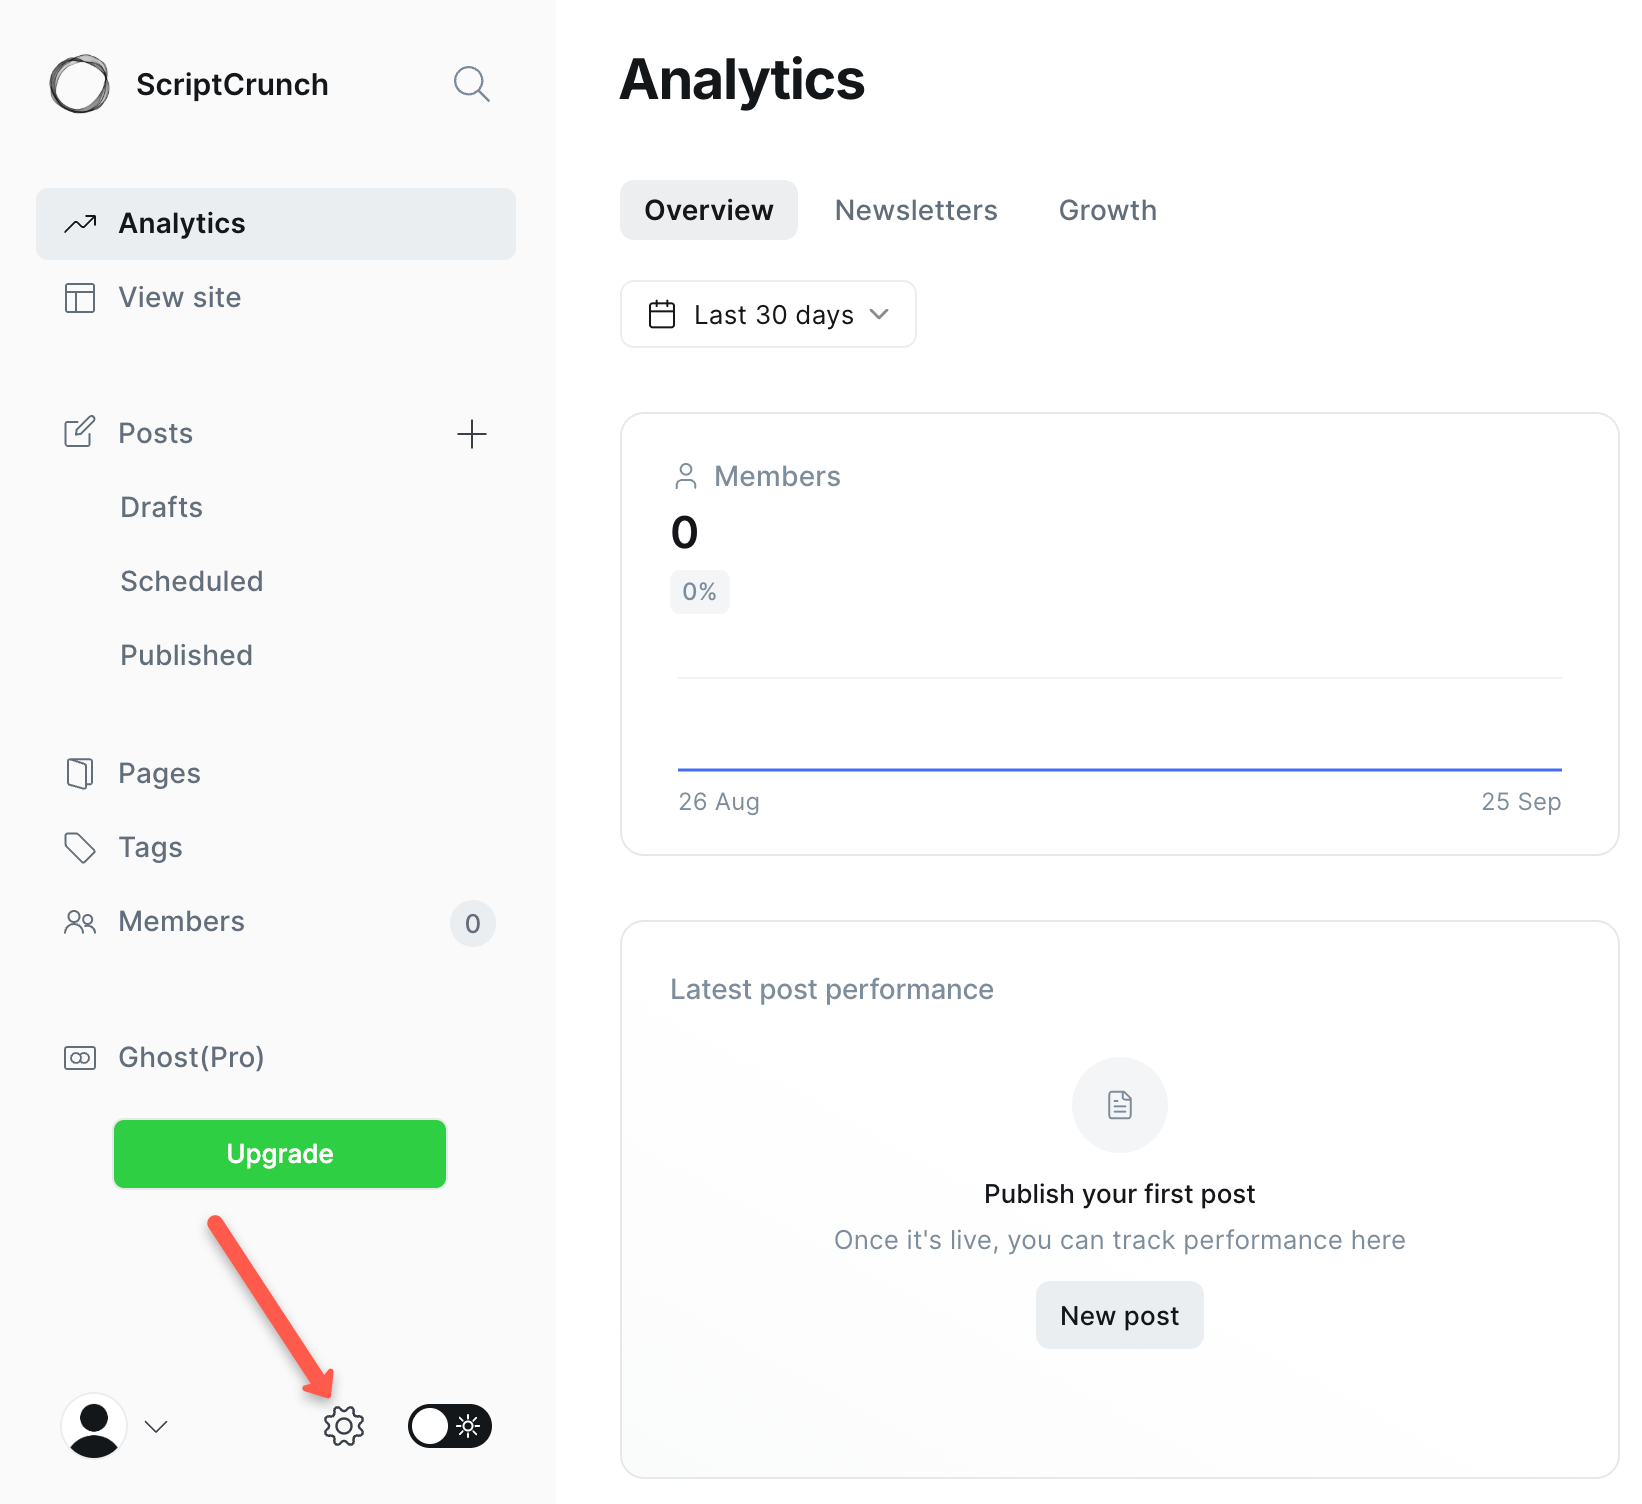
Step 1: Log in to your Ghost account. In the bottom-left admin menu, you will find the Settings option; click on it
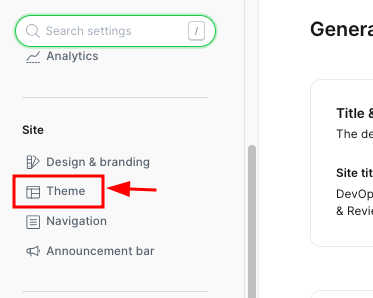
Step 2: Click the Theme option. You will find this in the left-side menu bar once you enter Ghost settings.
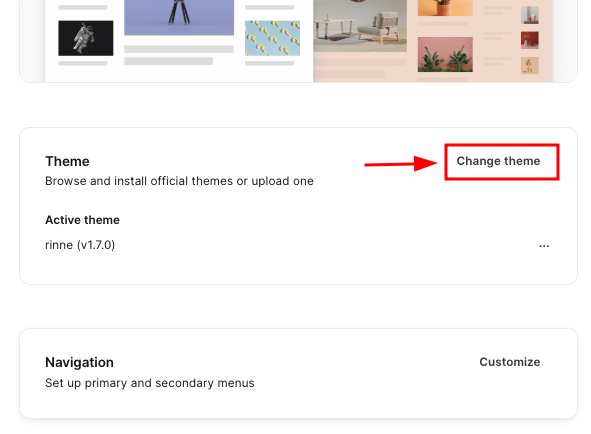
Step 3: Select Change theme.
You will see a list of free default themes.
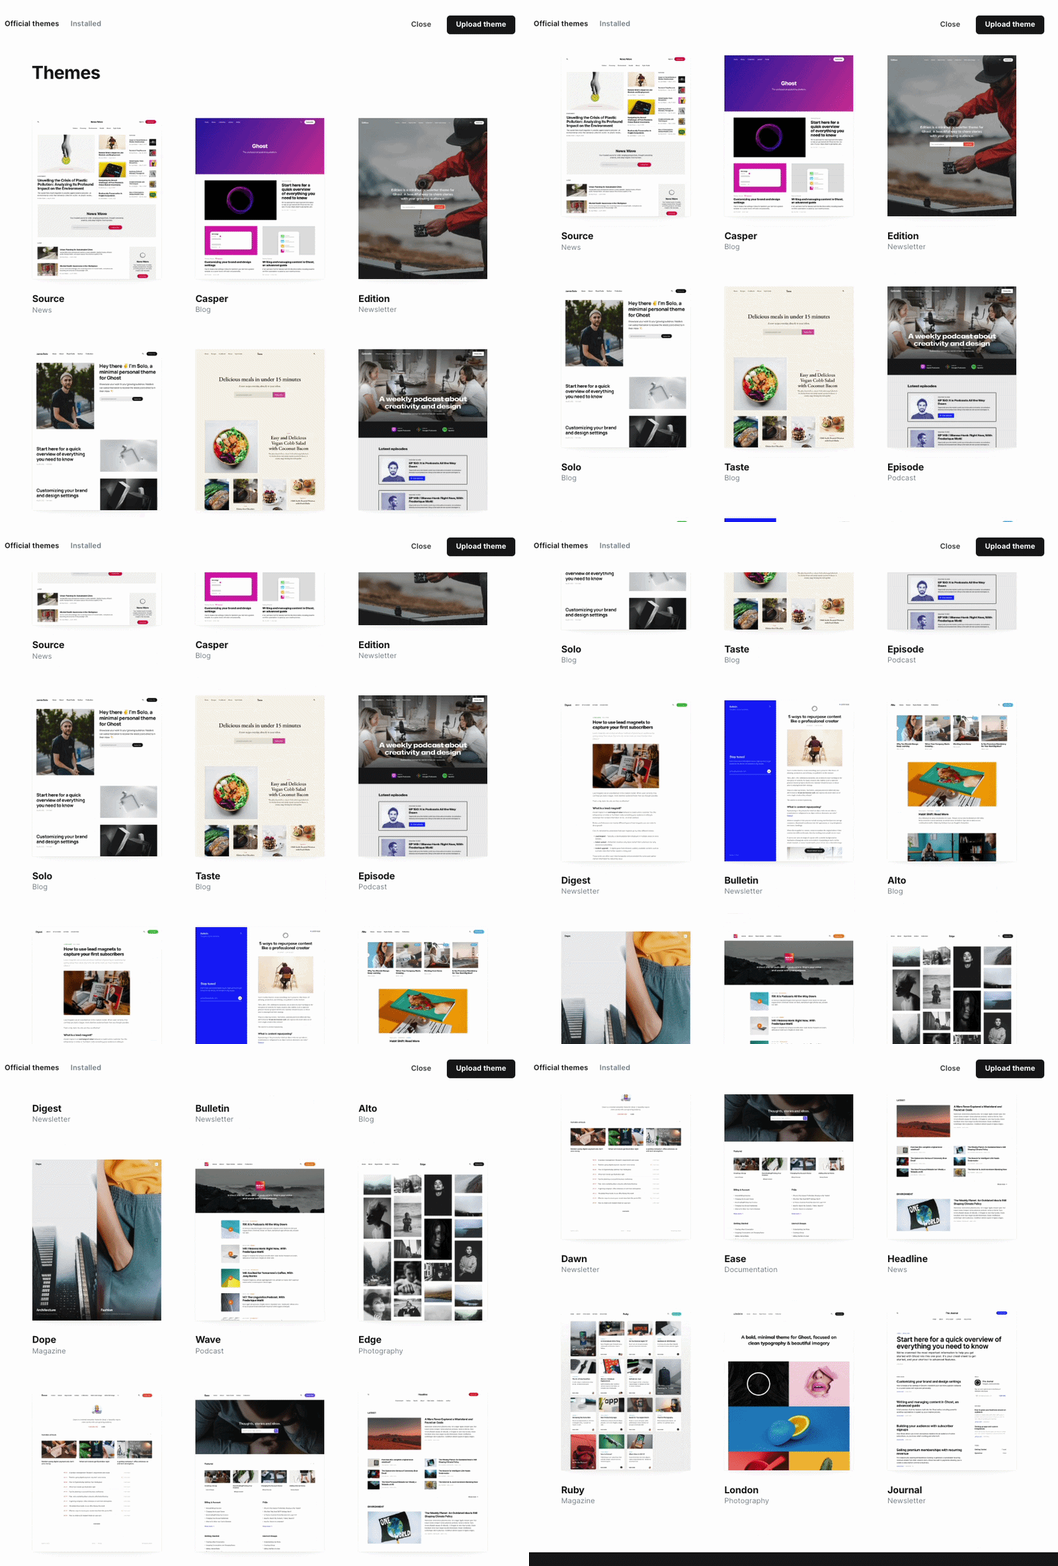
If you want a premium theme, you can go to the Ghost marketplace and purchase one based on your website's category.
Now let's start with the migration activities.
Pre-Migration Tasks
Before you start the migration, you need to perform the following on your WordPress website.
1. Take a Full WordPress Backup
Ensure you have a full backup of the WordPress website. Based on your hosting provider, you can perform a full website backup. If something goes wrong, the backup will help.
2. Export Your URL Inventory
You need a complete list of every URL currently indexed by Google. You can get this from the current XML sitemap.
You can also get it from the Google Search Console.
3. Export Affiliate Links
Next, if you are using affiliate links on your website, you need to export them to a CSV file.
Plugins like Pretty Links, ThirstyAffiliates, serve links from paths like /recommends/ or /go/. They don't work when you migrate to Ghost.
The affiliate plugins support exporting the links. With the exported file, we can easily create the redirects in Ghost without any URL changes. This way, the affiliate URLs remain the same in Ghost.
Migrate WordPress to Ghost
Now let's get started with migrating the WordPress content.
First, we need to import the content into Ghost. For that, Ghost has built-in tools that will help with the migration. Follow the steps given below carefully.
Step 1: Choose the WordPress Migration Tool
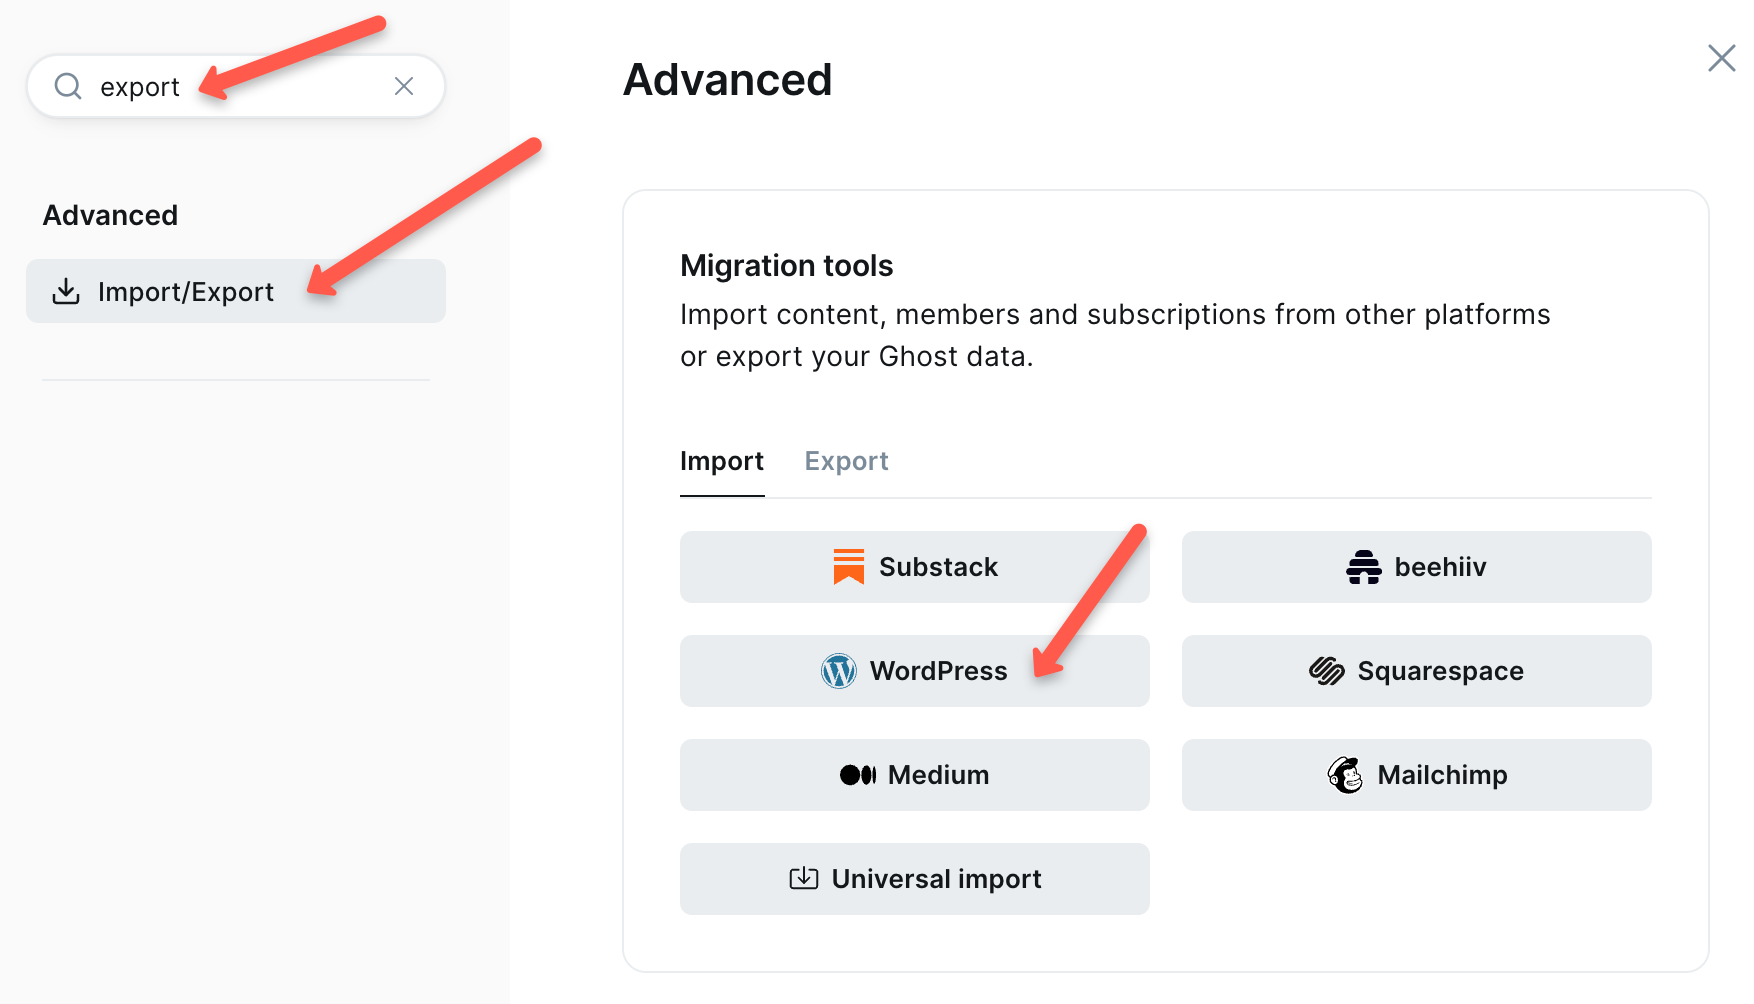
On the Ghost settings page, search for export in the left menu bar. You will see migration tools listed with WordPress, Beehiiv, etc.
Choose the WordPress option as shown below.
Step 2: Enter your WordPress Domain Name
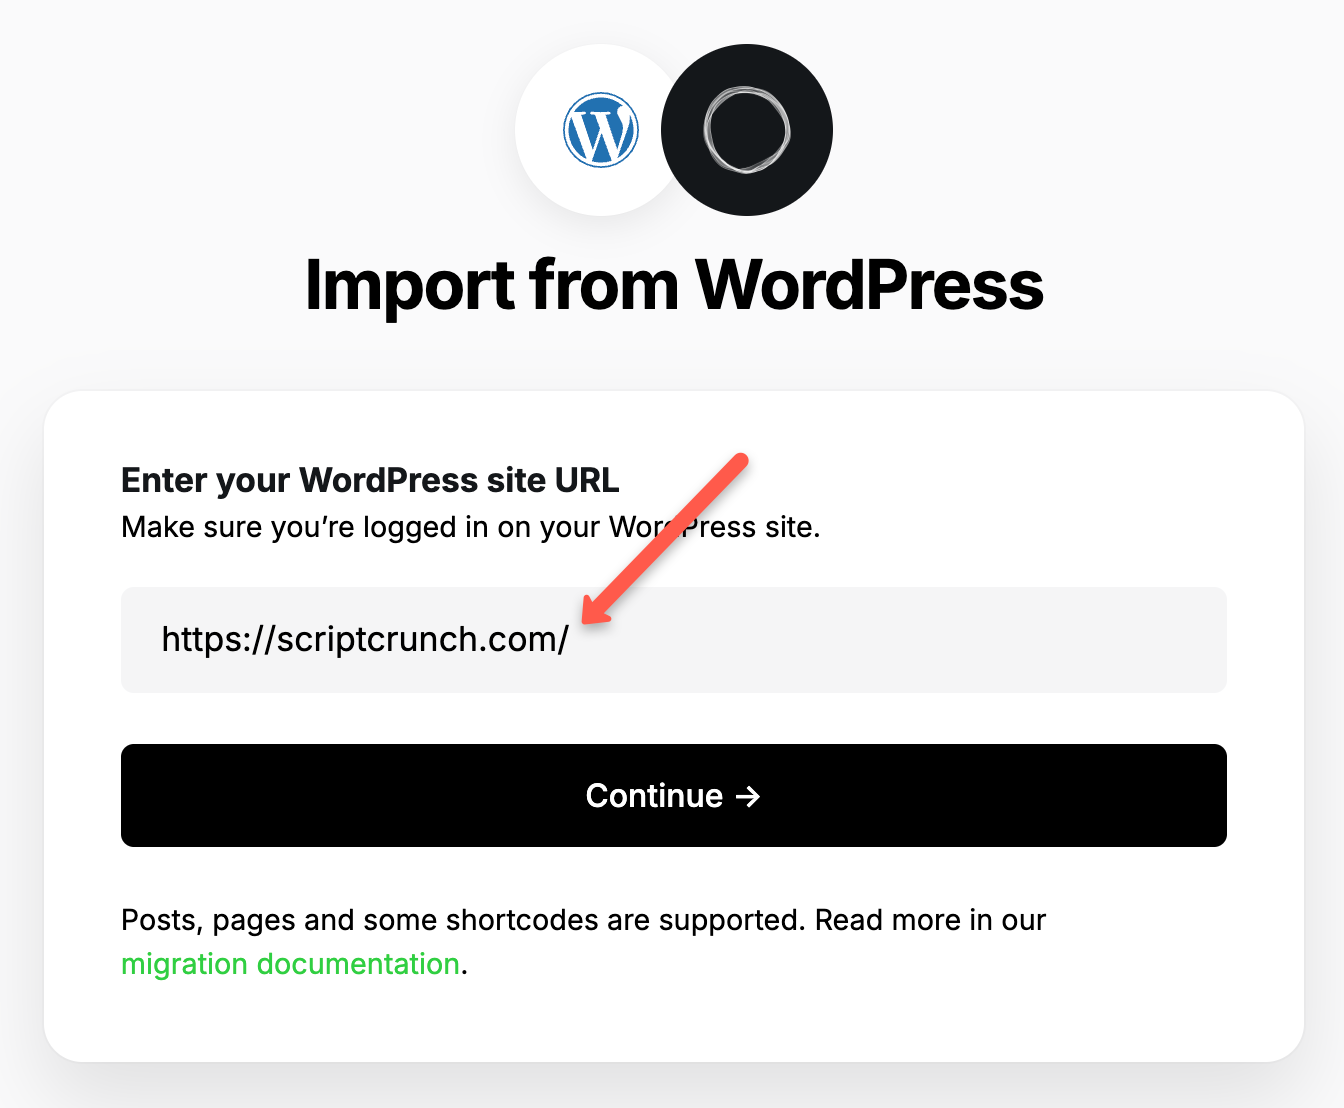
Now a page will open to import everything from WordPress to Ghost. For that, you have to enter your website URL (eg, https://example.com/) and click Continue.
Step 3: Click Open WordPress Settings Option
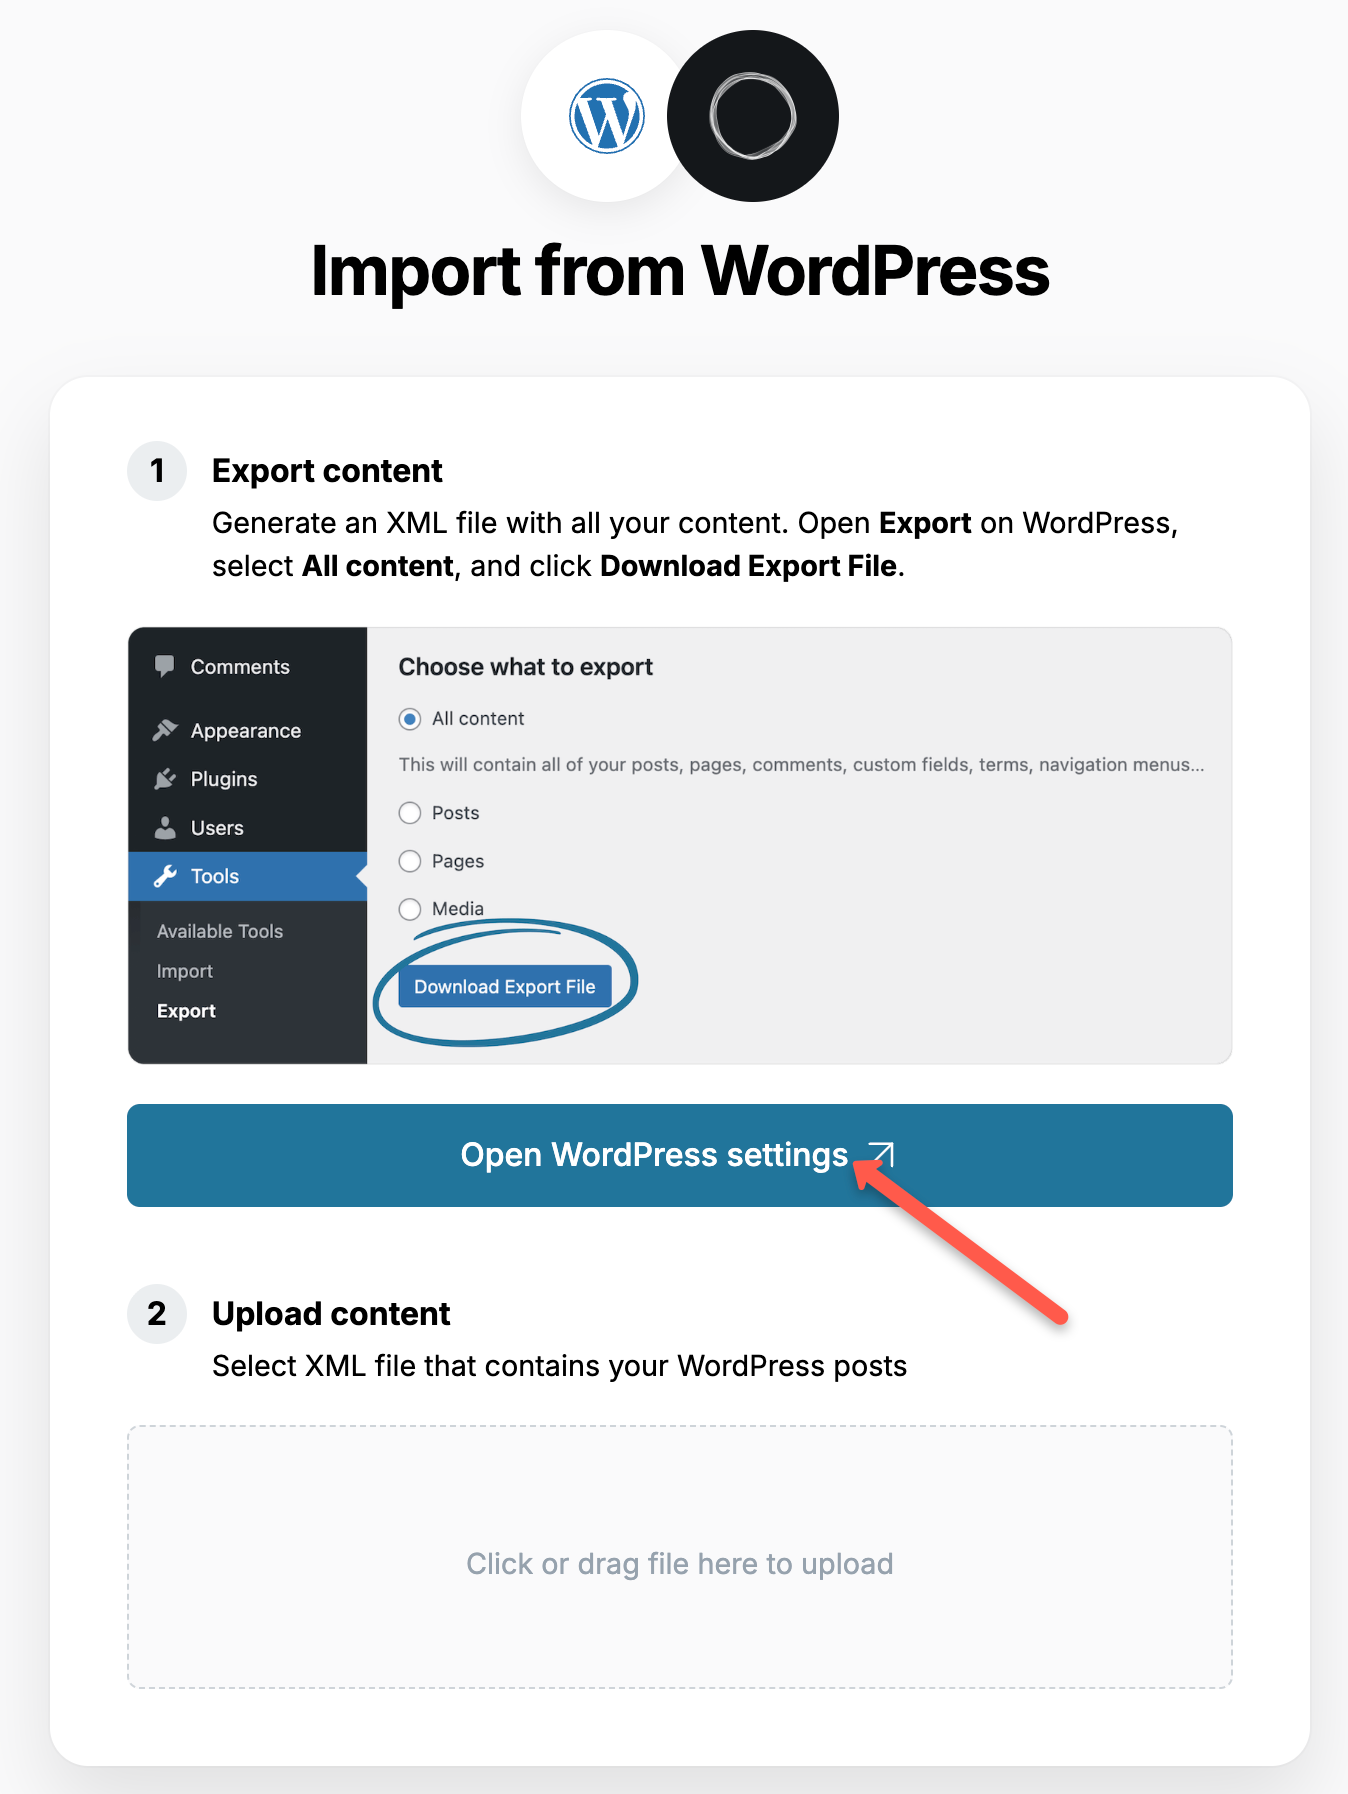
Now you will get the page with the Open WordPress Settings button; click on it.
Step 4: Click Download Export File
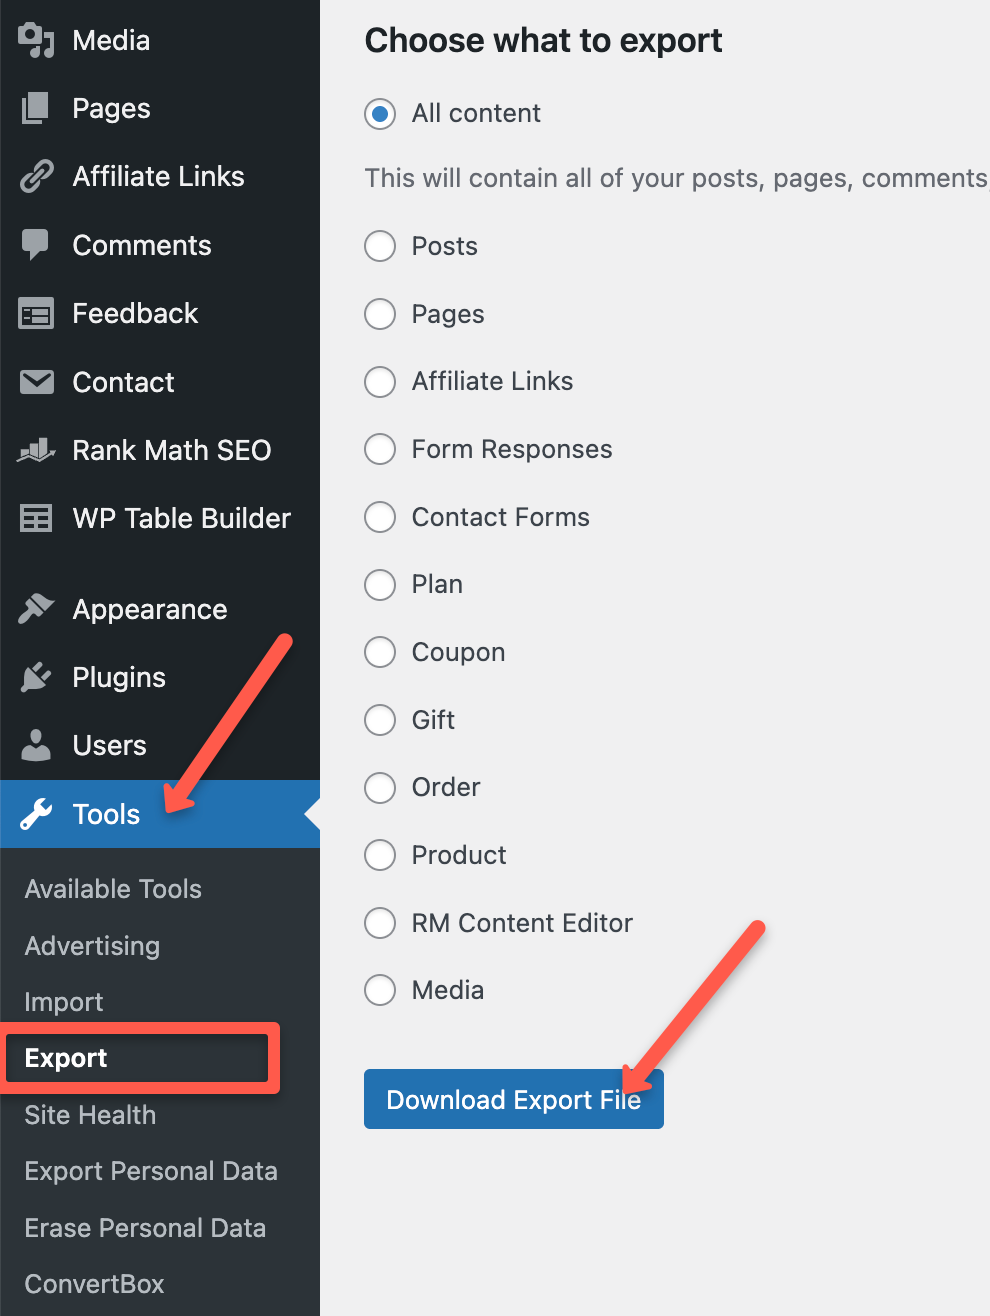
In WordPress, go to Tools, select Export, choose All content, and click Download Export File. It will download an XML file.
Step 5: Upload XML Content
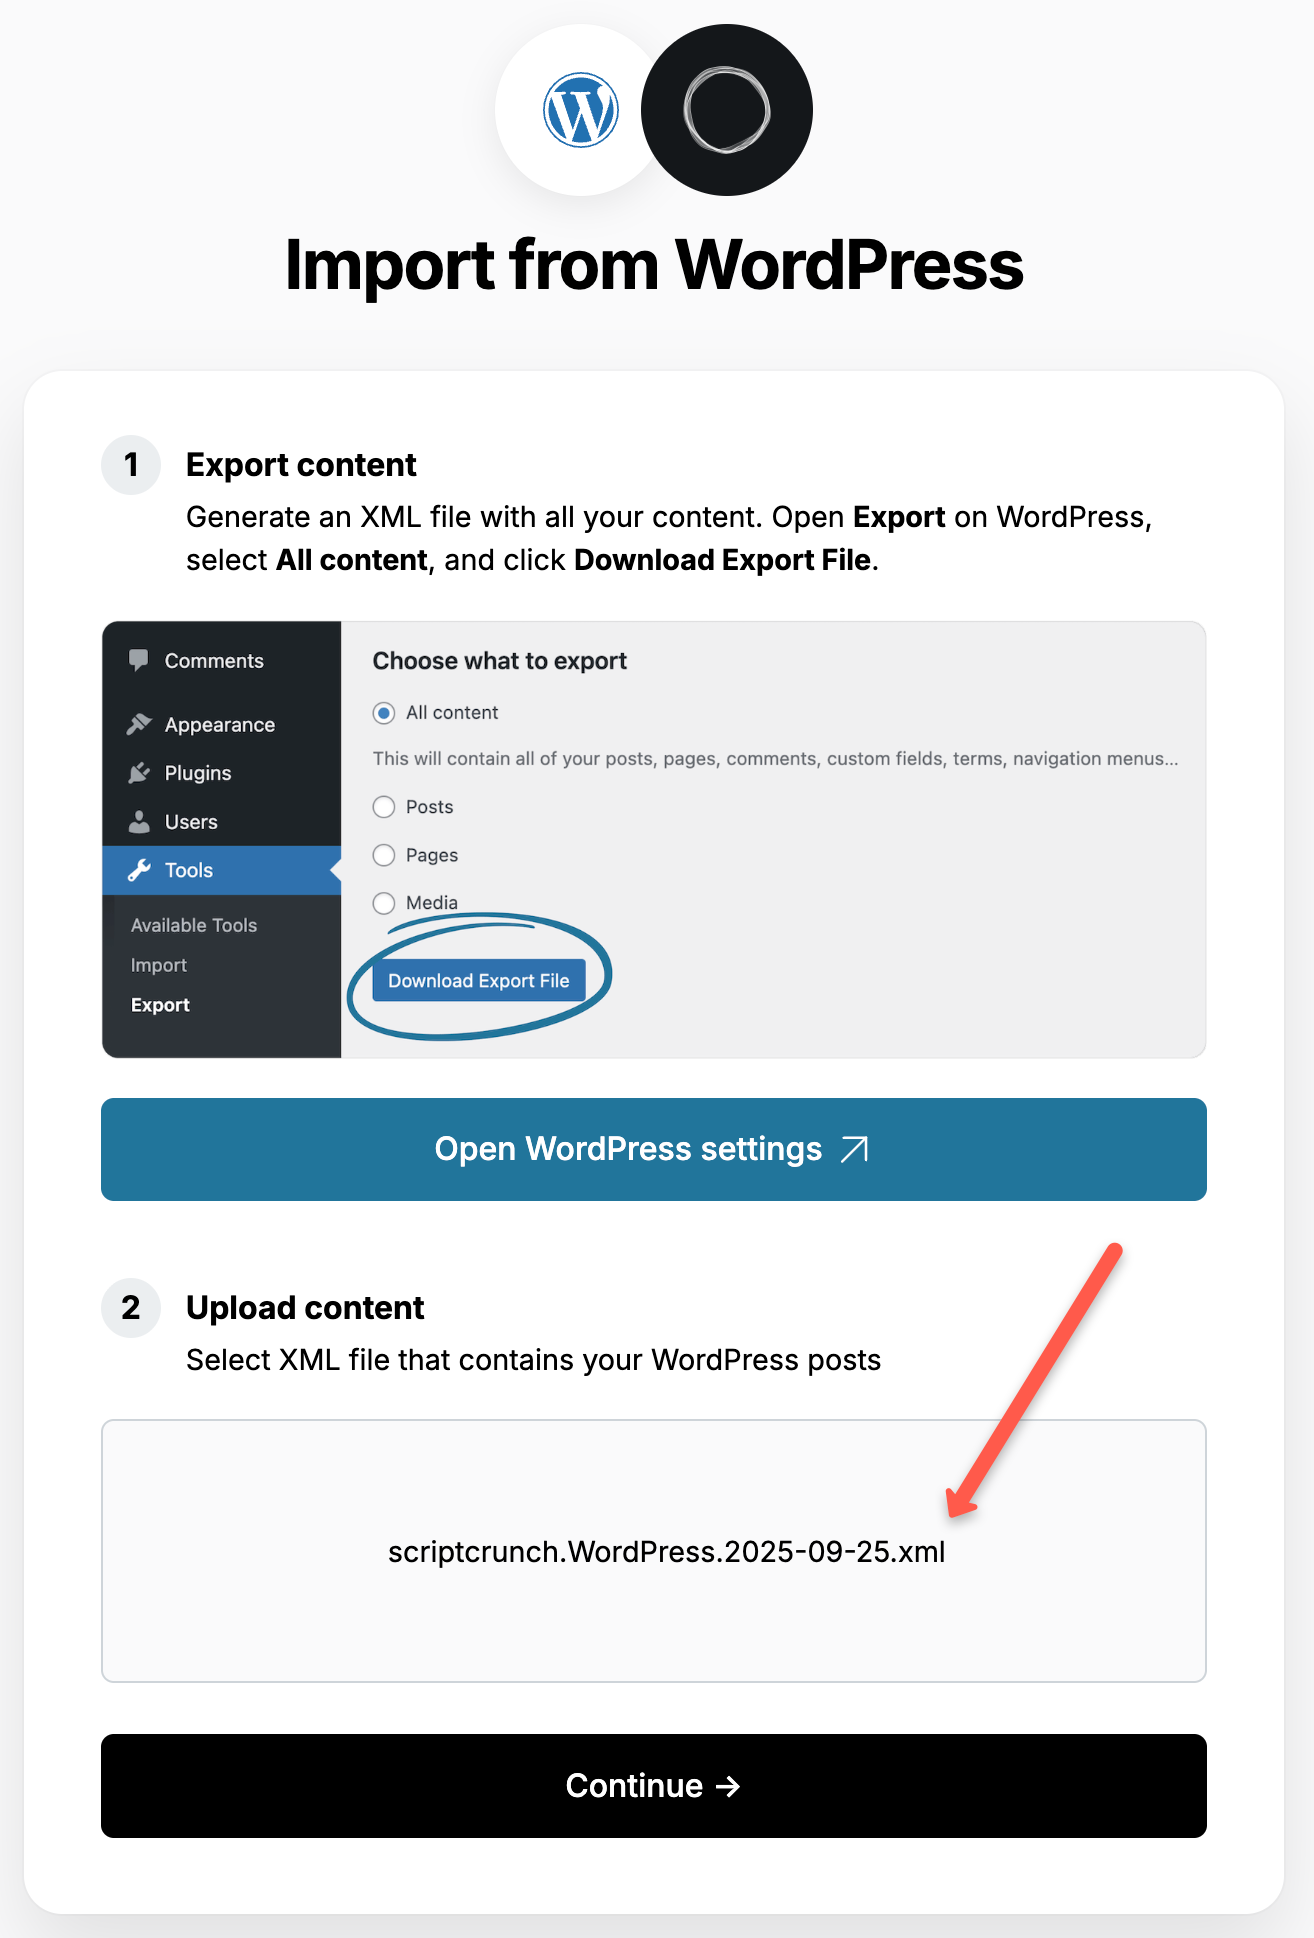
Now head back to the Ghost page, upload the downloaded XML file, and click Continue.
Step 6: Click Import Content
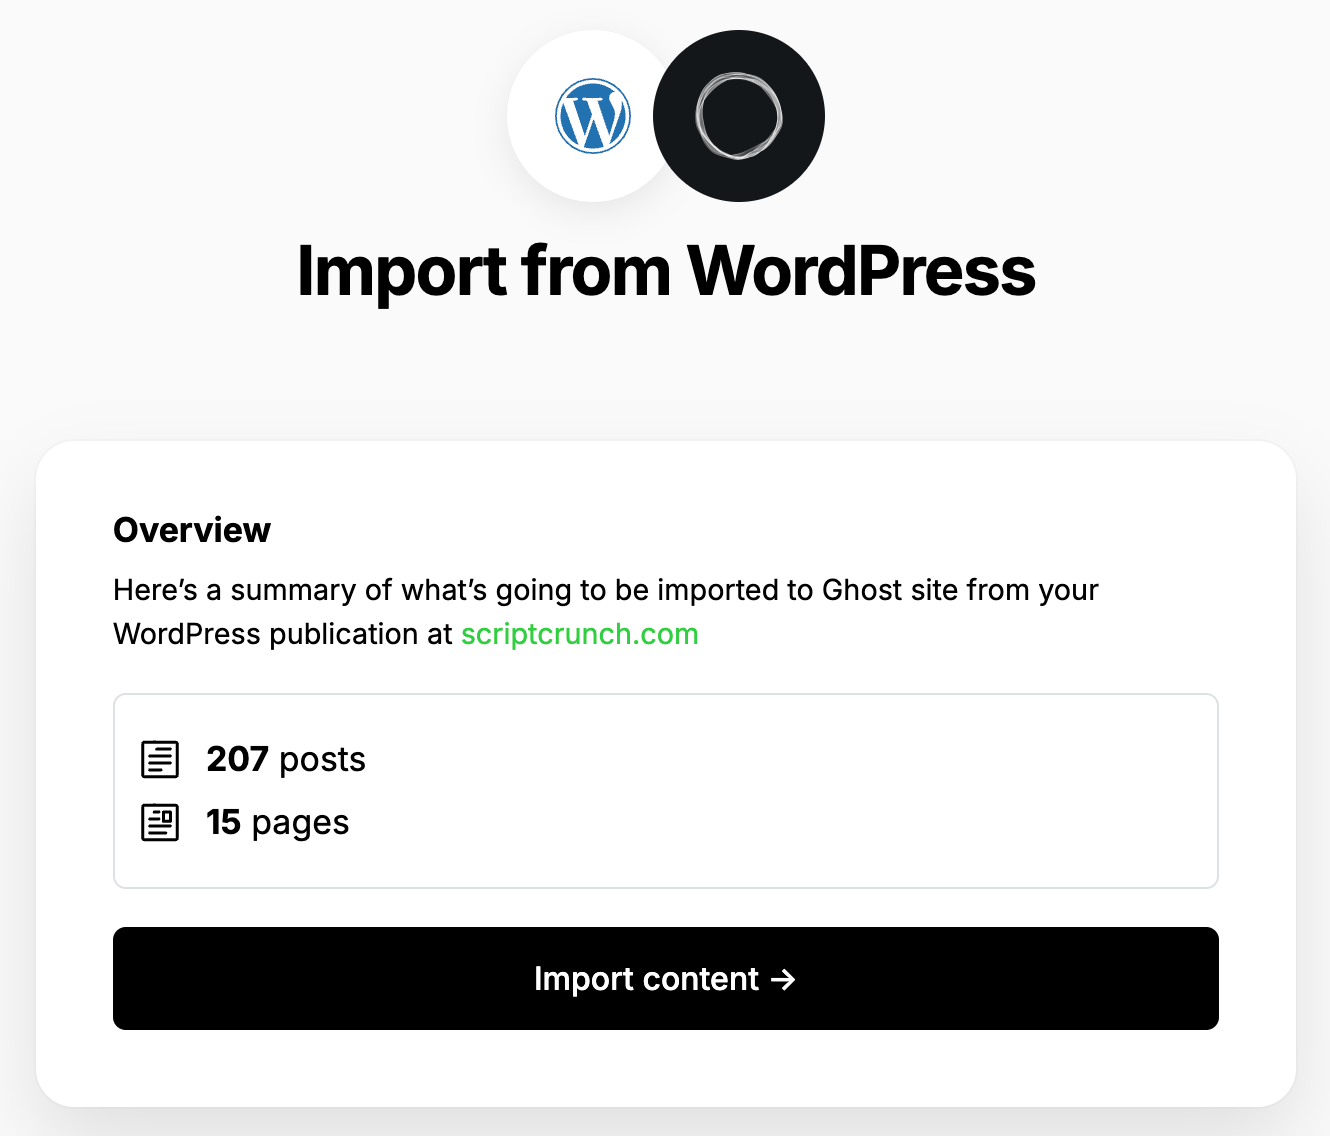
Next, you will see a summary of the total posts and pages being imported. Once verified, click the Import Content button.
The migration will take some time to finish. It is usually just a few minutes for small websites.
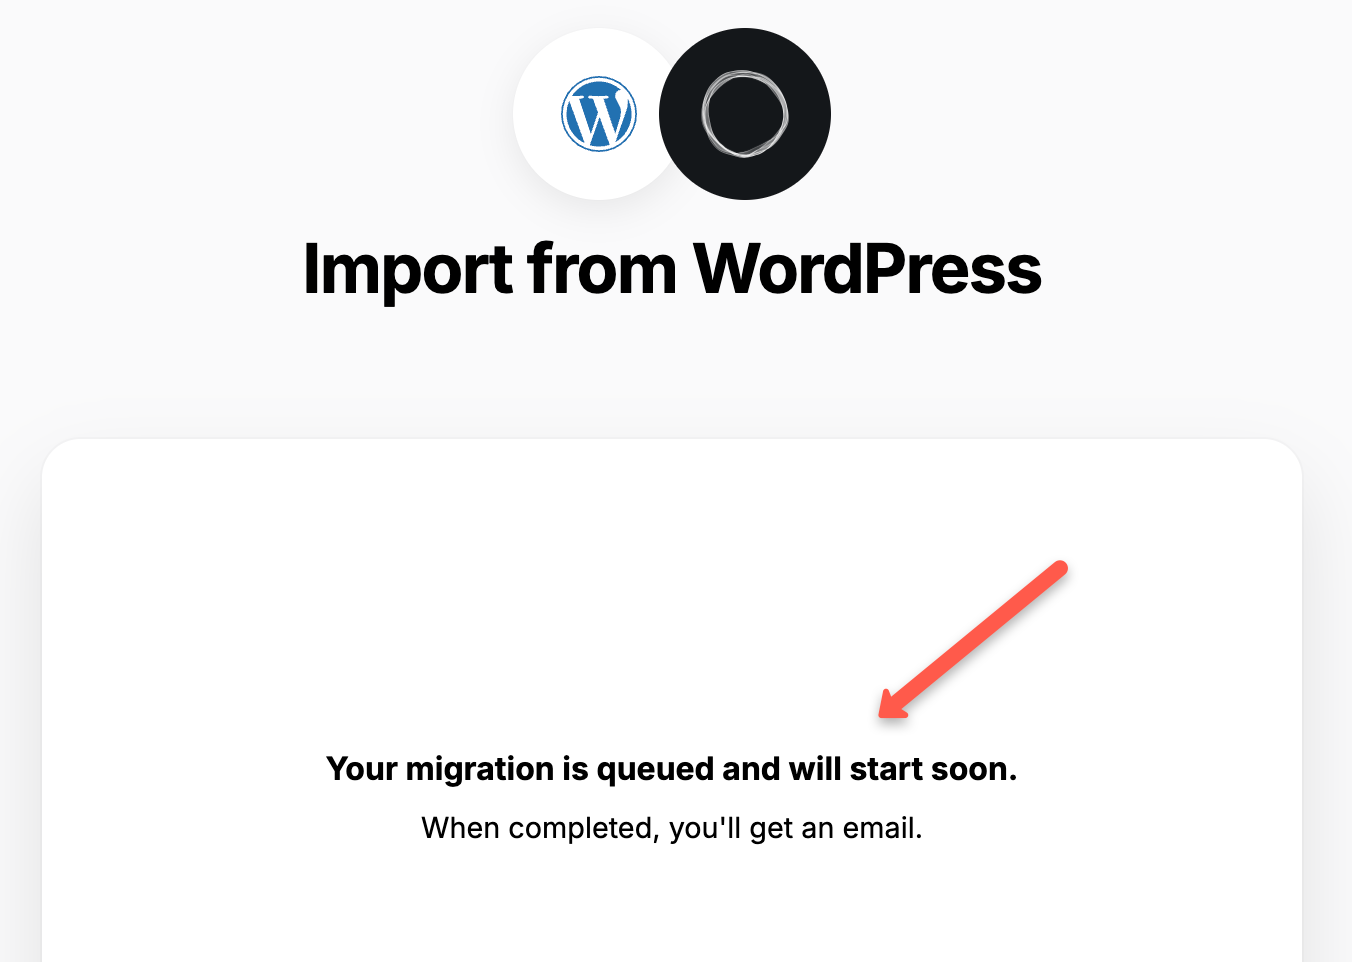
Once it's completed, you will see a confirmation message as shown in the image below.
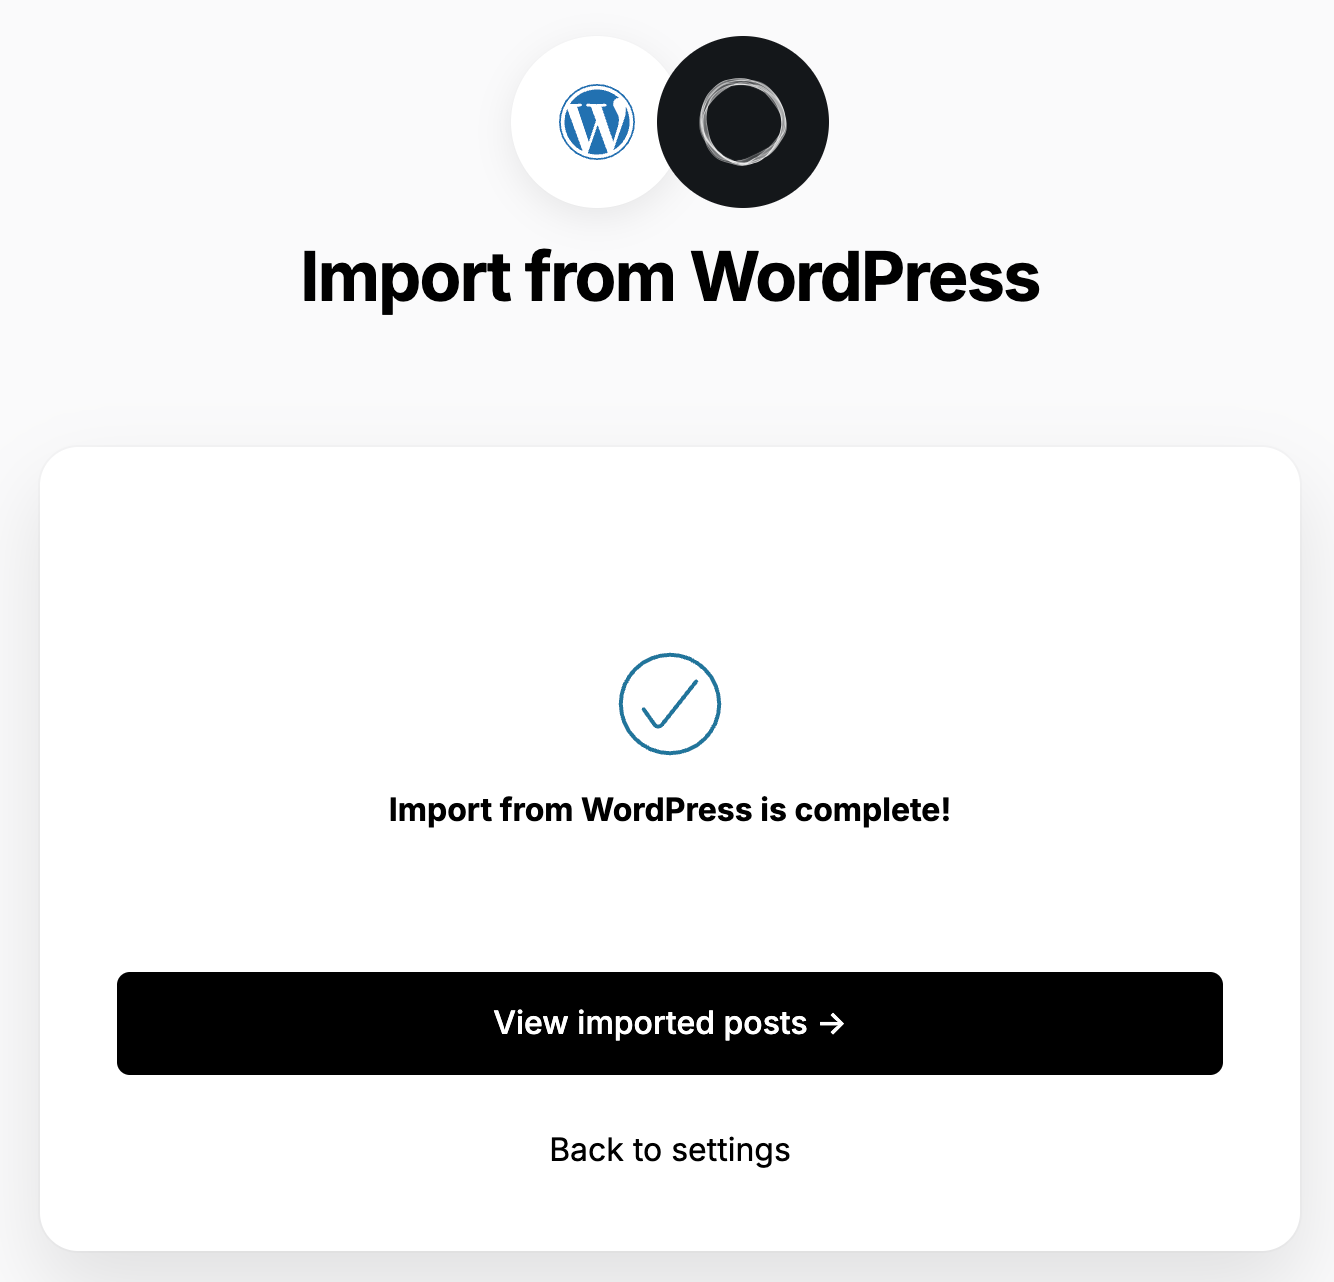
Image Migration
After migrating from WordPress, you may see broken images on your Ghost site, as shown below.

This is normal. Even though the status shows all content as imported, Ghost runs a background service that fetches the images and stores them on Ghost's servers. So the images will be fixed once it's complete.
It can take anywhere from a few minutes to a few hours, depending on how much content you migrated.
Adding Tags to all posts at once
When using certain themes, the theme expects specific tags on all the posts. For example, the theme I am using needs a #blogtag in all the posts. So I had to get them added to all 200+ blog posts.
Here is the easy way to do it.
You can email the Ghost Concierge Team (concierge@ghost.org) to add tags to all your posts.
Map Permalink Structure
The next important step is validating your post and page Permalinks (URL structure)
In WordPress, if you have used simple yourdomain.com/post-slug/, you don't have to do anything. Ghost uses /post-slug/ by default. Once you migrate the domain in Ghost, all the post URLs remain the same.
You can confirm this by opening a published post and checking its URL. You will be able to see the URL structure with the default DNS given by Ghost.
If you have a complex URL structure like /category/post-name or /2025/03/post-name/ , you have to make a change in the ghost routes.yaml.
For example, the following route config replicates WordPress date-based permalinks in Ghost.
routes:

collections:
  /:
    permalink: /{year}/{month}/{slug}/
    template: index

taxonomies:
  tag: /tag/{slug}/
  author: /author/{slug}/
Once you update the routes, verify the post URLs and see if they match your existing WordPress URLs.
Migrate SEO metadata
If you are using Yoast or Rank Math for SEO, the metadata won't migrate directly to Ghost.
If you have a very small number of posts, you have to do this manually for every post by copying the SEO plugin metadata to the Ghost post metadata setting.
However, if you have many posts, the best way to migrate the SEO plugin metadata to Ghost is via the Ghost APIs.
You need to export or crawl the post's SEO metadata and update it in the Ghost-specific built-in metadata fields.
Here is the process.
- From Rank Math/Yoast, export SEO metadata
- Create a script using Claude to map SEO title + description from the export file to Ghost fields
Migrate Affiliate URLs
For your affiliate URLs to work, you need to add all the redirection in the redirects.yamlfile
You can find the redirects file option under Labs, as shown below.
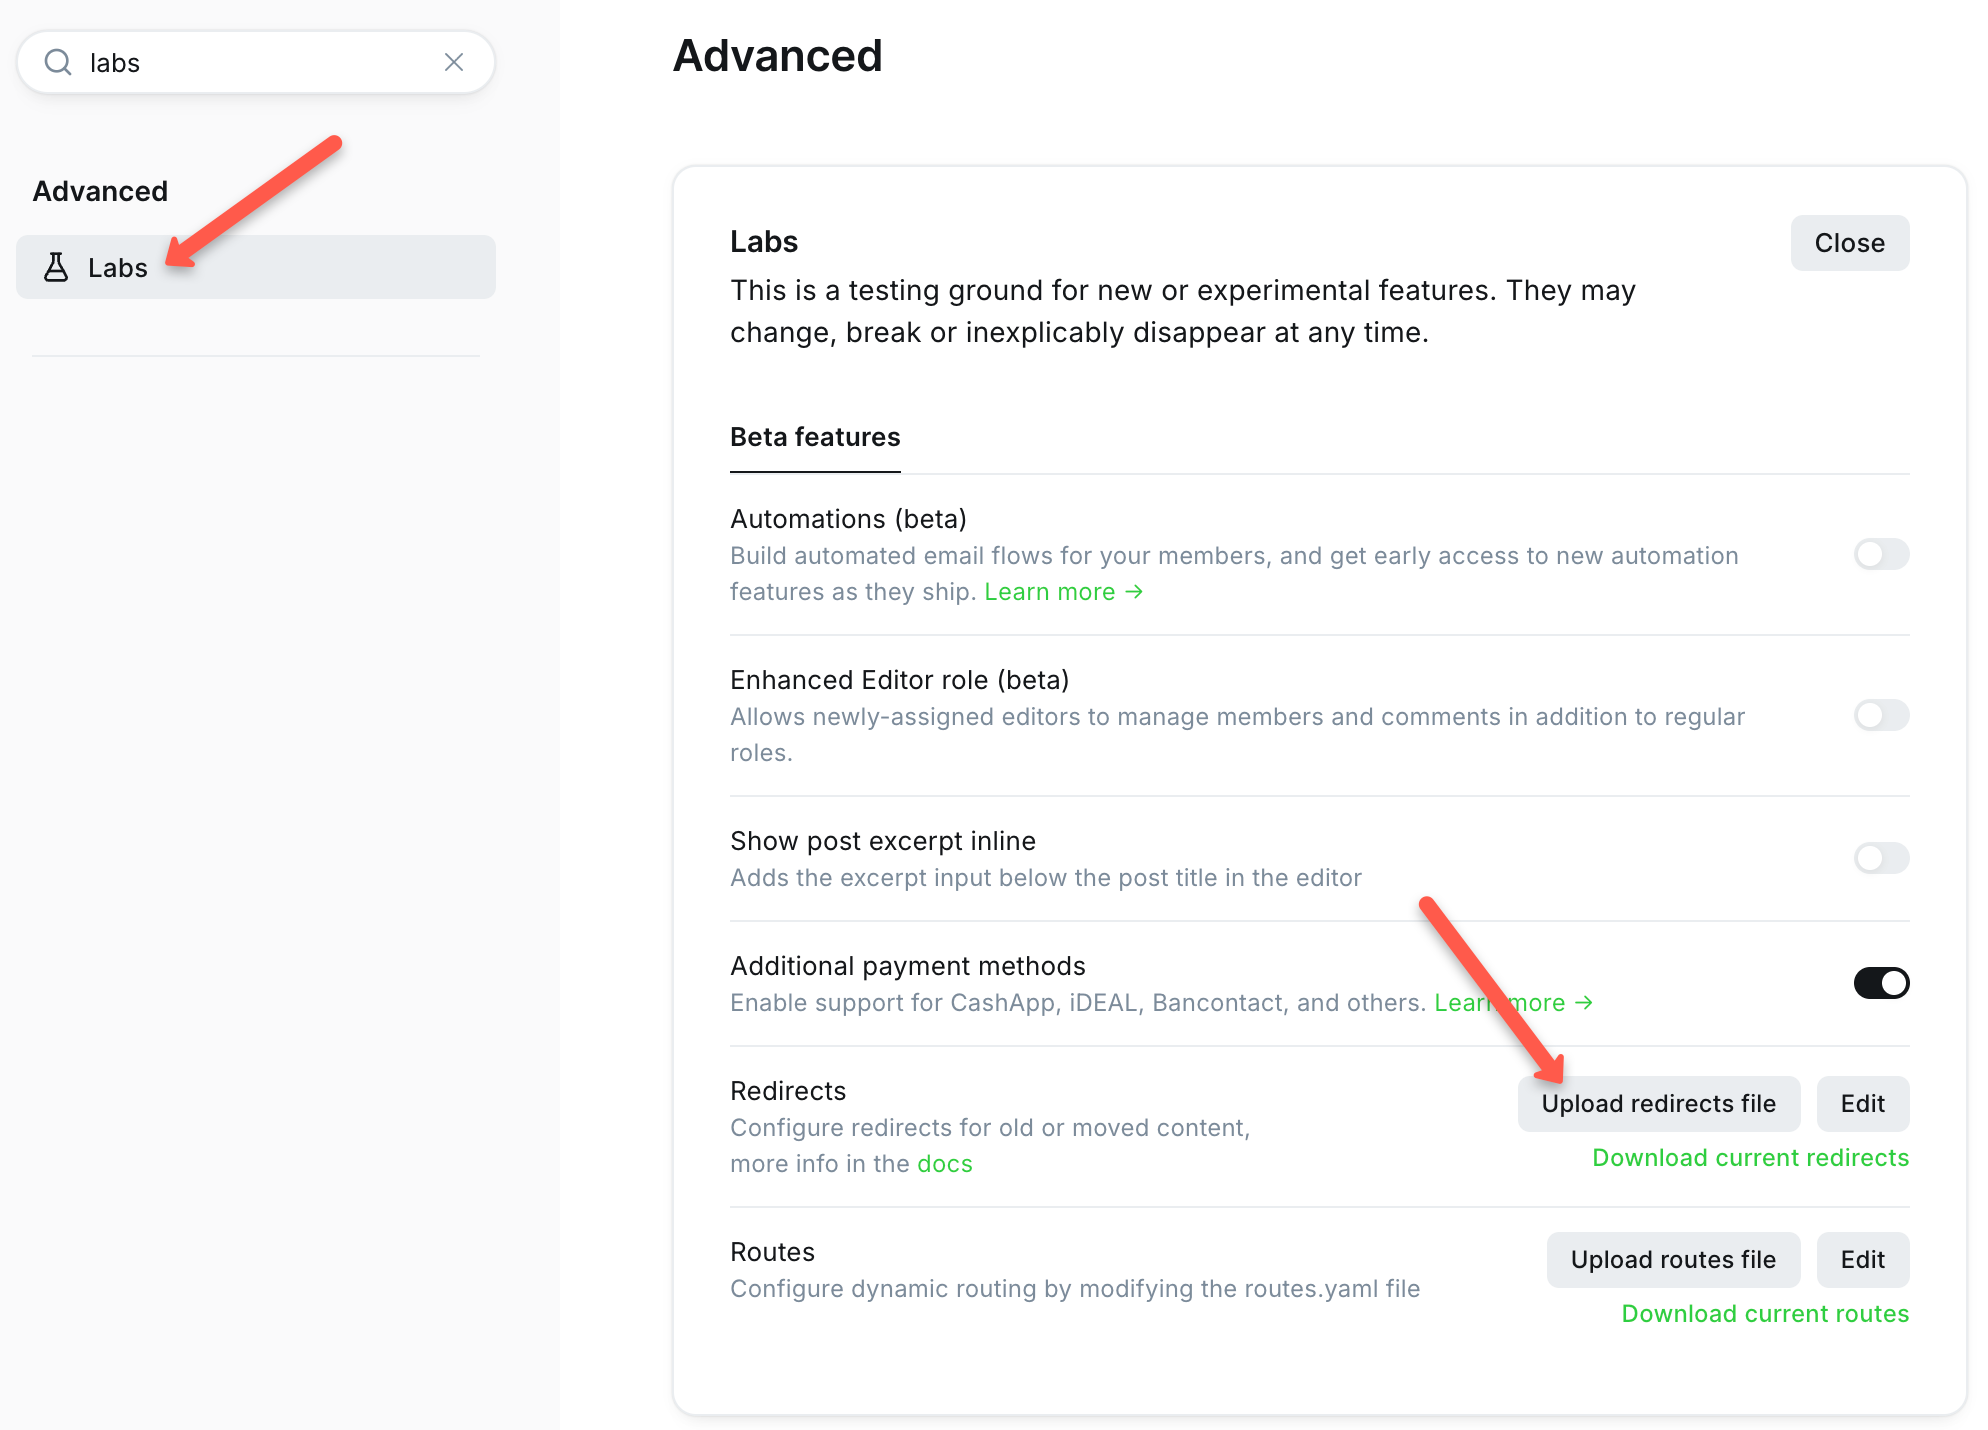
Based on your affiliate URL structure, you can create the redirect file. Here is the content of a simple redirect file.
301:
  /recommends/thrive-offer: https://ert.ly/3456
  /recommends/ghost-pro: https://ret.io/4m8XIwI
/recommends/bluehost: https://rt.ly/4d9RLviOnce you upload the redirects file with all the affiliate URLs, validate the redirects using the affiliate links in your posts.
DNS Migration
Up until now, we have only migrated and validated the content. Your website is still serving traffic from the WordPress website. To finish the migration, you need to perform the DNS migration.
Follow the steps given below for the DNS migration.
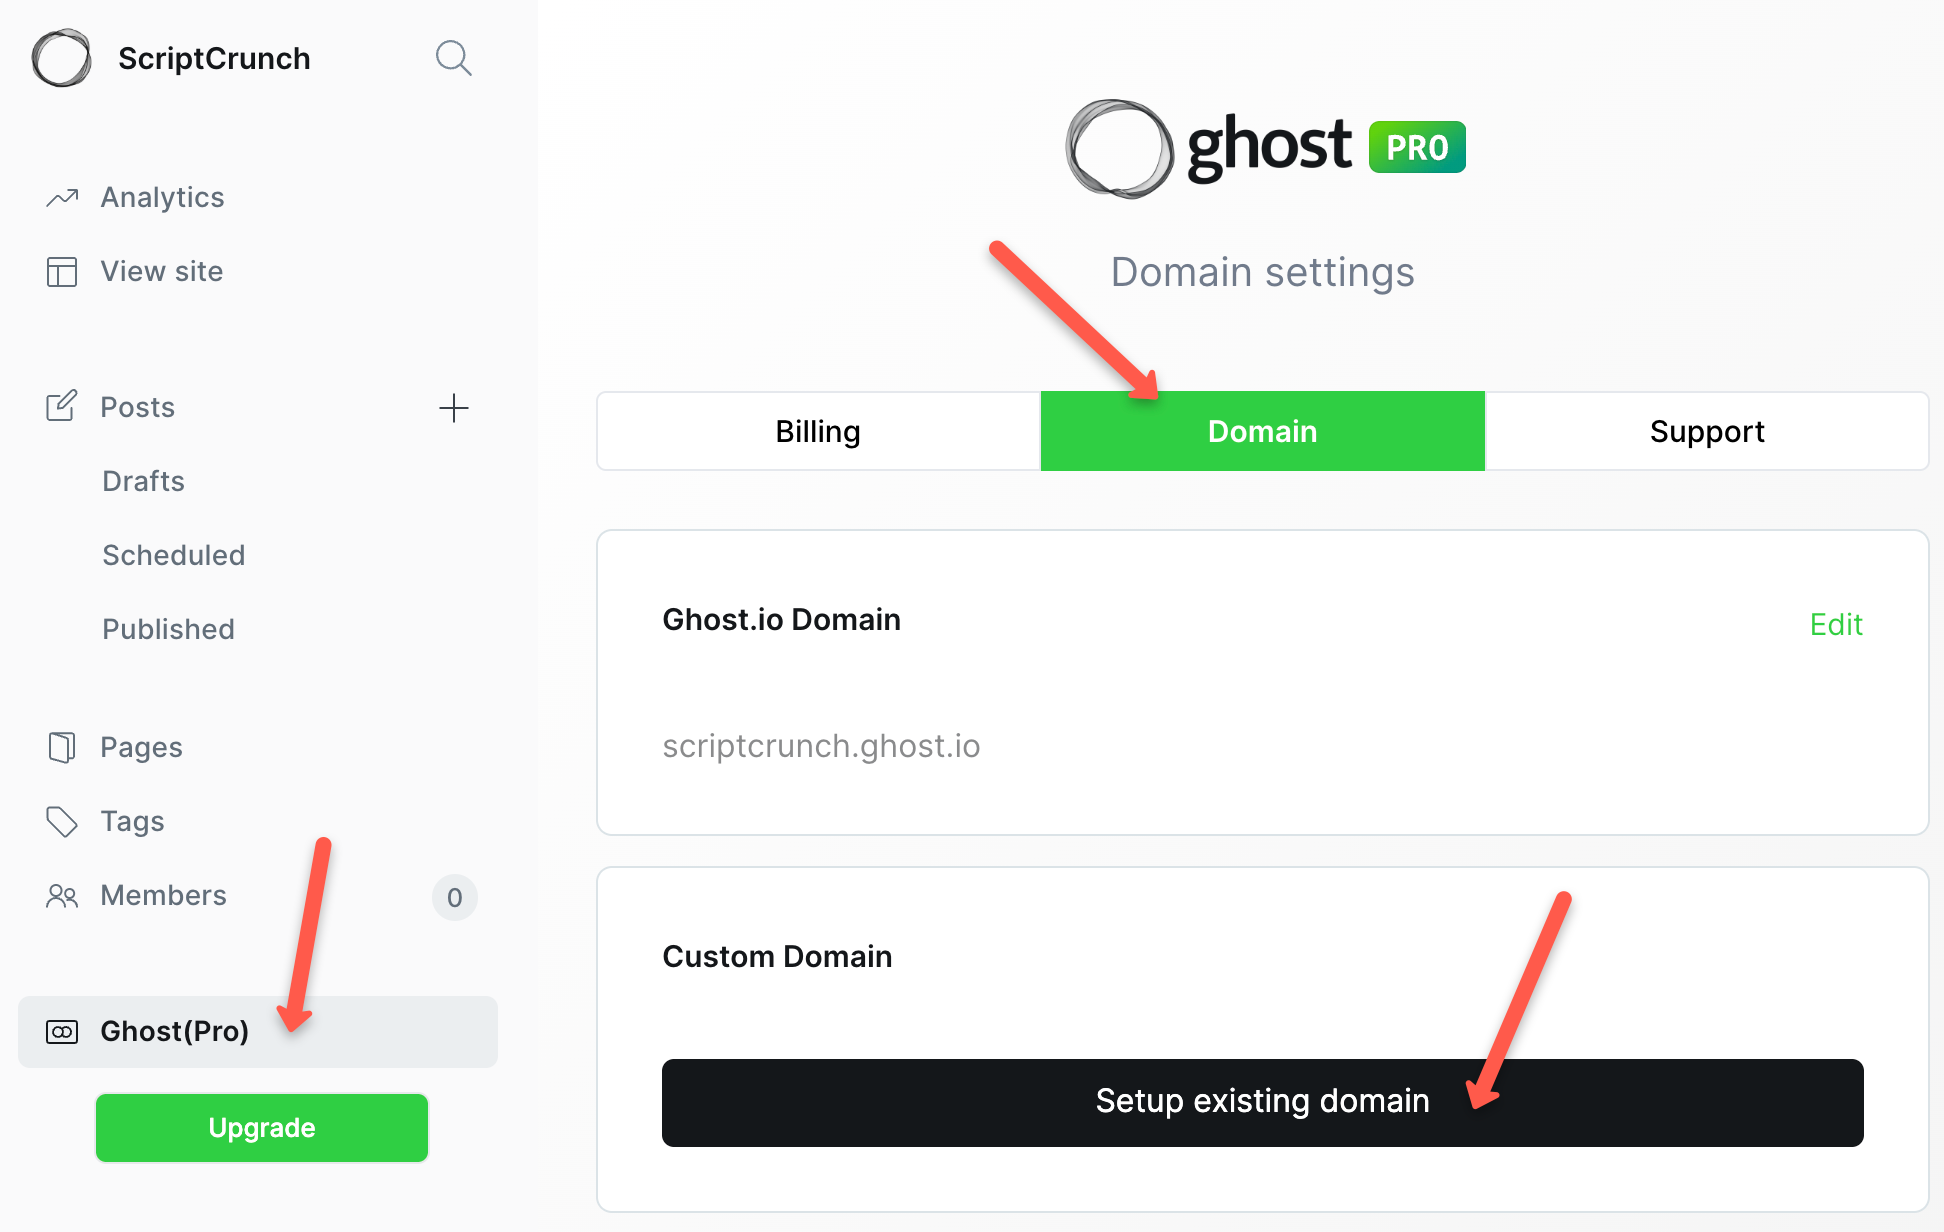
Step 1: Go to the Ghost(Pro) option and select the Domain option. Then click Setup existing domain as shown below.
Step 2: Enter the domain name you need to migrate. You will see DNS records populated on the same page.
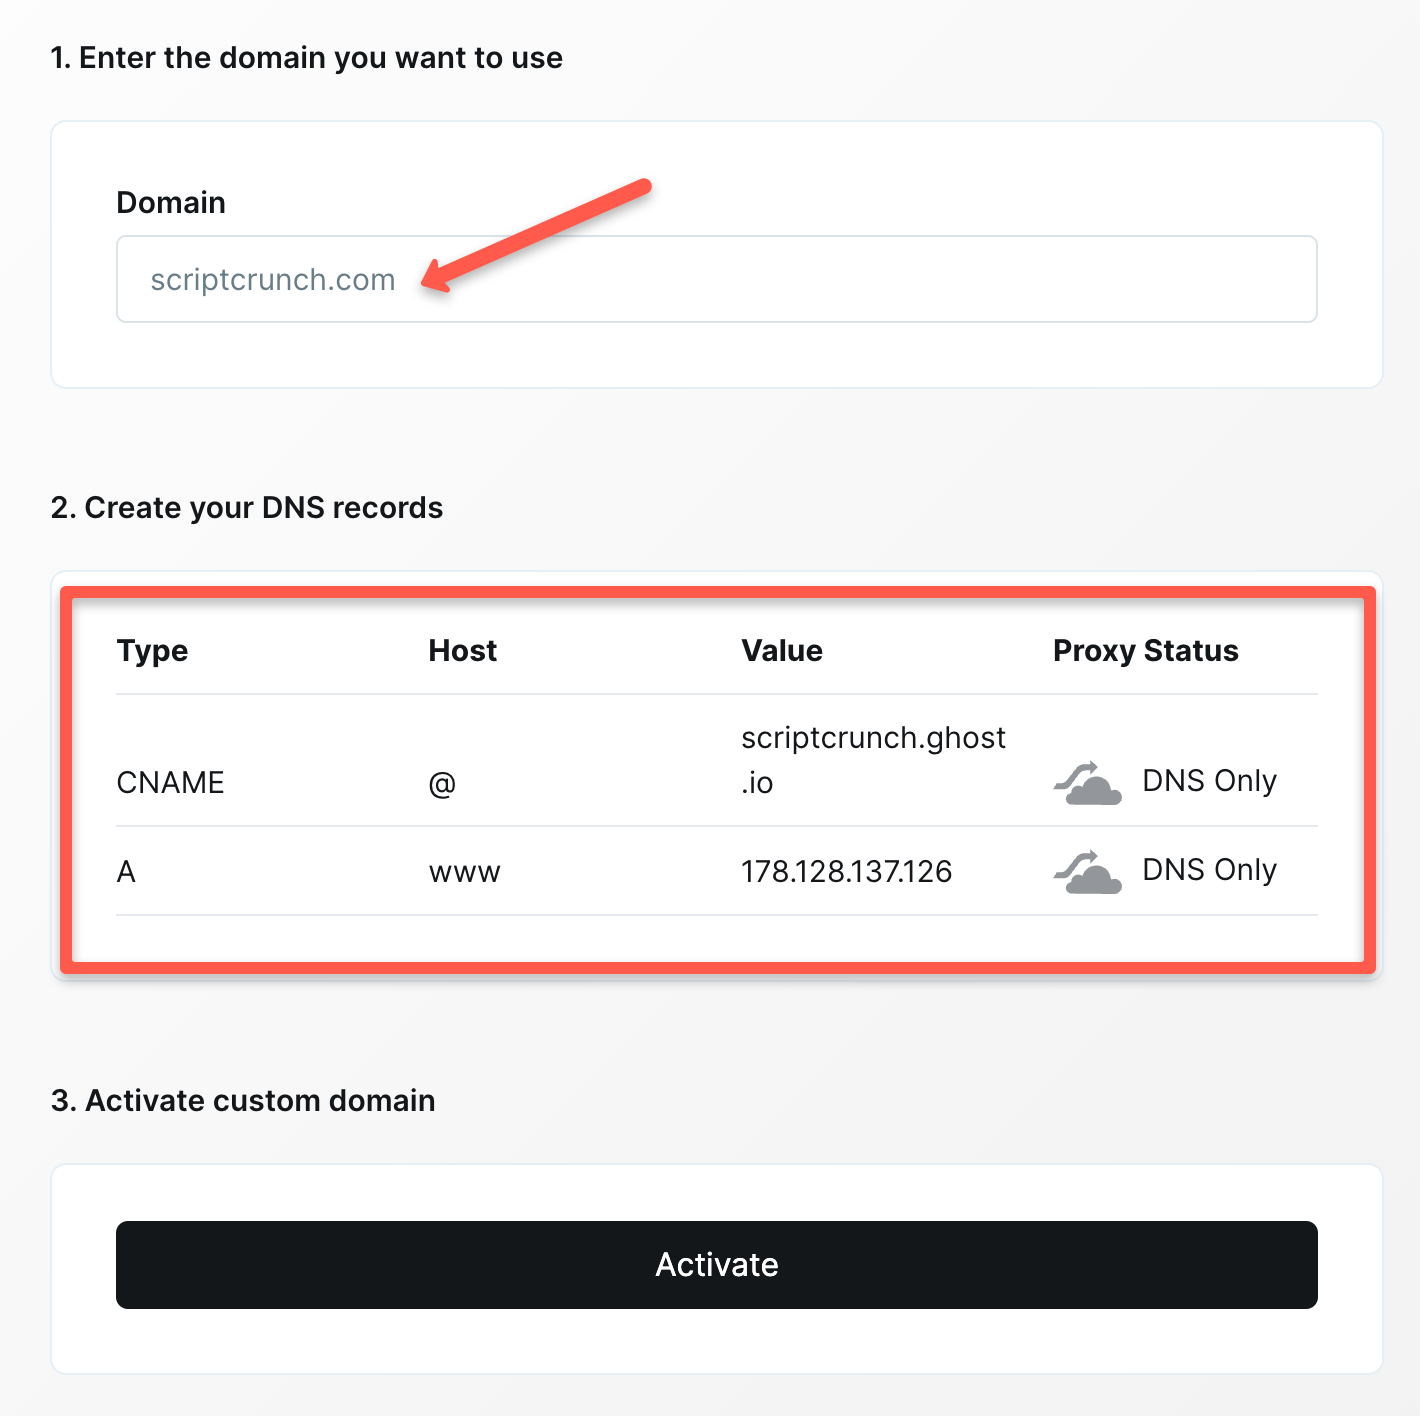
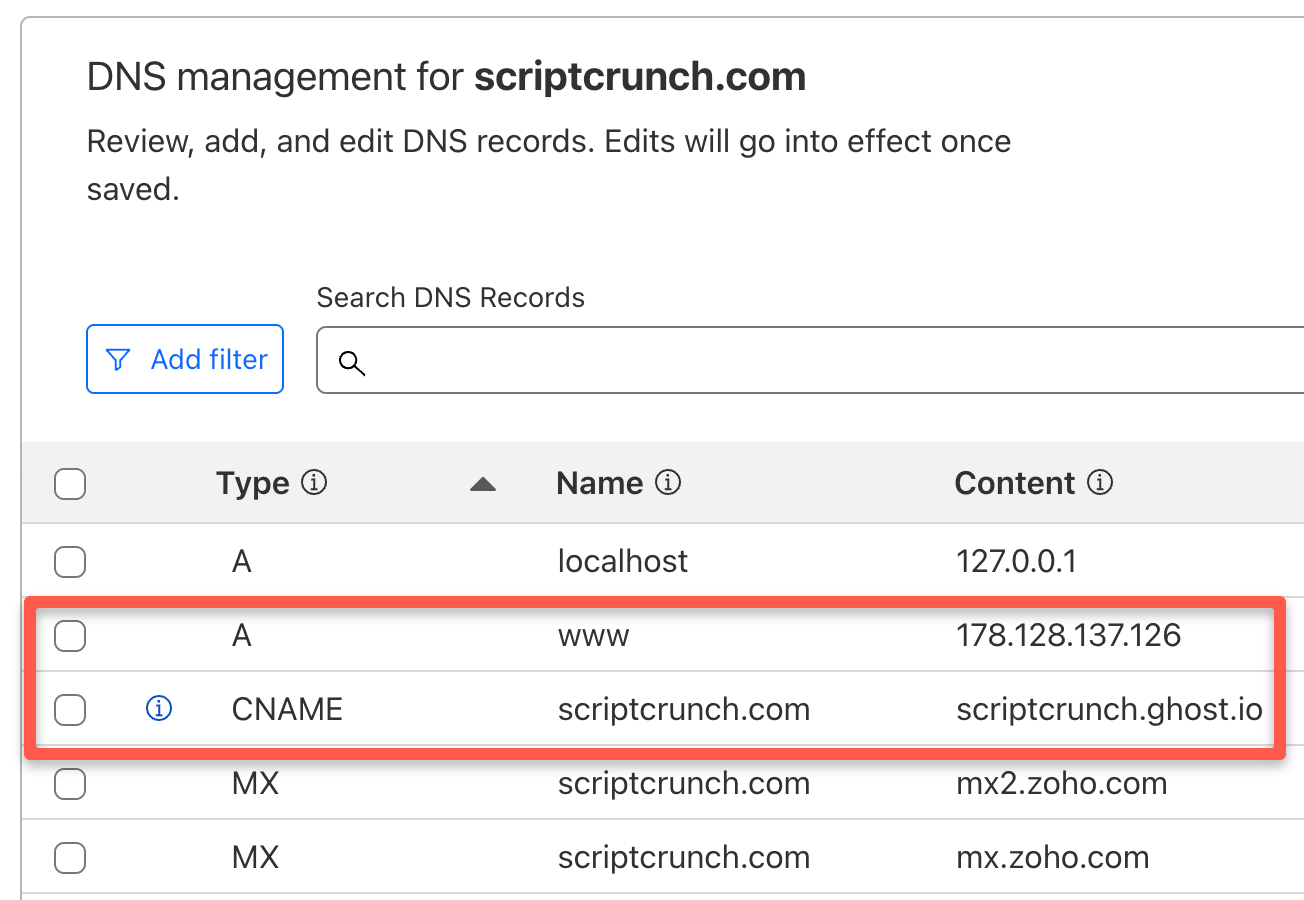
Step 3: Now, go to your DNS provider and update those DNS records according to the Type and the given value. An example of a Cloudflare DNS configuration I set up for a website is shown below.
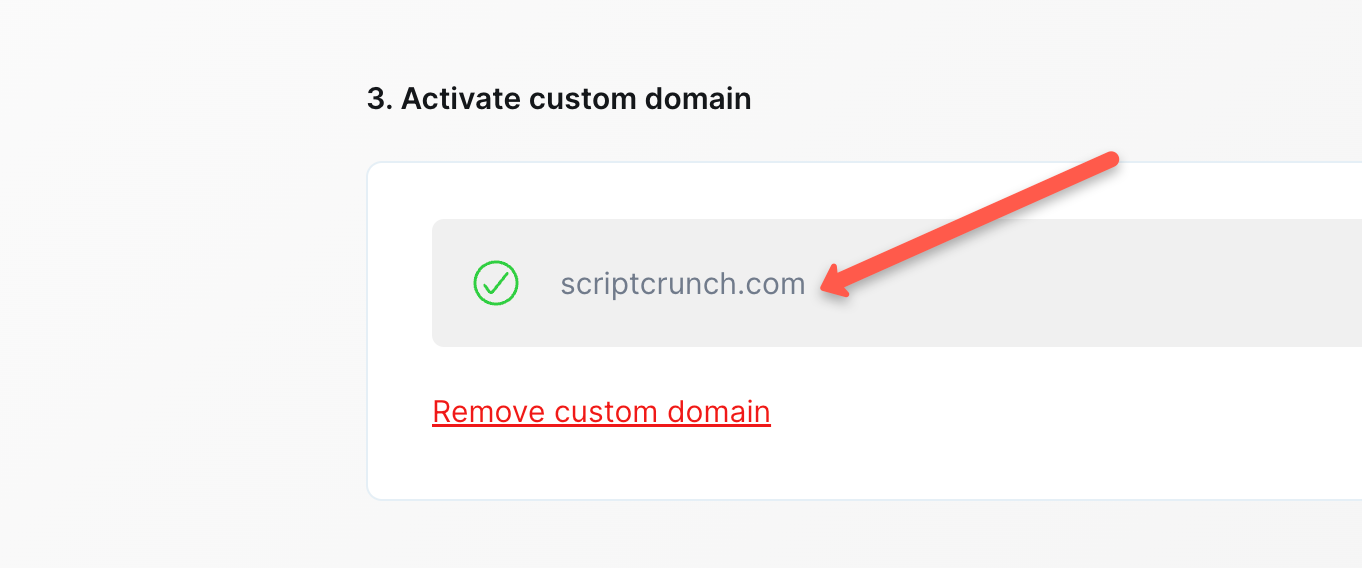
Step 4: Now, go back to the Ghost DNS page and click Setup. It may take 5 to 10 minutes for the domain to activate. Once activated, you will see the green tick mark next to your domain, as shown below.
Step 5: Once the DNS is validated, verify if the content is being served from the Ghost platform and ensure all the posts, images, and affiliate URLs are working as expected.
DNS Propagation and Downtime
Will there be any DNS downtime during the migration?
Possibly. Be prepared for 5-10 minutes of downtime during the DNS change.
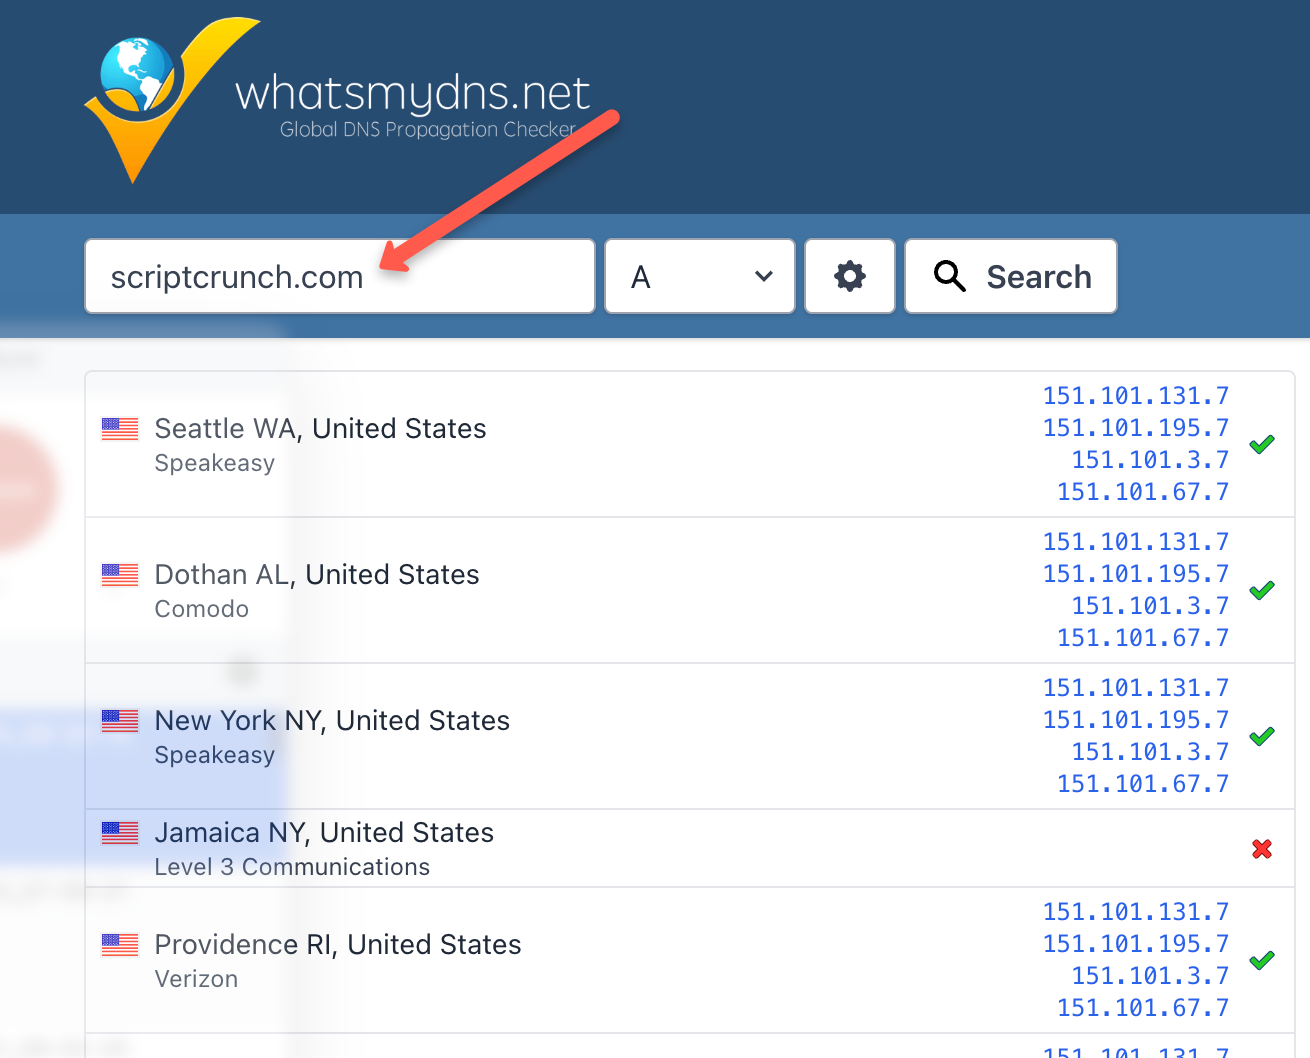
DNS propagation may take time. You can check the propagation status using whatsmydns. If you enter your domain name, it will show the DNS propagation status as shown below.
Here are a few things you need to do after the DNS change.
- Clear the browser cache to flush the DNS cache.
- Validate the website using a VPN.
- Check from different regions or new devices (mobile, etc.).
WWW to non-www
The routing rules you set up via WordPress web server configuration won't work in Ghost. So you need to set those up at the DNS level. For example, if you use Cloudflare, you can set up a redirect rule as given below.
- Go to Page Rules in Cloudflare.
- Create a new rule:
- If URL matches:
www.example.com/* - Forwarding URL:
301 Redirecttohttps://example.com/$1
- If URL matches:
This will redirect all www URLs to the non-www version.
Submit New Sitemap to Search Console
When you migrate to Ghost, your website's sitemap gets changed. For example, from /sitemap_index.xml to /sitemap.xml
Validate the new sitemap and submit it to the Google Search Console.
You can also add the sitemap redirection to the routes config. For example,
301:
  /sitemap_index.xml: /sitemap.xml
  /post-sitemap.xml: /sitemap-posts.xml
Validating RSS
When Ghost is running in private mode, RSS feeds will return a 404 error. RSS feeds do not appear in private posts. You can validate from the private URL followed by /rss
Once the website is live, you can verify it with the primary domain.
A key thing to understand is that the homepage RSS link sometimes returns a 404 error. This is because of the routes config.
For example, your blogs are listed on https://domain.com/blog, then your RSS feed URL would be https://domain.com/blog/rss
Post-Migration Activities
Here is the important part. Your migration is successful only if there are no issues with website traffic.
The following are the key things to do after migration,
- Check Search Console coverage daily for the next two weeks.
- Use tools like Semrush to run a full site audit to identify and fix broken backlinks.
- Compare the organic traffic against the same period before migration.
You can expect a dip in traffic for a few weeks after migration. However, if you have all the key steps in order, you will recover quickly.
Personally, I haven't seen much of a dip in traffic. In fact, after moving to Ghost Pro, the site's loading speed has improved significantly, and the overall user experience has improved.
Conclusion
In this guide, I have walked you through the entire end-to-end process of how to migrate WordPress to Ghost.
Not only that, but I have also covered image migration, DNS migration, DNS downtime, and validation.
By following all these steps, you will be able to set up your Ghost account without any issues.
If you have any doubts about the migration, drop them in the comments; we will help you out.
Here are other useful guides related to the Ghost platform