Storing Kubernetes Secret manifest files in version control tools like Git is not secure. They are only base64 encoded, which means anyone can decode them.
However, there are use cases where you might want to keep the secrets in Git securely.
This is where Sealed Secrets helps. It encrypts your Secret manifest files so they can be safely stored in version control tools like GitHub. It is one of the popular open source Kubernetes secret management tools with 7000+ Github Stars.
In this blog, you will learn how Sealed Secrets can encrypt and decrypt your Kubernetes Secret manifest files.
What is Sealed Secrets?
Sealed Secrets is a Kubernetes tool that solves the problem of storing confidential information, such as database credentials, TLS certificates, tokens, etc, in Git.
Sealed Secrets uses asymmetric encryption also known as public-key cryptography. It uses two different keys, a public key for encryption used by kubeseal for encrypting secrets and a private key for decryption used only by the controller in the cluster.
Kubeseal is a CLI tool that encrypts data in a secret manifest file using the Sealed Secrets Controller public key and saves them in a sealed secret.
The secret can only be decrypted by the Sealed Secrets controller running on the Kubernetes cluster. Even if the admin can't decrypt them, while deploying the Sealed Secret, it decrypts and creates a Kubernetes Secret using the data.
How Sealed Secrets Work?
Below is the diagrammatic workflow of the Sealed Secrets.
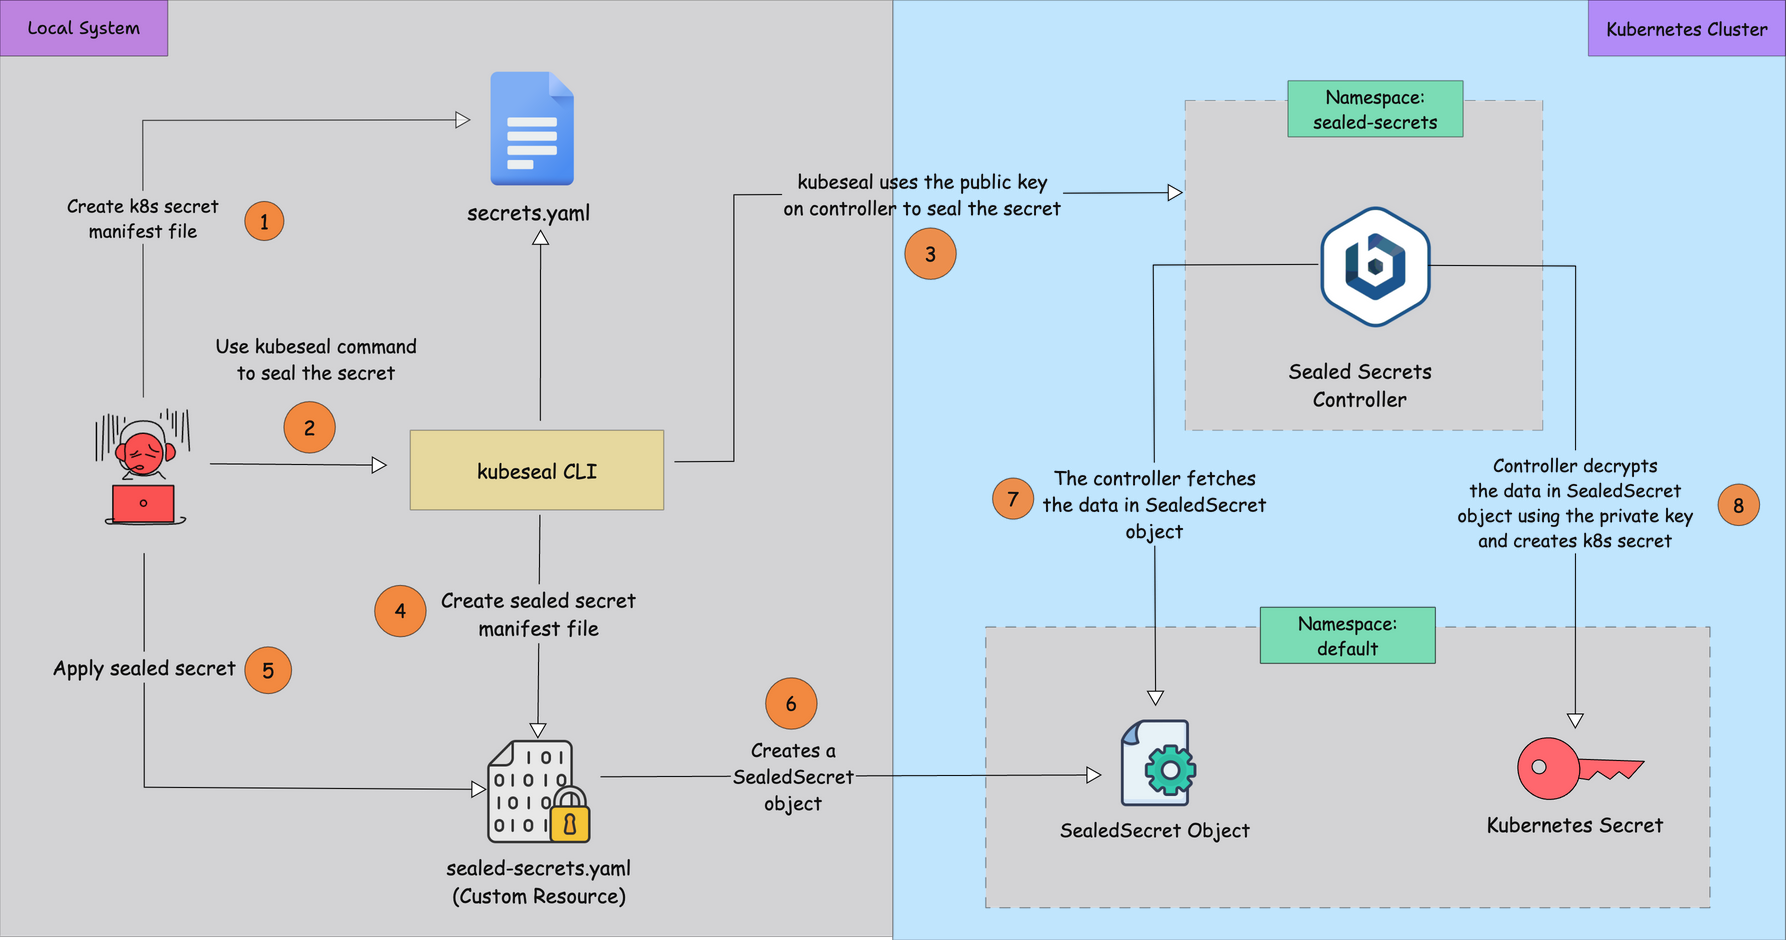
Here is how it works.
- Custom Resource: When you install Sealed Secrets, it adds a new Custom Resource Definition (CRD) called
SealedSecret. - Create a Secret manifest file: Write your sensitive data in a file, for example,
secret.yaml - Seal the Secret: Use the
kubesealCLI, which takes the public key from the Sealed Secrets controller. This turns yoursecret.yamlinto an encrypted file calledsealed-secret.yamlthat contains theSealedSecretObject - Apply the sealed secret: When you apply the
sealed-secret.yamlfile, aSealedSecretobject is created in your cluster. - Controller Watches for SealedSecret Objects: The Sealed Secrets controller is always watching for any new or changed
SealedSecretobjects in the cluster. - Private Key: The controller has access to a private key (stored securely inside the cluster).
- Decryption and creation of the real Secret: The Sealed Secrets controller fetches the encrypted data, decrypts it with its private key, and then creates a normal Kubernetes Secret in the target namespace.
With Sealed Secrets, you can safely store your sealed secret files in GitHub or similar version control systems because they remain encrypted until the Sealed Secrets controller decrypts them inside your Kubernetes cluster.
Setup Prerequisites
The prerequisites for the setup are given below.
Installing Sealed Secrets using Helm
Follow the below steps to install sealed secrets using Helm.
Step 1: Create Namespace
Let's start with creating a separate namespace for installing the sealed secrets controller.
Run the following command to create the namespace sealed-secrets.
kubectl create ns sealed-secretsThen, run the following command to check if the namespace is created.
kubectl get ns sealed-secretsYou will get the following output.

Step 2: Add Helm Repo
The next step is to add the Helm repo of the sealed secrets Helm chart.
Run the following command to add the Helm repo.
helm repo add sealed-secrets https://bitnami-labs.github.io/sealed-secretsOnce the repo is added, run the following command to update it.
helm repo update sealed-secretsIf you want to check all the charts in plain YAML format, run the following to convert the charts into plain YAML files.
helm template sealed-secrets sealed-secrets/sealed-secrets --output-dir .You will see a new directory created on your work directory with the below YAML files.
➜  sealed-secrets tree
.
└── templates
    ├── cluster-role-binding.yaml
    ├── cluster-role.yaml
    ├── deployment.yaml
    ├── role-binding.yaml
    ├── role.yaml
    ├── service-account.yaml
    └── service.yaml
By running the Helm chart, it will create the following:
- Service Account
- Cluster Role and Cluster Role Binding
- Role and Role Binding
- Sealed Secrets Controller (Deployment)
- Service
Step 3: Create a TLS Certificate and a Private Key
In this step, we will create a secret with a TLS certificate and a private key.
As mentioned earlier in the blog, Sealed Secrets uses asymmetric encryption that uses the TLS certificate as the public key and the TLS key as the private key.
Even though the Sealed Secrets controller automatically creates a secret with a TLS certificate and a private key, even if we don't give a TLS certificate and a private key.
But, it is recommended to use your own certificate and keys, also you can use the same key on multiple clusters, which will simplify the multi-cluster deployment.
If you don't have a TLS certificate and a private key run the following command to create it.
openssl req -x509 -days 365 -nodes -newkey rsa:4096 -keyout mytls.key -out mytls.crt -subj "/CN=sealed-secret/O=sealed-secret"This command will create a TLS certificate and a private key for Sealed Secrets with 365 days validity.
After running the above command, you can see the files mytls.key and mytls.crt in your work directory.
Now, run the following command to create a secret with the TLS certificate and private key in the sealed-secrets namespace.
kubectl create secret tls sealed-secrets-key \
  --cert=mytls.crt \
  --key=mytls.key \
  --namespace=sealed-secrets
The secret name should be sealed-secrets-key, or else the Sealed Secrets controller won't be able to recognize the secret, and it will create a secret of a new TLS certificate and private key.
Then, run the following command to check if the secret is created.
kubectl get secret -n sealed-secretsYou will get the following output.

Step 4: Deploy Sealed Secrets
Let's deploy the Sealed Secrets controller using Helm. Run the following command to deploy Sealed Secrets.
helm install sealed-secrets -n sealed-secrets --set-string fullnameOverride=sealed-secrets-controller sealed-secrets/sealed-secretsOnce it's completed, run the following command to check if the controller is up and running.
kubectl get deploy -n sealed-secretsYou will get the following output.

Step 5: Install kubeseal CLI
The final step of the setup is installing the kubeseal CLI in your system.
The sealed secret can only be deployed in the cluster, which has a Sealed Secrets controller with the right TLS key, which encrypts it.
There are three scopes in kubeseal that determine how the sealed secret can be used in the cluster.
You can specify the scope using the --scope flag in the kubeseal command, you will see the kubeseal command used to encrypt in the next section.
The three scopes are:
- strict - The sealed secret must decrypted and deployed with the same namespace and name, which means the namespace and name cannot be changed.
This is the default scope that will be applied if no scope is specified on the kubeseal command. - namespace-wide - If you use this scope you can change the name of the sealed secret but cannot change the namespace.
- cluster-wide - With this scope you can change the name and namespace of the sealed secrets.
To install the kubeseal CLI, run the following command.
For Mac:
brew install kubesealFor Linux:
You can check for the latest version here.
KUBESEAL_VERSION='0.27.3'

curl -OL "https://github.com/bitnami-labs/sealed-secrets/releases/download/v${KUBESEAL_VERSION:?}/kubeseal-${KUBESEAL_VERSION:?}-linux-amd64.tar.gz"

tar -xvzf kubeseal-${KUBESEAL_VERSION:?}-linux-amd64.tar.gz kubeseal

sudo install -m 755 kubeseal /usr/local/bin/kubeseal

rm kubeseal-${KUBESEAL_VERSION:?}-linux-amd64.tar.gz
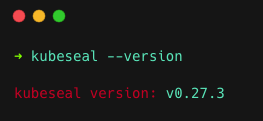
After the installation is completed, run the following command to verify that it's installed.
kubeseal --versionIf installed, you will get the kubeseal version as output, as shown below.
Creating Sealed Secrets
Let's see how to create a Sealed Secret. First, you need to create a Kubernetes Secret manifest file
Create a file secret.yaml and copy the following content.
apiVersion: v1
kind: Secret
metadata:
  name: my-secret
  namespace: default
type: Opaque
data:
  username: dXNlcm5hbWU=
  password: cGFzc3dvcmQ=
Now, run the following kubeseal command to create sealed secret from the Secret manifest.
kubeseal --scope namespace-wide -f secret.yaml -w sealed-secret.yaml -n sealed-secrets --controller-name sealed-secrets-controller --controller-namespace sealed-secretsThis command will create a Sealed Secret manifest file sealed-secret.yaml from the Secret manifest file secret.yaml.
You can also see the controller name, and the namespace where it is deployed also specified in the command.
That's because the kubeseal uses the private key in the Sealed Secret controller to seal the secrets.
After running the above kubeseal command, you can see the Sealed Secret manifest file sealed-secret.yaml.
Given below is the sealed secret manifest file that you will be saving on Git.
apiVersion: bitnami.com/v1alpha1
kind: SealedSecret
metadata:
  annotations:
    sealedsecrets.bitnami.com/namespace-wide: "true"
  creationTimestamp: null
  name: my-secret
  namespace: default
spec:
  encryptedData:
    password: AgAnJv9G37tt5Ovmxq7QS0HQjnsmdnbBNoU1pu2iT18W7yMiIoH0IRLNX7acLVWTk0FruOeYhXjorS7x9LykASEIMc9f7xK83Ew6GCegVBAGMQwjkM1pmJ4uiMGhR3RSPzw9b64Iac5VJUCuZSDewLWhDJH6kH1cHg7+a2VHKzLHkzn0SeHaczRxJWDigHB2sy5OWZP6AMZNah4Y7v/s8vrj6mYLIBiwtdl2N9sXFEip9Yf7NhON/c/5CjaJRJTsMuYoTBY4ums8ziXE4AkRU8NQHarcJvGb4J9Ef5xLWA2fIHrKLB0NB0+FMSILEbbZ9mlvNYYN/FqjFNpCj66ANFzpLf0l9RXl4ctnpQHdAJDpmQiB897mpqadnAt6vb3GGk094/QfSesdyBUvBUXXZkPjCrA6Hf+mm4RMhw7Bnx1sUypkiT+LQhKvHAiWJTgsksjpMwl2H8+wYBJB1tLgy5CurhNjSwu3k9hQJDpMde80Rwi+r2rhtAcWqqkbrpjGYYutAbn/w0tHidIuj5jaGn4PzFcj4a58OcTucO6tAcGsIlX7LiRrK588qH/xHgpQa/I2WJGzy5sPRWWl2XGcQLSgcVPF0CCRZBJtn9Xcm6RmDtlz3d9Udw1sVK5NizTb55qVcOyQGtqIEODGLIVwCu3QCQAnZmPFmTAn3OdPmBY7vgdebi/z9UR9r3ksxDpYQjdSjfOr8sEQ1Q==
    username: AgC22rcYnomXJAyfrXdumiE7k2kpbJHtvFouOWwo7cC2Qw3rbHLU73wuVEIGO5W8FYb2srQhbOIsWNREg4F25qFO8csZcQUB9OL/Tsch5UBPWbUwvvSx+I0vwDqSy29TAnjyT2YB3ydFB+B98LXi+gsPOtmm5Zdq74hO5iDDQKGwBBZ0AgaSImID/WHTySOXhUyDKFZtBJNMv8DcKMgYSqiI4cy9UeS5VubFlygAaXHadE1RUhma3A0oPHQmoxnuEqSZOc/Goi/4AI0OyGDpCfae8KyhLHD3RAuZeze1RLMJjk08jL94tw86UAXVK+hG2jo0LW6mURY/SMtH7AWDBc+e9SDuwhLps2srqqLfMnpjNMgEWJn3bJvuaw440ZxXP97esGA/jUNhy1Oa7EfVXW4aiexYDM0f0thzSG2uL7n6xE/p19Wn/WuHQ0X5JwXhAwDZR5XwIdfMfFx4XfjksfyLL8hBo88i0WsJF8szz345oo9MTpBYownir7gTbeohGYaElsLrEpxZ4VLUgaku1ns6dVjFWXOaen6x7kUbGLzKfMy5CxwPHchapSEl2cwoTLeLa/i9AfttGICdnrRM18xzHOI1dUqO4n2aXJjyuZoZ1NUulYX5w/rpKHwXJN/+yj1QIofl2RgQJqp3m8V6JlbiTw8+muP+epGBfPG1IABk9+PzYAW7zfwEVao4ImA5poj2cArMxfEwRw==
  template:
    metadata:
      annotations:
        sealedsecrets.bitnami.com/namespace-wide: "true"
      creationTimestamp: null
      name: my-secret
      namespace: default
    type: Opaque
You can see the username and password values have converted into encrypted data, and the kind has changed as SealedSecret.
Also, you can see sealedsecrets.bitnami.com/namespace-wide set to true because we use the namespace-wide scope.
The encrypted data will be decrypted by the controller when we deploy it.
Now, just run the below apply command to deploy the sealed secrets.
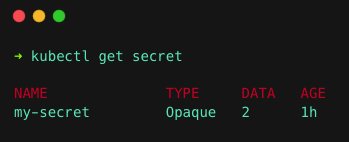
kubectl apply -f sealed-secret.yamlRun the following command to check if the Secret is created.
kubectl get secretYou will get the following output, you can see the controller decrypts the sealed secret and creates a Kubernetes secret.
Sealed-Secrets UI
Sealed-Secrets UI is a web interface for creating sealed secrets, it uses the public key on the Sealed Secrets controller to create a sealed secret.
This is an alternative to kubeseal CLI for those who prefer GUI instead of CLI.
Follow the below steps to deploy Sealed-Secrets UI.
Step 1: Deploy Sealed-Secrets UI
To deploy the Sealed-Secrets UI, create a file sealed-secret-ui.yaml and copy the following content.
apiVersion: apps/v1
kind: Deployment
metadata:
  name: sealed-secrets-ui
  namespace: sealed-secrets
  labels:
    app.kubernetes.io/instance: sealed-secrets-ui
    app.kubernetes.io/name: sealed-secrets-ui
spec:
  replicas: 1
  selector:
    matchLabels:
      app.kubernetes.io/instance: sealed-secrets-ui
      app.kubernetes.io/name: sealed-secrets-ui
  template:
    metadata:
      labels:
        app.kubernetes.io/instance: sealed-secrets-ui
        app.kubernetes.io/name: sealed-secrets-ui
    spec:
      serviceAccountName: sealed-secrets-controller
      containers:
        - name: sealed-secrets-ui
          image: alpheya/sealed-secrets-ui:0.3.3
          imagePullPolicy: IfNotPresent
          ports:
            - containerPort: 8080
          env:
            - name: SEALED_SECRETS_CONTROLLER_NAMESPACE
              value: sealed-secrets
            - name: SEALED_SECRETS_CONTROLLER_NAME
              value: sealed-secrets-controller
          resources:
            requests:
              cpu: 100m
              memory: 128Mi
            limits:
              cpu: 150m
              memory: 192Mi
          livenessProbe:
            httpGet:
              path: /healthz
              port: 8080
            initialDelaySeconds: 10
            periodSeconds: 10
          readinessProbe:
            httpGet:
              path: /healthz
              port: 8080
            initialDelaySeconds: 10
            periodSeconds: 10
This manifest file will deploy the Sealed-Secrets UI on the sealed-secrets namespace and use the same service account created for the controller.
In the above manifest file, change the following ENV if your Sealed Secrets Controller name is different and it is deployed in a different namespace other than sealed-secrets.
If you have followed the above controller setup as it is, then there is nothing to change.
env:
  - name: SEALED_SECRETS_CONTROLLER_NAMESPACE
    value: sealed-secrets
  - name: SEALED_SECRETS_CONTROLLER_NAME
    value: sealed-secrets-controller
Run the following command to deploy the Sealed-Secrets UI.
kubectl apply -f sealed-secret-ui.yamlYou can verify if the Sealed-Secrets UI deployment is up and running using the following command.
kubectl get deploy sealed-secrets-ui -n sealed-secretsStep 2: Create a Service for Sealed-Secrets UI
The next step is to create a service for the Sealed-Secrets UI so that we can access the UI on the web.
Create a file sealed-secret-ui-svc.yaml and copy the below content.
apiVersion: v1
kind: Service
metadata:
  name: sealed-secrets-ui
  namespace: sealed-secrets
  labels:
    app.kubernetes.io/instance: sealed-secrets-ui
    app.kubernetes.io/name: sealed-secrets-ui
spec:
  type: NodePort
  ports:
    - name: http
      port: 8080
      targetPort: 8080
      protocol: TCP
      nodePort: 30080
  selector:
    app.kubernetes.io/name: sealed-secrets-ui
This will create a service for Sealed-Secrets UI and expose it on NodePort 30080.
If the above specified nodeport is already used by another service in your cluster, change the nodeport to another port between the range 30000-32767.
Run the following command to create the service.
kubectl apply -f sealed-secret-ui-svc.yamlThen, run the following command to check if the service is created or not.
kubectl get svc sealed-secrets-ui -n sealed-secretsStep 3: Access the Web
Finally, try to access the Sealed-Secrets UI on the web using the node-ip and nodeport.
For example, if your node-IP is 0.0.0.10 and the nodeport is 30080, then the URL is http://10.0.0.10:30080.
You can see the UI as shown below.
In the UI, specify the scope, namespace, secret name, and values, then press the Encrypt button.
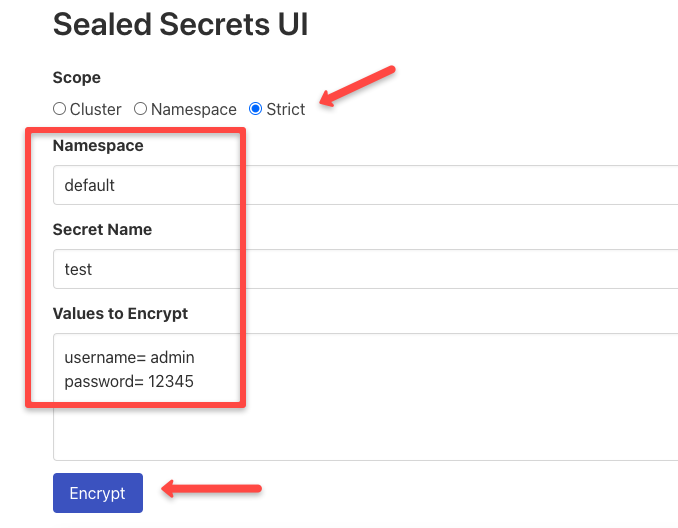
After you press the Encrypt button, you will get the sealed secret manifest content, as shown below.
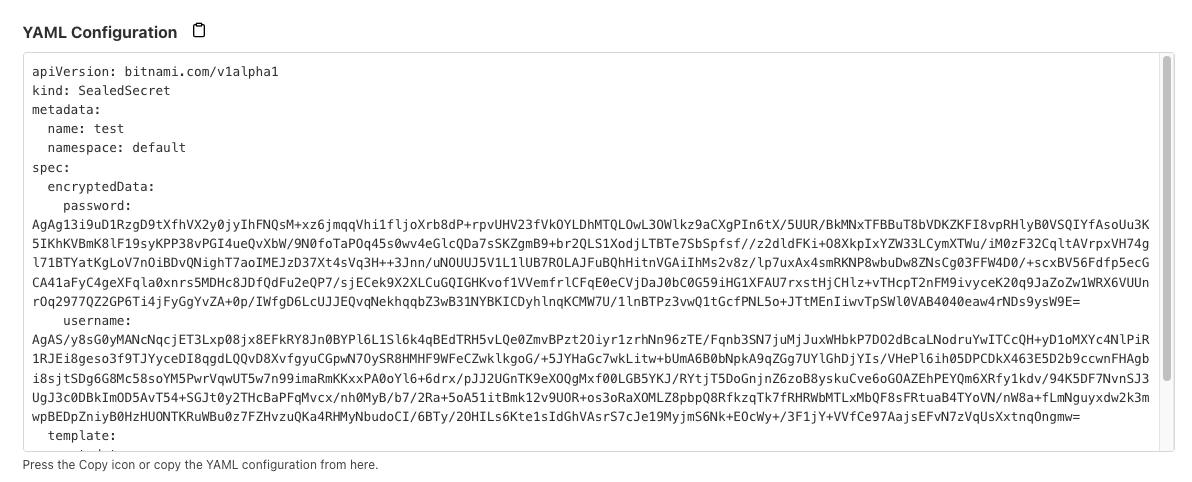
You can copy this YAML configuration into a YAML file and apply the file to create the secret.
Decrypting Secrets in Multiple Clusters
As you already know, the private key present in the controller is responsible for the decryption of sealed secrets.
What if you have multiple clusters deploying the same application for use cases like high availability?
In this case, you would need the same private key in all the sealed secret instances running in multiple clusters.
Let's assume the above setup you have done in one cluster and you want to decrypt the sealed secret created above in a second cluster.
For that, first you create a namespace sealed-secrets and create a secret with the same TLS certificate and private key you used in the first cluster on the second cluster as well.
If you don't know the TLS certificate and private key you used in the first cluster, run the following command to get it.
kubectl get secret -n sealed-secrets sealed-secrets-key -o yaml > sealed-secrets-key.yamlThis command will get the TLS certificate and private key and save it in a secret manifest file sealed-secrets-key.yaml.
You just have to apply the manifest file in the second cluster.
kubectl apply -f sealed-secrets-key.yaml -n sealed-secretsThen, you add the Sealed Secrets Helm repo to the second cluster and deploy the controllers as done in the above setup steps 2 and step 4.
Once the controller is up and running, you can deploy the sealed secrets on the second cluster as well.
Clean the Setup
If you no longer need to use the setup and want to clean it up, run the following commands.
Delete the secret by running the following command.
kubectl delete -f sealed-secret.yamlThen, delete the Sealed Secret controller.
helm delete -n sealed-secrets sealed-secretsThen run the following command to delete the namespace.
kubectl delete ns sealed-secretsFinally, run the following command to remove the kubeseal CLI from your system.
For Mac:
brew uninstall kubesealFor Linux:
sudo rm /usr/local/bin/kubesealReal-World Use Cases
The best practices for Sealed Secrets are given below.
- Sealed Secrets can encrypt secrets like credentials, TLS certificates, and tokens.
- Sealed Secrets can be stored in version control tools like GitHub without any security issues, which can be used in CI/CD workflows.
- Since the secrets are encrypted, accidental exposure of secrets is prevented.
- By using the same TLS keys for the Sealed Secrets controller in multiple clusters, you can use the same encrypted Sealed Secret for multi-cluster deployments.
Conclusion
In this blog, you have learned about Sealed Secrets, how it works, and what are the components used in the process.
Also, you have done a practical example of sealing and deploying a secret in a cluster.
There are other tools that will help you manage secrets in Kubernetes efficiently. You can take a look at Secret Store CSI Driver and external secret operator.
If you have doubts or face any errors during the setup, do drop a comment below. We will take a look.


