

In this detailed guide, you will learn how to set up and configure the Envoy Gateway API Controller for Gateway API implementation on Kubernetes.
By the end of this blog, you will learn how to:
- Install the Envoy Gateway
- Configure EnvoyProxy, GatewayClass, Gateway, and HTTPRoute (CRDs of the Gateway API)
- Test the traffic routing using a demo application with the Envoy Gateway.
Before we move on to the installation, lets understand what is Envoy Gateway.
What is Envoy Gateway?
Envoy Gateway is an open-source project that is designed to simplify the use of Envoy Proxy as an API Gateway. It is a CNCF (Community-led) project.
It acts as the controller that makes Gateway API resources work using Envoy Proxy.
Here is an interesting thing about Envoy. Compared to other Gateway API controllers, Envoy Gateway stands out because it uses Envoy Proxy, which is built specifically for cloud-native environments.
Envoy uses a fully dynamic control plane called xDS (Discovery Service). This means configuration changes, such as adding or updating a route, are applied instantly in memory. There is no need to restart or reload the proxy process.
In simple terms, traffic rules can change in real time without causing downtime. This makes Envoy Gateway a strong fit for modern Kubernetes and microservices setups where changes happen often and need to be safe and fast.
Also, Envoy Gateway is mainly used for North–South traffic and can be seen as a modern replacement for Ingress.
From a Gateway API workflow perspective, Envoy Gateway is similar to the NGINX Gateway Fabric controller that we explained in the Gateway API tutorial.
Envoy Gateway Workflow
Envoy Gateway has the following two main components.
- Gateway Controller (Control Plane) : Primary controller that watches the Gateway API Custom Resources and publishes the routing rules and configs to the Proxy controller.
- Proxy Controller (Data Plane): This is the actual traffic routing proxy controller created by the Gateway controller to route the traffic to the intended services.
Now lets understand the workflow of the Envoy Gateway.
The following diagram illustrates the workflow of the Envoy Gateway API on Kubernetes.

Here is how it works.
- The cluster admin creates a Gateway (and related resources like
HTTPRoute) using the Kubernetes Gateway API CRDs. - The Envoy Gateway controller watches these resources and configures the Envoy Proxy data plane. In most setups, it also creates a Kubernetes Service of type LoadBalancer, which triggers your cloud provider to provision an external load balancer.
- Based on your
HTTPRouterules, Envoy is configured with the right routing logic to reach your backend workloads. - When a user sends a request, it first hits the external load balancer, then gets forwarded to the Envoy Proxy pods.
- Envoy then routes the traffic to the correct backend Service, and from there Kubernetes forwards it to the right application pods.
So the flow looks like the following.
Client – >External Load Balancer – >Envoy Proxy (data plane) – >Kubernetes Service – >Application Pods
Now that you understand how Envoy Gateway works, let’s get started with the setup.
Prerequisites
The following are the requirements to install the Envoy Gateway on the Kubernetes cluster.
- A Kubernetes Cluster
- Kubectl (Local Workstation)
- Helm (Local Workstation)
I assume you have a Kubernetes cluster to start the Envoy installation. If not, refer to this --> Create AWS EKS Cluster Using eksctl
Install Envoy Gateway using Helm
Follow the steps given below to install the Envoy Gateway using the Helm chart.
Step 1: Install the Envoy Gateway & Gateway API CRD's
We can directly install the Gateway API CRDs and Envoy Gateway if you don't want to make any customization.
Execute Helm command for the installation.
helm install eg oci://docker.io/envoyproxy/gateway-helm --version v1.6.2 -n envoy-gateway-system --create-namespace
The installation will take a few minutes to complete. During that time, we can check the Gateway controller deployment status.
For reference, below is the structure of the Envoy Gateway Helm chart used for the installation.
envoy-gateway-helm
├── Chart.yaml
├── README.md
├── crds
│   ├── gatewayapi-crds.yaml
│   └── generated
│       ├── gateway.envoyproxy.io_backends.yaml
│       ├── gateway.envoyproxy.io_backendtrafficpolicies.yaml
│       ├── gateway.envoyproxy.io_clienttrafficpolicies.yaml
│       ├── gateway.envoyproxy.io_envoyextensionpolicies.yaml
│       ├── gateway.envoyproxy.io_envoypatchpolicies.yaml
│       ├── gateway.envoyproxy.io_envoyproxies.yaml
│       ├── gateway.envoyproxy.io_httproutefilters.yaml
│       └── gateway.envoyproxy.io_securitypolicies.yaml
├── templates
│   ├── NOTES.txt
│   ├── _helpers.tpl
│   ├── _rbac.tpl
│   ├── certgen-rbac.yaml
│   ├── certgen.yaml
│   ├── envoy-gateway-config.yaml
│   ├── envoy-gateway-deployment.yaml
│   ├── envoy-gateway-hpa.yaml
│   ├── envoy-gateway-poddisruptionbudget.yaml
│   ├── envoy-gateway-rbac.yaml
│   ├── envoy-gateway-service.yaml
│   ├── envoy-gateway-serviceaccount.yaml
│   ├── envoy-proxy-topology-injector-webhook.yaml
│   ├── infra-manager-rbac.yaml
│   ├── leader-election-rbac.yaml
│   ├── namespace.yaml
│   └── namespaced-infra-manager-rbac.yaml
└── values.yaml
The container images used on this Helm chart are.
docker.io/envoyproxy/gateway:v1.6.2- Control Plane Controllerdocker.io/envoyproxy/ratelimit:99d85510- This will limit the request to the Envoy proxy based on the given rules.docker.io/envoyproxy/gateway-dev:latest- The Data Plane
Step 2: Validating Installation
We can check the deployment status of the Envoy Gateway to ensure the Control Plane controller is deployed.
$ kubectl -n envoy-gateway-system get all

NAME                                READY   STATUS    RESTARTS   AGE
pod/envoy-gateway-6dd8f9b8f-r5w47   1/1     Running   0          2m18s

NAME                    TYPE        CLUSTER-IP     EXTERNAL-IP   PORT(S)                                            AGE
service/envoy-gateway   ClusterIP   10.110.16.99   <none>        18000/TCP,18001/TCP,18002/TCP,19001/TCP,9443/TCP   2m18s

NAME                            READY   UP-TO-DATE   AVAILABLE   AGE
deployment.apps/envoy-gateway   1/1     1            1           2m18s

NAME                                      DESIRED   CURRENT   READY   AGE
replicaset.apps/envoy-gateway-6dd8f9b8f   1         1         1       2m18s
The status (Running) ensures that the Control Plane Controller is ready to watch the Gateway API and Envoy Custom Resources and deploy Data Planes.
Before we create any Custom Resource, lets list the Custom Resource Definitions of the Gateway API as well as the Envoy Gateway.
$ kubectl get crds | grep -iE "gateway"

backends.gateway.envoyproxy.io
backendtrafficpolicies.gateway.envoyproxy.io
clienttrafficpolicies.gateway.envoyproxy.io
envoyextensionpolicies.gateway.envoyproxy.io
envoypatchpolicies.gateway.envoyproxy.io
envoyproxies.gateway.envoyproxy.io
httproutefilters.gateway.envoyproxy.io
securitypolicies.gateway.envoyproxy.io

backendtlspolicies.gateway.networking.k8s.io
gatewayclasses.gateway.networking.k8s.io
gateways.gateway.networking.k8s.io
grpcroutes.gateway.networking.k8s.io
httproutes.gateway.networking.k8s.io
referencegrants.gateway.networking.k8s.io
tcproutes.gateway.networking.k8s.io
tlsroutes.gateway.networking.k8s.io
udproutes.gateway.networking.k8s.io
xbackendtrafficpolicies.gateway.networking.x-k8s.io
xlistenersets.gateway.networking.x-k8s.io
Next, we will test the controller implementation using a sample application.
Deploying a Sample Application
To test the traffic routing using Envoy Gateway, we create an Nginx deployment on the cluster.
kubectl create deployment web-deploy --image nginx --port 80 --replicas 2Create a service for this deployment
kubectl expose deployment web-deploy --name web-svc --port 80 --target-port 80 --type ClusterIPOnce both deployment and service creation are completed, we can check them using the following command.
$ kubectl get deploy,svc

NAME                         READY   UP-TO-DATE   AVAILABLE   AGE
deployment.apps/web-deploy   2/2     2            2           2m10s

NAME                 TYPE        CLUSTER-IP       EXTERNAL-IP   PORT(S)   AGE
service/web-svc      ClusterIP   10.100.235.119   <none>        80/TCP    54s
Now that our demo application is ready, our next task is to setup external traffic to this application using the envoy gateway.
Let's start with creating the Envoy Proxy Custom Resource.
Create EnvoyProxy Resource
LoadBalancer service type for Data Planes. This means that if you are running in a cloud cluster, such as EKS or AKS, the Load Balancer will be automatically created when you deploy the gateway CRD.Since this is a test setup, we do not want a LoadBalancer. So we can change the Data Plane configuration to use
NodePort using the EnvoyProxy CRD. This changes the default behavior of the Control Plane so that the Data Planes created by the Controller will not use the Load Balancer service type.
Note: Skip the following EnvoyProxy modification if you can can use a Load Balancer to test the external traffic.Create the EnvoyProxy manifest with the parameter of type: NodePort. This will overwrite the default configuration available on the Control Plane.
cat <<EOF> envoyproxy.yaml
apiVersion: gateway.envoyproxy.io/v1alpha1
kind: EnvoyProxy
metadata:
  name: envoy-proxy
  namespace: default
spec:
  provider:
    type: Kubernetes
    kubernetes:
      envoyService:
        type: NodePort
EOF
Apply the Envoy Proxy on the Kubernetes cluster.
kubectl apply -f envoyproxy.yamlList the EnvoyProxy resource once the installation is completed.
$ kubectl get envoyproxy

NAME          AGE
envoy-proxy   22m
The first step is successfully completed, so we can now create the GatewayClass resource and attach this Envoy Proxy.
Create GatewayClass Resource
A cluster can have multiple gateway API controllers. The GatewayClass Custom Resource is used to identify which gateway API controller to be used.
So in the GatewayClass manifest, we need to mention the controller ID on the spec.controllerName parameter as well as the created EnvoyProxy under the spec.parametersRef section.
Execute the following to create gatewayclass.yaml
cat <<EOF> gatewayclass.yaml
apiVersion: gateway.networking.k8s.io/v1
kind: GatewayClass
metadata:
  name: envoy-gateway-class
spec:
  controllerName: gateway.envoyproxy.io/gatewayclass-controller
  parametersRef:
    group: gateway.envoyproxy.io
    kind: EnvoyProxy
    name: envoy-proxy
    namespace: default
EOF
The important config to note here is, gateway.envoyproxy.io/gatewayclass-controller is the default name given to the controller. This can be modified in the Helm chart when you use multiple controllers on a same cluster.
Note: Skip the parametersRef section, if you don't want to use the NodePort service for the Data Planes.Apply the Gateway Class configuration.
kubectl apply -f gatewayclass.yamlTo check the resource creation.
$ kubectl get gatewayclass

NAME                  CONTROLLER
envoy-gateway-class   gateway.envoyproxy.io/gatewayclass-controller
The Gateway Class resource creation is now completed. We can now create the Gateway Custom Resource.
Create Gateway Resource
Gateway Custom Resource is like a router. When the traffic enters the cluster, it initially hits the Gateway.
When you create a Gateway resource, the Control Plane controller essentially deploys an Envoy Proxy pod (Data Planes). So all the routing logic will be part of this proxy.
Lets create a Gateway manifest for the HTTP protocol, with Port 80 traffic to enter.
cat <<EOF> gateway.yaml
apiVersion: gateway.networking.k8s.io/v1
kind: Gateway
metadata:
  name: web-gateway
  namespace: default
spec:
  gatewayClassName: envoy-gateway-class
  listeners:
    - name: http
      protocol: HTTP
      port: 80
      allowedRoutes:
        namespaces:
          from: All
EOF
As you can see in the manifest, Gateways are listener-specific. This means you must clearly define which port and protocol the incoming traffic should use.
Now, apply the Gateway to the cluster.
kubectl apply -f gateway.yamlTo check the Gateway status, use the following command.
$ kubectl -n default get gateway

NAME          CLASS                 ADDRESS      PROGRAMMED   AGE
web-gateway   envoy-gateway-class   172.30.1.2   True         2m10s
Due to the modified Envoy proxy configs, the Data Plane will be deployed with the type NodePort service type. We can check it using the following command.
kubectl -n envoy-gateway-system get deploy,svc
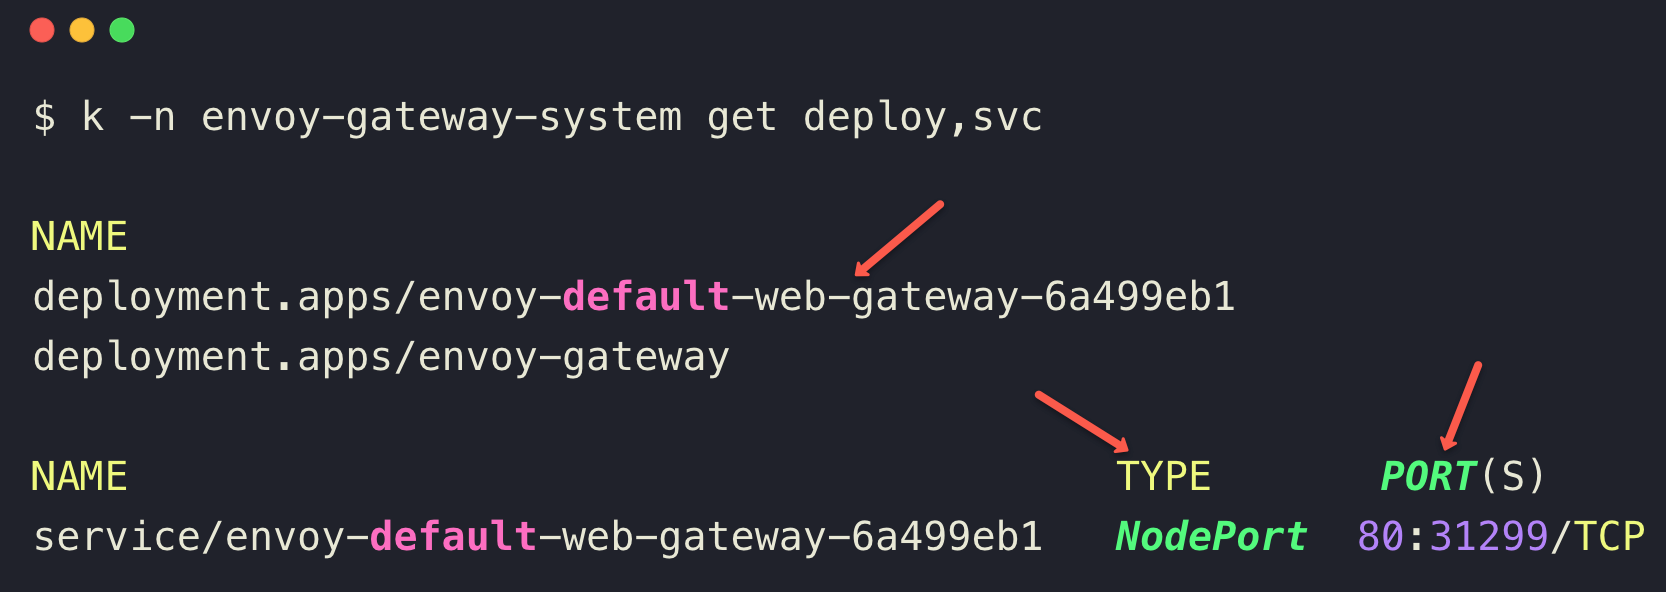
Note down your NodePort number (31299) to test the application access in the upcoming section.
Now the Gateway is ready, but we need to create one more resource called an HTTPRoute.
Create a HTTPRoute Resource
The HTTPRoute Custom Resource will help the traffic from the Gateway to the appropriate service of the application.
We need to create a HTTPRoute manifest with the following contents.
cat <<EOF> httproute.yaml
apiVersion: gateway.networking.k8s.io/v1
kind: HTTPRoute
metadata:
  name: web-httproute
spec:
  parentRefs:
    - name: web-gateway
  rules:
    - backendRefs:
        - group: ""
          kind: Service
          name: web-svc
          port: 80
          weight: 1
      matches:
        - path:
            type: PathPrefix
            value: /
EOF
Apply the HTTPRoute manifest.
kubectl apply -f httproute.yamlOnce it is deployed, we can list the available HTTPRoute resources.
$ kubectl -n default get httproute

NAME            HOSTNAMES   AGE
web-httproute               7m23s
We have configured everything needed to route external traffic to our application. Next is testing the traffic.
Test the Application Traffic
We can now try to access our application using the curl command from the local machine. For that, we need the NodePort of Gateway proxy and the IP of one of the worker nodes.
Use the following command to see the output.
curl [NODE_IP]:[NODE_PORT_NUMBER]The output will show the Nginx web page.
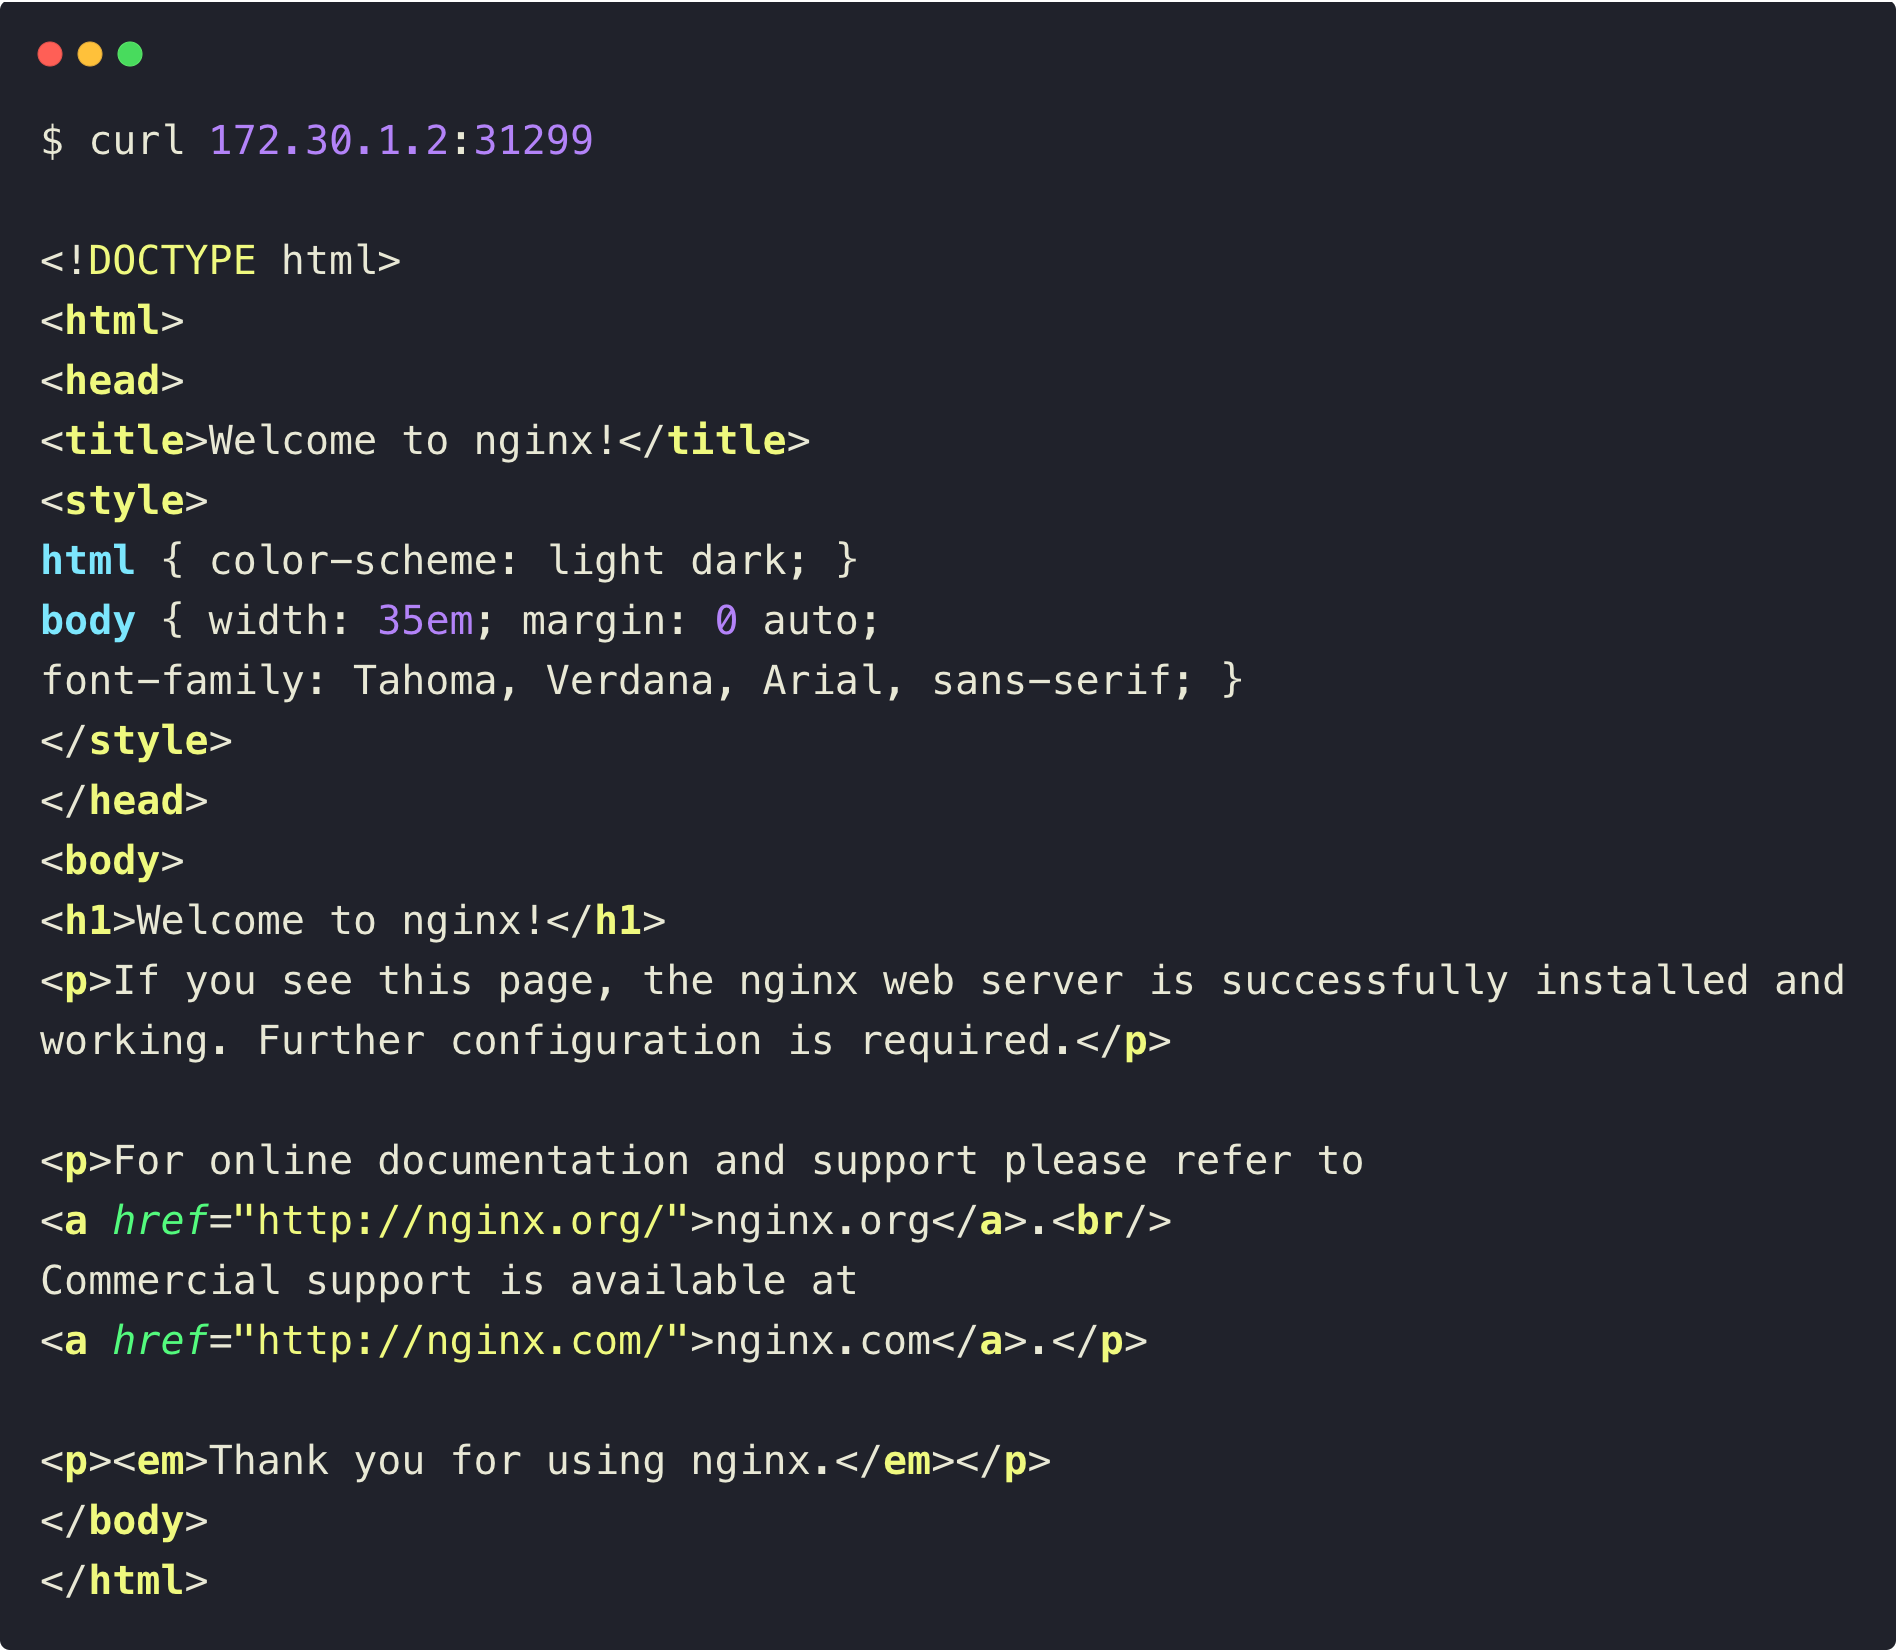
This ensures that the traffic is properly routed to the correct backend service through the envoy proxy.
Advantages of Envoy Gateway
We already have many Gateway API controllers, so why use Envoy Gateway?
The following are some of the advantages.
- This controller watches the Gateway API CRDs and automatically updates the Envoy proxy settings using the xDS API. The xDS API can make changes to running processes, so without downtime, we can make config changes.
- Envoy proxy uses a filter chain to handle HTTP processing, rate limiting, and authentication. For this, it uses WebAssembly (WASM), so we can also create custom filters.
- Popular services mesh like Istio use Envoy proxies, so using Envoy Gateway would be easier for the integration between them.
Conclusion
We saw how Envoy Gateway routes external traffic to backend services using the Gateway API.
But Envoy Gateway can do much more using its custom resources.
You can configure domain names and TLS secrets to encrypt traffic. You can also set up weighted routing for canary deployments, and method-based routing is supported as well.
Over to you.
Are you planning to implement Envoy gateway for your projects?
Are you using any other controller now?
Either way, let us know your thoughts in the comments.
