


This tutorial walks you through the core concepts and steps to configure a Private Hosted Zone in Route 53 for private DNS resolution inside your VPC.
By the end of this guide, you will understand:
- What a Route 53 Hosted Zone is
- How to set up a Private Hosted Zone
- How to find the AWS private DNS server IP
- How a VPN connection passes DNS settings to your local workstation
- A step-by-step setup of DNS for a sample web app and more!
Lets get started.
Need for Route53 Private Hosted Zone
Let’s understand why we need a Private Hosted Zone when we already have public ones.
AWS Route 53 is a managed DNS service that handles DNS for both AWS and non-AWS resources.
In production setups, many applications run in private VPC subnets. To use DNS names for these internal services, you need private DNS, DNS that works only inside the VPC or through VPN access.
This is where Route 53 Private Hosted Zones help. They allow DNS resolution within AWS’s internal DNS system, limited to the VPC. So, you don’t need to set up your own DNS server.
In short, Private Hosted Zones let you use custom domain names for internal AWS resources without exposing them to the public internet.
In such cases, instead of using AWS Private Hosted Zones, you can directly use your organization's internal DNS server for name resolution.
How Does Private Route53 Hosted Work?
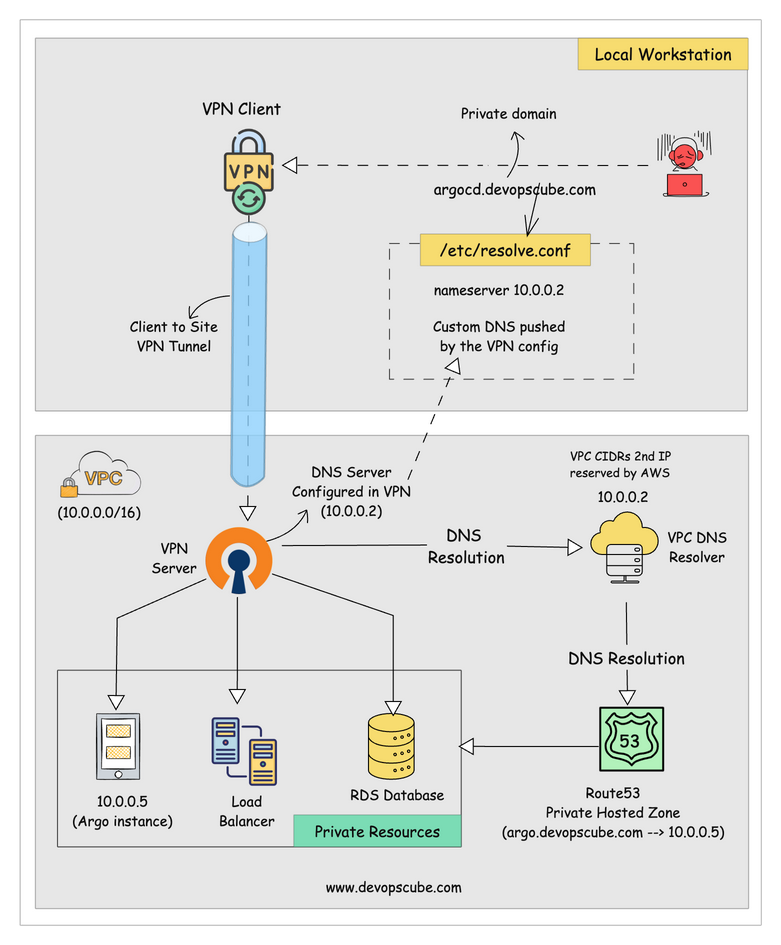
The private hosted zone setup is required when you want to access the AWS resource typically privately over a VPN.
The workflow diagram explains the AWS Route53 private hosted zone configurations as well as the integration of a VPN Server.
Here’s how it works:
- Route 53 Private Hosted Zone is a private DNS space inside a VPC.
It only resolves domain names within that VPC. - When a VPN connection is set up, your local system becomes part of the VPC network.
It’s like your computer is inside the VPC. - Your system's DNS config (like
/etc/resolv.conf) is updated to use the VPC's DNS server IP. This is usually done the configured VPN. - So when you try to access a domain (like
internal.example.com),
the DNS query goes through the VPN to the VPC’s DNS resolver. - The VPC resolver looks up the domain in the Private Hosted Zone and finds the correct internal IP.
- That IP is returned to your local machine, and now it can access private AWS resources like EC2, RDS, or internal services.
AWS DNS Resolver
In every AWS VPC, the VPC’s default DNS resolver is reachable at the address <VPC CIDR base> + 2
For example, in a VPC with CIDR 10.0.0.0/16, the DNS server is at 10.0.0.2. This DNS resolver is managed by AWS. You don’t manage or operate it yourself . You can't override or change it; it’s baked into AWS’ DHCP and network infrastructure
.2 IP is only one DNS resolver per VPC, not per subnetPrivate Hosted Zone Pricing
A single hosted zone creation will cost $0.50 per month.
This will be the same up to 25 hosted zones, and if it goes beyond that, each new one will cost an additional $0.10 per month.
AWS Route53 Private Hosted Zone Setup
Now lets get started with the setup.
Follow the below steps to setup a private hosted zone in AWS Route53.
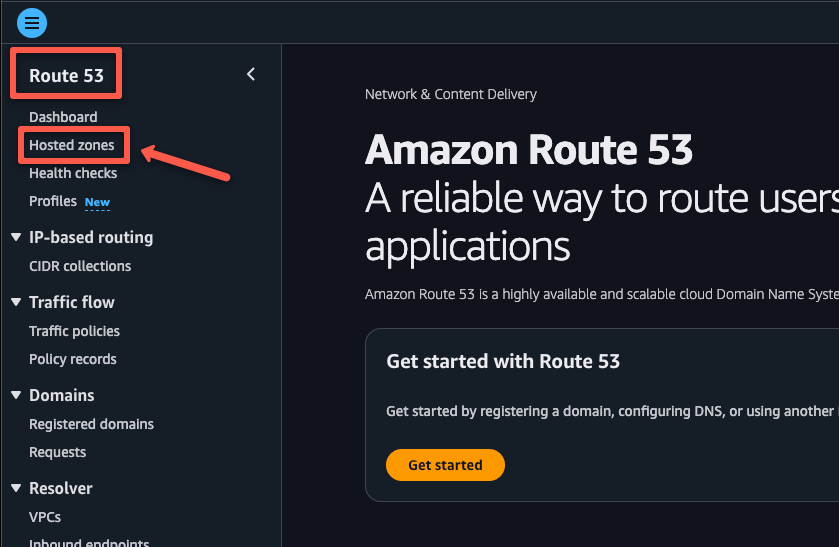
Step 1: Create a Private Hosted Zone
Open the AWS Route53 service and select the Hosted zones tab from the left side panel.
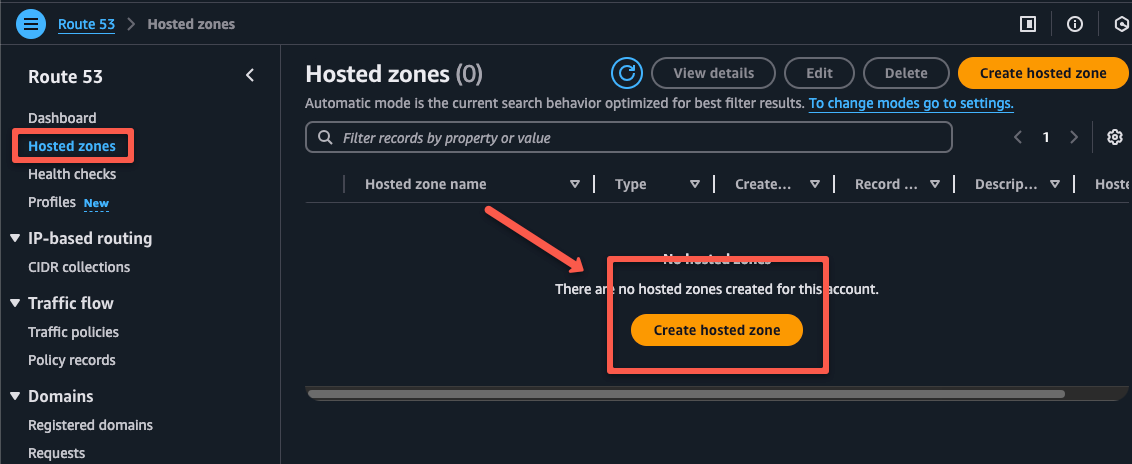
On the following window, click the Create hosted zone button to create a new hosted zone.
Provide a domain name that you want (techiescamp.com), you can provide any name.
Select the types as Private hosted zone and on the VPC association section, select the region of the VPC and its ID.
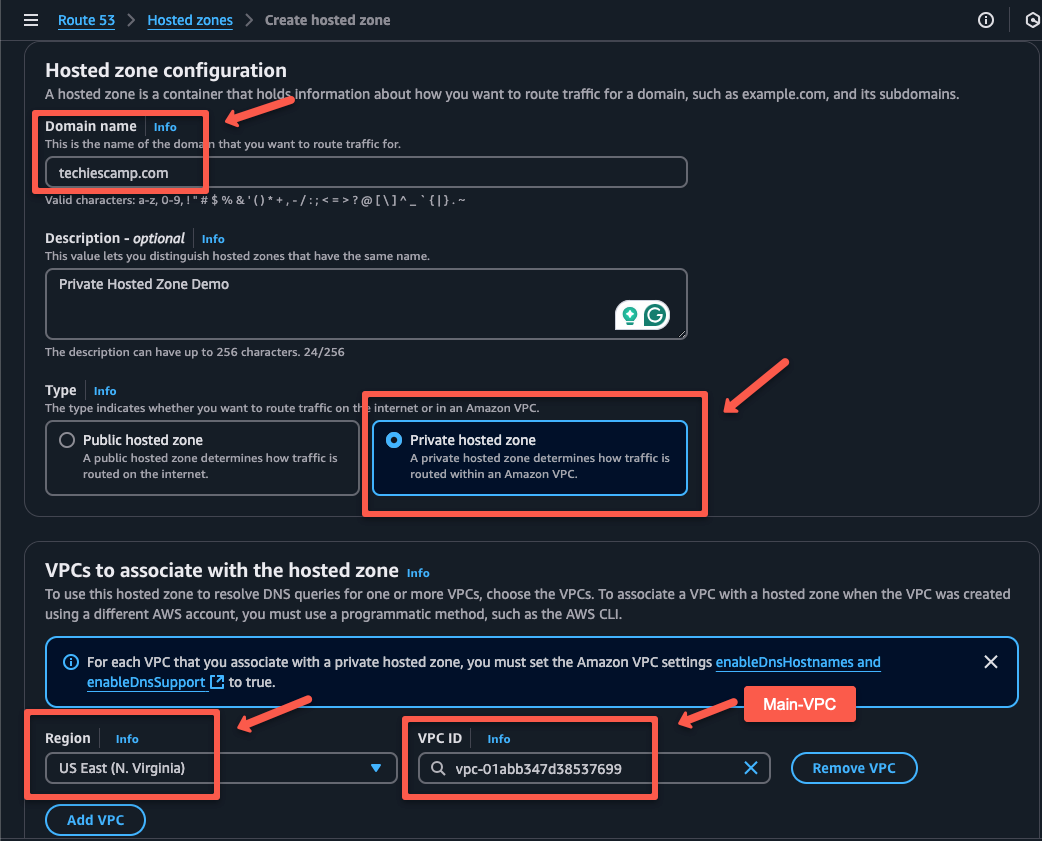
Once provide all the required information, click the Create hosted zone button to create the private hosted zone.
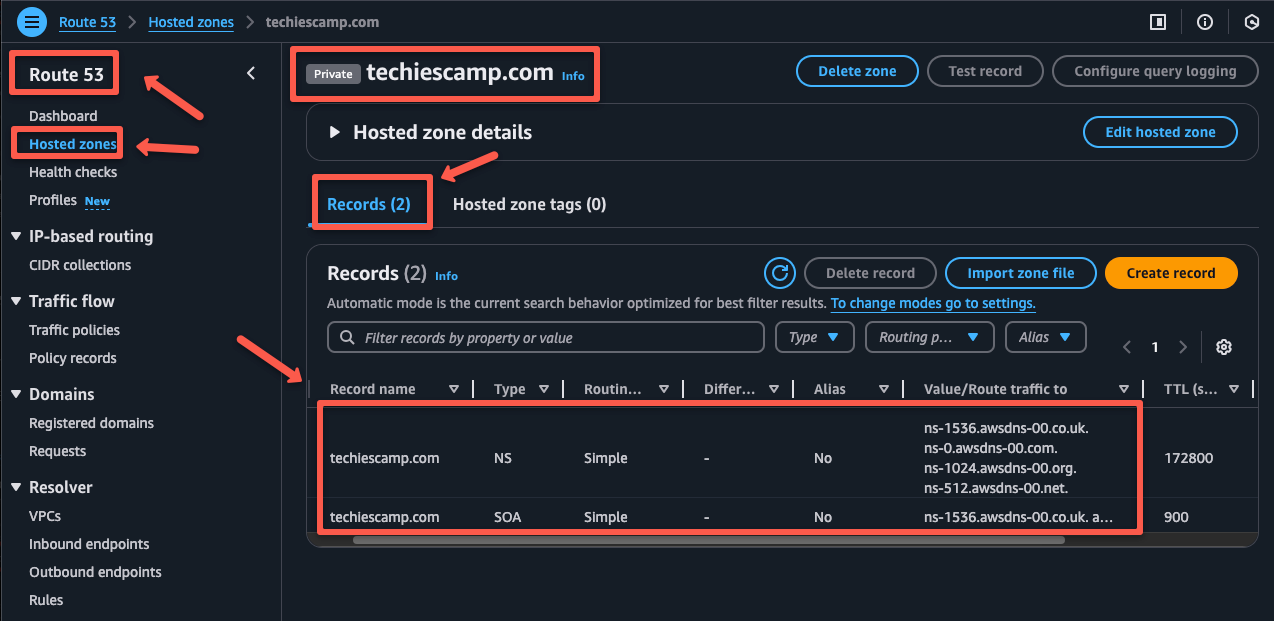
After the successful creation of the private hosted zone, two records will be available by default.
What are they?
- The first one is the
NSrecord which represents the Name Server Record. These records define the internal name servers that are responsible for the DNS resolution only within the VPC. - The second one is the
SOAwhich represents the Start of Authority Records, this will provide the metadata about the hosted zone, such as admin contact, serial number, and timing values(refresh, retry, and expire).
The Route53 private hosted zone setup is done, now we can test the setup.
Validate Route 53 Private DNS Using a Sample Application
Now that the private hosted zone setup is completed, next step is to validate the DNS resolution.
So how can we test it?
Well. we can create a simpe Nginx server on the private subnet and map the IP of that server to the Route53 private hosted zone.
Then try to access it from the public server using the hostname.
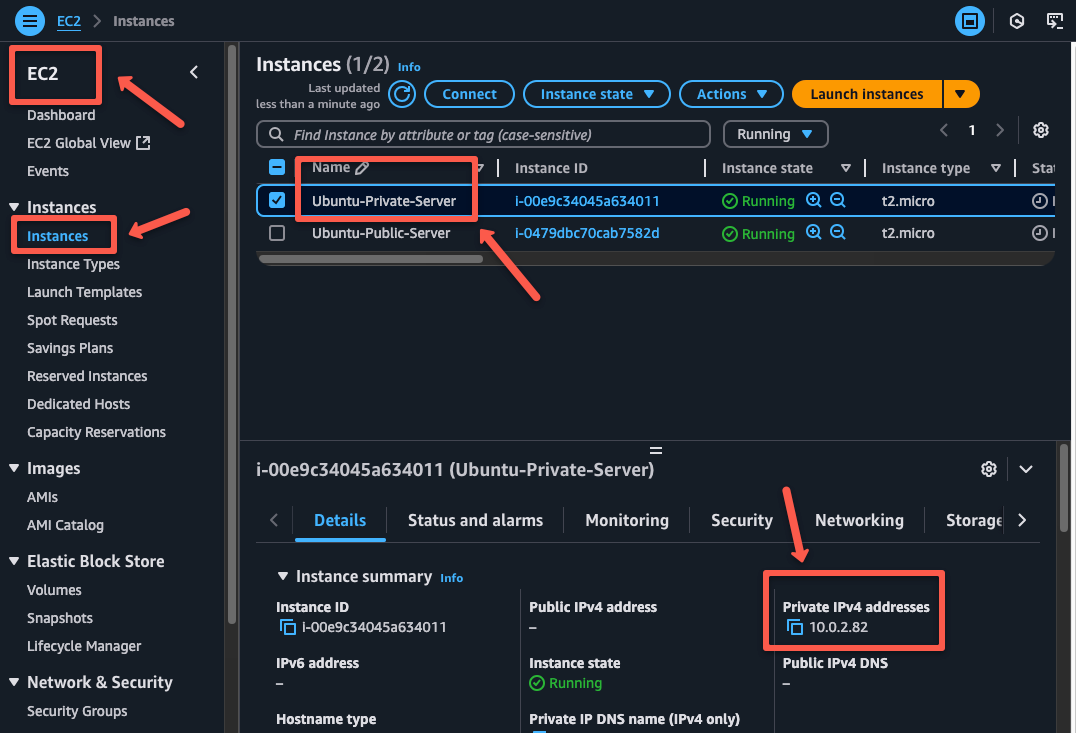
For that, we need to create an EC2 instance on both public and private subnets.
Step 1: Launch EC2 Instances in Public and Private Subnets
To test the private DNS configuration, we need one server in a public subnet and another in the private subnet.
We will be acessing the private server from the public server.
For this testing I am using two ubuntu instance instances. One in public subnet and one in private subnet.
Step 2: Install NGINX Web Server on Private EC2 Instance
Since the private server doesn't have public access, we can only access it from the public server.
So open the public server and SSH to the private server, but before that note down the private server's IP address.
Now open the public server.
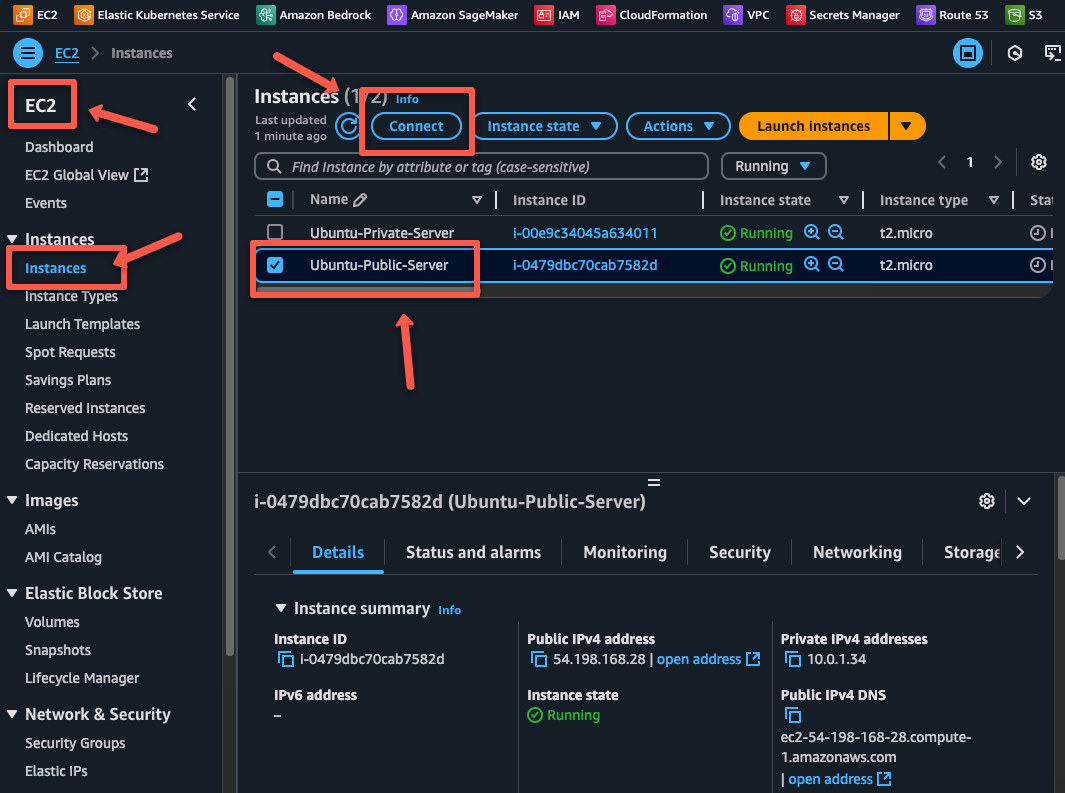
Select the EC2 Instance Connect option to connect the public server through the web terminal.
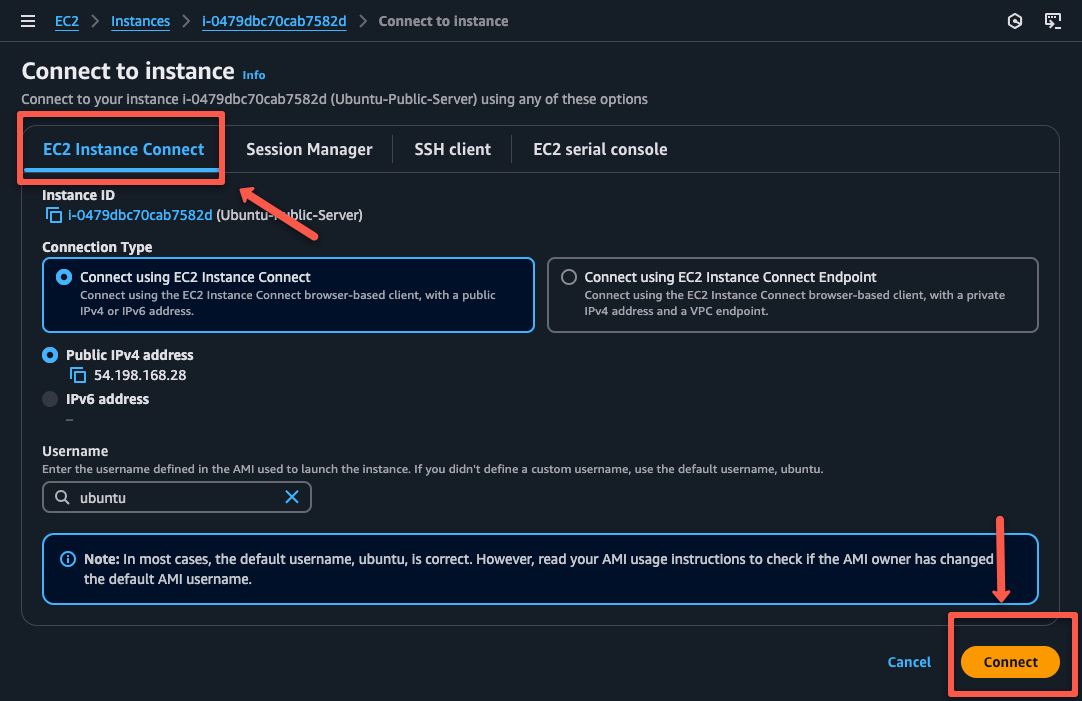
To SSH to the private server from public, we need the key pairs that we used to create the private server.
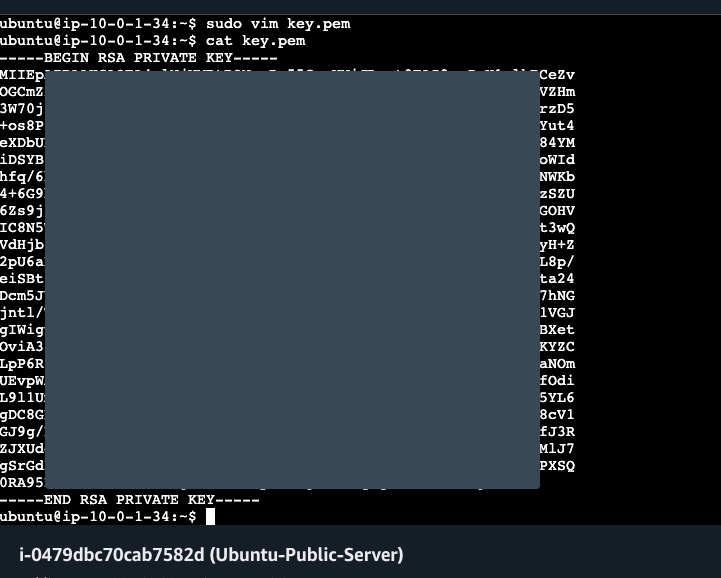
You need to copy all the contents from the key pairs and paste it in the public server terminal as a .pem extension file.
Create a .pem file in the public server and store the Key Pairs contents.
Using the following command, we can SSH to the private server to install the Nginx server.
ssh -i key.pem ubuntu@<PRIVATE_SERVER_IP>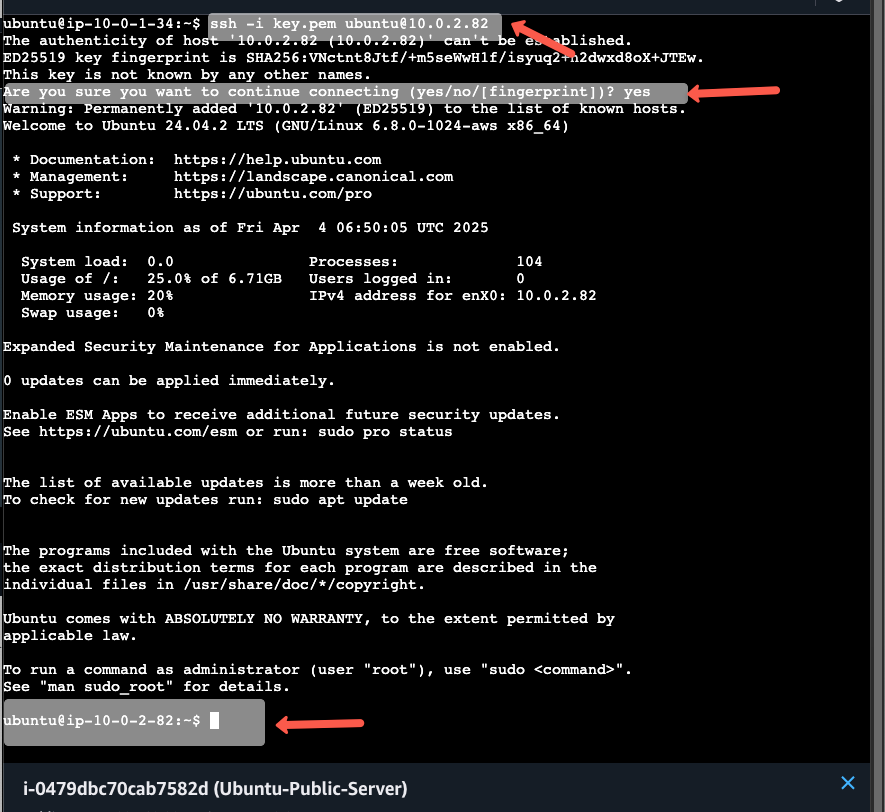
To install Nginx on the Ubuntu server, use the following command.
sudo apt update
sudo apt install nginx -y
Note: The private subnet should be attached with NAT, otherwise application packages won't be downloaded from the internet for the Nginx installation.To check the service after the installation,
systemctl status nginx.service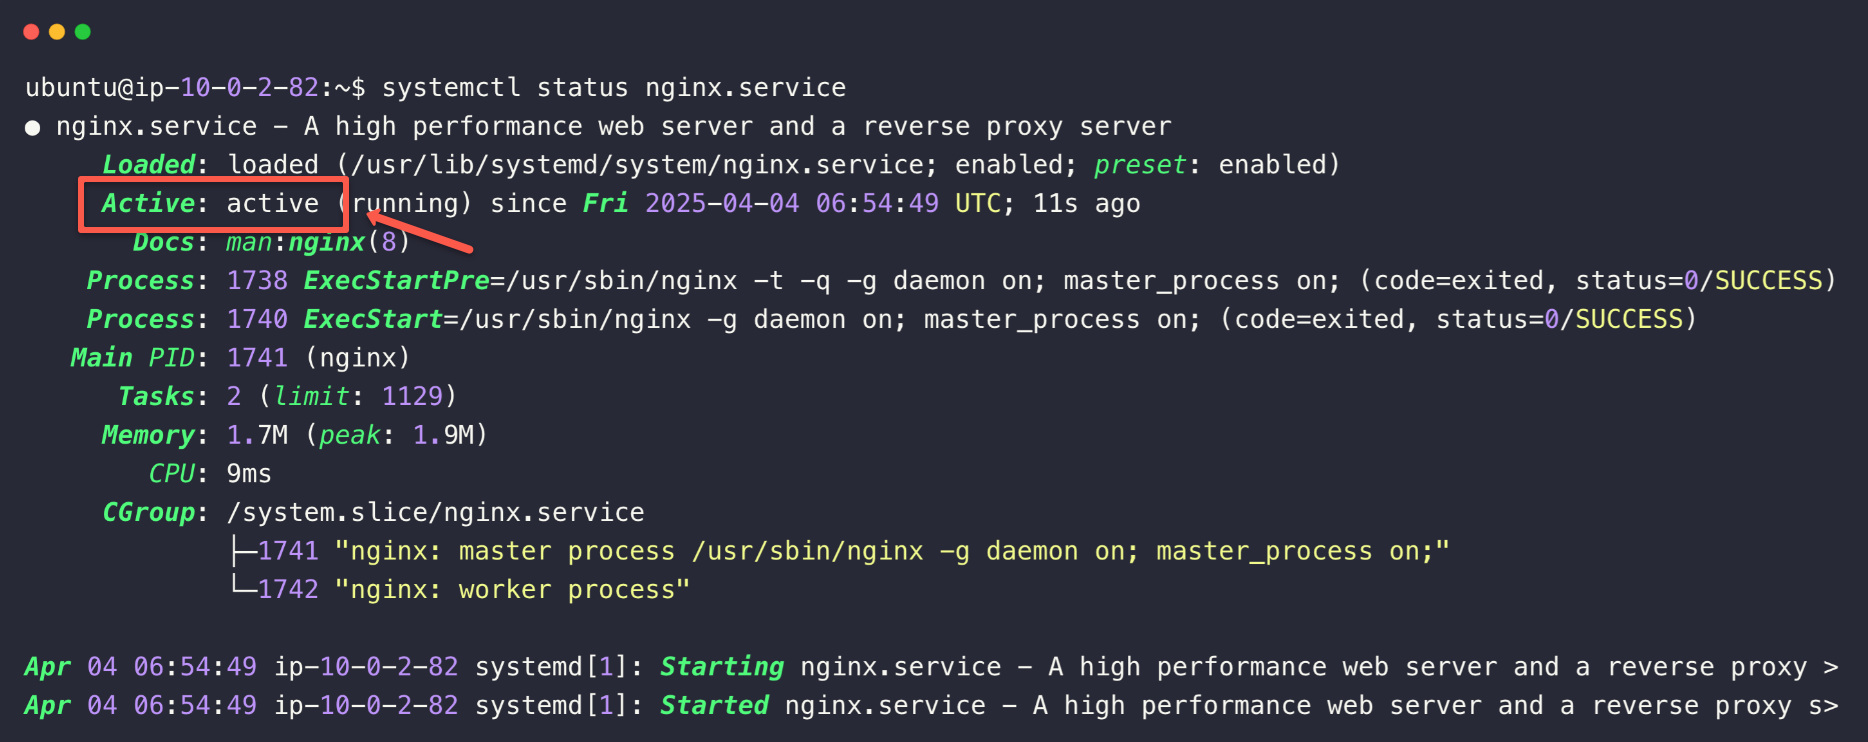
This ensures that the service is active and running, so now we need to check the localhost access.
curl localhost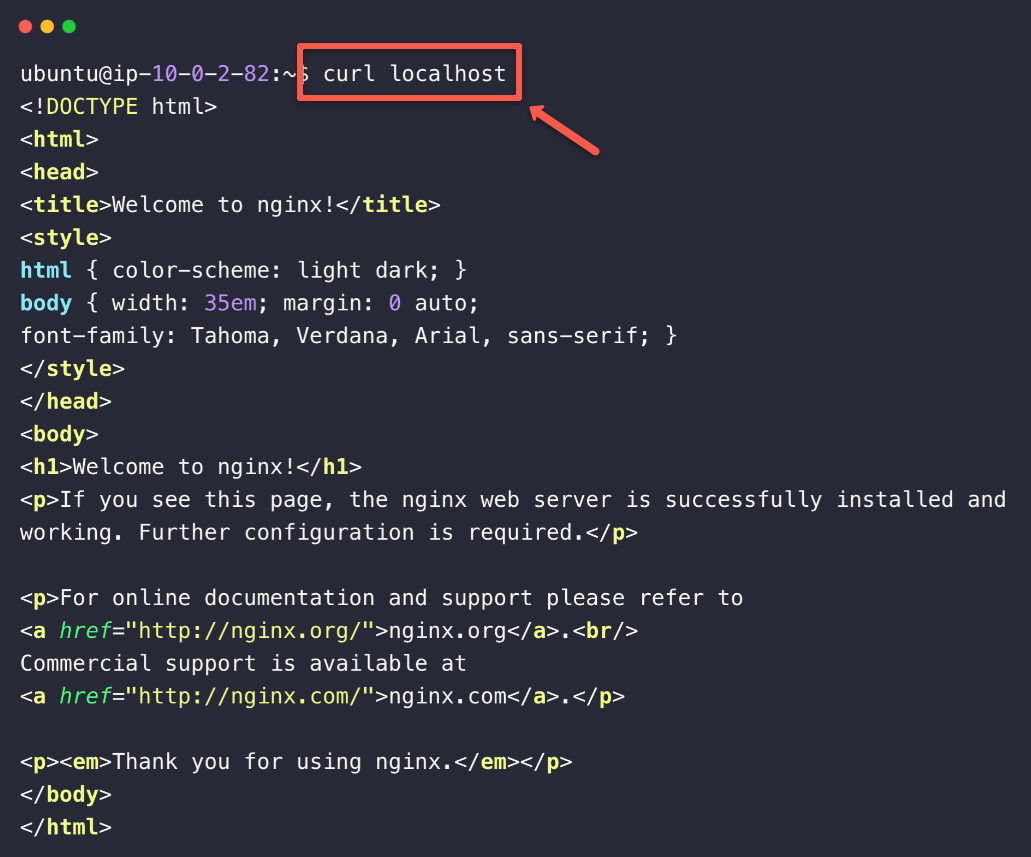
You can see the welcome page, which means that the web server page is actively loading on the private server itself.
Now, we need to check it directly from the public server.
So, you need to exit from the private server using the following command.
exitBefore directly accessing the Nginx server from the public server, ensure the private server's security group allows port 80 to the public server.
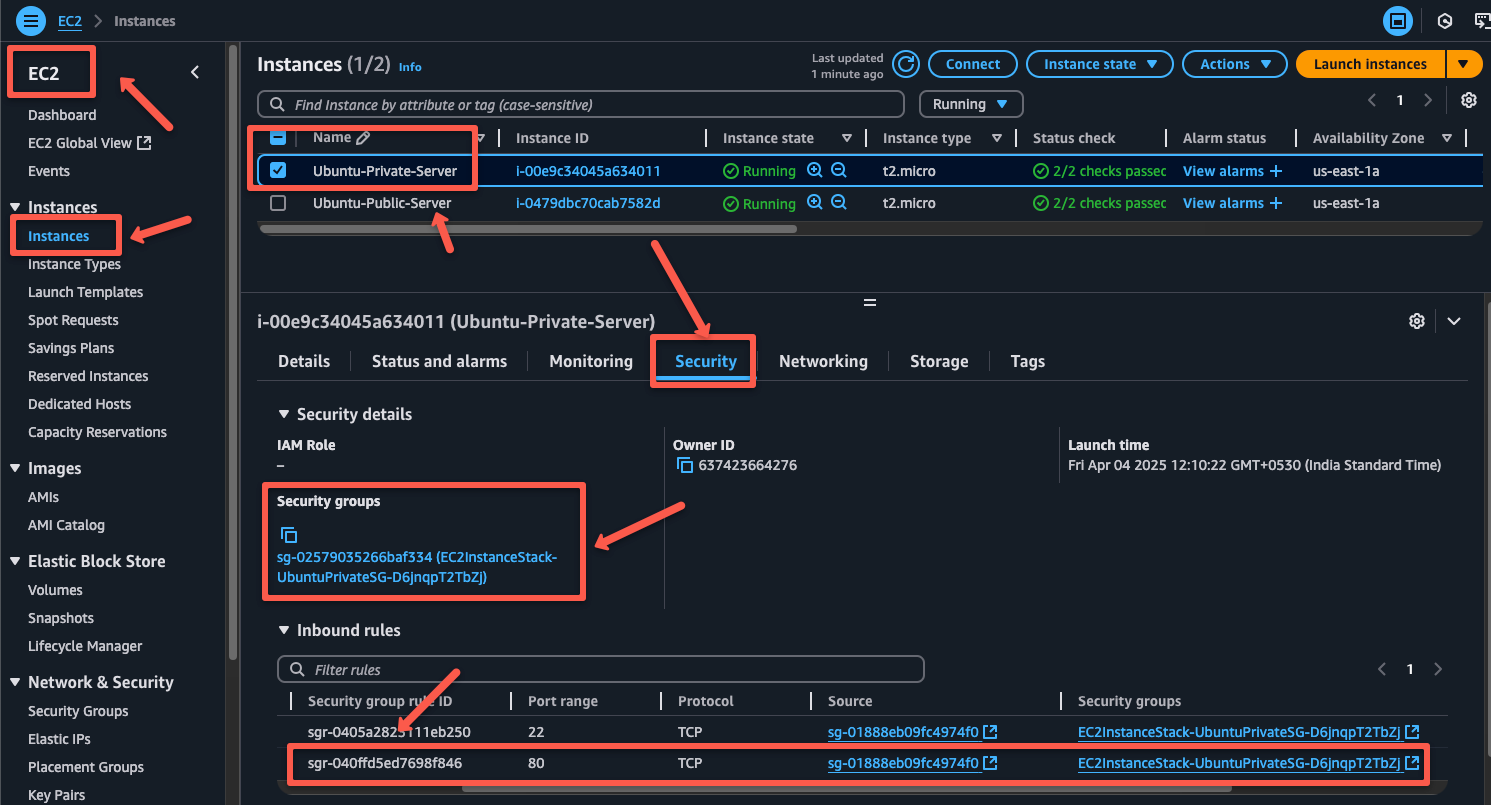
Once the security group rules are correctly set, we can access the private Nginx server from the public server using its private IP.
curl <PRIVATE_SERVER_IP>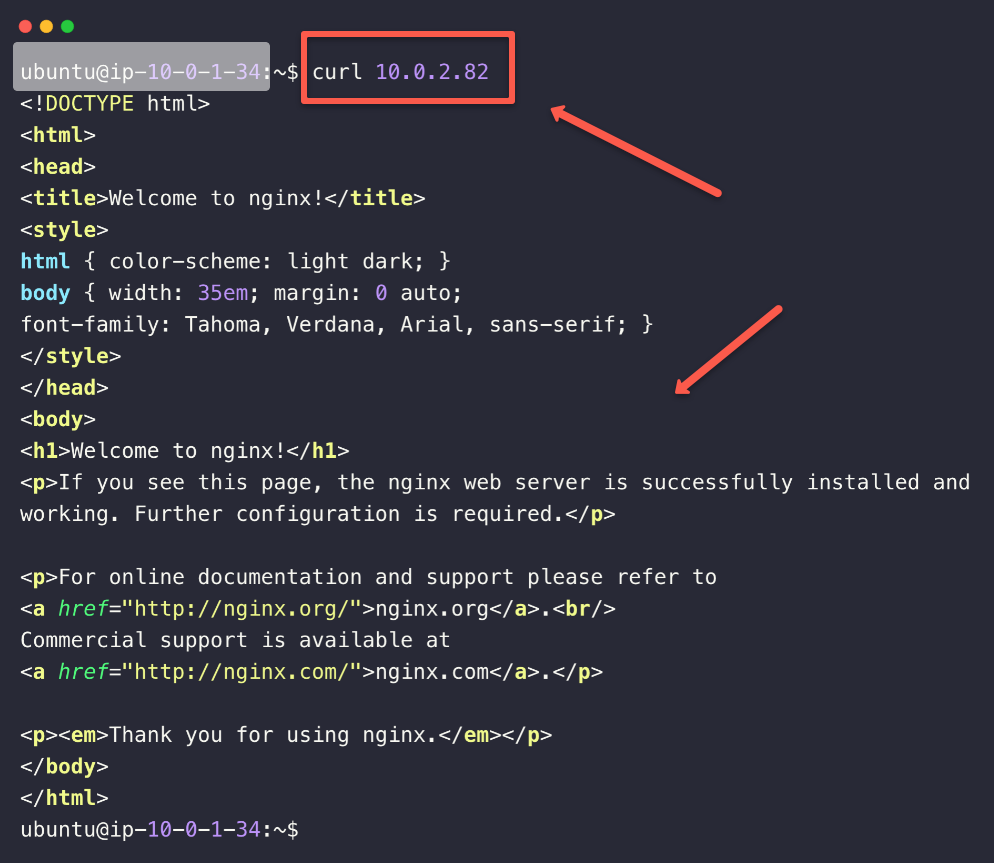
But this is not we want, we need to access this private Nginx server via a domain name.
Step 3: Map Private IP to a Custom Hostname in Route 53
We can map the same private IP to the Route53 private hosted zone, so that we can access this Nginx server using the hostname.
When we try to access, the DNS resolution will happen by the internal DNS servers, which AWS manages.
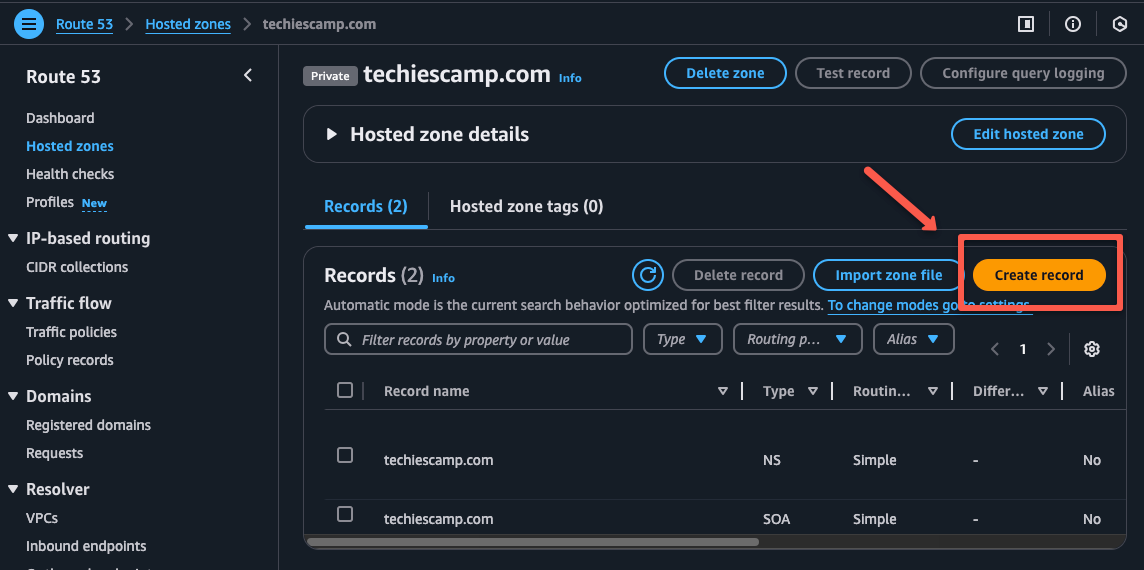
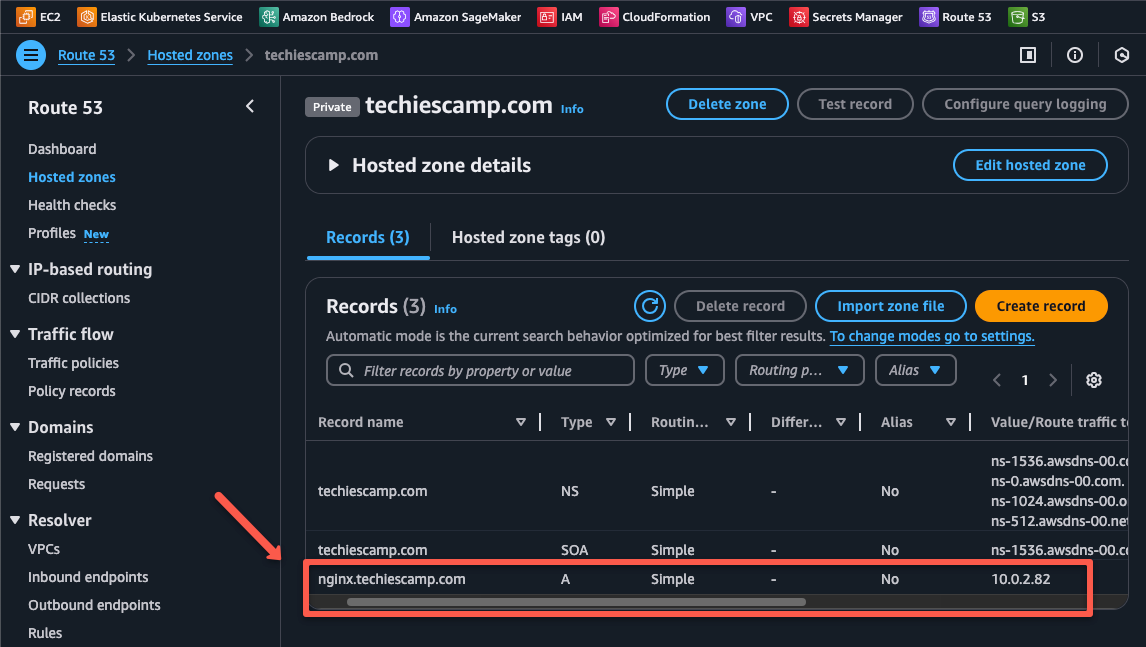
To map the private IP, navigate to the Route53 console private hosted zone and create a new DNS record.
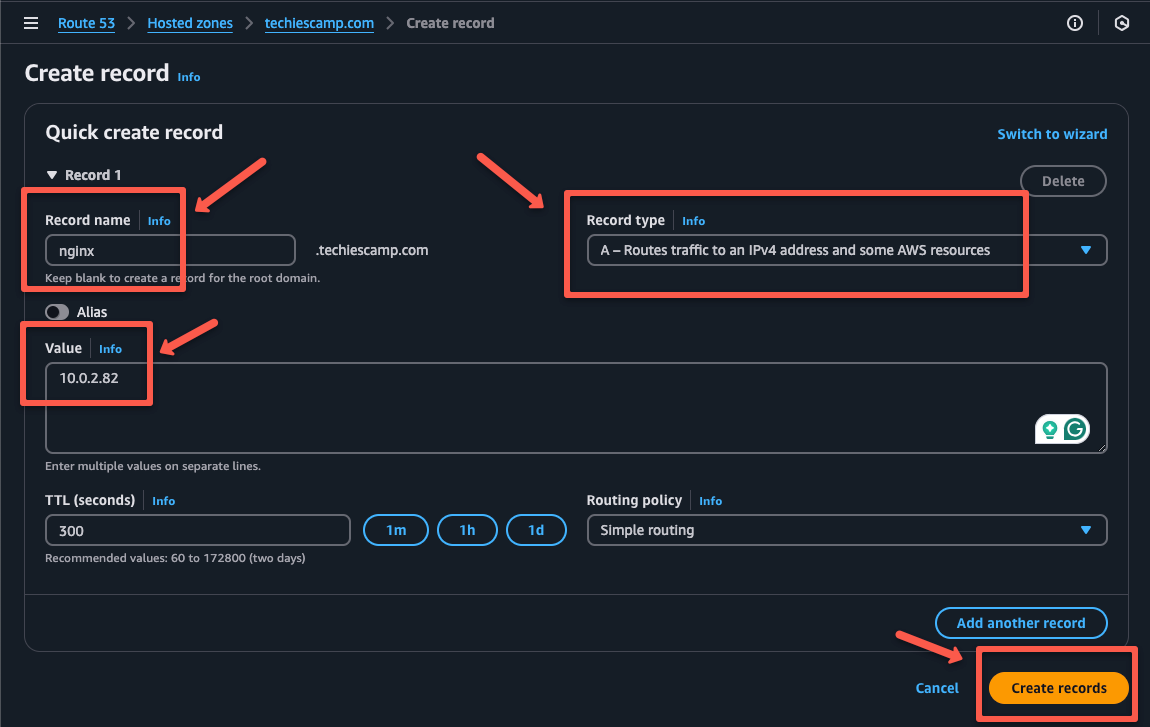
Create a prefix for the record name e.g., nginx and select the record type as A which will map the IP with hostname.
In the Value section, we need to add the IP of the private Nginx server, then click to Create records to create the record.
It will take a few minutes to complete and then you can see the record on the dashboard.
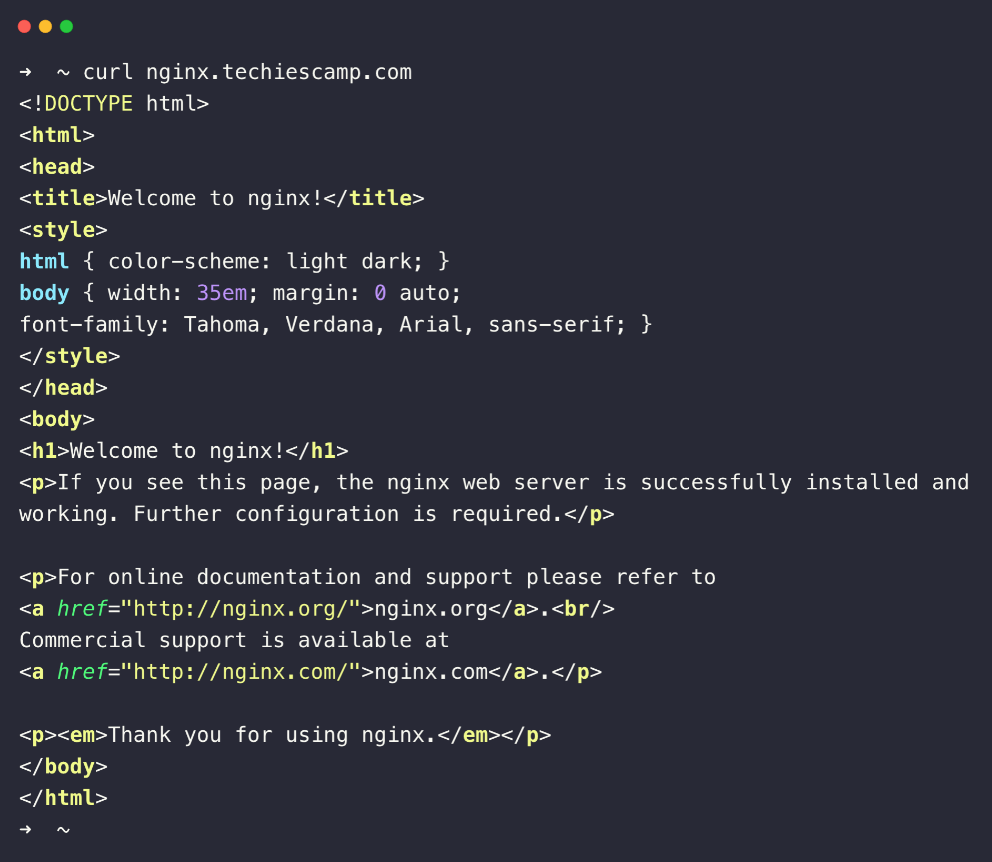
Now, we can access the Nginx server from the public server using this hostname instead of the IP address.
curl <HOST_NAME>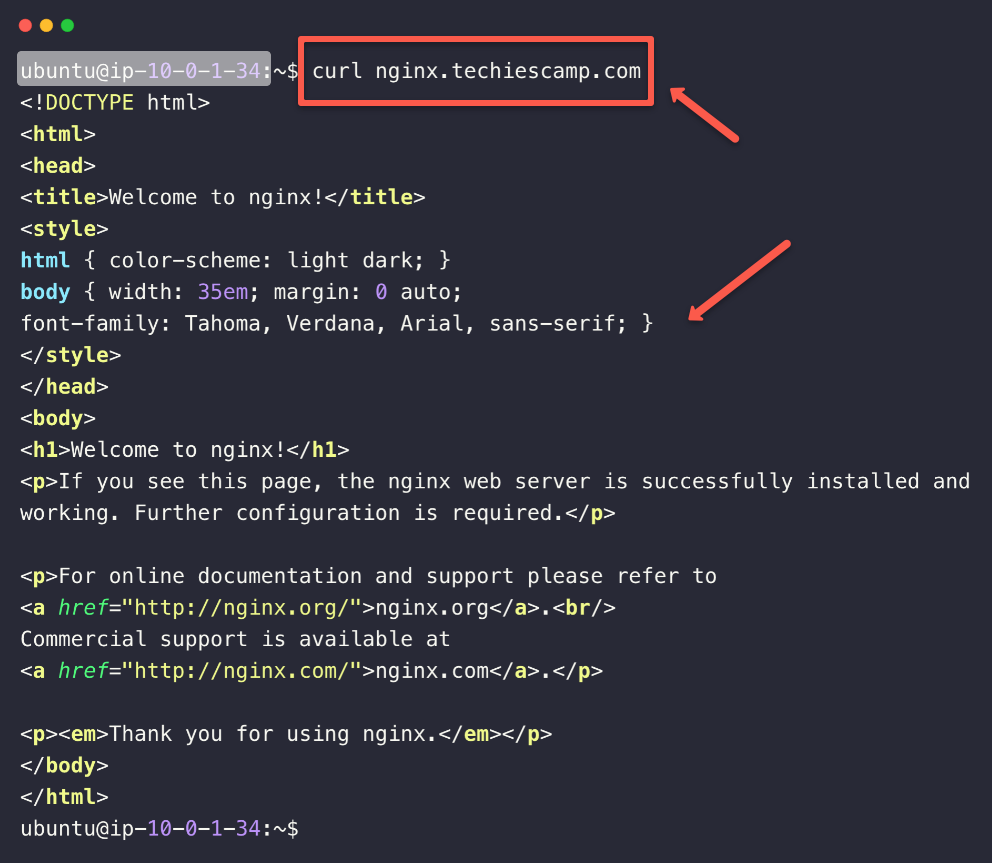
It is working, but what if I want to access it from my local machine?
First, you need to establish a VPN connection between your local machine and the AWS VPC.
Accessing Private Hosted Zone from Local Machine Using VPN
In this section, we will initiate the DNS resolution from the local machine to access the AWS resources securly over a VPN encrypted tunnel.
For this to work, we need a VPN connection between our local machine and the specific AWS VPC.
I am using the Pritunl Self-hosted VPN server for this demo, but you can use any VPN setup like OpenVPN, AWS Client VPN Endpoint, etc.
To know about the setup of the Pritunl VPN in an EC2 instance, you can refer to this blog How to Setup Pritunl VPN
Once the VPN connection is established, we can access the private Nginx server from our local machine by using its private IP as like we did in the public server.
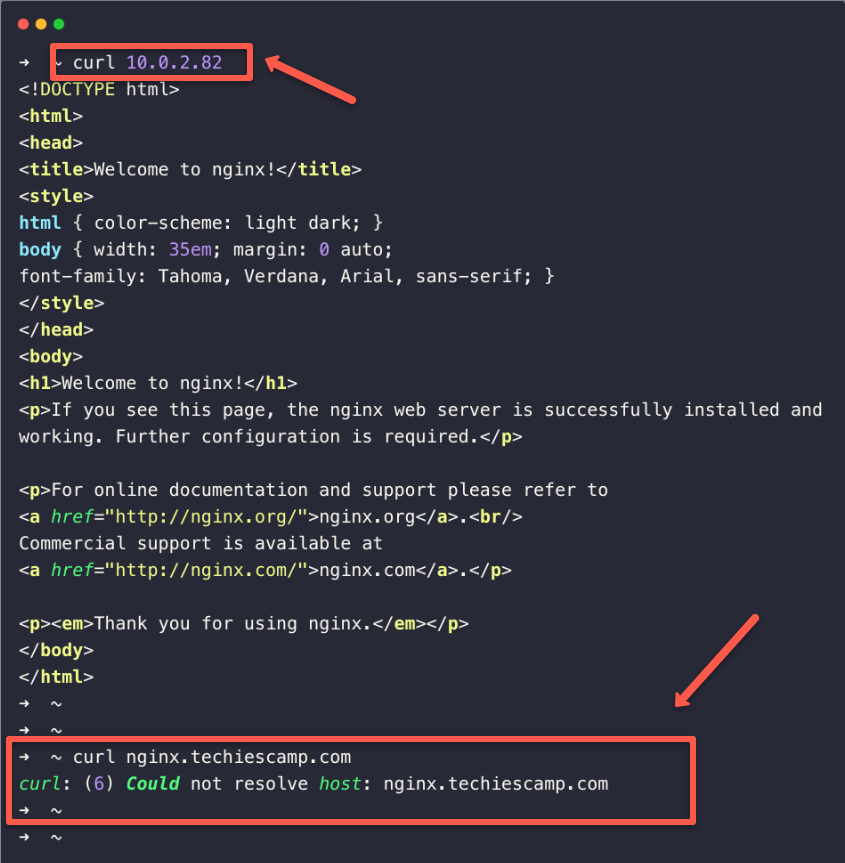
Here, you can see that the DNS resolution is not happening. This is because the local system is not part of the AWS VPC and doesn't have DNS server details.
So, we need to add the DNS server details.
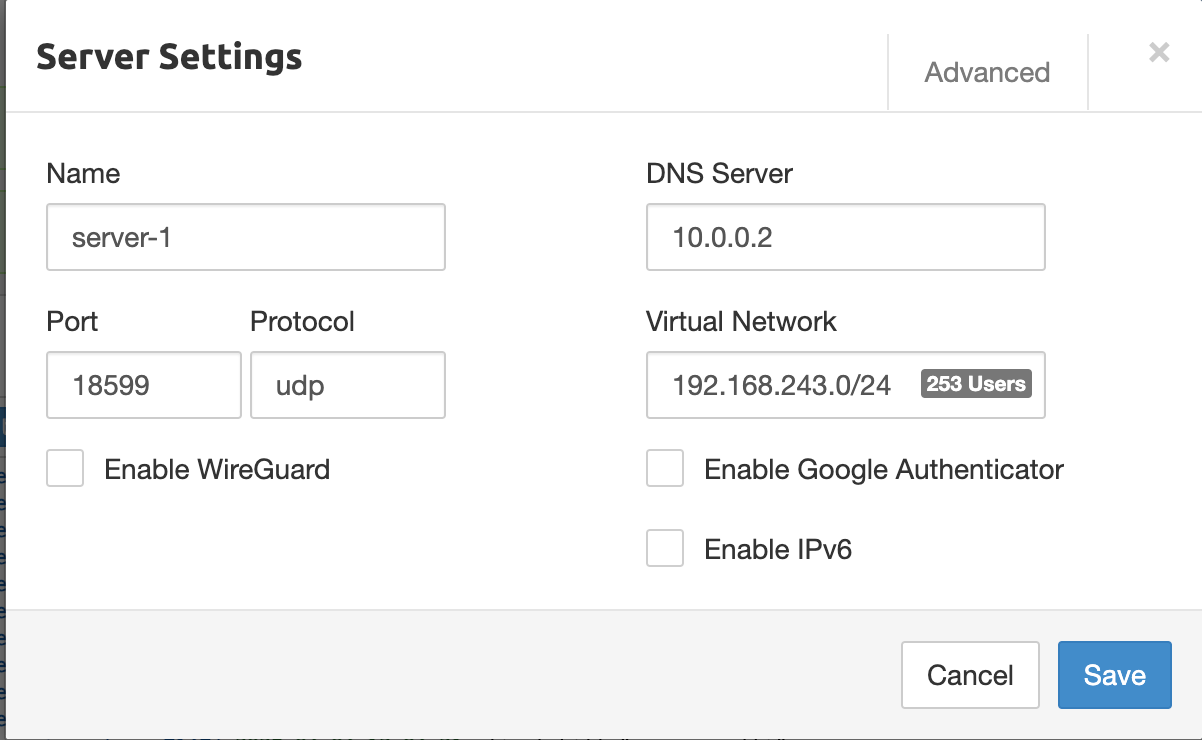
In the Pritunl configuration, we can provide the DNS server details, but how can we identify the DNS server information, such as its IP?
Well, for the custom DNS servers in the VPC, the IP of the DNS server is the second IP from the CIDR range. For example, if the VPC CIDR is 10.0.0.0/16, then the DNS server IP is 10.0.0.2.
To learn more about this, please refer to the official documentation.
We need to configure this for the DNS resolution on the VPN server configuration.
After changing the DNS server on the VPN configuration, when you establish the VPN connection from your local machine, your default DNS server configuration on the local machine will automatically be changed, and you can check that from the /etc/resolve.conf
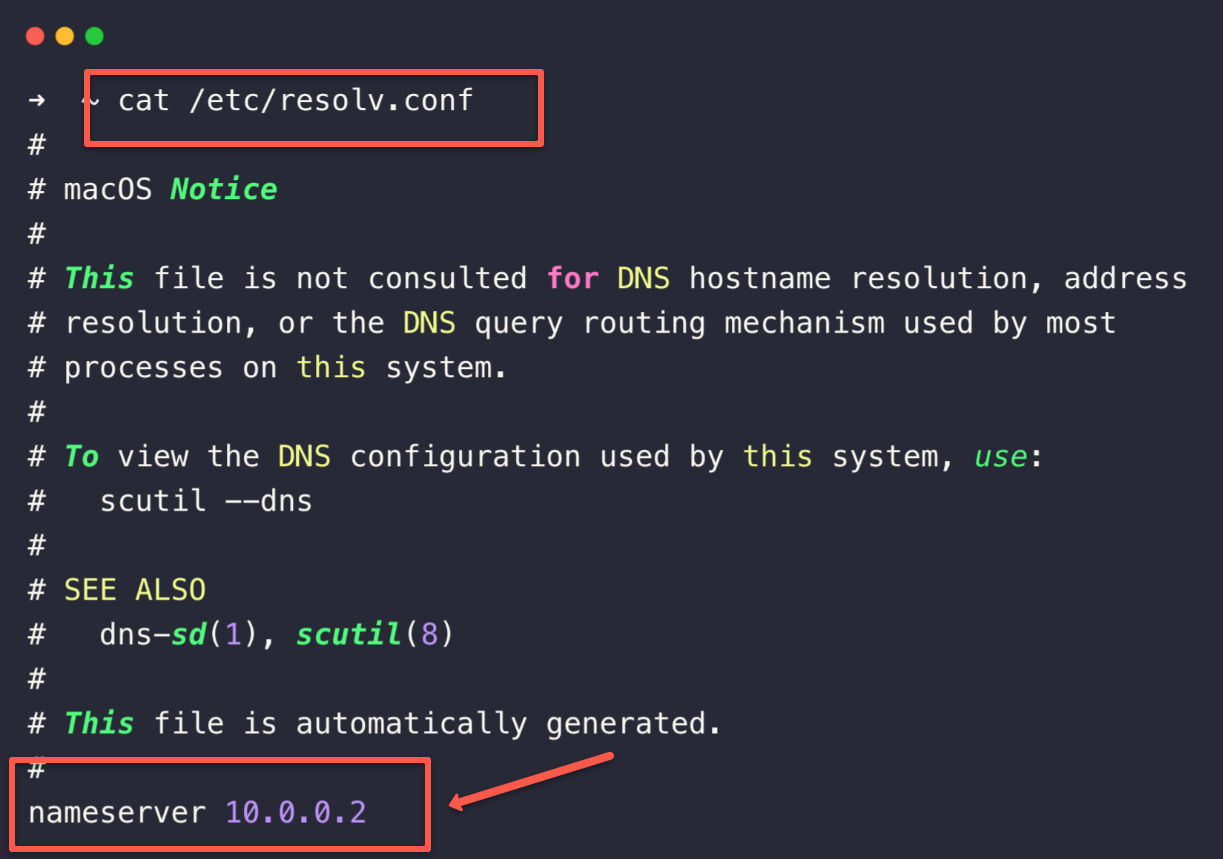
This ensures that the resolution will happen only through this DNS server.
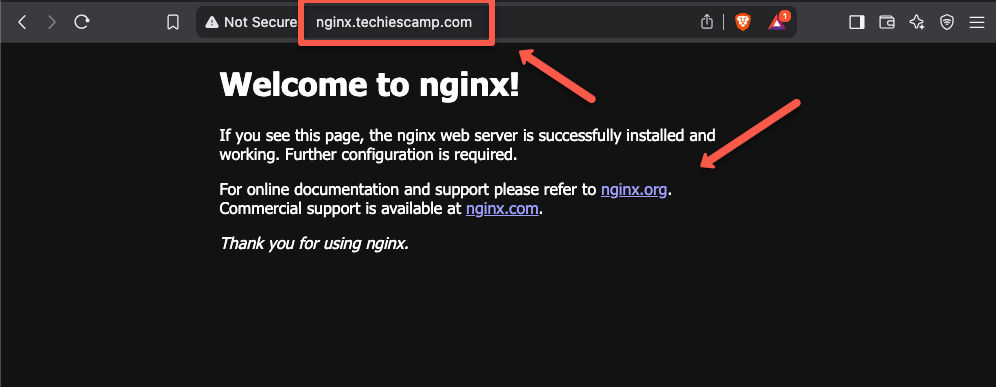
Now, we can check access from the local machine using the hostname.
Not only check from the terminal, but you can also directly check from the web browser.
Bonus: Manually Configure DNS on Local Machine (Without Pushing via VPN)
Instead of configuring the DNS server information directly to the VPN server, we can only configure it in our local machine to harden the security.
First, we need to keep the DNS details on the VPN server dashboard empty.
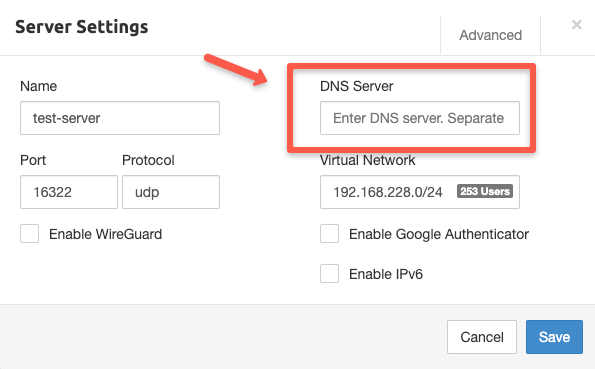
Now, configure the DNS server information on the local machine.
I am setting up on the MAC workstation, but it would be similar to every operating system.
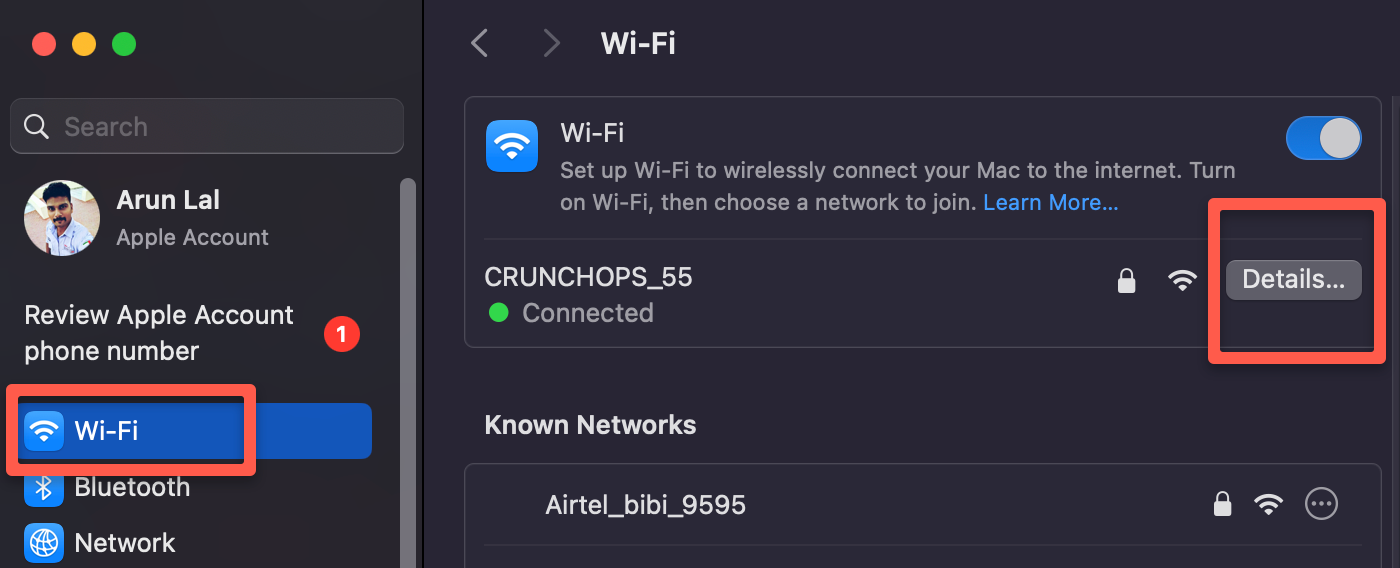
On the DNS configuration section, add the DNS server IP

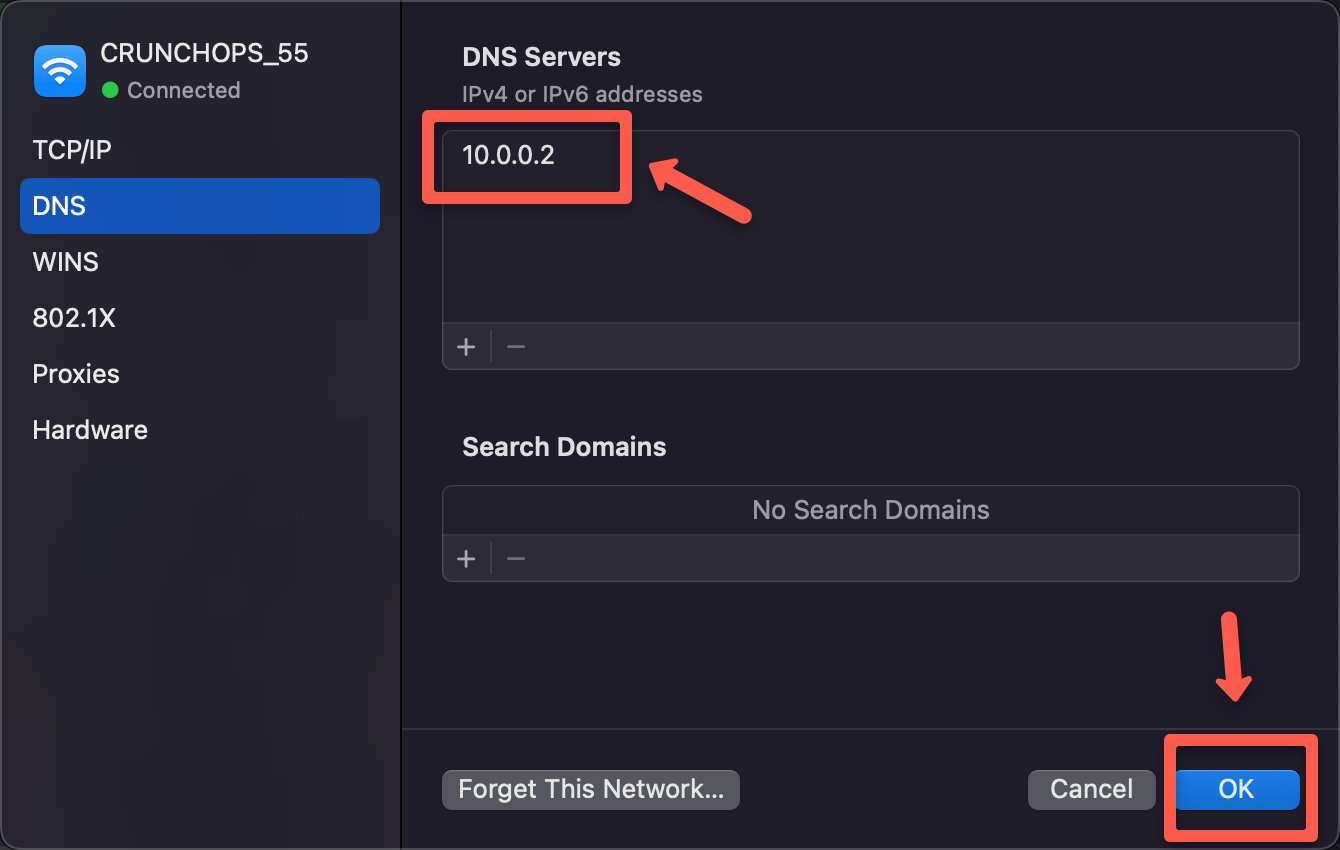
After adding the DNS server details on the local machine, we can use the hostname to access the private server resources in a secure manner.
Clean Up AWS Resources After Testing
Don’t forget to clean up all resources after testing to avoid unwanted charges for unused hosted zones or EC2 instances.
Route53 Public Vs Private Hosted Zone
- A public hosted zone is for the resources accessed by the user over the internet, such as public websites, etc. Here, the DNS resolution will happen on public DNS servers
- A private hosted zone is for internal resources, such as databases, etc. Here, the DNS resolution only occurs within the network by the internal DNS servers.
Conclusion
This is the effective method of using the Route53 Private hosted zone to access the private resources from the local machine.
You can use any VPN server to communicate between the local machine and the AWS VPC.