In this blog, we are going to learn how to deploy Helm Charts using Argo CD.
Helm charts are templates that can be used again and again just by changing the values on the values.yaml file according to your requirements.
In this guide, we will look at how helm charts can be used with ArgoCD to deploy single and multiple environments.
Setup Workflow
A simple diagrammatic overview of this setup is given below
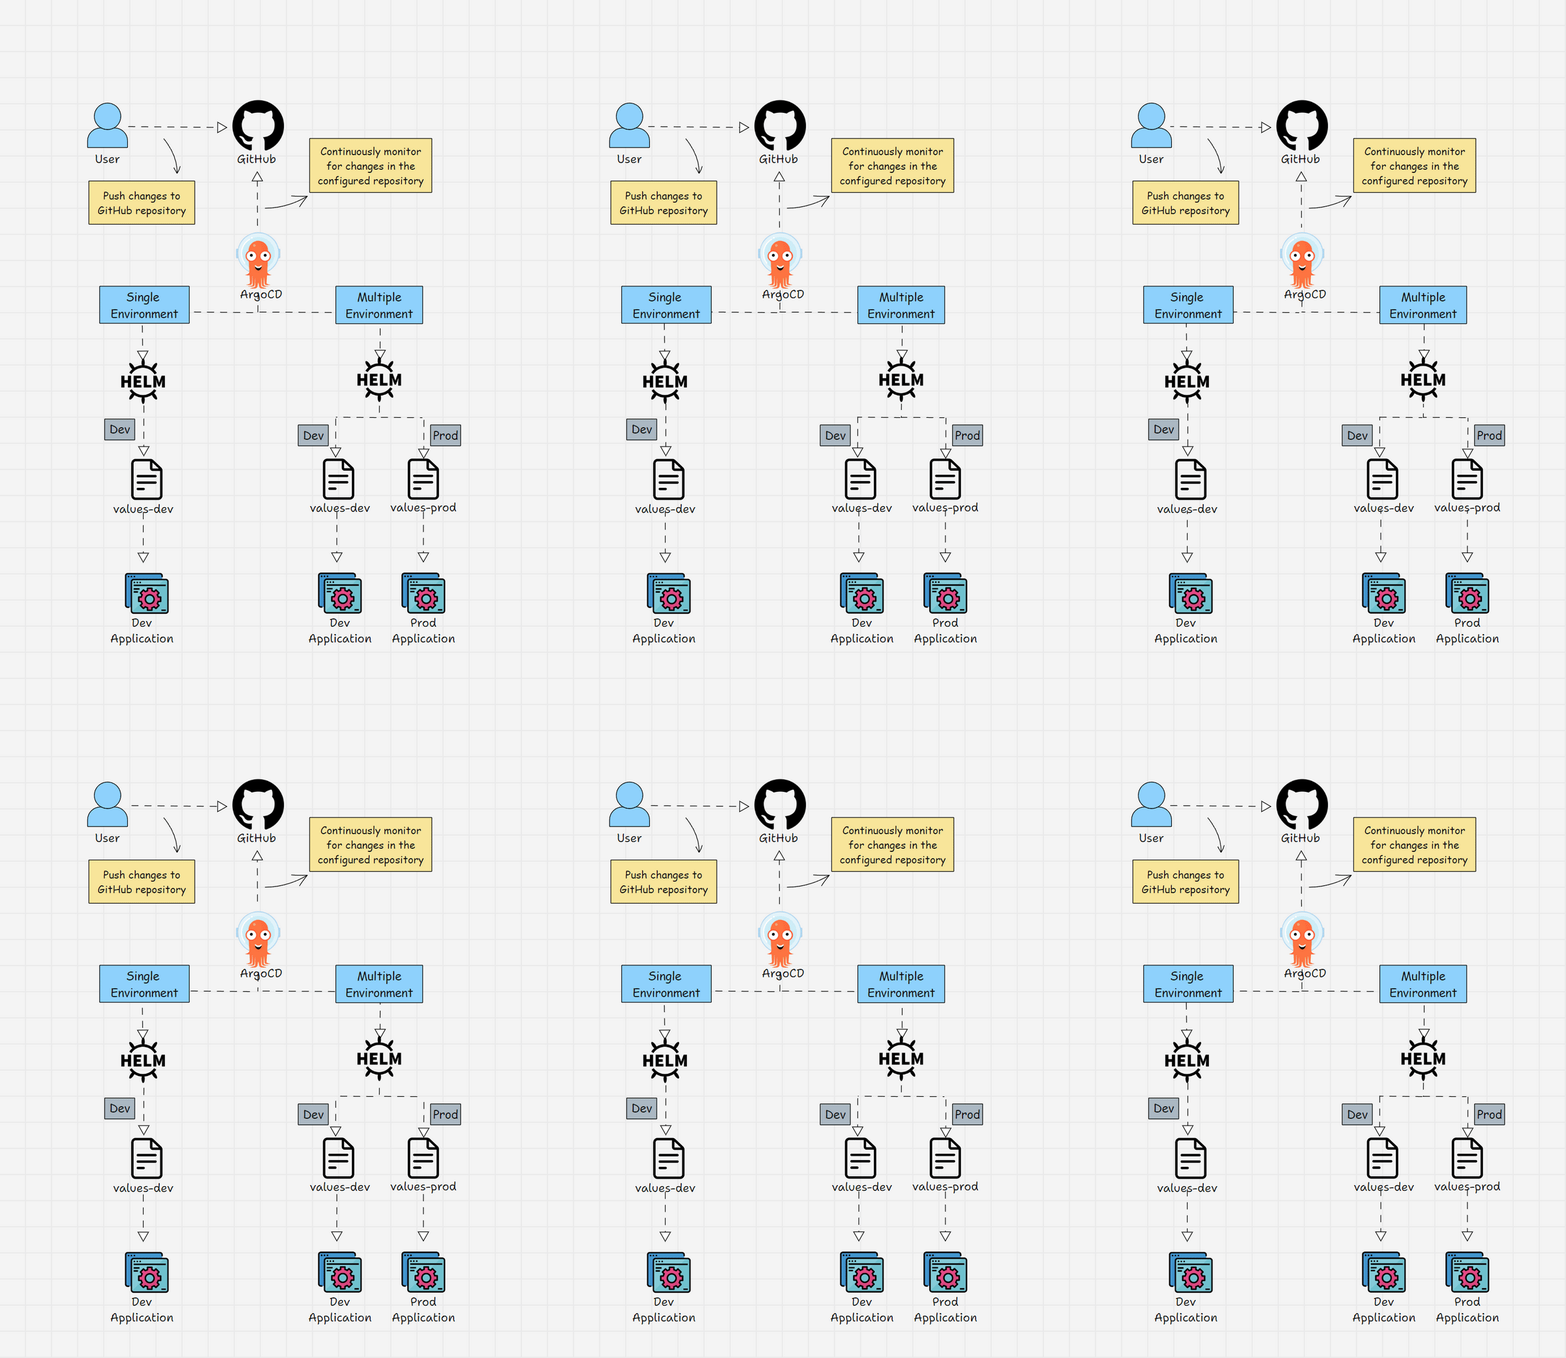
Setup Prerequisites
The following are the prerequisites for this setup.
- Kubernetes Cluster
- Kubectl
- Argo CD installed in your cluster
- Helm installed in your system
Helm Chart Repository
You can use the below repository as an example or you can your own helm repository.
Clone the repository to your workstation.
git clone https://github.com/kubernetes-learning-projects/helm-chart.gitFor this demo, we will use the java-app helm chart that is part of this repository.
Once the repository is cloned, cd in to the java-app folder using the following command
cd java-appYou can see the following directory structure.
.
├── Chart.yaml
├── templates
│   ├── configmap.yaml
│   ├── deployment.yaml
│   └── service.yaml
└── values.yaml
The Chart.yaml file contains the name, description, type, and version of the helm chart.
Inside the templates folder that contains the YAMl template of the application which gets values from the values.yaml file.
The values.yaml file contains values that will be substituted into the YAML templates inside the templates folder during deployment.
To get a detailed understanding of Helm Charts, visit the creating helm chart detailed blog.
Deploy Helm Charts using Argo CD
For the purpose of demonstration, we will assume, we have two environments named dev and prod.
First, we will be deploying the helm chart in a single environment dev and then will be deploying the helm chart on two environments dev and prod.
Lets get started with the setup.
Deploy Helm Chart in a Single Environment:
First, let's see how to deploy a helm chart in a single environment using Argo CD.
This is a basic helm deployment with just a single values.yaml file.
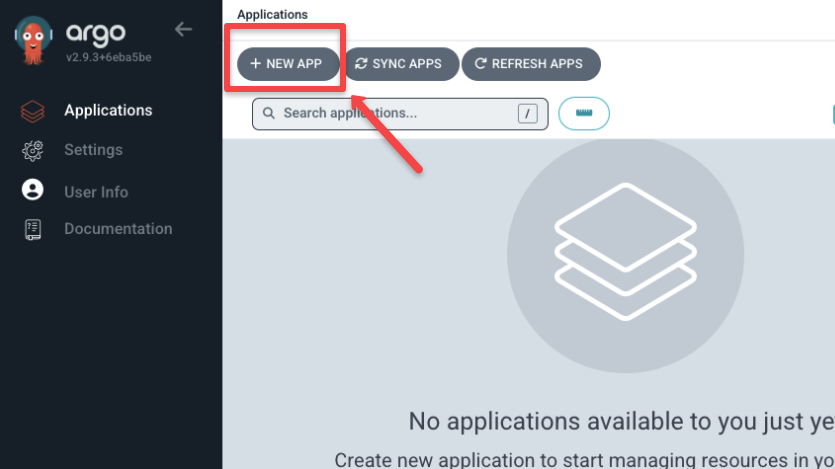
Now, login to your Argo CD UI and press the add NEW APP button to configure the GitHub repository which has the helm chart.
A new page will appear to give the configuration for your application, specify the Application Name, give the Project Name, and select the SYNC POLICY as shown below
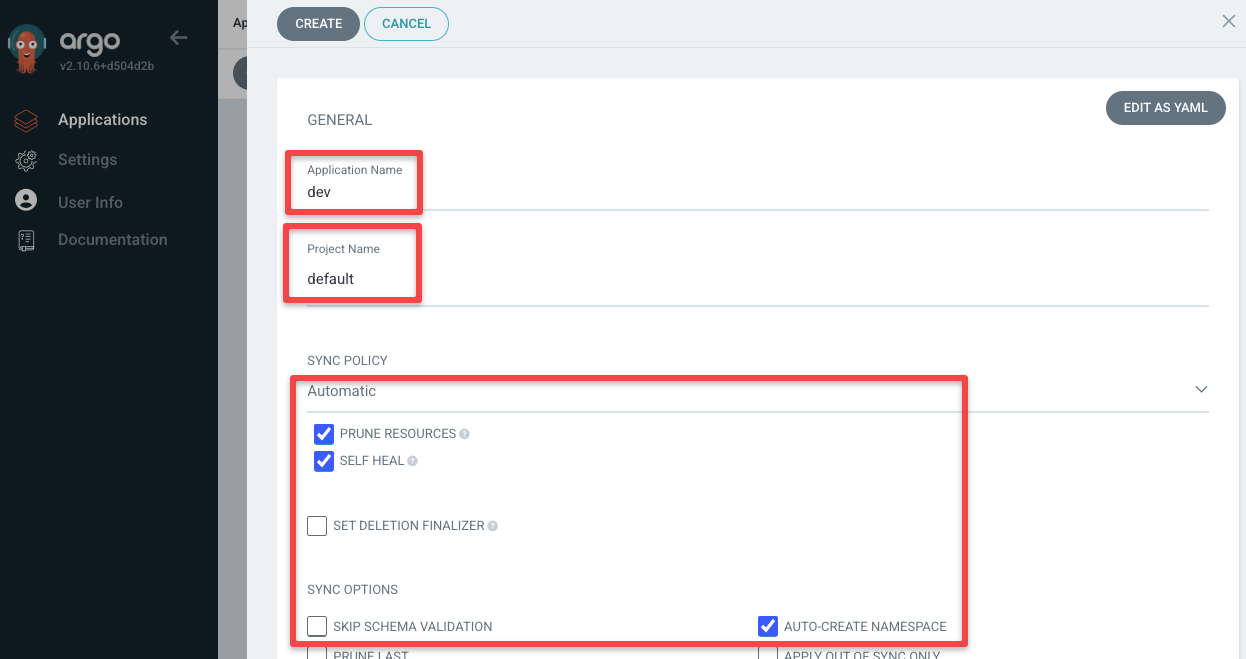
In the above image, you can see the AUTO-CREATE NAMESPACE sync option is selected, so you don't have to create a namespace manually Argo CD will create the namespace if not present.
Then, add the URL of your Git repository, and the path of the helm chart. In our case its java-app folder.
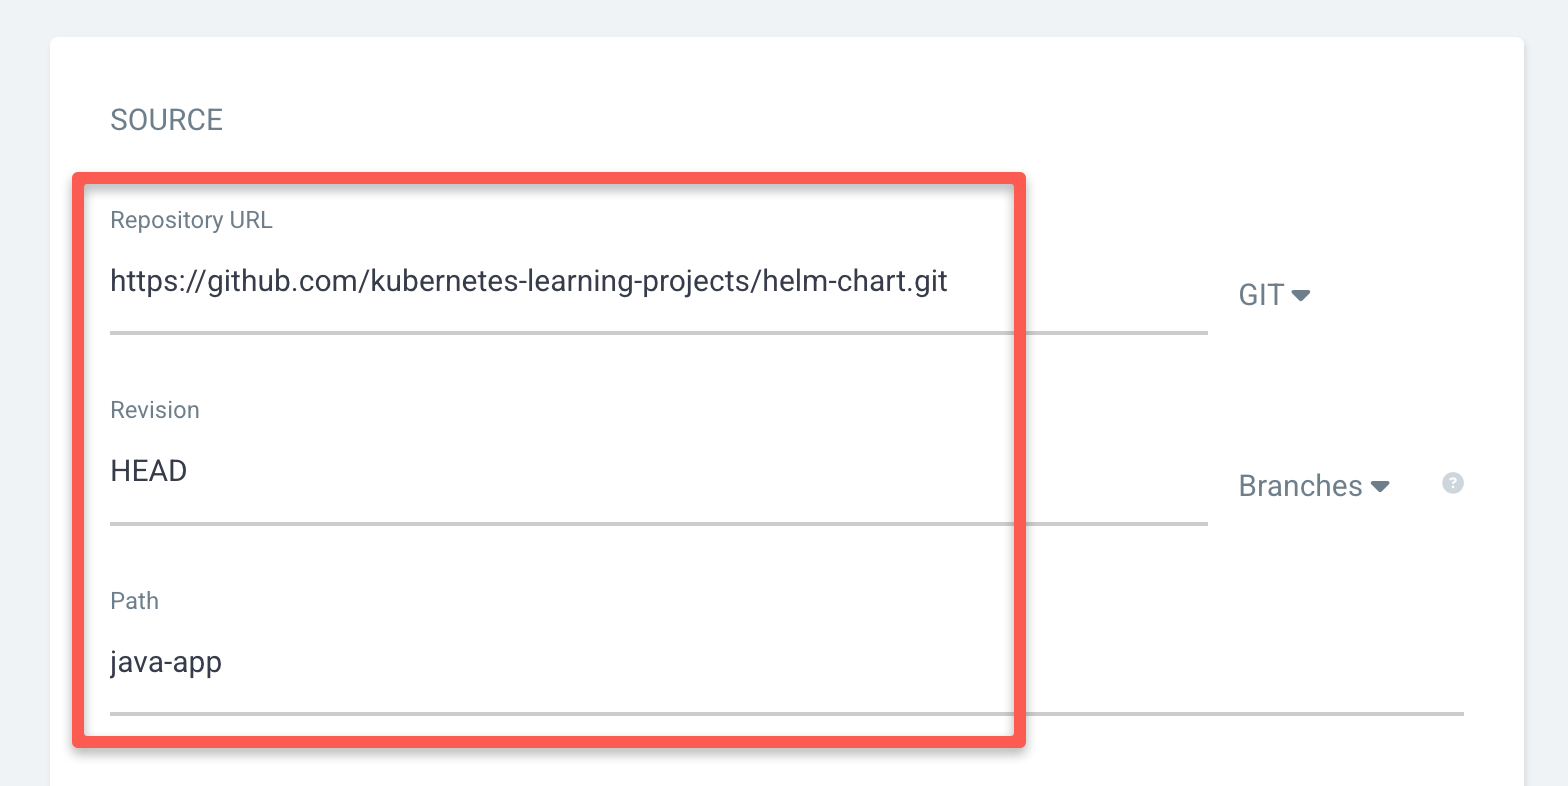
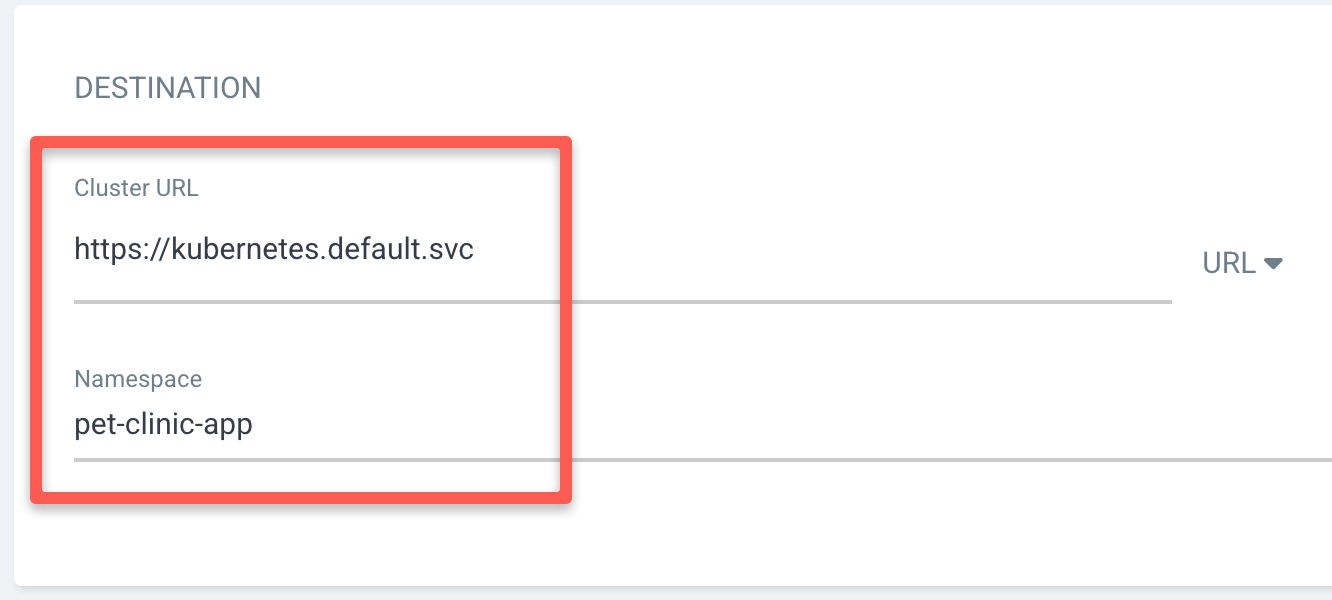
Then, select you're destination cluster URL and the namespace where you want to deploy the helm chart.
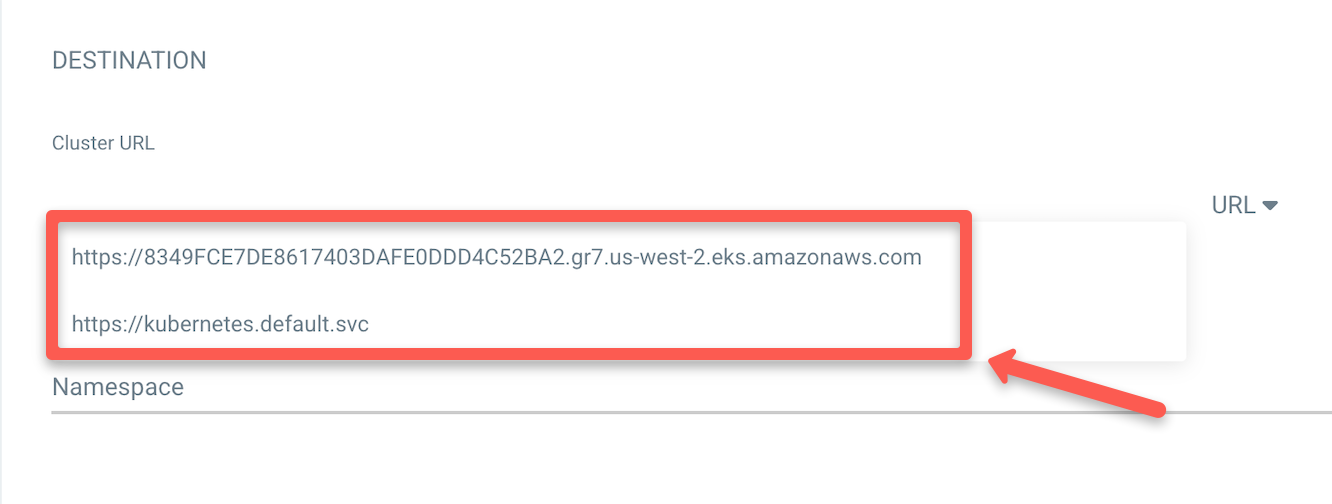
As you can see I am selecting the default cluster which is the cluster my Argo CD is running on, if you have multiple clusters configured to Argo CD select the cluster URL where you want to deploy.
And we are deploying the application on the pet-clinic-app namespace, the namespace you specify will be created by Argo CD is not present because of the AUTO-CREATE NAMESPACE sync option selected.
Below that, you can see Argo CD automatically detects the files in the Github repository as helm chart and will show you the values of the values.yaml file as shown below
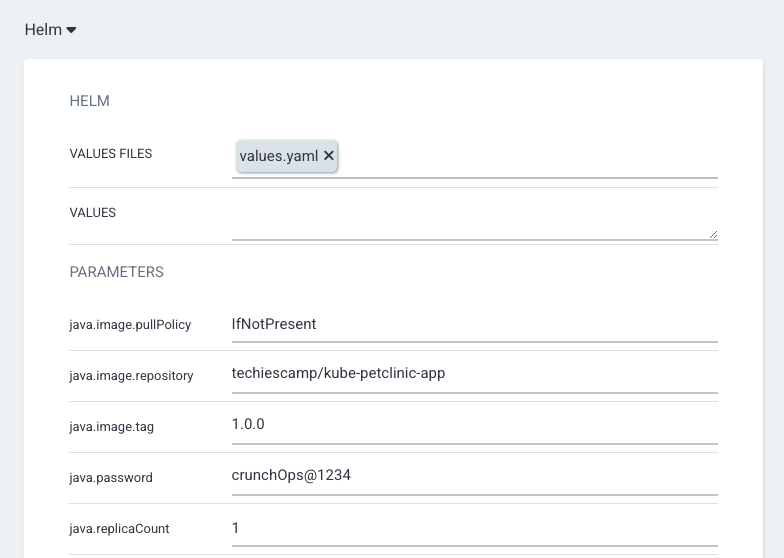
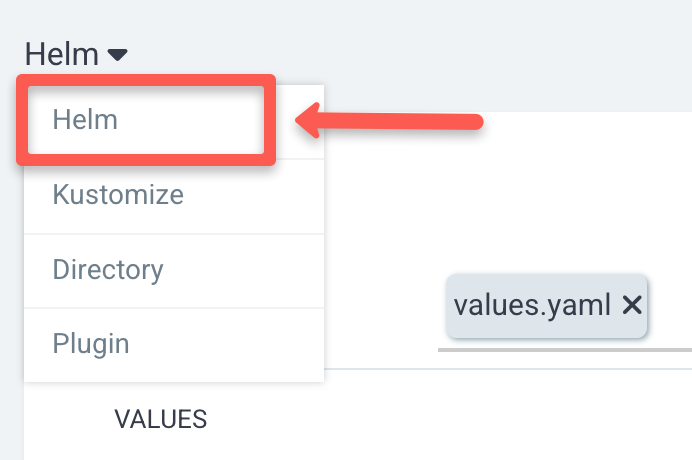
You can alter the values as per your requirements, and if the chart type is not detected automatically you can select the type as shown below
Then, press the Create button at the top of the configuration, then it will deploy the YAML file and create a dashboard for it as shown below
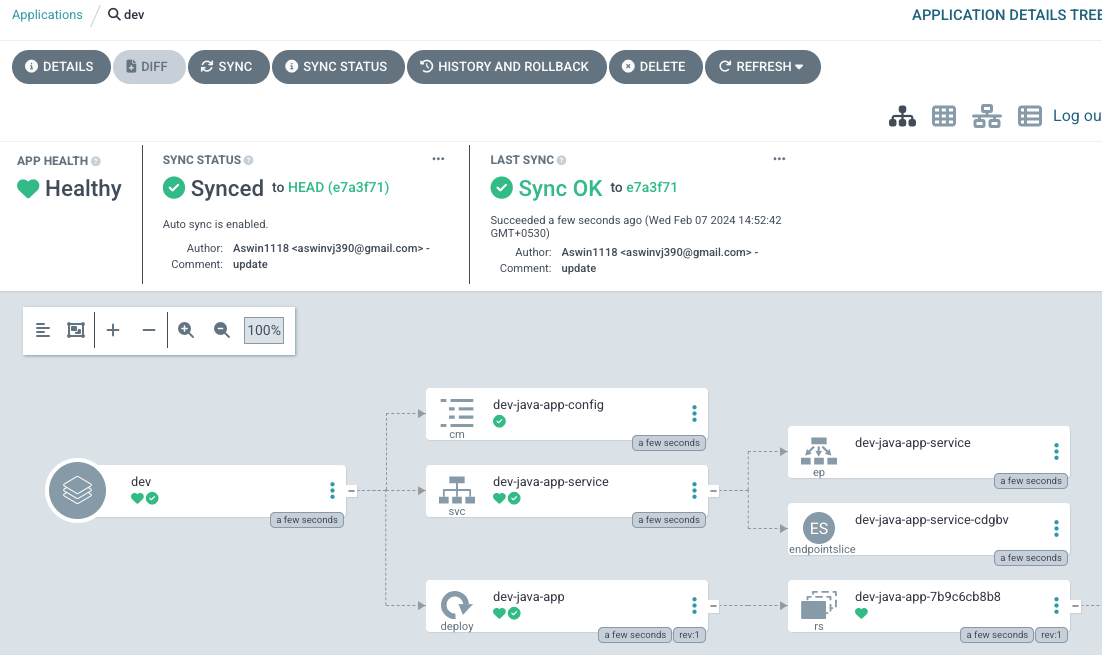
As you can see ArgoCD gives every information about the deployment on the dashboard.
Deploy Helm Chart on Multiple Environment
To do this you have to create two value files as shown below
.
├── Chart.yaml
├── templates
│   ├── configmap.yaml
│   ├── deployment.yaml
│   └── service.yaml
├── values-dev.yaml
└── values-prod.yaml
One of the differences in both methods is, that while using a single values file the values will be shown on the UI and you can alter the values from the UI.
But with multiple values files, you cannot change the values from the UI, you can only select the values file you want to use as shown below.
For this method, you have to create NEW APP two times, do the same steps you did in the above single environment method until the helm values.yaml file selecting step.
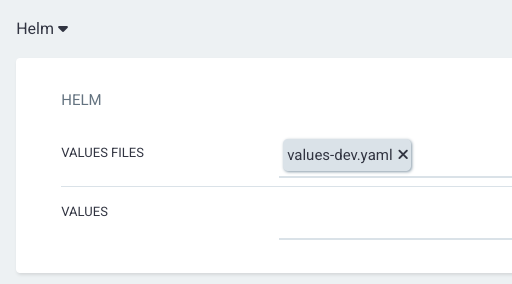
Do the same steps again and select the next values file
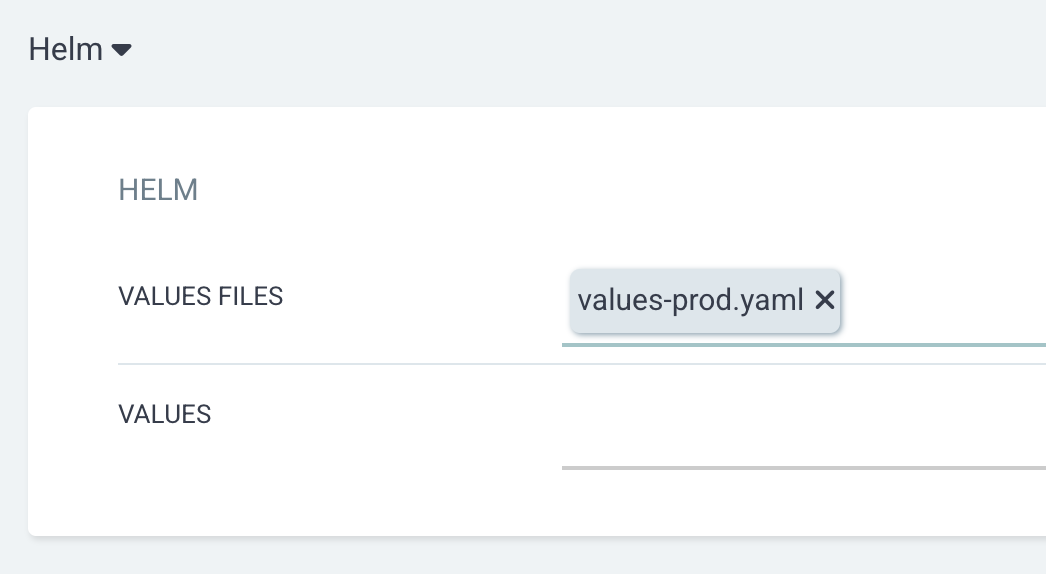
If you want to change the values, you have to modify the values file from your local workspace and push it to Git.
After deploying the helm chart on two environments you can see your application on the dashboard as shown below.
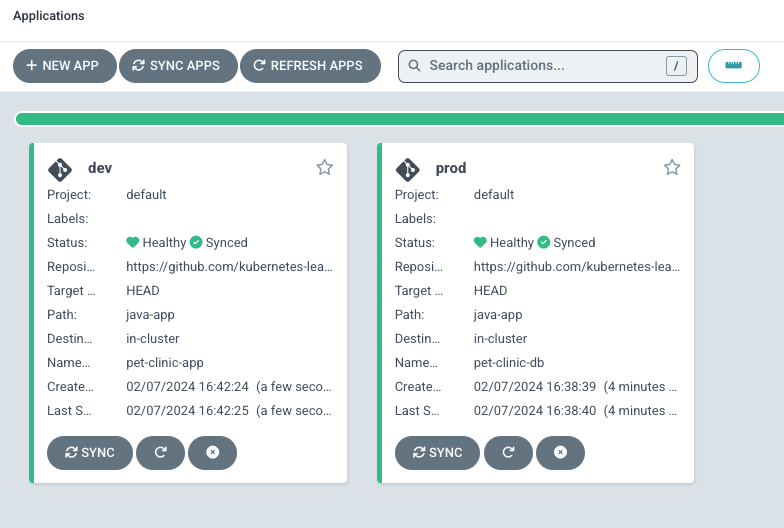
I have deployed both applications on the same cluster, if you want to deploy both applications on different clusters you can change the cluster URL in the destination section.
You may ask, why we have to create multiple value files for multiple environments and why can't we use a single value file and change the values while deploying the helm.
We can do that also, but it is only suitable for basic applications with a minimum number of values, it is not possible for large organizations that have an application with different deployment requirements per environment.
They can't change the values every time they deploy, so they keep fixed values for each environment and change the values on each value file if needed.
Conclusion
In summary, you learn about integrating Helm on Argo CD and also about deploying applications on both single and multiple environments with values files.
I hope you find this blog useful and easy to understand about Argo CD helm integration.


