

In this blog, we will look at Argo CD installation on Kubernetes using step-by-step instructions.
After the installation, we will look at deploying sample applications the GitOps way. We will use a git repository to deploy the application using Argo CD.
We will also look at configuring GitHub webhooks to enable the sync process as soon as there is a change in the configured git repository.
Before going into the setup, make sure you have a clear understanding of the Argo CD architecture.
What is Argo CD?
Argo CD is a declarative, GitOps CD tool for Kubernetes, which helps you to manage applications using the Kubernetes deployment YAML file stored in the Git repository.
Argo CD uses the GitOps principle, which means Argo CD continuously monitors the repository, detects changes, and deploys them.
Argo CD uses a pull-based deployment, which means whenever a change is made to the deployment YAML file in the GitHub repository, Argo CD detects, pulls, and automatically deploys the latest changes.
Given below is a simple workflow of Argo CD components.
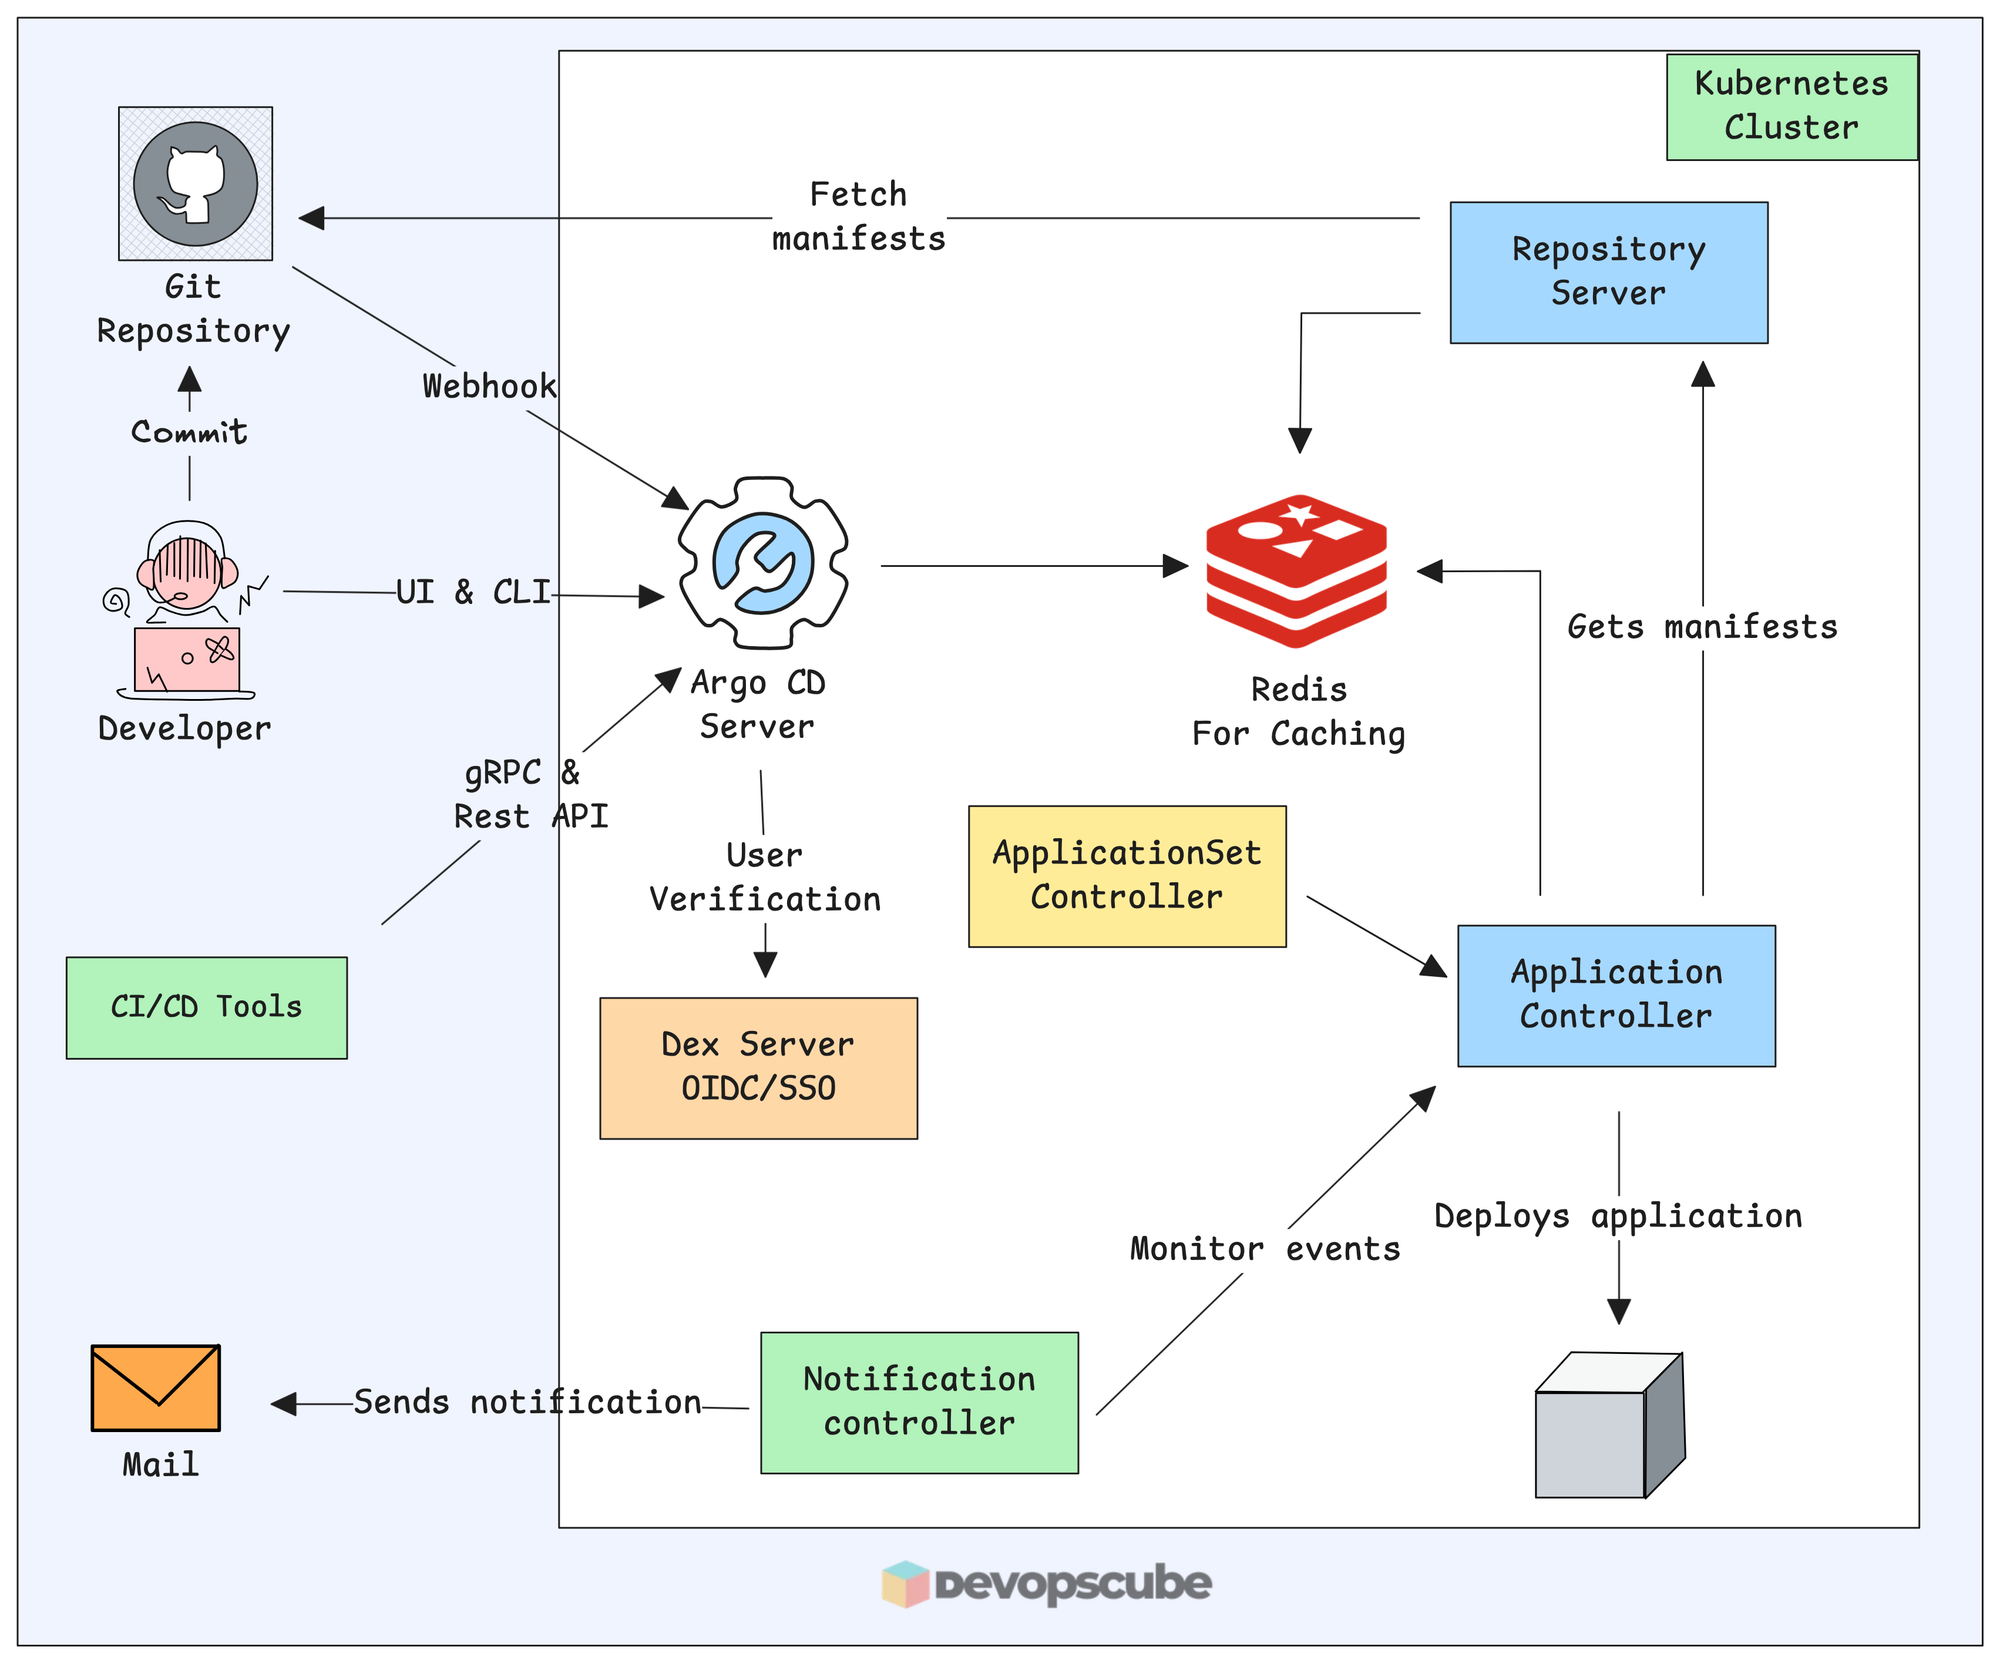
Below is the list of each Argo CD component.
- argocd application controller (Statefulset): A core component of Argo CD that is responsible for managing and synchronizing applications (reconciliation) deployed in a Kubernetes cluster with the desired state in Git
- argocd application set (Deployment): A controller that automatically generates and manages Argo CD Applications based on a template.
- argocd notification (Deployment): Sends notifications about Argo CD events to various channels like email, Slack, or webhooks.
- argocd reposerver (Deployment): The component that manages Git repositories and provides an API for accessing and synchronizing application manifests.
- argocd server (Deployment): The main component that exposes the Argo CD API and serves the web UI for managing applications and configurations.
- dex server (Deployment): It is an identity provider that can be integrated with Argo CD for user authentication and authorization with external identity providers (OIDC Providers) like GitHub, SAML etc.
- Redis (Deployment) : Used for caching to reduce request sent to Kube API and to Git provider.
Prerequisites
To get started with the setup, you should have the following.
- A working Kubernetes cluster
- Kubectl configured with the cluster
- Helm installed on your workstation.
We will see about two deployment methods of Argo CD, one is using manifest and the other using Helm.
Lets get started with the setup.
Argo CD Setup Using Manifest Files
The easiest way to set up Argo CD on Kubernetes is using plain Kubernetes manifest files available in the Argo project GitHub repository.
If you are setting up Argo CD for project requirements, use the Helm charts given in the next section.
We will deploy Argo CD in a custom namespace called argocd.
The following kubectl commands will create the namespace and deploy the manifest.
kubectl create namespace argocd

kubectl apply -n argocd --server-side --force-conflicts -f https://raw.githubusercontent.com/argoproj/argo-cd/stable/manifests/install.yamlserver-side flag ignores the annotation size limit because some CRDs have annotation size bigger than 262KB.And the
force-conflicts flag prevents conflict between server-side and client-side fields by changing the ownership of fields to server-side.This command creates Kubernetes objects related to Argo CD Namespace scoped and cluster scoped resources.
The key objects are Argocd services, deployments, and statefulsets, ClusterRoles, Configmaps, and Secrets.
It also created Argo CD custom resources like applications, applicationsets and appprojects.
You can access the Argo CD UI in our workstation using the following port forwarding command.
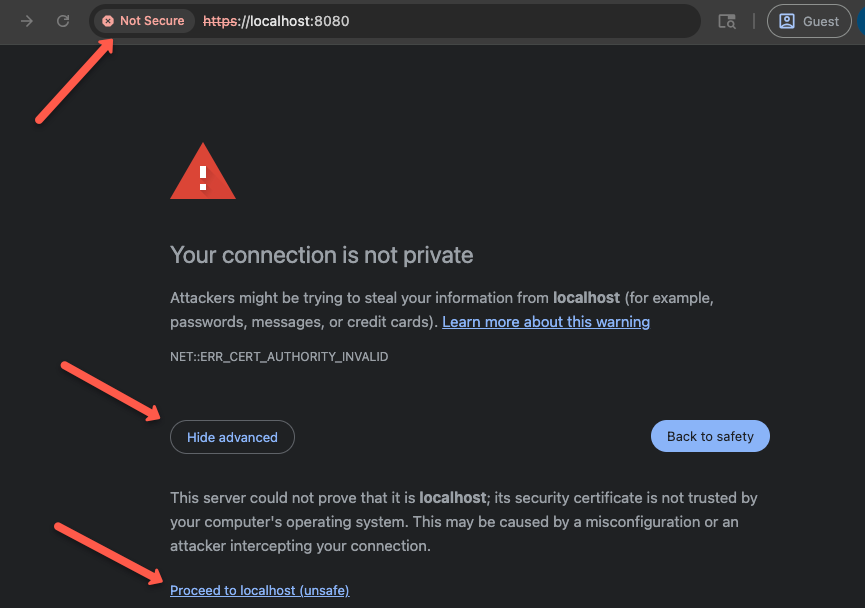
kubectl port-forward svc/argocd-server -n argocd 8080:443You will get an SSL error due to self-signed certificate added to the Argo CD server. You can click proceed to access the UI.
To login to the UI, you need a username and password.
The default username is admin. To get the password, execute the following command.
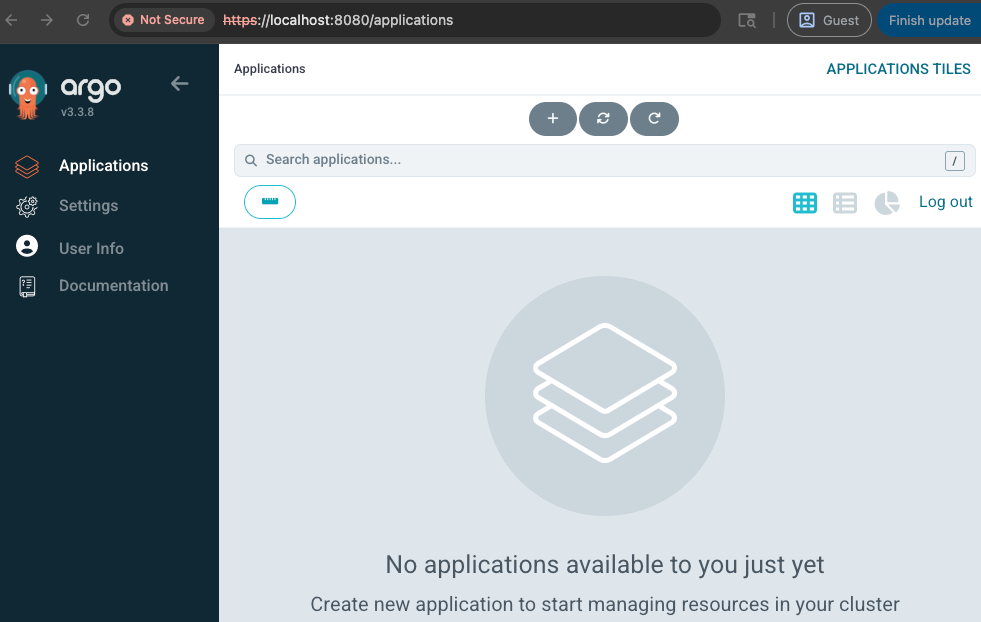
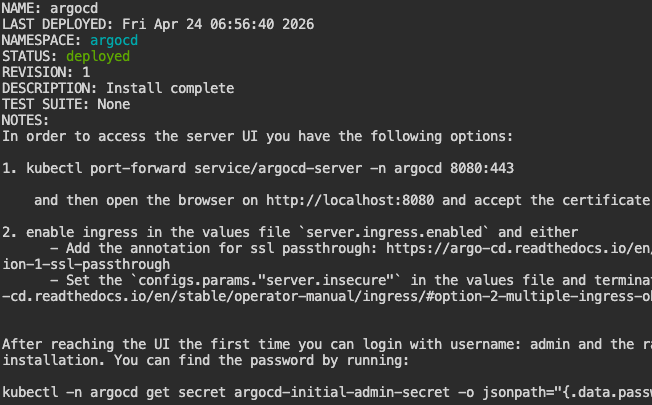
kubectl -n argocd get secret argocd-initial-admin-secret -o jsonpath="{.data.password}" | base64 --decode ; echoOnce logged in, you will get the Argo CD server dashboard as shown below.
You can clean up the setup using the following command.
kubectl delete -n argocd -f https://raw.githubusercontent.com/argoproj/argo-cd/stable/manifests/install.yamlHow to Deploy Argo CD Using Helm Chart
If you are setting up Argo CD for project purposes, we highly recommend you setup using Helm charts rather than plain manifest files.
Because with plain manifest, you need to find and modify each RAW YAML file each time and re-apply it.
But with Helm, all configurations are managed in a single values file, you just need to update it and run the Helm upgrade command.
Follow the steps given below to setup Argo CD using the official Argoproject helm chart.
Step 1: Add Argo CD repo
Add the Argo CD repo to your system to download the Helm chart for set up.
Run the following command to add the repo.
helm repo add argo https://argoproj.github.io/argo-helmNow, list every repo with the word argo using the command
helm search repo argoYou will get the list of repos with the word argo as shown below. The chart we need is argo-cd.
$ helm search repo argo

NAME                             CHART VERSION   APP VERSION

argo/argo                       1.0.0           v2.12.5
argo/argo-cd                    9.5.0           v3.3.6
argo/argo-ci                    1.0.0           v1.0.0-alpha2
argo/argo-events                2.4.21          v1.9.10
argo/argo-lite                  0.1.0
argo/argo-rollouts              2.40.9          v1.9.0
argo/argo-workflows             1.0.7           v4.0.4
argo/argocd-applicationset      1.12.1          v0.4.1
argo/argocd-apps                2.0.4
argo/argocd-image-updater       1.1.5           v1.1.1
argo/argocd-notifications       1.8.1           v1.2.1
my-repo/argo-cd                 11.0.0          3.1.1
my-repo/argo-workflows          13.0.6          3.7.1
community-charts/cloudflared    2.2.7           2026.2.0
Step 2: Customize Helm Chart Configuration Values
Before deploying, you need to update NodePort configurations in the Helm chart so that you can access Argo CD UI in the browser.
For that, use the below command to save the default values of the Helm chart in a YML file.
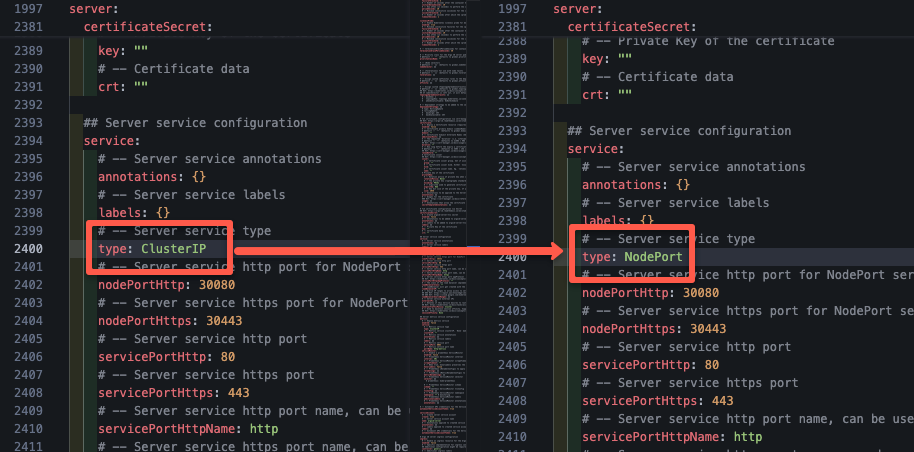
helm show values argo/argo-cd > values.yamlMake changes in the service configuration block. Change the type from ClusterIP to NodePort as shown in the below image.
It is responsible for exposing the Argo CD server UI. The default nodePort is 30080. You can customize that as well.
Below is the custom values file, which only has the configuration to change the service type of the Argo CD server component.
server:
  service:
    type: NodePort
    nodePortHttp: 30080
    nodePortHttps: 30443
By changing the type to NodePort you can access Argo CD UI on the browser using the URL <Public/Private IP of your k8s node>:<port>.
Make sure to use the same node port number you mentioned in the values.yml file.
Step 3: Deploy Argo CD
Now, use the below command to deploy Argo CD in the argocd namespace.
helm install -f values.yaml argocd argo/argo-cd -n argocd --create-namespaceOn a successful deployment, you should see the following output.
Now, run the following command to check if the pods are up and running.
$ kubectl get po -n argocd

NAME                                     READY  STATUS   RESTARTS AGE

argocd-application-controller-0          1/1    Running  0        2m53s
argocd-applicationset-controller-48css   1/1    Running  0        2m54s
argocd-dex-server-8f5687997-8txcr        1/1    Running  0        2m53s
argocd-notifications-controller-4jdd4    1/1    Running  0        2m54s
argocd-redis-fcd76bcfb-xnlgt             1/1    Running  0        2m54s
argocd-repo-server-7b8447858f-6fvsj      1/1    Running  0        2m54s
argocd-server-7f857f54f-5t466            1/1    Running  0        2m54s
All the pods are running, lets try accessing the UI.
Step 4: Log in to Argo CD Web UI
Since we have enabled the NodePort on 30080, you can use the public IP or Private IP of any node of your cluster with the node port number in the format <node IP>:<port>.
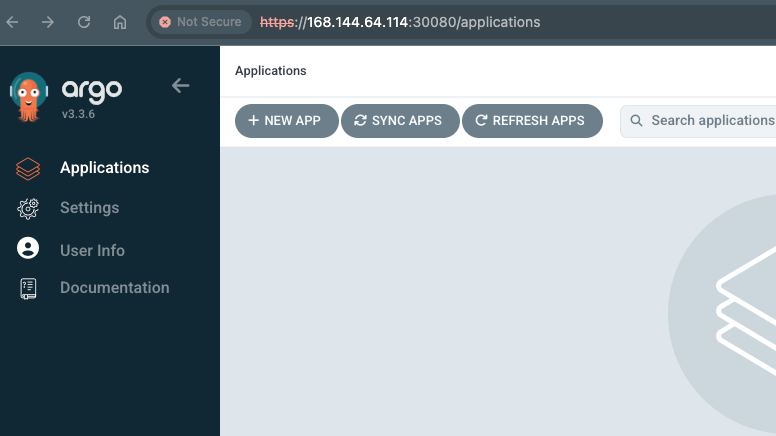
In my case, the URL will be 168.144.64.114:30080.
Now, access the UI in your browser using the URL, you will get the following window

Login to Argo CD using the username and password.
Your default username will be admin, and run the following command to get the password.
kubectl -n argocd get secret argocd-initial-admin-secret -o jsonpath="{.data.password}" | base64 --decode ; echoThis command will show your password for Argo CD, use the password and log in to Argo CD UI.
Once you log in you can see the home screen of Argo CD as shown below.
Step 5: Change Default Admin Password
We will not be using the default password for the admin user after login.
Lets, update the admin password.
The simplest way to update the password is through the UI.
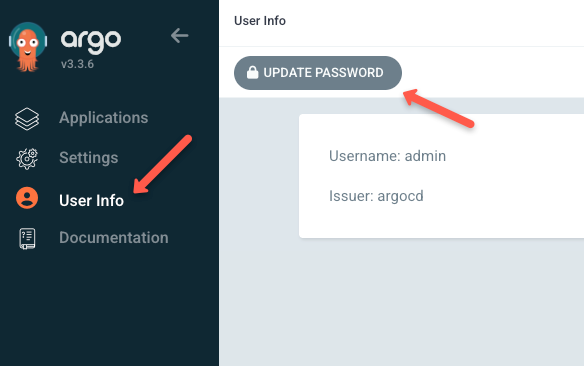
From the dashboard, go to User Info and click UPDATE PASSWORD.
A new pop up will appear to change the password.
In there, you need to give the current and new passwords you need to update.
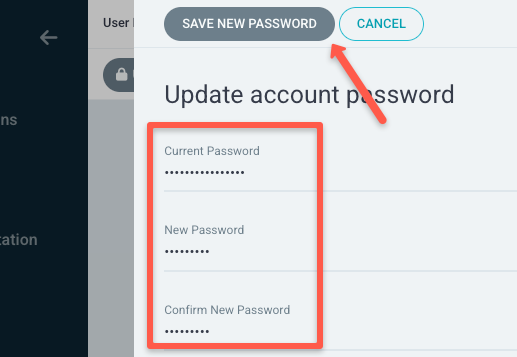
Then click the SAVE NEW PASSWORD button to update the new password.
That's it, you will get a password update successful message after a successful update.
The other method for updating a password and managing users is done using the ArgoCD CLI.
Refer to the user management blog for more information about user management.
Deploying Applications on GitHub using Argo CD (GitOps Way)
Now that we have the Argo CD setup ready, we can test an Nginx deployment that shows a custom message on the index page exposed on NodePort 32000.
We have the Nginx deployment files in the Argo CD Guide repository.
git clone https://github.com/techiescamp/argocd-guide.git

cd argocd-guide/nginx-deployment
You can see the manifests are organized under the nginx-deployment folder as shown below.
➜ nginx-deployment
├── configmap.yaml
├── deployment.yaml
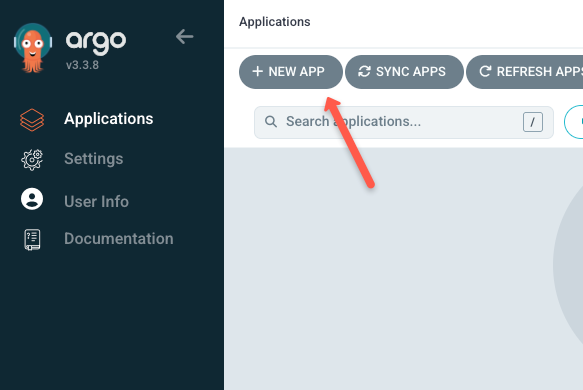
└── service.yamlFrom the Argo CD dashboard press the + NEW APP button to configure the repository.
A new window will pop up, specify the Application Name as nginx-deployment, give the Project Name as default, and set the SYNC POLICY to automatic or manual as you like.
If you set the SYNC POLICY to automatic, Argo CD automatically detects the changes made in your Git repository and triggers the deployment, or if you set the SYNC POLICY to manual you have to trigger it manually to start the deployment.
By default the automatic sync uses polling to find the changes that happens in the git repository. The default polling interval is three minutes (180 seconds). It is a configurable option in the helm chart. You can modify timeout.reconciliation as per your sync requirement.
Also enable AUTO-CREATE NAMESPACE option so that namespace will be created if it doesn't exist.
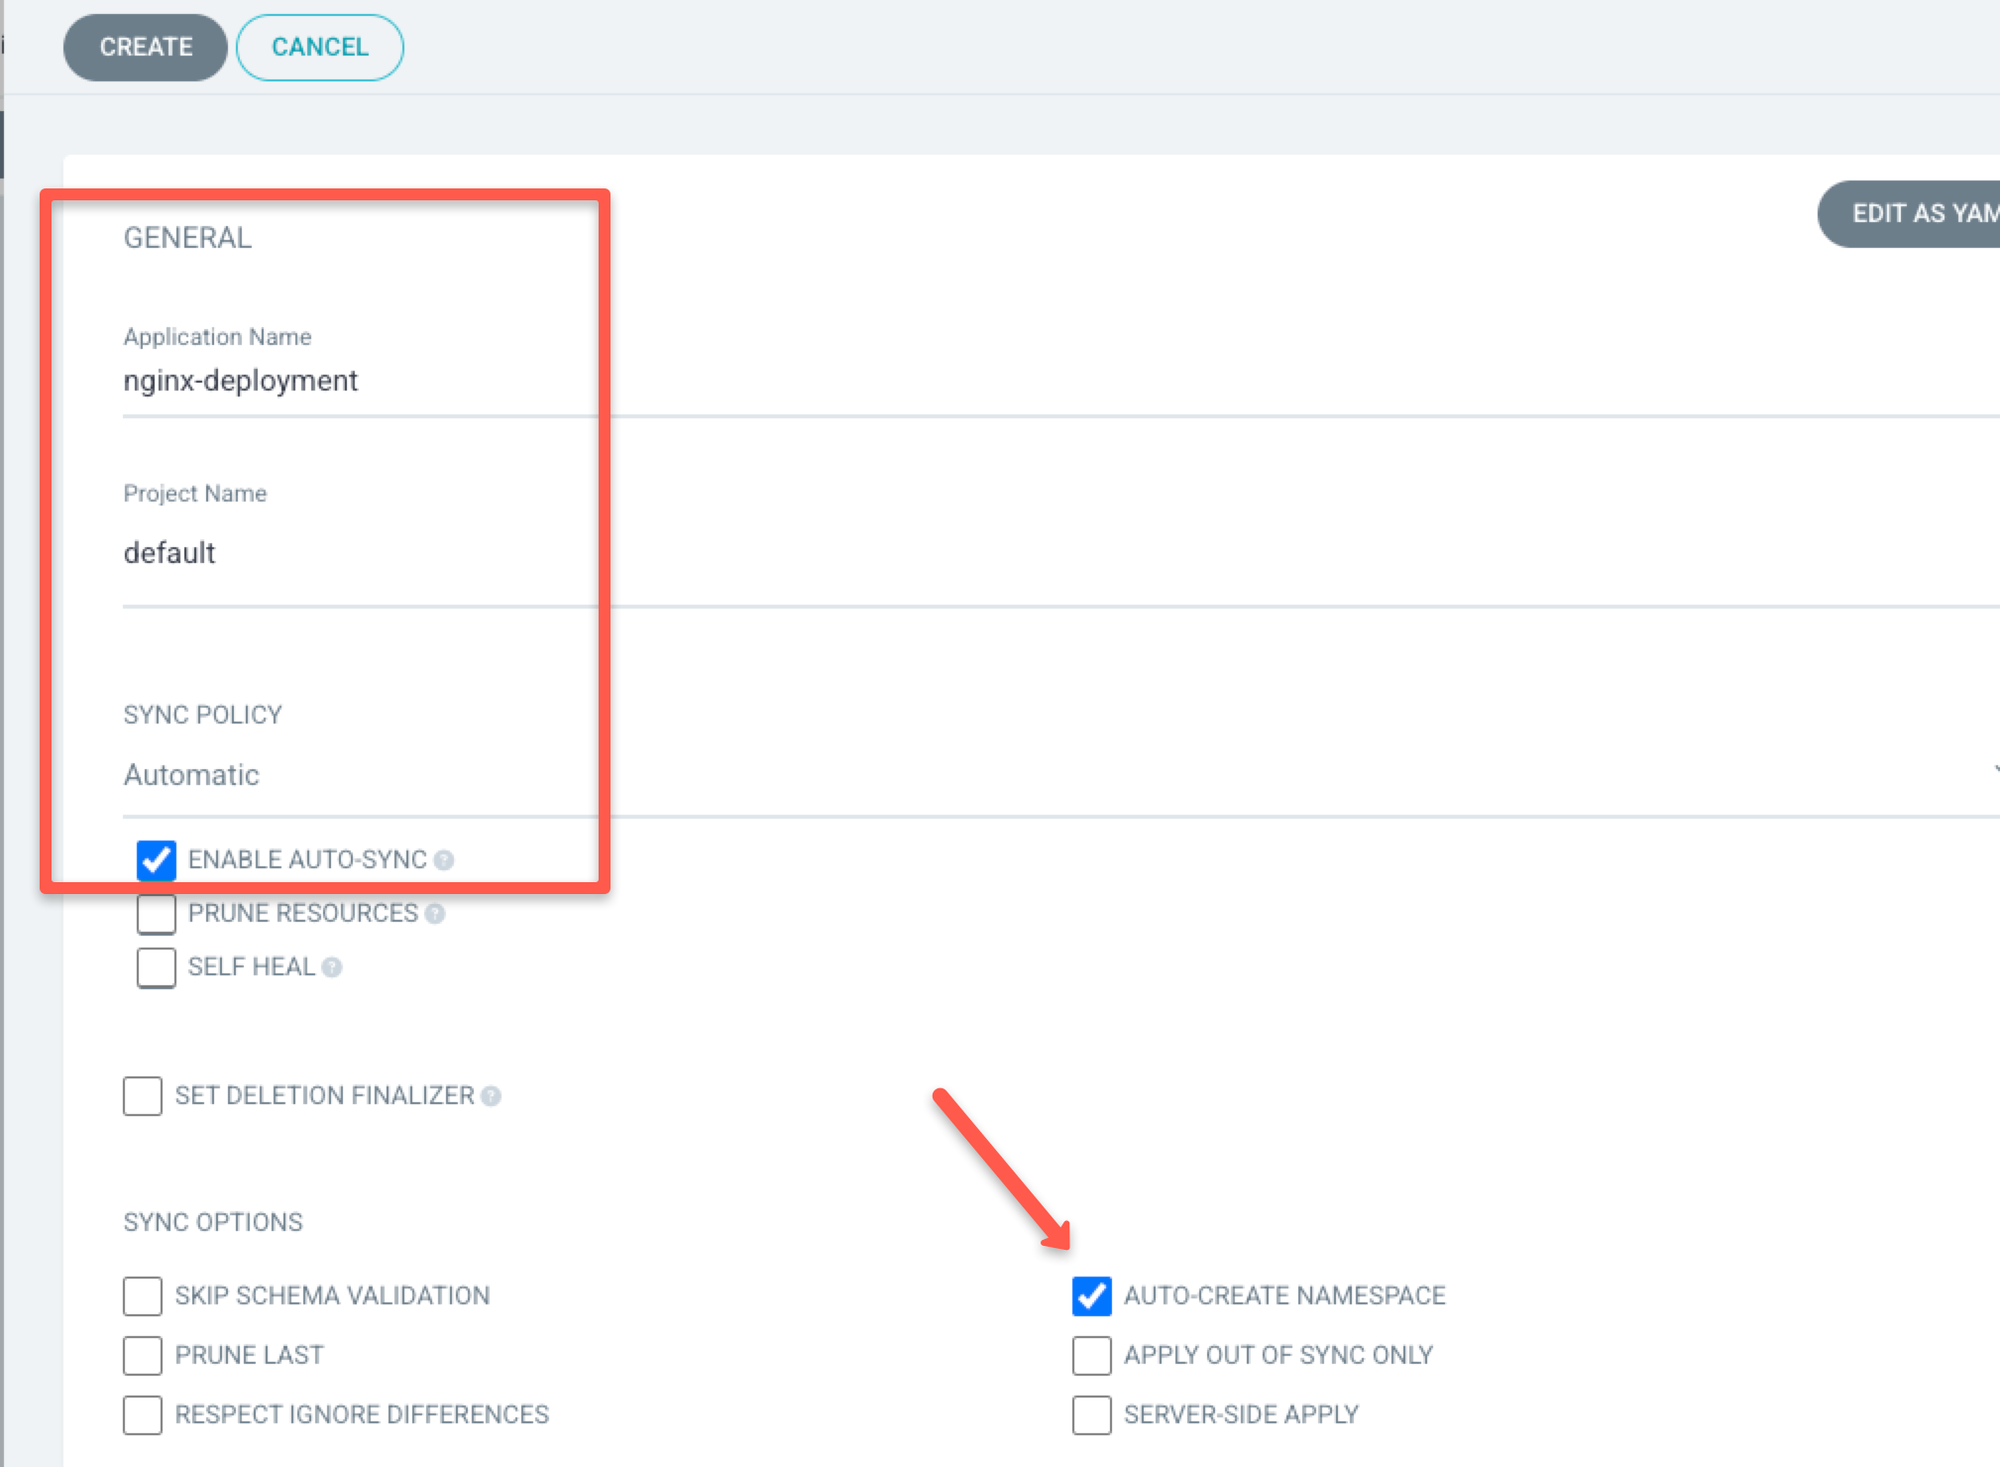
Also, there are other SYNC POLICY options, enable them as per your need.
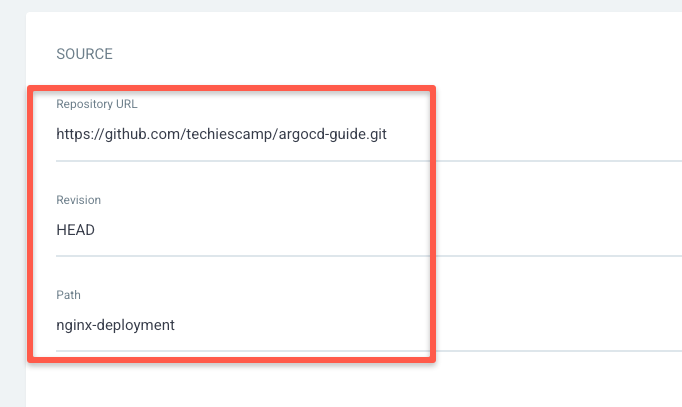
Now, add the source information which is your Git repository URL, and the path of the YAML file.
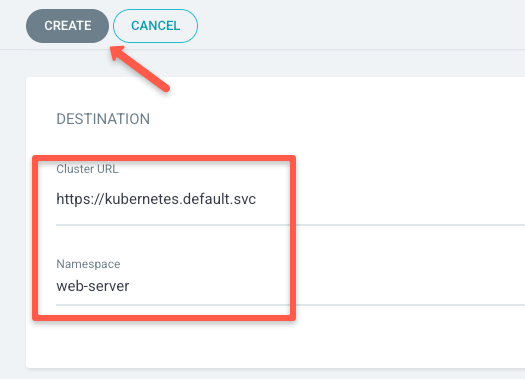
Then, select the Cluster URL, which will be shown when you select the Cluster URL tab. Select https://kubernetes.default.svc as we are deploying the application on the same cluster where Argo CD is deployed.
Also specify the namespace as webserver. Then, click the Create button as shown below.
When you click the create button it will sync the repository manifests and deploy it.
You can see the deployment information in the dashboard as shown below.
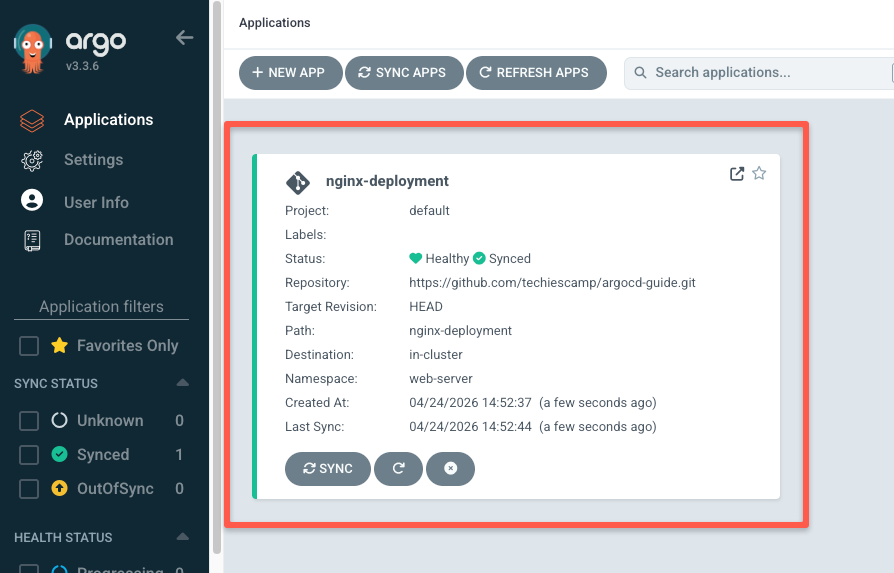
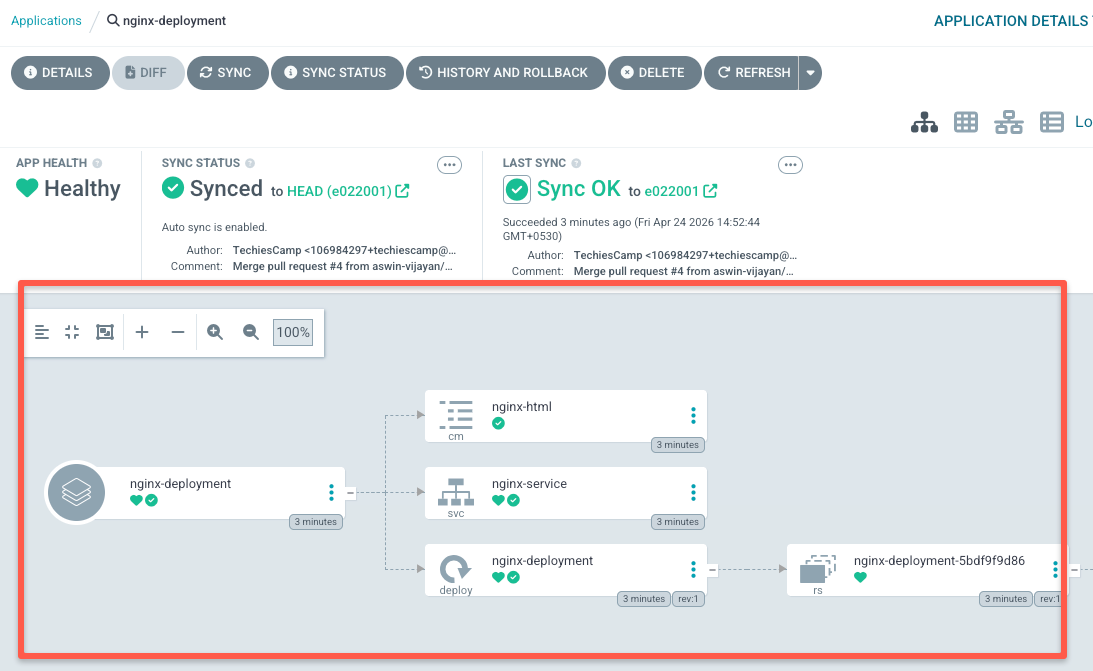
Click the application to see detailed info about your deployment as shown below.
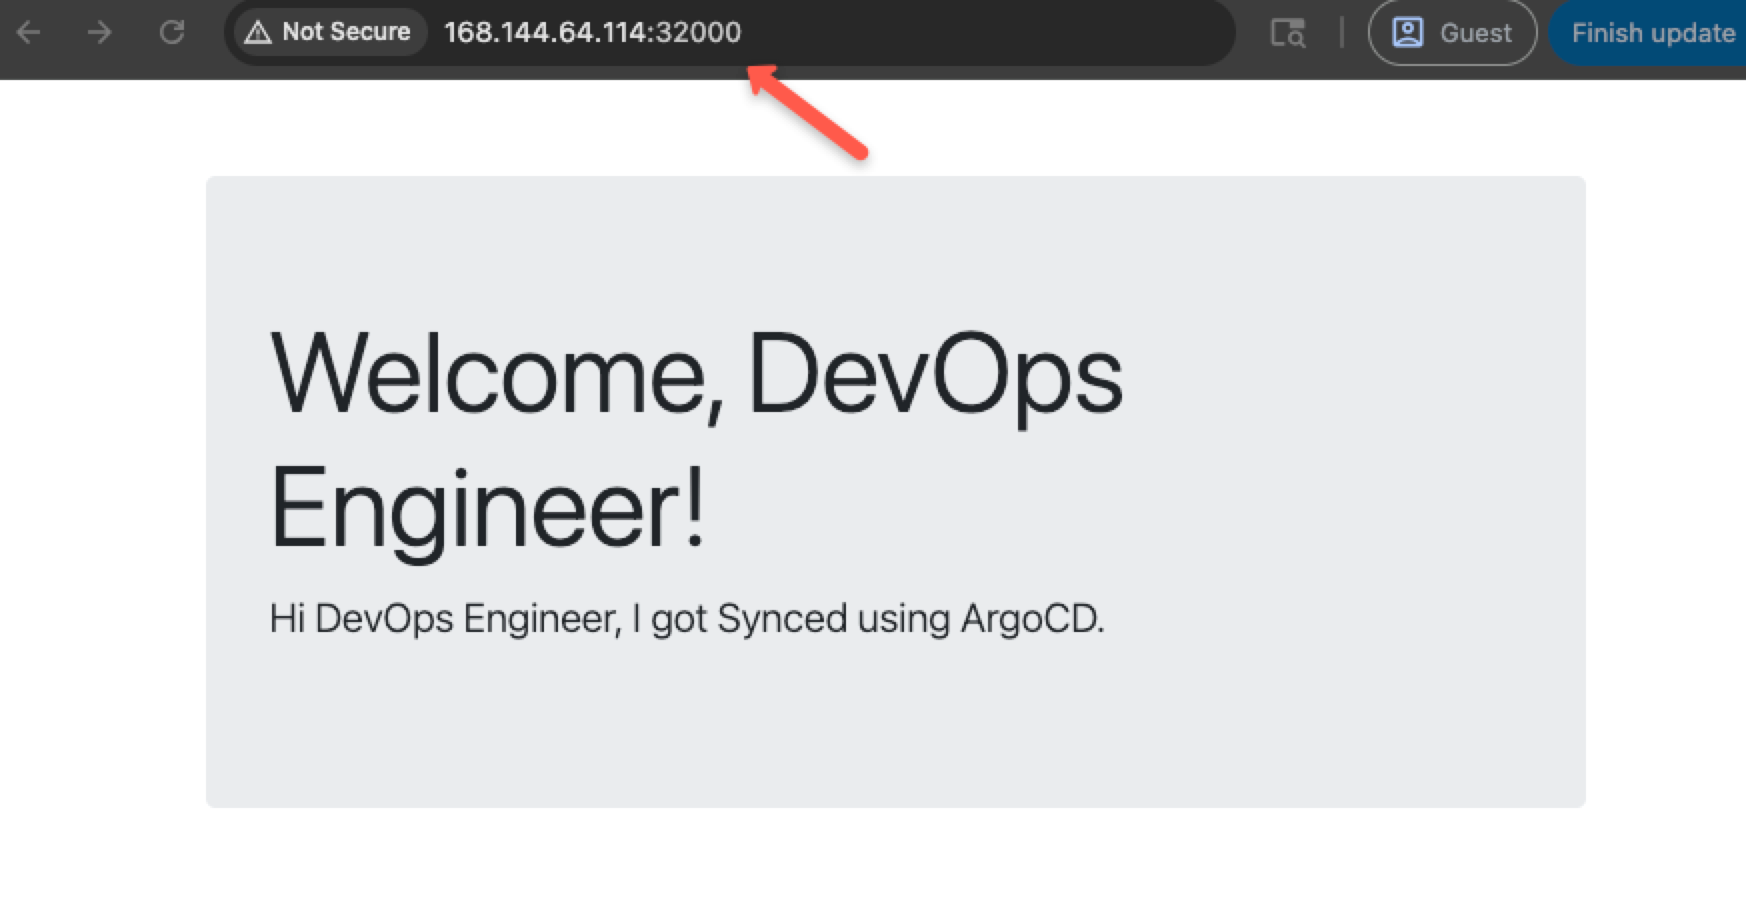
To validate our deployment, lets try to access the Nginx deployment on NodePort 32000. You should see a page as shown below.
How to Configure GitHub Webhook for Argo CD?
Even though Argo CD continuously monitors Git for changes there is a time delay in syncing the changes.
To remove the time delay we can use webhook which triggers the sync process as soon as a change is made in Git.
Let's look at how to configure a webhook on Argo CD.
First, go to your Git repository which you configured with Argo CD then go to
Setting->Webhooks->Add webhook as shown in the below image to configure webhooks.

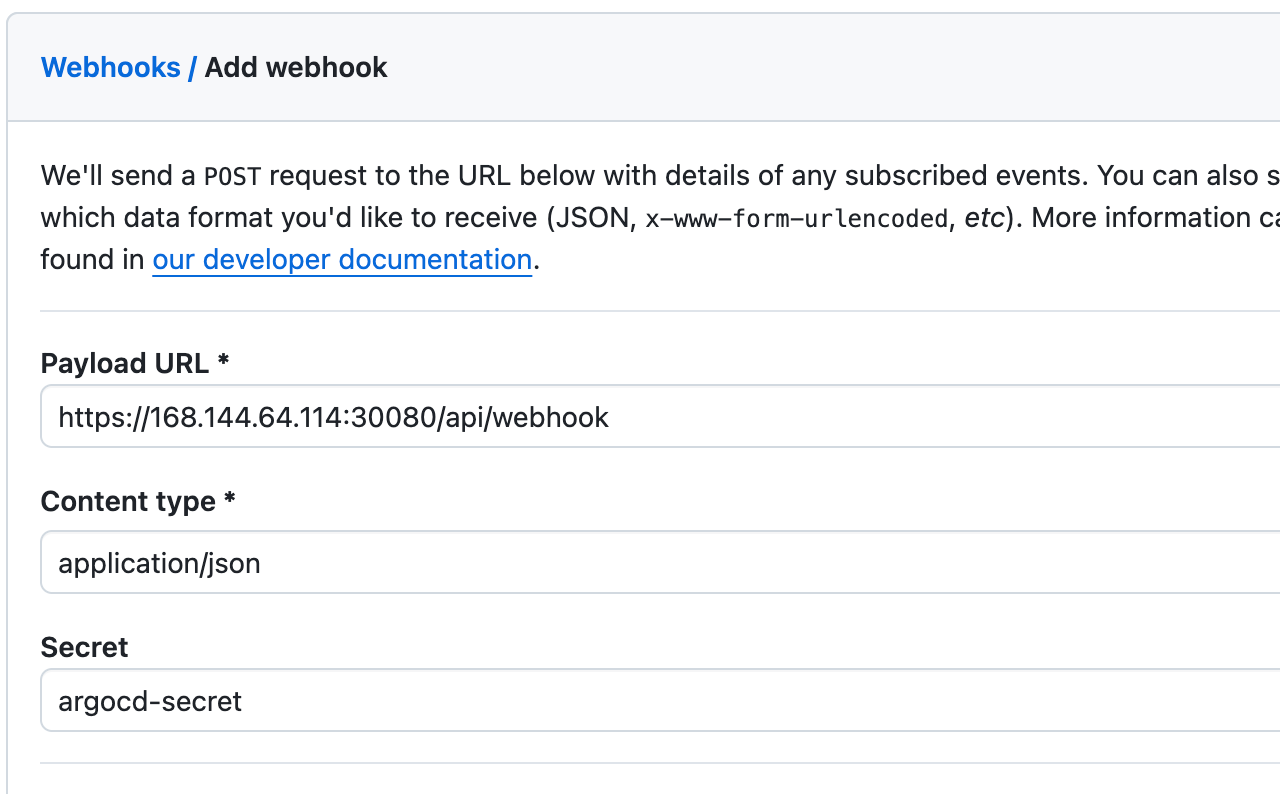
After pressing the Add webhook button you can see the configuration window as shown below.
The Payload URL would be the Argo CD webUI endpoint appended with /api/webhook. That is <node IP>:<port>/api/webhook
For example, https://34.71.163.101:30080/api/webhook.
Change the Content type to application/json, and give the Secret as you like.
Now, select Enable SSL verification if you are using an SSL certificate for your Argo CD, and select Disable if you are not using an SSL certificate.
Then select the event in which you like to trigger the webhook, it will trigger the webhook according to the event you select.
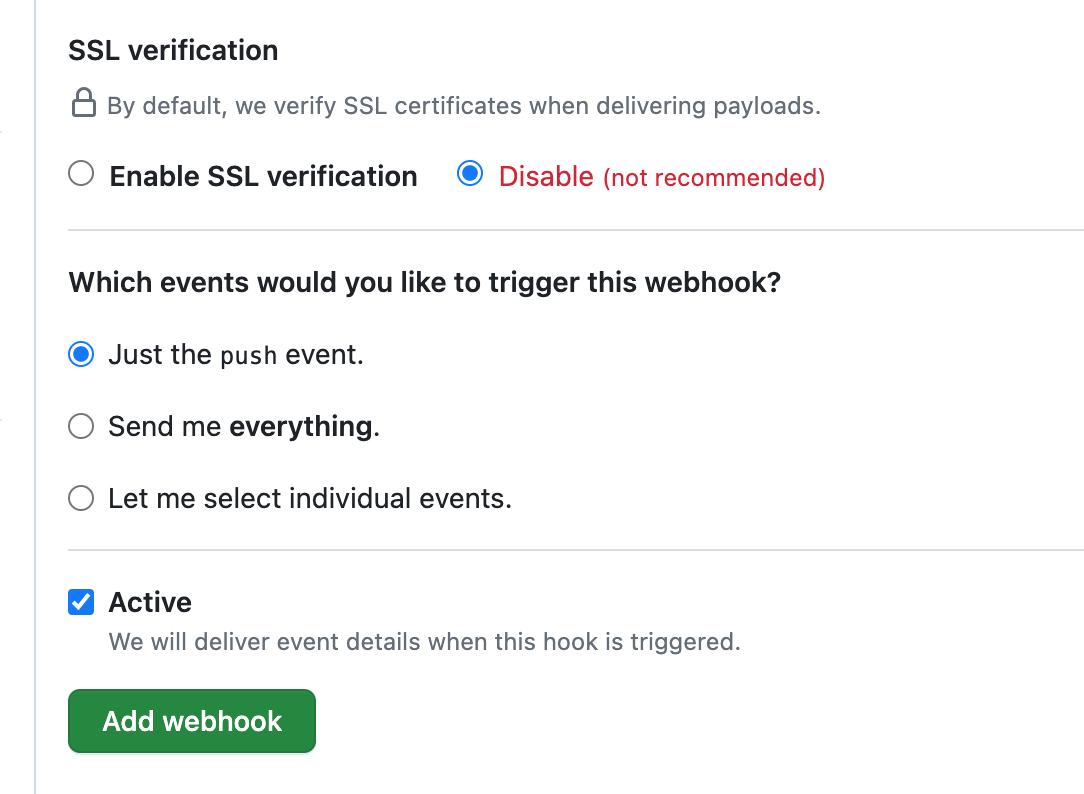
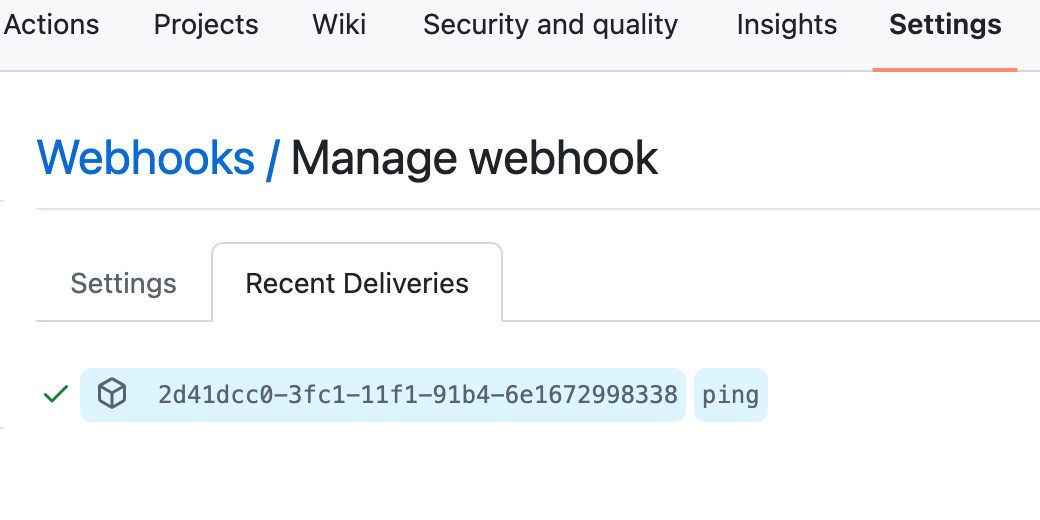
Click the Add webhook button to add the webhook configuration for your Argo CD, you can see the webhook has been added as shown below.

By selecting it you can see the triggers made by the hook as shown below.
Clean UP
If you no longer need the setup, run the following command.
helm delete argocd -n argocdArgo CD Setup Best Practices
Following are some of the best practices you need to follow when running Argo CD for production use cases.
- It is a standard practice to run one Argo CD instances per environment (dev, stage, prod) to avoid potential conflicts.
- Ensure you enable RBAC to limit access to the Argo CD instance to follow the principle of least privilege. Categorize users based on roles and responsibilities and audit them regularly.
- Patch the Argo CD image regularly to avoid security vulnerabilities.
- Backup Argo CD configuration for disaster Recovery and backup purposes.
- Setup monitoring and alerting using tools like Prometheus for events like deployment failures, resource constraints, etc.
Argo CD Configuration FAQ's
How does Argo CD store data?
Since Argo CD is a stateless app, it doesn't need any volumes to store data. All the data is stored as Kubernetes Objects. So ultimately, all the Argo CD data is stored in Kubernetes etcd. Also, it uses Redis as a throwaway cache.
If you want a study guide for Certified Argo Project Associate (CAPA), then here is the detailed study guide.
How to change the default admin password in Argo CD?
You can either update the password from the Argo CD UI or use Argo CD CLI commands to update it.
Conclusion
In summary, we have seen about deploying Argo CD using both the manifest method and the Helm method.
Also, we tested Argo CD by deploying an application manifest on GitHub in a GitOps way and configured a webhook for the repository.
