

In this guide, you will learn how to set up a Github Actions self-hosted runner on VMs and Docker Containers with practical examples.
What is a Self-Hosted Runner?
Just like other CI/CD systems, GitHub Actions uses the concept of agents (similar to Jenkins agents), though in GitHub's terminology, they’re called runners.
By default, GitHub provides hosted runners, which are fully managed by GitHub. These runners operate on GitHub’s infrastructure, meaning you don’t have control over the underlying environment.
But what if you need more control over your runners?
There are several scenarios where running them on your own infrastructure might make more sense. For example,
- Security and compliance requirements that mandate tighter control over your CI/CD environment.
- The need for specialized hardware or software that GitHub-hosted runners don’t support. For example, AI/ML workloads.
- Custom networking setups, such as accessing internal organizational resources.
- To optimize costs, especially when running high-volume workloads
That’s where self-hosted runners come into play. As the name suggests, these are runners that you manage and operate yourself, giving you full control over the environment in which your workflows run.
It can be deployed on your servers, VMs, containers or even in Kubernetes pods. Here, you control updates, maintenance, and security. It also allows you to customize hardware, operating system, and software based on your runner requirements.
How Does Self-Hosted Runners Work?
Self-hosted runners connect to GitHub through a client application that you install on your own infrastructure (runner).
This client regularly checks GitHub for new jobs, runs them locally in your environment, and then sends the results back to GitHub.
The following workflow diagram shows how a GitHub Actions self-hosted runner runs workflows on VM and Container.
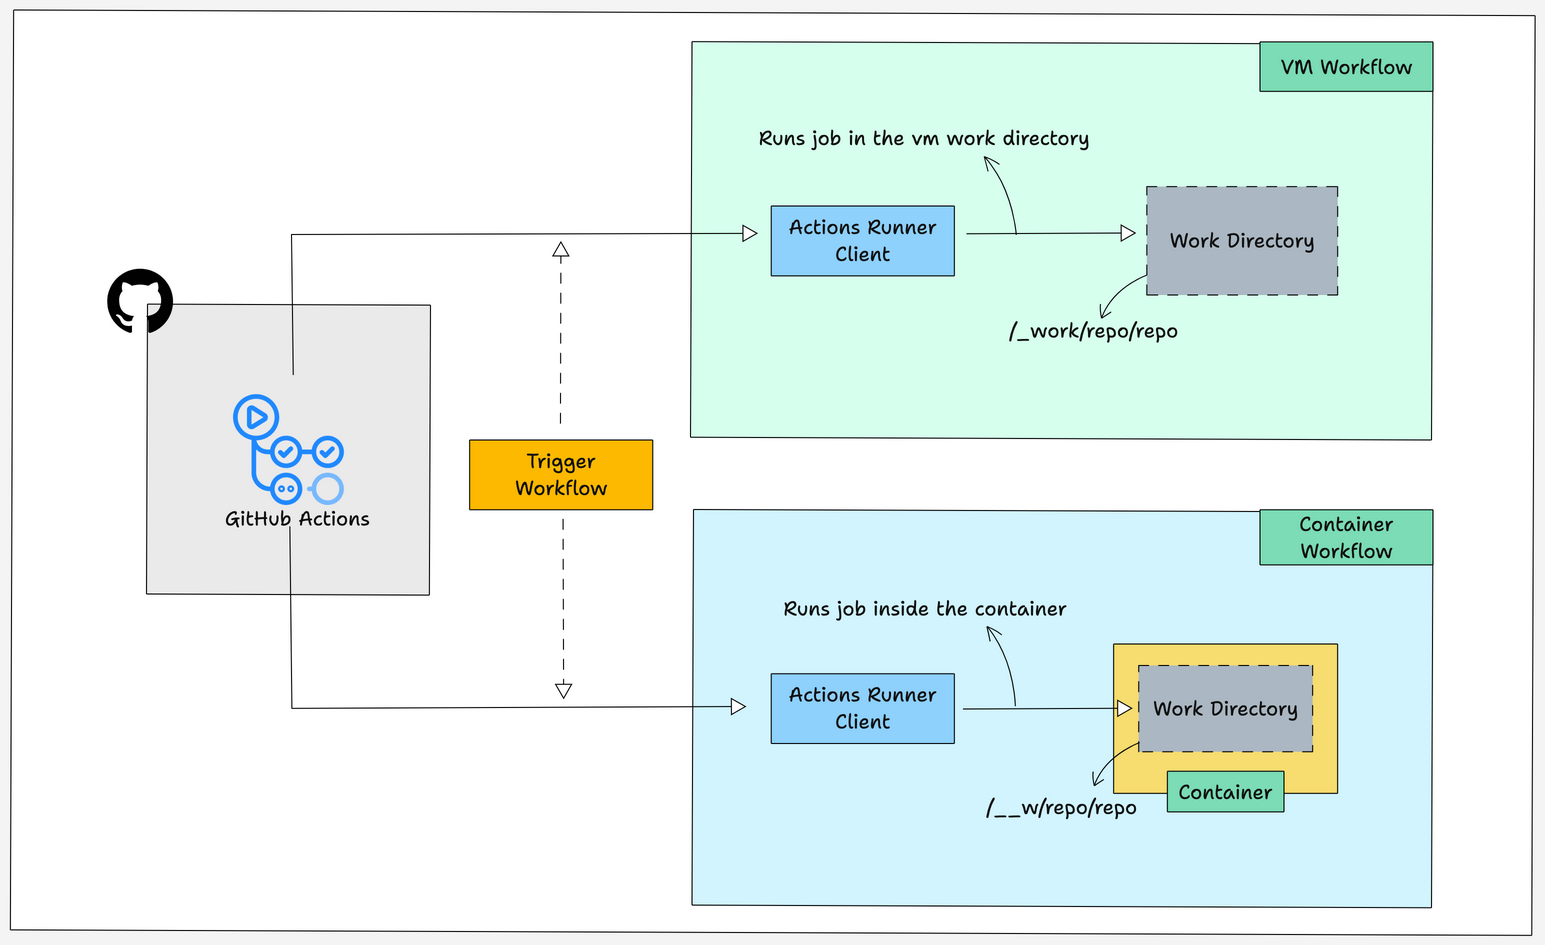
Let me explain the workflow of GitHub Actions self-hosted VM runner.
- GitHub Actions trigger the workflow by sending the job description to the specified runners client.
- The runner will run the jobs on the working directory of GitHub Actions and send the status of the job in runtime.
- The only difference is that in the VM the jobs will be run on the VM itself and while using the container the jobs will be running inside the containers.
Setup Prerequisites
- GitHub account
- VM of any cloud provider, I am going to use the AWS instance
- Docker should be installed in your VM because we are going to use the container as a runner as well.
- Create a security group and attach it to your VM that should allow ports 22 and 443.
Setting Up Self-Hosted Runner
Follow the below steps to set up a self-hosted runner for a repository
Step 1: Deploy a Server/Vm
Deploy a virtual machine (VM) on your preferred cloud provider (AWS, Azure, GCP). Or use an on-premises server in your data center
Ensure the VM meets GitHub's minimum requirements:
- Linux, Windows, or macOS
- Sufficient CPU and RAM for your workflows
- Adequate disk space for your builds and artifacts
- Enable outbound traffic on port 443 (HTTPS)
- Verify connectivity to GitHub's servers (*.github.com)
- No inbound ports need to be opened as the runner initiates all connections
Step 2: Create or choose an existing GitHub organization
Create a new organization or use an existing organization to set up GitHub Actions Runner.
You may ask why we have to configure Github Actions for an Github organization instead of a repository.
Yes, we can configure a single repository.
But at the production level, we won't configure runners for each repository, we will configure GitHub Actions for an organization so that all the repositories inside the organization can use the GitHub Actions runner.
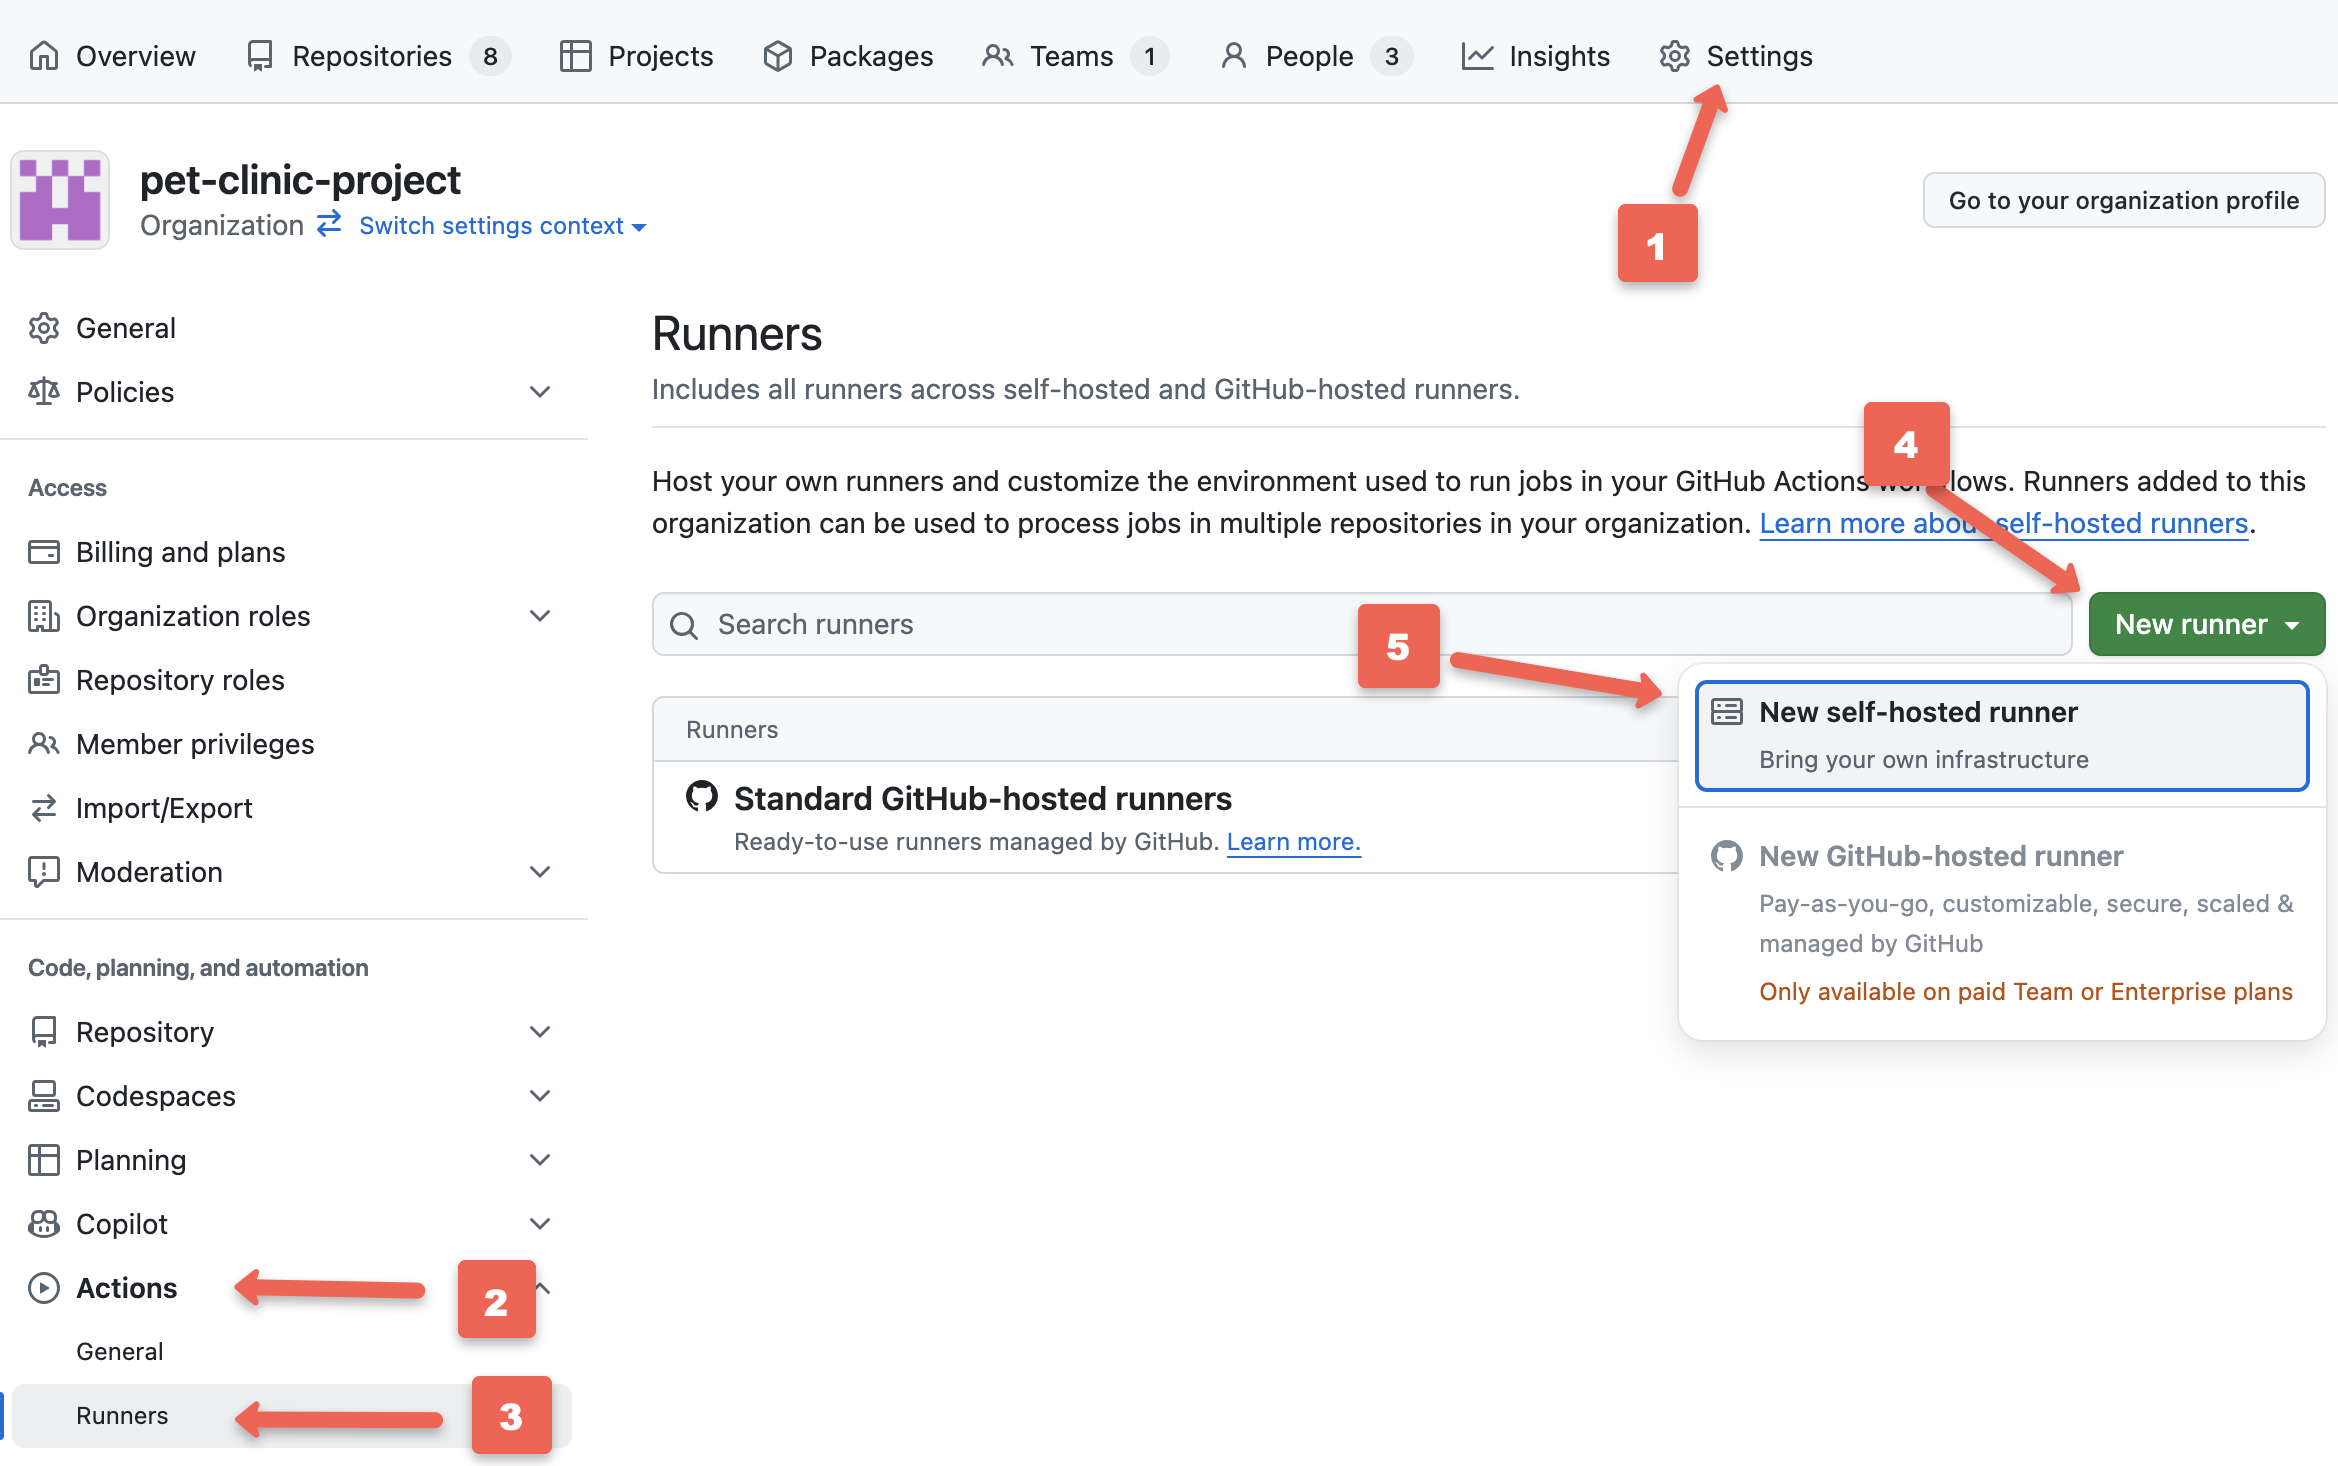
Step 3: Configure a New Self-Hosted Runner
In the organization go to Settings -> Actions -> Runners and press the New self-hosted runner button on the top right corner to configure the GitHub Actions runner for your organization.
Step 4: Select Runner Image and Architecture
When you press the New self-hosted runner button a new page will open to select the runner image and architecture for your runner as shown below.
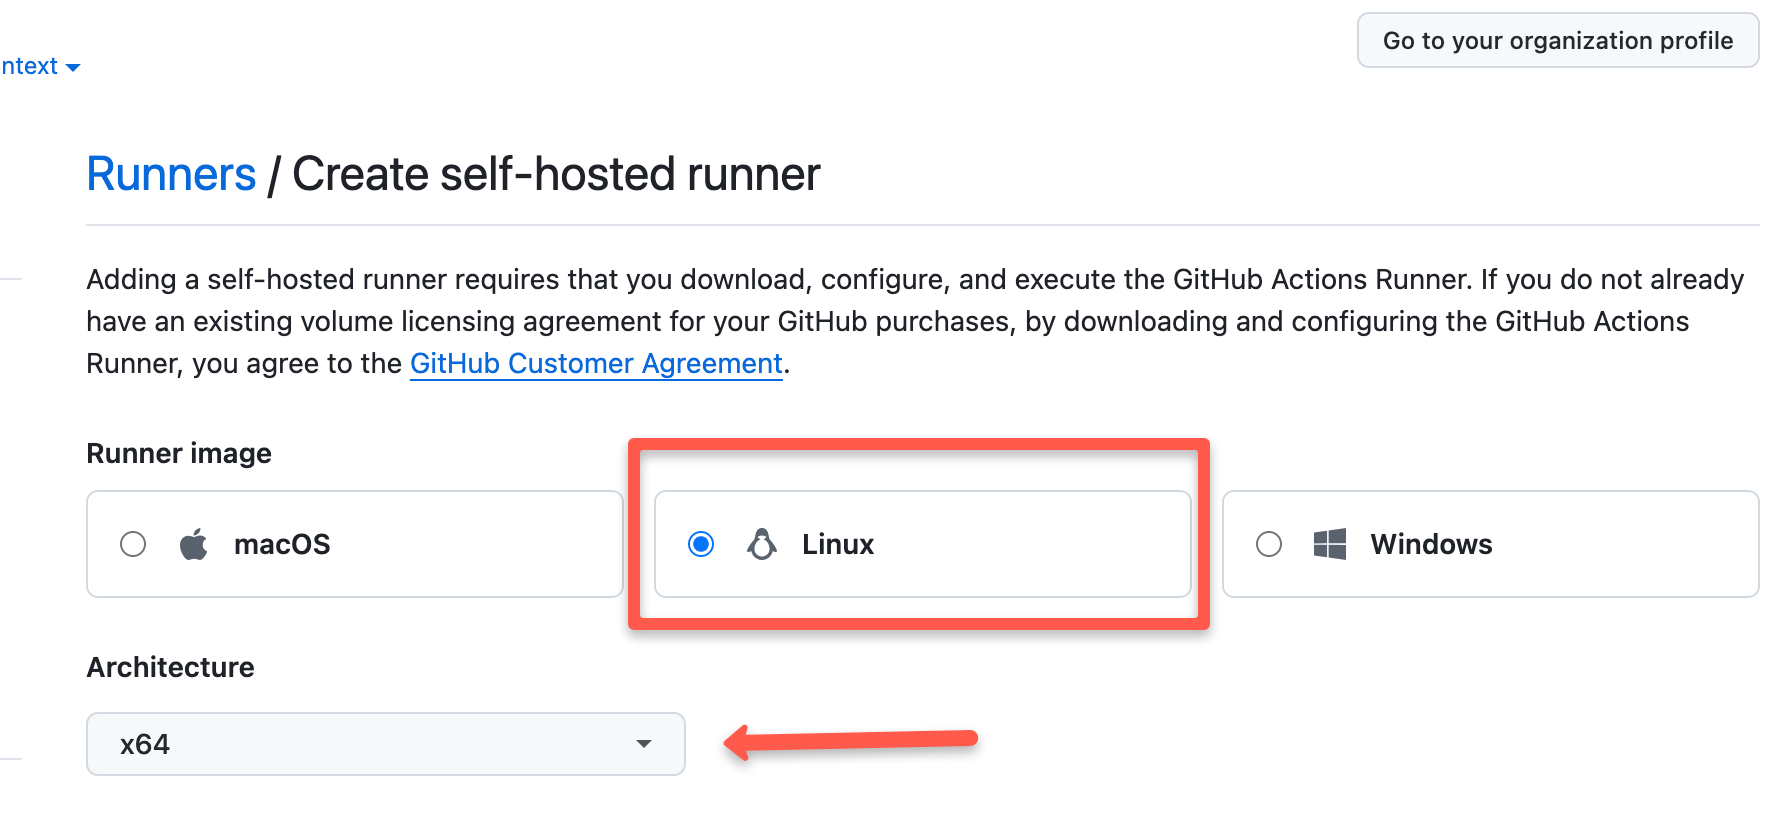
As shown in the above image you can select the runner image according to your OS and architecture as per your need.
You will get the configuration commands according to the runner image you select as shown below.
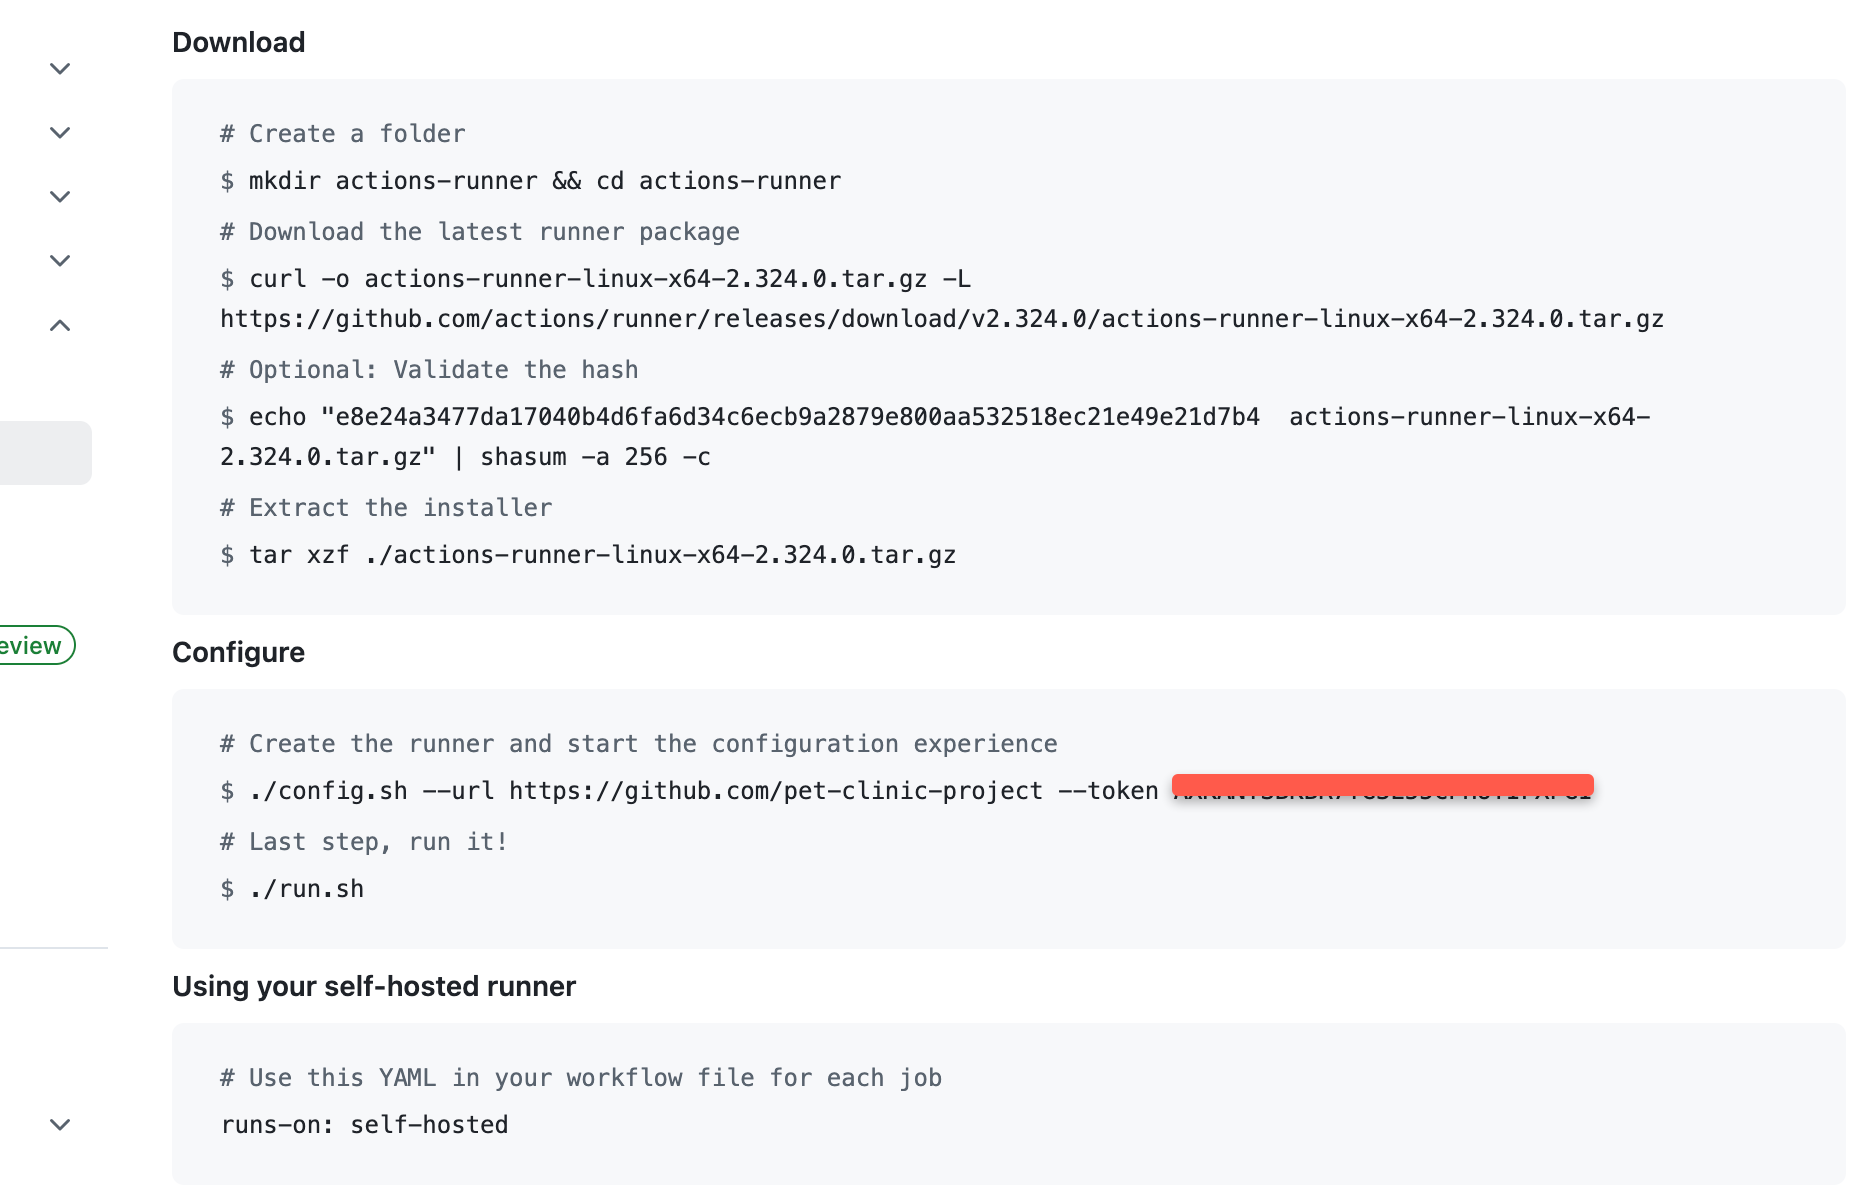
Run these commands one by one in your VM to install Actions Self-Hosted Runner and configure it to GitHub Actions.
The commands do the following tasks
- Create a folder to download the actions-runner files
- Download the latest runner package
- Validating and extracting the package
- Command to run configure script, which registers the runner to GitHub Actions using the repository URL and access token.
- Run script to run the application, which connects the runner to GitHub Actions
Step 5: Installing GitHub Actions Client on the Runner
When you run the configurations command in your VM, it asks some questions to configure the runner as shown in the below image.
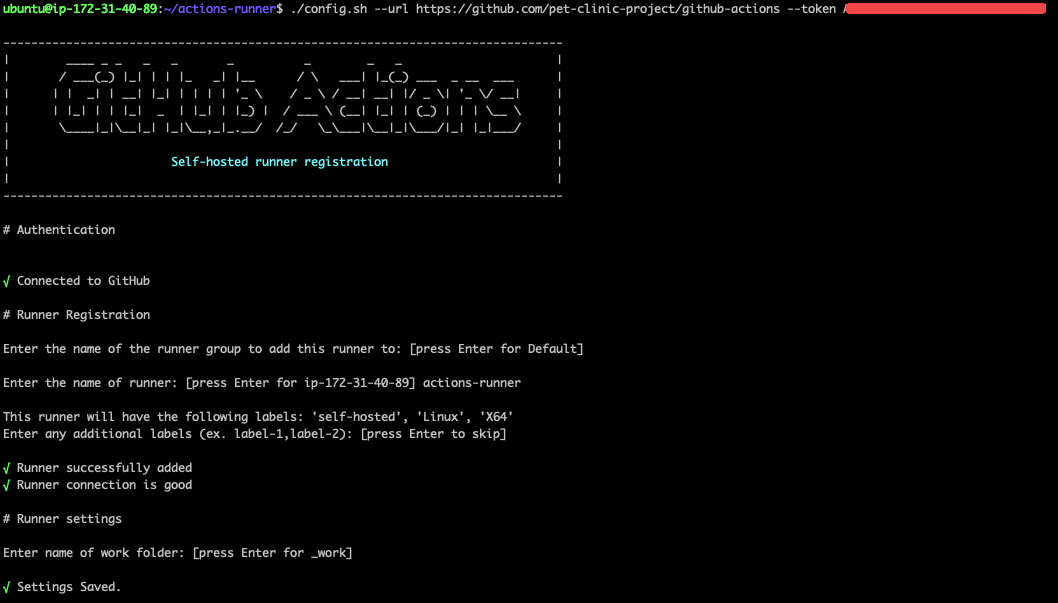
After answering the question, the runner will be configured to GitHub Actions.
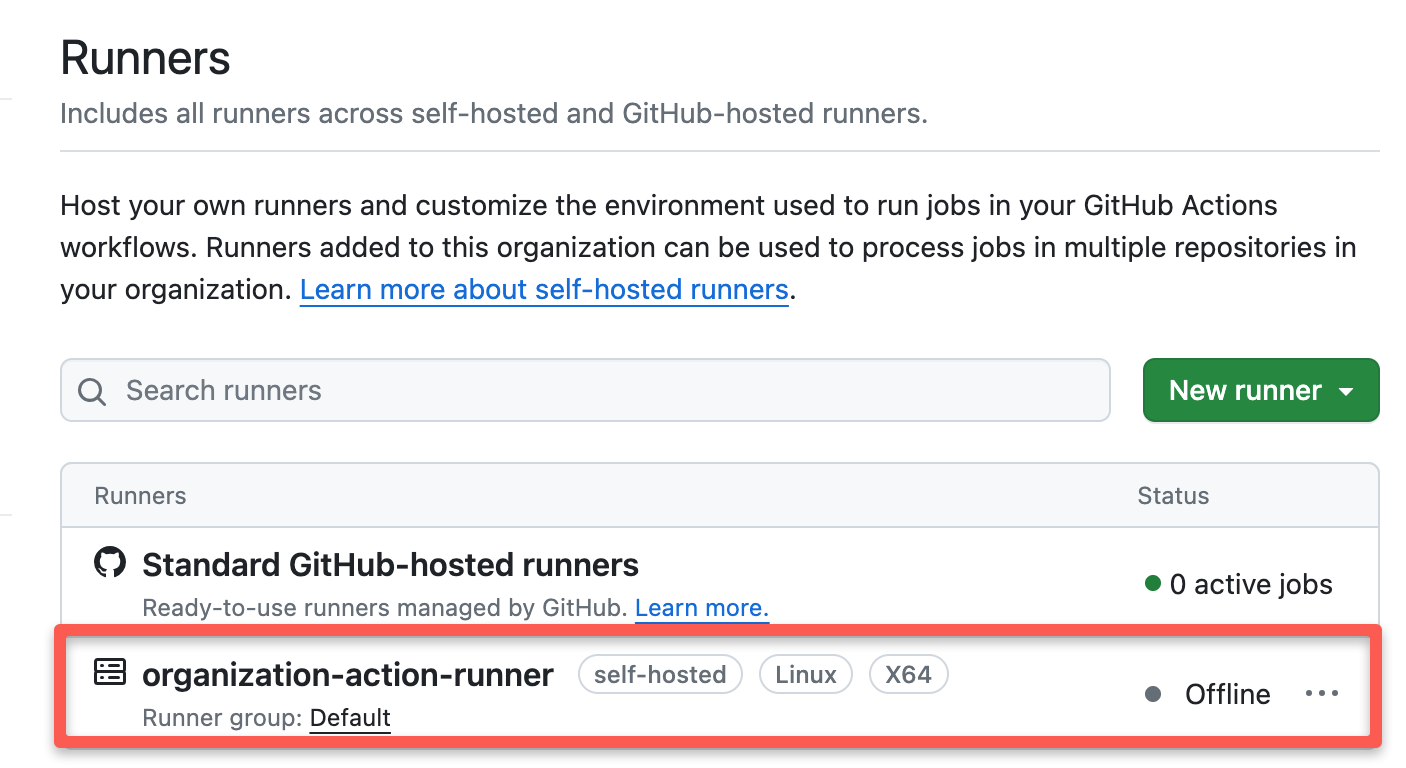
You can see your runner has been registered on GitHub in Settings -> Actions -> Runners as shown below.
Now, start the client application by running the run.sh script and you will get the following in your terminal
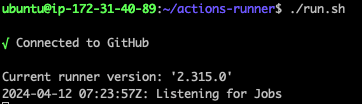
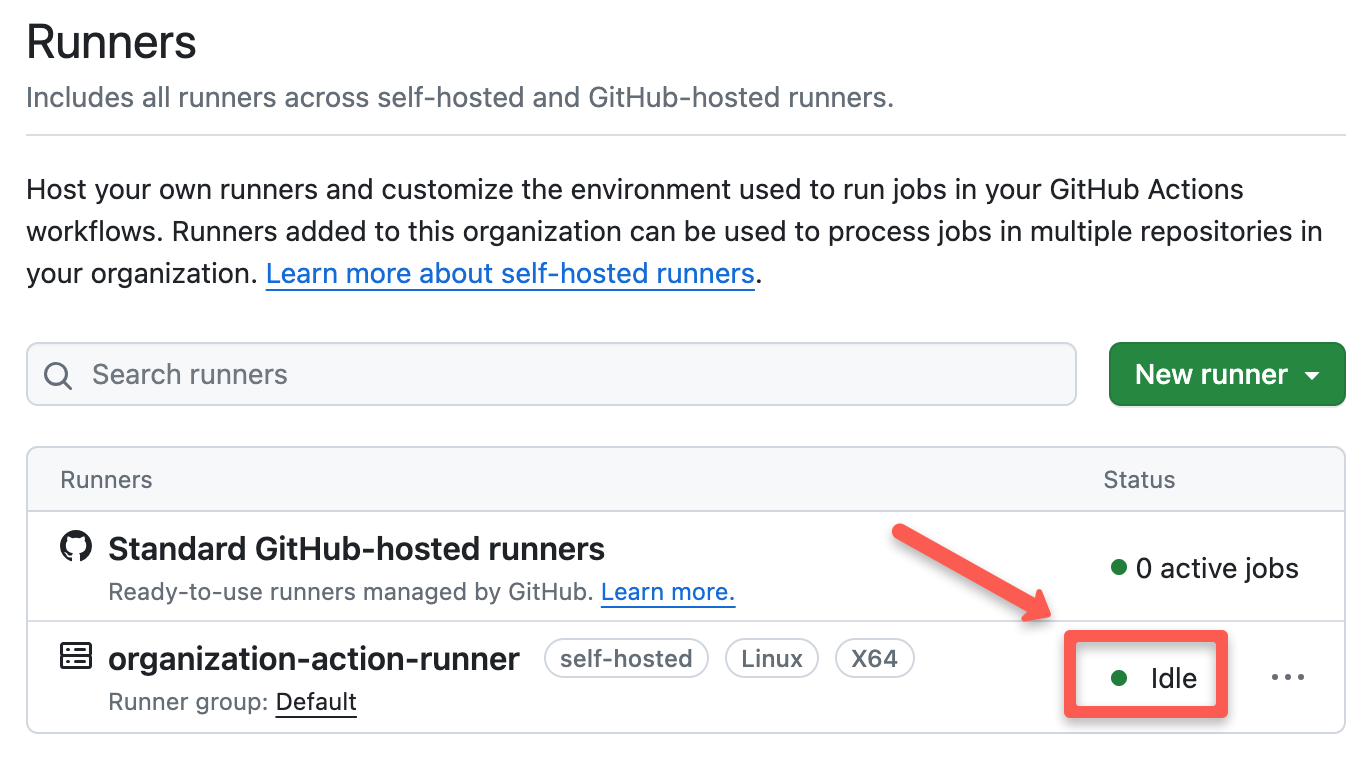
You can also see that your runner is online and ready to run workflows.
Note: If you are using GitHub Enterprise, you can also configure self-hosted runners for enterprise.
Test GitHub Actions Workflow
To check if the GitHub Actions self-hosted runner is working properly, we are going to run jobs on VM and a container.
Test Workflow on VM Runner
I am going to run the workflow with simple steps to check if the self-hosted runner is working properly.
Create a YAML file and your repository structure should be like given below
.
├── README.md
└── .github
    └── workflows
        └── test.yaml
In GitHub Actions a YAML file will be used to run the workflow which will be placed under the .github/workflows directory as shown in the above structure.
Copy the below contents and paste them into your YAML file.
name: Testing

on:
  push:
    branches:
      - main

jobs:
  build:
    runs-on: self-hosted

    steps:

    - name: Create Folder
      run: mkdir ~/test
What it does:
name: Testing

on:
  push:
    branches:
      - main
This block triggers the workflow whenever a change is pushed to the main branch.
jobs:
  build:
    runs-on: self-hosted
This block runs the build job on the GitHub Actions self-hosted runner labeled as self-hosted.
Make sure to replace the self-hosted label with your runner's label.
    steps:
    - name: Create Folder
      run: mkdir ~/test
In the steps block, you have to give the tasks it going to perform.
In the above example, the step will create a folder called test.
The default working directory is /_work/<repository-name>/<repository-name>.
For example, if your repository name is github-actions, then your working directory will be like as given below.
/_work/github-actions/github-actionsYour working directory may differ if you're given a different name for your working directory while configuring the runner.
Now the YAML file has been created, push the changes to your repository that will trigger the workflow.
You can see if the build process has started by going to your GitHub and selecting the Actions tab as given below.
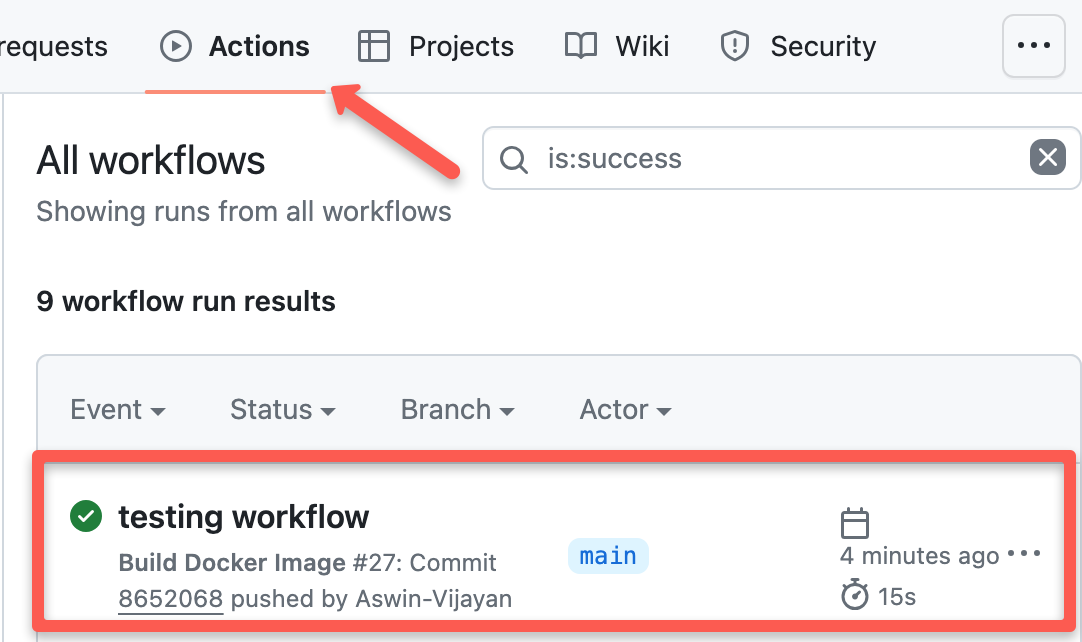
Once your job has been finished, you can view the summary of the workflow as shown below.
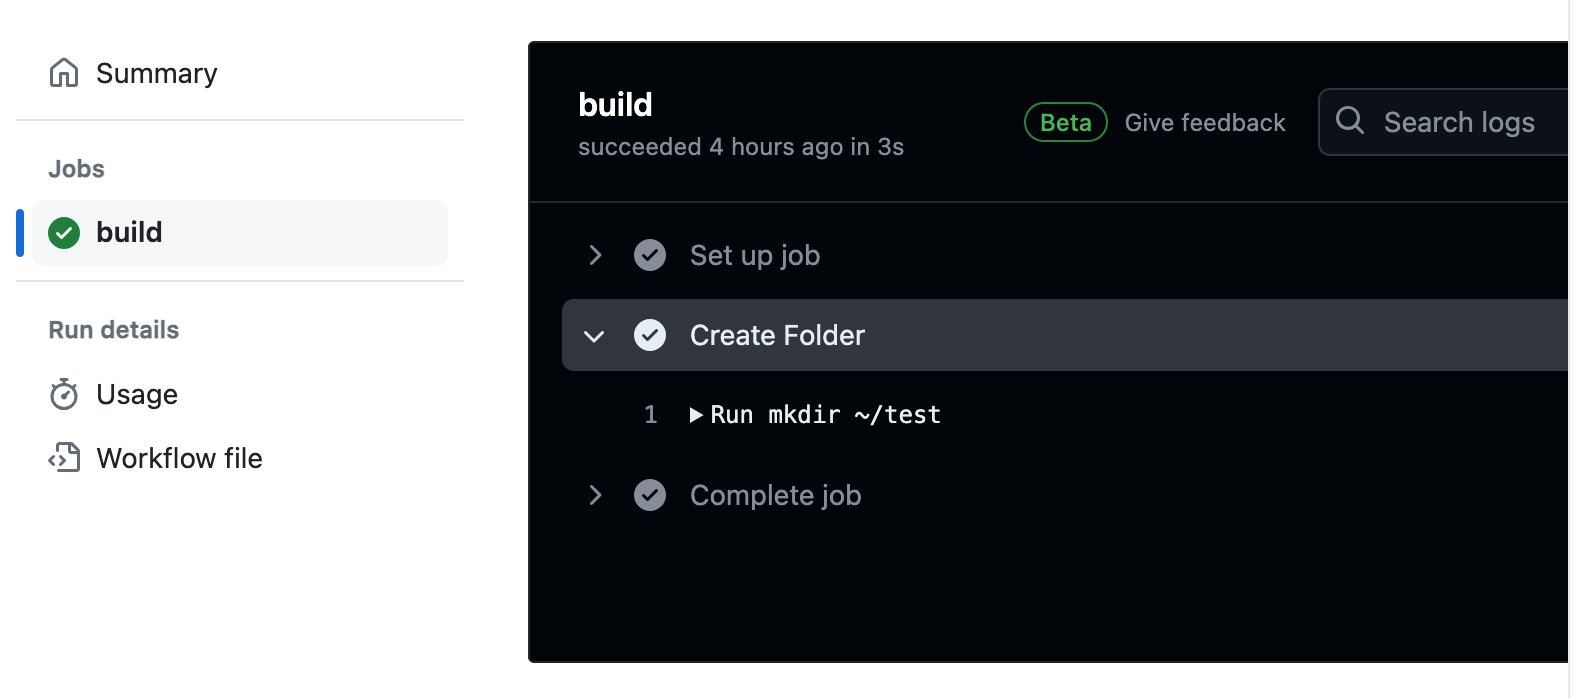
Test Workflow in a Container
Running workflow inside a container is no different from the above test workflow.
Follow the steps to configure a self-hosted runner and to run workflow inside a container, you just have to add a container block in the YAML file as given below
name: Testing

on:
  push:
    branches:
      - main

jobs:
  build:
    runs-on: self-hosted
    container:
      image: ubuntu:latest

    steps:
    - name: Create Folder
      run: mkdir actions-testing
You can see in the above YAML file, the only difference between running in VM and Container is a new container block is added to the YAML file.
The container block runs your jobs inside the container you specify. In the above example, I have given the official Ubuntu image as the container image.
When you run the jobs using a container the steps will run inside a container in the VM.
It creates a folder inside the container to run the clone and run the workflows, you can see how the folder is created inside the container in the below image.
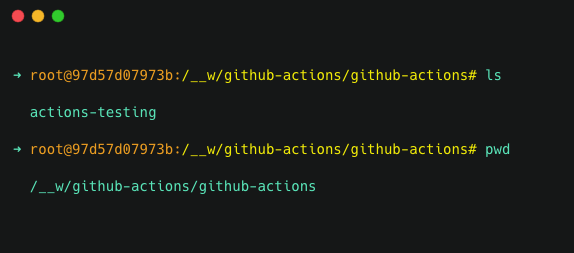
In the above image, /__w/github-actions/github-actions is the Actions Runner working directory inside the container.
Once your job has been finished, you can view the summary of the workflow as shown below.
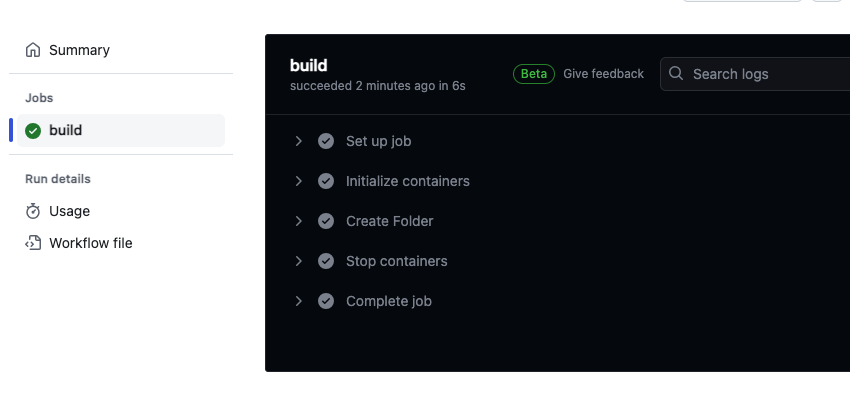
You can see in the above image, first, it starts the container then it runs the job inside the container, once the job is finished the container will be stopped as shown below

Conclusion
In this blog, you learned about configuring self-hosted runners for a organization. also learned about how to run workflows in VM and Containers.
If you are working on Github actions with AWS, you can checkout GitHub Actions OIDC AWS blog to learn more about secure authentication.
I hope this blog makes it easy to understand the setup of GitHub Actions Runner.
