


One of its best new features of Beehiiv is the Beehiiv MCP Server and that is saving a lot of time for us.
We run the DevOpsCube newsletter on Beehiiv with 20,000+ subscribers. We connected Beehiiv with Claude using MCP, and it has made it much easier to manage different tasks from one place.
In this guide, you will learn Beehiiv MCP server, what it can do, how to set it up, how to integrate it with your AI model, and much more.
If you are existing Beehiiv user or someone who wants to know about this feature, this guide it for you.
What is Beehiiv MCP Server?
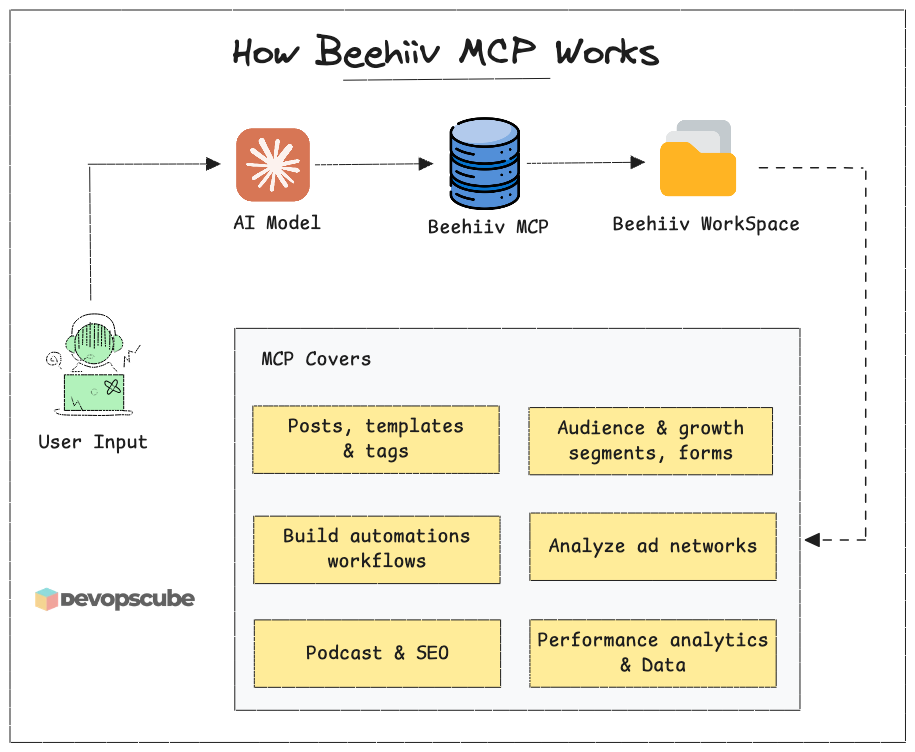
With the Beehiiv MCP server, you can connect your Beehiiv account with AI models like Claude, Codex, and other AI models that support MCP (Model Context Protocol).
This allows you to communicate with your Beehiiv account directly from your AI model. You can pull metrics, create surveys, create posts, analyze your podcast, perform SEO analysis, and much more.
The workflow diagram illustrated how the Beehiiv MCP server works.
If you want to know more about it, keep reading, and you will get a full, in-depth understanding of what you can do with the Beehiiv MCP server.
Set up Beehiiv MCP with AI Models
Lets startw with understanding how to connect the Beehiiv MCP with AI models.
I’m not going to cover every AI model in this guide. Instead, I will show you how to connect an MCP Server with Claude as an example, since it is one of the most widely used AI models today.
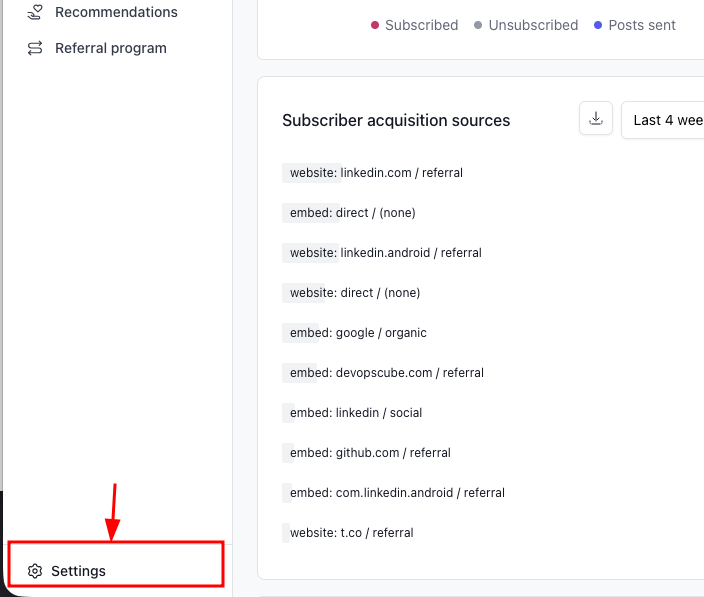
Step 1: Go to Beehiiv Settings
In the bottom left corner of the Beehiiv dashboard, you will see the Settings button, click on it.
Step 2: Find the MCP option and copy the connector URL
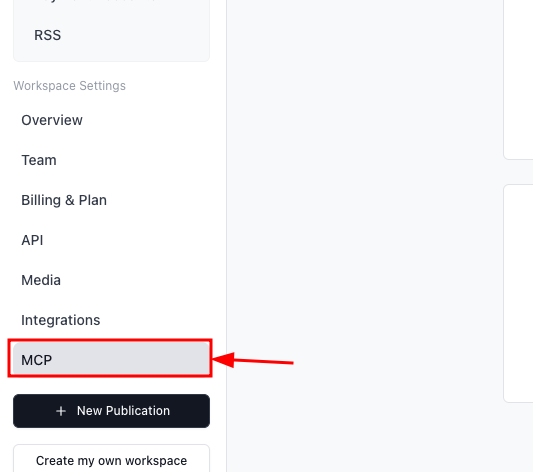
Once you open the Settings page, you will find the MCP option in the left-side menu. Click on it.
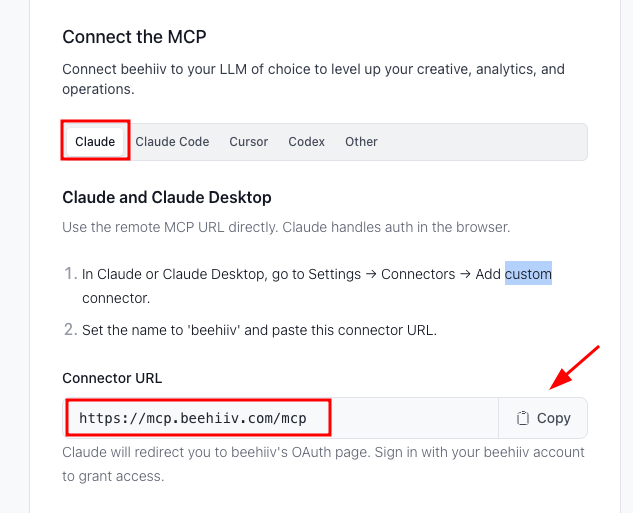
Next, go to the Claude section and copy the Connector URL, as shown in the image below.
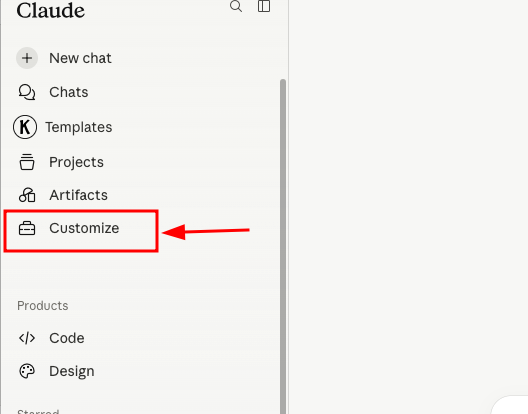
Step 3: Open Claude and Click Customize
Now, open your Claude account. In the left-side menu, click the Customize option.
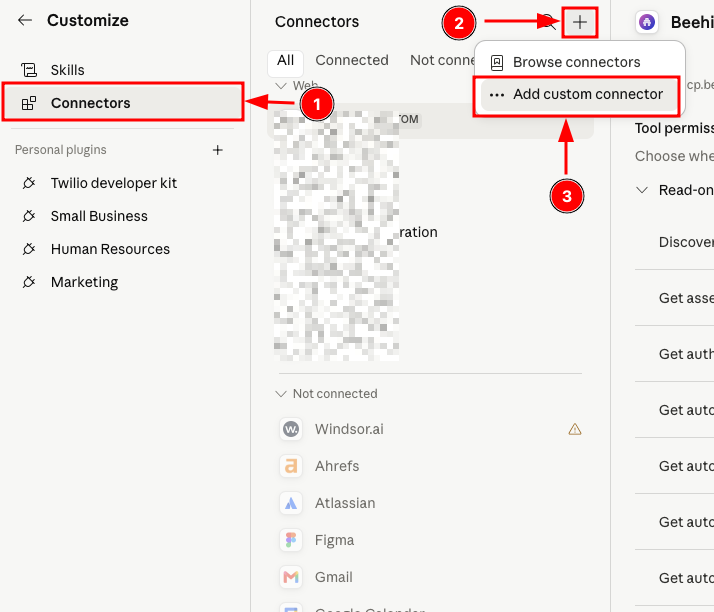
Step 4: Click connectors and Select Add Custom Connector
Now you have to click the connectors, then click the plus(+) icon, and select Add custom connector.
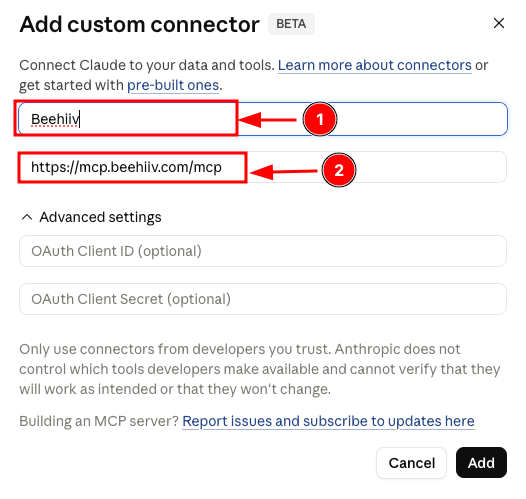
Step 5: Enter Beehiiv MCP Server Connector URL
Enter Beehiiv as the connector name, then paste the Connector URL you copied from the Beehiiv MCP section.
Click Add to connect the Beehiiv MCP Server to Claude.
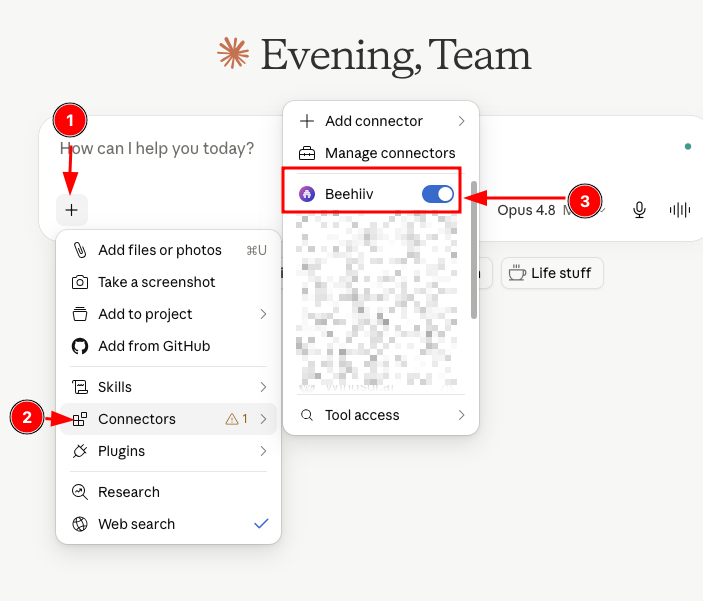
That's it! You have successfully connected your Beehiiv account to your Claude account.
As a final check, make sure the Beehiiv connector toggle is turned on in your Claude account. If you're unsure, refer to the image below for confirmation.
Next, let's look at one of the most important parts of this guide. I will show you what you can do with the Beehiiv MCP.
Features of Beehiiv MCP
Let's get to know, what you can do with the Beehiiv MCP without opening your Beehiiv account directly.
It allows AI to interact with your Beehiiv workspace and perform tasks for you, making newsletter management much faster and easier.
Content Creation & Management
You can do three things with your newsletter content using the Beehiiv MCP. Create new posts, edit existing drafts, and update your existing templates, all by using prompts in your AI.
But, there is one thing you still need to do manually is to publish or schedule the post directly from Beehiiv.
For example,
Let's say you want to create a newsletter post about DevOps Trends 2026 using one of your existing templates. You can use a prompt like this,
Prompt:
Create a post draft on the topic[Topic Name].
Conduct in-depth research across the web to identify the latest trends, industry insights, real-world use cases, and relevant statistics from credible sources.
Analyze how these trends are being applied in practice and include actionable examples where possible.
Structure the draft using the existing template, [Template Name], while ensuring the content is well-organized, informative, and optimized for readability.
Manage Your Subscribers
With your subscriber data, you can perform several tasks directly from your AI model, including tagging subscribers, creating audience segments, adding custom fields, and creating surveys and polls.
- Subscriber Tagging - Organize your subscribers using tags based on their interests or behavior. This makes it easier to manage your audience and run more targeted campaigns.
- Segment Creation - Create audience segments by grouping subscribers with similar characteristics or interests. You can then send specific newsletters or campaigns only to those targeted subscribers.
- Custom Fields - Create custom fields to collect additional information during the subscription process, such as age, profession, company, location, or any other data relevant to your newsletter.
- Create Surveys & Polls - Build surveys and polls to collect feedback, understand your audience's preferences, and make data-driven decisions to improve your newsletter content.
I was really shocked at first that we could use so much from our AI tool using MCP. It is very useful for us to know our audience so much better.
Give it a try yourself. Once you start using it, you will see why I was so impressed.
Newsletter & Website Analytics
You can pull all your newsletter metrics directly from your AI tool.
You can view open rates, click rates, best-performing newsletters, subscriber growth, where your subscribers are coming from, active subscribers, and much more.
Not only that, you can even perform a complete SEO audit of your website. Using MCP, you can also manage your metadata and redirects directly from your AI tool.
For example, you can use a prompt like this:
Audit my entire website from an SEO perspective. Provide a detailed analysis of the site's overall performance, identify posts that are not receiving traffic, highlight the highest-performing posts, and include actionable recommendations backed by relevant analytics.
The AI tool will then gather the necessary information from your Beehiiv account and generate a detailed report for you.
Create Automations
You can build email automations and workflows in Beehiiv using MCP. For example, when someone signs up, you can automatically send them an email about your course within a few seconds.
You can also create multiple automations within a single automation workflow.
As you can see in the image below, I created an automation that, if anyone subscribes, the welcome email is automatically sent to their inbox.
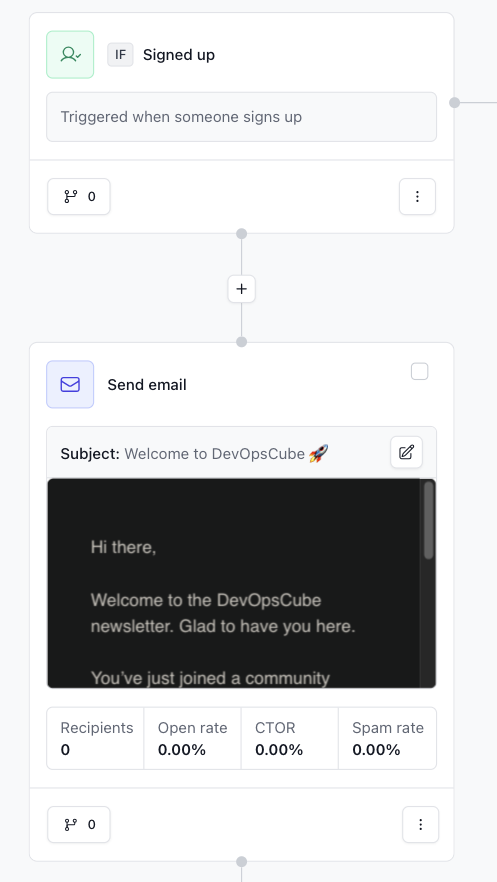
Yes, I know this is a very basic automation, but you can do much more.
If you want to learn more about automations, refer to the official Beehiiv Automations documentation.
Here are the other things you can do:
- Analyze and manage your podcast
- Manage your ad network
- You can create guest authors with bios.
Note: Free Beehiiv users only get read-only access. This means you can't create posts or make changes from your AI. You can only view and pull analytics.
Conclusion
In this guide, I have covered what you can do with Beehiiv MCP server, what you can't do, and how to connect your MCP to Claude.
For us, the newsletter automation with AI is really saves a lot of time. Infact it saves
If you learn and use it wisely, you can manage and grow your newsletter more effectively and faster.
Over to you?
Have you tried this feature?
If a question about the Beehiiv MCP server? Drop it in the comments. We will answer it.
If you have any doubts regarding Beehiiv MCP, drop them in the comments.
We will help you out!
Other Beehiiv Useful Guides: