

In this blog, you will learn how to migrate EFS data from one AWS Account to another using AWS Datasync.
I have given step by step instructions along with screenshots for this guide.
EFS to EFS DataSync Workflow
The following image shows the high level workflow of EFS to EFS data transfer using Datasync.
Here is how it works.
- DataSync Agent EC2 instance will be created in the source account within the same region and subnet.
- The DataSync Agent can access the source EFS via its mount point.
- A VPC Peering connection (cross account) from the source to the destination secures private communication between networks.
- A VPC Endpoint will be created in the destination account for the AWS DataSync Service, enabling secure communication.
- The DataSync Agent instance in the source account writes data to the destination EFS account through the VPC Endpoint using ENIs.
- AWS DataSync encrypts the data during transfer and allows scheduling and filtering it during migration.
EFS to EFS DataSync Transfer Steps
Follow the steps given below to setup Datasync for EFS to EFS data transfer.
Step 1: Source Account Elastic File System (EFS)
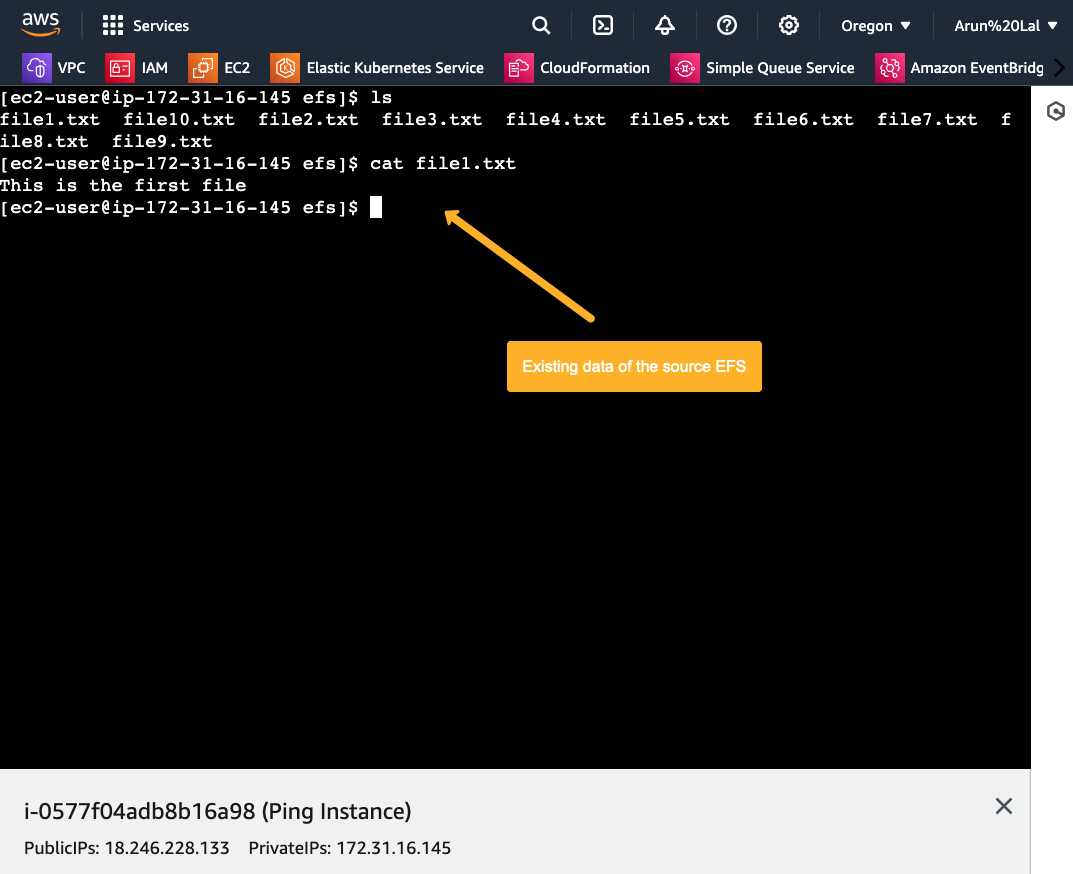
I already have an Elastic File System with data in the source account.
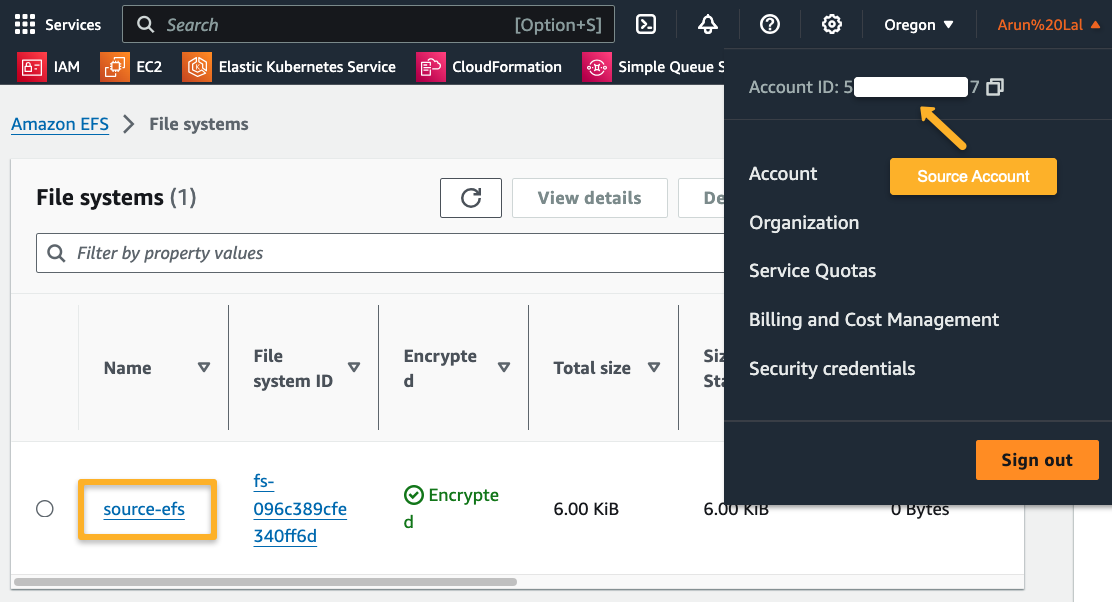
We can mount this to a server to check the available data in the file system.
I am mounting this EFS to an EC2 instance. For that, we need the EFS DNS name and other details.
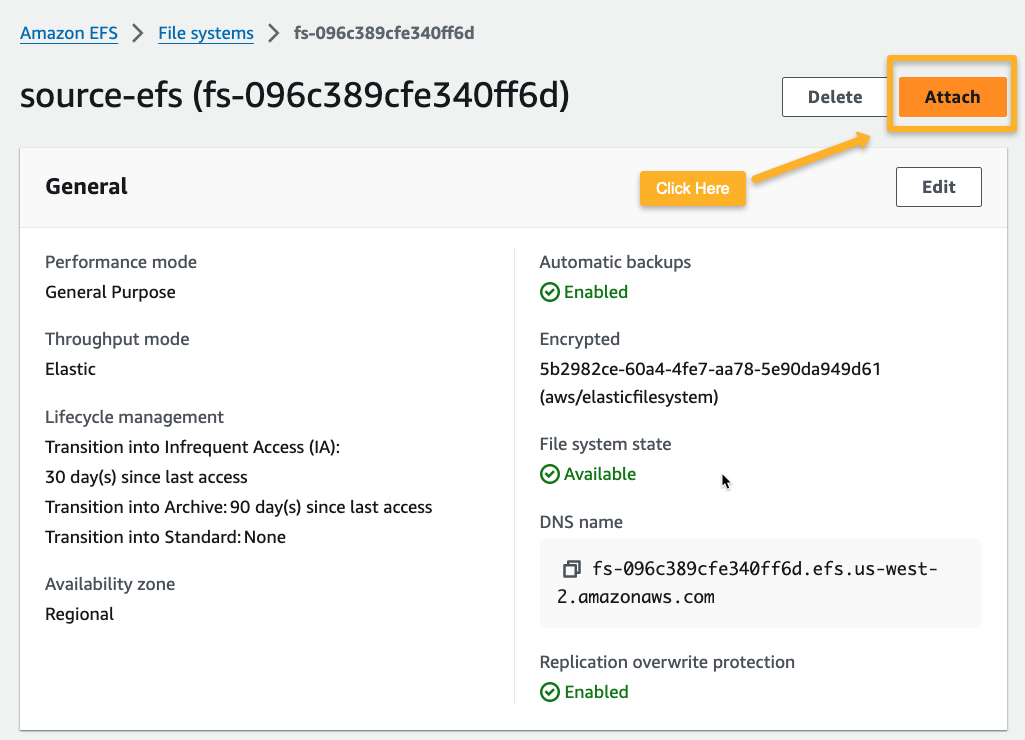
The following window will give the mount command with the File System DNS name.
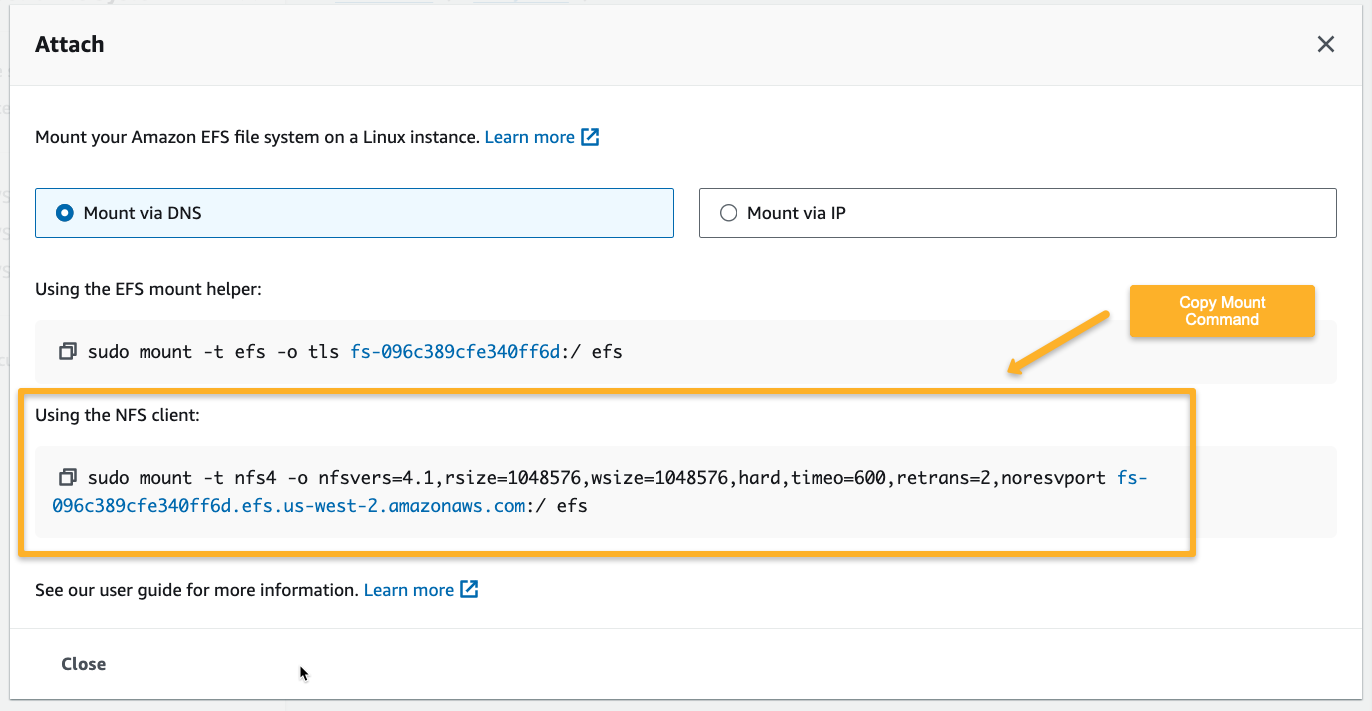
Create an EC2 instance with Amazon Linux AMI, and use the following command to add the Network File System client.
sudo yum install -y amazon-efs-utilsCreate a directory to mount the File System
mkdir efsPaste the mount command from the above screenshot.
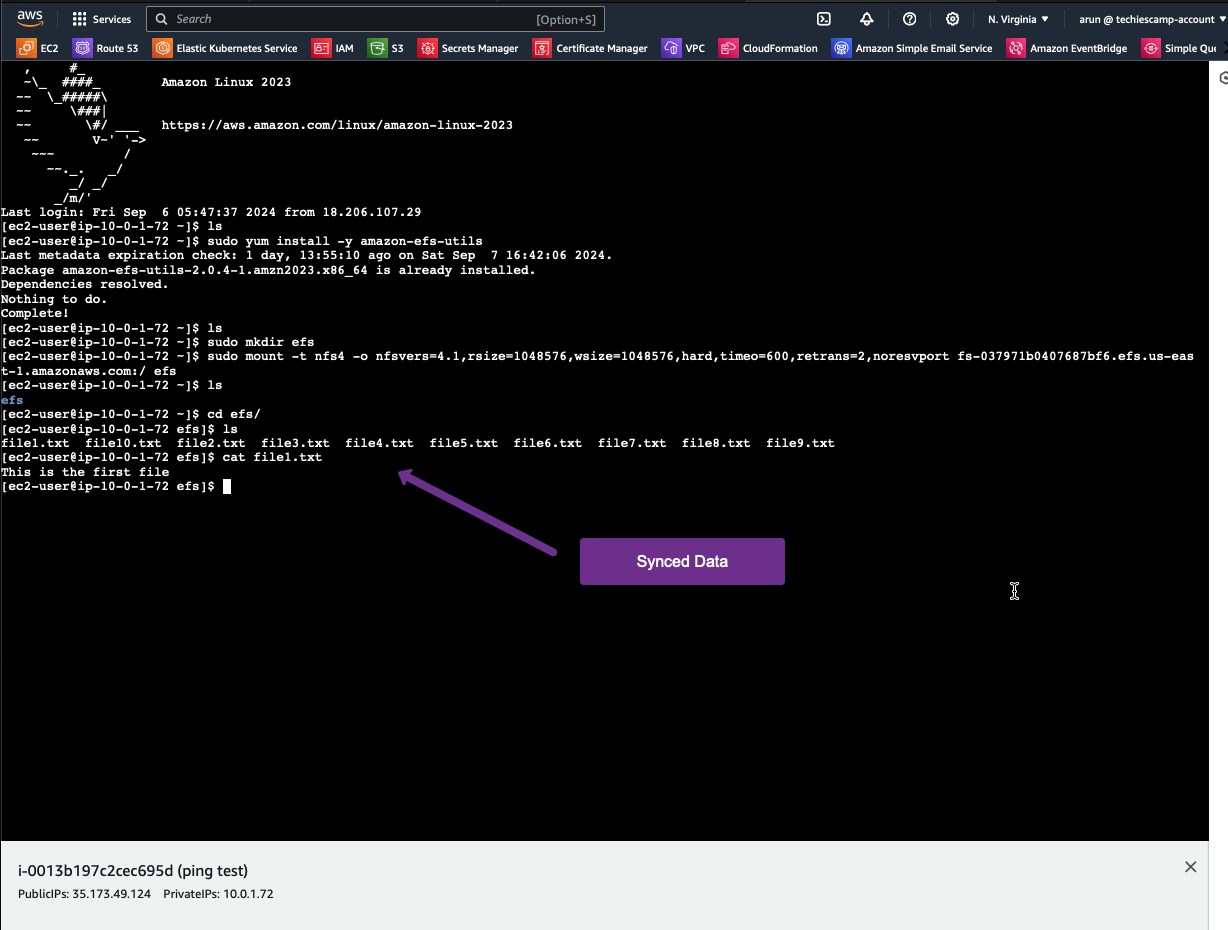
sudo mount -t nfs4 -o nfsvers=4.1,rsize=1048576,wsize=1048576,hard,timeo=600,retrans=2,noresvport <EFS_DNS_NAME>:/ efsAfter mounting the file system, we can view the available data in the efs directory.
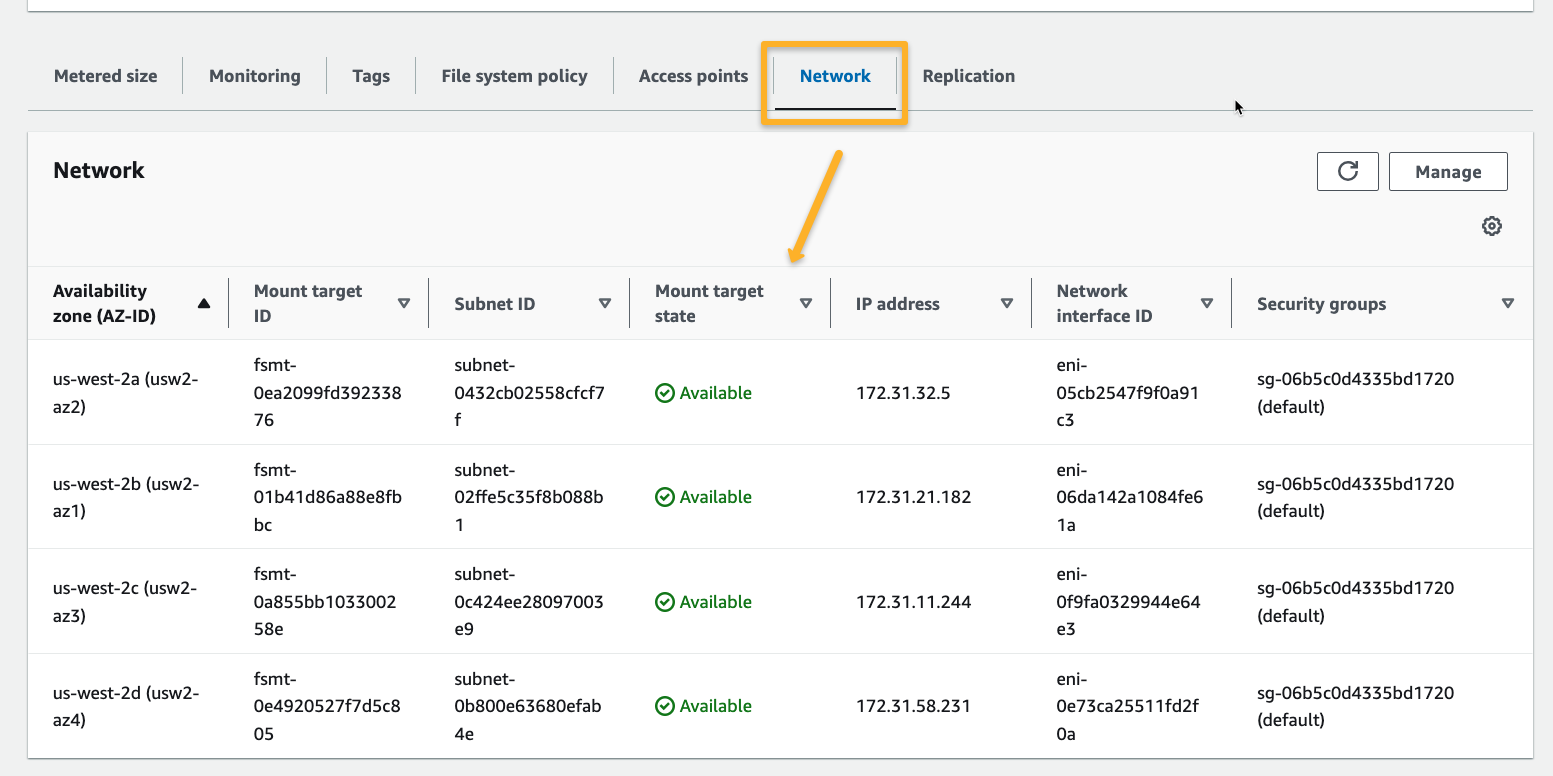
Now, we will migrate this data to another EFS situated on another AWS account.
Ensure the EFS has mount points; otherwise, it cannot connect with other services.
Step 2: Create VPCs in Both Accounts
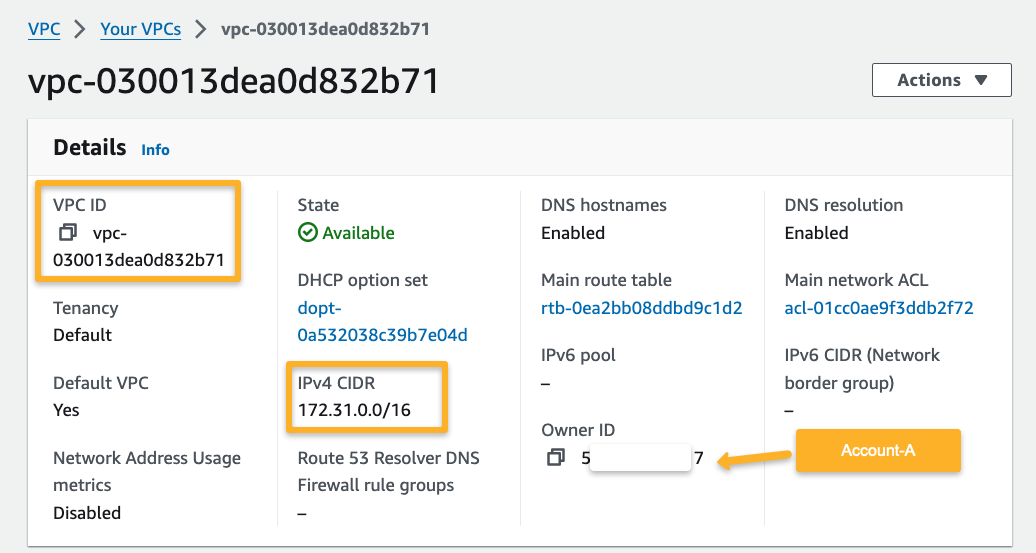
First, we need to create a VPC in both accounts, and the CIDR values of both VPCs should be different.
Source AWS Account
Here, the source account VPC CIDR is 172.16.0.0/16, and the region I have chosen is us-west-2.
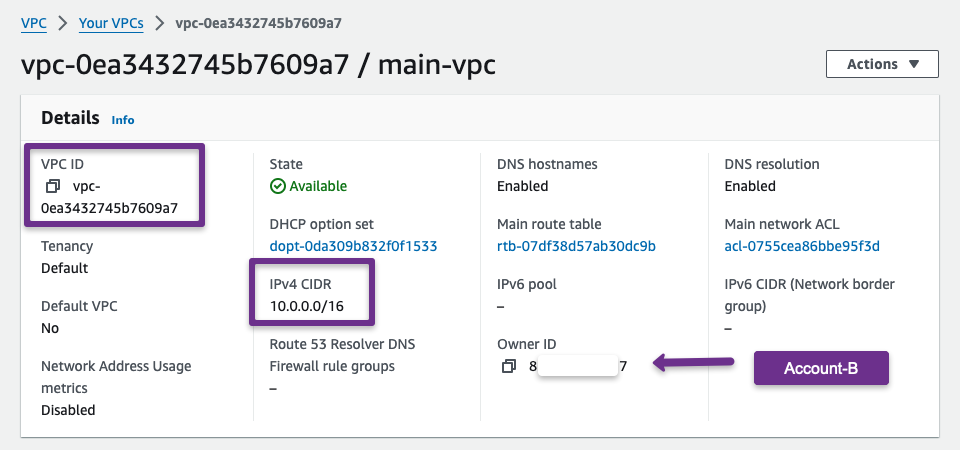
Destination AWS Account
For the destination account, I have chosen the 10.0.0.0/16 CIDR VPC, and the region is us-east-1
Step 3: VPC Peering
We use the Peering connection method to establish private communication between two different networks.
Source Account
First, we must establish the peering connection request from the source VPC.
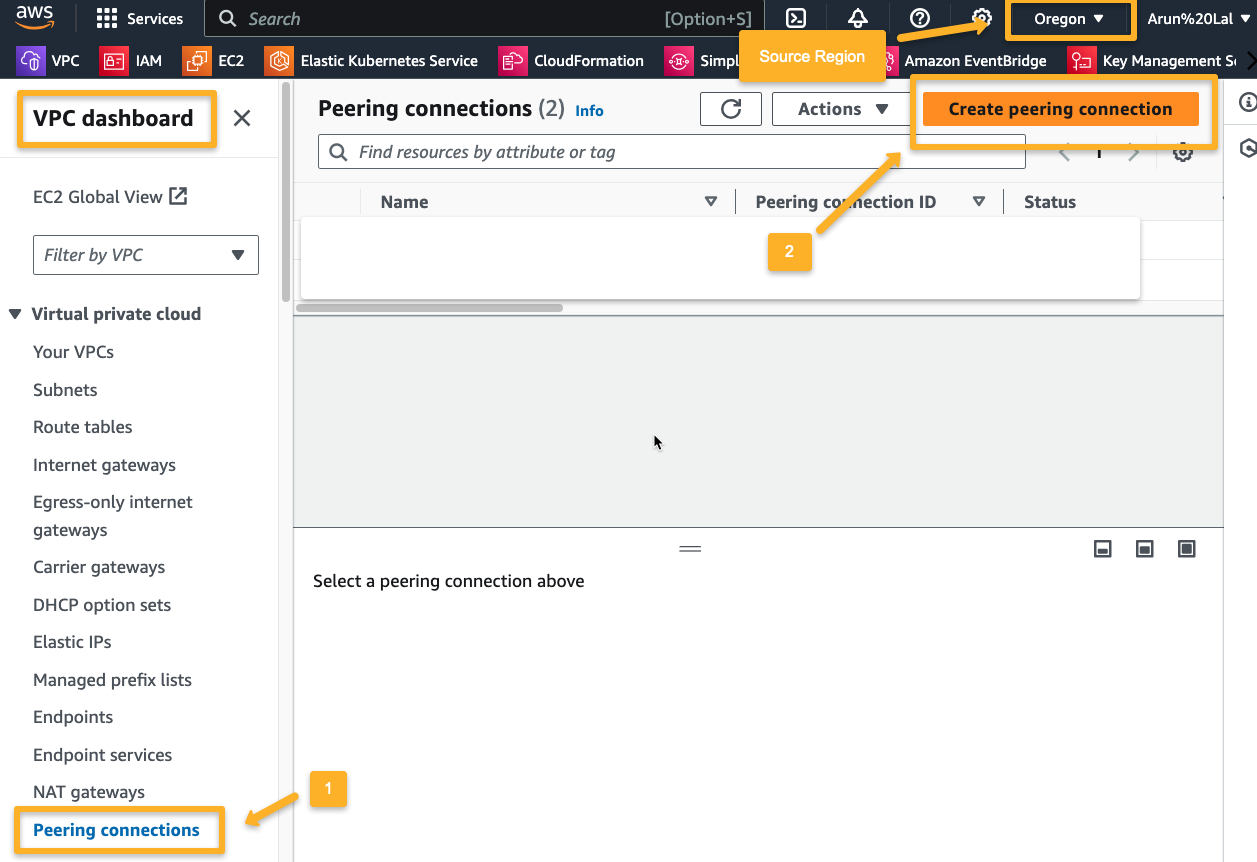
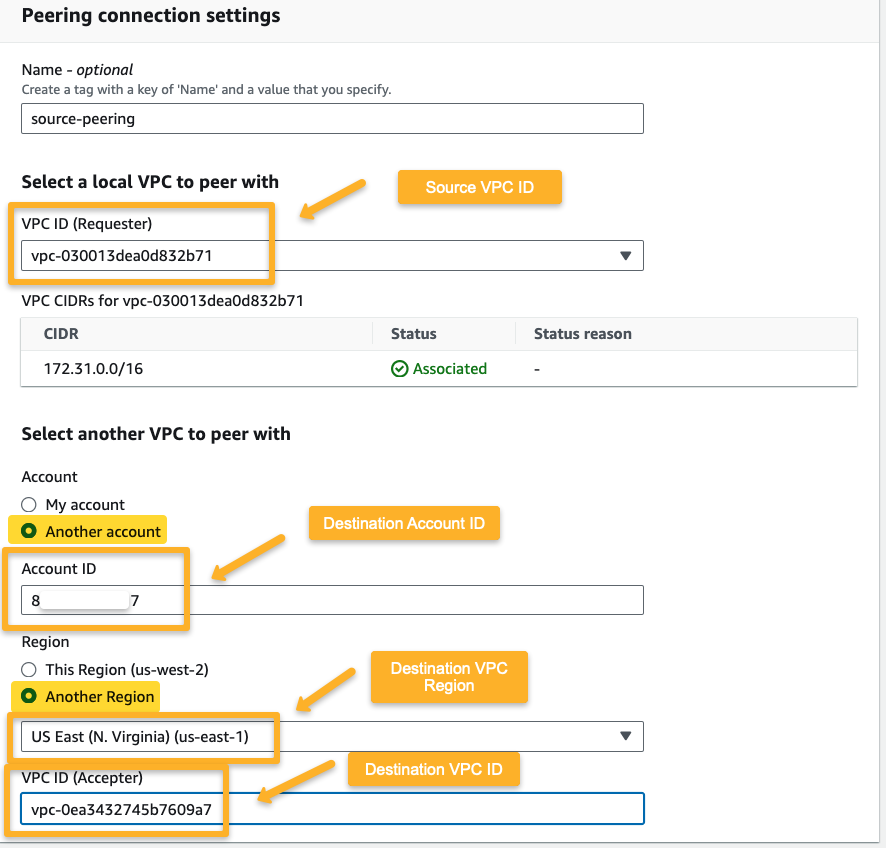
On the next page, provide the required information.
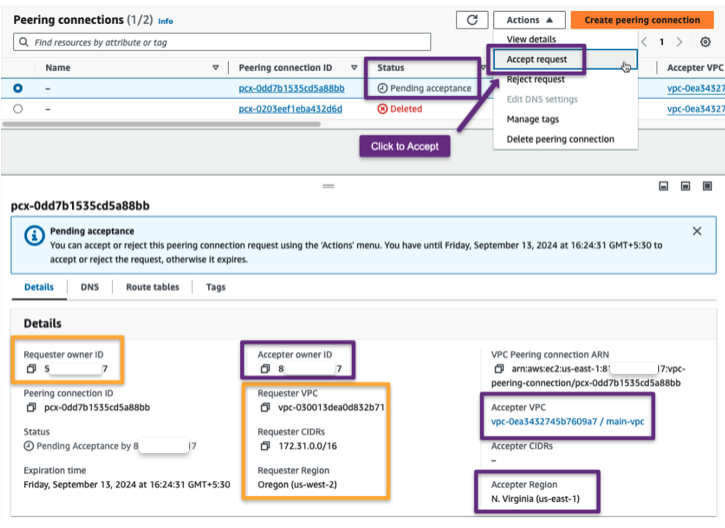
After creating the peering connection, the request goes to the destination account, so we need to accept the request from the destination account.
Destination Account
The peering connection won't be established until the request is accepted.
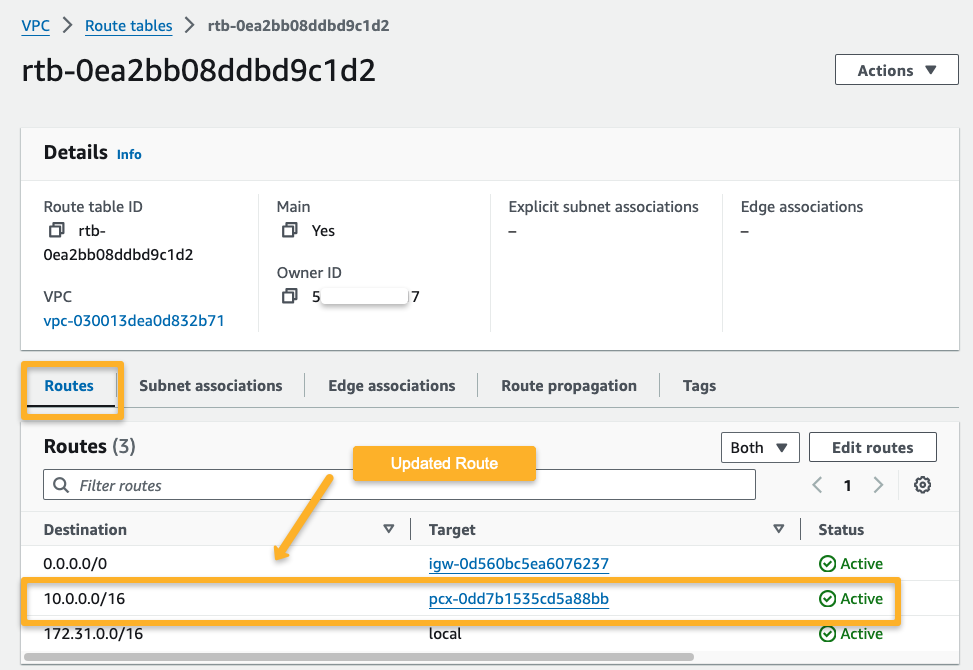
Step 4: Update Route Table
We need to modify both VPC route tables to route the traffic between the two networks via the peering connection.
Source Account
First, we updated the source account's VPC Route Table Rules.
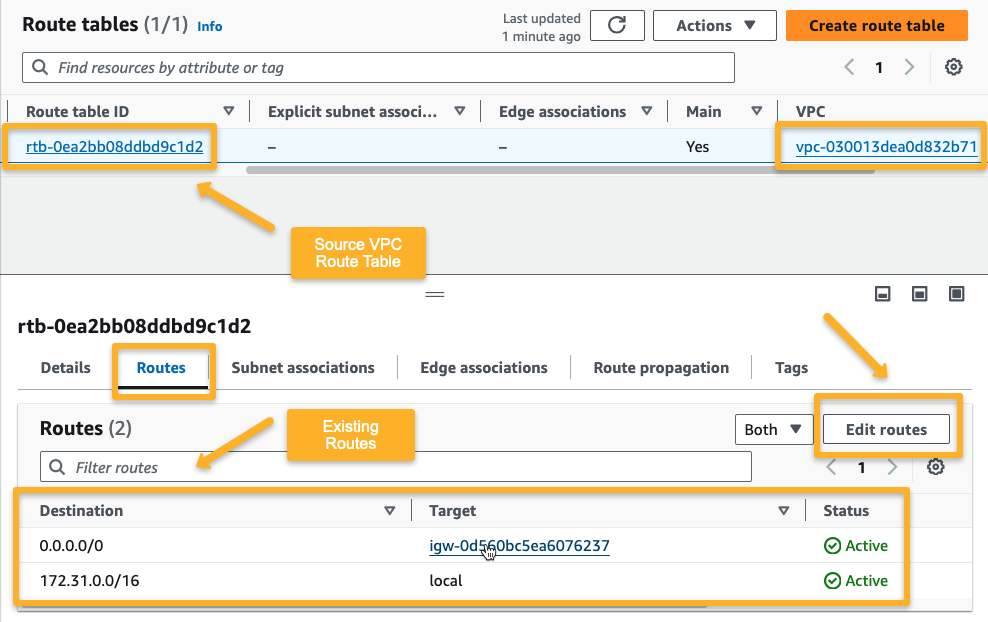
Edit routes to add new routes. For the new route, the Destination is the destination VPC CIDR 10.0.0.0/16 , and the Target is the Peering Connection.
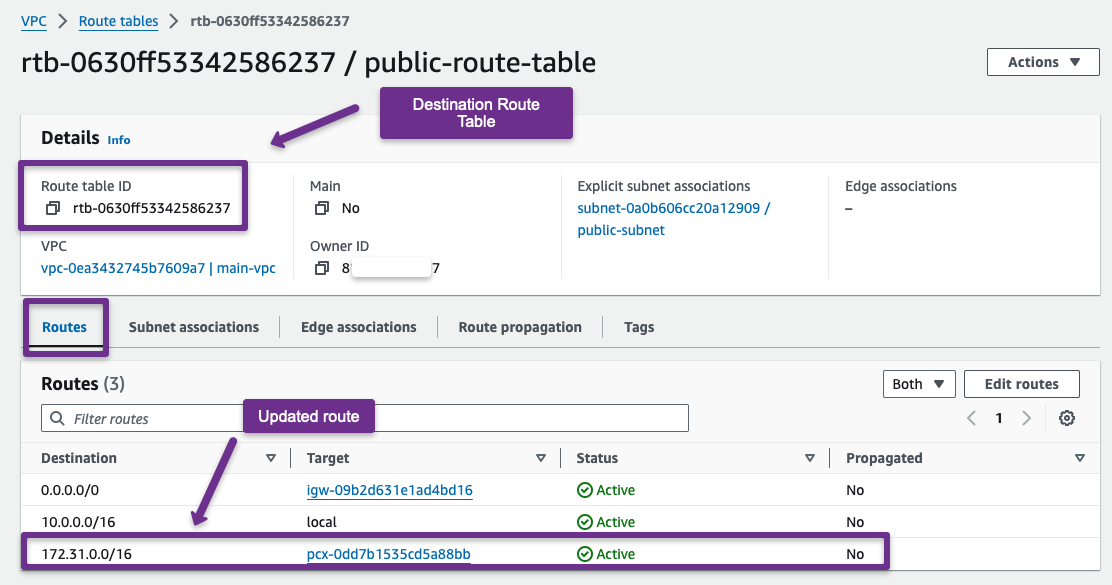
Destination Account
We update the destination account's route table with the source VPC details.
Step 5: Install Datasync Agent Instance
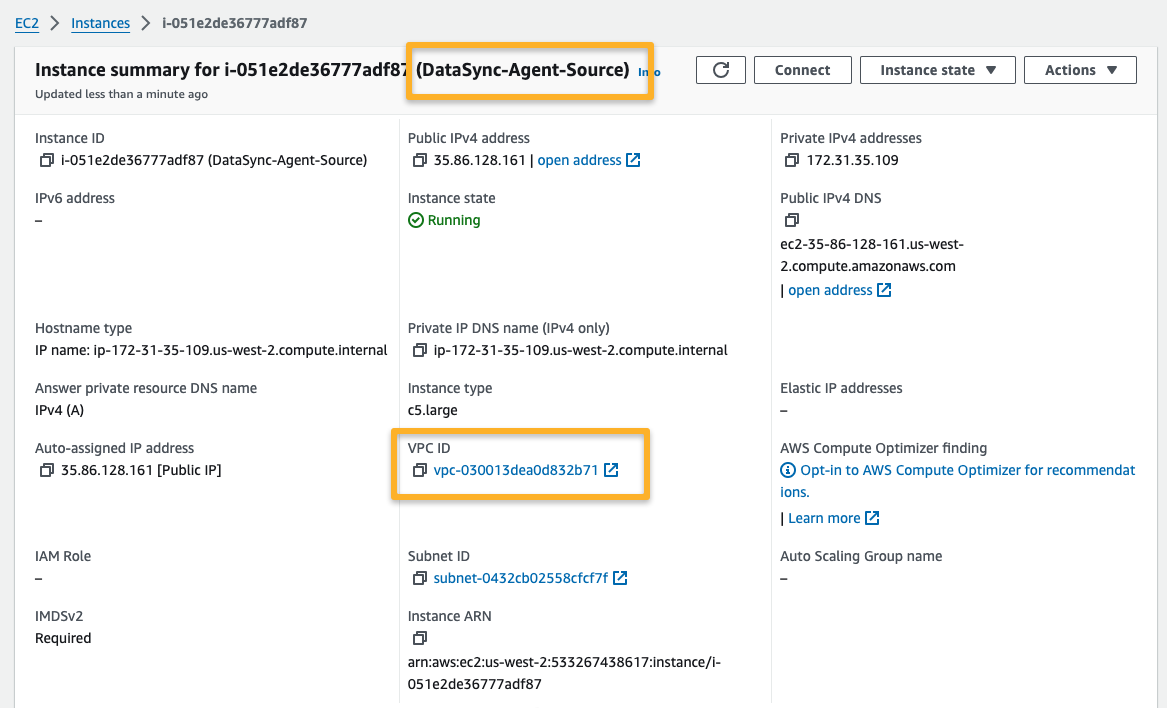
We need to create a Datasync AWS EC2 Agent instance in the source account.
The DataSync Agent instance should be in the same region and network as the source EFS to effectively read the data and reduce latency.
Source Account
To transfer data between EFS systems, we need a data transfer agent so that the agent can get the data from the source and store it in the destination file system.
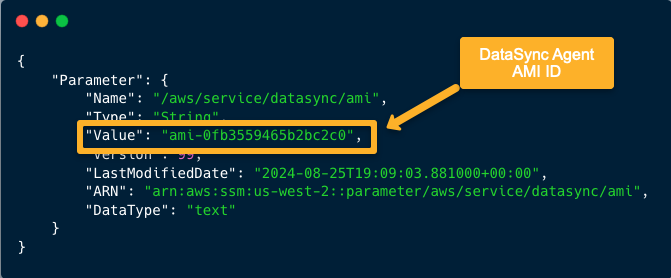
To get the AMI of the DataSync Agent, use the following command.
You can use the cloud shell to run this command.
aws ssm get-parameter --name /aws/service/datasync/ami --region us-west-2From the output, we can get the DataSync Agent AMI ID.
Create an EC2 instance using this AMI ID.
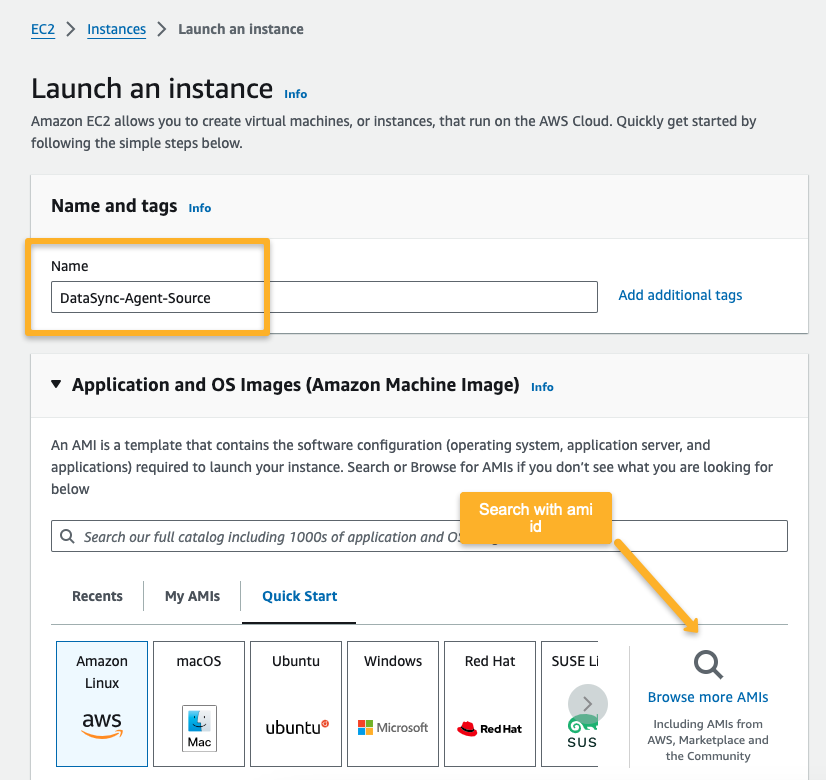
The AMI will be available in the community AMI's section.
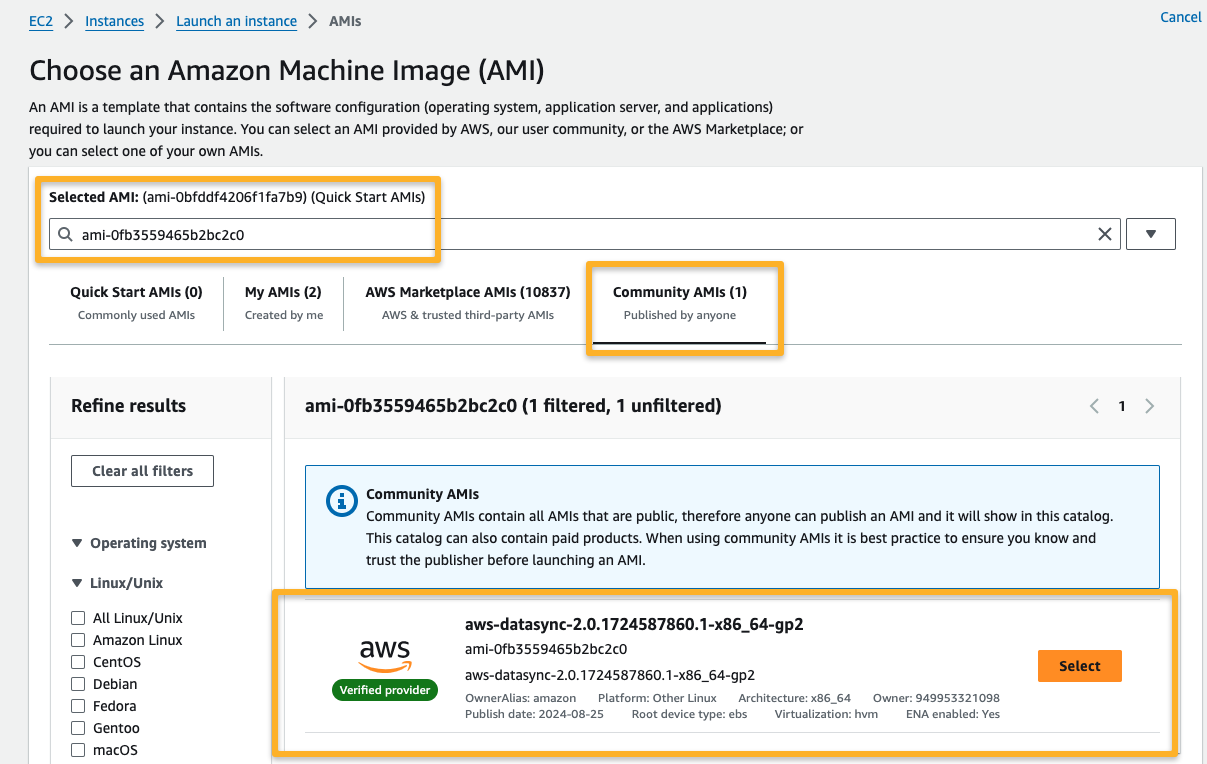
Note: The DataSync Agent should be created in the same network as the Source EFS to ensure it can access the EFS.
Step 6: Create a VPC Endpoint in the Destination Account
We need a private VPC endpoint in the destination account to transfer data securely to an AWS service.
Destination Account
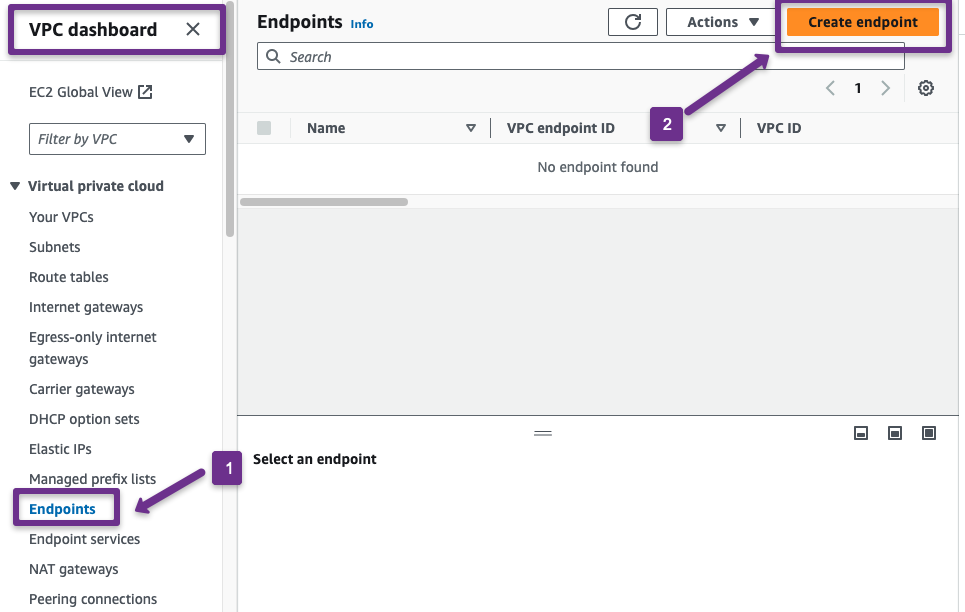
Navigate to the VPC dashboard and select the "Endpoints" tab.
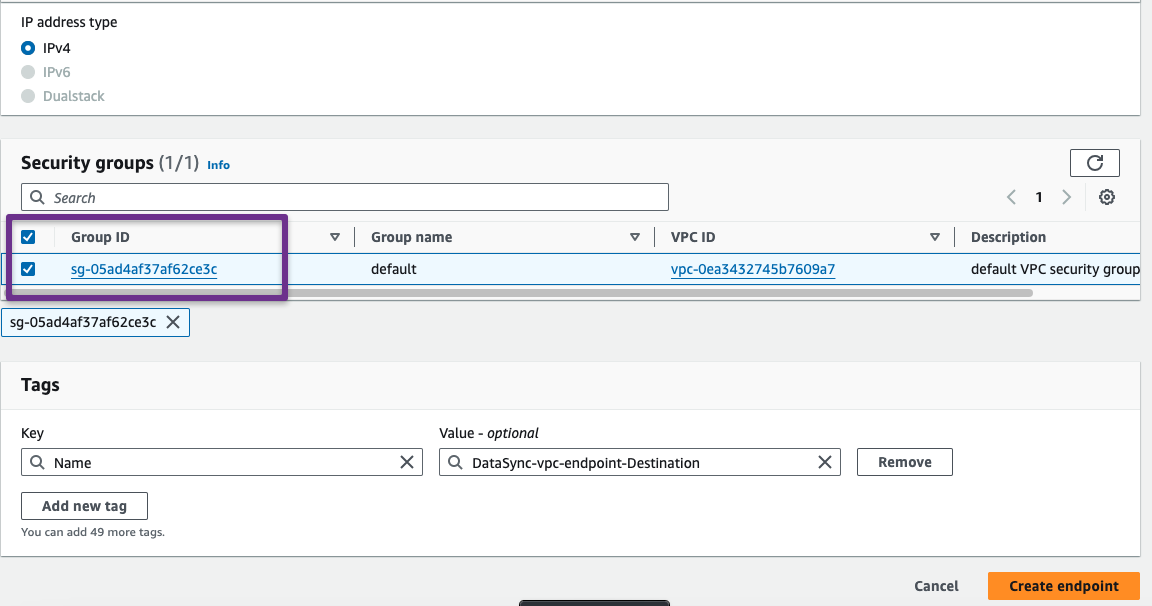
In the next window, we need to choose the Service category as "AWS Service" because we are using this for internal service communication.
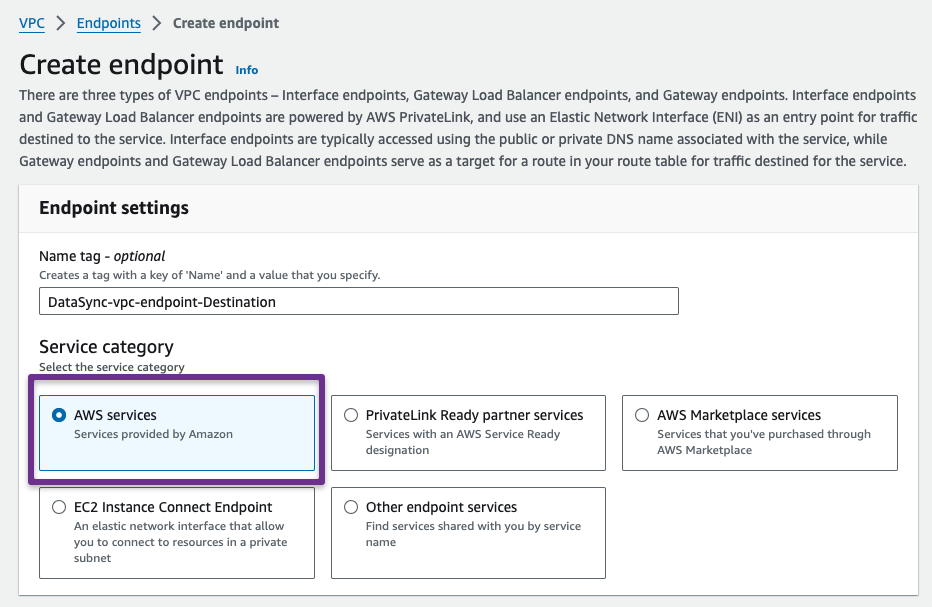
In the following section, select the AWS Service, destination VPC, Subnets, and Security group to attach to the VPC endpoint.

Step 7: Setup DataSync in Destination
In the destination account, we need to set up the DataSync Agent with the VPC Endpoint and create source and destination locations with that Agent to perform the data sync between accounts.
Prerequisite
We need the IP address of the source account DataSync Agent instances for AWS DataSync activation.
Source Account
If your browser can access the Private IP of the Source DataSync Instance, you can use it to activate it. Otherwise, you use the public IP of the instance for the activation.

Note: If you haven't establised a VPN connection, you cannot use the Private IP for DataSync Agent activation.
Refer to this blog to learn how to set up the AWS Client VPN.
Destination Account
Open the AWS DataSync Service from the destination account.
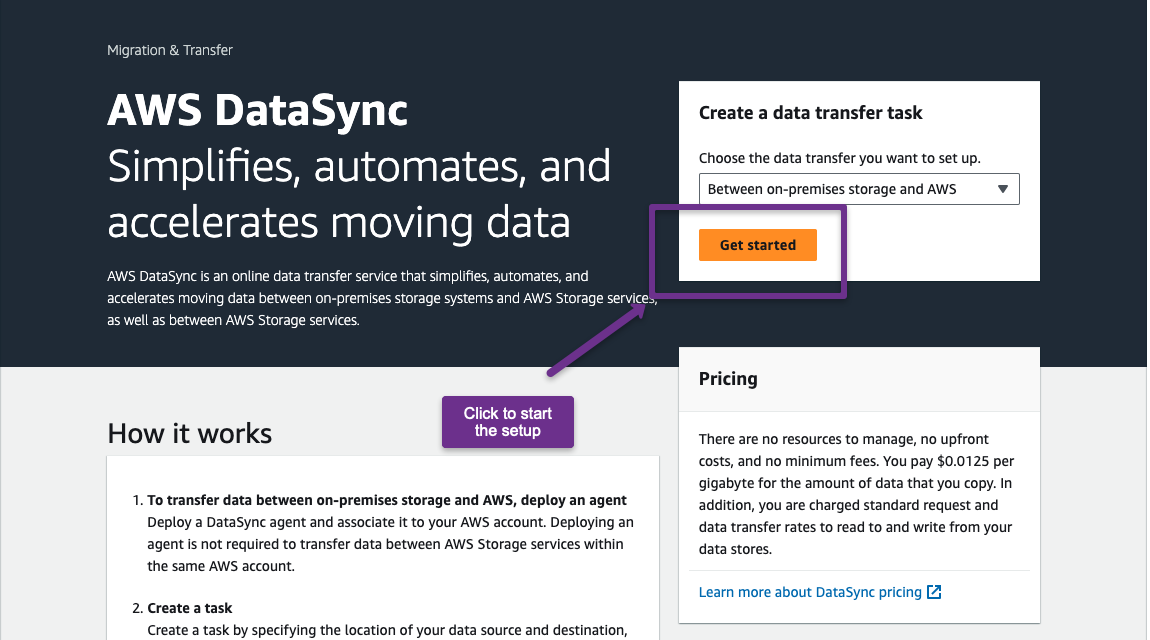
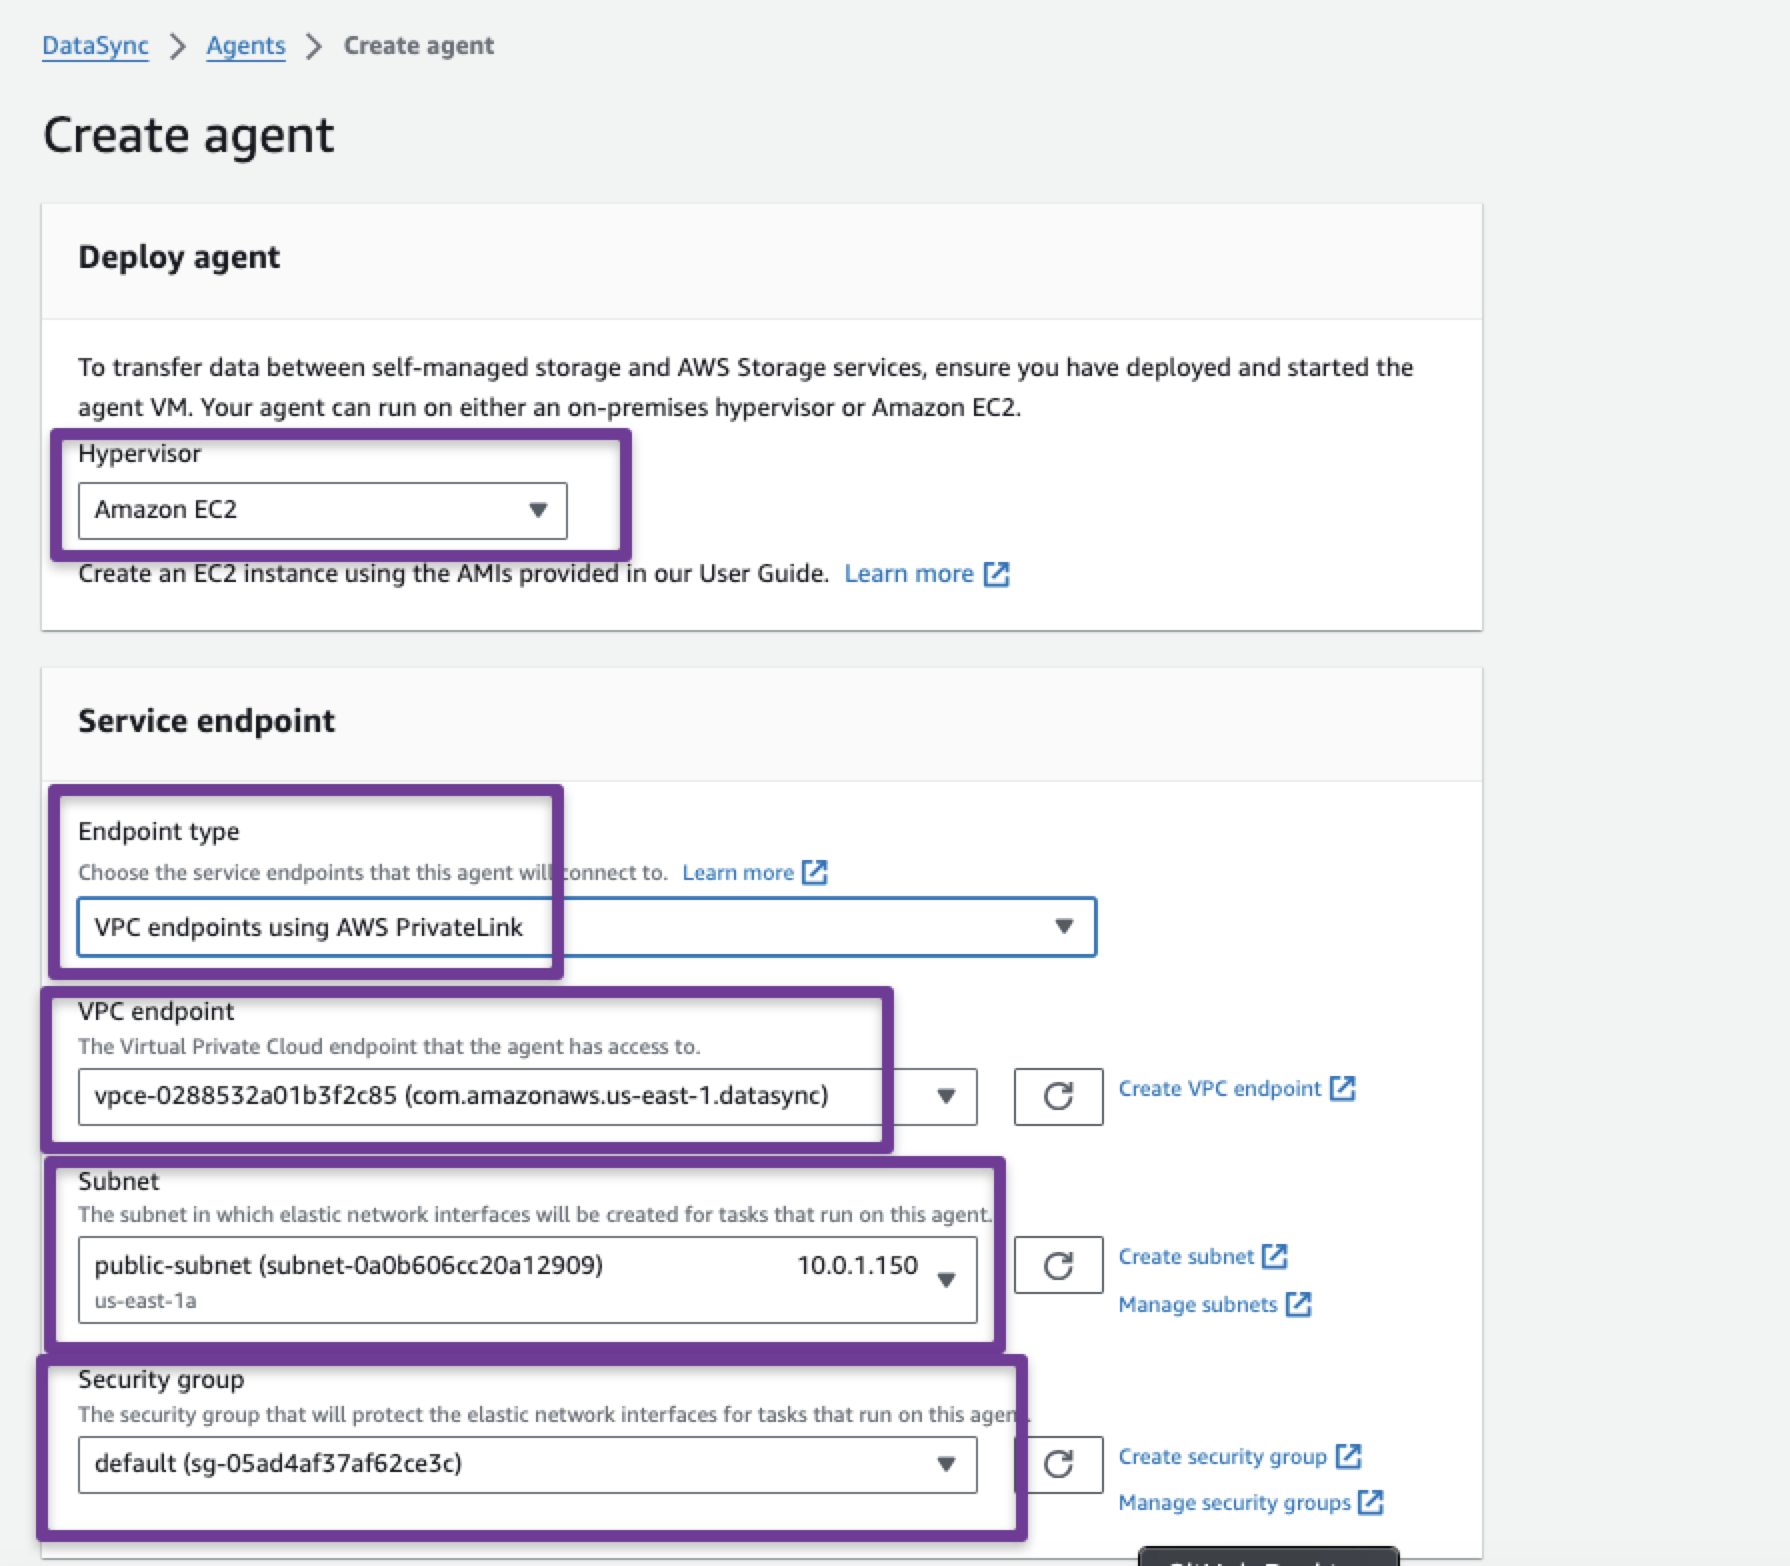
In the next window, choose the 'Deploy agent as Amazon EC2', because our agent runs in the source as an EC2 instance.
In the 'Service endpoint' section, select the VPC Endpoint we created in the previous steps.
The endpoint type should be VPC endpoints using AWS PrivateLink. We also need to select the VPC, Subnet, and security group.
In the Activation key section, provide the Public IP of the source DataSync Agent instance.
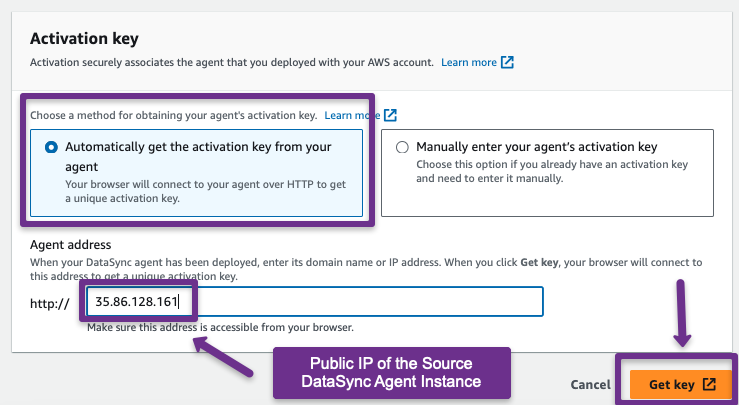
If you successfully activate the Agent, you will see the following output.
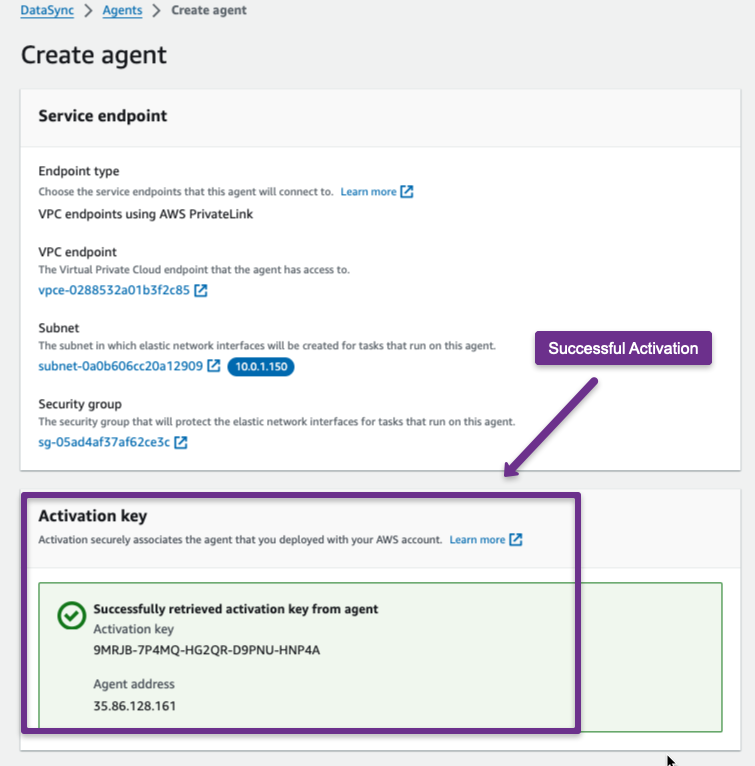
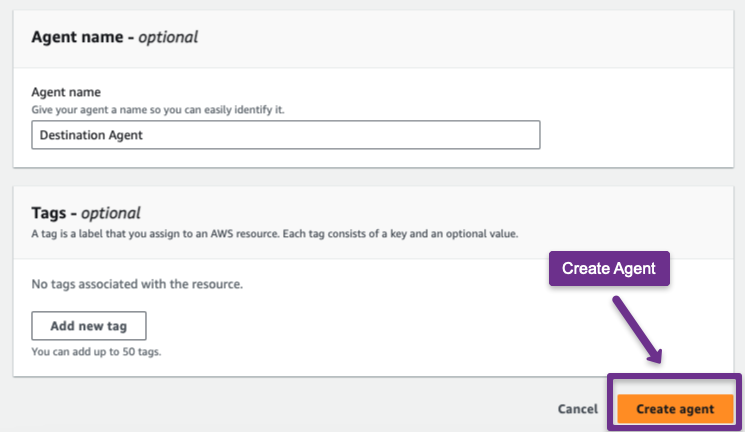
Now, we can create the Agent.
Step 8: Create Destination Elastic File System (EFS)
We must create a destination EFS to migrate data from the source EFS.
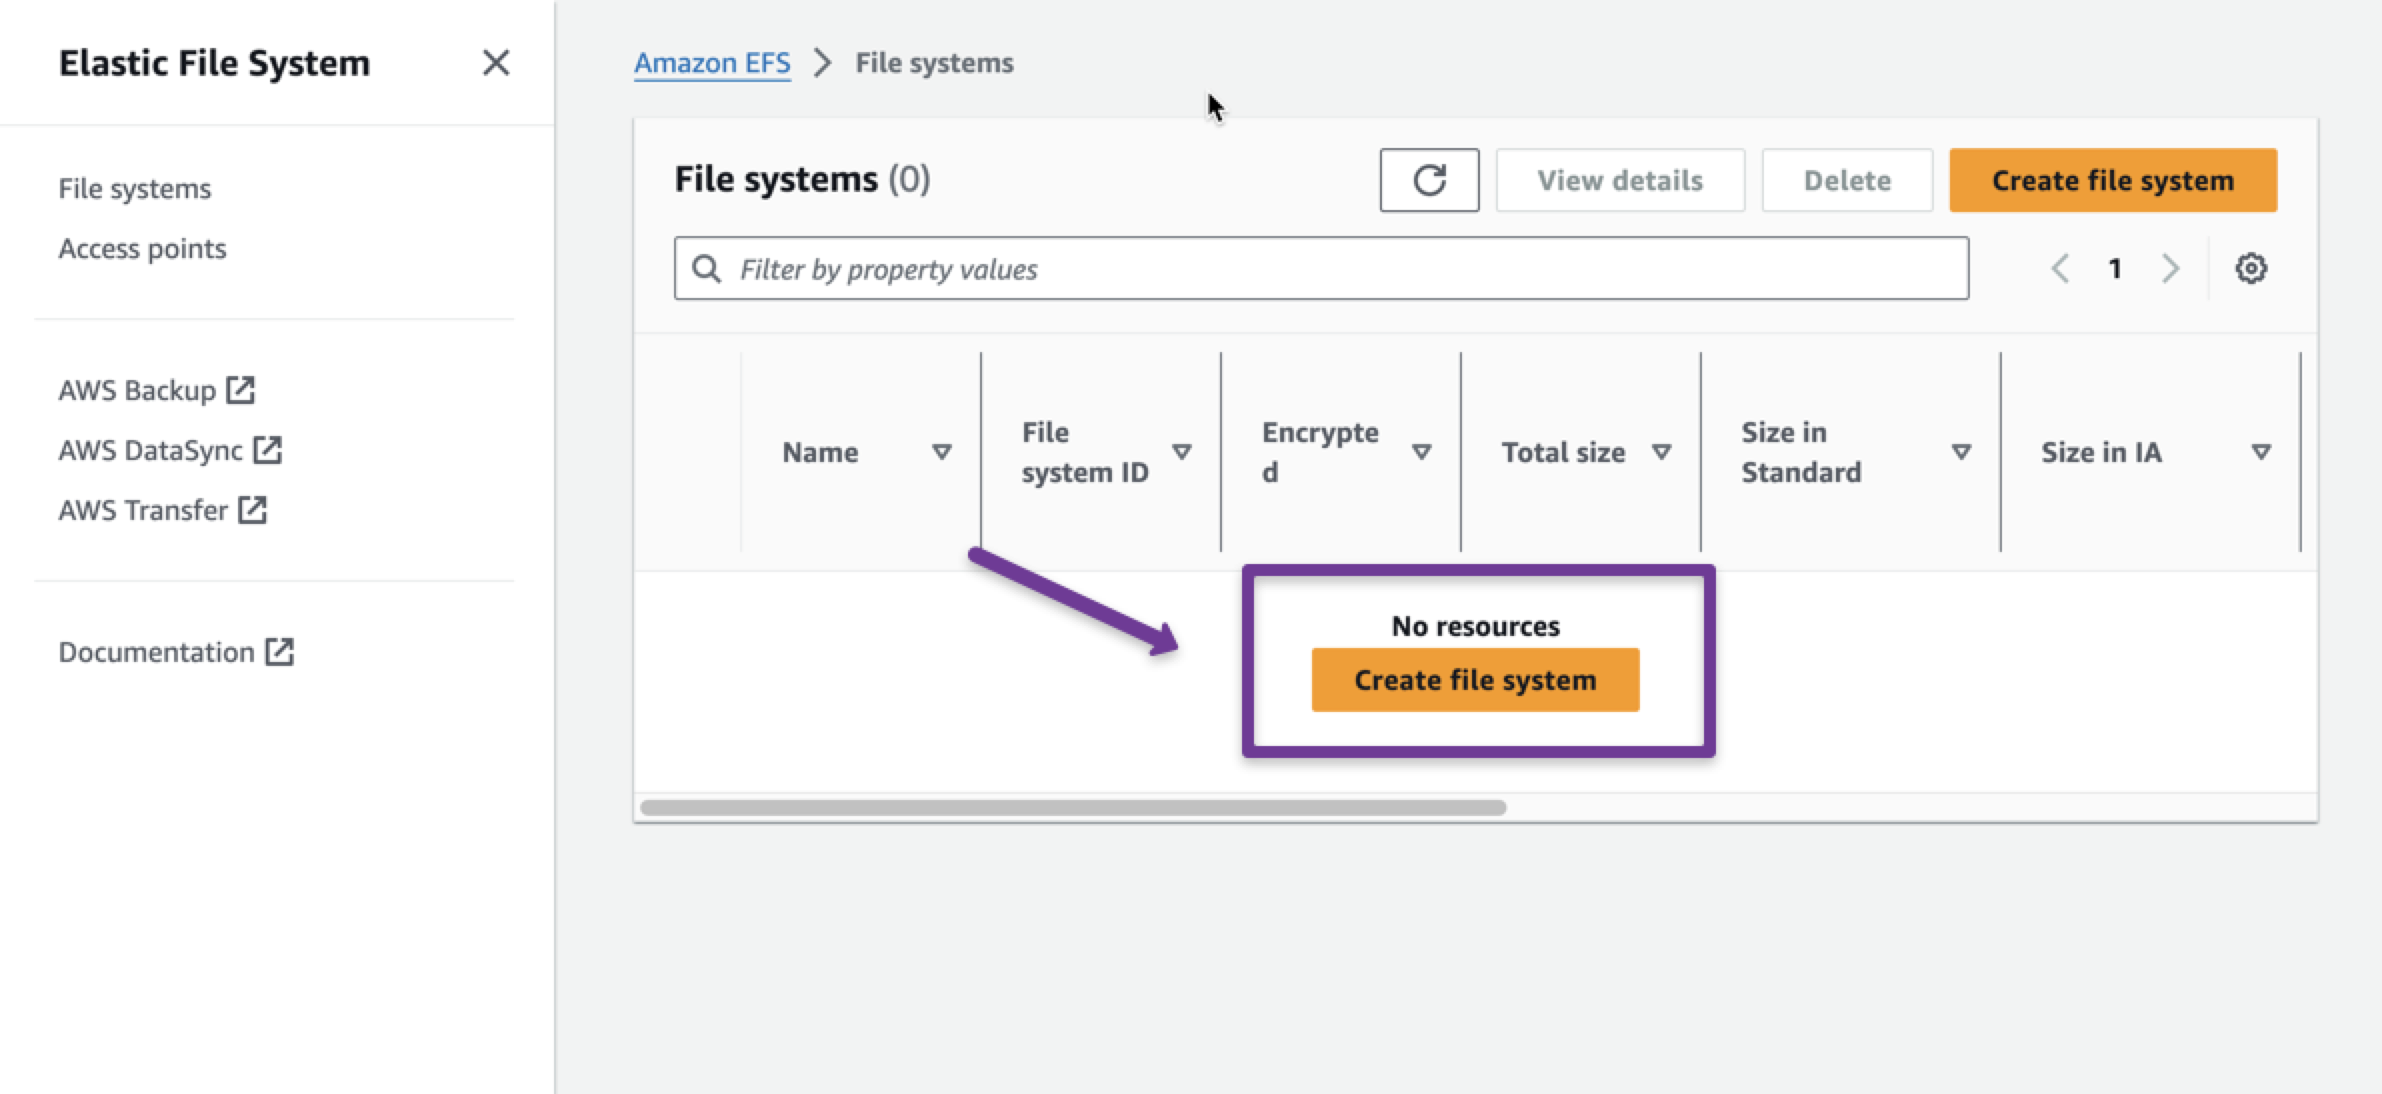
Provide the destination VPC and Security Group in the settings to create the EFS.
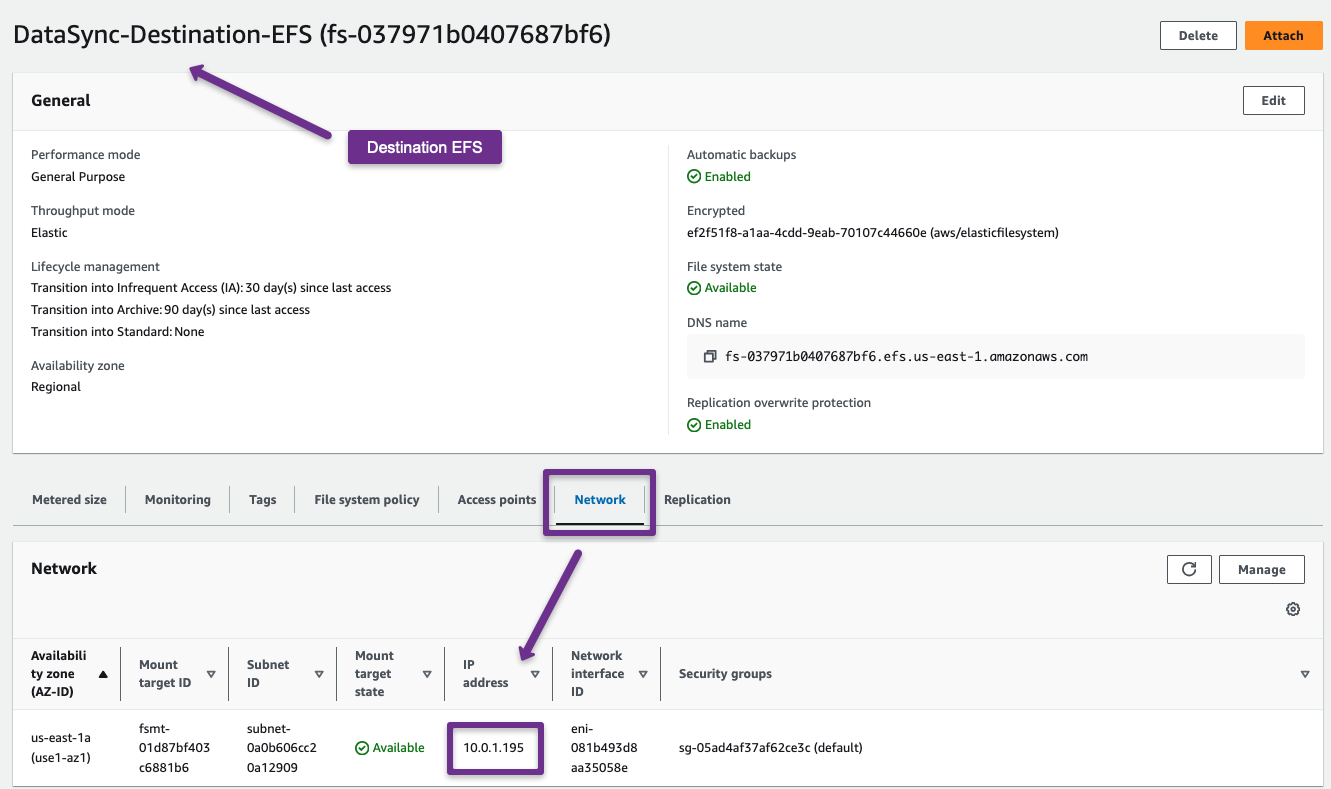
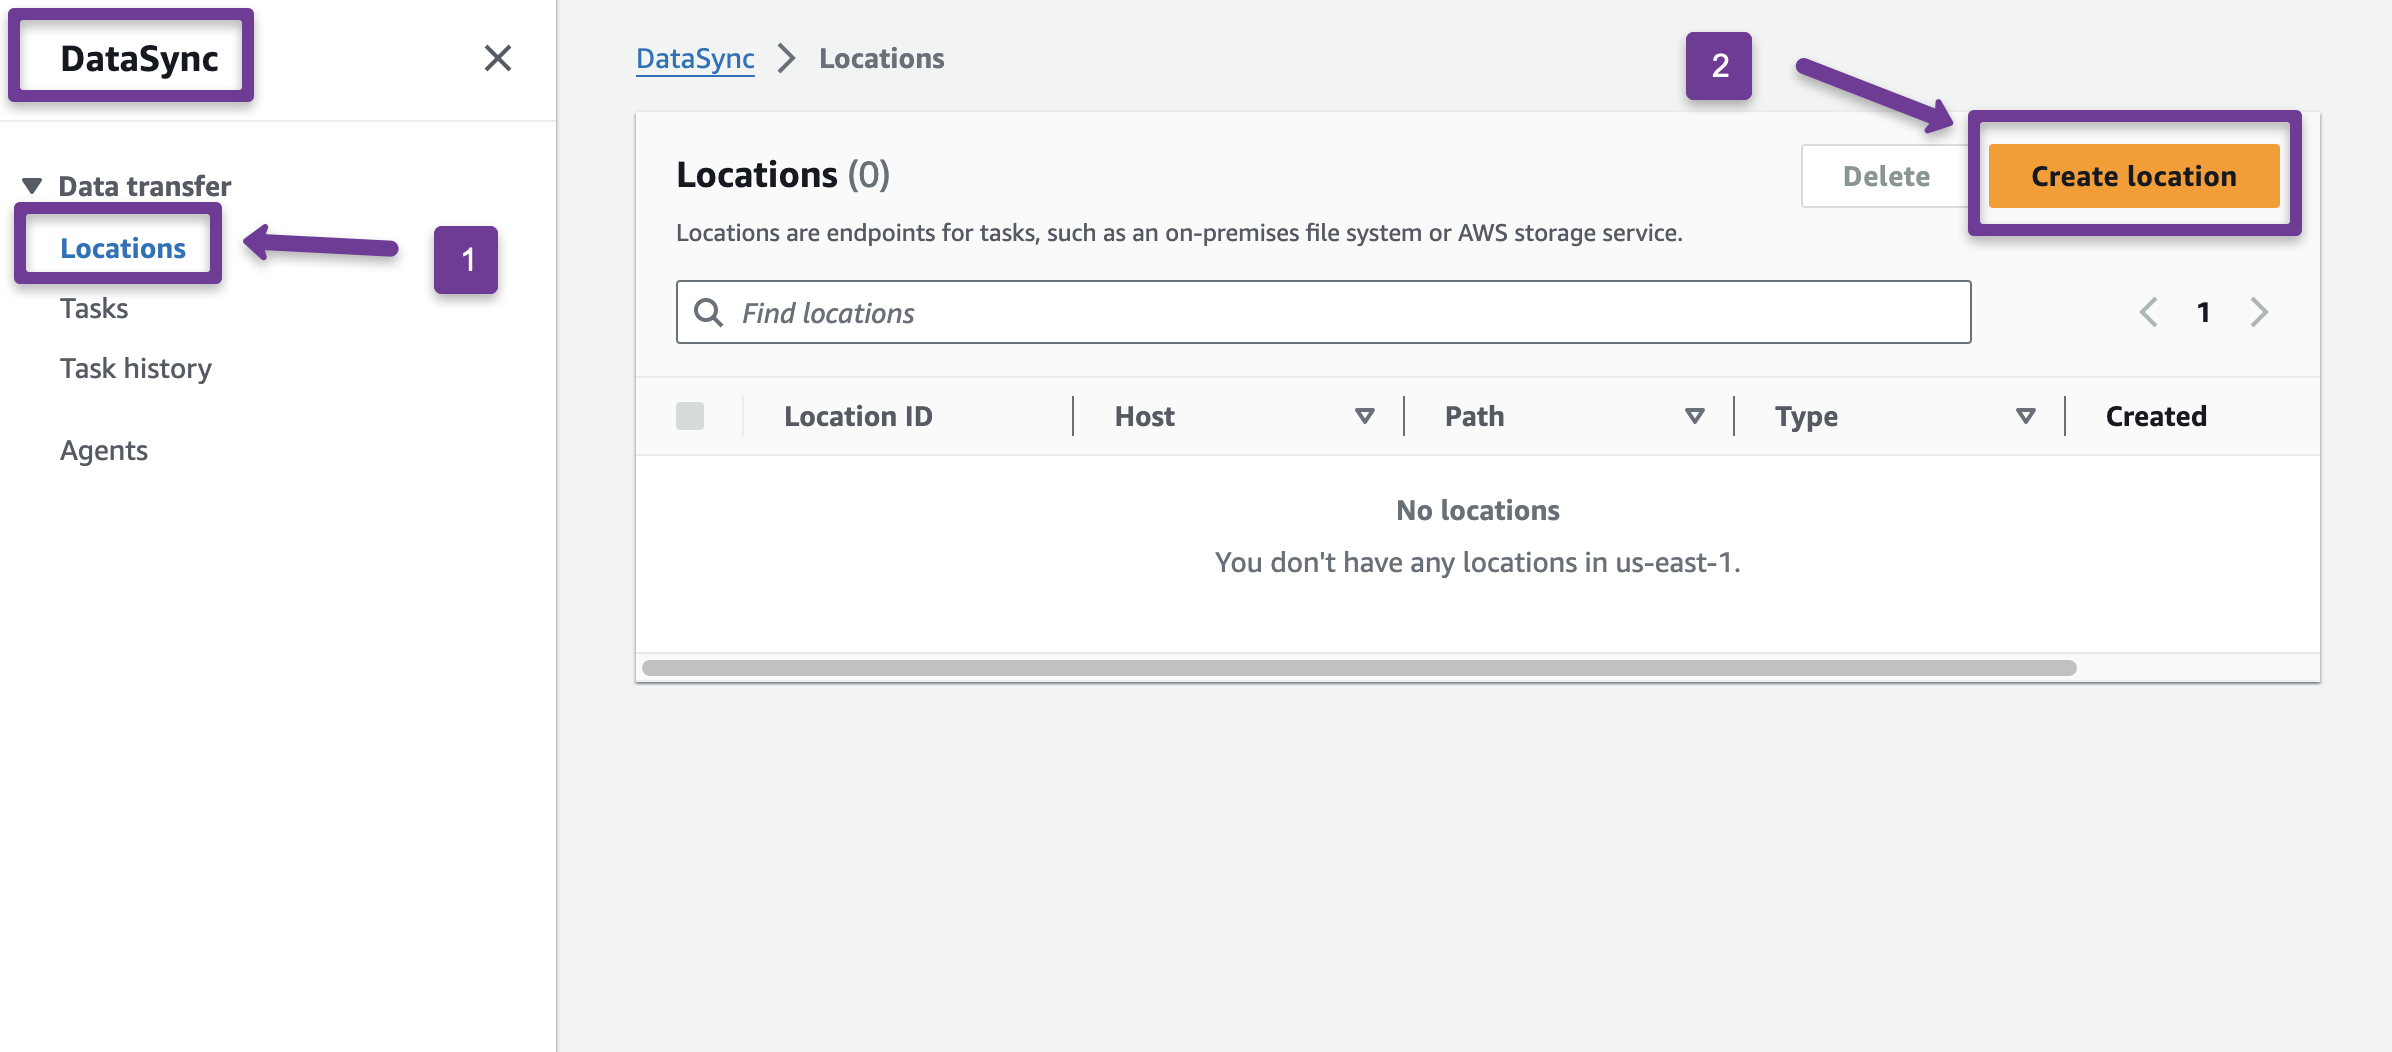
Step 9: Create DataSync Locations
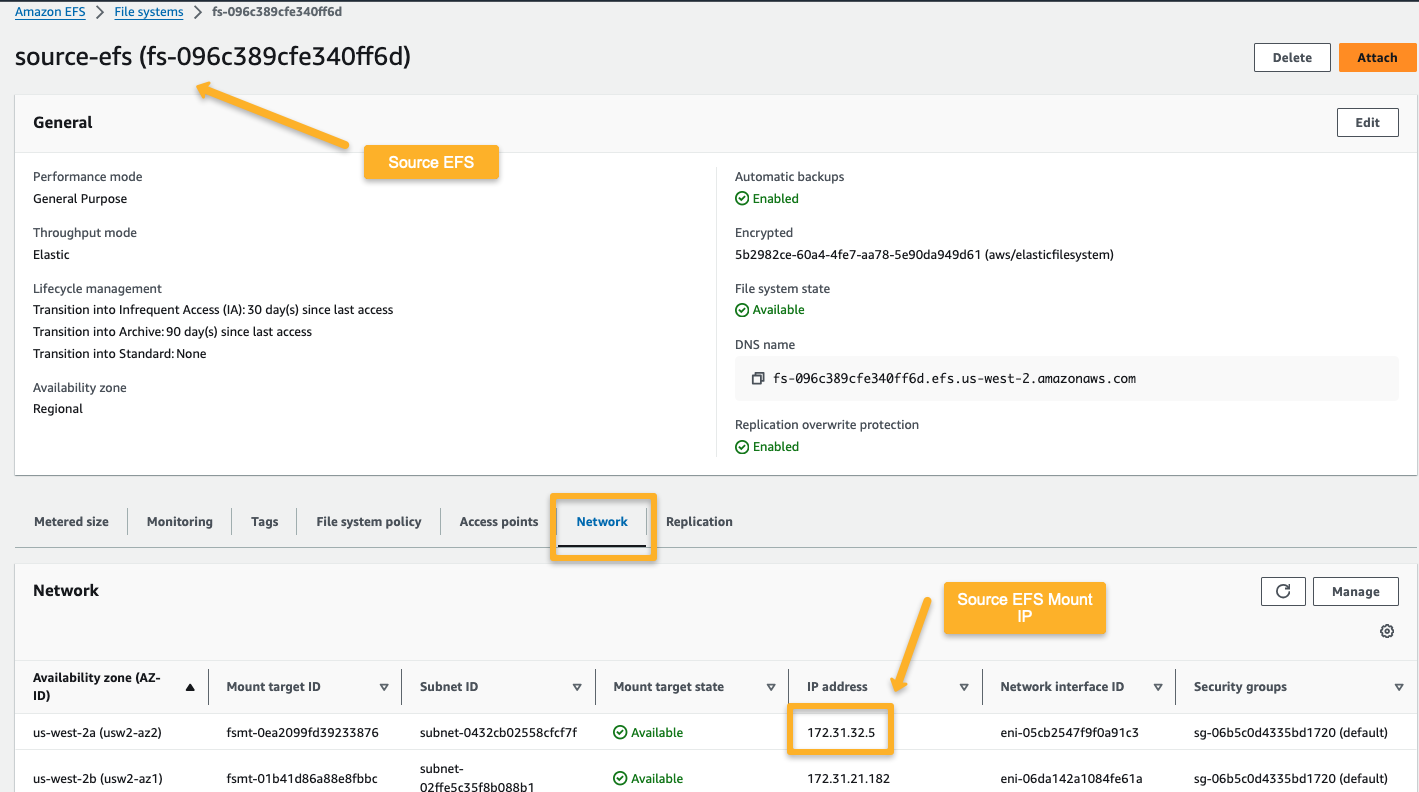
Before creating the locations, we need one of the Mount Point IPs of the source EFS.
Source Account
Destination Account
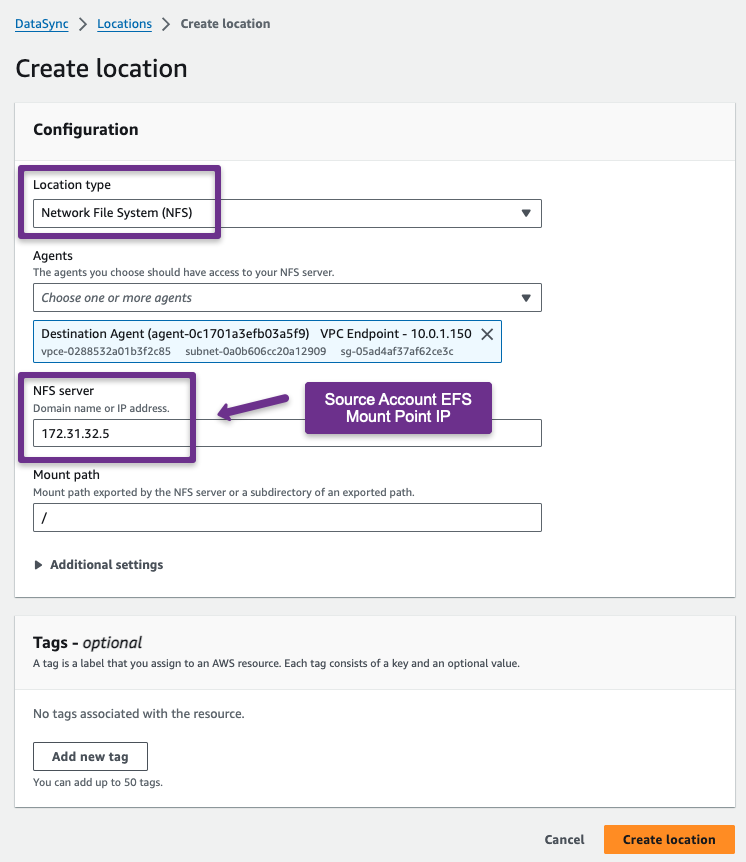
Now, create a location for the source and destination.
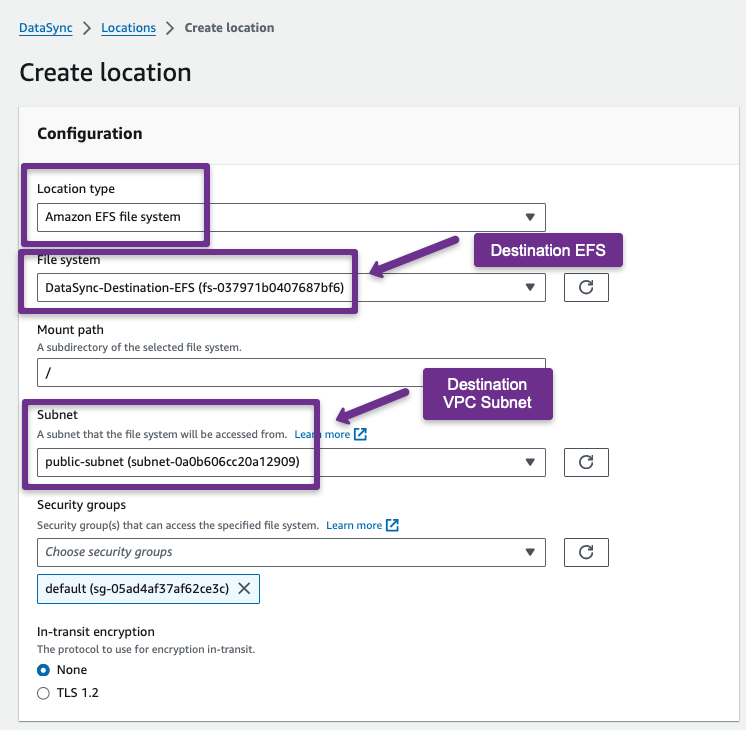
Now, we need to create a location for the destination EFS.
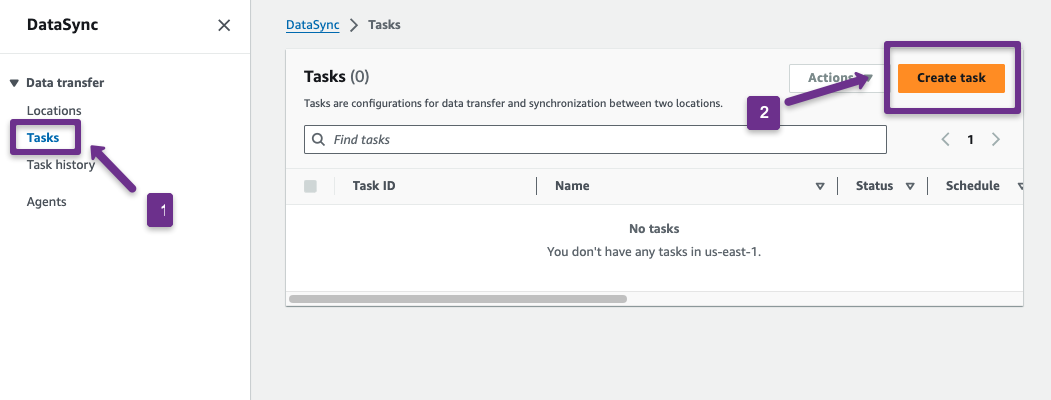
Step 10: Setup DataSync Task
Now, we can set up the DataSync task to perform the migration.
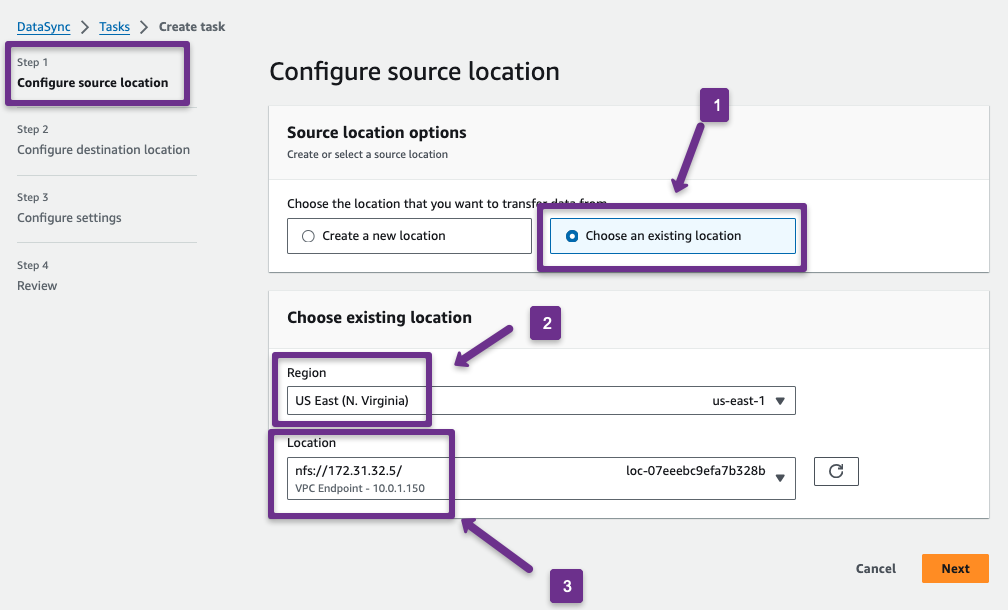
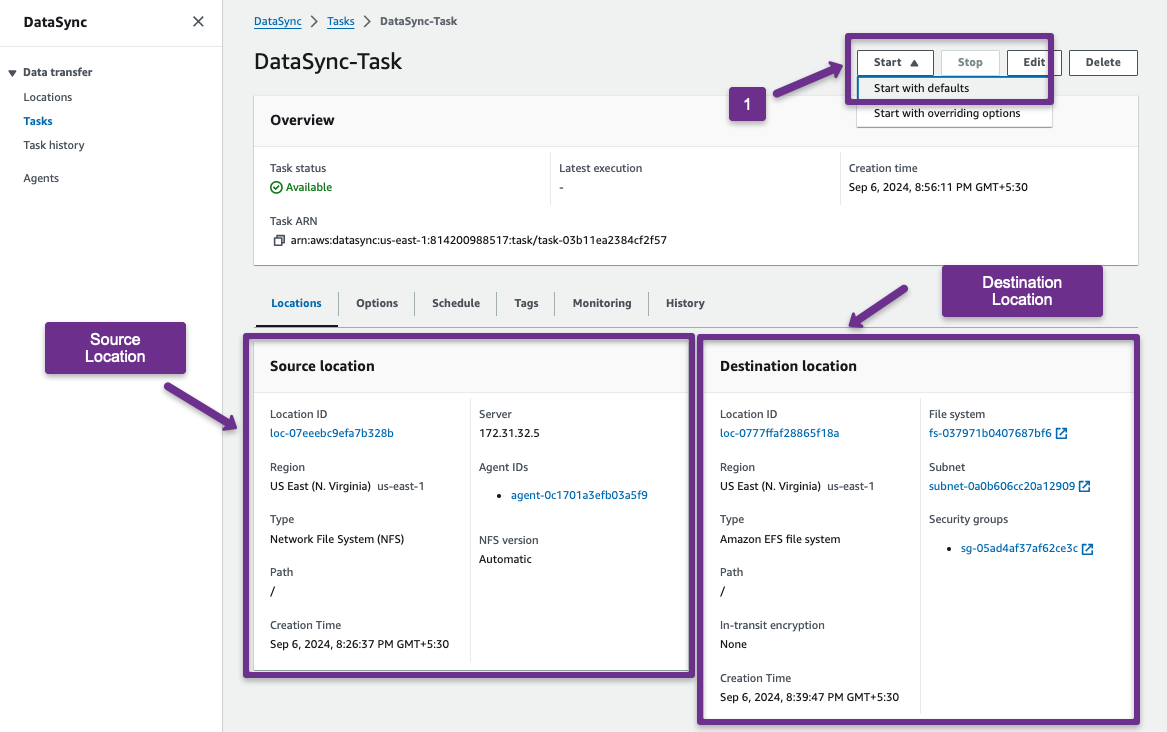
First, we need to configure the source location.
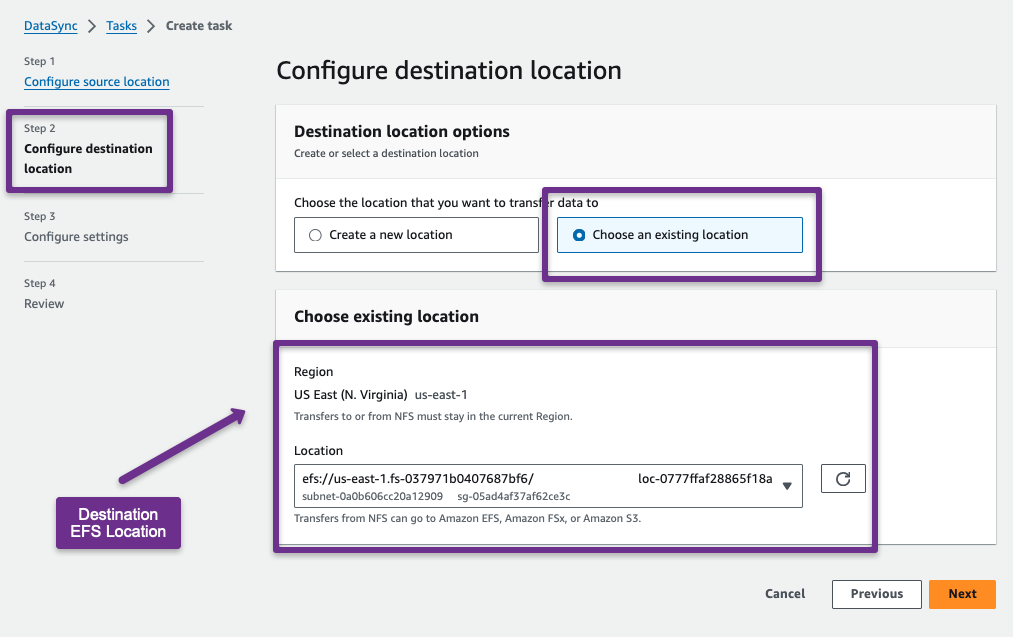
Then, configure the destination location
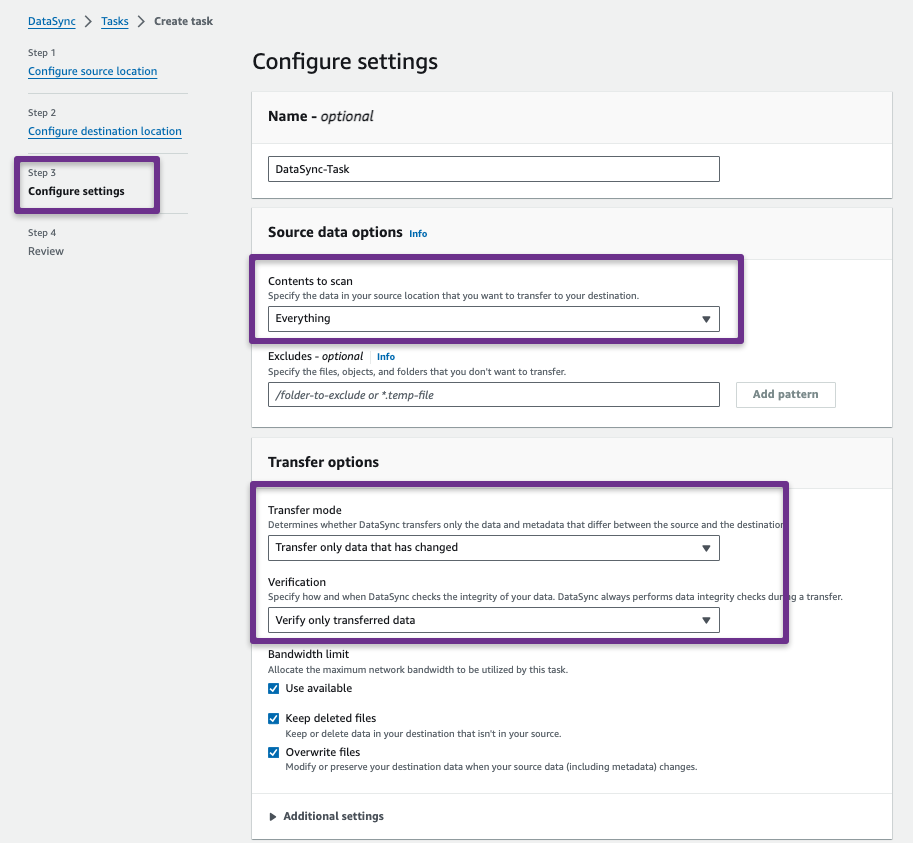
Both locations are now configured, and the other configuration settings are performed.
Provide a name for the task. In the 'Source Data Option' Section, choose between Everything and Specific files, objects, and folders.
I need to transfer all data from the source account to the Destination account, so I am choosing Everything. However, you can exclude specific files, objects, or folders if required.
In the Transfer Options section, various configurations are available.
Transfer Mode
- Transfer all data: This will not compare the source and destination files; instead, it will directly proceed with copying.
- Transfer only changed data: This option will compare the source and destination data before copying them. If any data is changed in the source or the destination doesn't have that data, only the copy will happen.
Verification
- Verify all data: After transferring the data, verify all the source and destination data and ensure that the source and destination are properly synced.
- Verify only transferred data.
- Don't verify data after transferred
Bandwidth Limit
- By default, DataSync will use a maximum bandwidth limit to transfer the data, but we can limit the bandwidth if required.
- We can always keep the files in the destination location even if it is deleted from the source location.
- Overwrite the data when the source data has any changes.
Additional Settings
- Copy Ownership: User and Group ID
- Copy Permissions from the source
- Copy Timestamps from the source
- Queueing
Note: Depends on the configuration, the on premises to AWS data transfer bandwidth can go upto 10 Gbps.
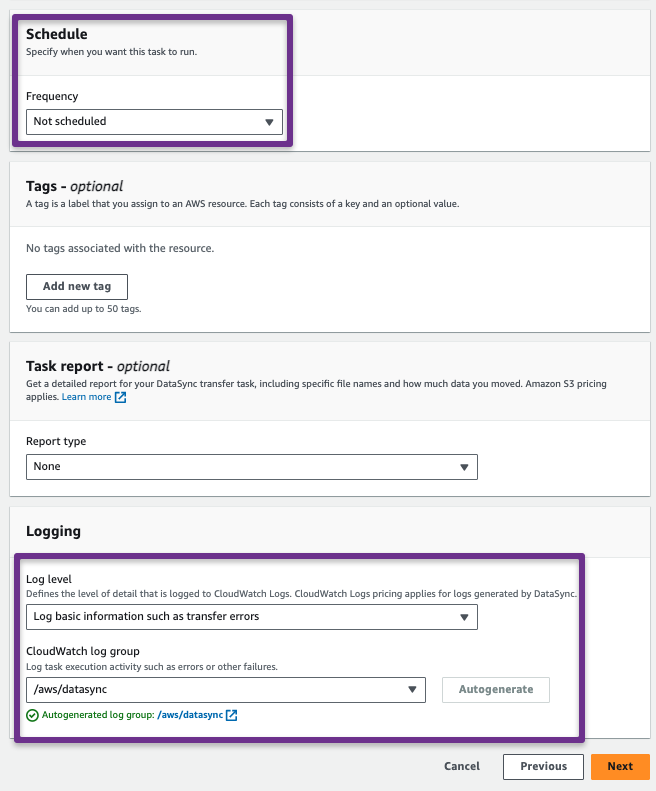
In the Scheduling section, we can manually trigger the sync or configure it to occur periodically.
In the Task Repot section, we can create a standard or summary only report about the sync and can be stored in an S3 Bucket.
If choosing the Standard Report, you will get more customization options such as success and errors or errors only reports for (Transferred, Verified, Deleted, or Skipped)
In the Logging section, we can send the logs to AWS Cloudwatch.
The task is ready to perform the sync. We have to start the task.
Note: Each AWS DataSync task creates four Elastice Network Interfaces (ENIs) will be created. This will optimize the performance and helps for the fault tolerance.
Step 11: Verify the DataSync
We can check the Task history to verify that the data is properly migrated from the source to the destination account.
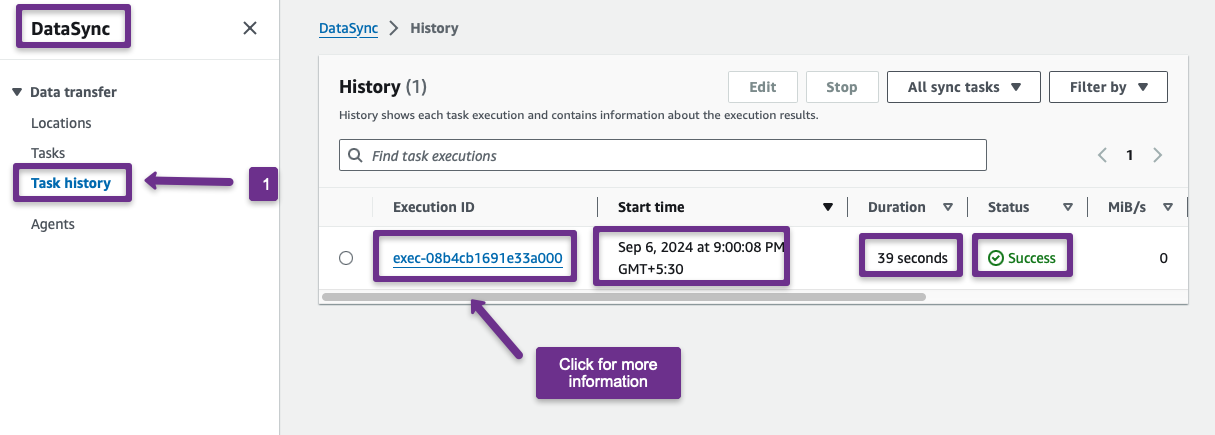
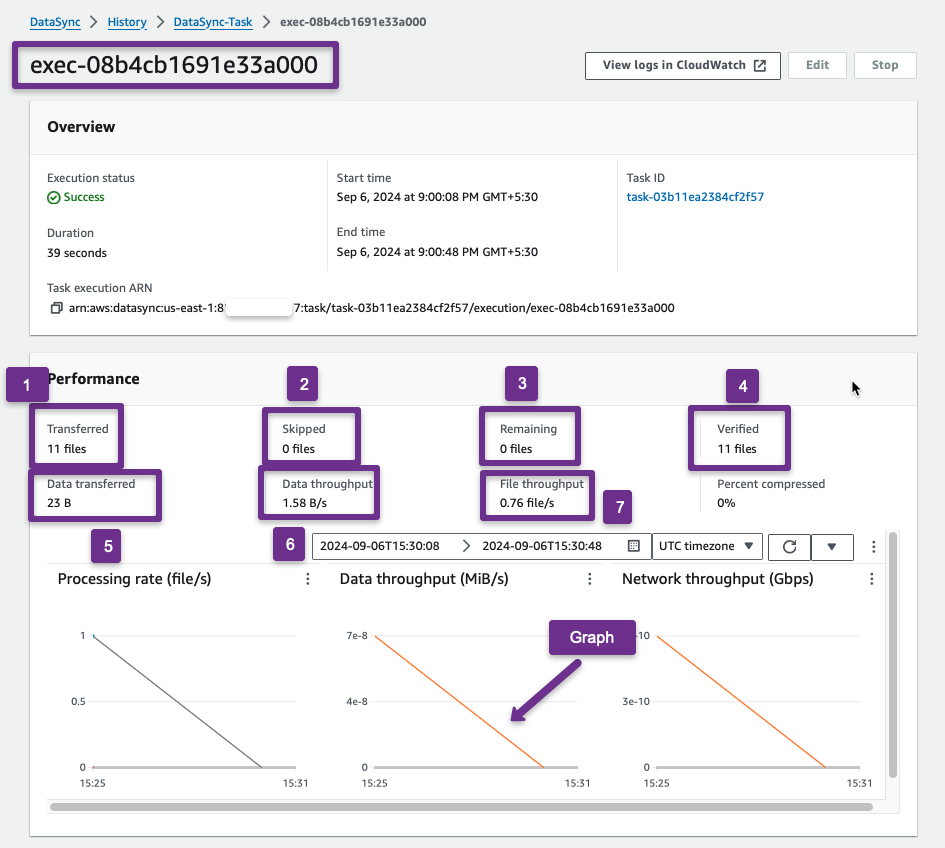
In the history, you can see the execution details such as Execution ID, Start Time, Duration, Status, Transfer Speed, Size, etc.; if we want more information, we can click the execution ID.
You can also manually check if all the files have been synced by mounting the destination EFS to an EC2 instance.
Conclusion
I hope this blog will give you an idea of the AWS DayaSync Workflow and how we can migrate or sync EFS data from one account to another in different regions.
With DayaSync, you can do more configuration and implementation. When you implement it, make sure that the security groups provide only the required network and ports to route the traffic.
