

Learn how to set up a WordPress website on Cloudways in just 9 minutes. This easy step-by-step guide is perfect for beginners looking for a fast and hassle-free setup.
I’ve been using WordPress for over a decade and have always self-hosted my websites.
Now, I’m moving everything to Cloudways managed hosting to get rid of the server maintenance overhead and focus more on growing the business.
I’ve documented every step of the process to make it easier for you.
Let's get started.
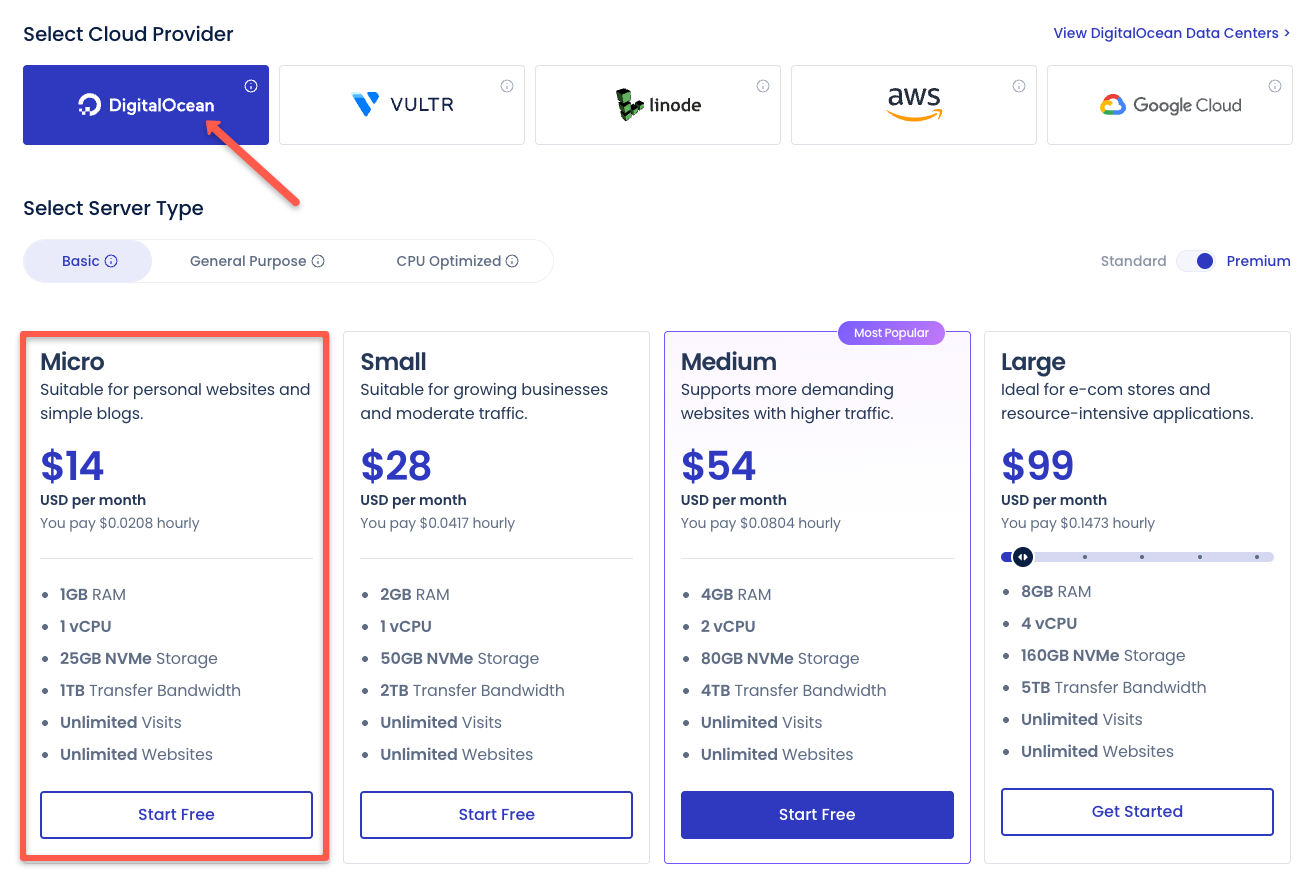
Choose a Plan
Go to pricing page and choose a required plan.
Choosing a plan depends on your website traffic and specific needs.
For example, the micro plan can host two WordPress websites and can serve ~10000 visitors per day with CDN + Caching.
I’m choosing the Flexible hosting option with DigitalOcean cloud and the Basic Micro plan, as I plan to host my company website and a tech blog that usually doesn’t receive heavy traffic.
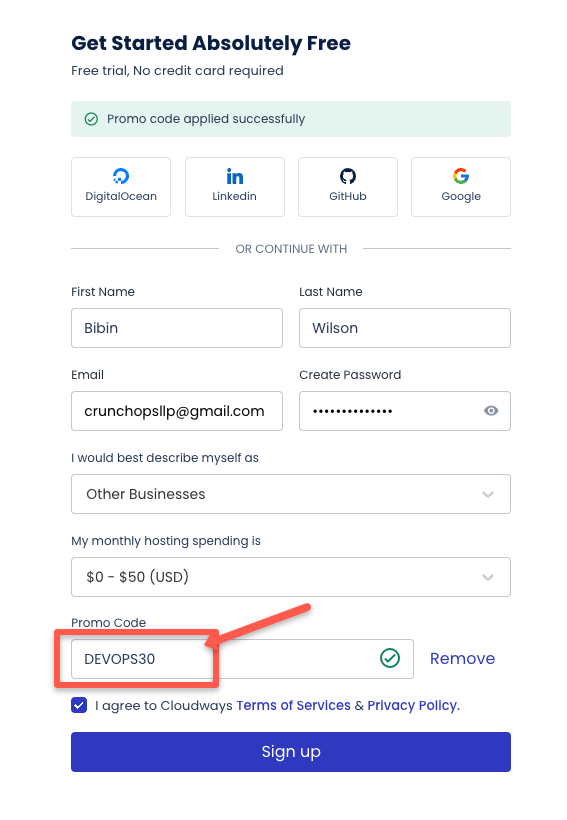
Signup With Promo Code
Next, you need to signup for the Cloudways account with a promo code to save on hosting plans. A good thing is that if you are getting started, you don't need to use a credit card.
Verify Your Account
Usually, account verification is immediate.
In some cases, due to fraud prevention and security protocols, you may be asked to verify your account using your details.
After submitting the details, if verification doesn't happen right away, you can email the Cloudways verification team at av@cloudways.com or verify@cloudways.com for faster account activation.
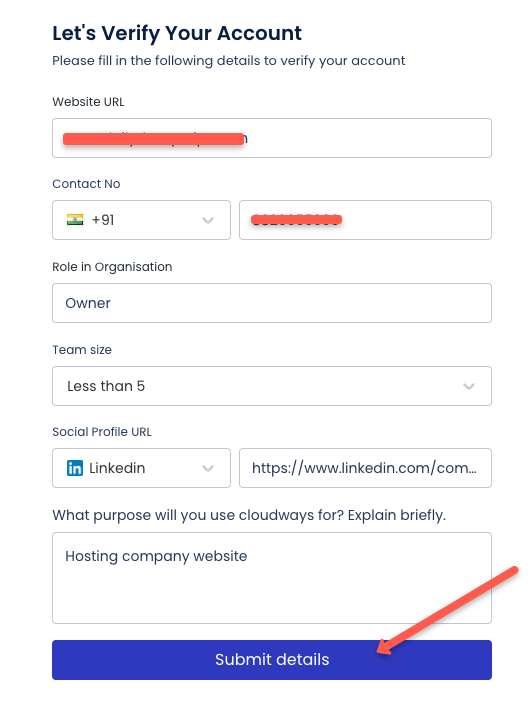
Once you have a verified account, move on to the next step.
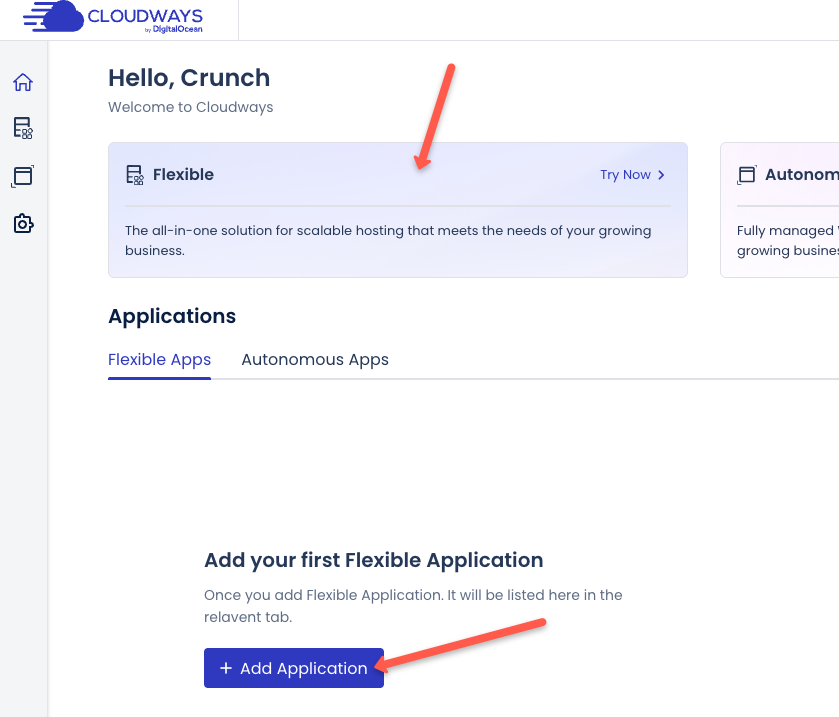
Add Wordpress Application
Now, if you have an account, you will get the option to add the application as shown below. Click the "Add Application" option to get started.
On the next page, fill up the server details as shown below.
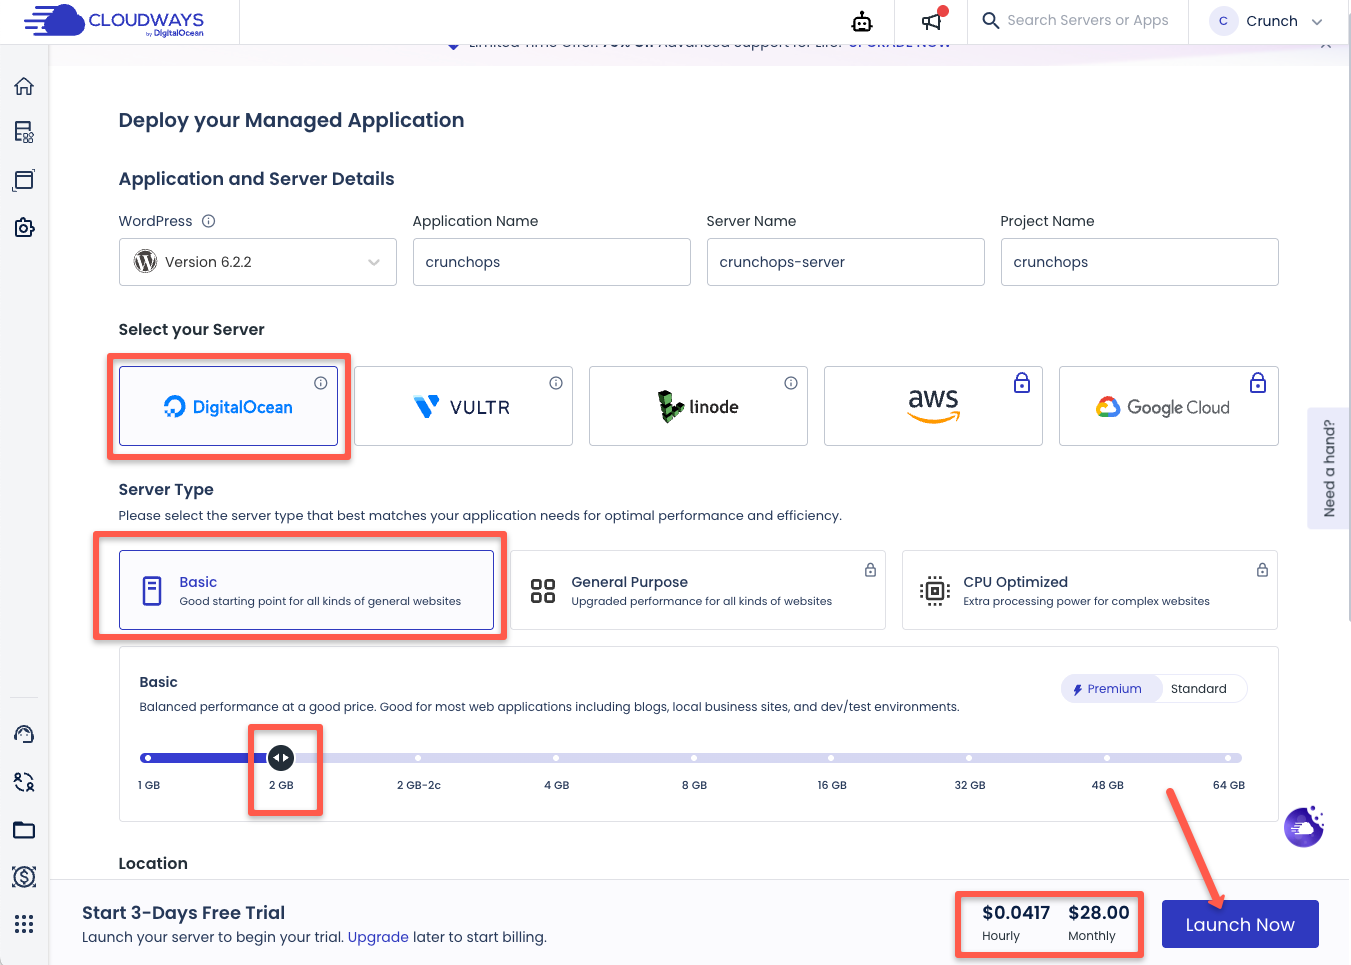
You can choose the backend cloud you want to use. I am choosing,
- DigitalOcean server (I have been using DigitalOcean for a really long time for many other use cases)
- Basic Server Type
- 2GB RAM
- Location - Bangalore (Because the business is in India)
It costs approximately $28 per month.
Once you have filled in all the details, click Launch now to launch the server.
It takes approximately ~7 minutes for the server to be configured.
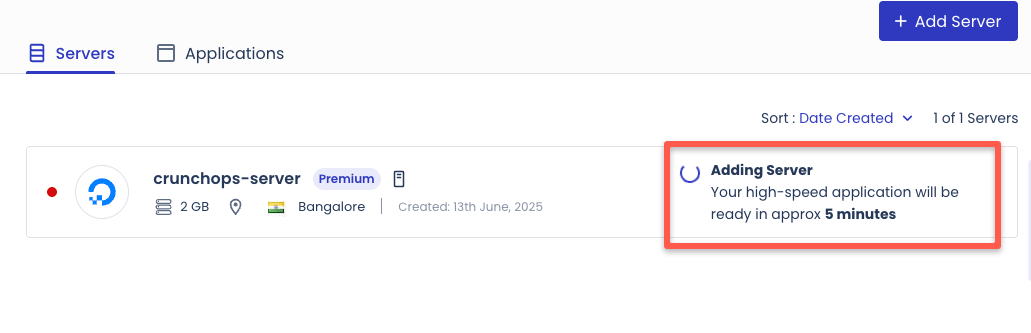
So, the server is now added.
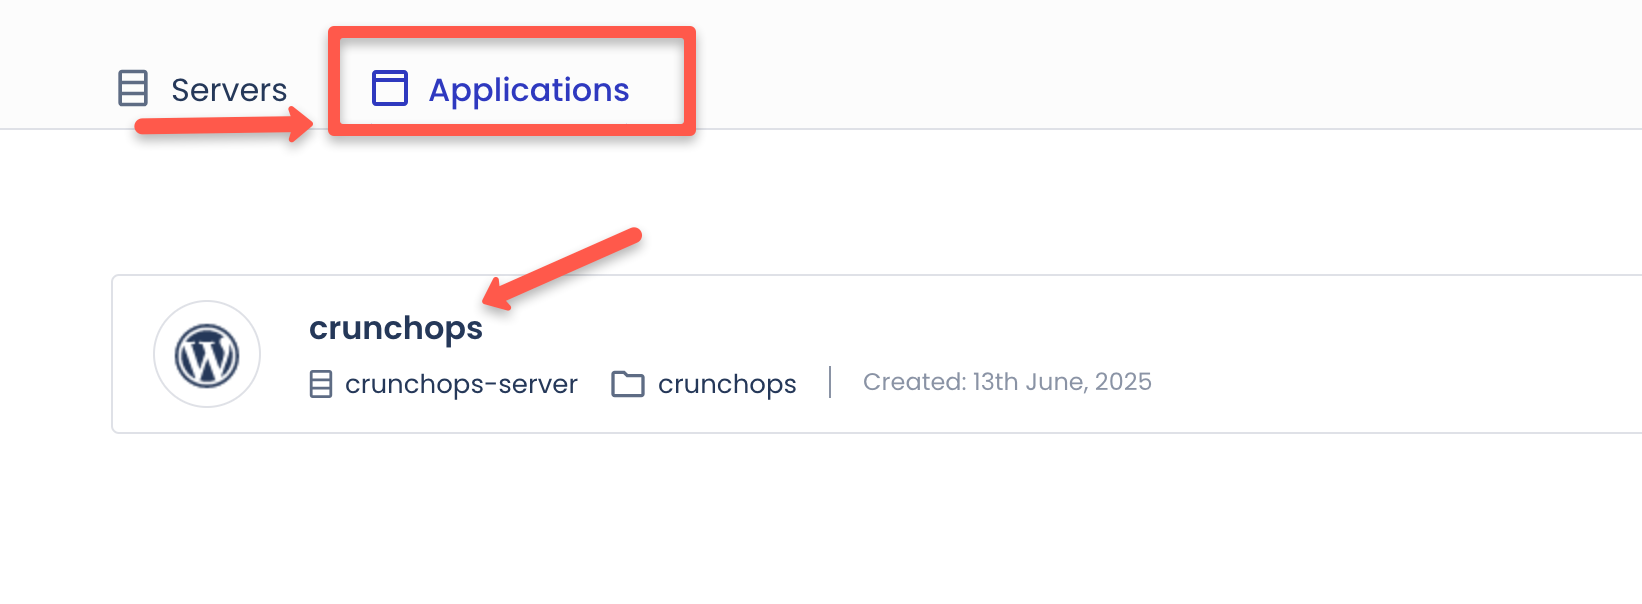
Now go to the Application and click on the Crunchops.
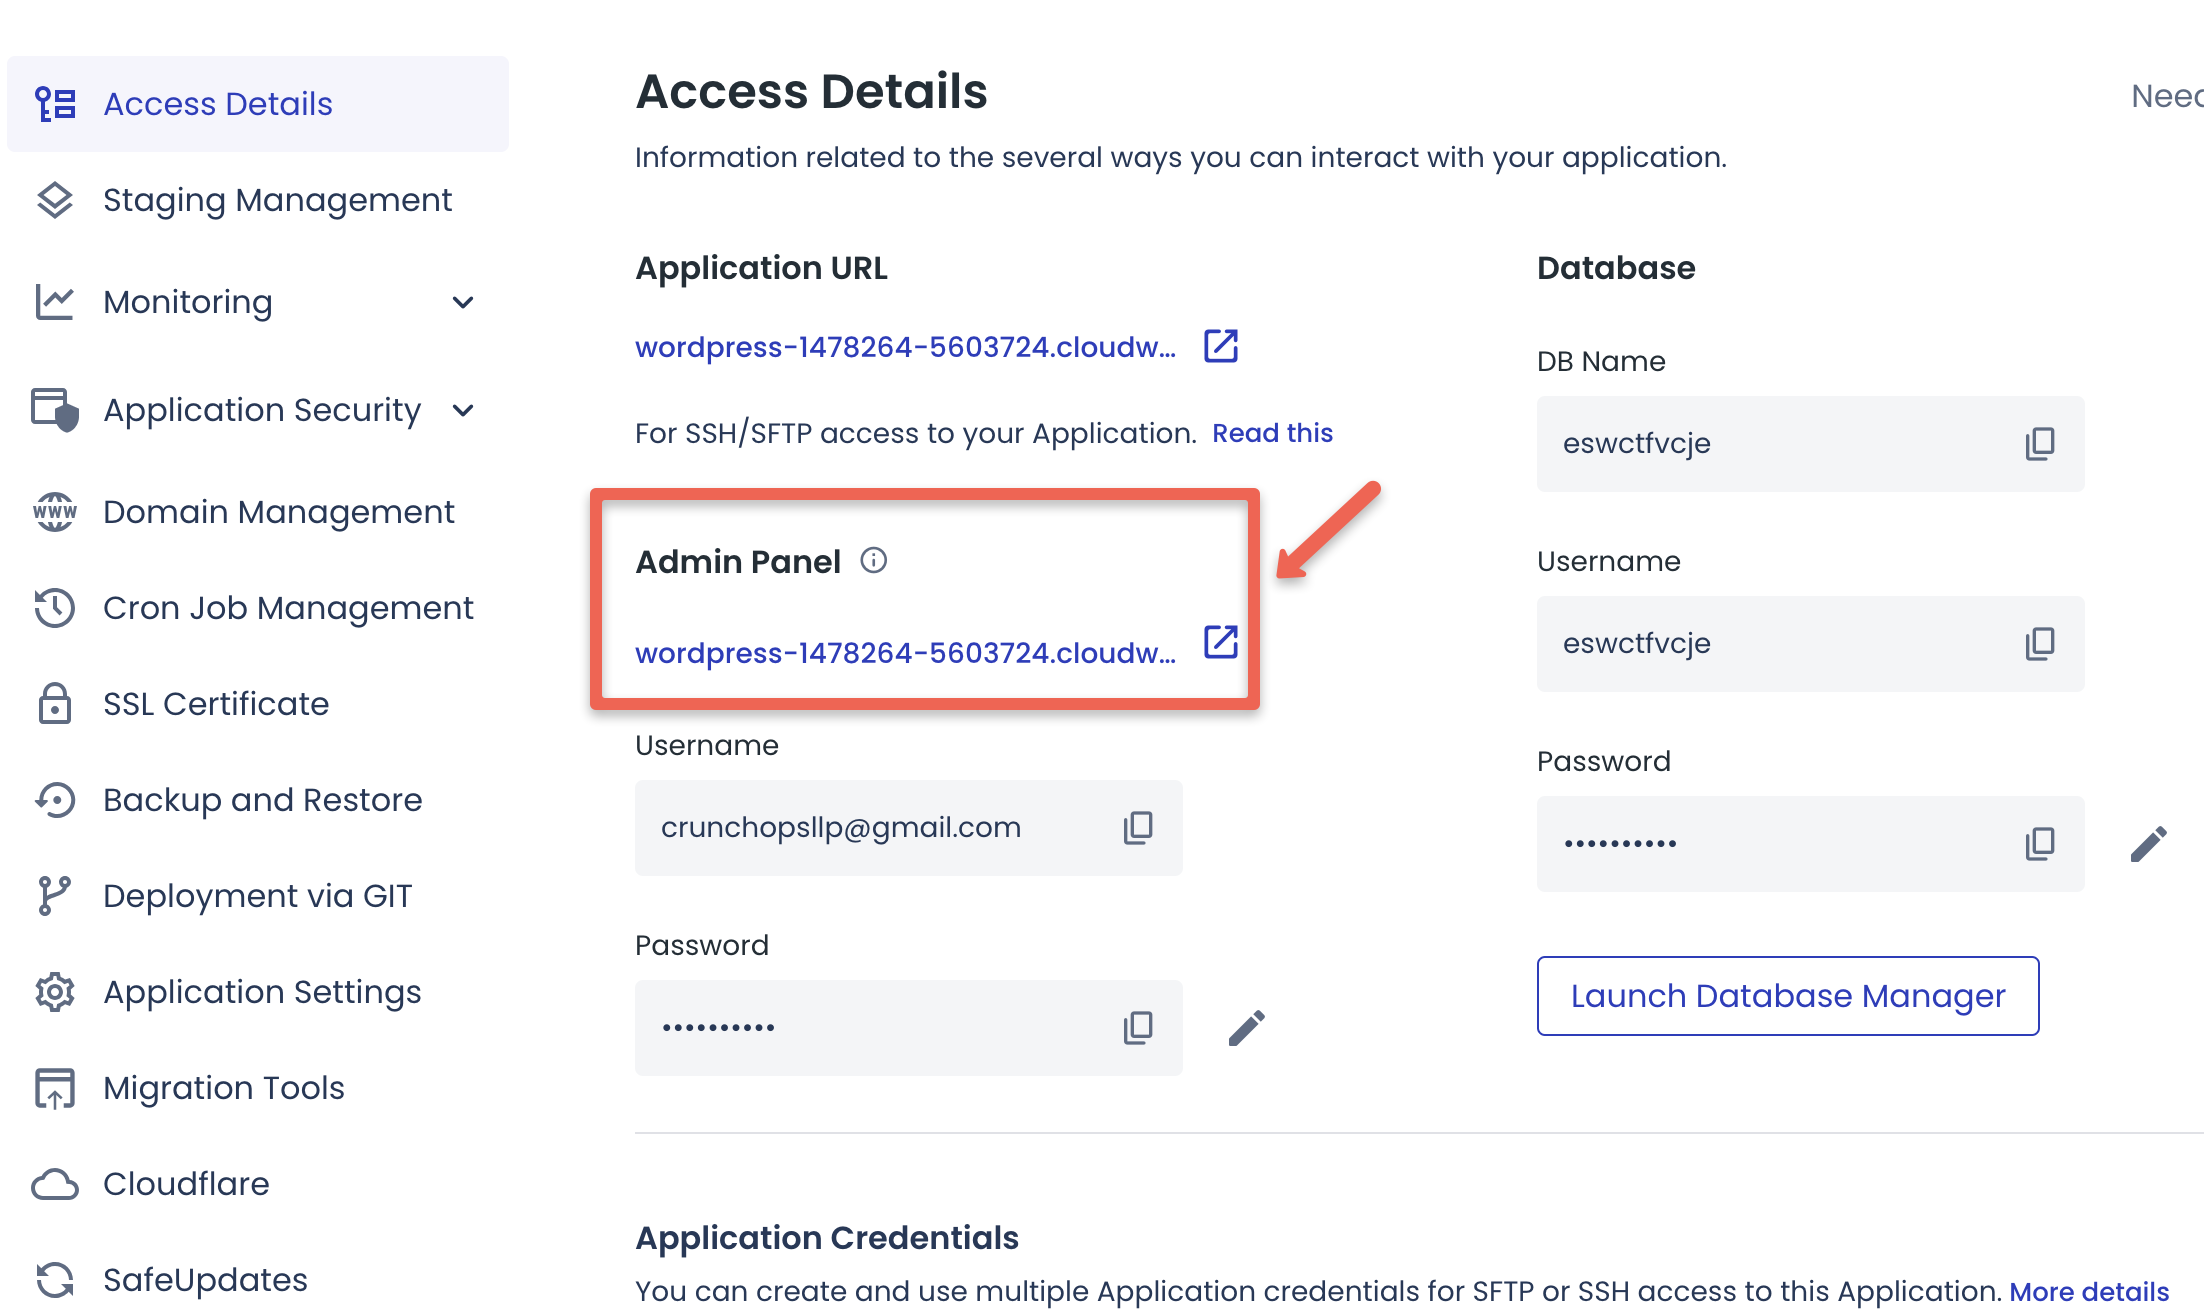
In the applications tab, you will get all the access details to the Cloudways hosting.
Also, you will get staging management, Monitoring, application security, your website domain management, SSL certificate, backup & restore, deployment via GIT and many other options as shown below.
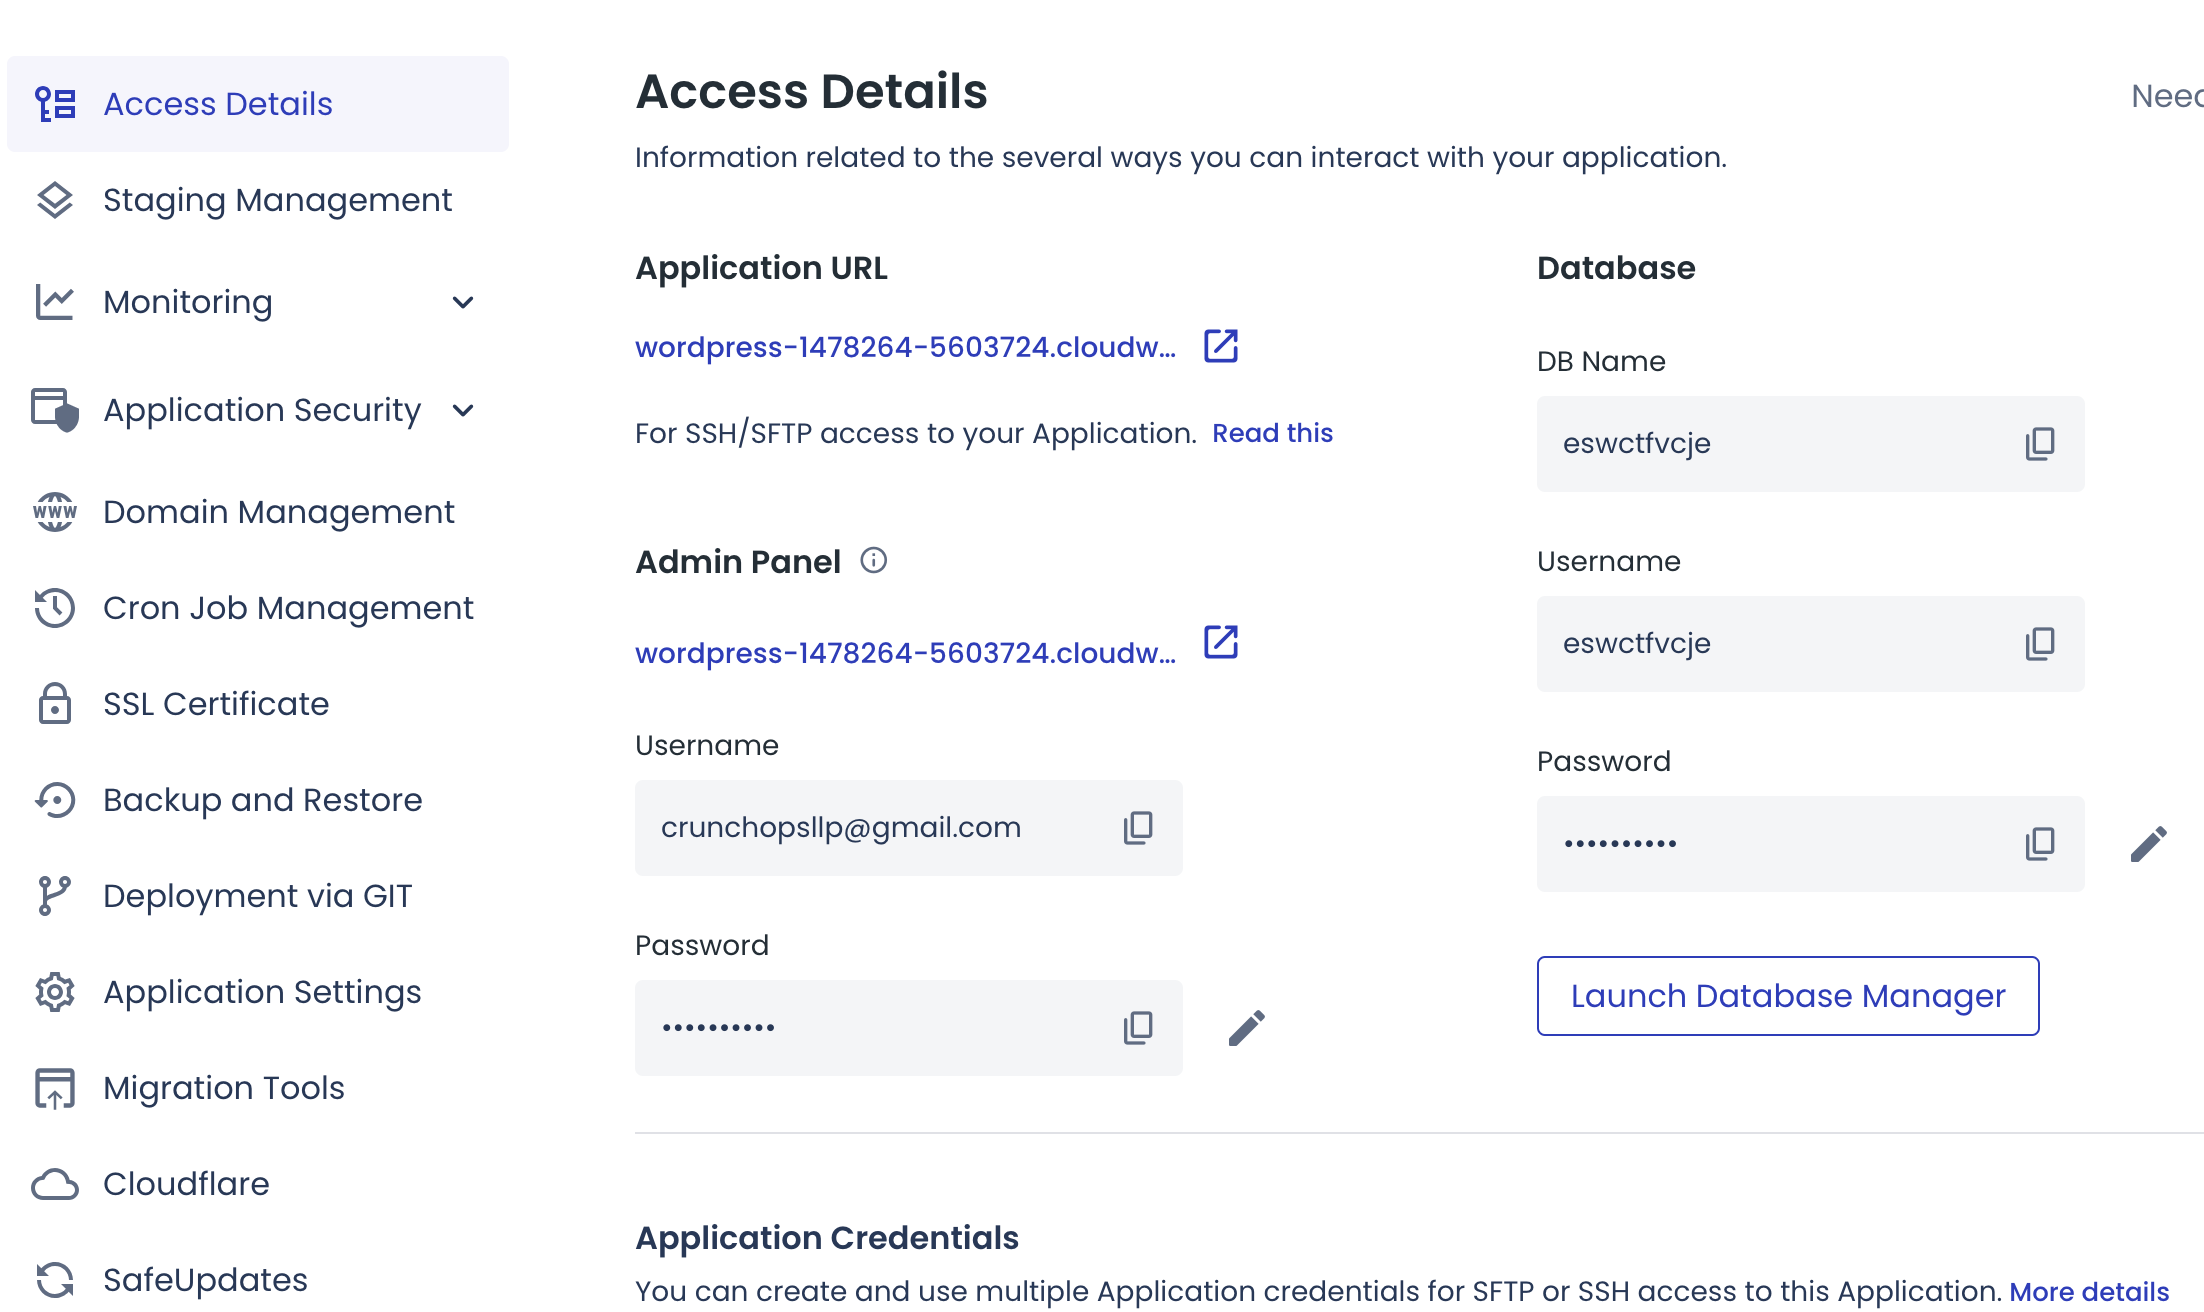
If you are self-hosting Wordpress, you would have to pay or setup custom solutions for all these functionalities. In Cloudways it all comes bundled with the managed hosting subscription.
Logging in to Wordpress Admin
To view your WordPress admin panel, click the link under Admin Panel url under Access details. It is a temporary DNS created by Cloudways so that you can setup your website before you map your main DNS to Cloudways.
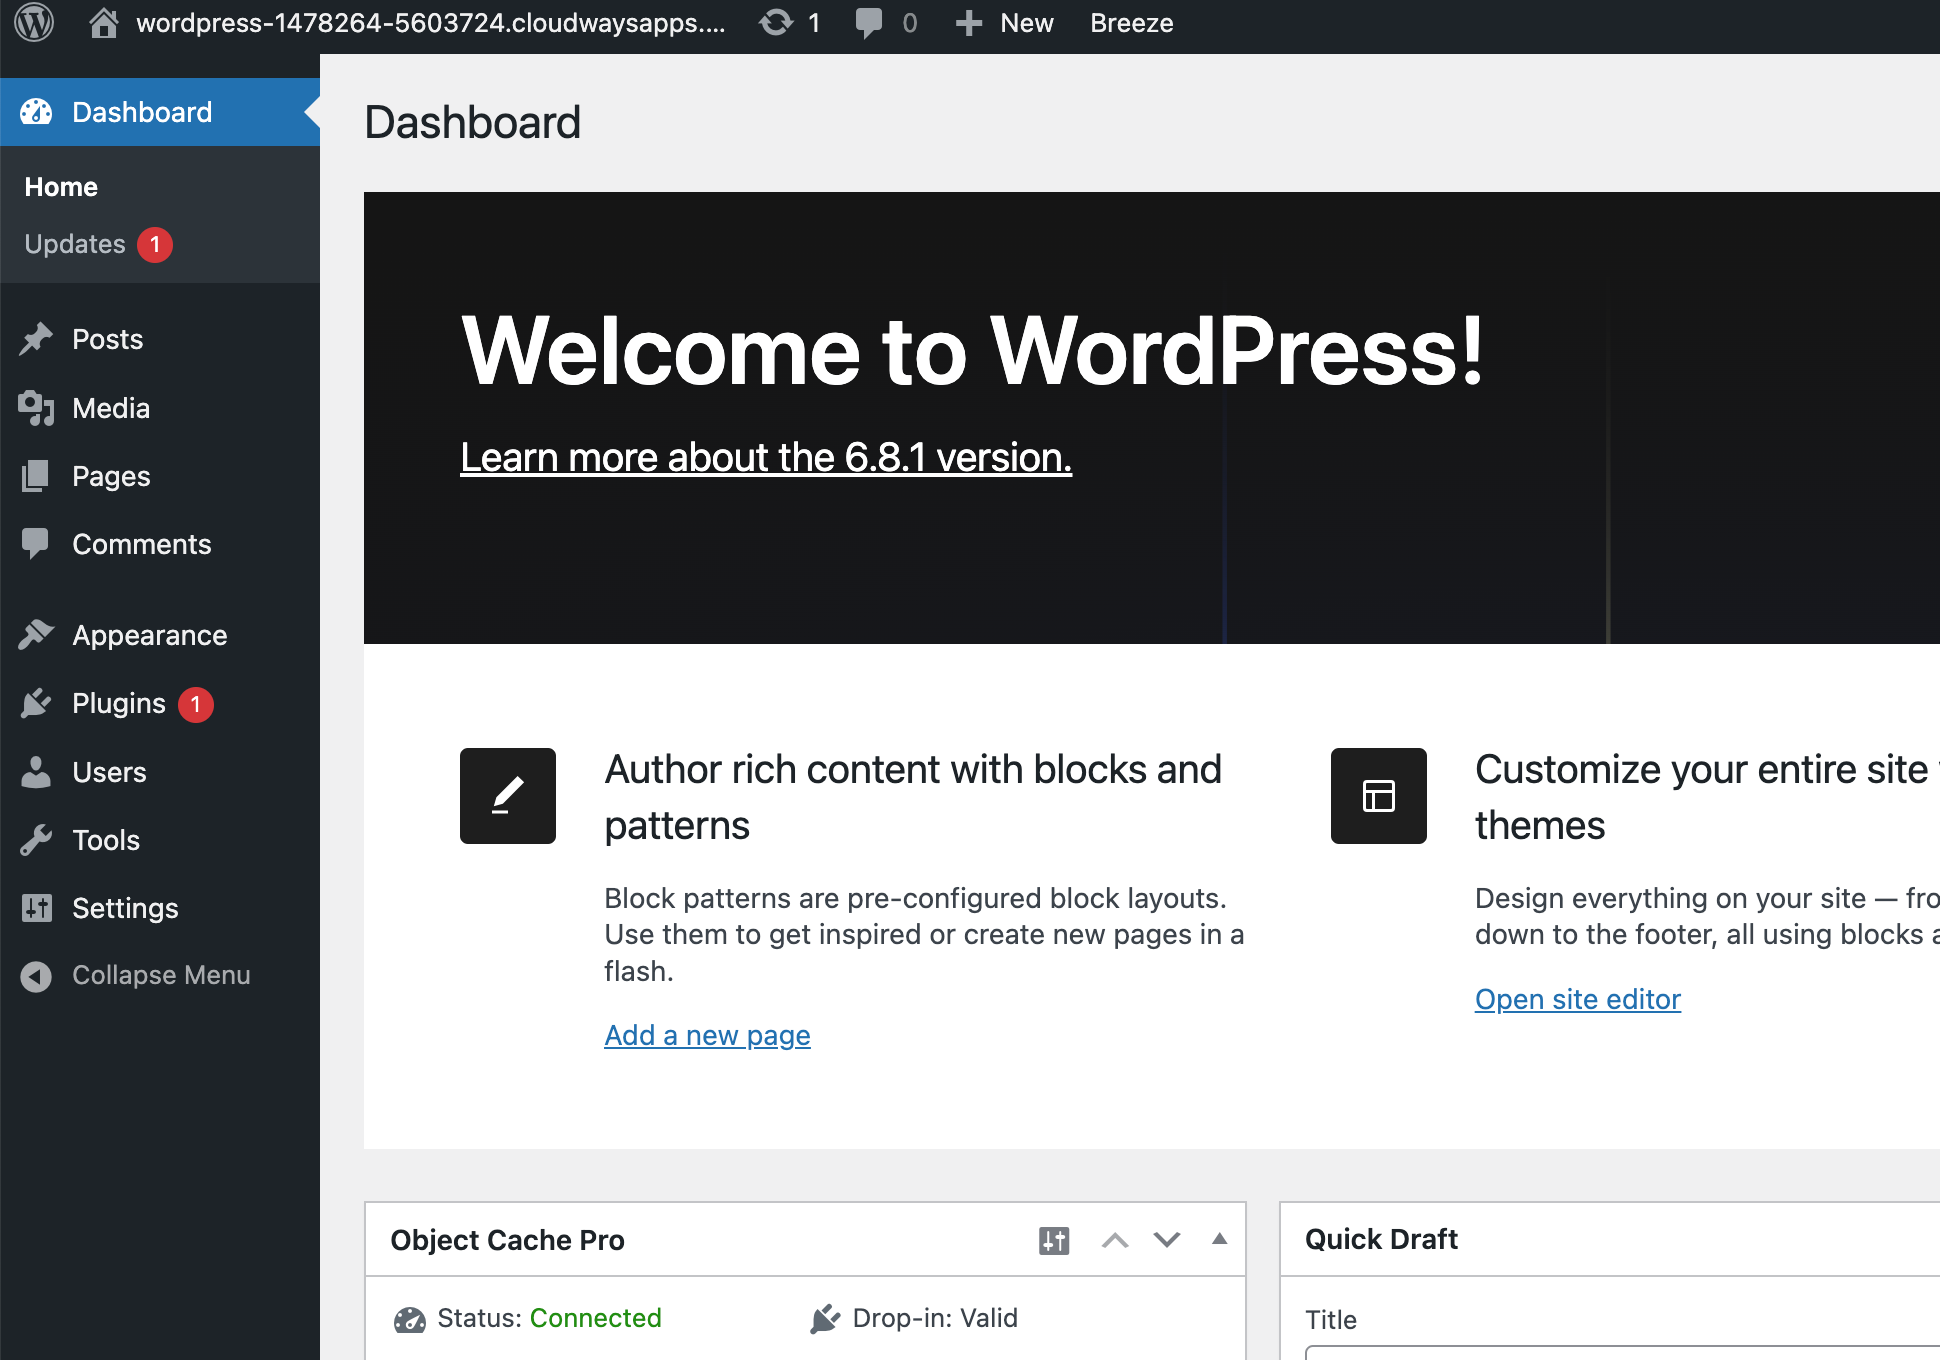
That's it. You have now setup your Wordpress website on Cloudways.
Upgrading from Cloudways Trial to Full Account
If you like the Cloudways service, you can upgrade your account to continue using the server and the deployed applications.
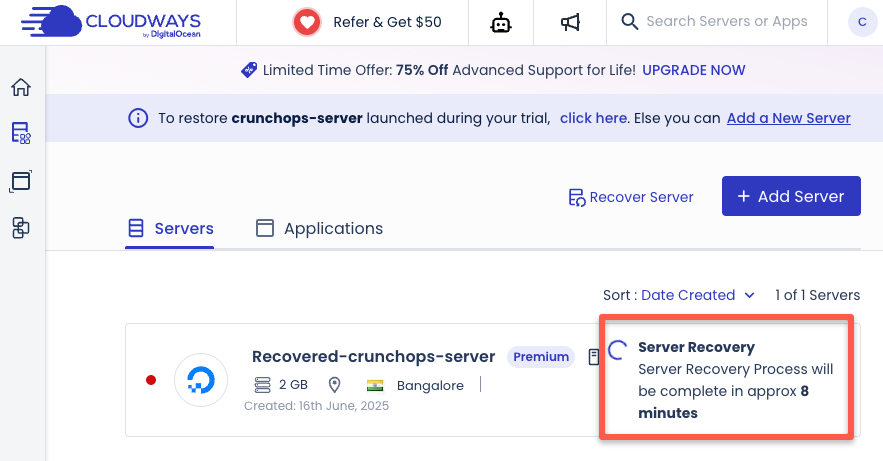
If you forget to upgrade within three days, your server will be deleted. However, once you upgrade your account, you'll have the option to restore the same server with all the application settings intact.
I forgot to upgrade on time, so I had to restore the server after upgrading my account. The restore process took around 8–10 minutes. The image below shows my server recovery after the upgrade.
Next Steps
Here are the next steps I’ll be taking to complete my WordPress website setup on Cloudways:
- Set up caching for faster page loads
- Configure CDN using Cloudflare
- Apply a clean and responsive website theme
- Install all essential WordPress plugins
- Set up monitoring (RAM, CPU usage, uptime, etc.)
- Configure email delivery (SMTP or transactional email service)
- Perform speed and performance testing across all pages
- Map the main domain to the Cloudways application
- Set up a free SSL certificate using Let’s Encrypt
- Change the default WordPress login URL to prevent brute-force attacks
- Review and configure all key SEO settings
- Enable automatic backups (daily or hourly)
- Test manual backup and restore to prepare for emergencies
- Create a staging environment for safe testing and updates
Wrapping Up
I’ll be documenting all these steps in detail as I continue my WordPress setup journey with Cloudways.
If you’re thinking about using Cloudways or need help setting it up, feel free to drop a comment. I’m happy to help.