In this blog, you will learn about setting up Jenkins Email notification.
Email notification for Jenkins build status is an important part each pipeline. It allows developers and relevant teams to get instance feedback on their pipeline job.
SMTP Credentials (Prerequisite)
You need to have valid SMTP credentials to setup the email notification.
If you are setting it up for your organisation, you can get the SMTP details from the network team.
If you are using AWS you can make use of AWS SES to create SMTP credentials.
Setup Jenkins Email Notification
Follow the steps below to set up the Jenkins Email notification.
Step 1: Create Credentials of SMTP Username and Password
The first step is to create a Jenkins credential with SMTP username and password.
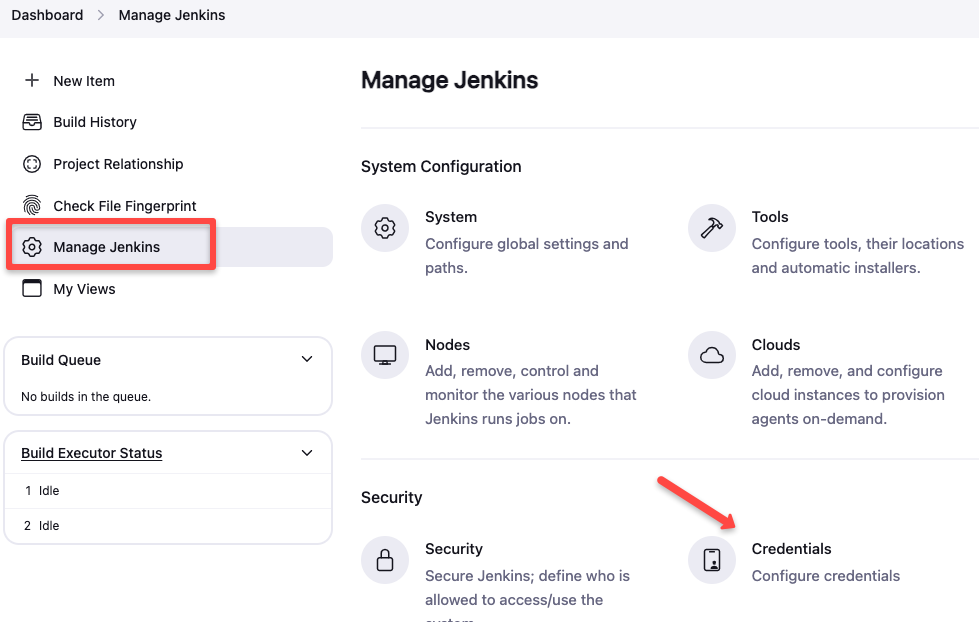
Go to Manage Jenkins -> Credentials and create a global credential.
Select the credentials kind as Username with password and specify your SMTP username and password.
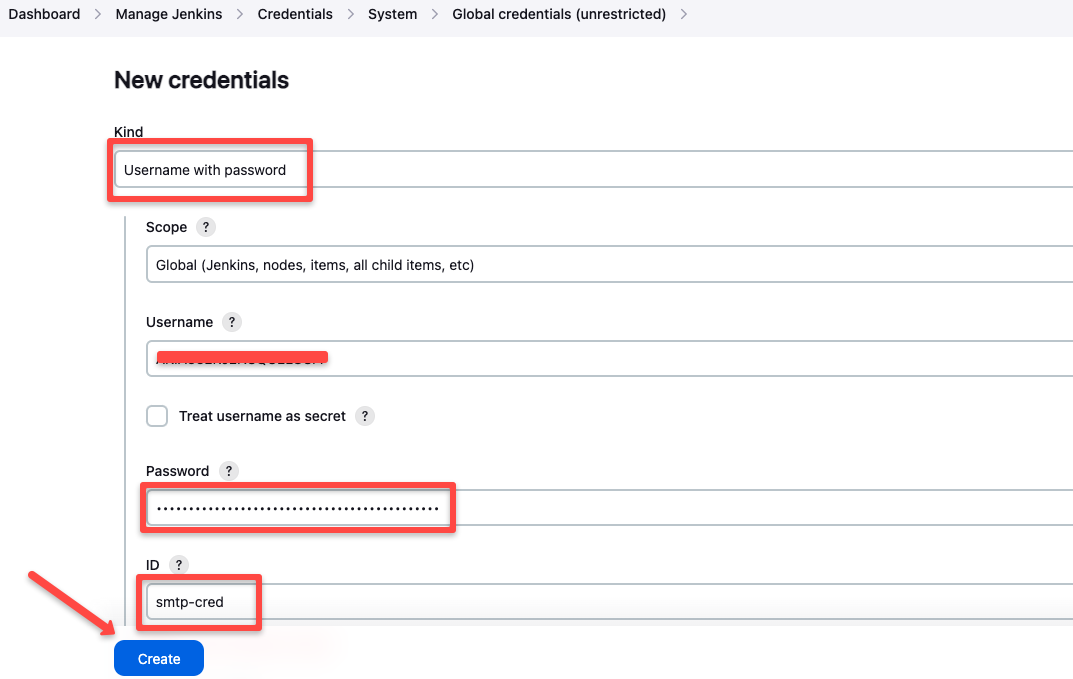
Then, press the Create button to create the credential.
Step 2: Configure SMTP Server on Jenkins
The next step is to configure the SMTP server on Jenkins. For that, go to
Manage Jenkins -> System scroll down to the Jenkins Location section and enter your from address, which is your SMTP server's name.
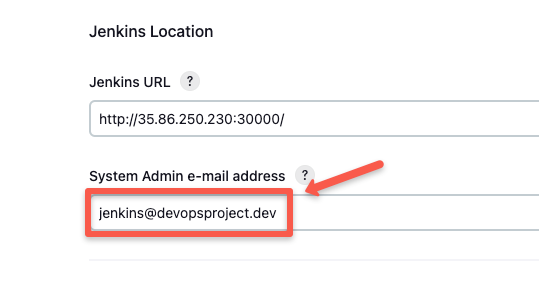
You have to specify the from address in the following format
example@<smtp-server-name>For example, my SMTP server's name is devopsprojects.dev, and I have given it as jenkins@devopsproject.dev.
Now, scroll down to the Extended E-mail Notification section and specify your SMTP server address, port, select SSL and select the credentials you created in the previous step.
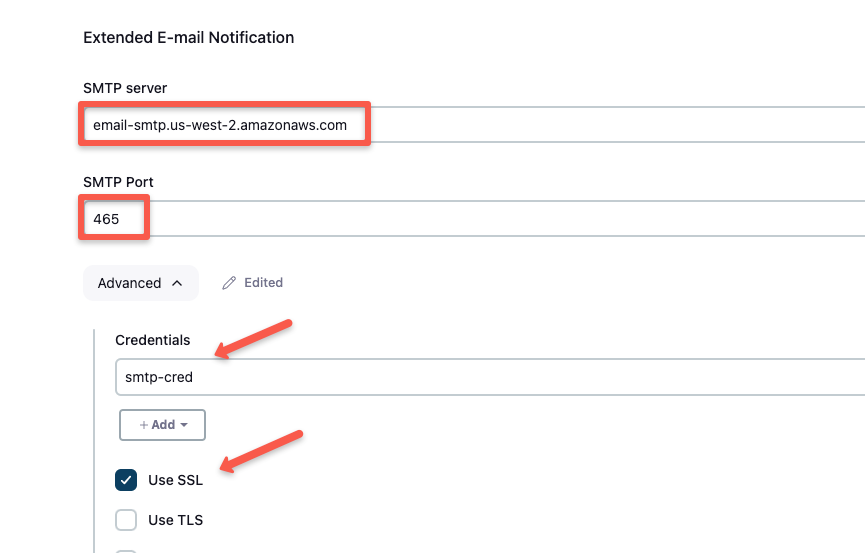
Make sure you have given your SMTP server's address and click the Save button to save the configurations.
Step 3: Test Jenkins Email Notification on a Pipeline Job
Once the SMTP server is configured, you can add email notification on each job.
An example Jenkins pipeline code for email notification is given below (highlighted code).The post block is responsible for sending email notifications.
pipeline {
    agent {
        label 'kubeagent'
    }

    stages {
        stage('Code Checkout') {
            steps {
                sh "echo 'Checkout Completed'"
            }
        }
        stage('Build') {
            steps {
                sh "echo 'Build Completed'"
            }
        }
    }
    post {
        always {
            mail to: 'aswin@crunchops.com',
                 subject: "Jenkins Build Notification: ${currentBuild.fullDisplayName}",
                 body: """\
                 Build Status: ${currentBuild.currentResult}
                 Project: ${env.JOB_NAME}
                 Build Number: ${env.BUILD_NUMBER}
                 Build URL: ${env.BUILD_URL}
                 """
        }
    }
}
The label 'kubeagent' on the agent block is the label of my agent make sure to replace it with your agent label.
Also, make sure to update the email ID before starting the build.
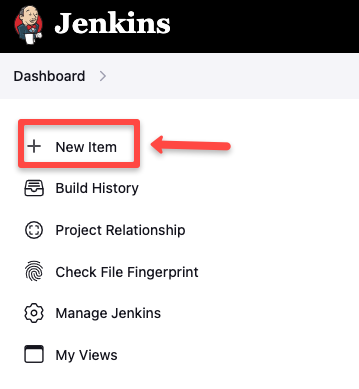
Now, Create a new pipeline using the above pipeline code.
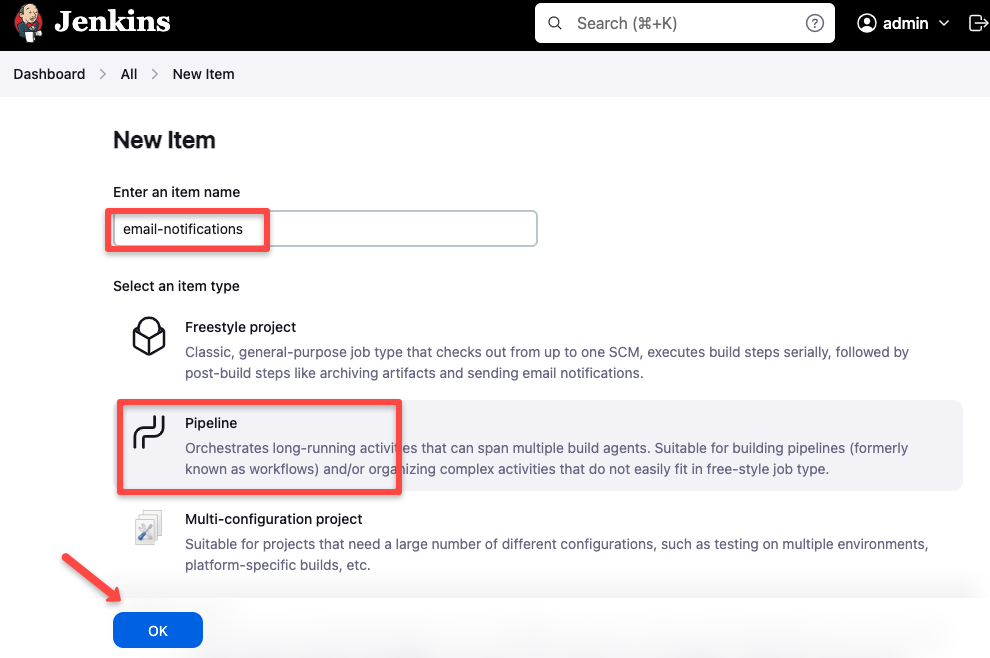
Give a name to the job and select the type as Pipeline
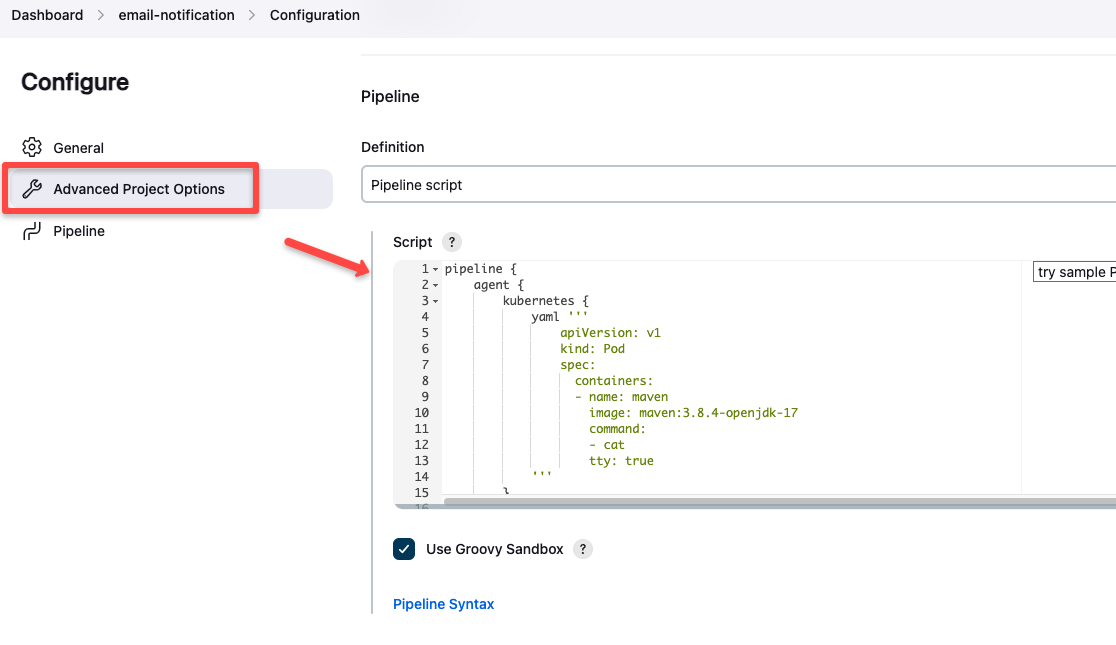
On the next page, go to Advanced Project Options and paste the above pipeline code inside the script block
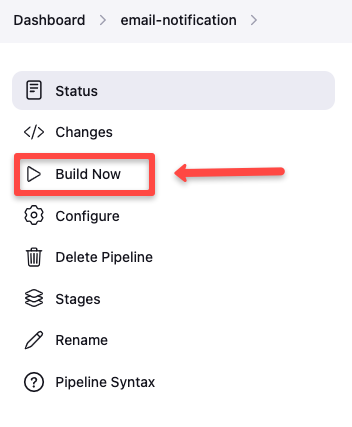
Once the Job is created click the Build now button to start the build
You can see the build is successful
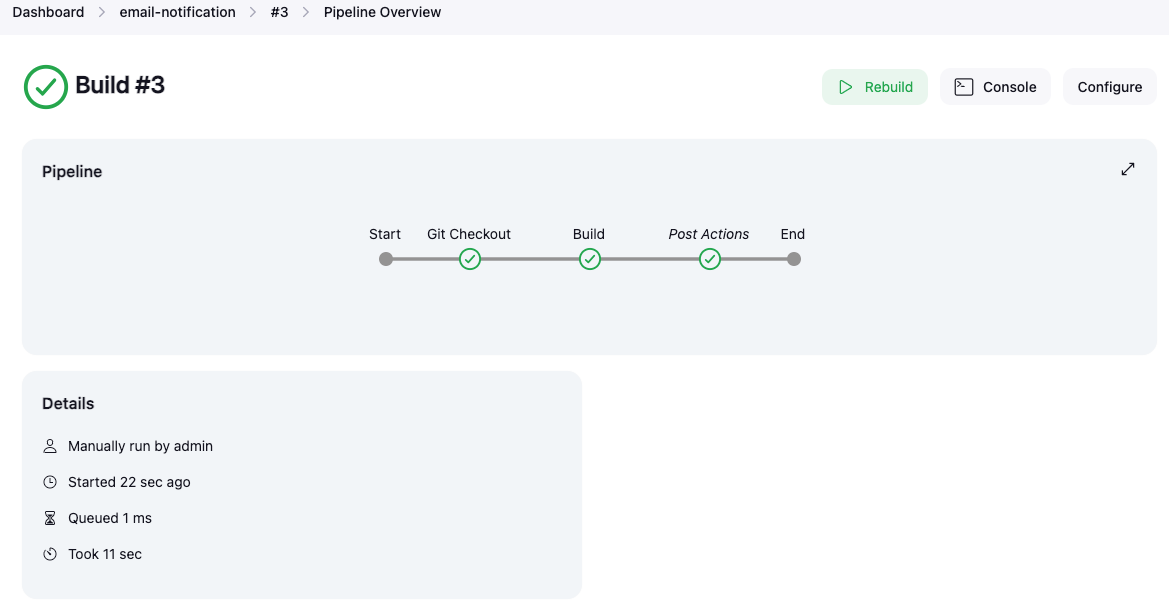
And you will receive an email notification on the specified email as shown below
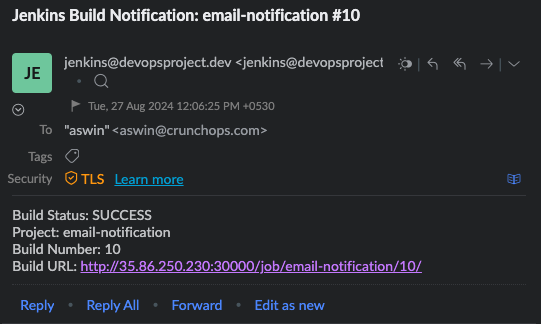
Now, let's see what happens if the build gets failed.
I have added the following stage in the pipeline to fail the build.
stage('Test') {
    steps {
        sh "exit 1"
    }
}
You will receive the below mail for failed build
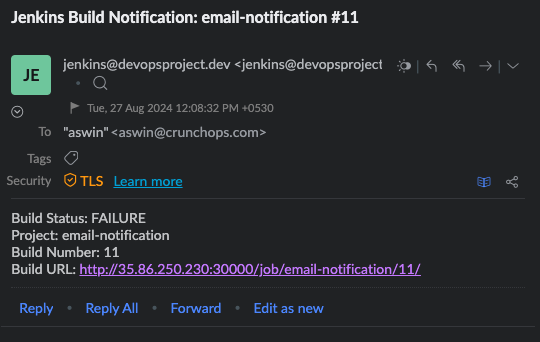
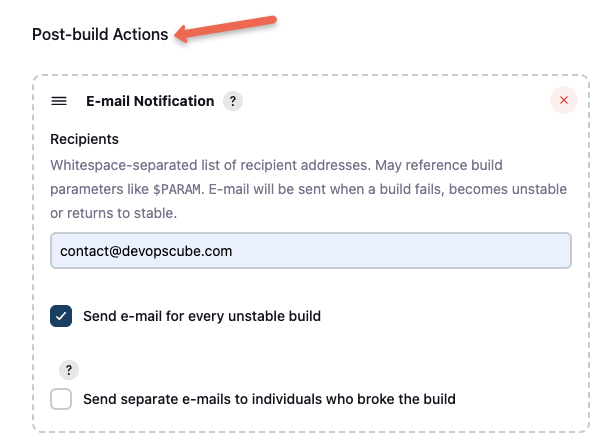
If you are using freestyle job, you can configure the email notification in the post build actions as shown below.
Email Notification Using Shared Library
Follow that steps given below to setup email notification using Jenkins shared library.
Step 1: Configure Jenkins Shared Library
We will be using the shared library in the pipeline, you can find the script in the following GitHub repository.
https://github.com/techiescamp/jenkins-shared-libraryIf you already have a shared library, you can make use of the EmailNotification Function and the related HTML template from the resources folder.
If you want to use our shared library repo, follow the below steps to configure it.
Go to Manage Jenkins --> System and scroll down to the Global Trusted Pipeline Libraries section and configure shared library as shown below
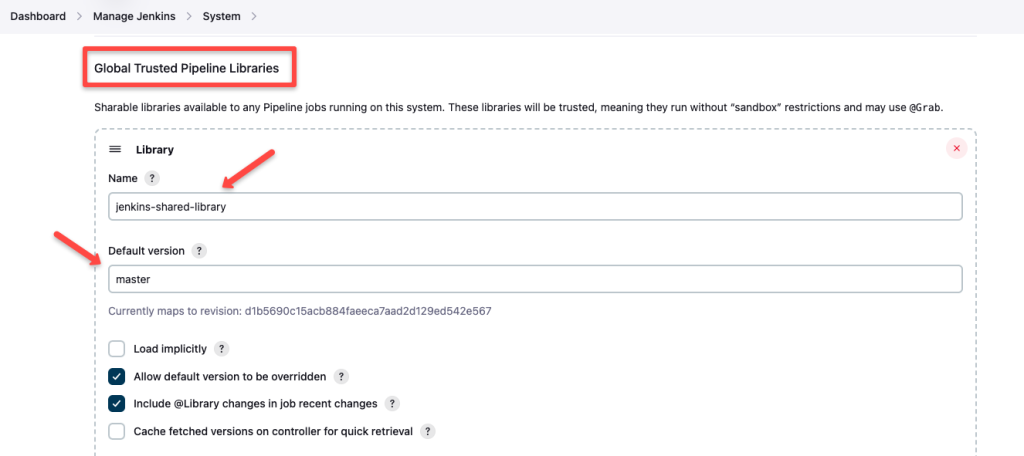
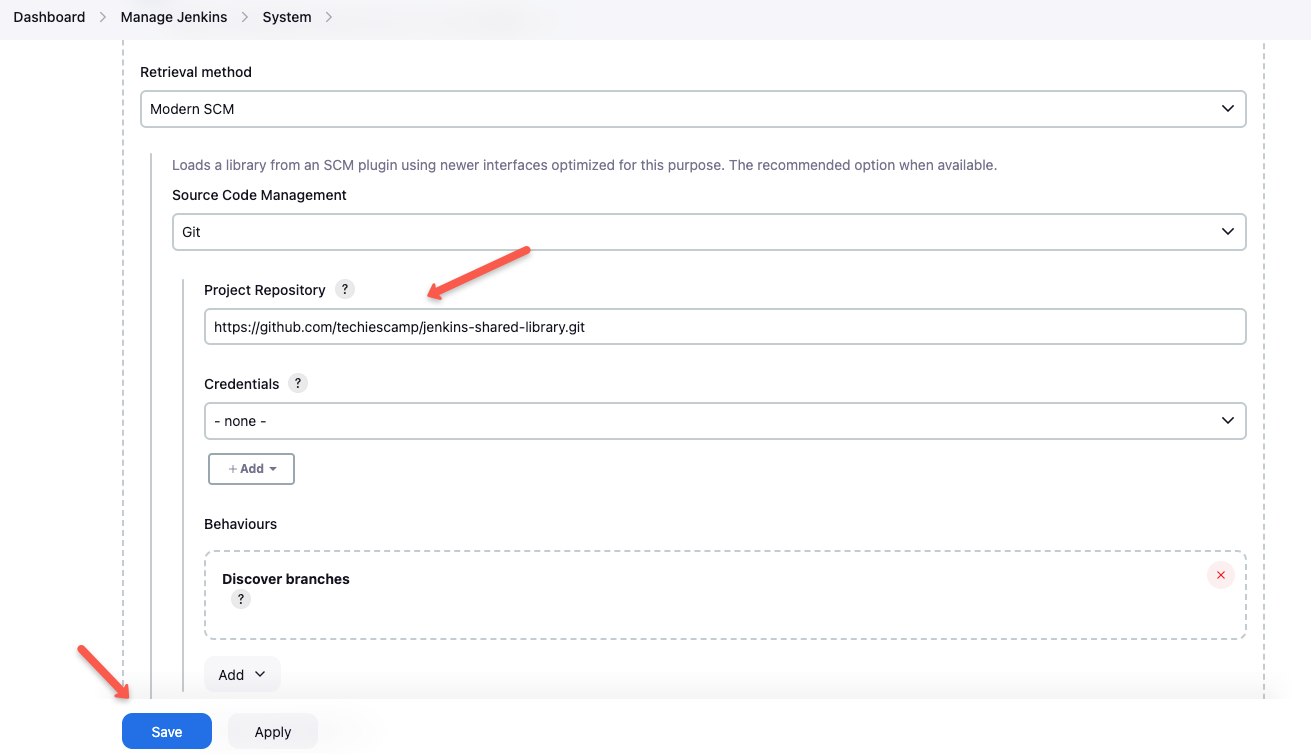
Step 2: Test Jenkins Email Notification with Shared Library
An example pipeline code for email notification is given below
@Library('jenkins-shared-library@master') _
pipeline {
    agent {
        label 'kubeagent'
    }

    stages {
        stage('Git Checkout') {
            steps {
                sh "echo 'Checkout Completed'"
            }
        }
        stage('Build') {
            steps {
                sh "echo 'Build Completed'"
            }
        }
    }
    post {
        always {
            script {
                emailNotification("aswin@crunchops.com")
            }
        }
    }
}
Make sure to update the Email ID before starting the build.
The groovy script for email notification and its template is placed inside the following directory
├── resources
│       └── notify.tpl
├── src
└── vars
      └── emailNotification.groovy
The groovy script uses the notify.tpl template in the resource folder, you can get the directory structure and code used in this lesson from Github.
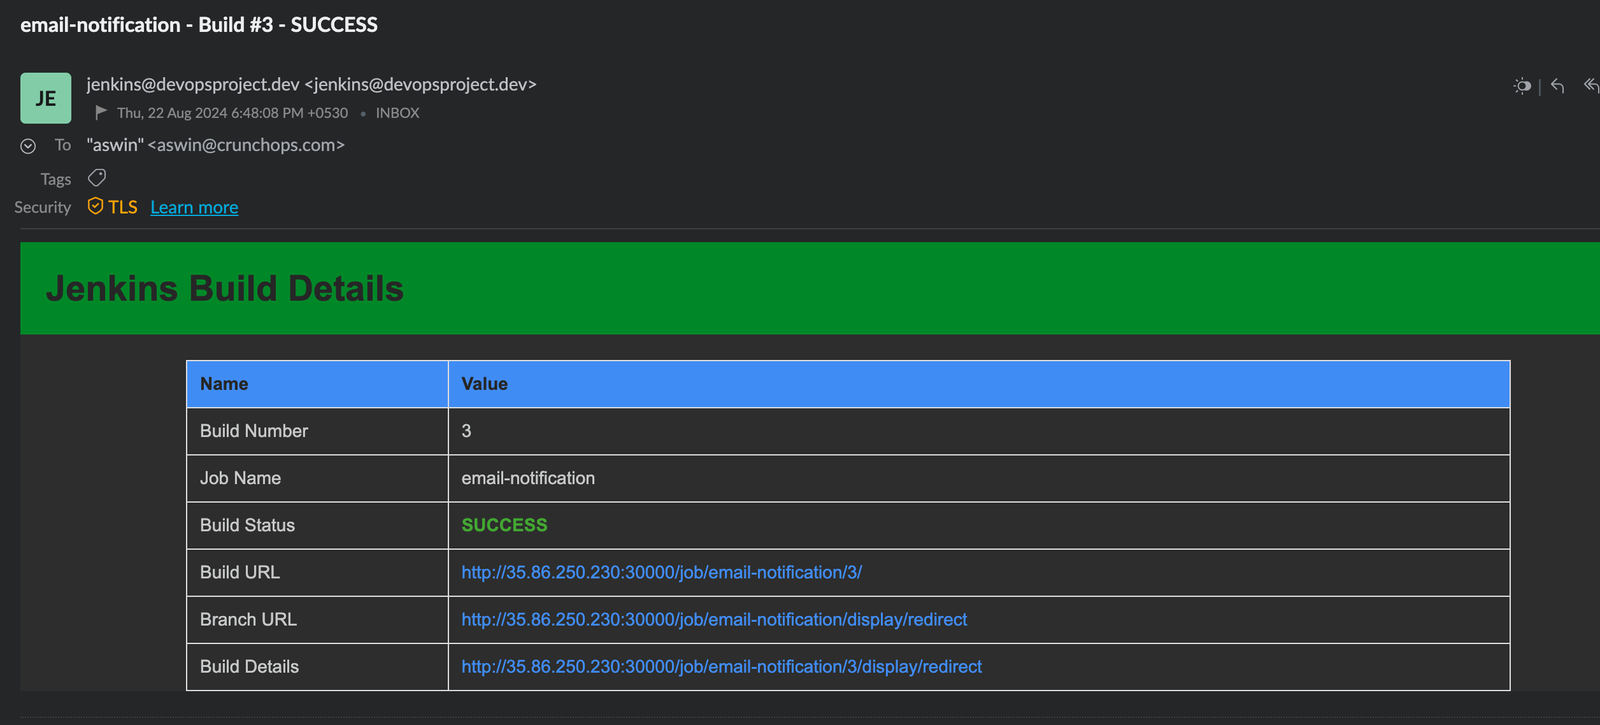
Create a pipeline with above pipeline code, and once the build is completed, you will receive an email notification on the specified email as shown below
And, this is the notification you will get for a failed build.
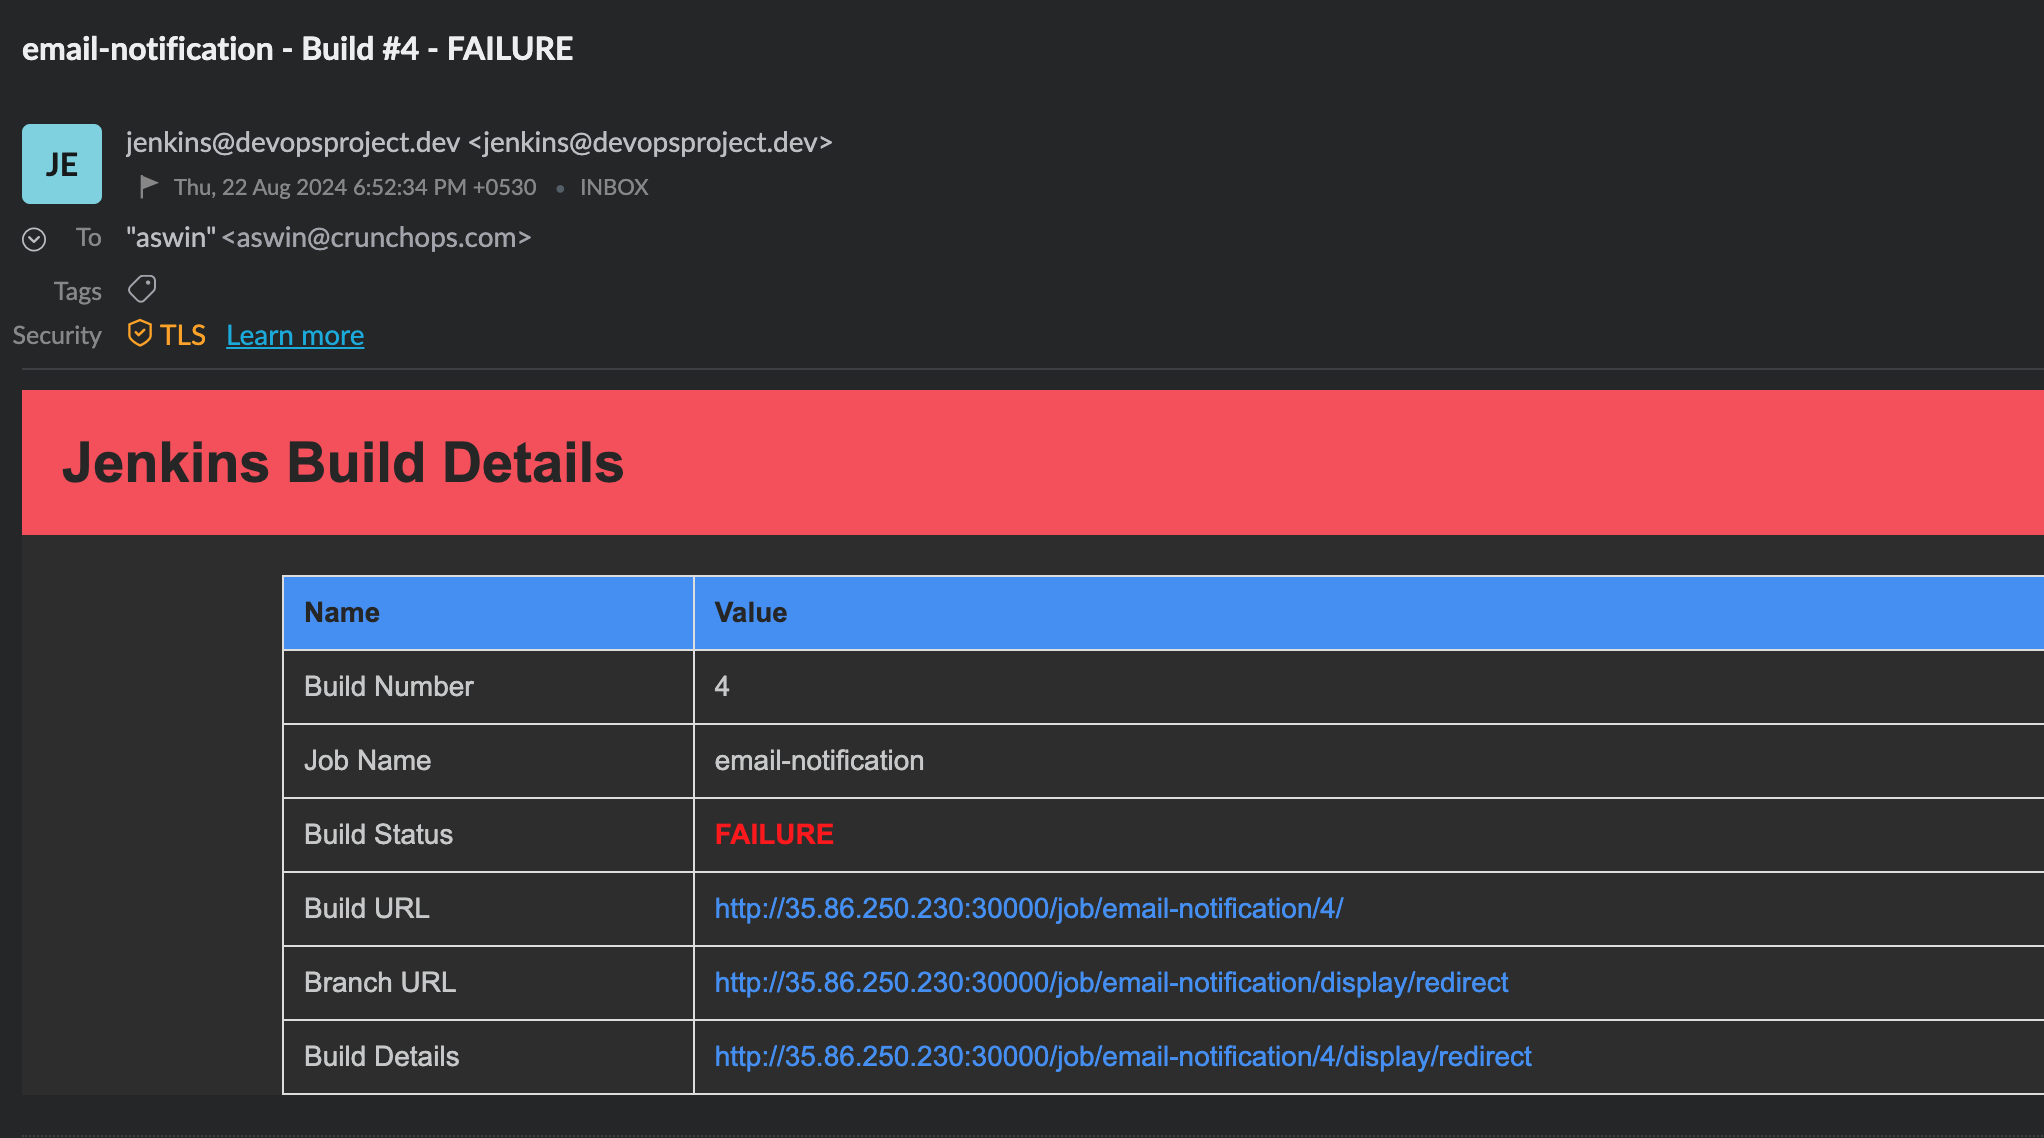
You can see that the URL for the build, the branch, and the build details are given directly in the email notification itself.
Troubleshooting Jenkins Email Notification
The following are the common reasons why your Email notification is not sent properly after every build.
- Check the SMTP configuration you did on the Email notification setup step 2. Check if the from address (System Admin e-mail address), SMTP server address, and port are correct.
- Check if the SMTP server credentials stored in the Jenkins credentials are correct, and make sure you are using the correct credentials in the SMTP configuration.
- Make sure you have defined the Post Build Action block in the pipeline correctly.
- Check if the correct recipient Email is given in the pipeline.
- The SMTP port you are using may be blocked in the security group of the Jenkins server. Make sure to allow the port required to connect with the SMTP server, in our case it’s port 465.
- You may receive your Email, but it's in spam. Check if your SMTP server is configured with DKIM (Domain Keys Identified Mail) and SPF (Sender Policy Framework).
Conclusion
In this blog, you have learned about setting up Jenkins Email notifications and tested it on a pipeline job.
Also, you have learned about setting up Jenkins shared library and using it to send Email notifications.


