

In this blog, I am going to setup AWS SES for you.
The necessity of email notifications is very important, we all receive emails each day for various purposes, like promotion-related emails, newsletters, application updates, authentication emails, etc.
If you are a person who is looking for this kind of requirement and also wants to send hundreds of emails each day, then you need an email service.
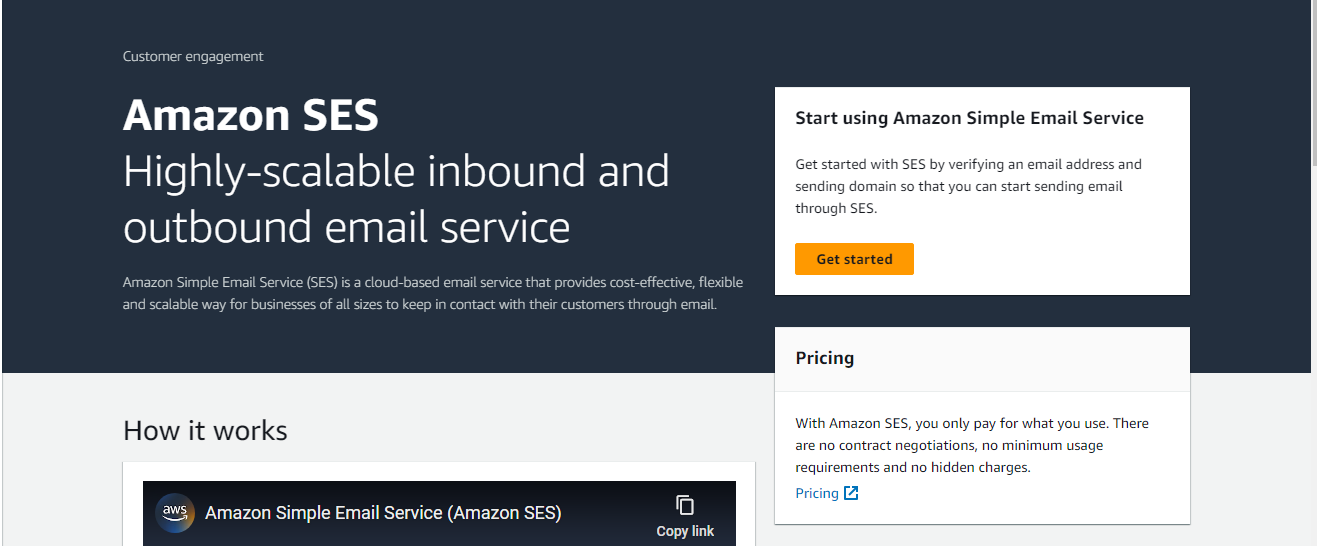
In the cloud environment, AWS provides a service called Simple Email Service (SES), which is capable of sending and receiving emails in a pay-as-you-go manner.
Before we move to the setup, let's see how the SES works.
AWS SES Workflow
The following workflow explains the process of mailing from the sender to the receiver.
email.devopsproject.dev). So the domain name need to verified by the DNS server, in our case it is Route53.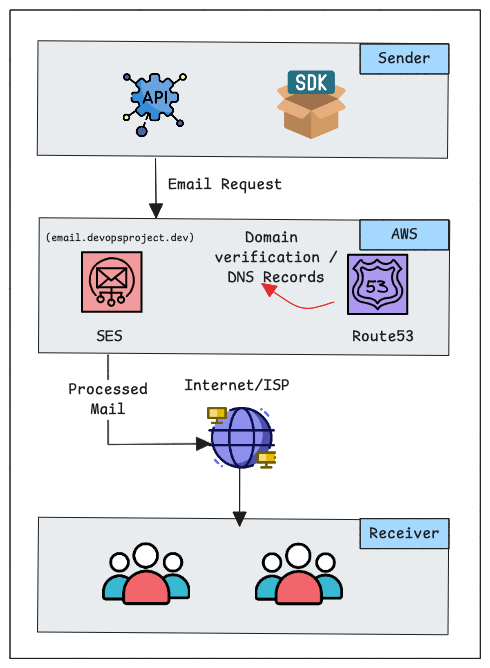
The explanation of the AWS SES workflow starts from.
- An application (Sender) creates an API request to the AWS SES to send emails to users.
- Verified SES services will process the email and send it out to the Internet.
- The Internet Service Providers will pass it to various mail servers (e.g., Gmail, Yahoo, Zoho).
- Once it reaches the correct mail server of the receiver, the email will be verified as not spam, and then it will reach the inbox.
Now, you have got understand how AWS SES works so that we can start the setup.
Step 1: Create Identity for SES
You can create an SES service with your email address as the identity, but email has some limitations, so providing a valid domain name is recommended.
In this setup, I am using a valid domain name devopsproject.dev, which is hosted in Route53.
Open the AWS console and navigate to SES.
On the next window, under the configuration section, select the verified identities tab.
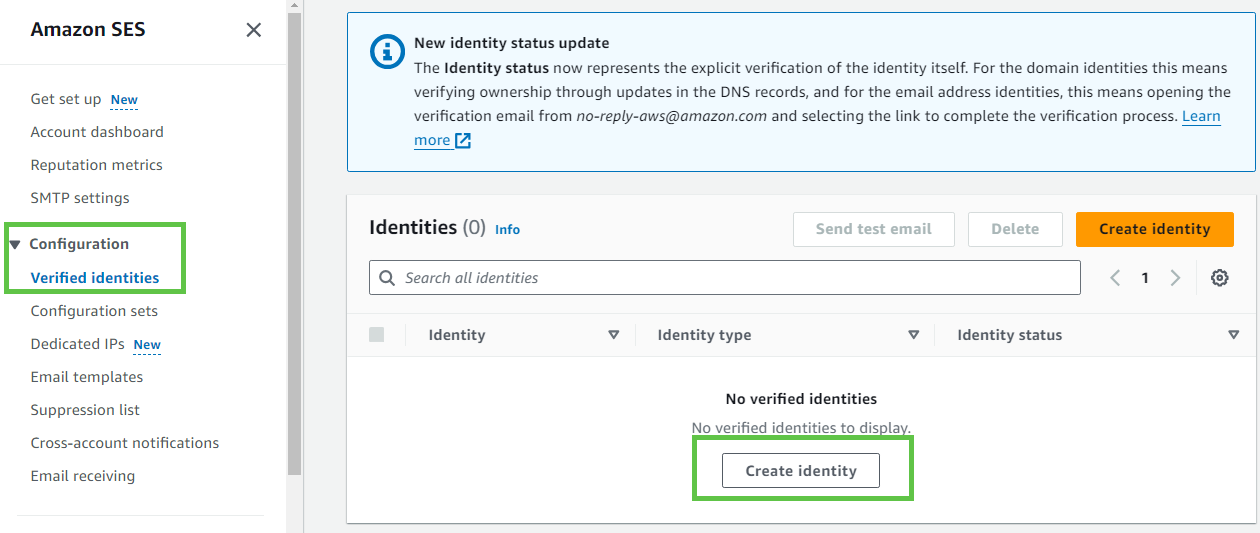
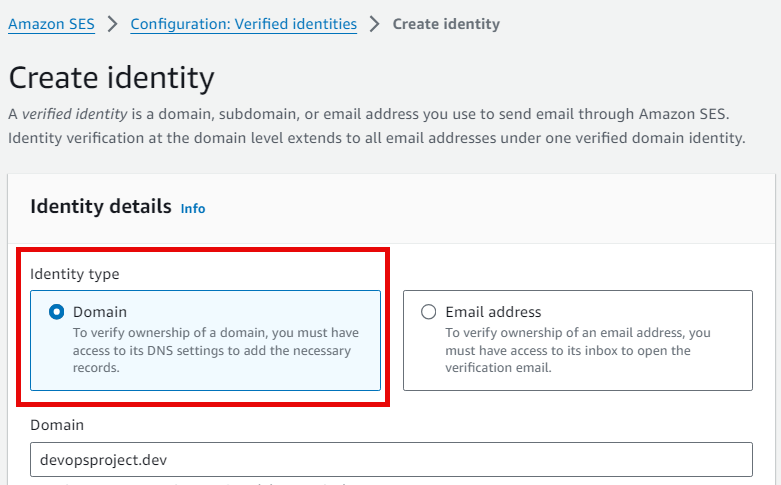
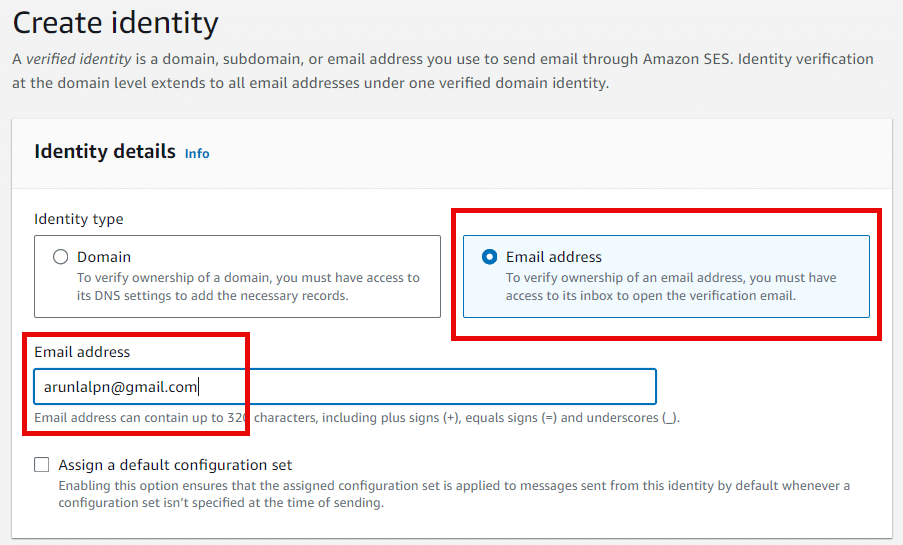
A new window will open, and you can see two options, which are Domain and Email address. You can choose one of the methods that suits your requirements.
Step 2: Choose the Identity Type
If you are choosing Domain, you should provide a valid domain name. If you select Email address, you can provide any of your email addresses.
For this setup, I am choosing the Domain Identity type.
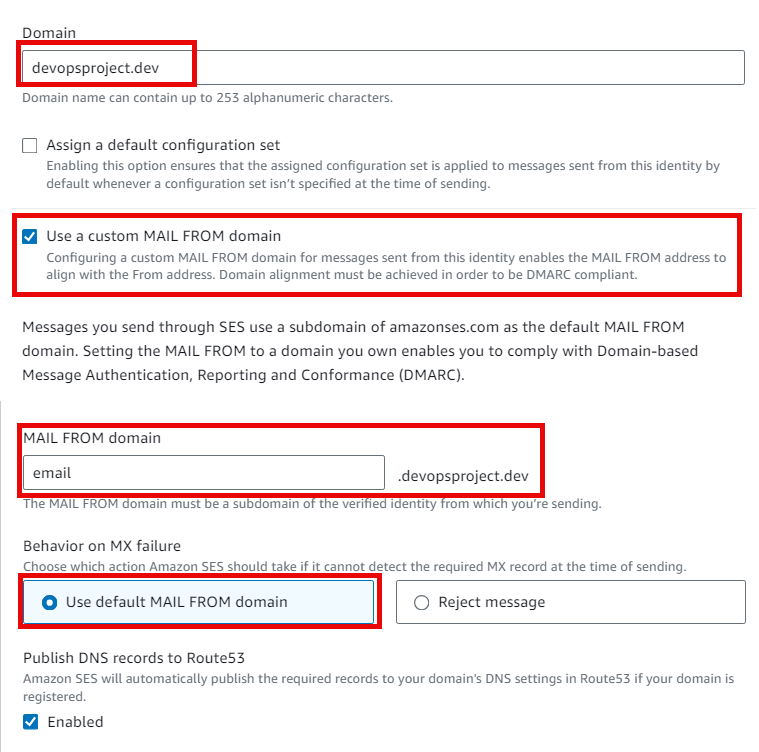
After choosing the identity type and providing the domain name devopsproject.dev, a few options will be available to customize the service.
The first option you will see is Assign a default configuration set. sets are a set of rules that work with sending emails, example,
- You can use a dedicated IP address for your marketing emails, and in SES, you can create IP pools.
- Integrate Transport Layer Security to make communication more secure.
- Use a subdomain to handle the redirected responses.
- You can analyze the bounce and compliance emails with the help of CloudWatch.
- You can also create a suppression list based on the bouncing and compliant emails.
These are the options you will see when you create a configuration set. You can create multiple configuration sets and attach them to your emails.
Step 3: Create a Custom Mail From Domain
The second option is to use a custom MAIL FROM domain. You can see only if you choose the Domain identity.
Here, you can provide a subdomain to send emails.
For example, my domain name is devopsproject.dev, and I want all of my sending emails from address should be the subdomain, which is email.devopsproject.dev.
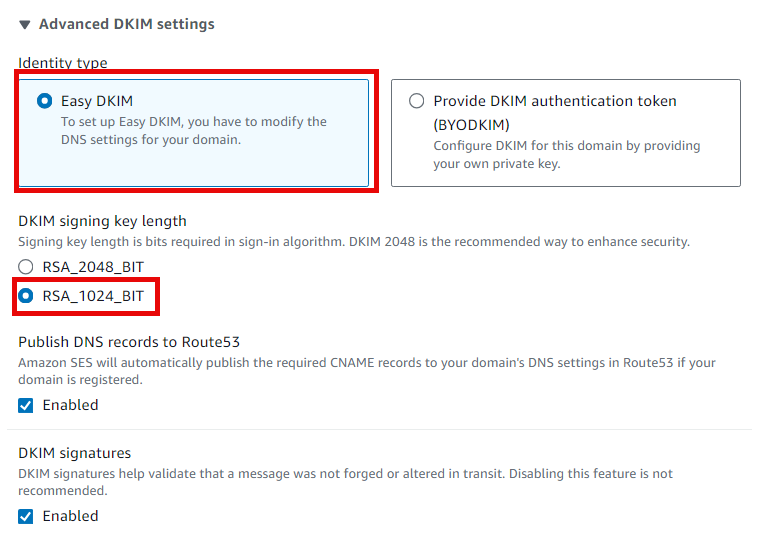
Step 4: Authentication Mechanism
The third one is an authentication mechanism, which is DomainKeys Identified Mails (DKIM).
This is a recommended option, and this security feature helps the sender's mail server to verify the domain and the receiver's mail server to ensure the authenticity of the mail.
Step 5: Update DNS Records
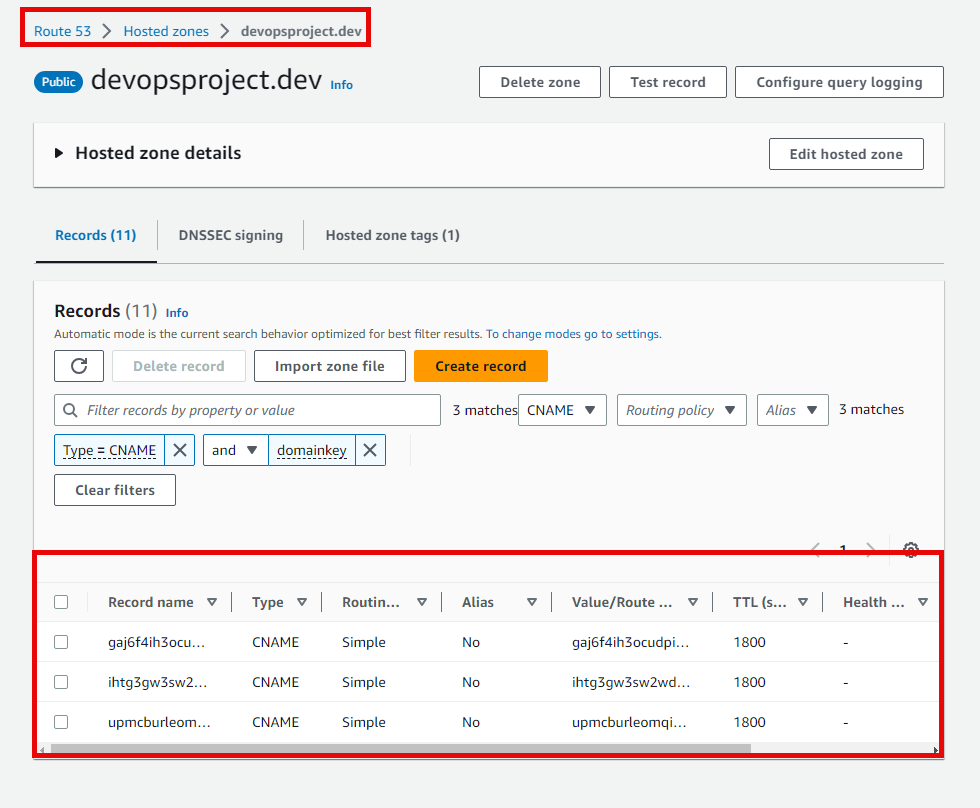
This setup will create CNAME, MX, and TXT DNS records, and you can directly update them in Route 53 if your domain is hosted in Route 53, otherwise, you have to update the DNS records to your intended DNS server manually.
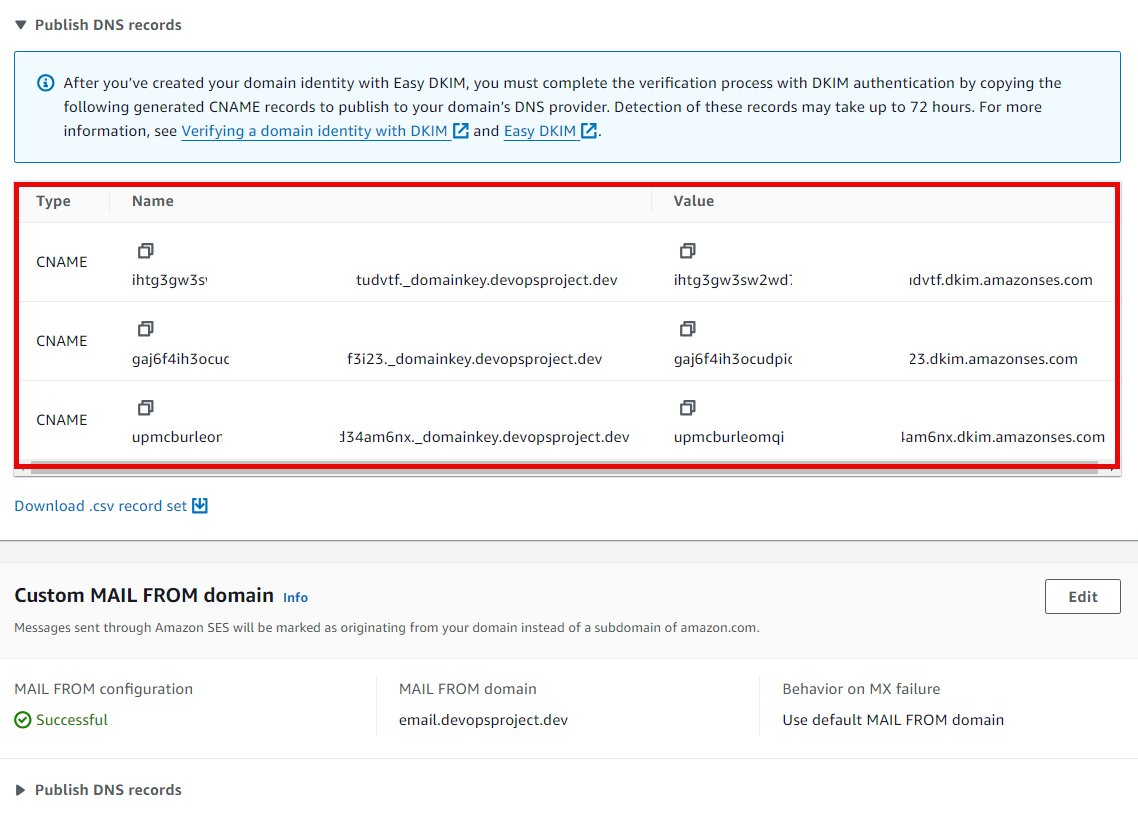
The DNS server will verify the records; until then, the identity will not be verified.
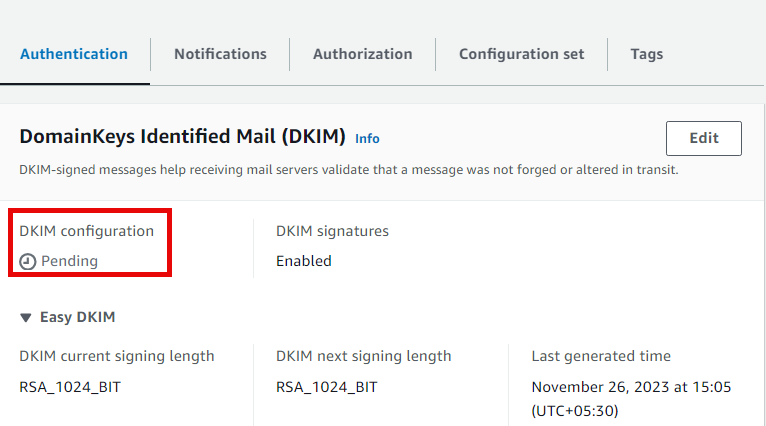
For me, it took only a few minutes to get verified, in your case it may take an hour or so, and if it is not verified, ensure your DNS records are properly stored in the DNS server.
This is how the record is stored in Route 53.
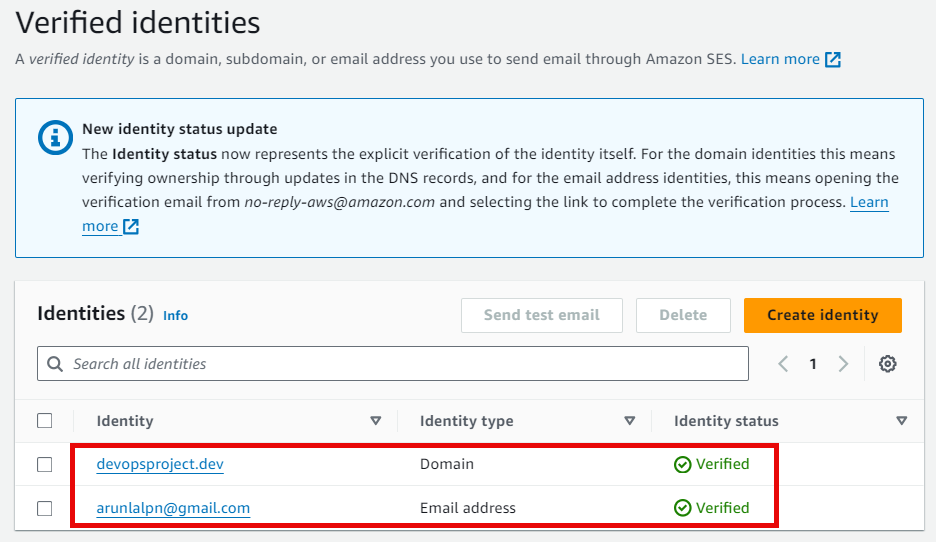
Once the verification process is completed, you can see the verified mark on your identity status.
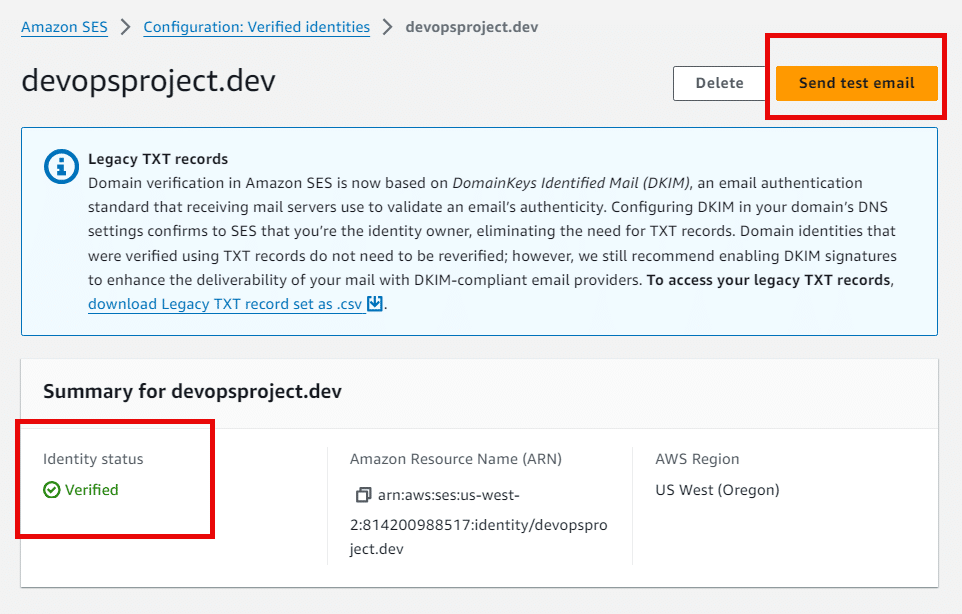
Now, you can see in the top right corner that the Send test email function is enabled, so you can test the email service, but one thing you have to know is that now the service is in the Sandbox environment.
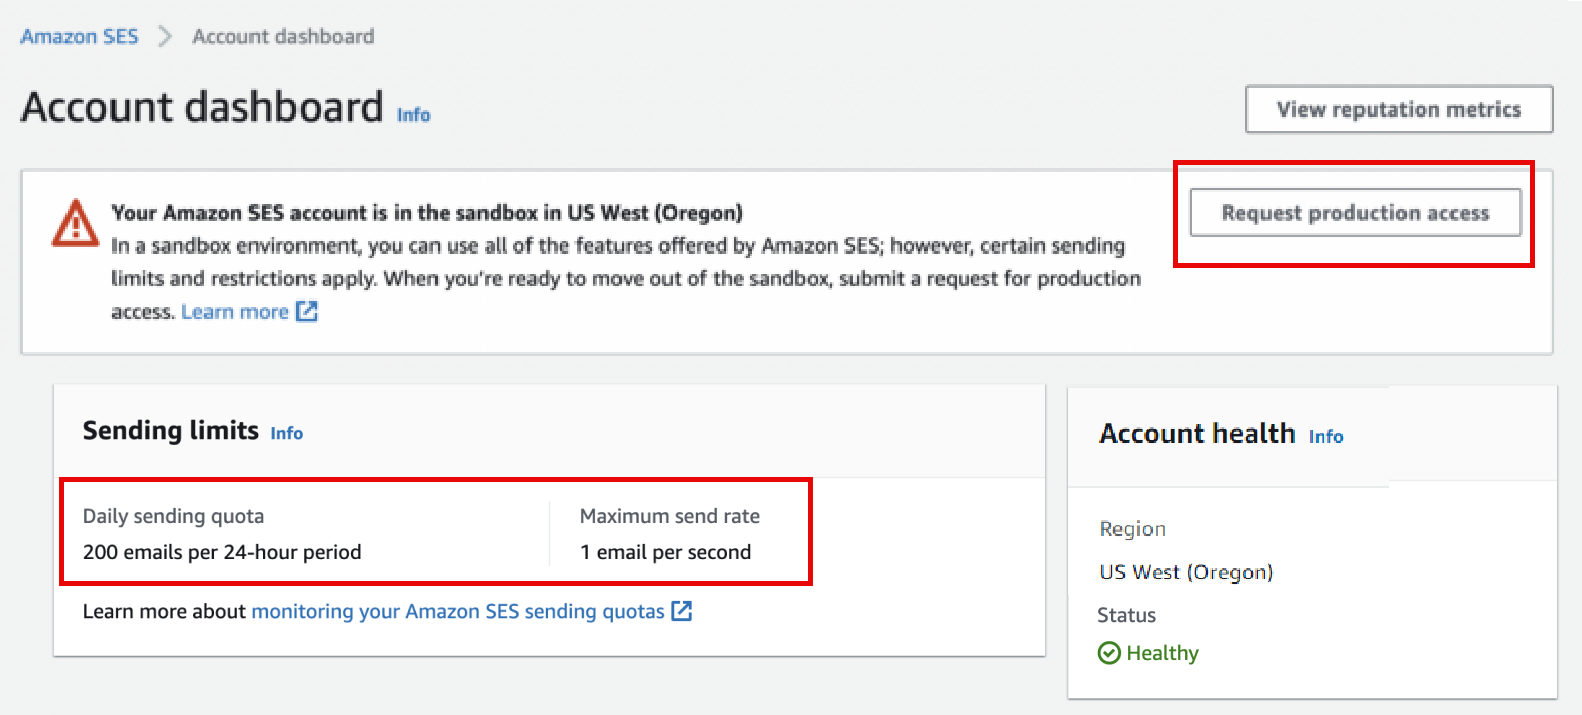
Step 6: Sandbox Environment
Sandbox is only used to test the email and it has email limits that only 200 emails can sent each day, also, if you want to send an email to someone, that receiver's mail ID should be verified.
To verify the receiver's mail ID with AWS SES, you have to follow all the steps we have done for the domain validation, but here, instead of Domain, we use an email address.
The receiver will get an email with a URL, and clicking that link will verify the identity.
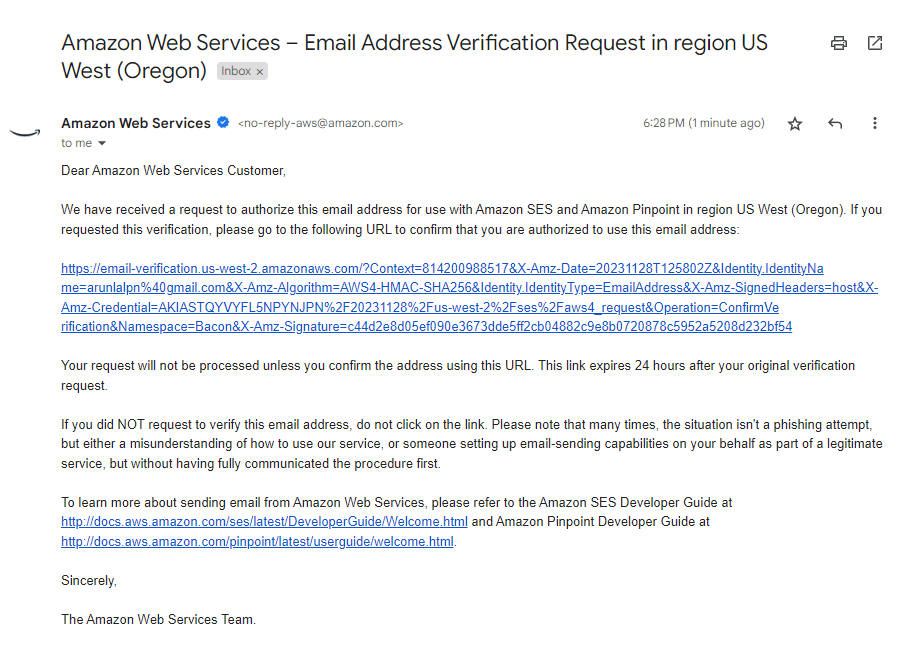
Once the receiver's identity is verified, you can send test emails to that specific email address.
Our configurations and the testing process are completed, now is the time to get out of the Sandbox environment.
Step 7: Get Over From Sandbox Environment
In the account dashboard, we can see the request production access tab. Click that will navigate to another page, where you have to send a request with valid information.
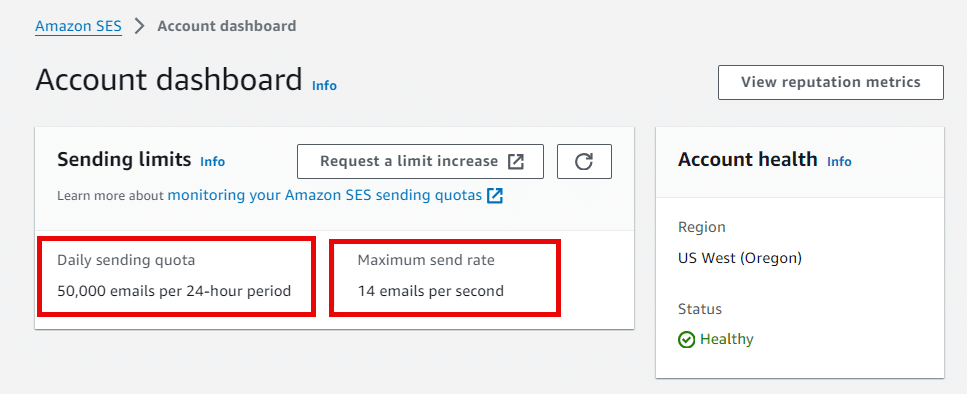
The request will take almost one day to process, after that, your limitations will be removed.
Then you can see the dashboard like this, and from now on, we won't have to verify the receiver's email IDs to send emails.
Step 8: Send Emails through AWS SES
Navigate to the Configuration section and open the verified identities. Then click to open the domain devopsproject.dev.
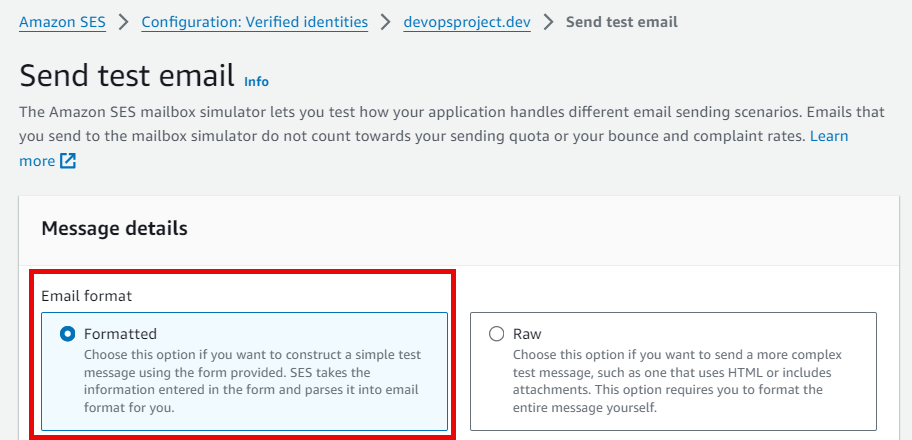
Click the send test email tab, and a new page will open. Here you can compose your emails.
SES provides two Email formats, one is Formatted and the other one is Raw.
If you want to create a custom Email format, then choosing RAW would satisfy your preference, the Multipurpose Internet Mail Extention Standard (MIME) helps you create the emails.
I am doing this for testing purposes, so I am choosing a Formatted format to send a mail.
In the next step, you have to provide the from-address, I am giving the subdomain prefix, which is email.
Instead of email, you can give other prefixes like bounce, support, etc, based on your email.
In the scenario section, you can choose a predefined one, like successful delivery or automatic response, or you can choose a custom one.
Then the remaining things are the subject and body part, and if you already created a configurations set, you can choose that too, but that is optional.
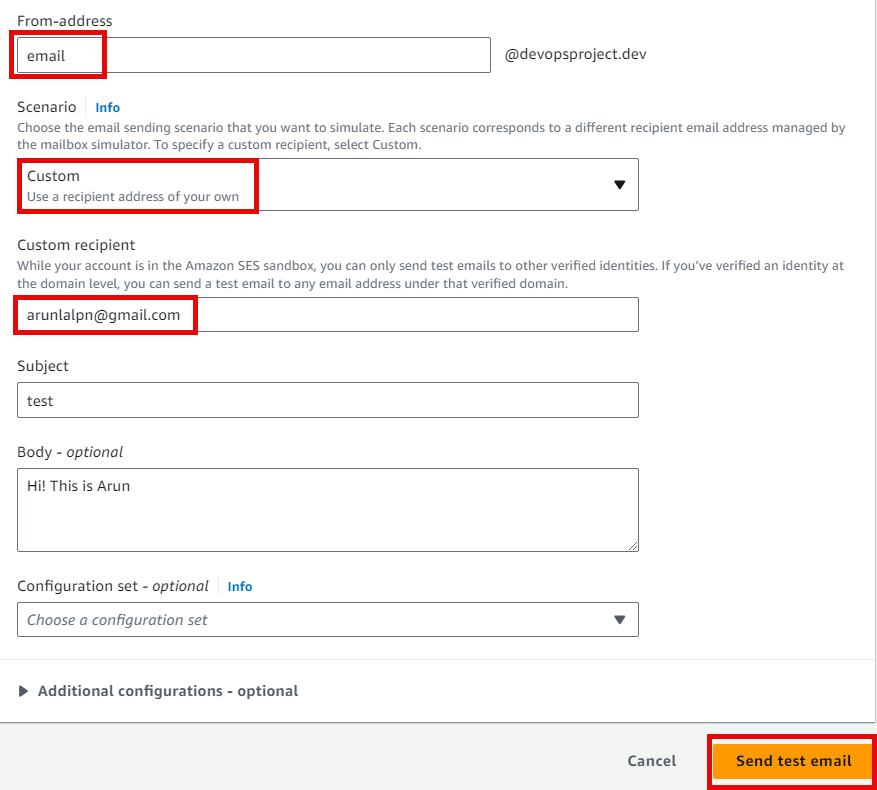
Once you send the mail, you will get the output like this.

One more thing I want to include in this is that we know we can create a configuration set, which rules, we can attach with the sending emails, same as we can create rules for incoming emails that you can see in the Email Receiving tab.
Conclusion
This is just a base setup of the AWS SES, there are a lot of options available, explore them and include them when you implement them in real situations.
Understanding more about the configuration set and the Email-receiving options will give you more customization features.
Also, your Email templates can be stored in SES and a suppression list helps to add emails for bounce and complaints.
Amazon SES pricing will be calculated based on criteria such as the number of incoming and outgoing messages, dedicated IP, size of the emails, etc.
To know about the pricing, please visit the official documentation.
