
![How to Setup Google Cloud gcloud CLI [Beginners Guide]](https://storage.ghost.io/c/5f/2f/5f2f4d20-2abf-4534-8d40-7aa233aedd43/content/images/size/w2000/format/webp/2025/03/gcloud-cli-1.png)
If you want to interact with Google Cloud through gcloud CLI or through code, you need to setup the gcloud CLI & SDK on your workstation.
For example, if you want to write a python script that interacts with google cloud, you should have the gcloud sdk installed so that all the required packages for python will be available for your script.
This tutorial will guide you through the steps for setting up Google Cloud gcloud CLI SDK on your workstation.
Also, I have added some of the tips and tricks that I have learned while using gcloud CLI utility in my workstation.
Install gloud CLI SDK
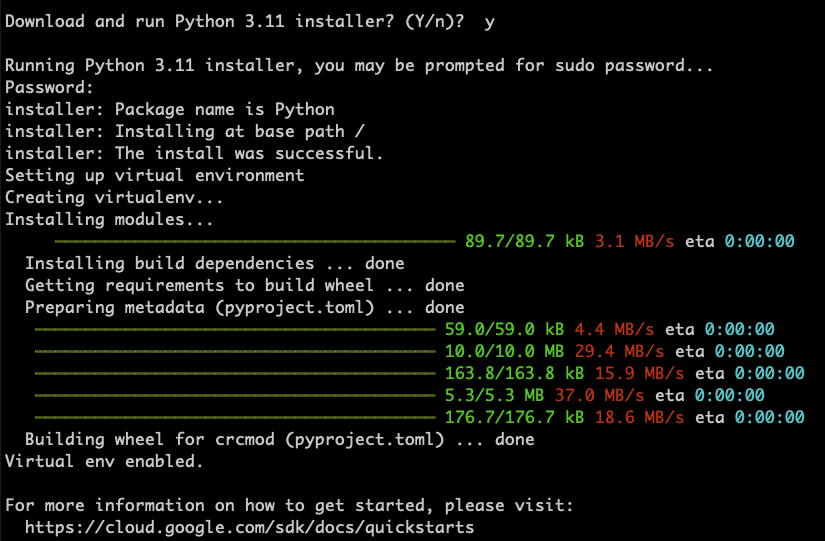
Step 1: Head over to https://cloud.google.com/sdk/ and copy the link to the appropriate installation package. This package is common for all Linux distributions.
Step 2: Download the package.
wget https://dl.google.com/dl/cloudsdk/channels/rapid/downloads/google-cloud-cli-470.0.0-linux-x86_64.tar.gzStep 3: Untar the sdk package.
tar -xvf google-cloud-sdk*Step 4: Install the SDK using the install.sh script. It will detect the appropriate package for your Linux distribution and installs it.
./google-cloud-sdk/install.shStep 5: Follow through the installation prompts and select the required options. It is pretty self-explanatory. It will take a couple of minutes for the setup.
Step 6: Restart the terminal or source the .bashrc or .zshrc file based on the shell profile preference you chose during the installation.
source ~/.bashrc
source ~/.zshrc
If you dont open a new terminal session or source the relevant shell profile, you might see the following error.
-bash: gcloud: command not foundStep 7: Now, to validate the installation, open a new terminal session and execute the gcloud command.
$ gcloud --version

Google Cloud SDK 470.0.0
bq 2.1.2
core 2024.03.22
gcloud-crc32c 1.0.0
gsutil 5.27
Configuring gcloud CLI With Google Project
Now that we have the SDK installed, we need to configure the Google cloud SDK to talk to a specific project.
We use the gcloud utility from the installed SDK for CLI based google cloud access.
Follow the steps given below to configure gcloud with a specific google project.
Step 1: Initialise the project configuration using the following command.
gcloud init --console-onlyStep 2: You will see the following prompt. Select "Y".
To continue, you must log in. Would you like to log in (Y/n)? Y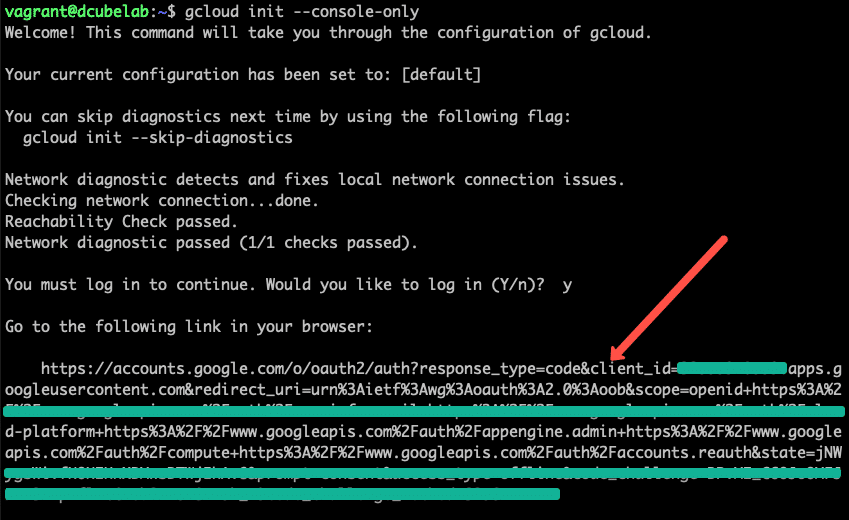
Copy and paste the URL in the browser. Then log in to your google cloud account and grant permissions to access google cloud resources.
You will see a page with a token. Copy the token and enter in the terminal.
Now you will be logged in, and you can select the project that you want to set as default, as shown in the image below.

Like this, you can add multiple gcloud configurations if you work with multiple google cloud accounts. You can switch between different accounts. I have explained this in the next section.
gcloud CLI SDK Auth Config Location
To know all the configuration location of gcloud CLI SDK, execute the following command.
gcloud info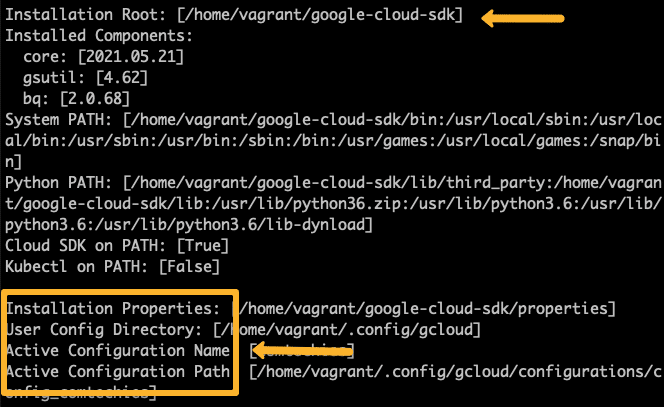
All the SDK configs get stored in the .config folder in your workstation home location.
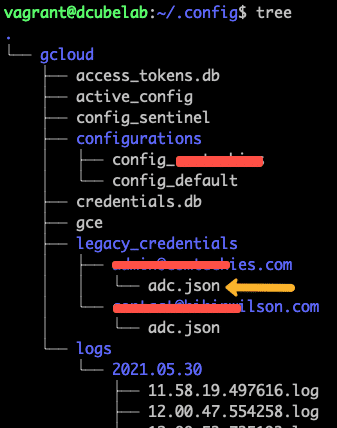
If I run a tree from the .config folder, this is what I have. The JSON files under legacy_credentials have the client id and client secret to connect to the google cloud account.
Validate gcloud CLI Authentication
Now that we have a valid cloud configuration, let's run some basic gcloud CLI commands to verify the installation.
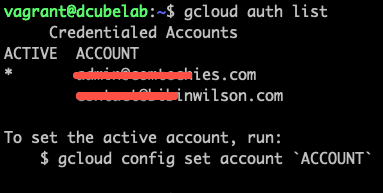
Step 1: List the credential account.
gcloud auth listIn my case, I have two google cloud accounts configured in my workstation. So it lists two accounts, and there is a * in the active account.
When you have multiple gcloud accounts, you can switch between accounts using the following command
gcloud config set account account@devopscube.comStep 2: To view your default gcloud configs of the active configuration, use the following command.
gcloud config listYou can also manually change the configuration by editing the config file from the ~/.config/gcloud/configurations folder.
Sometimes when you have multiple accounts configured, there could be a mismatch between activated account and active configuration. To solve this, first list the configruations.
gcloud config configurations list
If there is a mismatch, you can activate the correct configuration using the following command, assuming you activate the default configuration.
gcloud config configurations activate defaultStep 3: To list all the gcloud commands, use the following command.
gcloud helpgcloud Cheat Sheet
Well, I don't have any cheat sheet for gcloud.
However, there is a cool gcloud cheat sheet command which displays the gcloud cheat sheet.
gcloud cheat-sheetAlso you can use the cheat sheet from google cloud documentation.
Other gcloud Components
When you install the google SDK, only the core google cloud libraries get installed.
But there are other components that are part of google cloud sdk.
For example kubectl. A utility required to interact with Google Kubernetes cluster.
To list all the available components execute the following command.
gcloud components list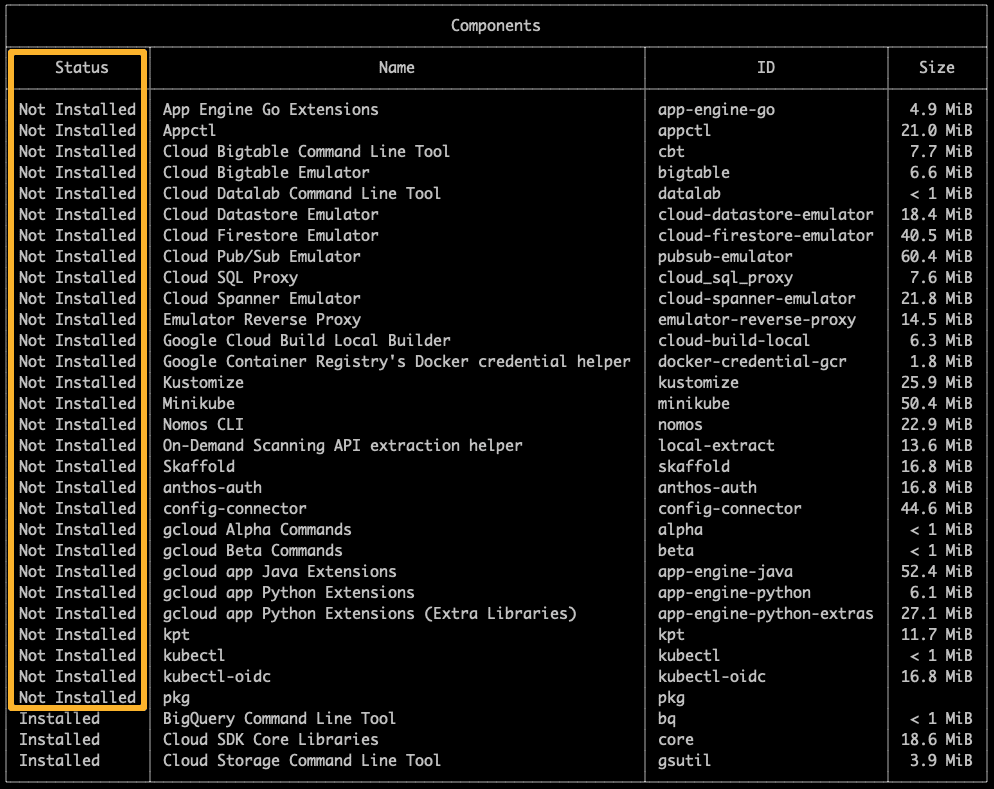
Updating gcloud CLI Components
Updating gcloud CLI is pretty simple.
Use the following one-line to update gcloud components.
gcloud components updateCreate a Google Compute Instance Using CLI
This section is only optional.
If you want to have a little hands-on with the gcloud command-line utility, you can follow this section to create a compute instance, access it, and then delete it.
To start with, we will create a instance using the CLI.
Step 1: Get the list of images using the following command.
gcloud compute images list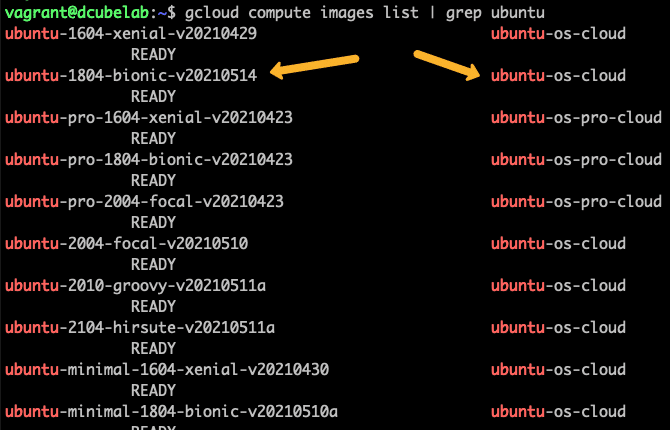
Step 2: The following command will create an f1 micro ubuntu instance with the ubuntu image from the highlighted image family.
gcloud compute instances create devopscube-demo-instance \
 --image centos-7-v20170523 \
 --image-project centos-cloud --set-machine-type f1-micro --zone us-central1-a
There are so many flags associated with instance creations. Refer to this official documentation for more information on the flags.
Step 3: To connect the instance via ssh, just execute the following command. The gcloud command will automatically create the ssh key in your ~/.ssh folder if it doesn't exist and connects to your instance.
gcloud compute ssh (instance-name)
For example,
gcloud compute ssh devopscube-demo-instanceStep 4: Delete the created instance using the following command.
gcloud compute instances delete (instance name)For example,
gcloud compute instances delete devopscube-demo-instanceConclusion
In this blog I have covered the steps to setup google cloud SDK and using it with gcloud CLI
Hope it helped or you might have more tips that can add value to the existing content.
Either way, please drop a comment.
