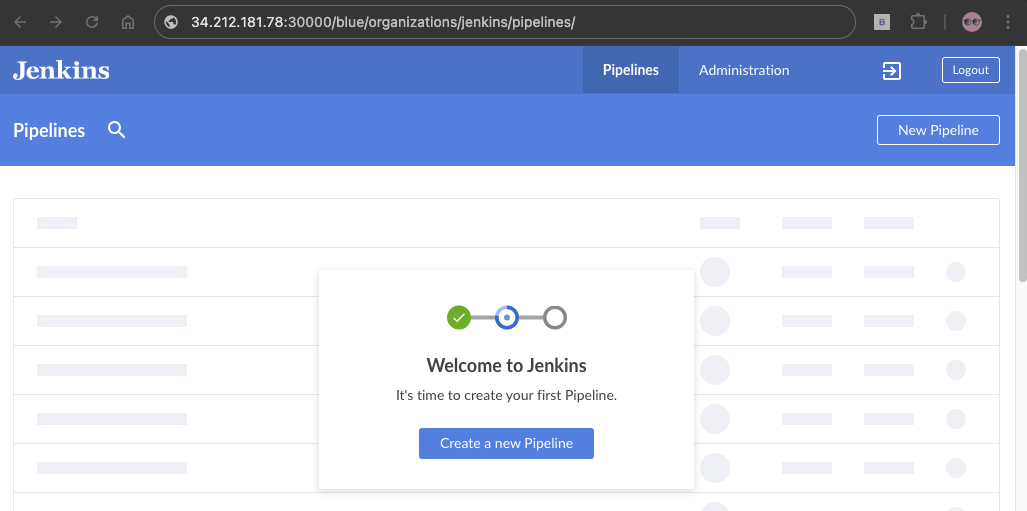
In this blog, I have given the step by step tutorial to deploy Jenkins as StatefulSet on the Kubernetes Cluster.
Prerequisites
Given below are the Prerequisites for this setup
- Kubernetes Cluster
- kubectl installed in your system
Deploy Jenkins as StatefulSet
The following image shows the setup architecture and workflow.
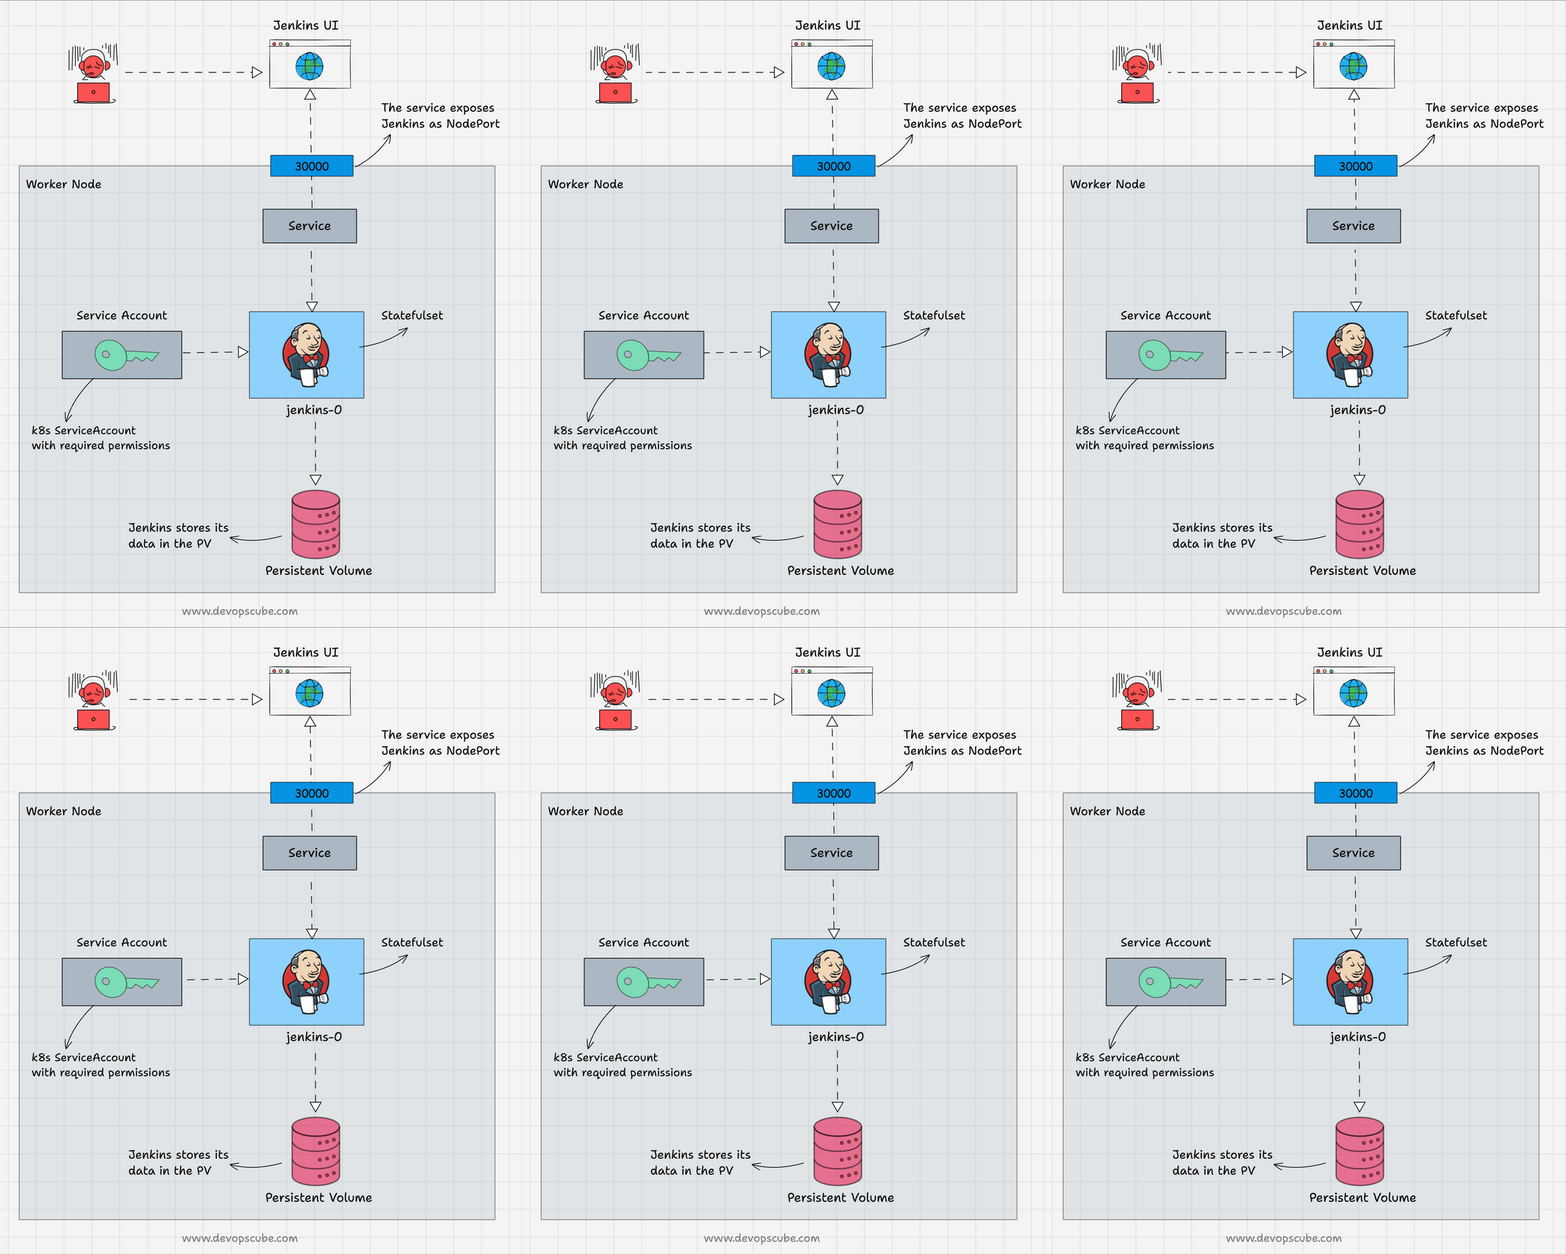
Follow the below steps to deploy Jenkins as a StatefulSet.
Step 1: Create a Namespace
The first step is to create a separate namespace to deploy Jenkins.
Run the following command to create a namespace
kubectl create ns jenkinsStep 2: Create a ClusterRole and ServiceAccount
After creating the namespace, the next step is to create a clusterrole, serviceaccount and bind the clusterrole to a service account.
This service account grants Jenkins the necessary permissions to interact with the Kubernetes API.
This is primarily required for CI/CD tasks where Jenkins need to create, update, and manage resources within the cluster (e.g., pods, services, and deployments).
Create a YAML file sa.yaml and copy the below contents
apiVersion: rbac.authorization.k8s.io/v1
kind: ClusterRole
metadata:
  name: jenkins-admin
rules:
  - apiGroups: [""]
    resources: ["*"]
    verbs: ["*"]

---
apiVersion: v1
kind: ServiceAccount
metadata:
  name: jenkins-admin
  namespace: jenkins

---
apiVersion: rbac.authorization.k8s.io/v1
kind: ClusterRoleBinding
metadata:
  name: jenkins-admin
roleRef:
  apiGroup: rbac.authorization.k8s.io
  kind: ClusterRole
  name: jenkins-admin
subjects:
- kind: ServiceAccount
  name: jenkins-admin
  namespace: jenkins
This file creates a ServiceAccount and a ClusterRole with admin permission, you can limit the permissions as you want.
Then it binds the ClusterRole with the ServiceAccount. Run the following command to create the service account
kubectl apply -f sa.yamlStep 3: Create a Secret
The next step is to create a Secret which creates a token for the serviceaccount.
Create a YAML file secret.yaml and copy the below contents in to it
apiVersion: v1
kind: Secret
metadata:
  name: sa-token-secret
  namespace: jenkins
  annotations:
    kubernetes.io/service-account.name: jenkins-admin
type: kubernetes.io/service-account-token
This creates a secret and links it with the service account using the annotation.
The token in the secret is particularly useful when you use Kubernetes pods and dynamic jenkins agents.
Step 4: Create a PersistentVolumeClaim (PVC)
Now, create a PersistentVolumeClaim for Jenkins.
Create a YAML file pvc.yaml and copy the below contents
apiVersion: v1
kind: PersistentVolumeClaim
metadata:
  name: jenkins-pv-claim
  namespace: jenkins
spec:
  accessModes:
    - ReadWriteOnce
  resources:
    requests:
      storage: 10Gi
This file creates a PVC which requests 10GB of storage with readwriteonce access mode.
Run the following command to create a PVC
kubectl apply -f pvc.yamlStep 5: Deploy Jenkins as SatefulSet
Once the required resources for Jenkins are created, deploy Jenkins as a Statefulset on the cluster.
Create a YAML file statefulset.yaml and copy the below contents into it
apiVersion: apps/v1
kind: StatefulSet
metadata:
  name: jenkins
  namespace: jenkins
spec:
  serviceName: "jenkins"
  replicas: 1
  selector:
    matchLabels:
      app: jenkins-server
  template:
    metadata:
      labels:
        app: jenkins-server
    spec:
      securityContext:
        fsGroup: 1000
        runAsUser: 1000
      serviceAccountName: jenkins-admin
      containers:
        - name: jenkins
          image: jenkins/jenkins:lts
          resources:
            limits:
              memory: "2Gi"
              cpu: "1000m"
            requests:
              memory: "500Mi"
              cpu: "500m"
          ports:
            - name: httpport
              containerPort: 8080
            - name: jnlpport
              containerPort: 50000
          livenessProbe:
            httpGet:
              path: "/login"
              port: 8080
            initialDelaySeconds: 90
            periodSeconds: 10
            timeoutSeconds: 5
            failureThreshold: 5
          readinessProbe:
            httpGet:
              path: "/login"
              port: 8080
            initialDelaySeconds: 60
            periodSeconds: 10
            timeoutSeconds: 5
            failureThreshold: 3
          volumeMounts:
            - name: jenkins-data
              mountPath: /var/jenkins_home
      volumes:
        - name: jenkins-data
          persistentVolumeClaim:
              claimName: jenkins-pv-claim
This file deploys Jenkins on the Jenkins namespace with the following:
- As statefulset with one replica. We cannot run more than one replica becuase of the way Jenkins manages it data. Read the Jenkins architecture blog to know more.
- Uses a security context to run Jenkins as non-root user ID 1000. By specifying a non-root UID, you limit the potential security risk that can be caused by a compromised Jenkins container. Running as a non-root user reduces the risk of privilege escalation attacks.
- Jenkins uses the serviceaccount jenkins-admin we created in step 2.
- Uses the latest container image jenkins/jenkins:lts
- Added resource limits and requests, as well as liveness and readiness probes.
- Then it exposes port 8080 for UI access and jnlp port 50000 to communicate with the agent.
- Jenkins stores its data on the mounted volume under the path /var/jenkins_home and it claims the volume using the PVC created in Step 3.
Run the following command to deploy Jenkins as statefulset
kubectl apply -f statefulset.yamlStep 6: Expose Jenkins
The final step is to expose Jenkins as NodePort using a service so that we can access the Jenkins UI on the web.
Create a YAML file sva.yaml and copy the below content into it
apiVersion: v1
kind: Service
metadata:
  name: jenkins-service
  namespace: jenkins
spec:
  selector:
    app: jenkins-server
  type: NodePort
  ports:
    - name: http-port
      port: 8080
      targetPort: 8080
      nodePort: 30000
    - name: jnlp-port
      port: 50000
      targetPort: 50000
The jenkins-service service exposes the Jenkins port 8080 on NodePort 30000 to access the Jenkins UI on the web.
Run the following command to create the service
kubectl apply -f svc.yamlNote: Exposing Jenkins as NodePort is not suitable for the production environment. In actual projects need to setup Ingress to access Jenkins.
Now access your Jenkins on the web using the following URL
http://<node-ip>:30000After running this command Jenkins will as you to enter the initialAdminPassword as shown below
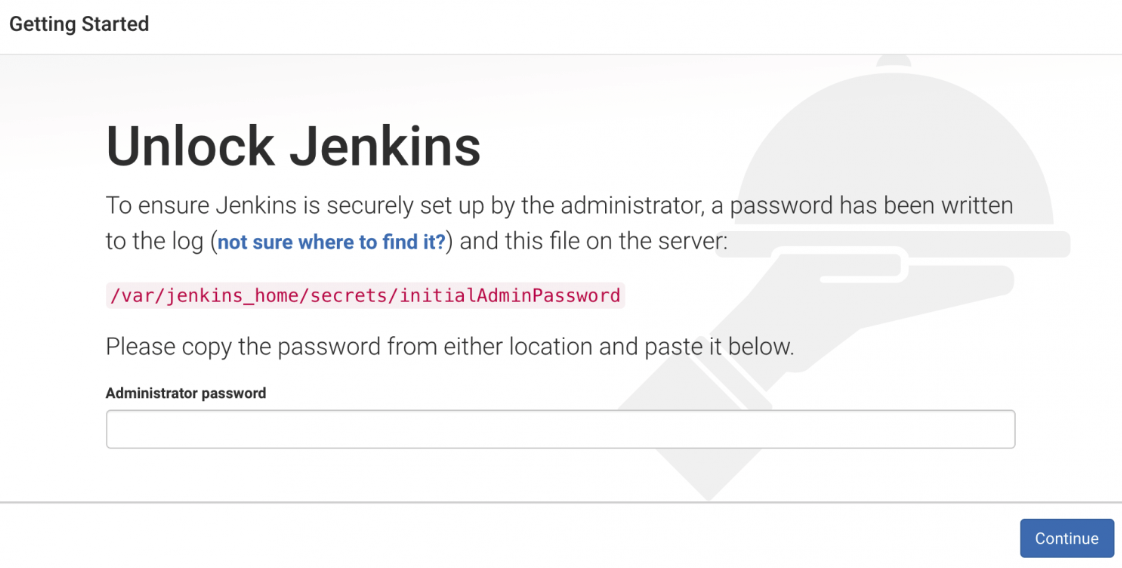
To get the admin password run the following command. Replace jenkins-0 with your pod name.
kubectl exec -it jenkins-0 cat /var/jenkins_home/secrets/initialAdminPassword -n jenkinsAfter entering the admin password, it will ask you to install the plugins, and create an admin user and you can see the Jenkins workspace after completing the steps.
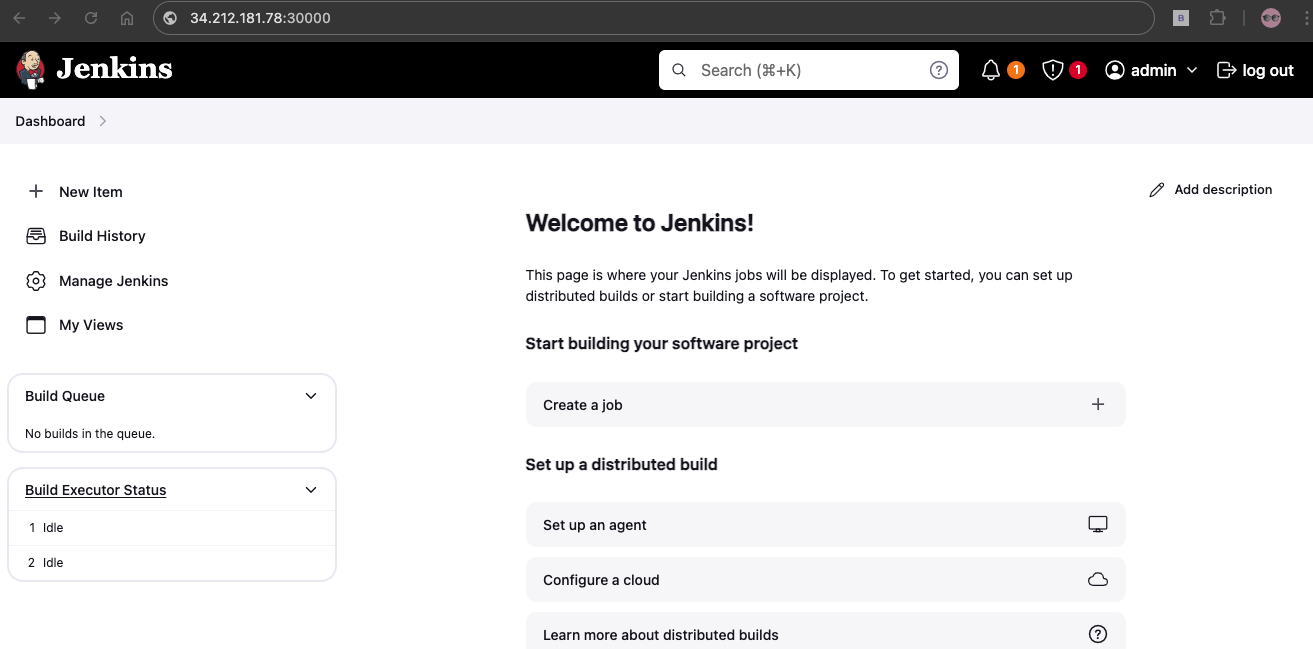
If you want to add additional plugins to your Jenkins, go to
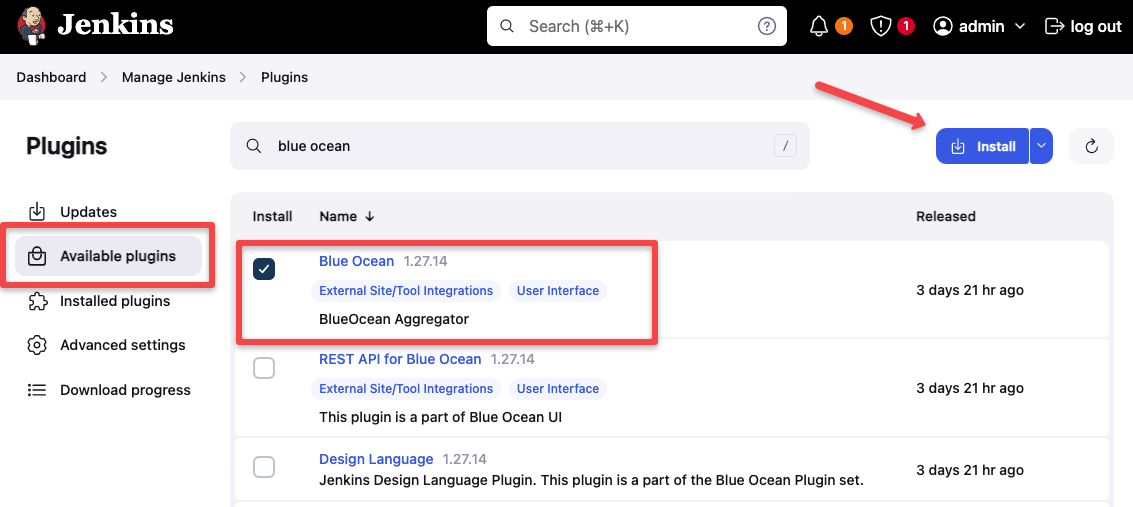
Manage Jenkins->Plugins->Available plugins and search for the plugin you need.
For example, in the below image, I am installing the Blue Ocean plugin on Jenkins, select the plugin and click the Install button to install it
After installing the plugin you can see it on the left side of your Jenkins dashboard as shown below
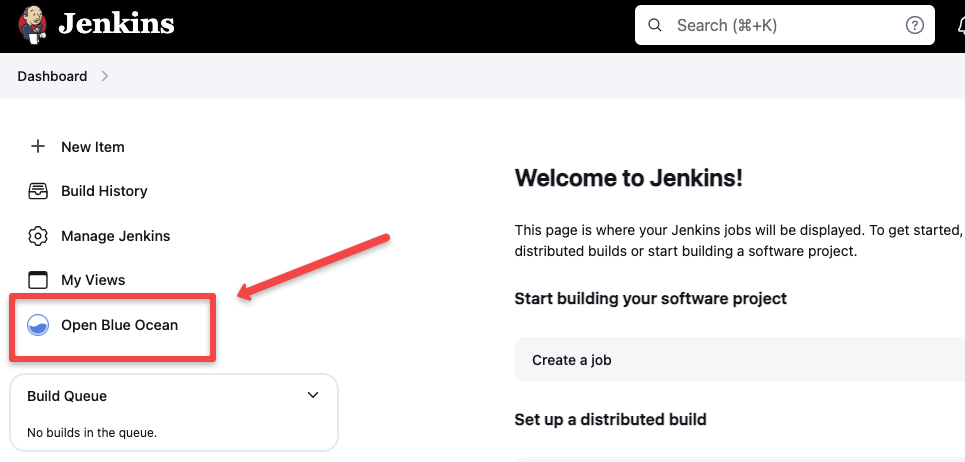
Click the Open Blue Ocean button to open the Blue Ocean dashboard
