

In this Kubernetes tutorial, you will learn to create an AWS EKS cluster using eksctl. I will also cover the important eksctl concepts.
By the end of this guide, you will be able to:
- Build a fully working EKS cluster.
- Setup on‑demand and spot instances for the cluster.
- Configure key add‑ons needed for EKS production.
- Adding users/roles to eks cluster.
- Deploy Metrics Server for HPA and VPA
- Understand how eksctl works behind the scenes.
- Troubleshoot common EKS problems.
Setup Prerequisites
To work with eksctl you need to have the following installed and configured on your workstation.
- AWS CLI installed and configured with required IAM permissions to launch eks cluster.
kubectlshould be installed.
Install eksctl
eksctl installation instructions for Linux and MAC systems are given below. For other platforms, please check the official documentation for detailed instructions.
For Linux based system, you can install eksctl using the following commands.
# for ARM systems, set ARCH to: `arm64`, `armv6` or `armv7`
ARCH=amd64
PLATFORM=$(uname -s)_$ARCH

curl -sLO "https://github.com/eksctl-io/eksctl/releases/latest/download/eksctl_$PLATFORM.tar.gz"

# (Optional) Verify checksum
curl -sL "https://github.com/eksctl-io/eksctl/releases/latest/download/eksctl_checksums.txt" | grep $PLATFORM | sha256sum --check

tar -xzf eksctl_$PLATFORM.tar.gz -C /tmp && rm eksctl_$PLATFORM.tar.gz

sudo mv /tmp/eksctl /usr/local/bin
For Mac,
Use the following command to install eksctl on mac
brew tap weaveworks/tap
brew install weaveworks/tap/eksctl
Create EKS Cluster Using eksctl
You can launch an EKS cluster using eksctl in two ways.
- Using eksctl CLI and parameters
- Using eksctl CLI and YAML config.
Using CLI and parameters is pretty straightforward. However I would prefer the YAML config as you can have the cluster configuration as a config file.
Create a file named eks-cluster.yaml
vi eks-cluster.yaml Copy the following contents to the file. You need to replace the VPC id, CIDR, and subnet IDs with your own ids. Replace techiescamp with the name of your keypair.
apiVersion: eksctl.io/v1alpha5
kind: ClusterConfig

metadata:
  name: eks-spot-cluster
  region: us-west-2

vpc:
  id: "vpc-0951fe2c76e36eab9"
  cidr: "10.0.0.0/16"
  subnets:
    public:
      us-west-2a: { id: subnet-01b8ff5eaa0b39c10 }
      us-west-2b: { id: subnet-0e5de906289149fc0 }
      us-west-2c: { id: subnet-0185f1eee8a1a6561 }

managedNodeGroups:
  - name: ng-workers
    instanceType: t3.small
    labels: { role: workers }
    minSize: 2
    maxSize: 4
    ssh:
      allow: true
      publicKeyName: techiescamp
    tags:
      Name: ng-db
  - name: ng-spot
    instanceType: t3.medium
    labels: { role: builders }
    minSize: 3
    maxSize: 6
    spot: true
    ssh:
      allow: true
      publicKeyName: techiescamp
    tags:
      Name: ng-spot

addons:
  - name: aws-ebs-csi-driver
    version: latest
  - name: eks-pod-identity-agent
    version: latest

addonsConfig:
   autoApplyPodIdentityAssociations: true
The above config has the following.
- Cluster VPC configurations with public subnet spanning three availability zones.
- Two managed node groups. One with regular on-demand instances and one with spot instances.
- There are two add-ons. There are required one when working in real projects.
- aws-ebs-csi-driver: For managing EBS (Elastic Block Store) volumes
- eks-pod-identity-agent: For managing pod identities. It allows pods to assume IAM roles directly, without the need for long-lived AWS credentials. It maps the Kubernetes service account to an AWS IAM role, giving any pod using that service account access to to interact with AWS services (like S3, DynamoDB, etc.) without embedding AWS credentials directly into the application code. Instead, permissions are managed through IAM roles associated with specific service accounts
autoApplyPodIdentityAssociations: true: With this option eksctl automatically resolves and applies the recommended IAM roles and pod identity associations for the add-ons. For example, the aws-ebs-csi-driver addon requires certain IAM privileges to create and manage EBS volumes. It gets automatically created by this option.
Now that you have a config ready, deploy the cluster using the following command. It will take a while for the cluster control plane and worker nodes to be provisioned.
eksctl create cluster -f eks-cluster.yamlThe following security groups get created during the cluster launch.
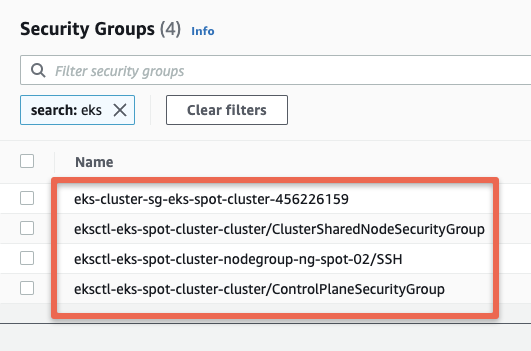
This eksctl configuration creates two node groups, one with on-demand and the other with spot instance, you can use the Cluster AutoScaler to manage node scaling for both node groups automatically.
Connect to EKS cluster
Once the cluster is provisioned, you can use the following AWS CLI command to get or update the kubeconfig file.
aws eks update-kubeconfig --region us-west-2 --name eks-spot-clusterYou should see the following output.
➜  public git:(main) ✗ aws eks update-kubeconfig --region us-west-2 --name eks-spot-cluster
Added new context arn:aws:eks:us-west-2:936855596904:cluster/eks-spot-cluster to /Users/bibinwilson/.kube/config
Verify the cluster connectivity by executing the following kubectl commands.
kubectl cluster-info
kubectl get nodes
kubectl get po -n kube-system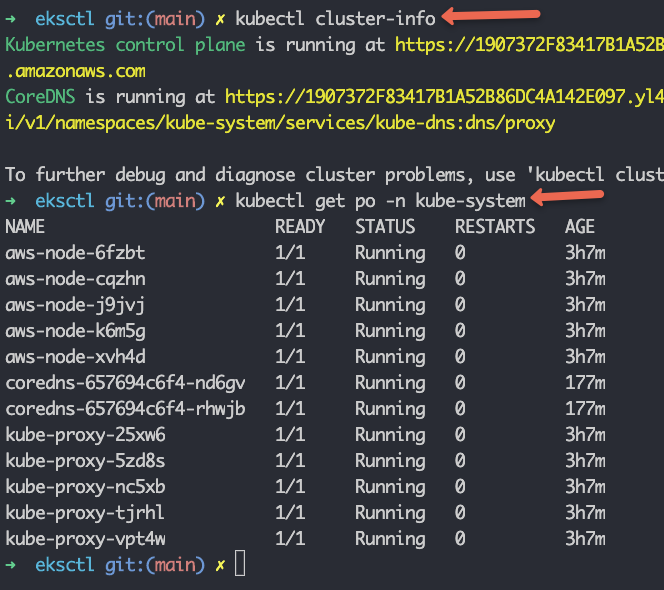
Adding Users & Roles To EKS Cluster
By default, only the user or role that creates the EKS cluster will have full access to it. Other users, even if they have AWS admin permissions, will get an "Unauthorized" error like this:
error: You must be logged in to the server (Unauthorized)You will also see a permission error in the EKS web console as shown below.
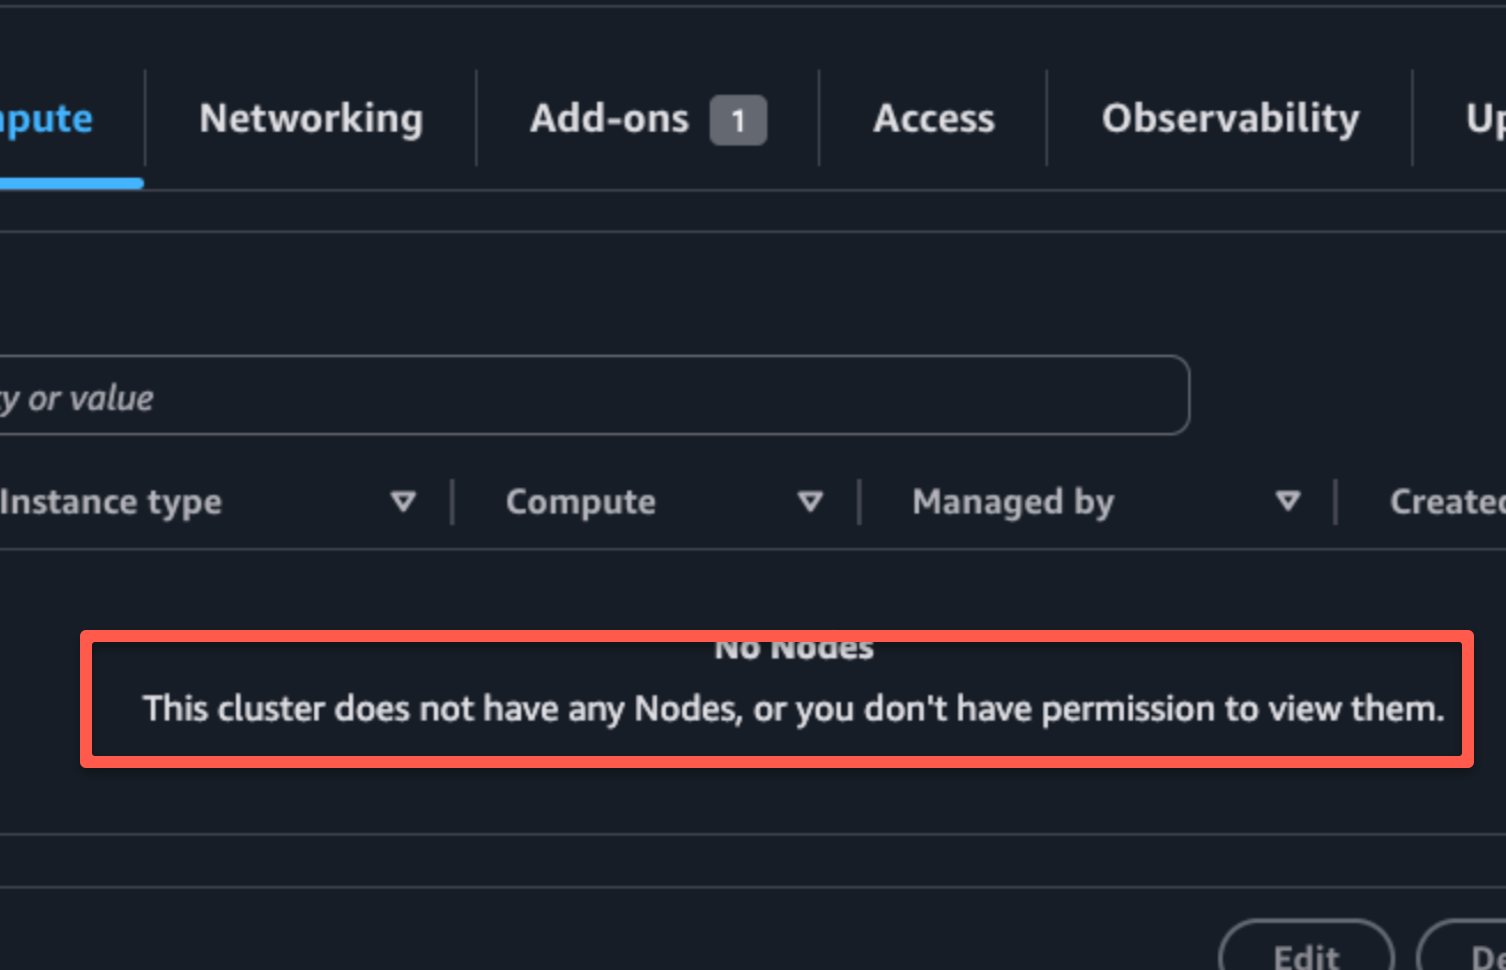
If you want other users or roles to access the cluster, you must add them to the EKS access entries.
Next, assign access policies to these entries to give them the right permissions in the cluster.
AWS EKS provides predefined access policies. You can list them using this command.
aws eks list-access-policies --output tableLet’s say you want to add an IAM user or role.
First, get the ARN of the user or role. Then, add the access configuration in your eksctl config file.
Here is an example. This config gives full cluster access to a user or role by attaching the AmazonEKSClusterAdminPolicy. Replace <user/role-arn-here> with your actual user or role ARN.
accessConfig:
  authenticationMode: API_AND_CONFIG_MAP
  accessEntries:
  - principalARN: <user/role-arn-here>
    type: STANDARD
    accessPolicies:
    - policyARN: arn:aws:eks::aws:cluster-access-policy/AmazonEKSClusterAdminPolicy
      accessScope:
        type: cluster
Once you add the config, you can apply only the the accessConfig using the following command.
eksctl create accessentry -f eks-cluster.yaml You can follow the same method to add multiple users or roles with specific permissions in the cluster.
EKS Capabilities
We can even enable the AWS managed platform tools, such as ArgoCD, AWS Controllers for Kubernetes, and Kubernetes Resource Orchestrator, over the Eksctl manifest.
capabilities:
  - name: dev-argocd
    type: ARGOCD
    roleARN: arn:aws:iam::123456789012:role/ArgoCDCapabilityRole

  - name: dev-ack
    type: ACK
    roleARN: arn:aws:iam::123456789012:role/ACKCapabilityRole
    ackServiceControllers:
      - s3
      - rds

  - name: dev-kro
    type: KRO
    roleARN: arn:aws:iam::123456789012:role/KROCapabilityRole
Change the Role to the appropriate one.
These tools are not run inside your cluster instead AWS manage them on their own infra so as the scaling and security.
Install Kubernetes Metrics Server
By default the metrics server is not installed on the EKS cluster. It is required in the EKS cluster for HPA or VPA to work.
Without the metrics server, you will get the following error if you try to get the pod or node metrics.
$ kubectl top nodes
error: Metrics API not available
$ kubectl top pods
error: Metrics API not available
You can install the metrics server using the following command.
kubectl apply -f https://github.com/kubernetes-sigs/metrics-server/releases/latest/download/components.yamlValidate the deployment using the following command. It will take a couple of minutes for the metrics server deployment to be in ready state.
kubectl get deployment metrics-server -n kube-systemNow if you check the node metrics, you should be able to see it.
$ kubectl top nodes
NAME                                        CPU(cores)   CPU%   MEMORY(bytes)   MEMORY%
ip-10-0-19-135.eu-west-2.compute.internal   29m          1%     410Mi           28%
ip-10-0-3-139.eu-west-2.compute.internal    27m          1%     381Mi           26%
How Does eksctl Work?
Now that we have deploying a working eks cluster using eksctl, lets understand how it works behind the scenes. This understanding will help you troubleshoot issues when working in real-world production setup.
When you create an EKS cluster using eksctl (either via YAML configuration or command line parameters), it translates your specifications into CloudFormation templates.
It then deploys the generated Cloudformation template to provision the necessary AWS resources for EKS. So, ideally, even though you deploy the YAML file using eksctl, behind the scenes, the Cloudformation templates deploy the clusters.
eksctl is just a wrapper for Cloudformation.
Once you execute the eksctl cluster create command and if you look at the AWS Cloudformation dashboard, you can see all the Cloudformation stacks deployed for creating the EKS clusters.
Here is an example.
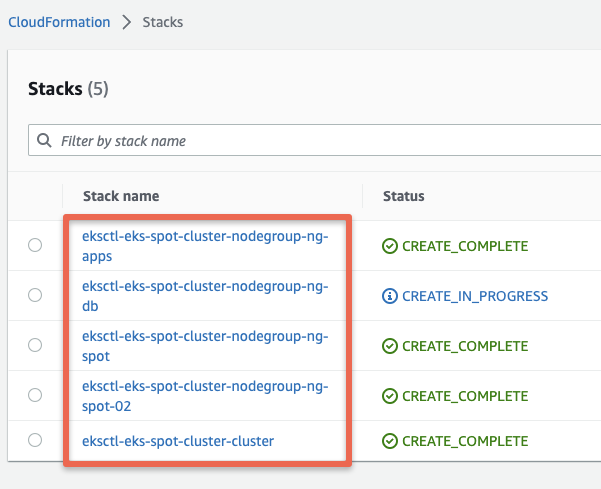
Also, when you update the cluster configs, it again creates a Cloudformation stack to update the new configs.
Increase EKS Pods Per Node
You can host 110 Pods per node is in a standard Kubernetes cluster.
However, For EKS by default, there is a pod per node limitation based on the instance type.
You can increase this limit by setting maxPodsPerNode parameter in the YAML
For example, If you dont parameter, the default and recommended pods per node for t3.medium instance is 17.
For testing purposes, I am giving the value 110, so that I can create more than 17 pods in each node.
If you want to calculate the recommended pods for your node, then first download this script.
curl -O https://raw.githubusercontent.com/awslabs/amazon-eks-ami/master/files/max-pods-calculator.shGiving executable permission for this script
chmod +x max-pods-calculator.shBefore you run the script, you need two things, one is instance type and the other one is the cni version.
You know the instance type, so we have to find the cni version. for that, use the following command.
kubectl describe daemonset aws-node --namespace kube-system | grep Image | cut -d "/" -f 2You will get a similar output
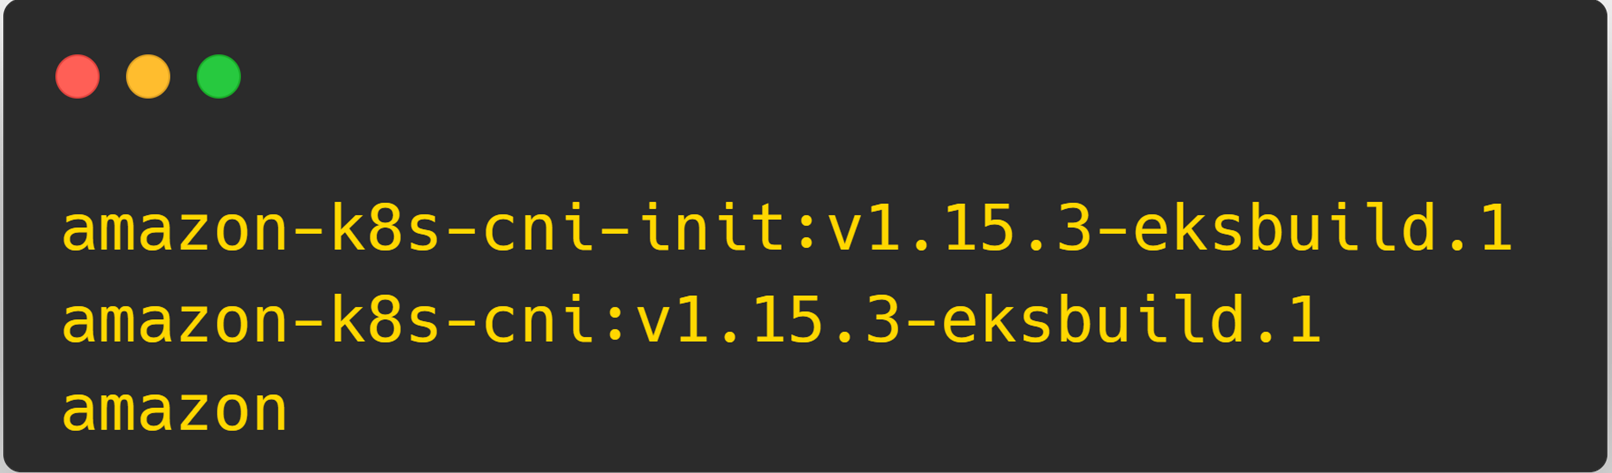
Here, 1.15.3-eksbuild.1 is the cni version.
Now, we can run the script.
./max-pods-calculator.sh --instance-type t3.medium --cni-version 1.15.3-eksbuild.1If you are also using the t3.medium instance, then it will give the output is 17.
To create a cluster using the above configuration, use the following command.
eksctl create cluster -f eks-cluster.ymlAfter the cluster creation, use the following command to enable more IPs for the network interface.
kubectl set env daemonset aws-node -n kube-system ENABLE_PREFIX_DELEGATION=trueSpecifying Kubernetes Version in eksctl
There are scenarios where you need to deploy a specific version on Kubernetes in EKS
eksctl supports version parameter to specify the required supported version.
Here is an example.
apiVersion: eksctl.io/v1alpha5
kind: ClusterConfig

metadata:
  name: eks-spot-cluster
  region: us-west-2
  version: "1.31"
Delete & Recreating Node Group
If you want to change the instance type of a node group, you will have to delete the node group and recreating it again.
For example,
eksctl delete nodegroup \
  --cluster <cluster-name> \
  --name <node-group-name>
When you try to delete a node group, you might get the following pods are unevictable error.
2025-11-16 16:43:38 [!] 1 pods are unevictable from node ip-172-31-43-101.us-west-2.compute.internalTo rectify this, you can use the --disable-eviction flag with eksctl as shown below.
eksctl delete nodegroup \
  --cluster <cluster-name> \
  --name <node-group-name> \
  --disable-eviction
Possible eksctl Errors
Based on my hands-on experience with eksctl, I've documented common issues and their solutions to save you troubleshooting time. This section contains regularly updated solutions for challenges I've encountered in different environments.
Let's look at some of the possible eksctl errors.
Stack Already Exists Error
If you try to create a NodeGroup using eksctl with an existing Cloudformation stack, you will get the following error.
creating CloudFormation stack "stack-name": operation error CloudFormation: CreateStack, https response error StatusCode: 40, AlreadyExistsException: Stack [stack-name] already existsTo rectify this, Go to the Cloudformation dashboard and delete the cloud formation stack for the NodeGroup.
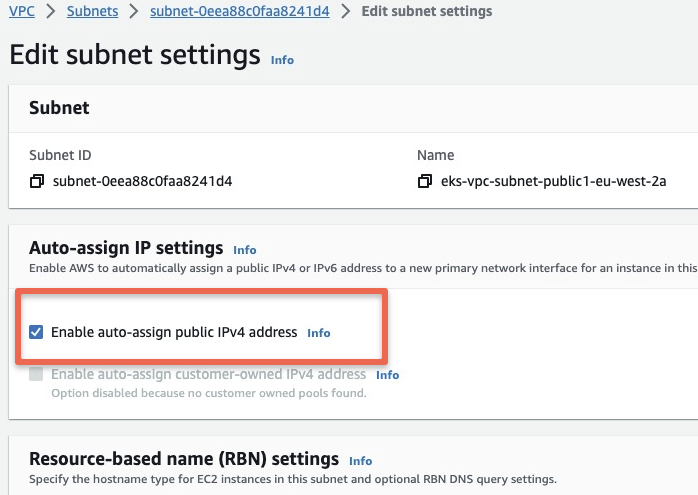
Subnet Autoassign Public IP Error
Resource handler returned message: "[Issue(Code=Ec2SubnetInvalidConfiguration, Message=One or more Amazon EC2 Subnets of [subnet-0eea88c0faa8241d4, subnet-05ff592bd0095ad75] for node group ng-app does not automatically assign public IP addresses to instances launched into it. If you want your instances to be assigned a public IP address, then you need to enable auto-assign public IP address for the subnetTo rectify this error, go the subent settings and enable "Enable Autoassign Public IPv4 Address" Option.
invalid apiversion “client.authentication.k8s.io Error
This error primarily happens due to IAM RBAC issues.
We have created a detailed blog explaining the solutions for this issue.
Please refer client.authentication.k8s.io Error blog for more information.
Latest EKS version is not available in eksctl
If you are trying to deploy the latest Kubernetes version with eksctl, you might get the following error.
Error: invalid version, supported values: 1.23, 1.24, 1.25, 1.26, 1.27, 1.28, 1.29, 1.30To set up the latest Kubernetes versions in EKS, ensure you have the most recent version of the eksctl utility. Check for updates and upgrade it to the latest version if necessary.
Then you will be able to deploy the latest version available in EKS.
Cleanup EKS Resources
When you finish testing your EKS setup, make sure you clean up the cluster and all related AWS resources. This helps avoid unwanted charges.
Use the following command to delete the cluster.
eksctl delete cluster --name eks-spot-cluster --region us-west-2
This removes Control plane, Managed node groups and CloudFormation stacks
Conclusion
We have looked into AWS EKS cluster creation using eksctl CLI.
When it comes to production deployment, ensure you follow the kubernetes cluster best practices.
You can also use tools like Amazon Q CLI to manage EKS clusters.
If you are planning for Kubernetes certification, you can use eksctl to deploy test clusters very easily. Also, check out the kubernetes certification coupon to save money on CKA, CKAD, and CKS certification exams.