In this blog, we will look at step by step instructions to backup and restore EKS cluster using Velero in Kubernetes.
We all know the importance of backing up a Kubernetes cluster. There are several solutions are available for Kubernetes cluster backup and restoration.
However, Velero stands out because it can back up both cluster resources and the storage associated with the cluster.
When backing up a cluster, there are two key aspects to keep in mind:
- ETCD key-value store that contains all the cluster-related configuration information.
- Persistent storage solutions hold your applications' data running inside the cluster.
So, when performing a backup, both should be included.
To store the backup, I am using Amazon S3, a storage service from AWS.
Prerequisites
- EKS Cluster (v1.31)
- EKSCTL (v0.191.0) should be available on the local machine
- Kubectl (v1.31.0) should be available on the local machine
- AWS CLI (v2.18.10) should be available on the local machine and configured with the required permissions.
- Helm (v3.16.1) should be available on your local system.
Velero Backup Workflow
The following image shows Velero's high-level workflow.
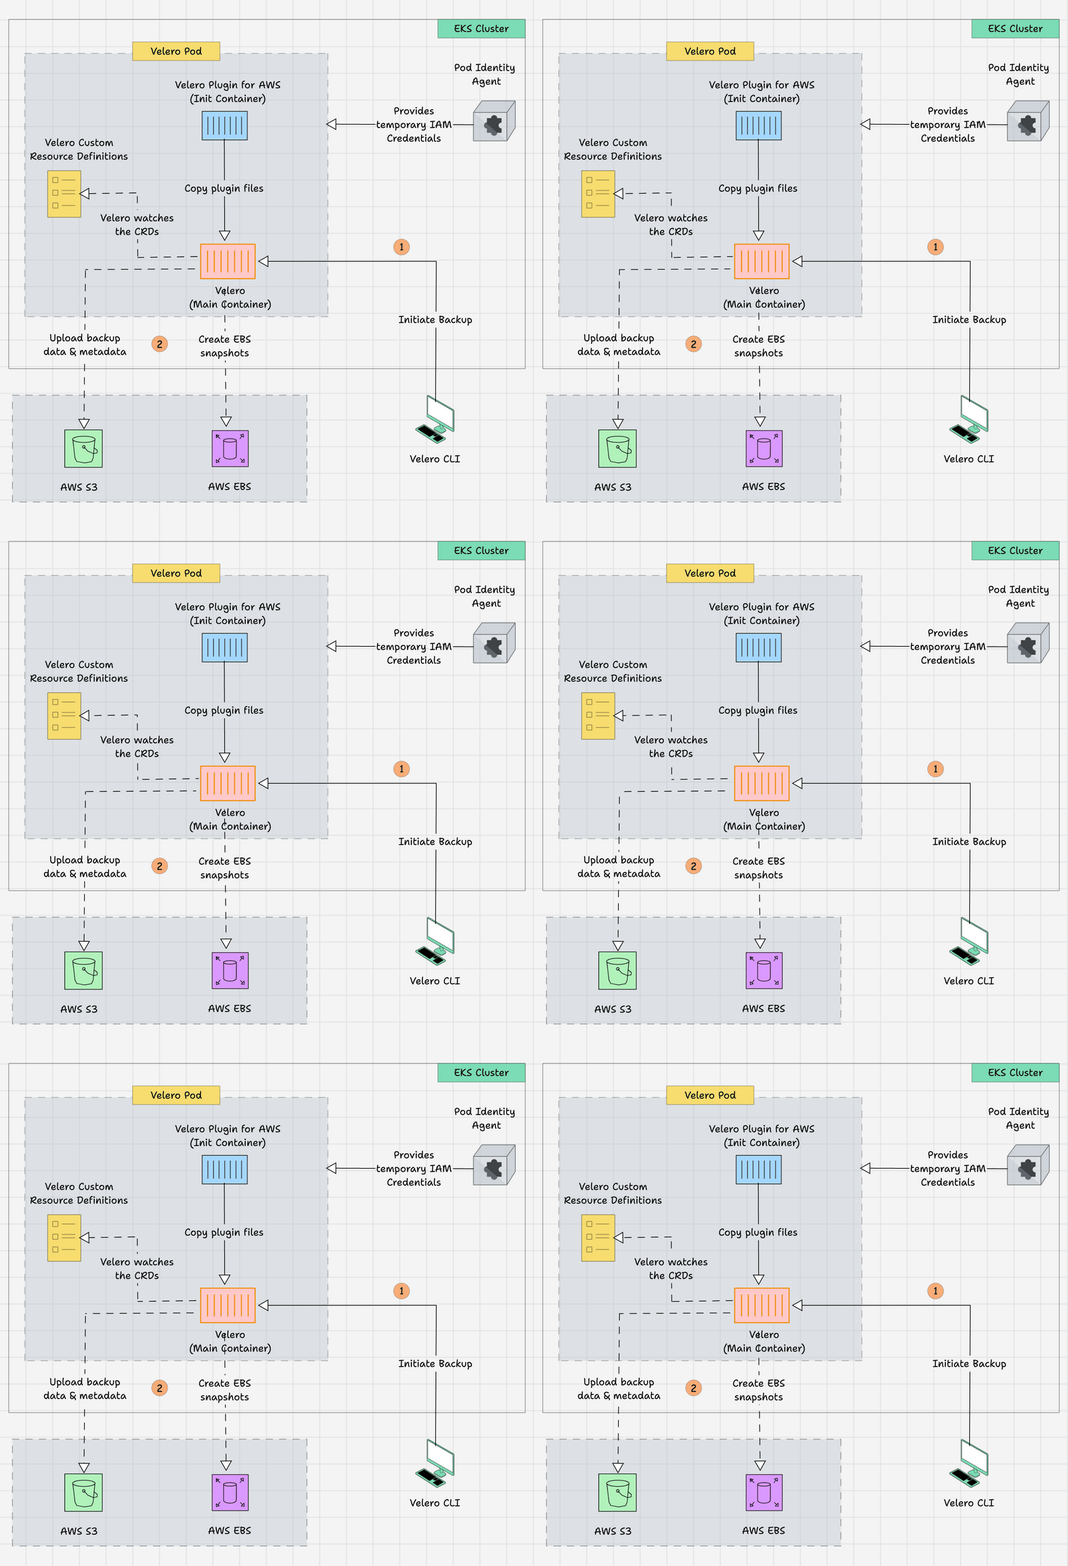
- The Velero CLI is on the local machine, which can help initiate the backup/restore using CLI commands.
- The request will go through the Kubernetes API server to the Velero Pod, and the Velero Pod contains the Init Container, which is for the AWS scoped plugin for Velero and has the main Velero container.
- The Init container provides the AWS-specific files to the main container before it starts.
- Both containers get the AWS temporary credentials via Pod Identity Agent to access the AWS services.
- The main container keeps watching the Velero Custom Resource Definitions (CRDs). If any changes happen on those resources, the Velero raises API calls to the Kubernetes API to make the changes.
- Backup
- Restore
- Schedule
- BackupStorageLocation
- VolumeSnapshotLocation
- Velero creates the EBS Volume Snapshots for the Persistent Volume Claim (PVC) and upload the backup data & metadata to the S3 bucket.
Setup Velero in an EKS Cluster
Follow the steps given below to set up the Velero in EKS Cluster.
Step 1: Create an S3 Bucket
We need a storage solution to back up the cluster components using Velero; for now, we are using AWS S3 as the storage option.
To create an S3 bucket, use the following CLI command or use GUI to create one.
BUCKET_NAME="velero-k8s-backup-bucket"
REGION=us-west-2
aws s3 mb s3://${BUCKET_NAME} --region ${REGION}
Check that the bucket is created with the appropriate settings.
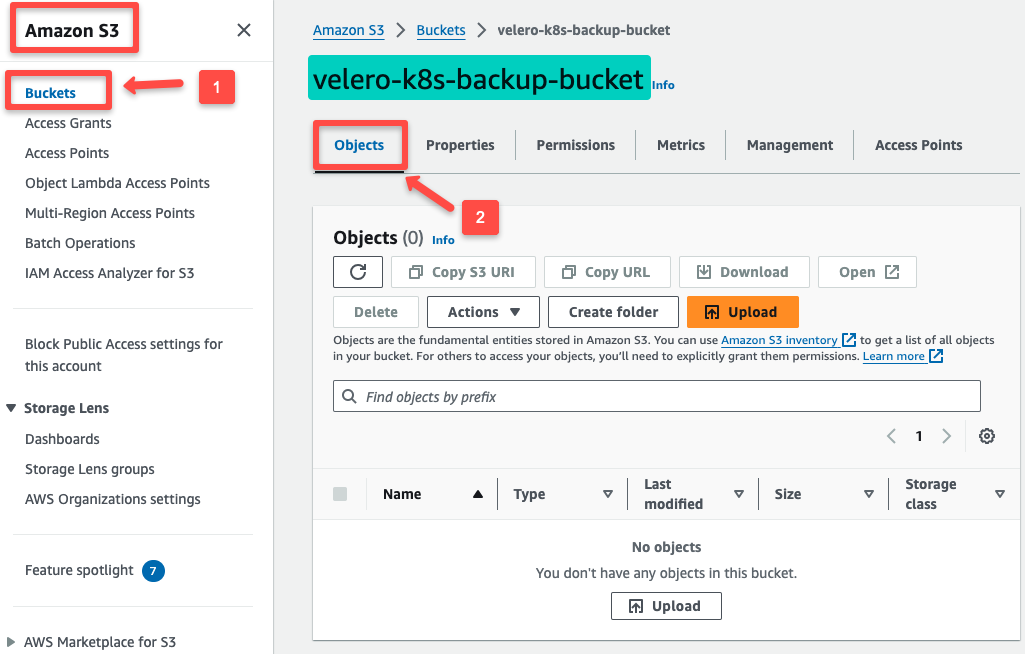
I have created a simple S3 bucket with the default settings for the demo purpose, but you can customize the configuration with appropriate permissions.
Step 2: Create an IAM Policy for Velero
We need to create an IAM Policy with the required permissions because Velero should communicate with other AWS services for use cases such as taking snapshots of the EBS volumes and storing other cluster components' data on S3.
Use the following permissions to create the IAM Policy.
cat << EOF | envsubst > velero_policy.json
{
  "Version": "2012-10-17",
  "Statement": [
      {
          "Effect": "Allow",
          "Action": [
              "ec2:DescribeVolumes",
              "ec2:DescribeSnapshots",
              "ec2:CreateTags",
              "ec2:CreateVolume",
              "ec2:CreateSnapshot",
              "ec2:DeleteSnapshot"
          ],
          "Resource": "*"
      },
      {
          "Effect": "Allow",
          "Action": [
              "s3:GetObject",
              "s3:DeleteObject",
              "s3:PutObject",
              "s3:AbortMultipartUpload",
              "s3:ListMultipartUploadParts"
          ],
          "Resource": [
              "arn:aws:s3:::${BUCKET_NAME}/*"
          ]
      },
      {
          "Effect": "Allow",
          "Action": [
              "s3:ListBucket"
          ],
          "Resource": [
              "arn:aws:s3:::${BUCKET_NAME}"
          ]
      }
  ]
}
EOF
The IAM Policy will be created with the S3 Bucket name, so provide your Bucket name properly.
Once the JSON file is created, we can create the IAM Policy using the following command.
export POLICY_NAME=VeleroAccessPolicyaws iam create-policy \
--policy-name $POLICY_NAME \
--policy-document file://velero_policy.jsonOnce the IAM Policy is created, you can see the details in the output.
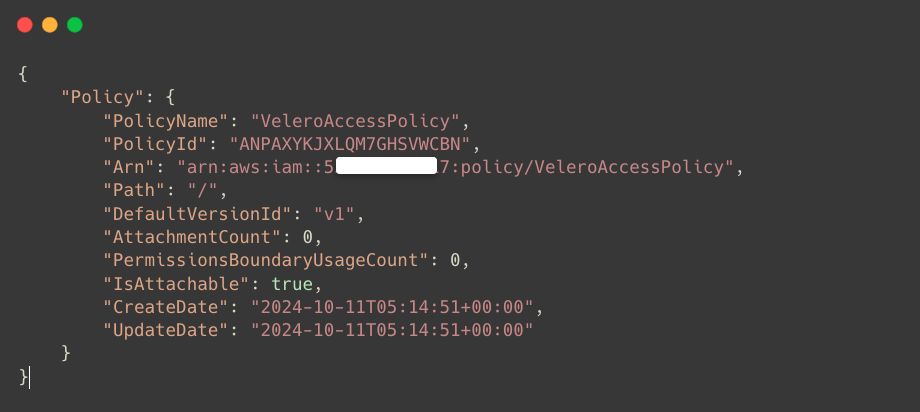
To get the ARN of the created IAM Policy.
export POLICY_ARN=$(aws iam list-policies --query "Policies[?PolicyName=='$POLICY_NAME'].Arn" --output text)We can use the AWS IAM console to ensure that the IAM policy is created.
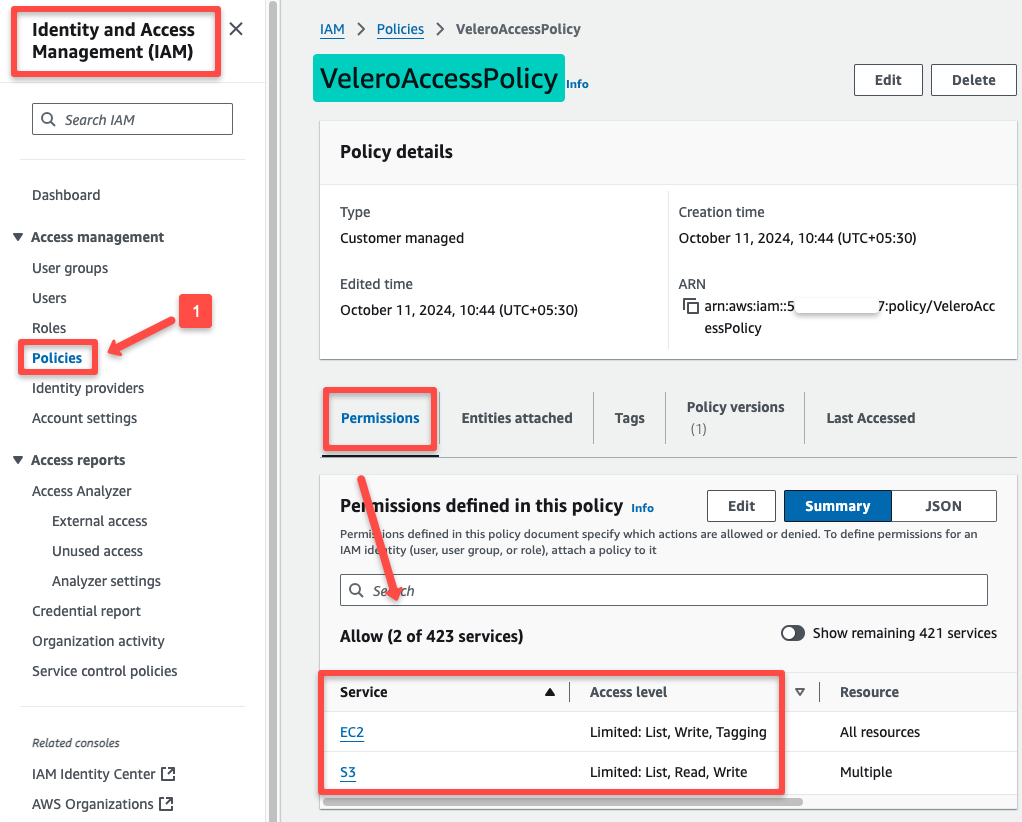
The IAM Policy is ready, so we have to create an IAM Role with it. Then, we can attach it to the Velero Pod.
Step 3: Create an IAM Role for Velero
First, we need to create a Trust Relationship JSON file for the Role.
cat <<EOF > trust-policy.json
{
  "Version": "2012-10-17",
  "Statement": [
    {
      "Effect": "Allow",
      "Principal": {
        "Service": "pods.eks.amazonaws.com"
      },
      "Action": [
        "sts:AssumeRole",
        "sts:TagSession"
      ]
    }
  ]
}
EOF
We will use the EKS Pod Identity Agent to provide the IAM Credentials to the Velero Pods to access the AWS services.
Create an IAM Role with the Trust Policy; use the following command.
export ROLE_NAME=VeleroAccessRoleaws iam create-role \
--role-name $ROLE_NAME \
--assume-role-policy-document file://trust-policy.jsonIf the IAM Role is successfully created, you can see the following output.
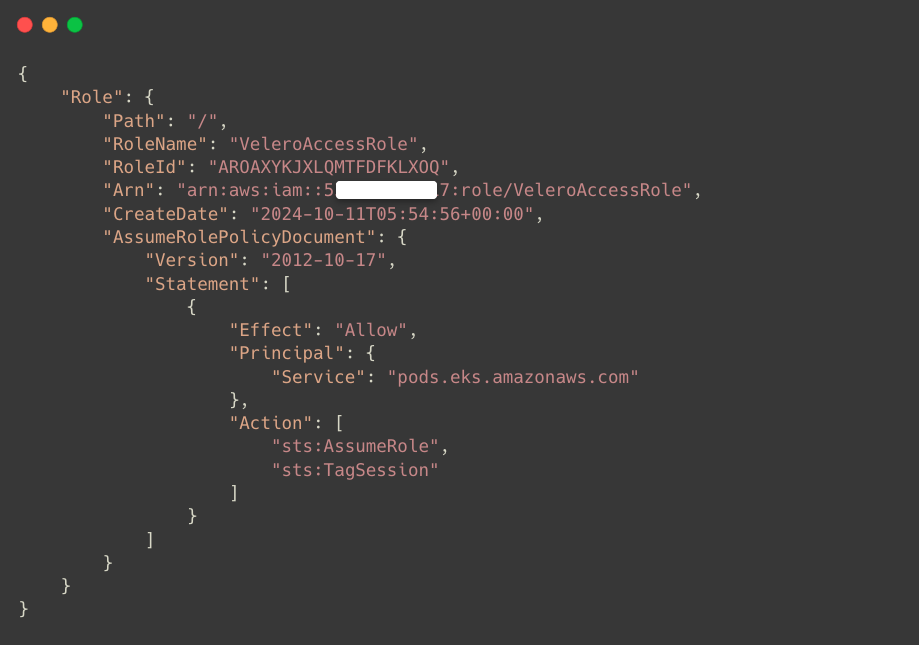
Now, we need to attach the IAM Role VeleroAccessRole to the IAM Policy VeleroAccessPolicy.
aws iam attach-role-policy \
    --role-name $ROLE_NAME \
    --policy-arn $POLICY_ARN
We can check the IAM Role on the console after attaching it with the IAM Policy.
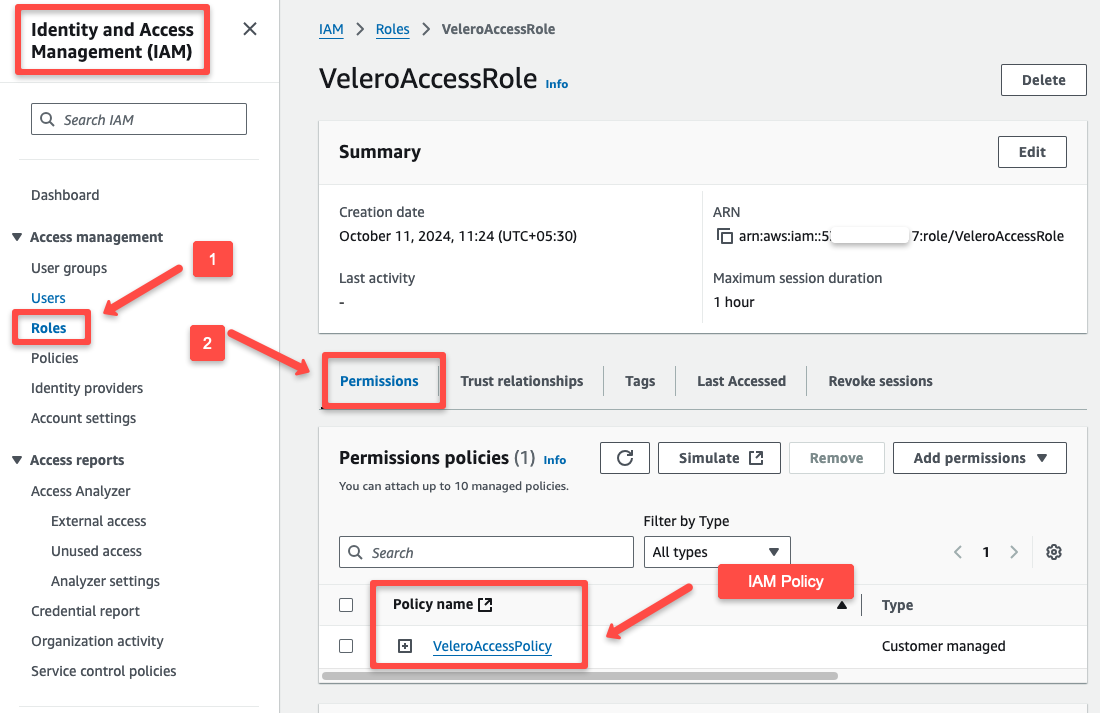
We can check the Trust Relationship as well.
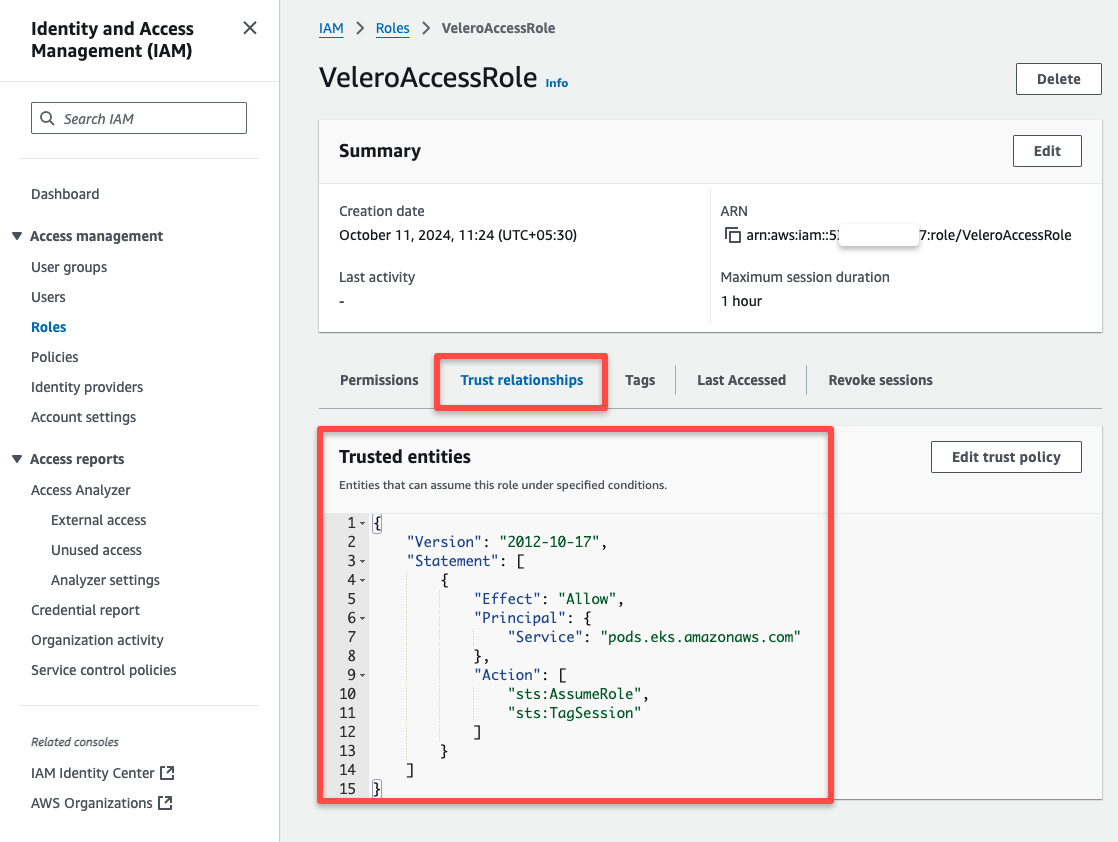
Use the following command to store the Role ARN as an environment variable for the upcoming configuration.
export ROLE_ARN=$(aws iam get-role --role-name $ROLE_NAME --query "Role.Arn" --output text)Step 4: Pod Identity Association
Before the Identity association, we need to create a Namespace and Service Account on the EKS Cluster for the Velero.
Follow the below commands to create Namespace and Service Account
export NAMESPACE=velero
export SERVICE_ACCOUNT=velero-server
kubectl create ns $NAMESPACE
kubectl -n $NAMESPACE create sa $SERVICE_ACCOUNTTo list the available Namespaces
kubectl get nsTo list the Service Account in the particular Namespace.
kubectl -n $NAMESPACE get saBefore performing the Pod Identity Association, we need to create the Cluster name as an environment variable and ensure that the Pod Identity Agent is present in the cluster.
To list the available EKS clusters.
aws eks list-clusters --region ${REGION}To create a cluster name as an environment variable
export CLUSTER_NAME=eks-cluster-pocTo list the available addons in the cluster.
aws eks list-addons --cluster-name $CLUSTER_NAME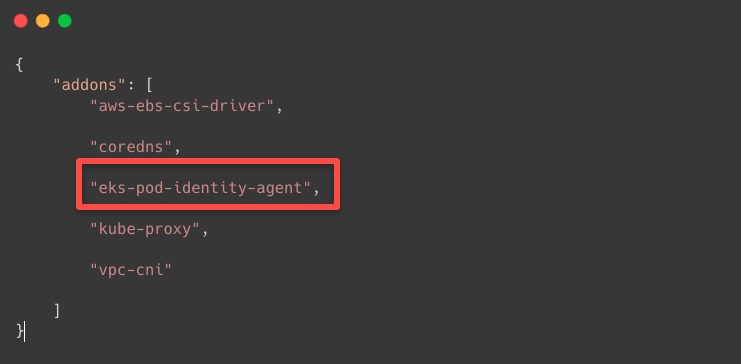
Use the following command if the Pod Identity Agent is unavailable in the cluster.
aws eks create-addon --cluster-name $CLUSTER_NAME --addon-name eks-pod-identity-agentThe Service Account is ready; we can perform the Pod Identity Association.
eksctl create podidentityassociation \
    --cluster $CLUSTER_NAME \
    --namespace $NAMESPACE \
    --service-account-name $SERVICE_ACCOUNT \
    --role-arn $ROLE_ARN
After the successful association, we can list the Pod Identity Associations.
aws eks list-pod-identity-associations --cluster-name $CLUSTER_NAME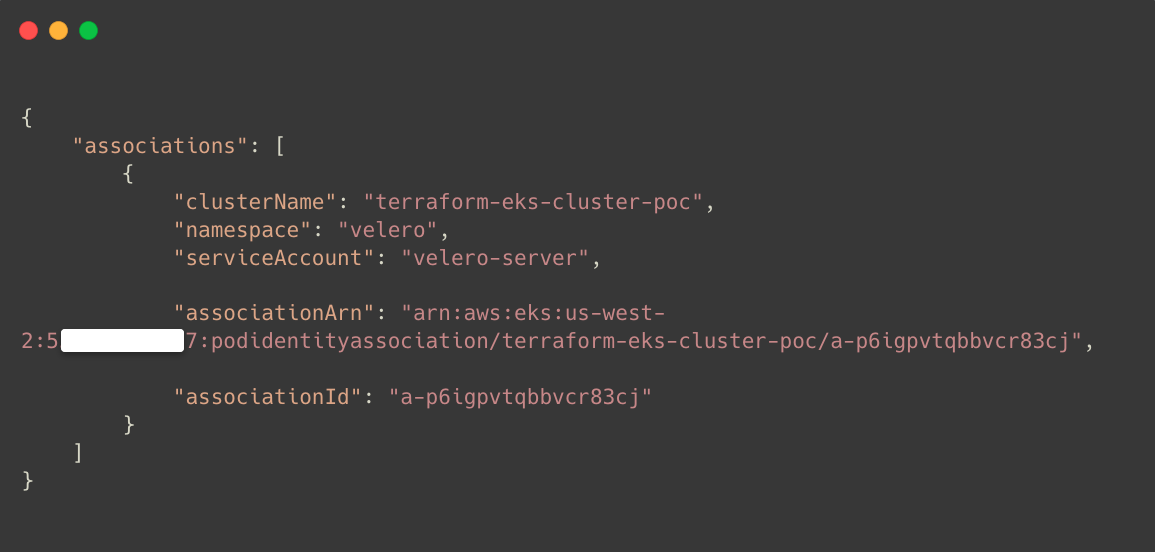
This ensures the Pod Identity Association is properly done to the Velero Service Account.
Step 5: Install Velero on EKS Cluster
We will use the Helm Chart to deploy the Velero in the Kubernetes cluster.
First, we need to add the Velero repo using Helm
helm repo add vmware-tanzu https://vmware-tanzu.github.io/helm-chartsWe need values.yaml file to know what changes we can make as per our requirements.
helm search repo vmware-tanzuThe output will provide the name of the chart and other details.
To get the values, we need the Chart name.
helm show values vmware-tanzu/veleroThis will show you all the available values we can use to modify the configuration for the Velero deployment.
We can take the entire output as a file, or we can copy only the necessary values to create a new values.yaml file.
For this tutorial, I am taking only the necessary information from the output and creating a new YAML file.
We need to set an environment variable for the provider; in our case, the provider is AWS.
export PROVIDER=awscat << EOF | envsubst > dev-values.yaml
initContainers:
- name: velero-plugin-for-aws
image: velero/velero-plugin-for-aws:v1.10.0
imagePullPolicy: IfNotPresent
volumeMounts:
- mountPath: /target
name: plugins
configuration:
backupStorageLocation:
- provider: ${PROVIDER}
bucket: ${BUCKET_NAME}
config:
region: ${REGION}
volumeSnapshotLocation:
- provider: ${PROVIDER}
config:
region: ${REGION}
serviceAccount:
server:
create: false
name: ${SERVICE_ACCOUNT}
credentials:
useSecret: false
EOFEnsure the S3 Bucket name and other details are properly placed in the YAML file.
To install the Velero using the Helm chart, use the following command.
helm install velero vmware-tanzu/velero \
    --namespace velero \
    -f dev-values.yaml
If the deployment is completed, we can see the following output.
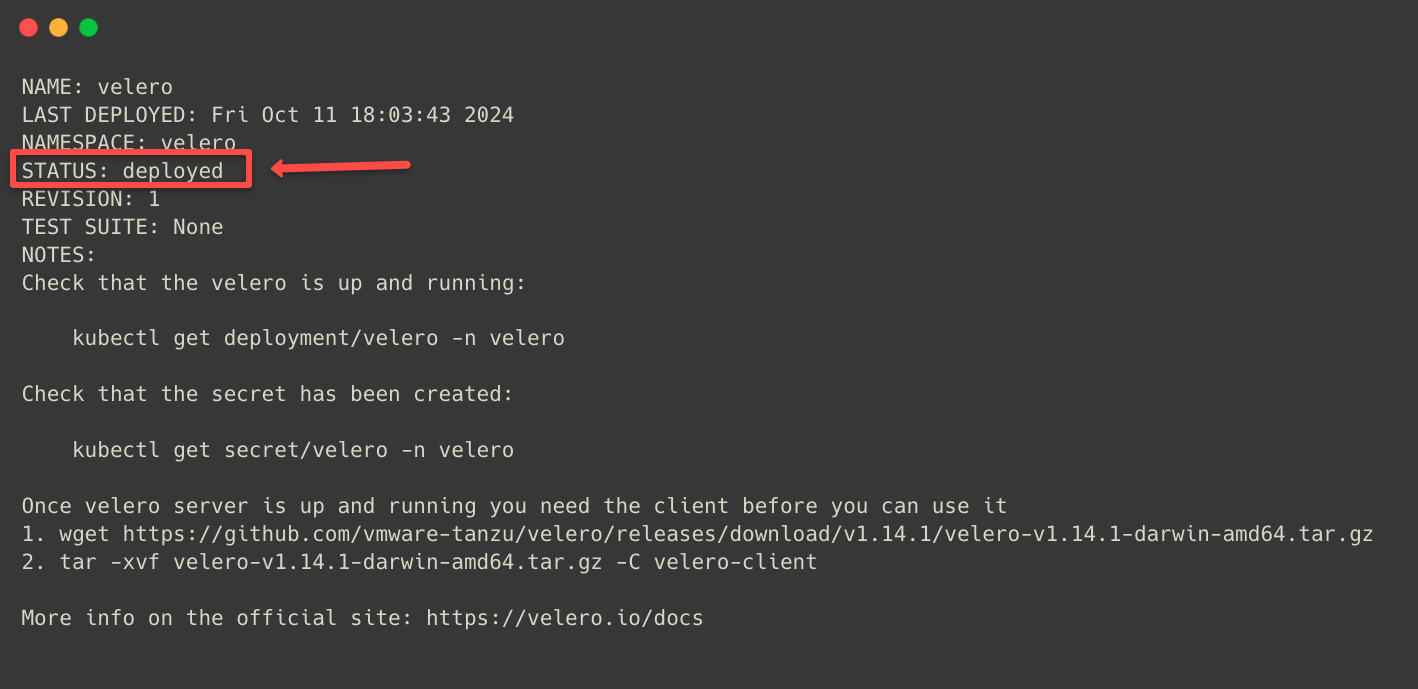
The Velero has been deployed, and we have to check what objects are created within.
kubectl -n ${NAMESPACE} get all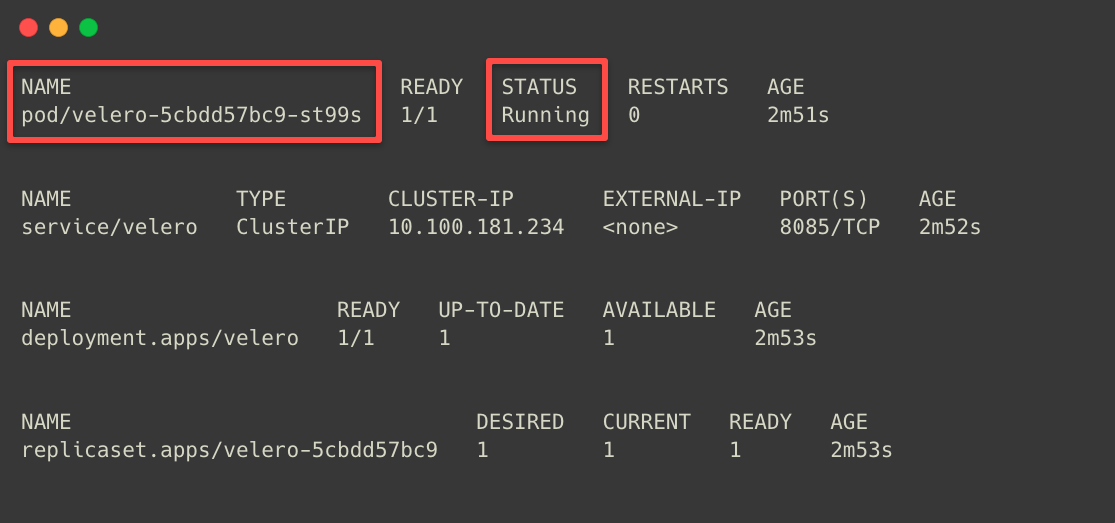
Describing the Pod will give more detailed information.
kubectl -n ${NAMESPACE} describe po <POD NAME>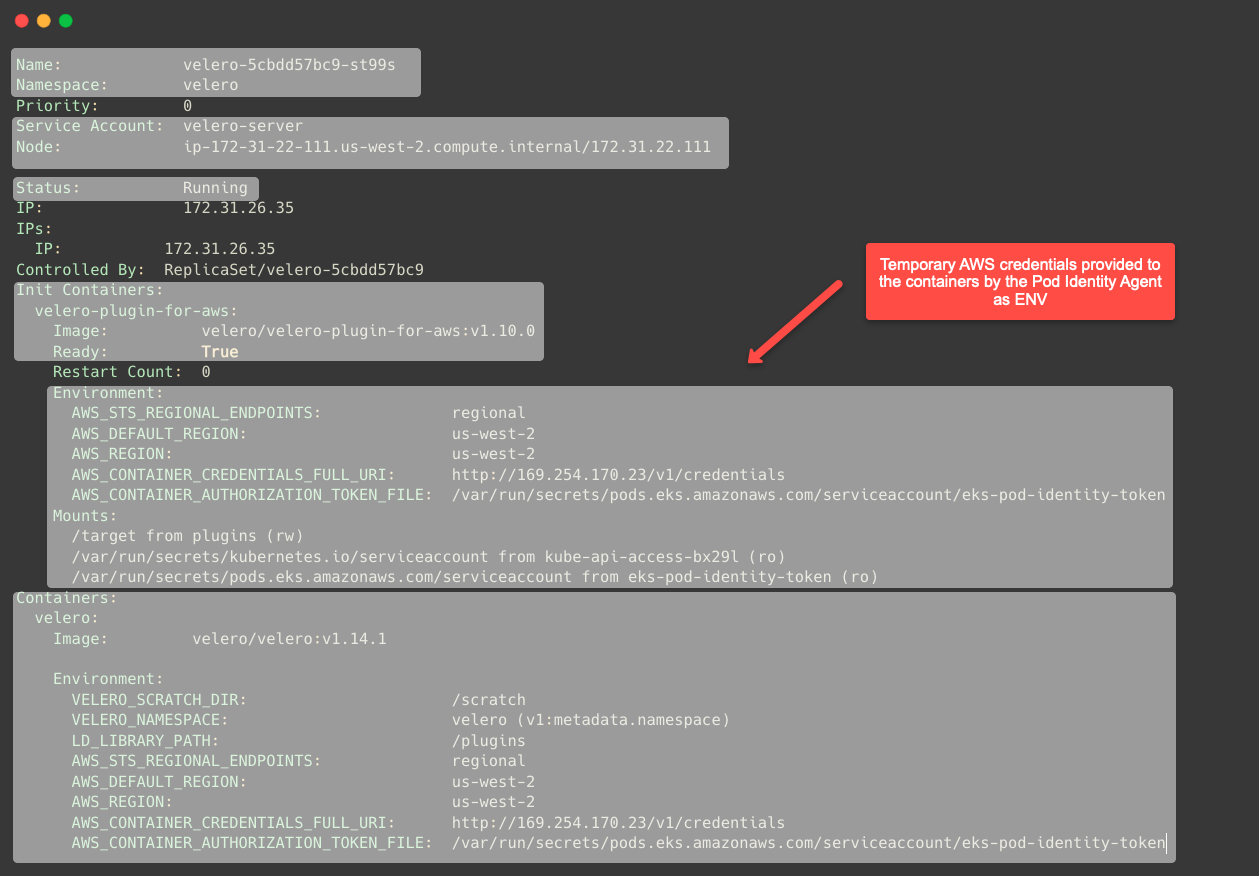
Here, we can see how the Pod Identity Agent provides the Velero Pod with temporary AWS credentials to access the other AWS services.
We will perform the Backup, Restore, and Schedule using its Custom Resource Definitions, so let's list the available CRDs.
kubectl -n ${NAMESPACE} get crds | grep velero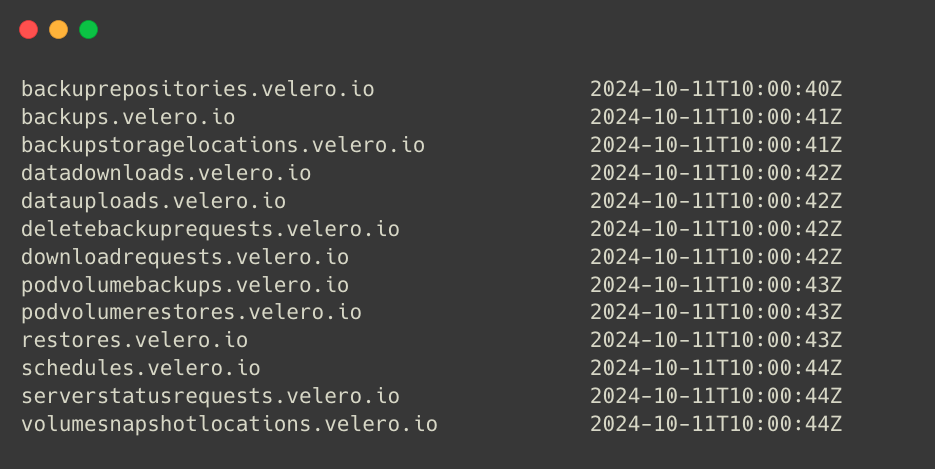
When we install Velero, we provide our backup storage and volume snapshot location, which will act as a default configuration.
But we can even configure it after the installation using Custom Resources, which are kind: BackupStorageLocation and kind: VolumeSnapshotLocation manifests.
Step 6: Install Velero CLI
We will install the Velero CLI utility on our local machine.
For Linux, use the following command.
curl -L https://github.com/vmware-tanzu/velero/releases/download/v1.14.1/velero-v1.14.1-linux-amd64.tar.gz -o velero.tar.gz
tar -zxvf velero.tar.gz
sudo mv velero-v1.14.1-linux-amd64/velero /usr/local/bin/
For macOS, use the following command.
brew install veleroCheck the version and ensure the Velero CLI is installed.
velero version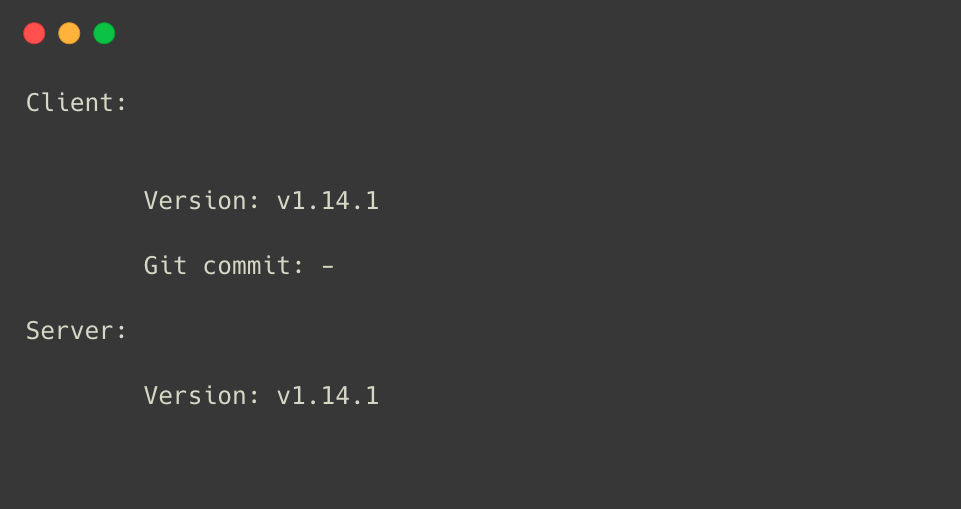
Backing Up Cluster Using Velero
Manual Backup Method
In Velero, we can manually take Backups or automate the process by scheduling.
The Backup and Restore operations we are going to perform using the Custom Resource Definitions (CRDs)
But before that, I will deploy a demo Deployment to test the setup.
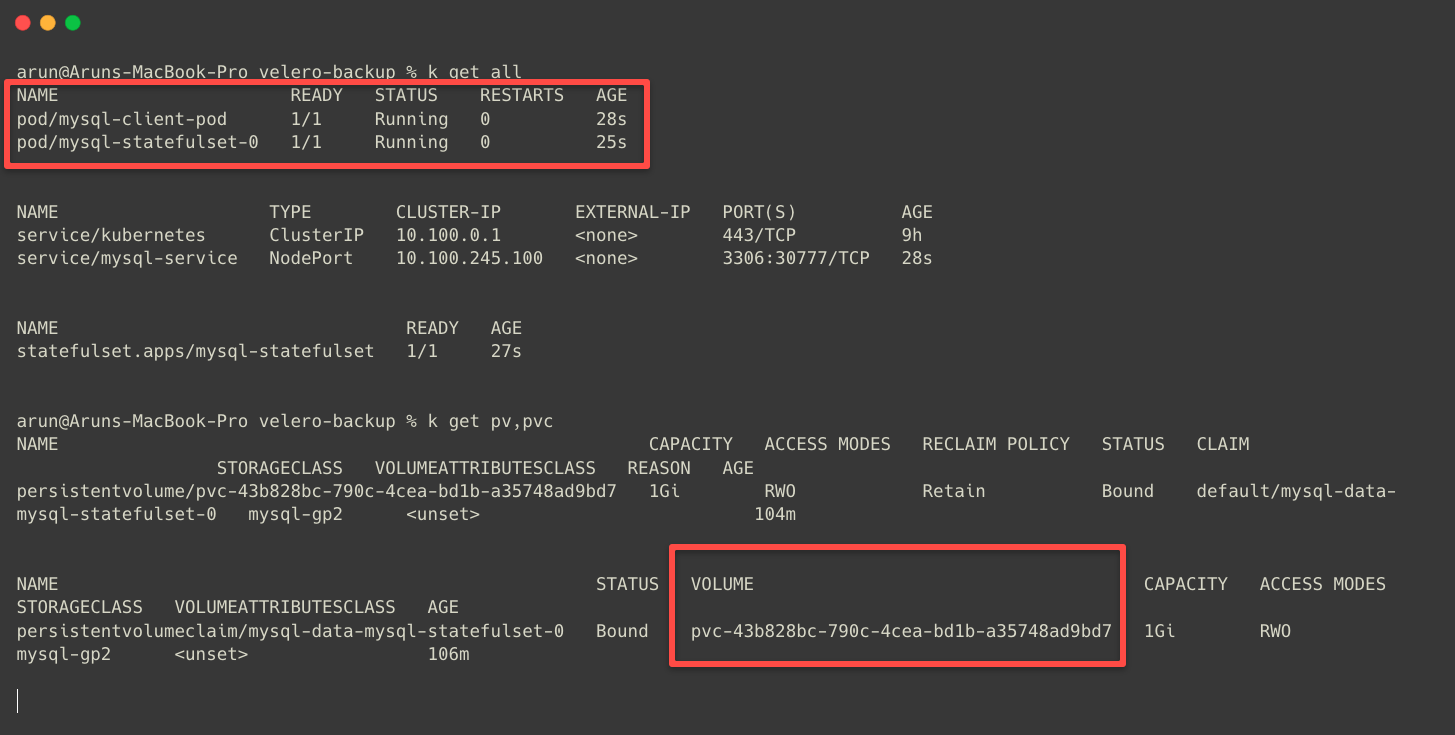
I have deployed a MySQL StatefulSet with a Persistent Volume. The manifest repo is attached if you want to replicate the same setup.
git clone https://github.com/kubernetes-learning-projects/mysql-statefulset.gitVelero can back up the entire cluster, but it is also possible to Back up only particular objects.
First, I manually back up the whole cluster, and for that, we execute a command from our local machine using the Velero CLI.
velero backup create test-backupInstead of using the command, we can create a Backup Custom Resource manifest to take backups.
apiVersion: velero.io/v1
kind: Backup
metadata:
  name: manual-backup
  namespace: velero
spec:
  includedNamespaces:
  - '*'
  excludedNamespaces:
  - kube-system
  includedResources:
  - '*'
  excludedResources:
  - storageclasses.storage.k8s.io
  includeClusterResources: null
  labelSelector:
    matchLabels:
      app: velero
      component: server
  snapshotVolumes: null
  storageLocation: aws-primary
  volumeSnapshotLocations:
    - aws-primary
    - gcp-primary
  ttl: 24h0m0s
  defaultVolumesToRestic: true
Creating a manifest will give more flexibility to make modifications to the configuration, but this time, we are using a CLI command to take a backup.
To describe the Backup, use the following command.
velero backup describe test-backup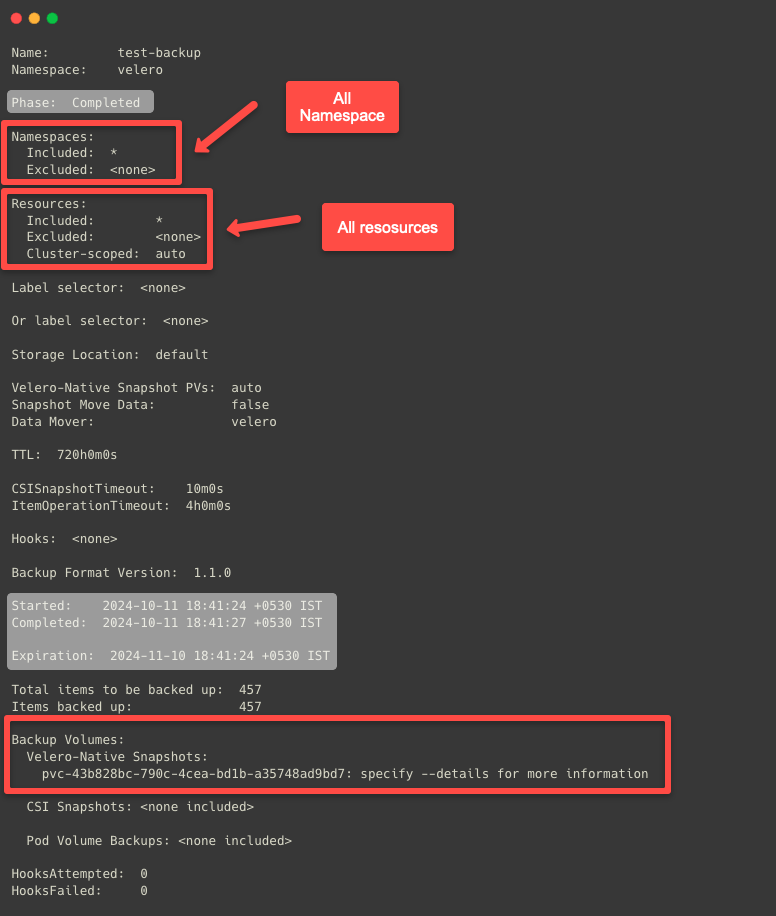
The default validity of a Backup is 30 days, but we can adjust that with the help of --default-backup-ttl flag.
Velero can snapshot the Node volumes on AWS only in the same regions.
To list the available backups.
kubectl -n velero get backupVelero has taken a snapshot of the EBS volume and stored the other backup data in the S3 bucket.
First, we can check the snapshot of the EBS volume from the AWS console.
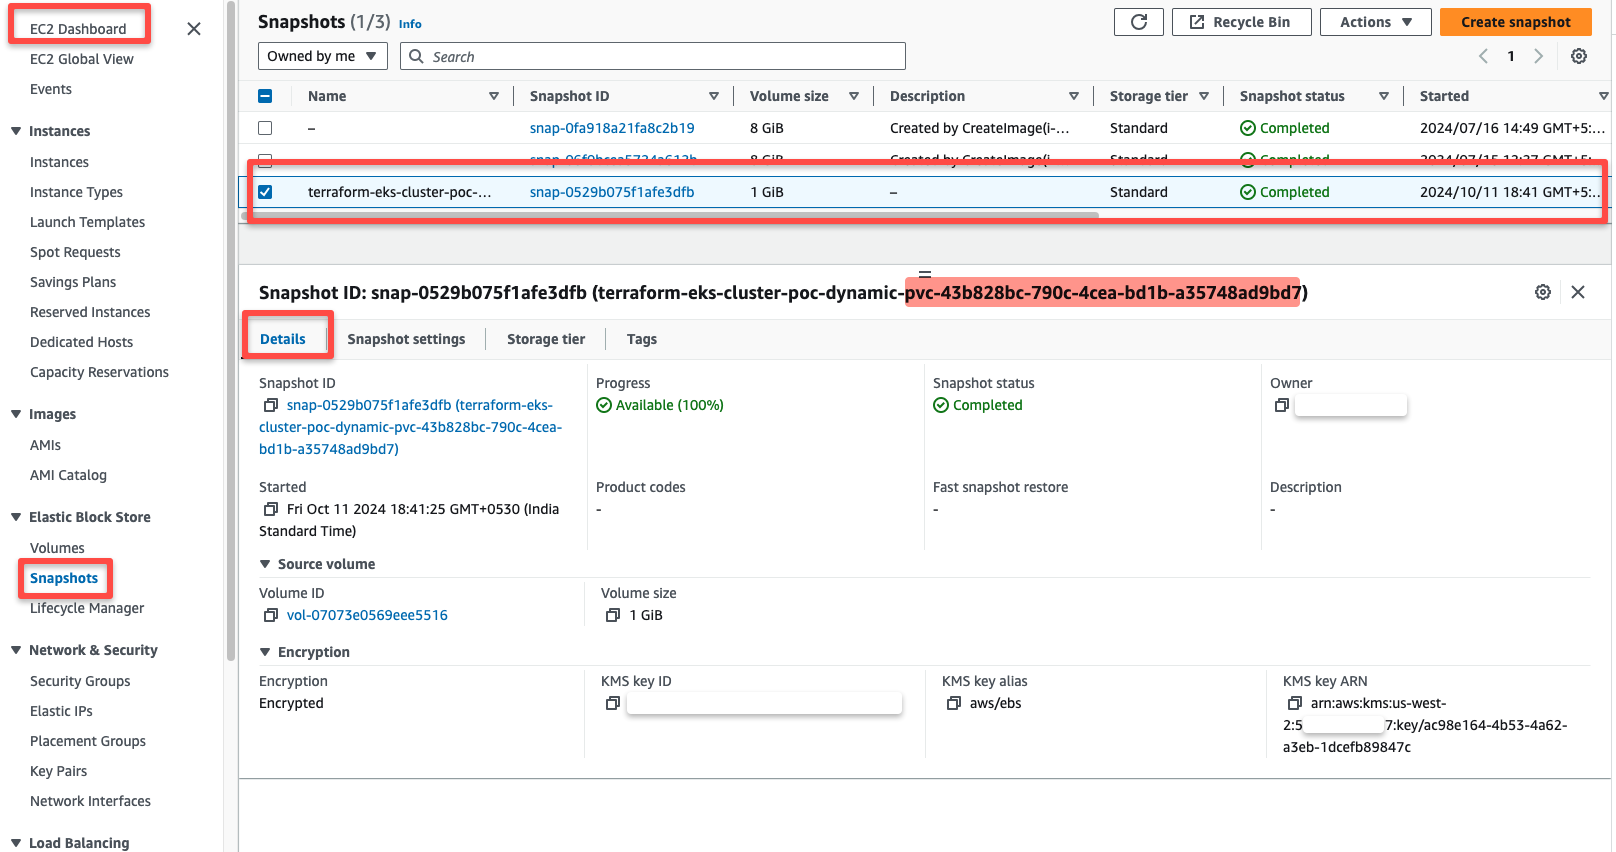
To view the other object's Backup, we have to look at S3.
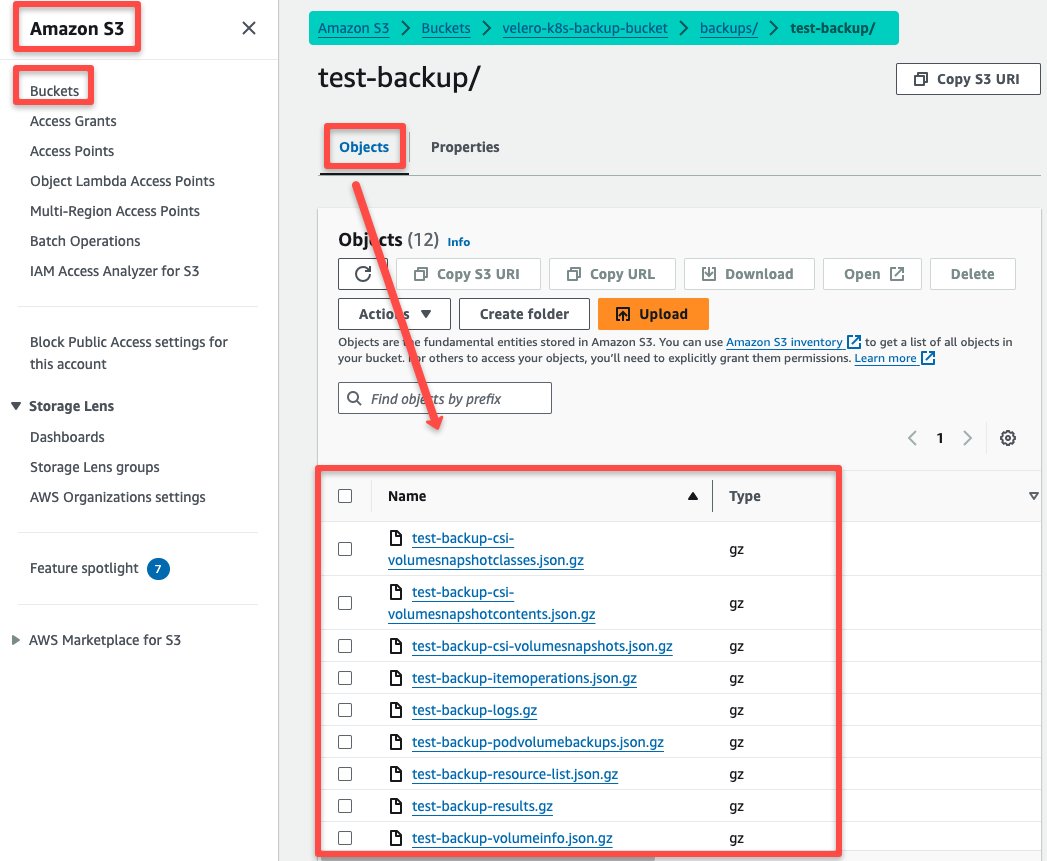
This ensures that the Cluster's object information and the volume snapshot are successfully backed up.
Restoring the Cluster Using Velero
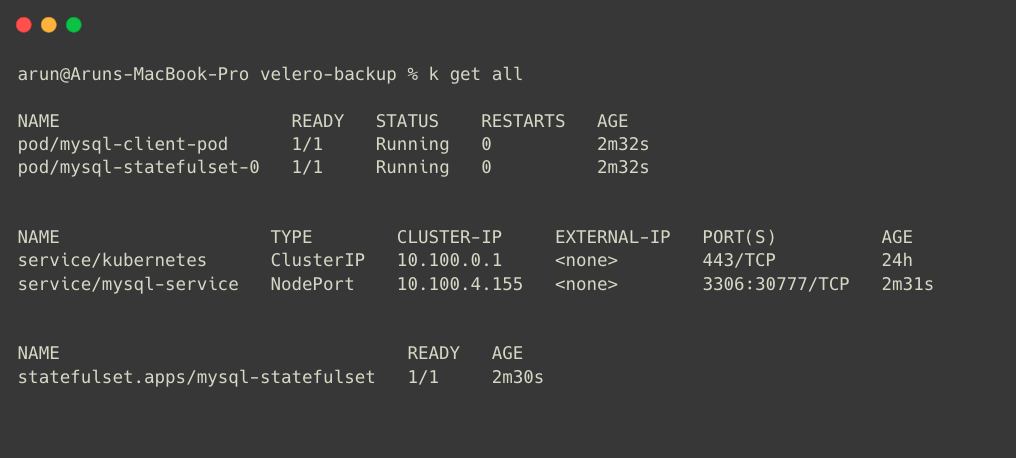
To test the Restoring process, I intentionally deleted the MySQL StatefulSet.
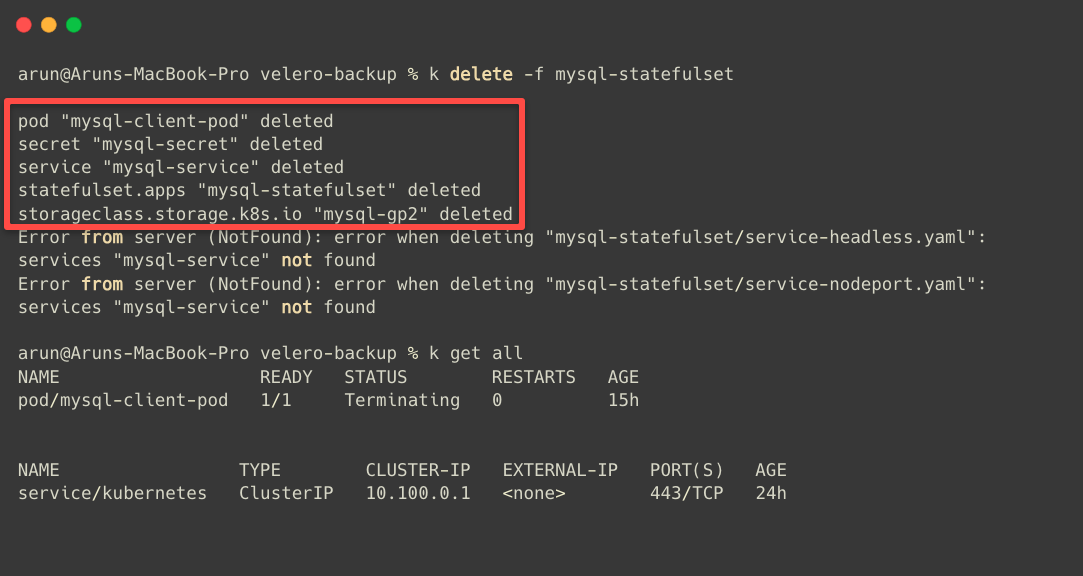
Now, I am restoring from the previous Backup, and when we perform Restore, it won't delete existing objects or resources on the cluster.
If the data is already in the cluster, the process will skip that part.
velero restore create test-restore --from-backup test-backupThe Restoring process is completed, but if you are Restoring it to another cluster, the API Server version should be the same as the source cluster.
velero restore describe test-restoreor
kubectl -n velero describe restore test-restore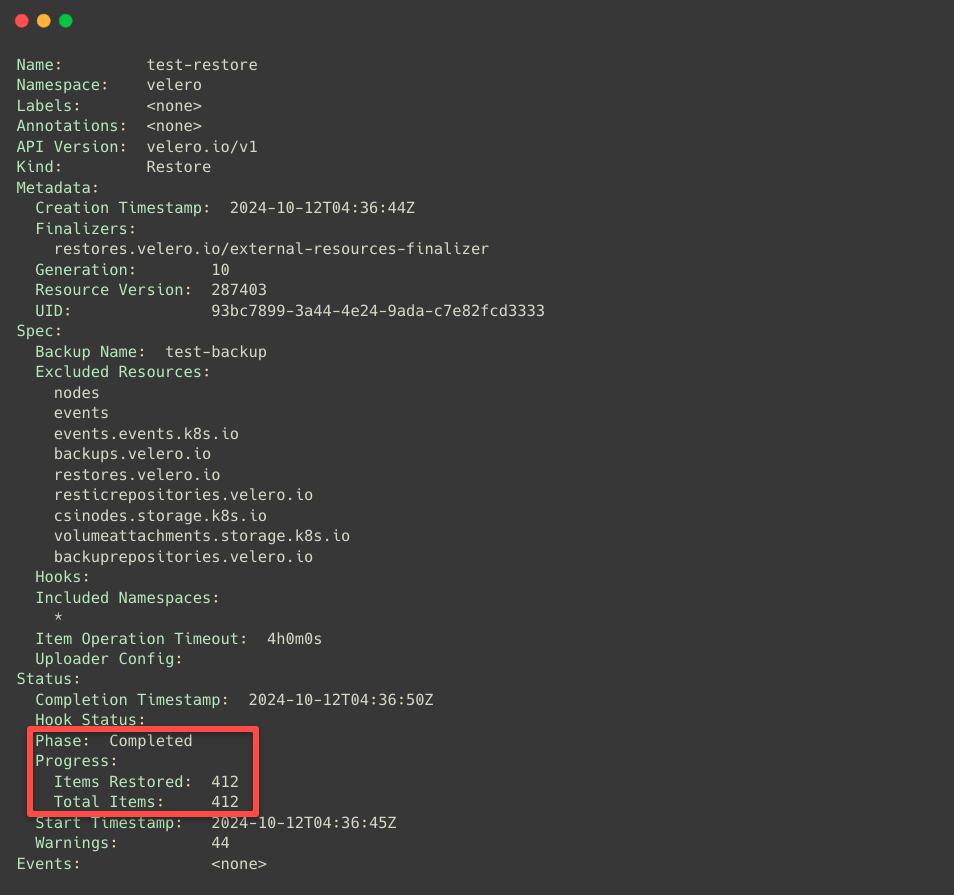
This will completely Restore the cluster. In Velero, you can also migrate your entire cluster to another Region.
Automatic Backup Method
We can schedule our Backup process, so then, without human intervention, we can conduct periodical Backups.
If you don't want the entire cluster to be Backed up but want some specific objects to be Backed up, we can do that, too, with the help of Velero.
Step 1: Create a Backup Storage Location
First, we are creating the BackupStorageLocation Custom Resource manifest to provide the backup storage configuration. We already provided the backup storage location in the Velero installation time, but that is the default one.
The default configuration will work if you do not create any resources for the backup storage and volume snapshot.
cat << EOF | envsubst > backup-storage-location.yaml
apiVersion: velero.io/v1
kind: BackupStorageLocation
metadata:
  name: custom-bsl
  namespace: velero
spec:
  backupSyncPeriod: 2m0s
  accessMode: ReadWrite
  provider: ${PROVIDER}
  objectStorage:
    bucket: ${BUCKET_NAME}
    prefix: custom-bsl
  config:
    region: ${REGION}
EOF
kubectl apply -f backup-storage-location.yamlTo list the Backup Storage Locations.
kubectl -n velero get backupstoragelocations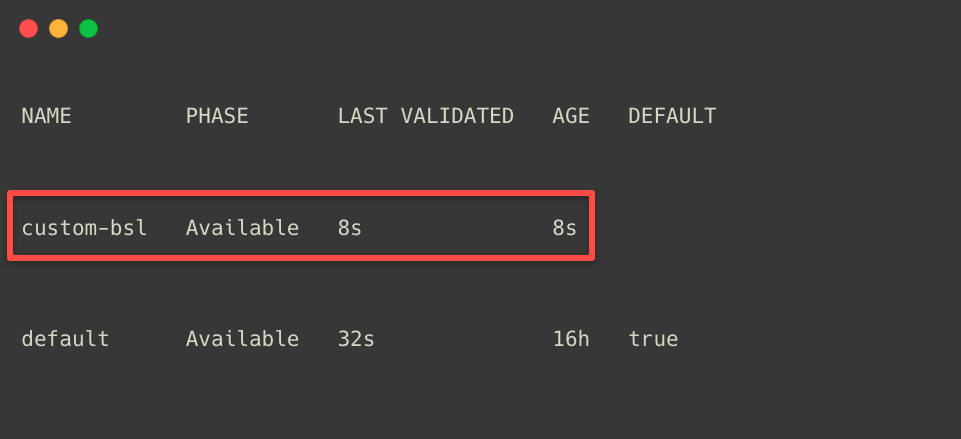
Step 2: Create a Volume Snapshot Location
We need to create a VolumeSnapshotLocation custom resource manifest for the volume snapshot configuration.
cat << EOF | envsubst > volume-snapshot-location.yaml
apiVersion: velero.io/v1
kind: VolumeSnapshotLocation
metadata:
  name: custom-vsl
  namespace: velero
spec:
  provider: ${PROVIDER}
  config:
    region: ${REGION}
EOF
kubectl apply -f volume-snapshot-location.yamlTo list the available Volume Snapshot Locations.
kubectl -n velero get volumesnapshotlocationsStep 3: Create a Backup Schedule
Here, I am creating a Velero schedule Custom Resource Manifest to Backup all objects from a particular Namespace.
cat << EOF > scheduled-backup.yaml
apiVersion: velero.io/v1
kind: Schedule
metadata:
  name: scheduled-backup
  namespace: velero
spec:
  schedule: "0/5 * * * *"
  template:
    includedNamespaces:
    - "default"
    includedResources:
    - "secrets"
    storageLocation: "custom-bsl"
    volumeSnapshotLocations:
    - "custom-vsl"
EOF
This manifest will take a Backup of all Secrets objects only from the default Namespace in every 5 minutes.
Before we schedule the backup, list the available secrets in the default namespace.
kubectl get secrets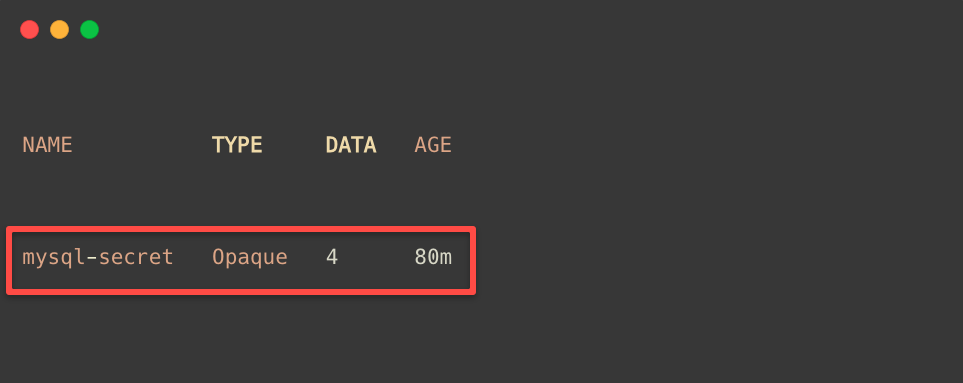
The parameters of the Backup CRD and the Schedule CRD are almost the same.
kubectl apply -f scheduled-backup.yamlScheduled Backups will be saved with a timestamp. For more about the parameters, please refer to the official documentation.
After waiting some time, we can list the backups.
kubectl -n velero get backup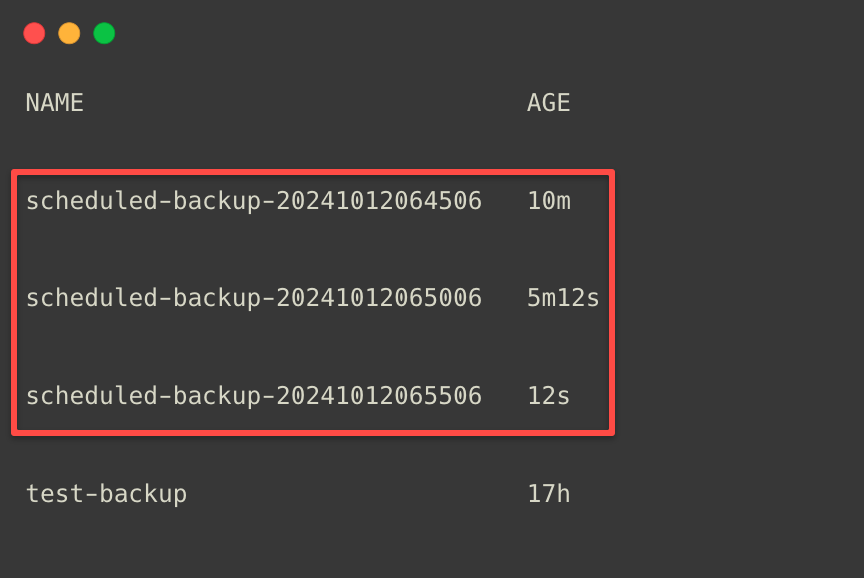
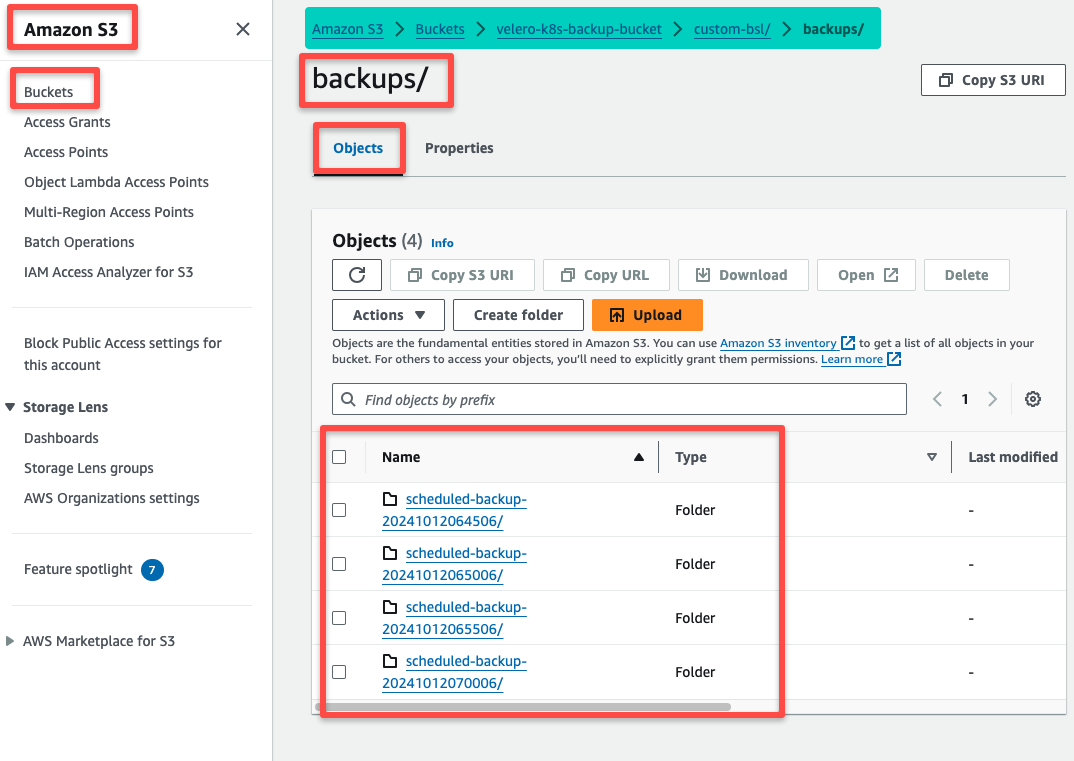
We can see that each backups are created in the 5-minute intervals.
We can check this to the S3 bucket as well.
I am deleting the Secret object from the default Namespace for testing purposes.
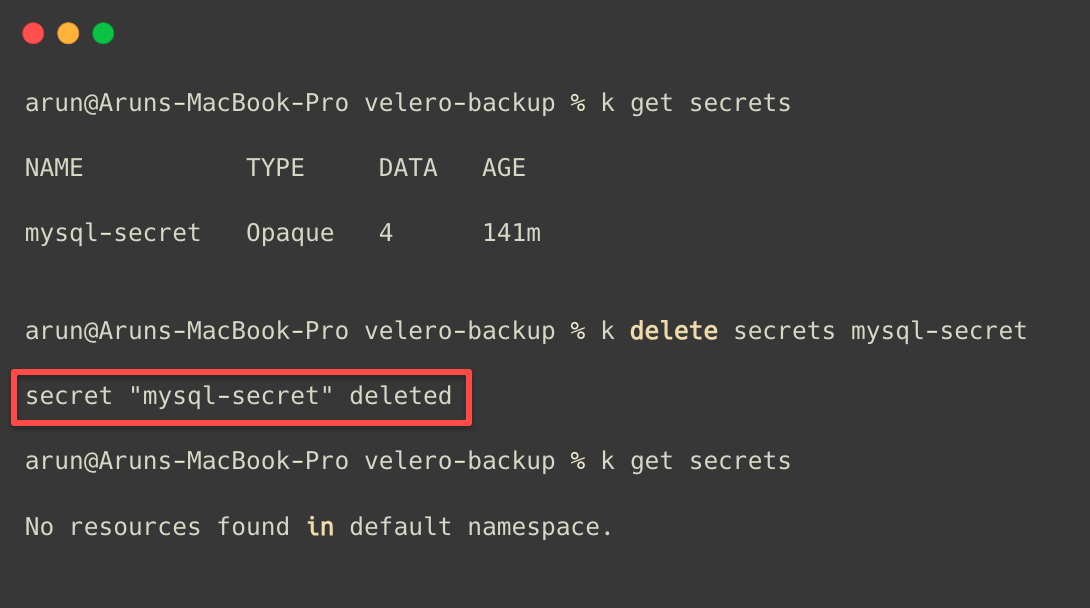
Now, we know that the Secret is deleted from the default Namespace.
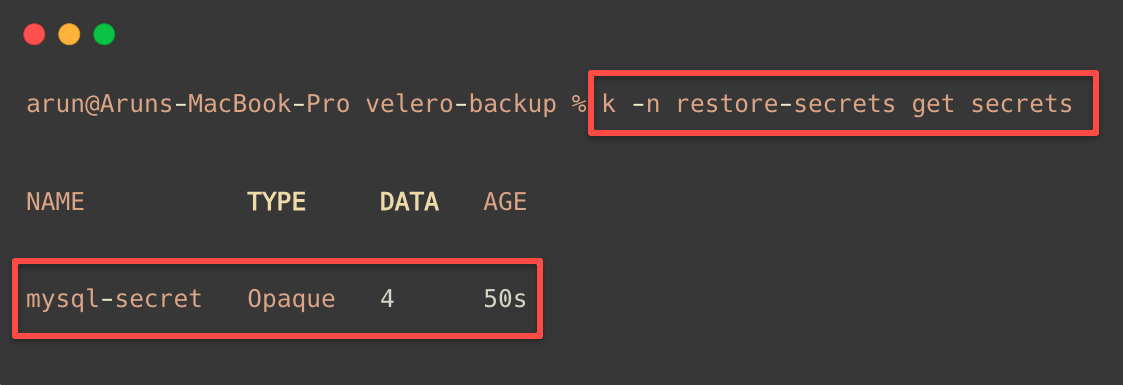
We have a backup and restore this, but we are restoring these resources in a new namespace.
Step 4: Configure Restore
First, I am creating a new Namespace restore-secrets
kubectl create ns restore-secretsWhen we perform Backup and Restore, we can exclude objects, too.
cat << EOF > restore.yaml
apiVersion: velero.io/v1
kind: Restore
metadata:
  name: my-daily-backup-restore
  namespace: velero
spec:
  backupName: scheduled-backup-20241012065006
  includedNamespaces:
    - default
  # excludedResources:
  #   - "Pods"
  # restorePVs: true
  namespaceMapping:
    default: restore-secrets
EOF
In spec.namespaceMapping section, on the left side, we provide the Backup from Namespace and on the right side, Restore to Namespace to migrate the objects from one Namespace to another.
If you want to delete the backup data, you should clean up the EBS snapshots created by Velero from the EC2 dashboard and need to clean the S3 bucket data.
Conclusion
This is a high-level overview of the Velero and a hands-on. You can do more with this utility because Velero gives more flexibility when backing up the cluster.
To store backups, try different storage solutions at your convenience. To learn more about Velero, try all the Custom Resource definitions; please refer to the official documentation.


