In this blog, you will learn about the AWS IAM role and instance profile, its use cases with practical examples.
As an end user, to access AWS services, you need a valid AWS account with the necessary permissions. For users other than the root user (the admin user), these permissions are granted through AWS IAM policies. The policy defines the set of permissions on an AWS service.
Users can access AWS services via the AWS Management Console. To access services through AWS CLI and programming SDKs, the user must use the AWS access key and secret key, which can be obtained from the AWS account page.
What is an IAM Role?
AWS has many services. When you design applications on the AWS cloud, in most cases, you would use more than one service.
Assume you want to deploy a photo-sharing app on EC2 that uses S3 as a storage for storing user images.
In this case, the application running on EC2 should have read and write access to S3 to store and retrieve user images.
How does the application get access to S3?
One way is to add the access key and secret key of a user to the EC2 instance, and the application will make use of the credentials to access S3.
However, this approach has its downsides in terms of the security risk of accidentally leaked access keys, difficulty in key rotation, flexibility, and traceability.
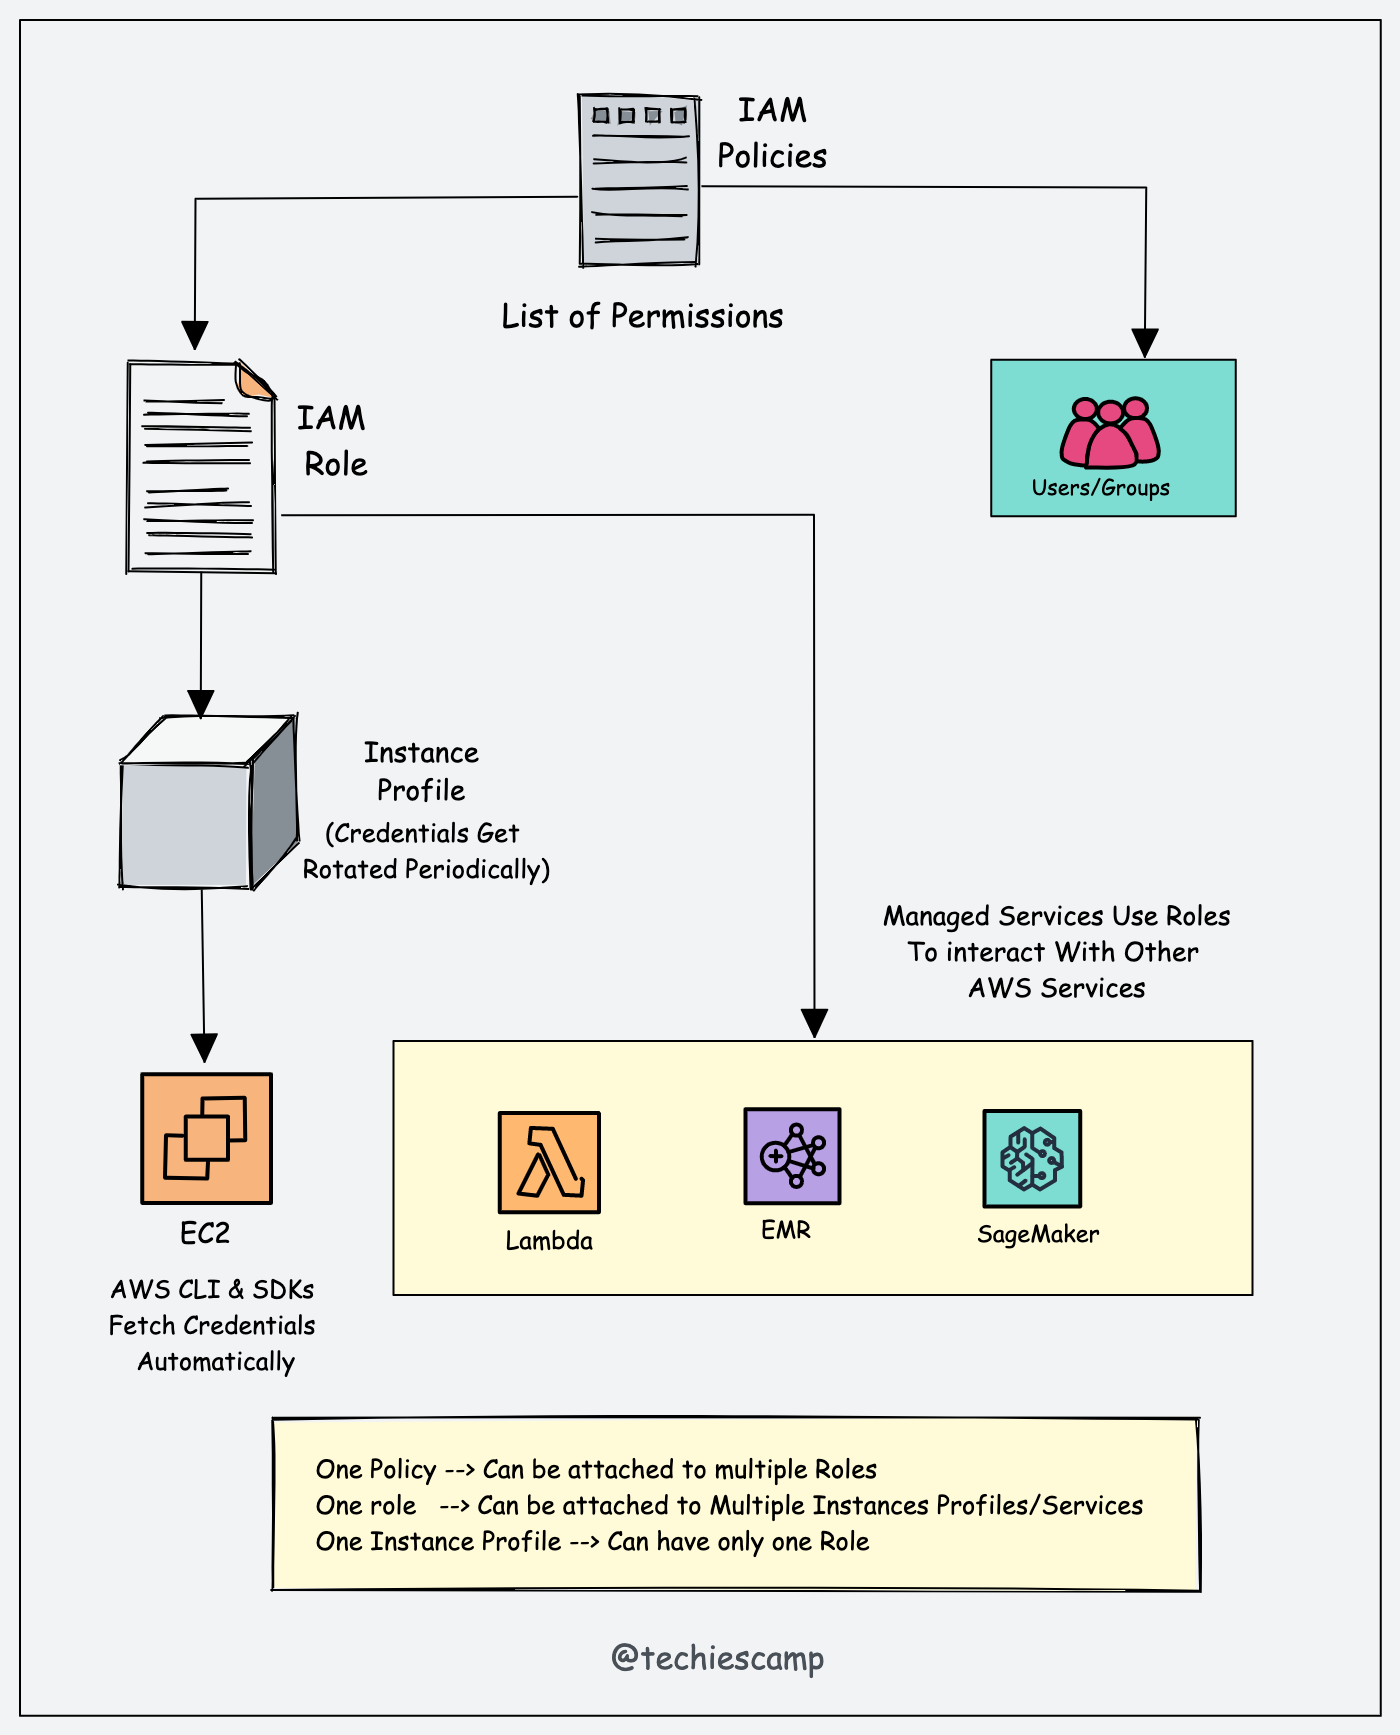
To overcome this, AWS provides an option called IAM Roles to securely grant permissions to various AWS services without having to share long-term security credentials like access keys.
For example, we attach an IAM policy with the required permissions for the IAM role. And then attach the role to the EC2 instance. AWS SDKs and CLI tools can automatically fetch the access key and secret key generated by the role inside the instance.
It's important to note that IAM roles are not specific to EC2 instances. There are many services in AWS that can make use of IAM roles.
For example, when you deploy an EMR cluster, the EMR-managed service requires permission to launch an EC2 instance in specific networks. This launch permission can be given to EMR by attaching an IAM role that has permission to read network details and launch instances in a VPC.

What is an Instance Profile?
If you want to attach an IAM role to an EC2 instance, you need to use an Instance Profile.
When you create an IAM role from the AWS console, the instance profile gets automatically created with the same name. That is why you don't see an instance profile option in the UI.
However, when you use the CLI or SDK, you need to create the instance profile separately and attach it to the IAM role, and then attach the instance profile to the EC2 instance.
Here is how the AWS instance profile works in the background.
- When you launch an EC2 instance and associate an IAM role/instance profile, AWS generates temporary security credentials for that role.
- The temporary credentials are made available through the instance metadata at
http://169.254.169.254/latest/meta-data/iam/security-credentials/role_name. AWS SDKs and CLI make use of these credentials when required. - AWS automatically rotates the temporary security credentials multiple times a day. When new credentials are generated, the old ones are invalidated. At the backend, the STS Assume role is used for rotation.
- AWS takes care of managing the lifecycle of these temporary credentials, including their creation, distribution, and expiration.
Also, one instance profile can have only one Role attached to it. However, a role can be attached to multiple instance profiles.
How to Attach an IAM Role to an Instance From AWS Console?
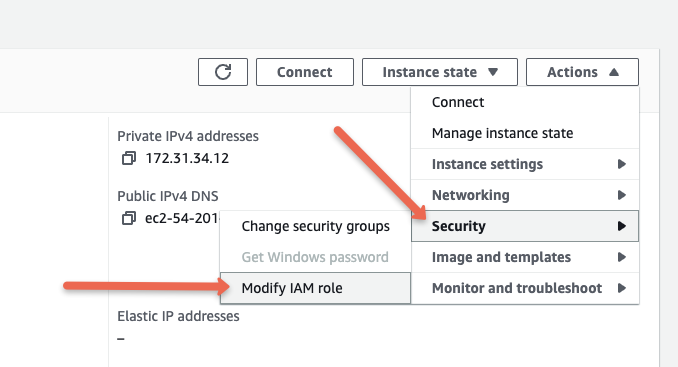
You can attach an IAM role to an EC2 instance under the security settings as shown in the image below.
Go to Actions --> Security and Modify IAM Role.

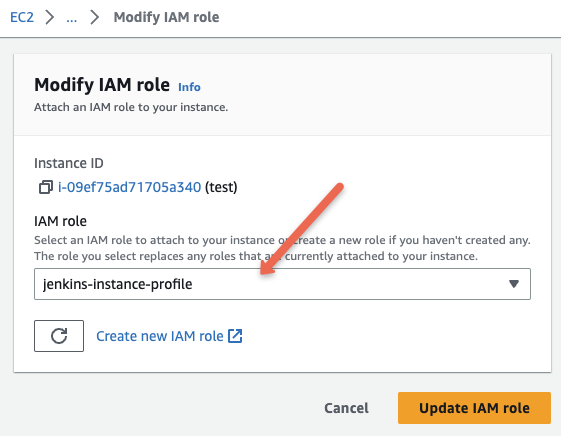
From the dropdown, you can select the required role and update it as shown in the image below.


