

In kubernetes tutorial, I have added step-by-step guides to upgrade the Kubernetes cluster using Kubeadm. It is one of the important tasks in the CKA Exam.
In another blog, I have covered the Kubeadm cluster setup. You can follow it to deploy a fresh cluser for testing the upgrade.
Kubeadm Kubernetes Cluster Upgrade
We need to run the upgrades in the following order
- Control plane node
- Worker Nodes
Also, we need to upgrade the following components on both the control plane and the worker nodes.
- Kubeadm
- Kubelet
- Kubectl
Before we get started you should know the cluster and node names. Execute the following command to get the node names.
kubectl get nodesYou will get the following output.
NAME           STATUS   ROLES           AGE    VERSION
controlplane   Ready    control-plane   7d7h   v1.34.0
node01         Ready    worker          7d7h   v1.34.0
Upgrade The Control Plane
Following are the high level steps for the control plane upgrade
- Login to control plane
- Check the existing version
- unhold kubeadm and Install the latest kubeadm version
- Decide on the upgrade version by running a kubeadm upgrade plan (Same version patch or new version)
- Apply Kubeadm upgrade
- Evict all workloads from control plane except daemonsets
- Upgrade kubectl and kubelet.
- Make the control plane schedulable (Uncordon)
Lets get started with the Upgrade.
Step 1: Check the existing Kubeadm version
Login to the control plane and can check the existing version using the following command.
kubeadm version -o jsonYou will get the following output.
{
  "clientVersion": {
    "major": "1",
    "minor": "34",
    "gitVersion": "v1.34.0",
    "gitCommit": "f28b4c9efbca5c5c0af716d9f2d5702667ee8a45",
    "gitTreeState": "clean",
    "buildDate": "2025-08-27T10:15:59Z",
    "goVersion": "go1.24.6",
    "compiler": "gc",
    "platform": "linux/arm64"
  }
}
Step 2: unhold kubeadm and Install the latest version
During the Kubeadm cluster installation process, you would have hold the kubeadm installation to prevent upgrades.
Now we need to unhold kubeadm.
sudo apt-mark unhold kubeadm Check the available latest Kubeadm version using the following command.
sudo apt-cache madison kubeadm | tacYou will get the following output.
   kubeadm | 1.34.0-1.1 | https://pkgs.k8s.io/core:/stable:/v1.34/deb  Packages
   kubeadm | 1.34.1-1.1 | https://pkgs.k8s.io/core:/stable:/v1.34/deb  Packages
   kubeadm | 1.34.2-1.1 | https://pkgs.k8s.io/core:/stable:/v1.34/deb  Packages
   kubeadm | 1.34.3-1.1 | https://pkgs.k8s.io/core:/stable:/v1.34/deb  Packages
   kubeadm | 1.34.4-1.1 | https://pkgs.k8s.io/core:/stable:/v1.34/deb  Packages
   kubeadm | 1.34.5-1.1 | https://pkgs.k8s.io/core:/stable:/v1.34/deb  Packages
   kubeadm | 1.34.6-1.1 | https://pkgs.k8s.io/core:/stable:/v1.34/deb  Packages
In my case the latest version is 1.34.6-1.1. Update and install the latest version using the following command. Replace the version number you get from the output.
sudo apt-get update -y
sudo apt-get install -y kubeadm=1.34.6-1.1
Hold kubeadm package.
sudo apt-mark hold kubeadmStep 3: Decide on the upgrade version
You can get the list of available kubernetes version using the kubeadm upgrade plan.
sudo kubeadm upgrade planThe output will show the version that can be applied for the upgrade. In my case the version to be upgraded is v1.34.6. Change this version as per your output.
Step 4: Apply Kubeadm upgrade
Apply the upgrade using the following command with the version.
kubeadm upgrade apply v1.34.6Now if you check the kubeadm version, you can see the upgraded version.
{
  "clientVersion": {
    "major": "1",
    "minor": "34",
    "gitVersion": "v1.34.6",
    "gitCommit": "8b2bf66ce7018f6e13e8767624d4ce7768a8a2e5",
    "gitTreeState": "clean",
    "buildDate": "2026-03-18T19:18:06Z",
    "goVersion": "go1.24.13",
    "compiler": "gc",
    "platform": "linux/arm64"
  }
}
Step 6: Drain the Node to evict all workloads.
To apply the upgrade we nee to evict all the workloads except daemonsets using the following command. Replace controlplane with your controlplane node name.
kubectl drain controlplane --ignore-daemonsetsStep 7: Upgrade Kubelet and Kubectl.
Unhold and upgrade kubectl and kubelet using the following commands.
sudo apt-mark unhold kubelet kubectl
sudo apt-get update
sudo apt-get install -y kubelet=1.34.6-1.1 kubectl=1.34.6-1.1
sudo apt-mark hold kubelet kubectl
Restart the services.
sudo systemctl daemon-reload
sudo systemctl restart kubelet
Step 7: Uncordon the Node and Verify the Node Status
Use the following command to uncordon the control plane node
kubectl uncordon controlplaneVerify the node status and version using the following command.
kubectl get nodesYou can see the control plane upgraded to the new version and nodes running on the old version as shown below.
NAME           STATUS   ROLES           AGE    VERSION
controlplane   Ready    control-plane   7d7h   v1.34.6
node01         Ready    worker          7d7h   v1.34.0
Upgrade Worker Nodes
Worker node upgrade steps are similar to control plane upgrade. However the internal upgrade process differ from control plane.
All the following steps should be executed on the Worker node. If you have multiple worker nodes, upgrade one at a time.
Step 1: Unhold Kubeadm and Install Required Version
Install the required version of Kubeadm on worker nodes. Replace 1.34.6-1.1 with you version.
sudo apt-mark unhold kubeadm
sudo apt-get update && sudo apt-get install -y kubeadm=1.34.6-1.1
sudo apt-mark hold kubeadm
Step 2: Upgrde Kubeadm
As you are running the following command on a worker node, it skips all the steps required for the control plane and update only kubelet configuration required for a worker node.
sudo kubeadm upgrade nodeStep 3: Drain the Node
Evict all the pods on the worker node by draining it. Replace node01 with your worker node name. Execute this command from terminal where you have kubectl access.
kubectl drain node01 --ignore-daemonsetsIf pods are using local storage, you might get the following error. This is mostly occur in vagrant setup. In CKA exam, you will not probably face this issue.
error: unable to drain node "node01" due to error:cannot delete Pods with local storage (use --delete-emptydir-data to override): kube-system/metrics-server-69fb86cf66-nqmhn, continuing command...
There are pending nodes to be drained:
 node01
cannot delete Pods with local storage (use --delete-emptydir-data to override): kube-system/metrics-server-69fb86cf66-nqmhn
To rectify that issues, you need to add the --delete-emptydir-data as well.
kubectl drain node01 --ignore-daemonsets --delete-emptydir-dataStep 4: Upgrade Kubelet & Kubectl
Run these commands on worker nodes
sudo apt-mark unhold kubelet kubectl
sudo apt-get update
sudo apt-get install -y kubelet=1.34.6-1.1 kubectl=1.34.6-1.1
sudo apt-mark hold kubelet kubectl
Restart kubelet
sudo systemctl daemon-reload
sudo systemctl restart kubelet
Step 5: Uncordon worker node
Execute the following uncordon command from the node where you have kubectl access.
kubectl uncordon node01Verify Cluster Upgrade
Now that we have upgraded the control plane node and the worker nodes, lets verify if the cluster is upgraded and working as expected.
Get the node information
kubectl get nodesYou should see the control plane and worker nodes upgraded to the specified version.
NAME           STATUS   ROLES           AGE    VERSION
controlplane   Ready    control-plane   7d8h   v1.34.6
node01         Ready    worker          7d7h   v1.34.6
From the control plane node, you can use any one of the following kubectl commands to check the status of all the cluster components.
kubectl get --raw='/readyz?verbose'
curl -k https://localhost:6443/livez?verbose
Also, check if all the kube-system control node pods are running.
kubectl get po -n kube-system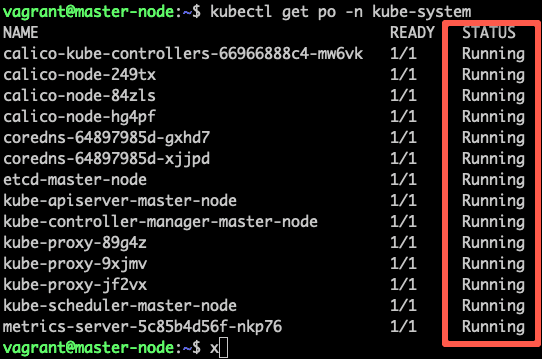
Conclusion
Kubeadm utility helps you upgrade the Kubernetes cluster control plane and worker nodes without downtime. Ensure you verify the cluster and application status after the upgrade.
Also, Kubeadm cluster upgrade is one of the important topics in Kubernets CKA certification. If you are preparing for CKA exam, you can check out CKA exam guide.
If you are preparation for Kubernetes certification, checkout the best Kubernetes certification guide that matches your skillset.