
![How to Setup Jenkins Agent Using SSH [Password & SSH Key]](https://storage.ghost.io/c/5f/2f/5f2f4d20-2abf-4534-8d40-7aa233aedd43/content/images/size/w2000/format/webp/2025/03/jenkins-master-slave-ssh-1.jpg)
In this beginner's guide, we will walk you through the steps to set up Jenkins agent nodes using SSH (Password and SSH key-based authentication).
One of the best features of Jenkins is its distributed nature. You can configure multiple build slaves for better segregation and scalability.
For example, you might want to test a cross-platform code base with a different operating system. In this case, you can set up different Jenkins agents or slaves and run the job against them.
Also, a Jenkins distributed architecture will reduce the load on the master server.
Setup Jenkins Agents/Slaves on Jenkins
In this guide, I will walk you through the steps for setting up the Jenkins agent node using password and SSH keys.
There are two ways of authentication for setting up the Linux Jenkins slave agents.
- Using username and password
- Using ssh keys.
Also, do check out my Jenkins Docker Based Agent. You can scale and manage your Jenkins agent using Docker containers.
Jenkins Agent Prerequisites
For Jenkins agent configuration, you need to have the following in the slave machines before adding it to the master.
- Java should be installed on your agent server.
- A valid Linux user account that can perform the required tasks on the agent server. (preferably a sudo user if your job requires elevated privileges)
- Git should be installed as most build job requires git-specific actions.
Let's get started with the Jenkins agent node configuration.
Create a Jenkins User
It is recommended to execute all Jenkins jobs as a Jenkins user on the Jenkins agent nodes.
Step 1: Create a Jenkins user and a password using the following command.
sudo adduser jenkins --gecos ""Type a password when prompted. The above commands should create a user and a home directory named Jenkins under "/home".
Step 2: Now, log in as a Jenkins user.
su jenkinsStep 3: Create a "jenkins-agent" directory under /home/jenkins.
mkdir /home/jenkins/jenkins-agentSetting up Jenkins Agents/Slaves using username and password
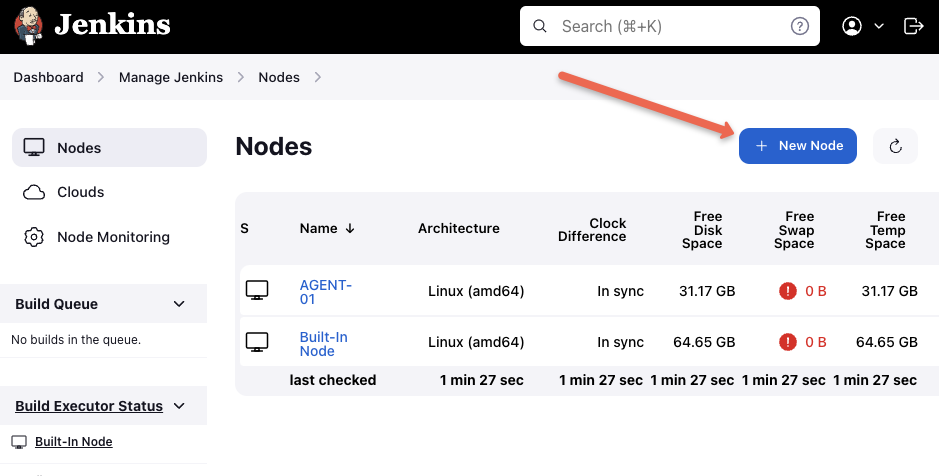
Step 1: Head over to Jenkins dashboard --> Manage Jenkins --> Nodes
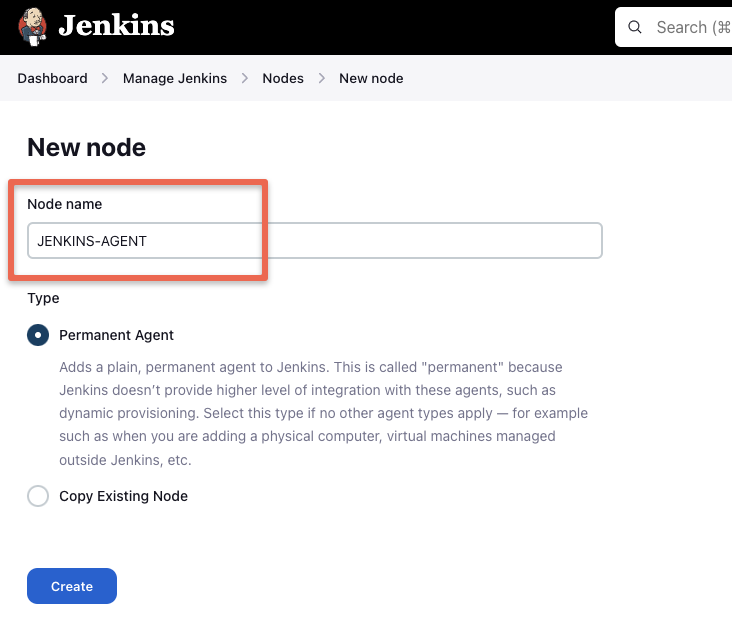
Step 2: Select the new node option.
Step 3: Give it a name, select the "permanent agent" option and click Create.
Step 4: Enter the details as shown in the image below and save them.
For the credential box, click the add button and enter the agent server username and password. In our case, the username is jenkins and password is the one you created when you created the Jenkins user on the agent server. This credential will be used by the Jenkins controller to connect to the agent.
To know more about each option, click the question mark on the right side of each text box.
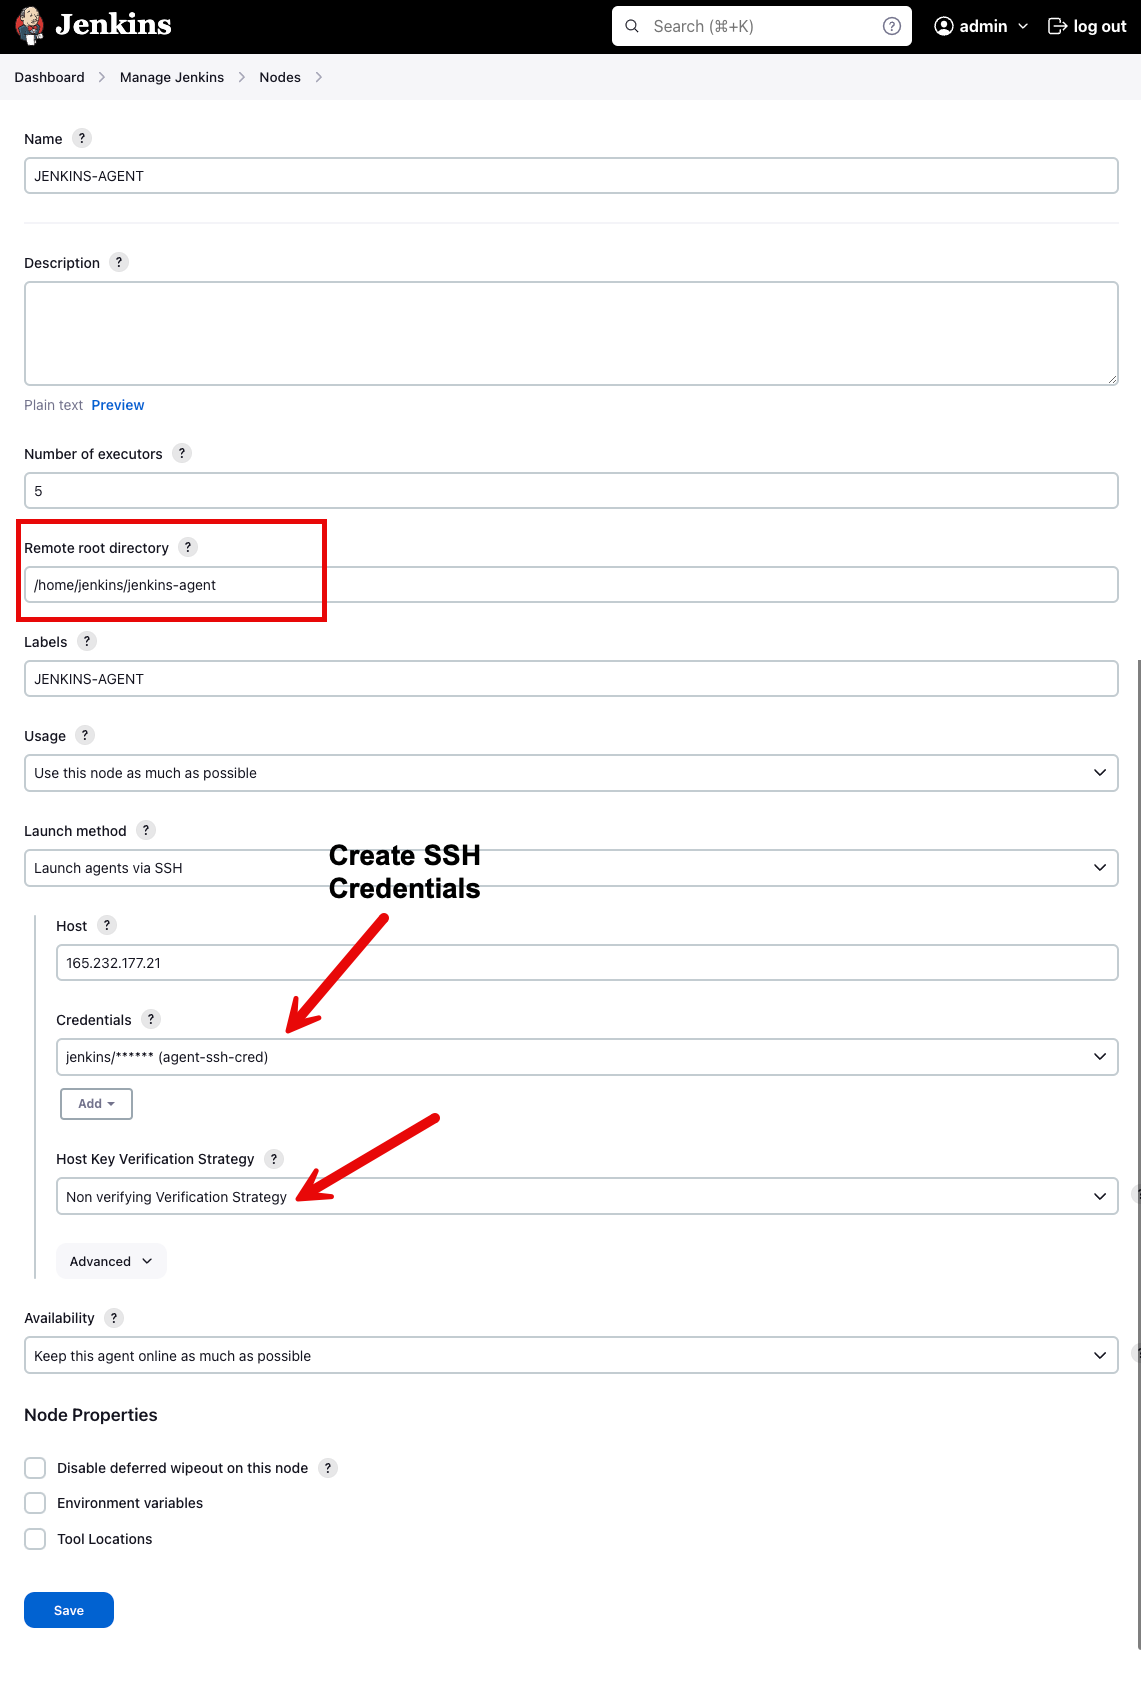
Step 4: Once you click save, the controller will automatically connect to the agent server and configure it as an agent.
If the agent is not connected automatically,
By following the same steps, you can add multiple servers as Jenkins agent nodes.
Setting up Jenkins Agent Using SSH keys
Step 1: Log in to the slave server as a jenkins user.
Step 2: Create a .ssh directory and cd into the directory.
mkdir ~/.ssh && cd ~/.sshStep 3: Create an ssh key pair using the following command. Press enter for all the defaults when prompted.
ssh-keygen -t rsa -C "The access key for Jenkins slaves"Step 4: Add the public to authorized_keys file using the following command.
cat id_rsa.pub >> ~/.ssh/authorized_keysStep 5: Now, copy the contents of the private key to the clipboard.
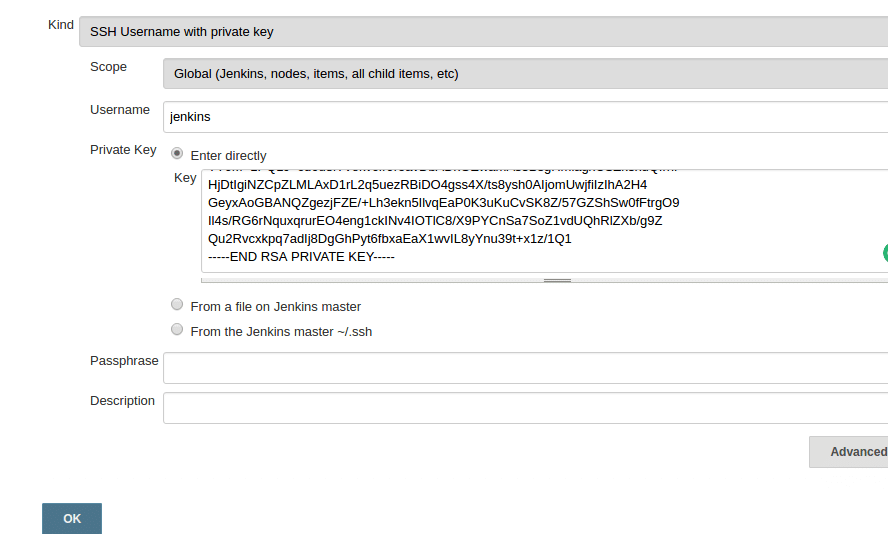
cat id_rsaAdd the SSH Private Key to Jenkins Credentials
Step 1: Go to Jenkins dashboard --> credentials --> Global credentials --> add credentials, select and enter all the credentials as shown below and click ok.
Connect SSH Jenkins Agent to Master Node
Step 1: Follow the first 3 steps we did for slave configuration using username and password.
Step 2: Follow all the configurations in the 4th step as well. But this time, for the launch method, select the credential you created with the SSH key.
Test Jenkins Agent/Slave Nodes
To test the Jenkins agent node or slave, create a sample project and select the option as shown below.
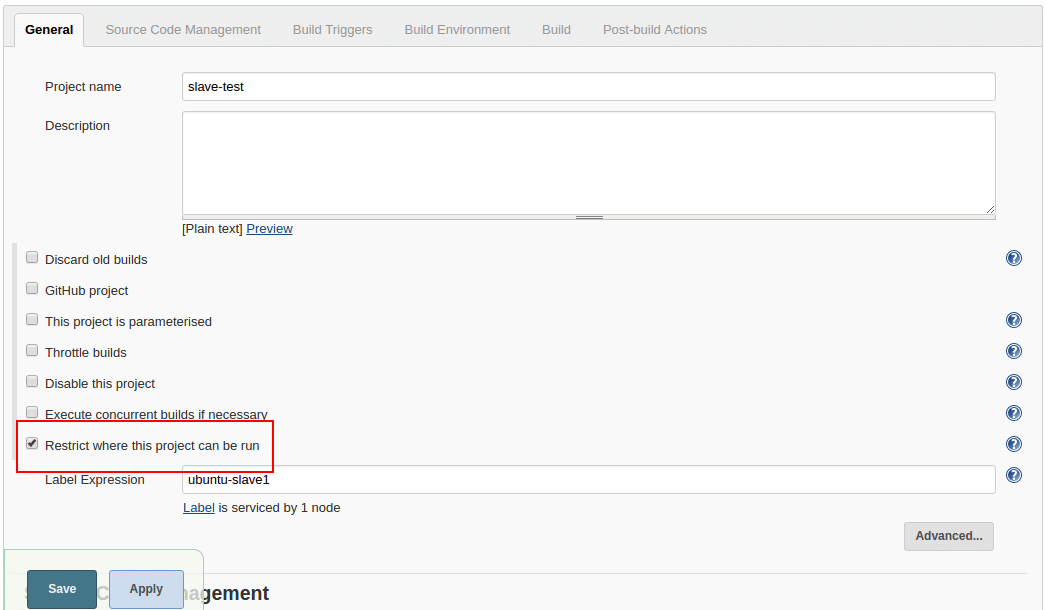
You need to select the node using the label option. If you start to type the letter the node list will show up.
You can then run a simple, shell script operation to check if the Jenkins agent is executing the job.
Conclusion
In this tutorial, we learned how to set up slaves for Jenkins. There is no complex step involved in this configuration.
When it comes to automating the process, you will need scripts and Jenkins CLI to do this. I will cover that in future posts.
Share if you like it and leave a comment if you have queries!!