

Google Cloud Filestore is a managed NFS implementation on google cloud. This is one of the awaited features for Google cloud users. Amazon AWS has released its Managed NFS service EFS in June 2016 with 99.99% availability.
Google Filestore Features
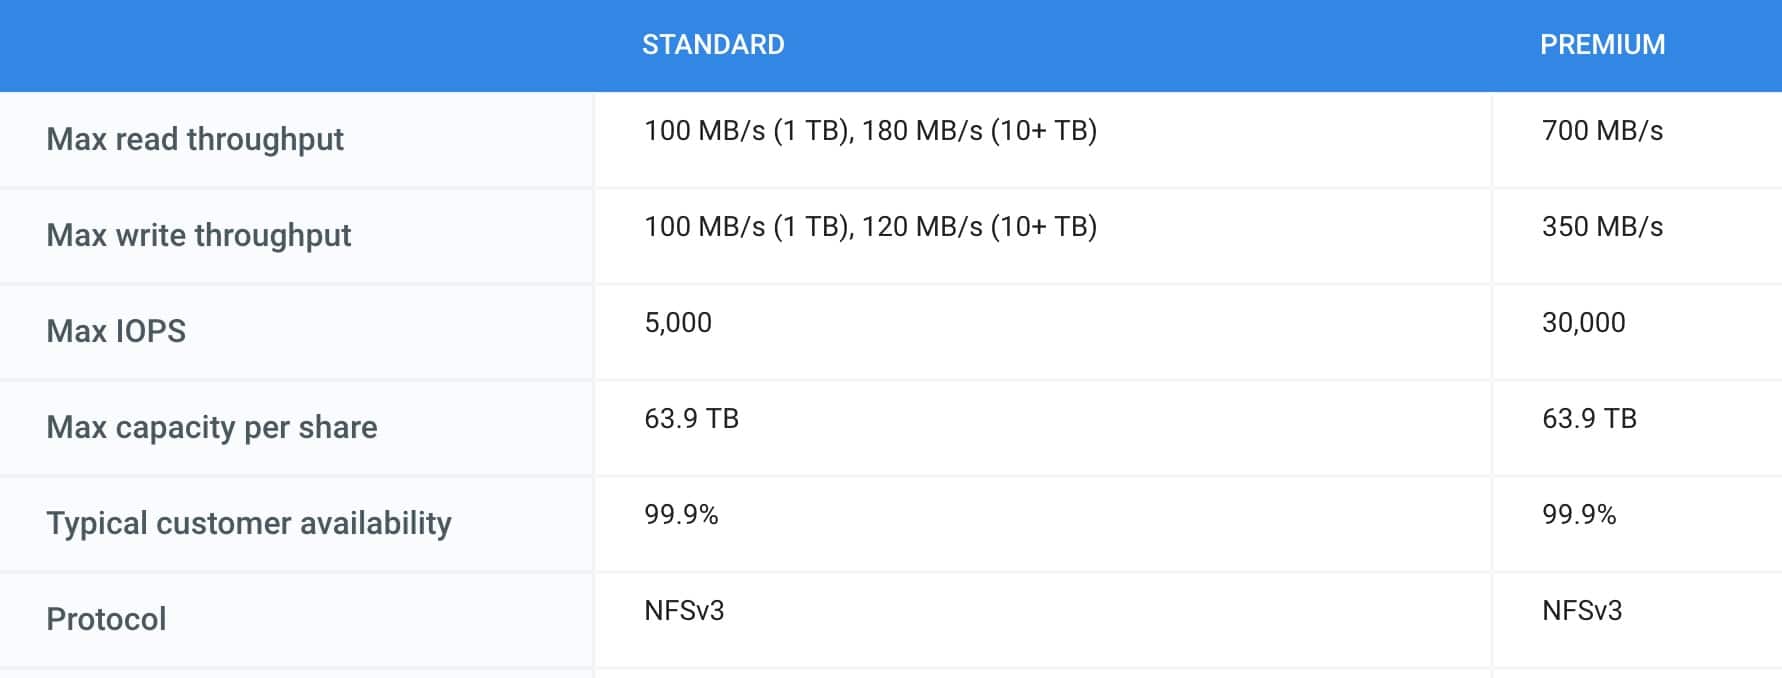
Key features of cloud filestore are shown in the table below. You can find the filestore pricing details here
Google FileStore Setup
In this guide, I will walk you through the process of setting up a filestore using CLI and google cloud console.
Following are the topics covered.
- Creating filestore using CLI
- Creating filestore using Console
- Connecting to filestore from a Google Compute Instance
Create Filestore Using Gcloud CLI
Note: Filestore is in beta stage now
Step 1: Use the following syntax to create a filestore. Make sure you have Gcloud CLI installed
gcloud beta filestore instances create <name-of-filestore-instance> \
    --location=us-central1-c \
    --tier=STANDARD \
    --file-share=name="<filestore-name>",capacity=1TB \
    --network=name="default",reserved-ip-range="<IP-range>"
For example,
gcloud beta filestore instances create devopscube-nfs-server \
    --location=us-central1-c \
    --tier=STANDARD \
    --file-share=name="devopscubefileserver",capacity=1TB \
    --network=name="default",reserved-ip-range="10.0.0.0/29"
Step 2: You can list the available filestore instances using the following command.
gcloud beta filestore instances listStep 3: You can describe a filestore using the following command.
gcloud beta filestore instances describe <filestore-instance-name> --location <region>For example,
gcloud beta filestore instances describe devopscube-demo-nfs --location us-central1-aYou will get the following output.
createTime: '2018-08-16T18:26:46.864763Z'
fileShares:
- capacityGb: '1024'
  name: devopscubenfs
name: projects/devopscube/locations/us-central1-a/instances/devopscube-demo-nfs
networks:
- ipAddresses:
  - 10.179.213.42
  network: default
  reservedIpRange: 10.179.213.40/29
state: READY
tier: STANDARD
Create Filestore NFS Server From Cloud Console
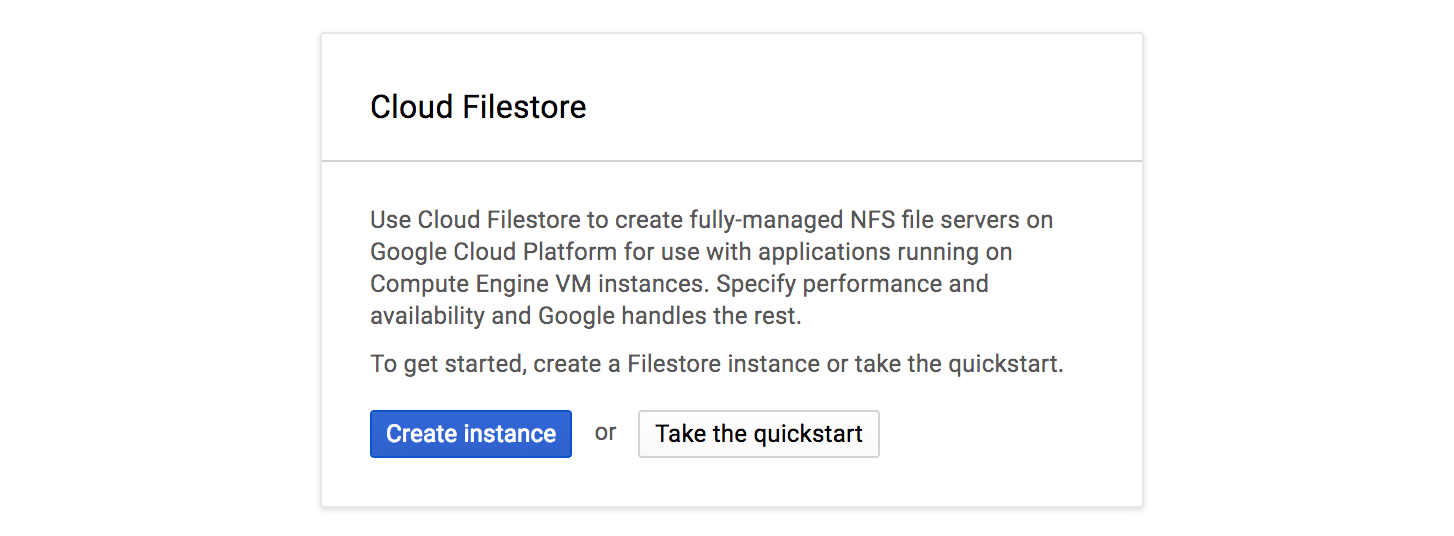
Step1: Go to https://console.cloud.google.com/filestore/
Step 2: Click "Create Instance" option.
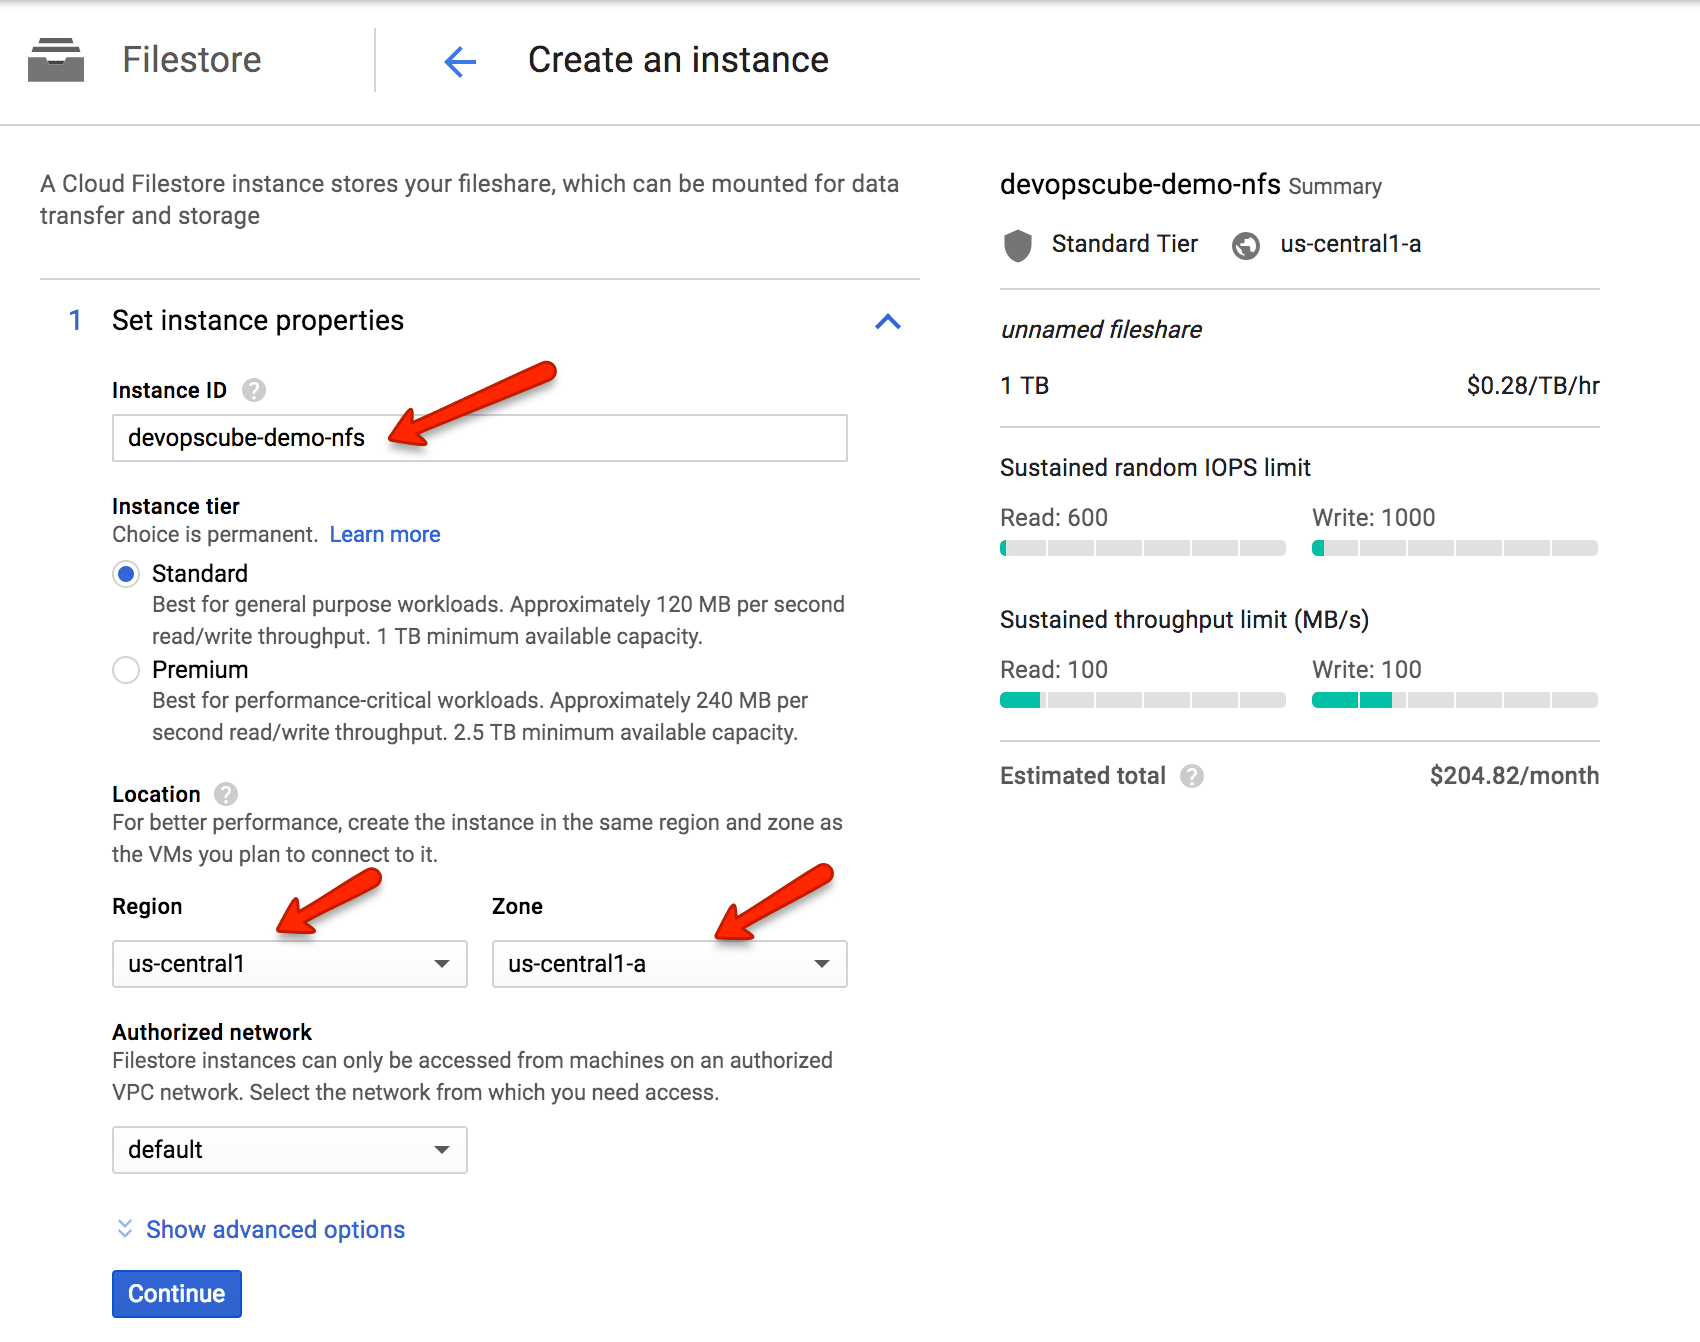
Step 3: Fill out the basic details as shown below.
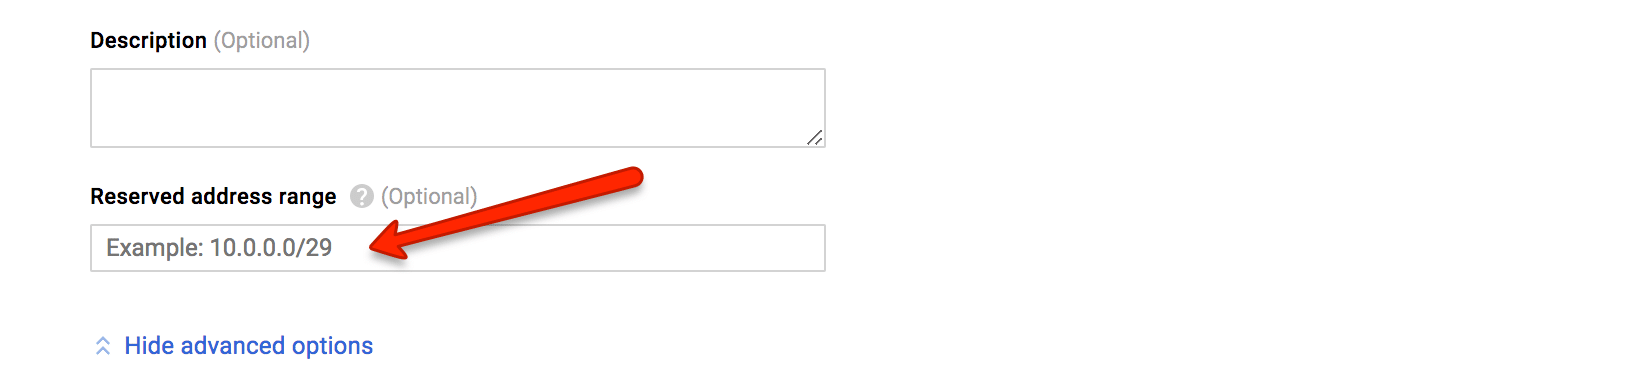
Also, you can mention a custom network range in a selected network as shown below.
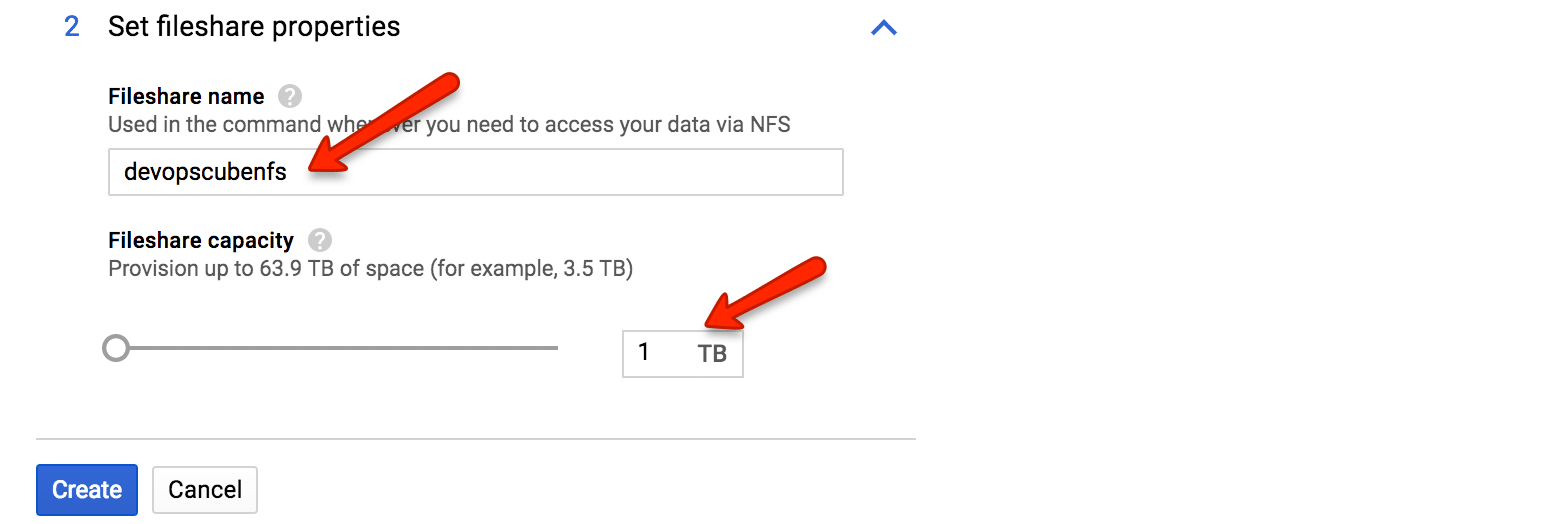
Step 4: The minimum size of NFS that can be created in 1 TB. Enter filestore name, required storage and click create. It will take a few minutes for the NFS instance to be created.
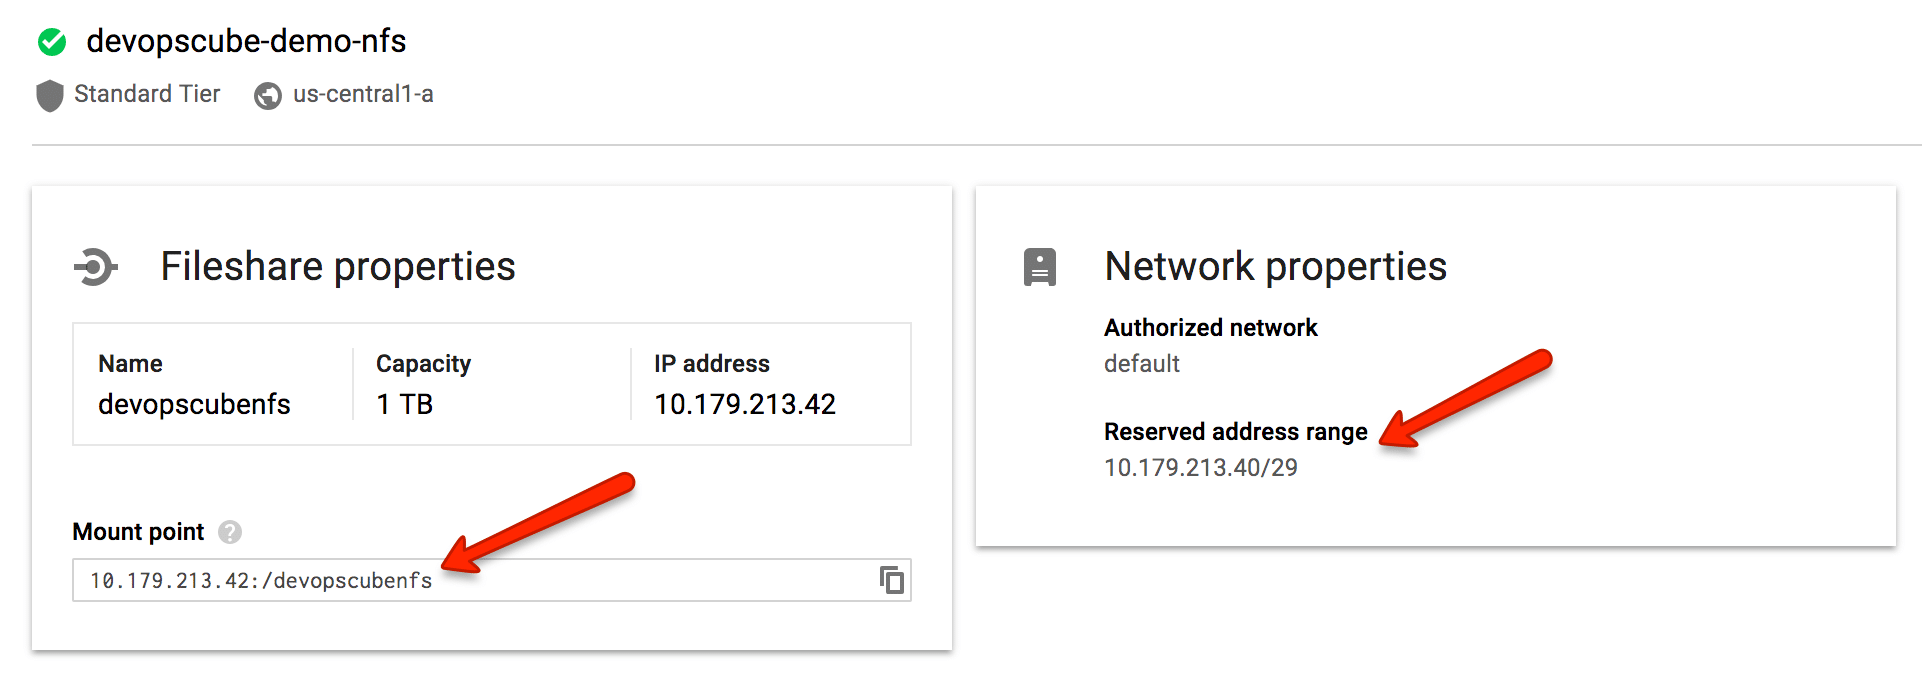
Step 5: Click on the created instance to get the NFS details.

It will show all the details such as mount point and networking address range as shown below.
Connecting to filestore from a Google Compute Instance
Note: The instance which needs access to filestore storage should have access to the filestore network.
Step 1: Update the package list and install the NFS client.
sudo yum install nfs-utilsStep 2: Create a mount directory for mounting the filestore volume.
sudo mkdir /mnt/nfs-mountStep 3: Mount the filestore volume to the mount point. You can get the mount point from the filestore details page as shown in previous steps.
sudo mount <filestore-IP>:/<filestore-name> /mnt/nfs-mountFor example,
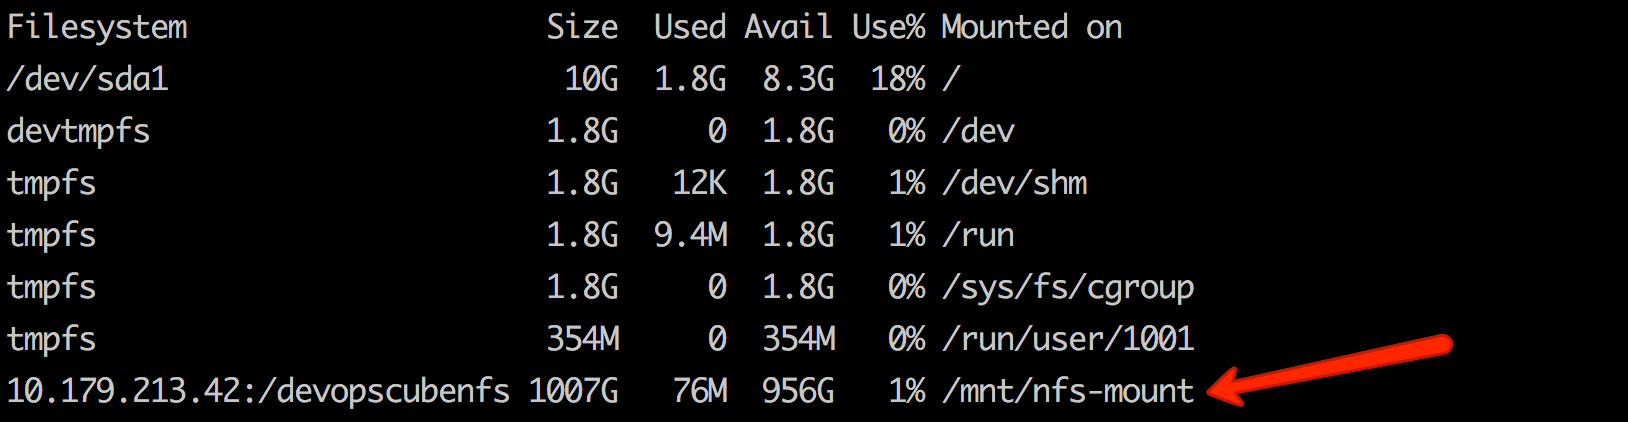
sudo mount 10.179.213.42:/devopscubenfs /mnt/nfs-mountStep 4: Check the mount point using df command.
df -hYou should see the mounted NFS as shown below.
Let us know in the comment section if you face any errors.
