

In this blog, we will look at how to map a domain name to your application running on a Cloudways server.
As I explained in the Cloudways review, once you set up your application on a Cloudways server, you’ll get instant access to a temporary domain name that points to your application. You can use this domain for development and testing.
To take your website live, you need to map your actual domain name to the server where your application (for example, WordPress) is running.
Here’s a step-by-step guide to help you do that.
Prerequisites
You should have a valid domain name registered with any DNS provider, such as GoDaddy, Hostinger, or others.
Let’s get started with the setup.
Map Domain Name in Cloudways
Follow the steps given below to connect the Cloudways application with your custom domain name.
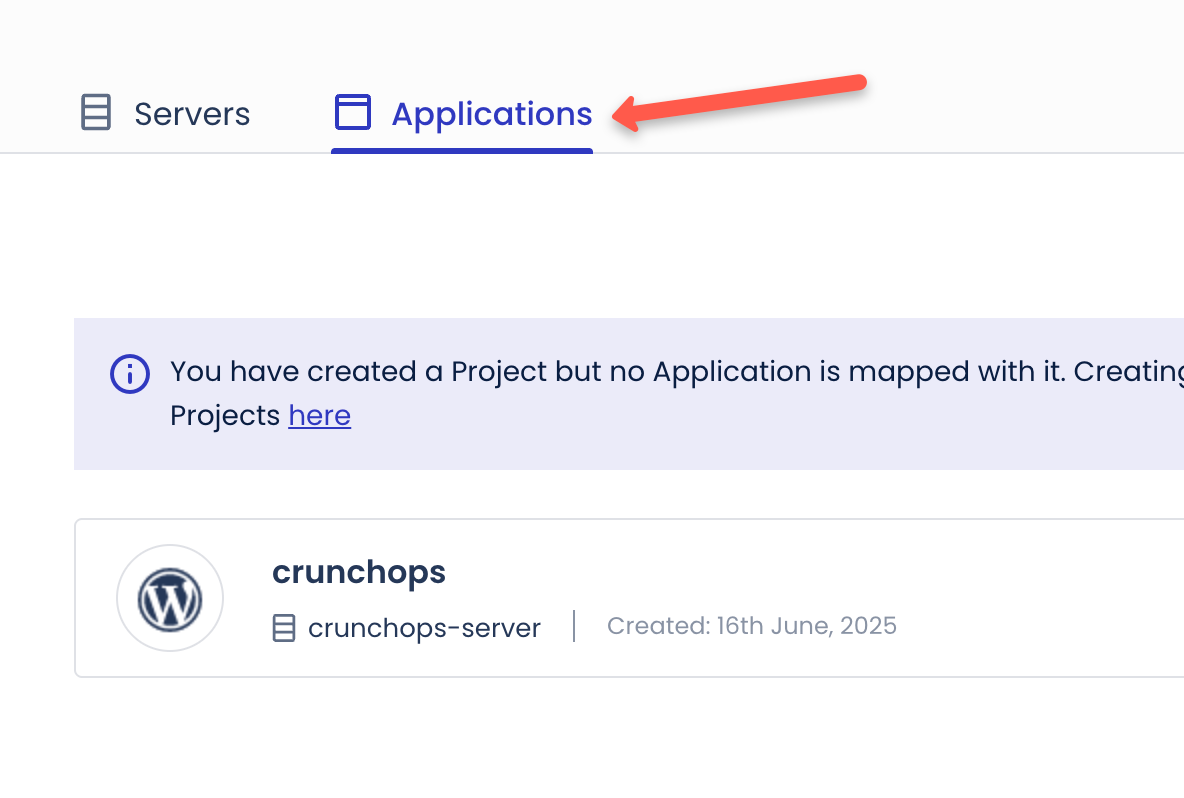
Step 1: Go to Application
In the Cloudways dashboard, go to the Applications tab and select the application you want to set the domain for.
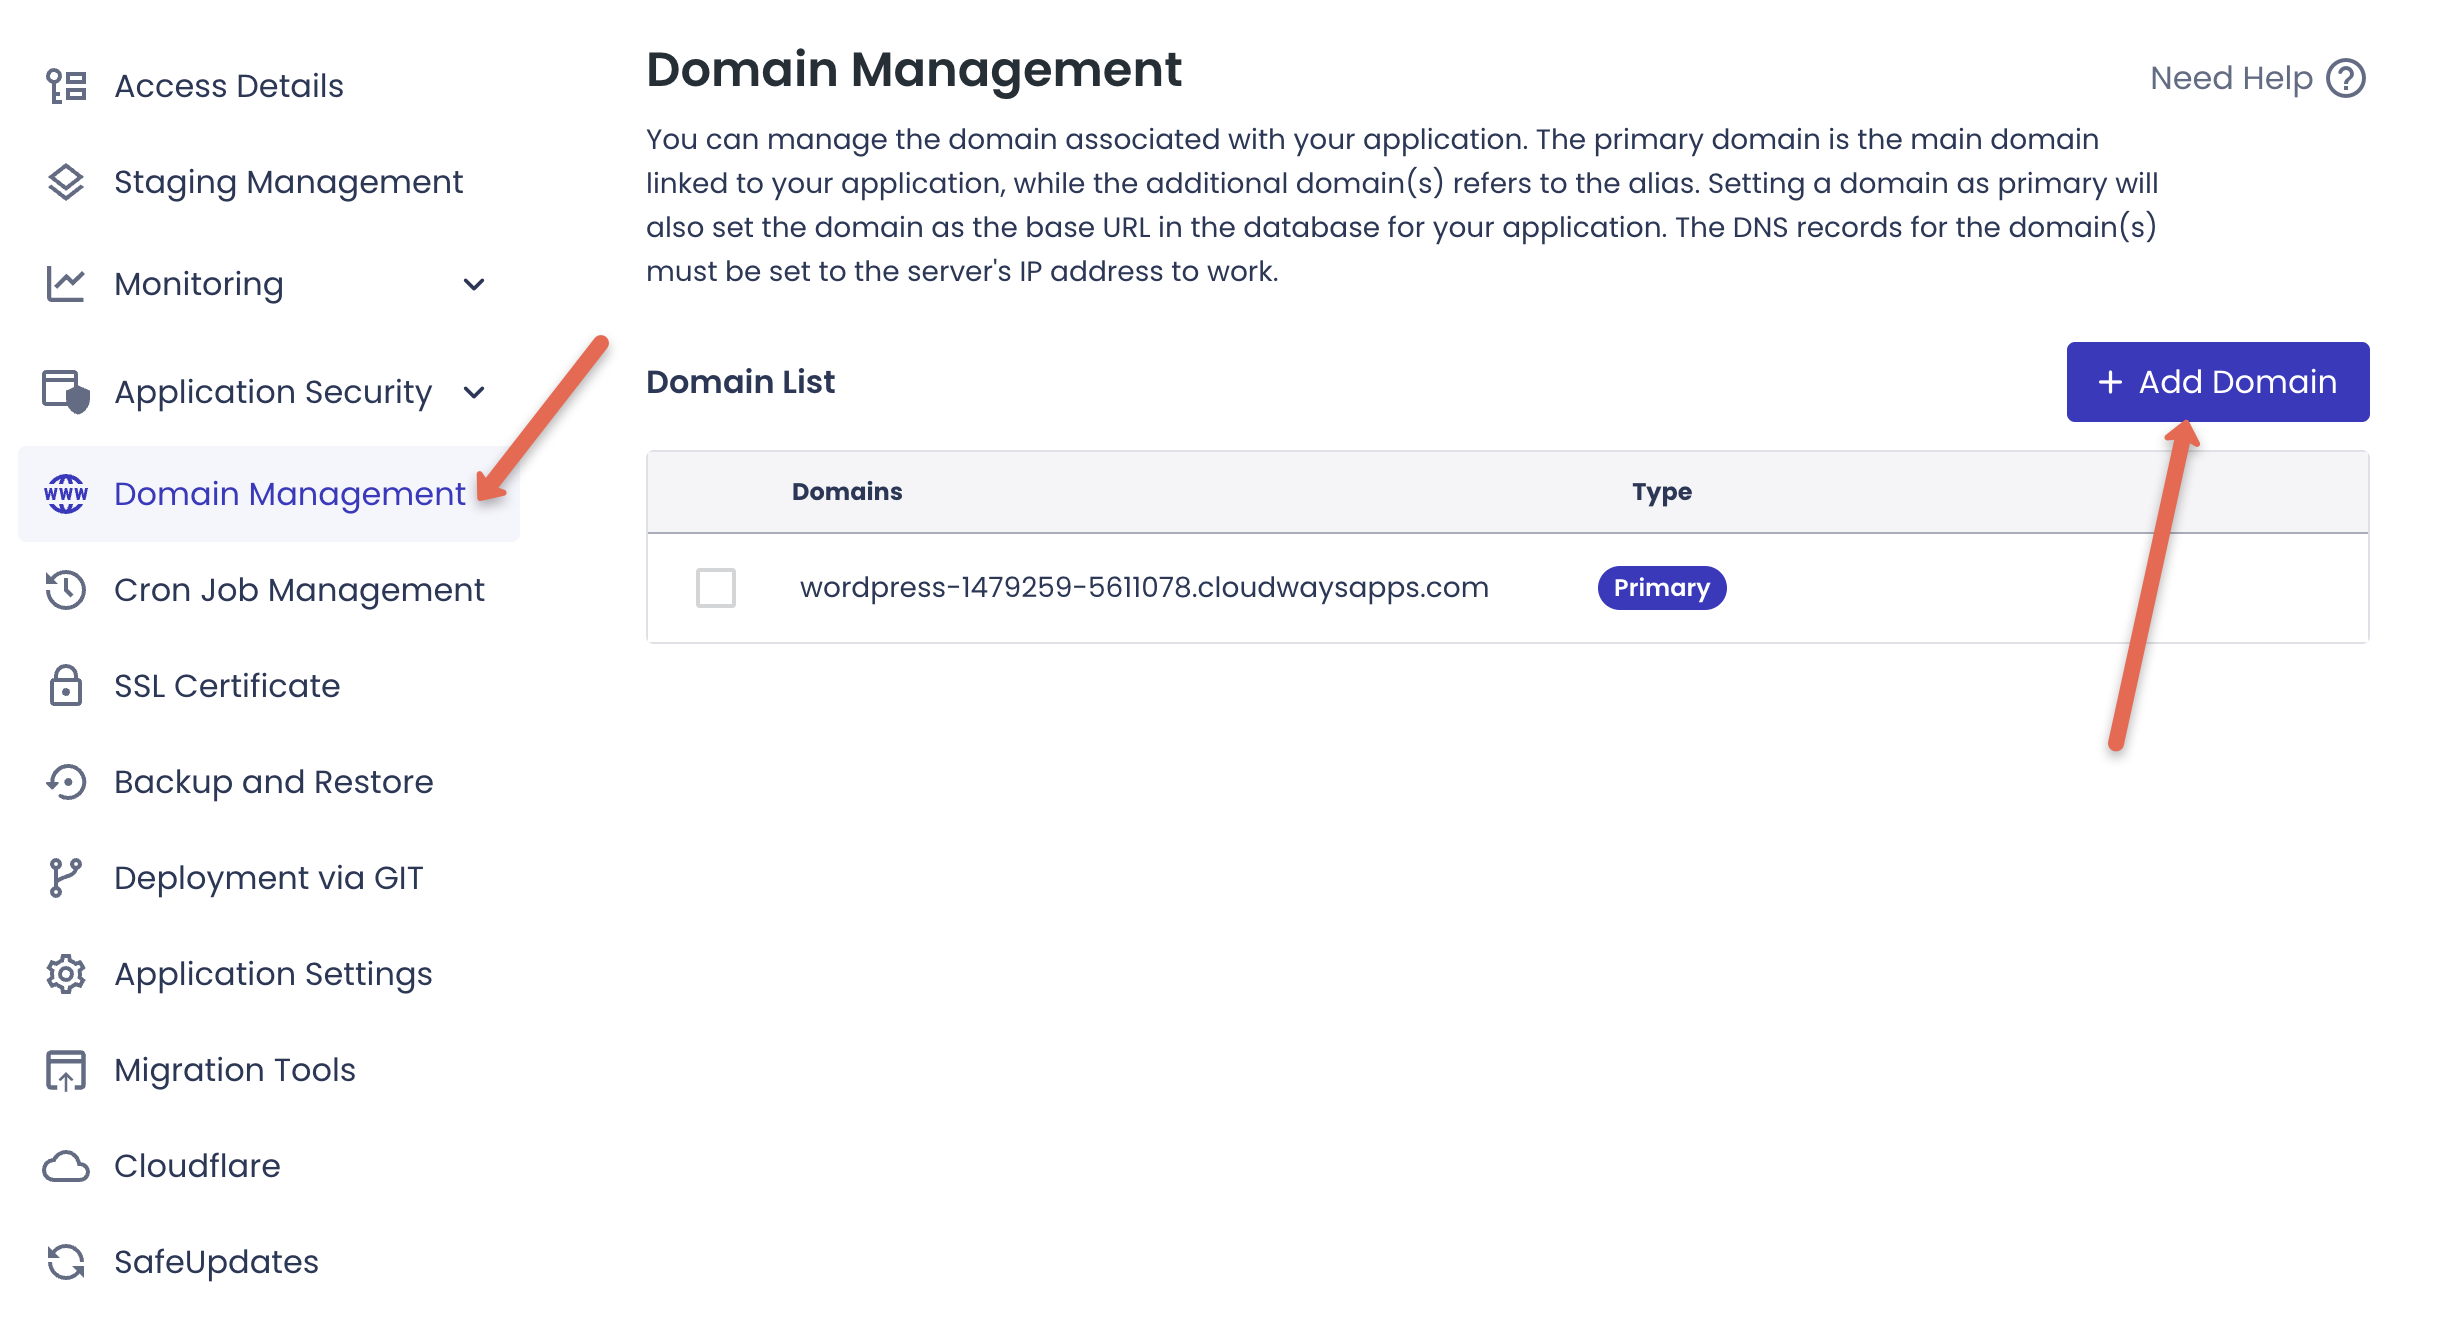
Step 2: Locate Domain Management
In the left pane, you will find the Domain Management option as shown below. Click on Add Domain.
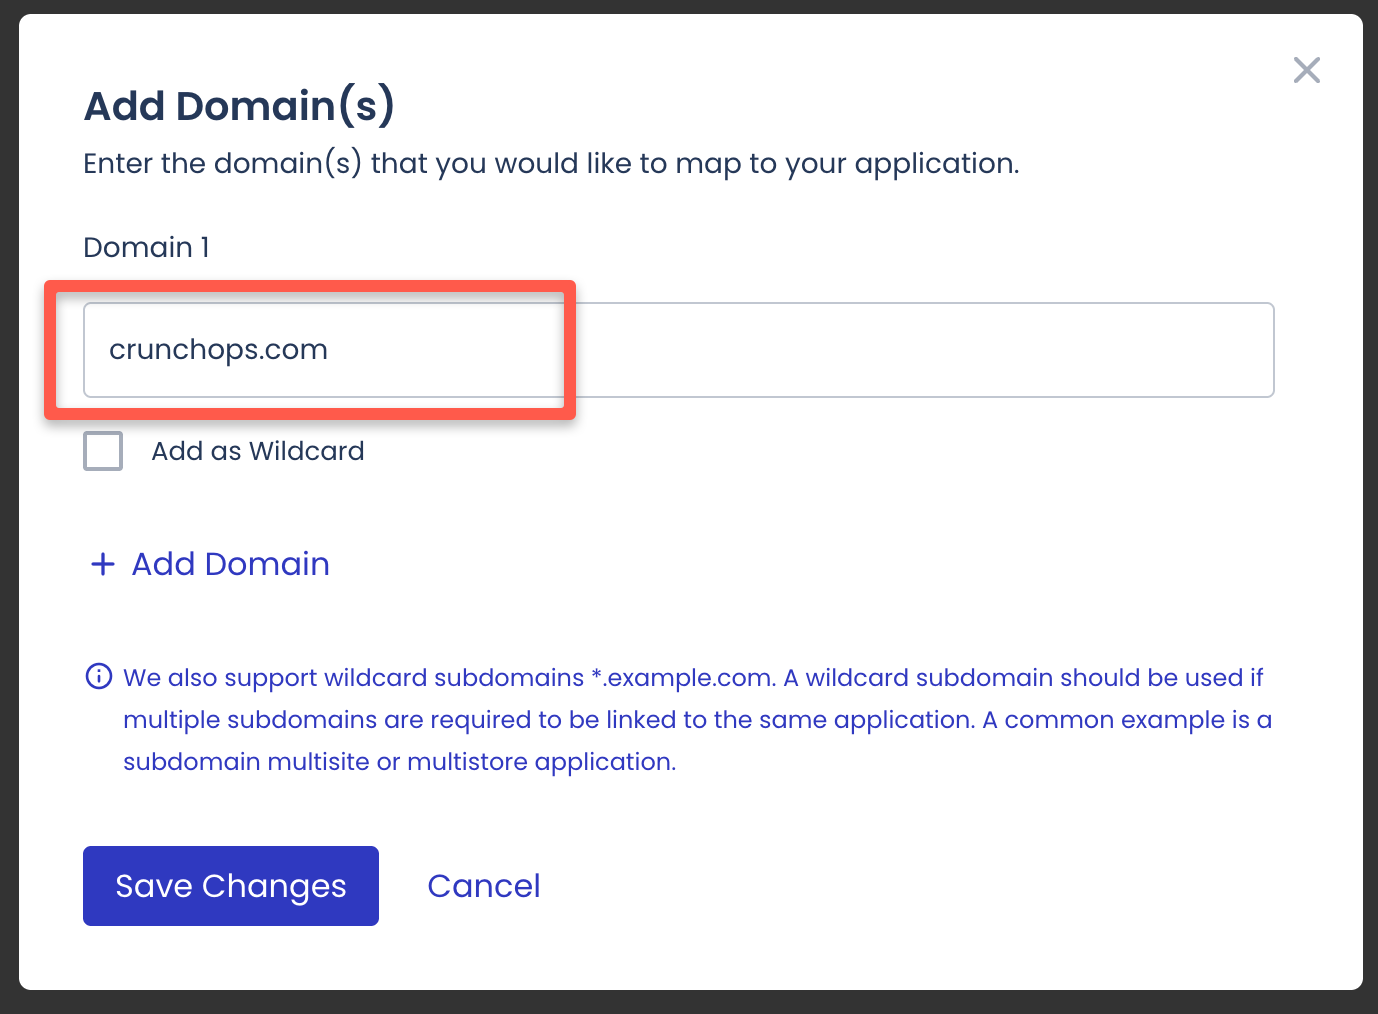
Step 3: Add the Domain name
In the popup, add the domain name you own and click Save Changes. Make sure you enter the correct spelling of your domain name.
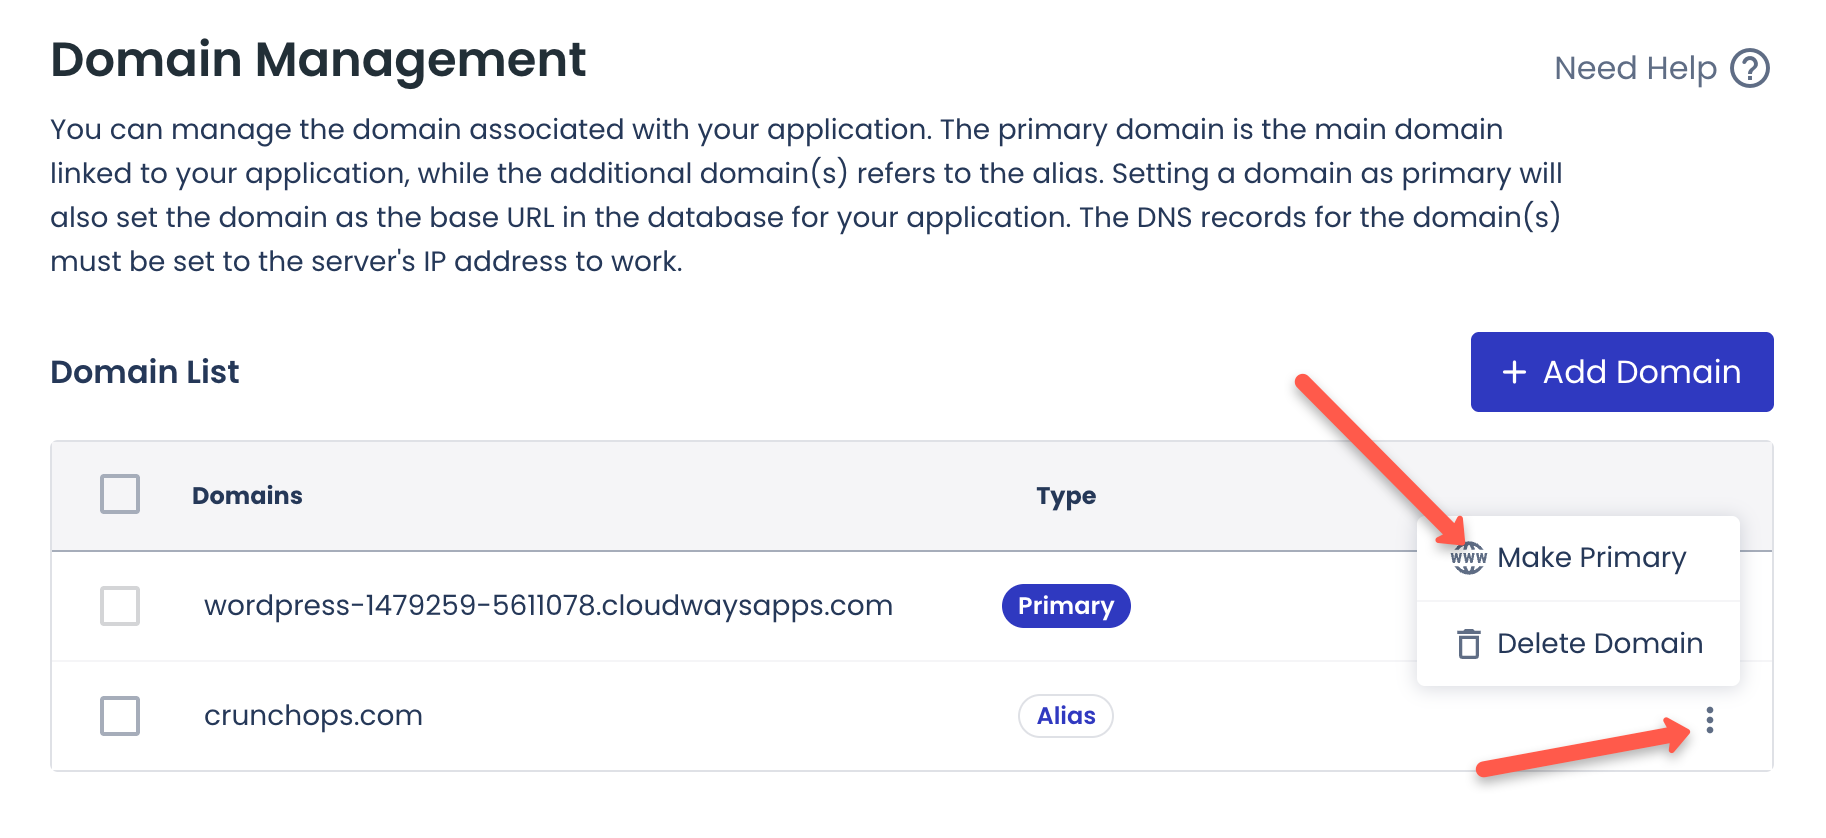
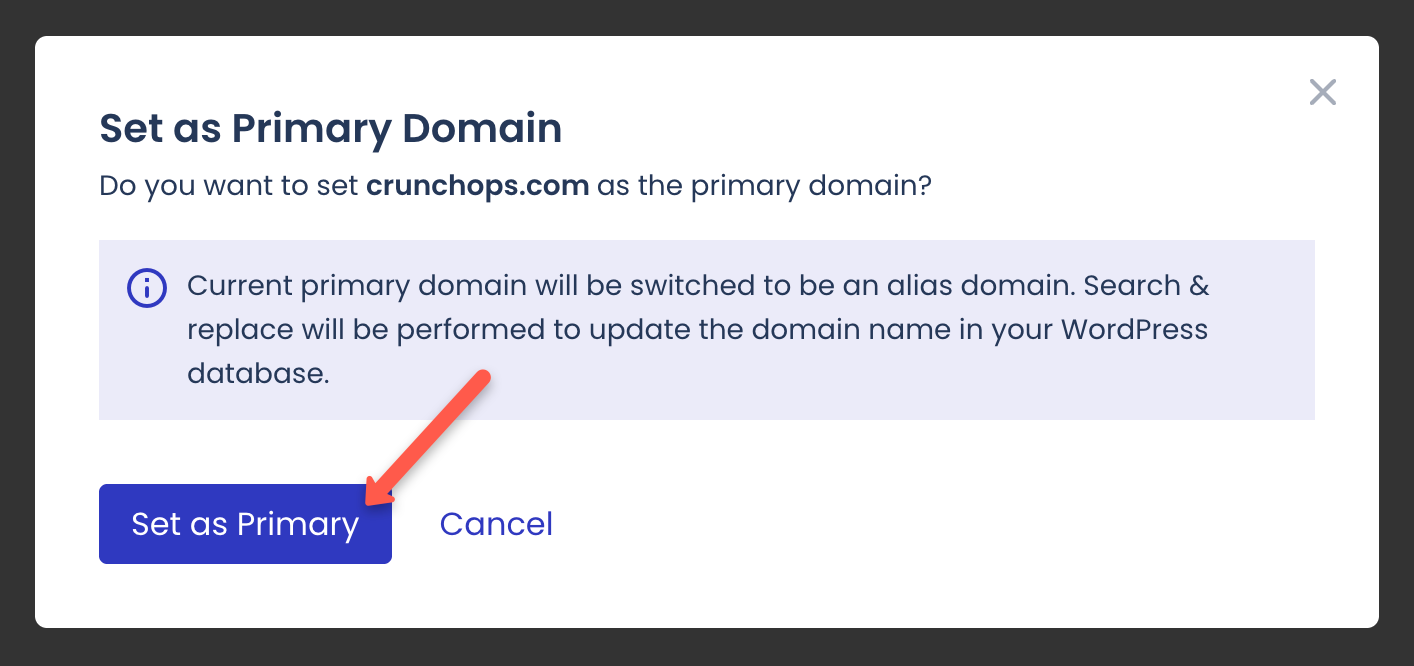
Step 4: Make the Domain Primary
Now, if you have multiple domains, make the primary domain based on your website's URL.
So, that selected primary domain will show as your website's official URL.
You will get a popup to confirm
Map Server IP to Domain
Now that we have added the domain name to Cloudways, the next step is to map the Cloudways server IP as an A record in your domain settings on your domain registrar’s page.
Here is why.
When you add a domain name to Cloudways, you're telling Cloudways, "This is the domain I want to use for my website."
But to make the internet send visitors to your Cloudways server when they type your domain name, you need to:
- Go to the place where you bought your domain (like GoDaddy or Cloudflare).
- Find the DNS settings (this is where domain name and IP address connections are made).
- Add an A record, which simply says: “When someone types mydomain.com, send them to this IP address (your Cloudways server IP).”
So you’re linking your domain name to your Cloudways server by pointing it to the correct IP address.
Lets get started.
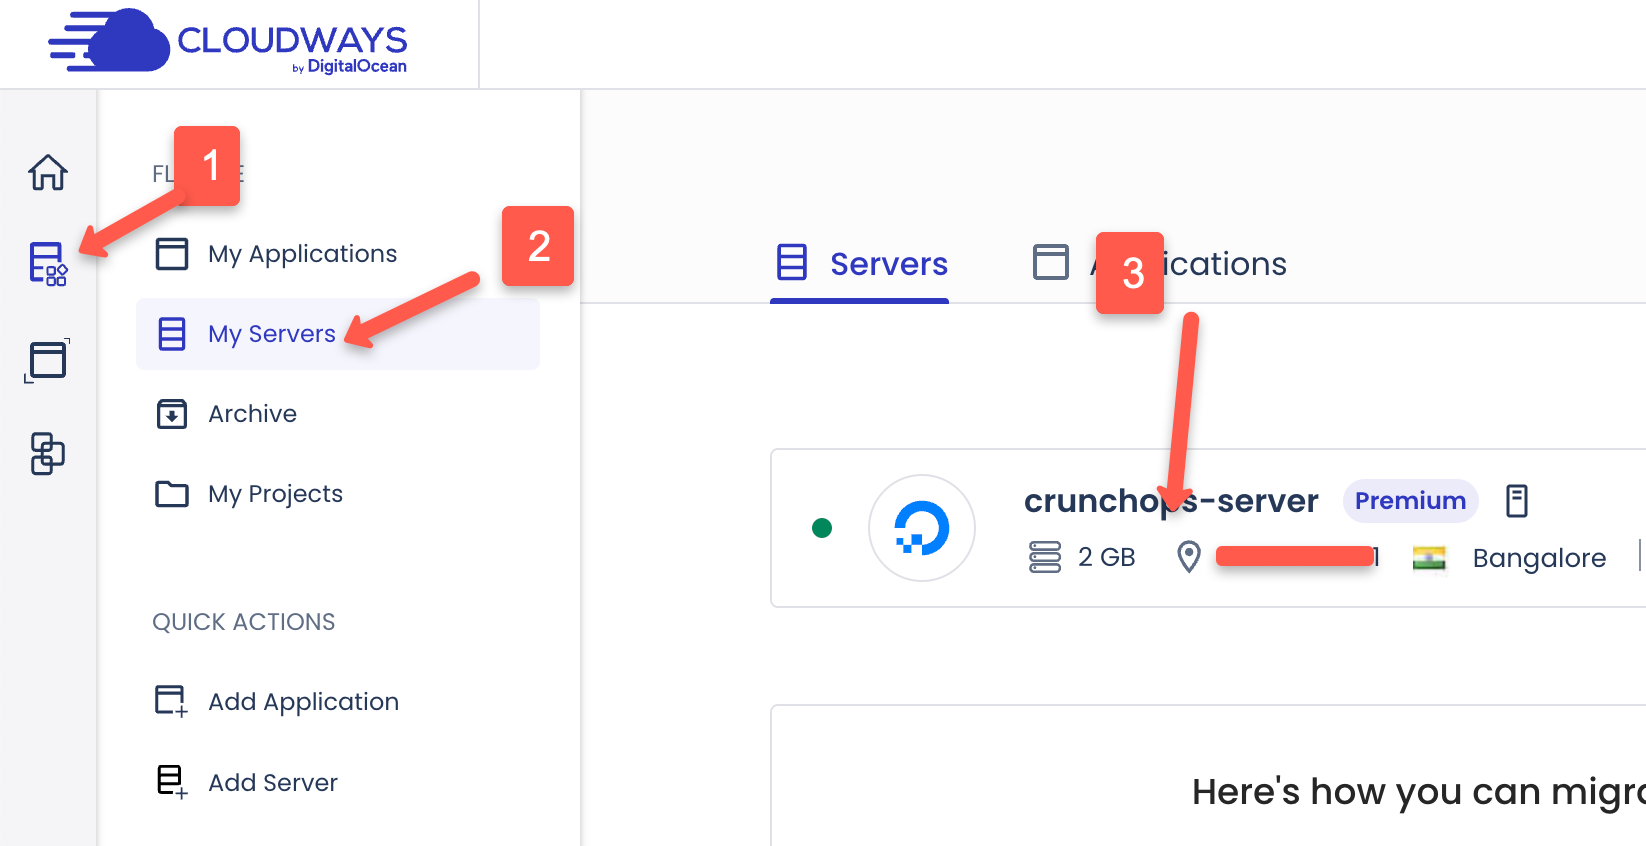
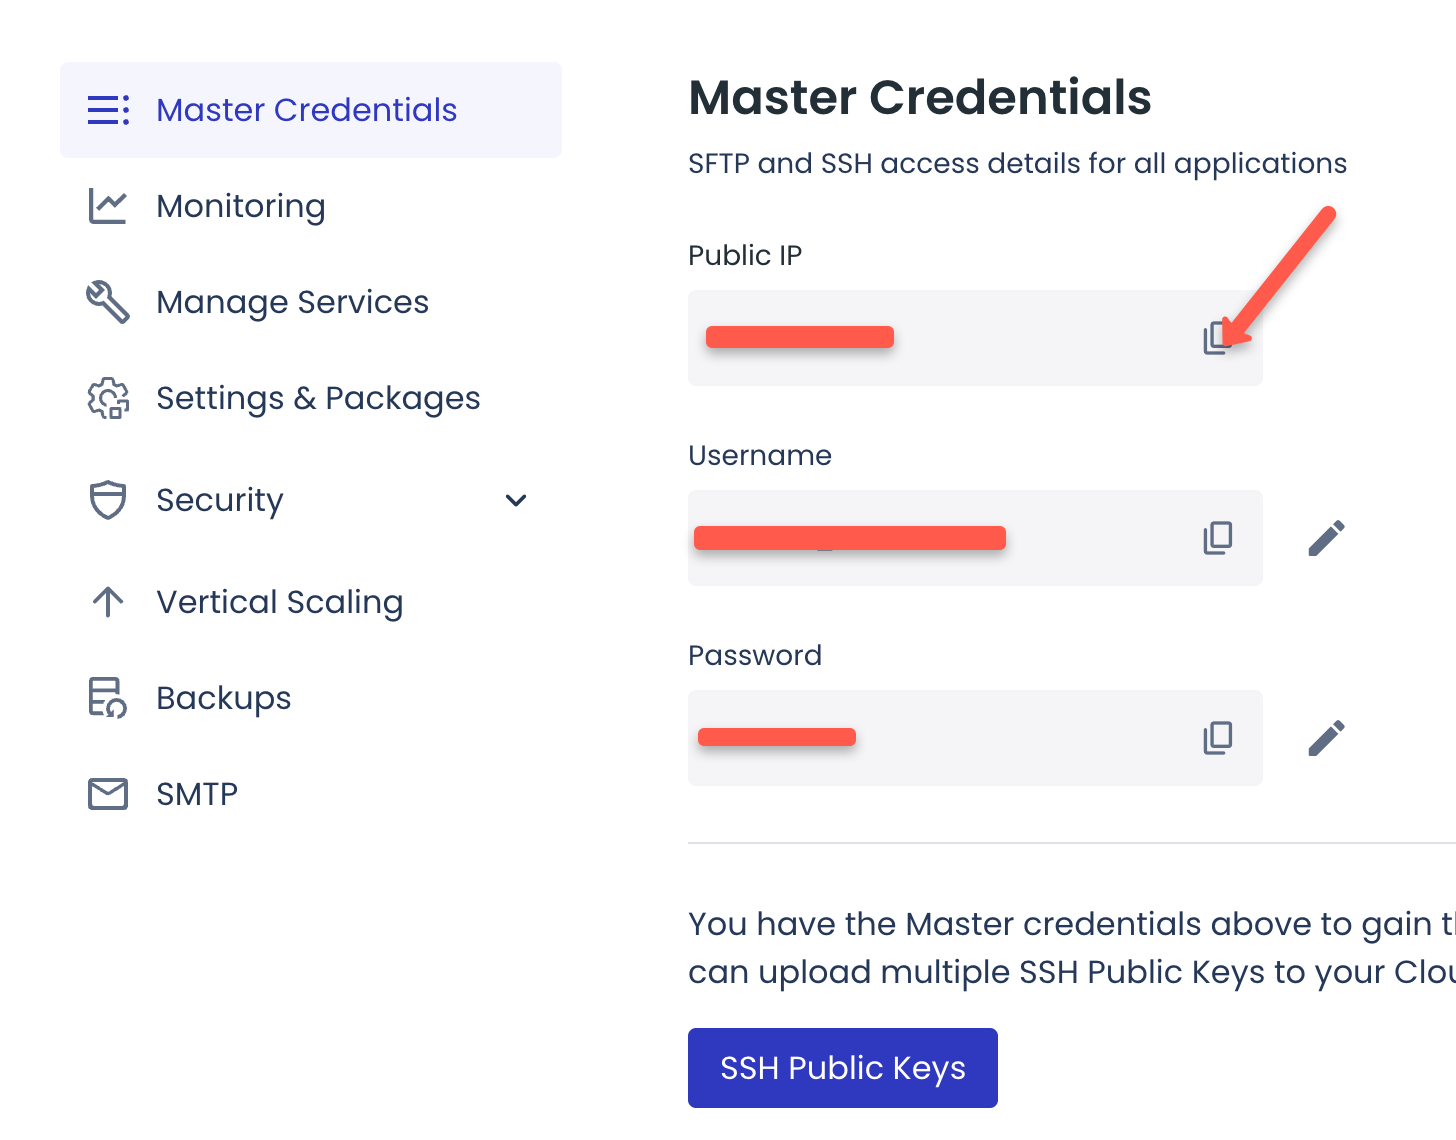
Open server to get the Server IP
Copy the Public IP of the server.
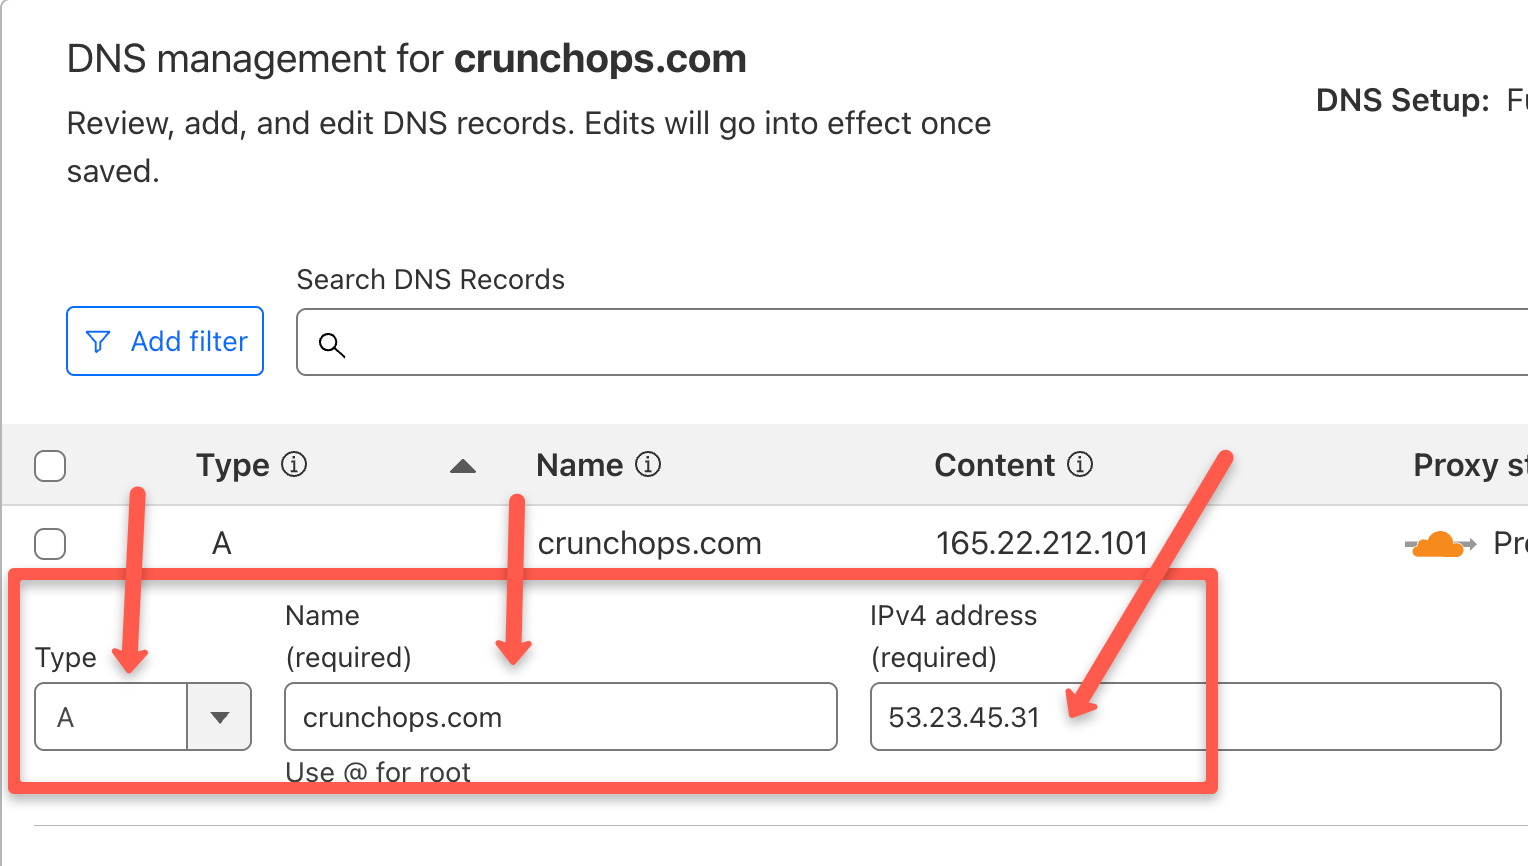
Next, update the DNS A record in your domain registrar’s settings to point to your Cloudways server’s public IP address.
For example, I am using Cloudflare for DNS management, and my DNS update looks like the one below.
Conclusion
In this guide, I have shown how to map Cloudways server to a domain with easy steps.
If you have any doubts about this setup guide, drop them in the comments!
You can reduce the cost of the host with Cloudways promo code, which is offering a 30% discount for all its plans.
Also, if your website is built on WordPress, then here is a detailed guide for you to setup WordPress on Cloudways.