

When you use Jenkins multi-branch pipelines, you can integrate status checks with GitHub Pull Requests.
Here is an example of status checks.
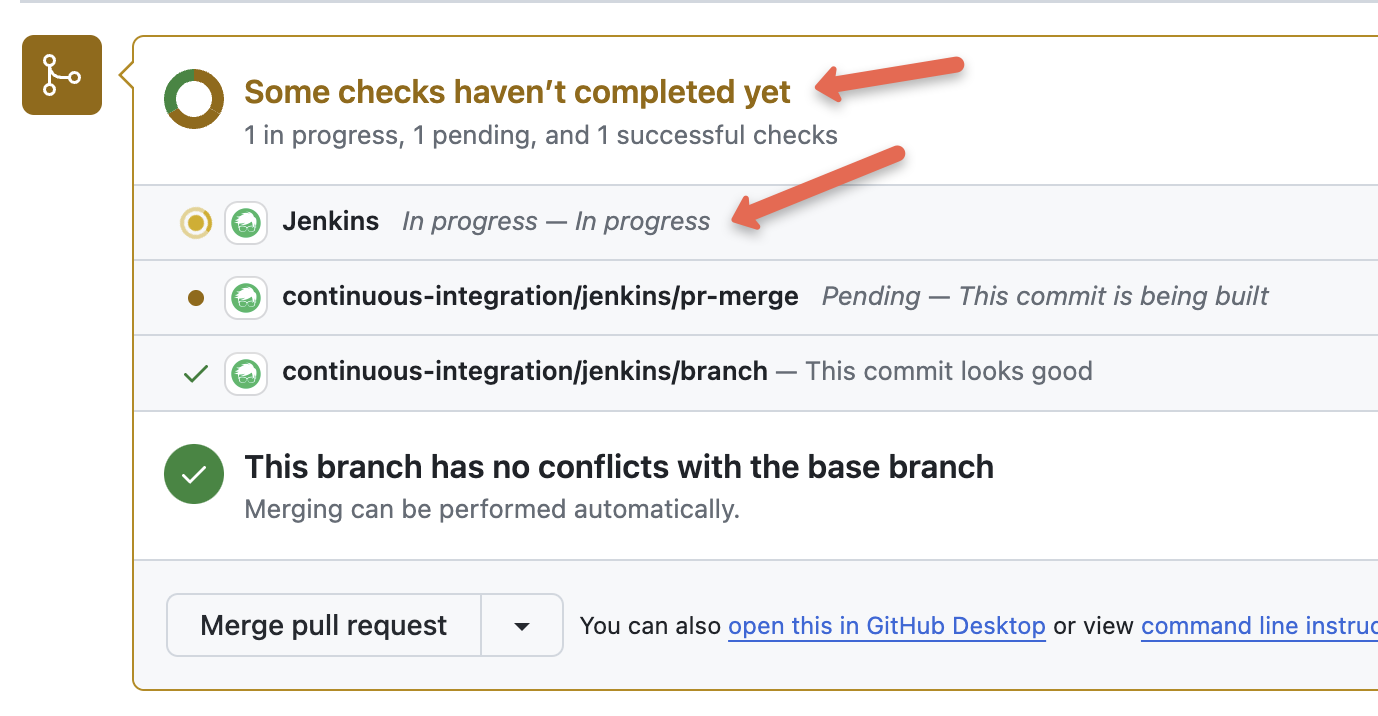
To implement these types of status checks, you need to create a GitHub App that integrates with the Jenkins controller instance.
In this blog, we will look at how to create a GitHub app for enabling status checks in the pipeline.
Creating Github App
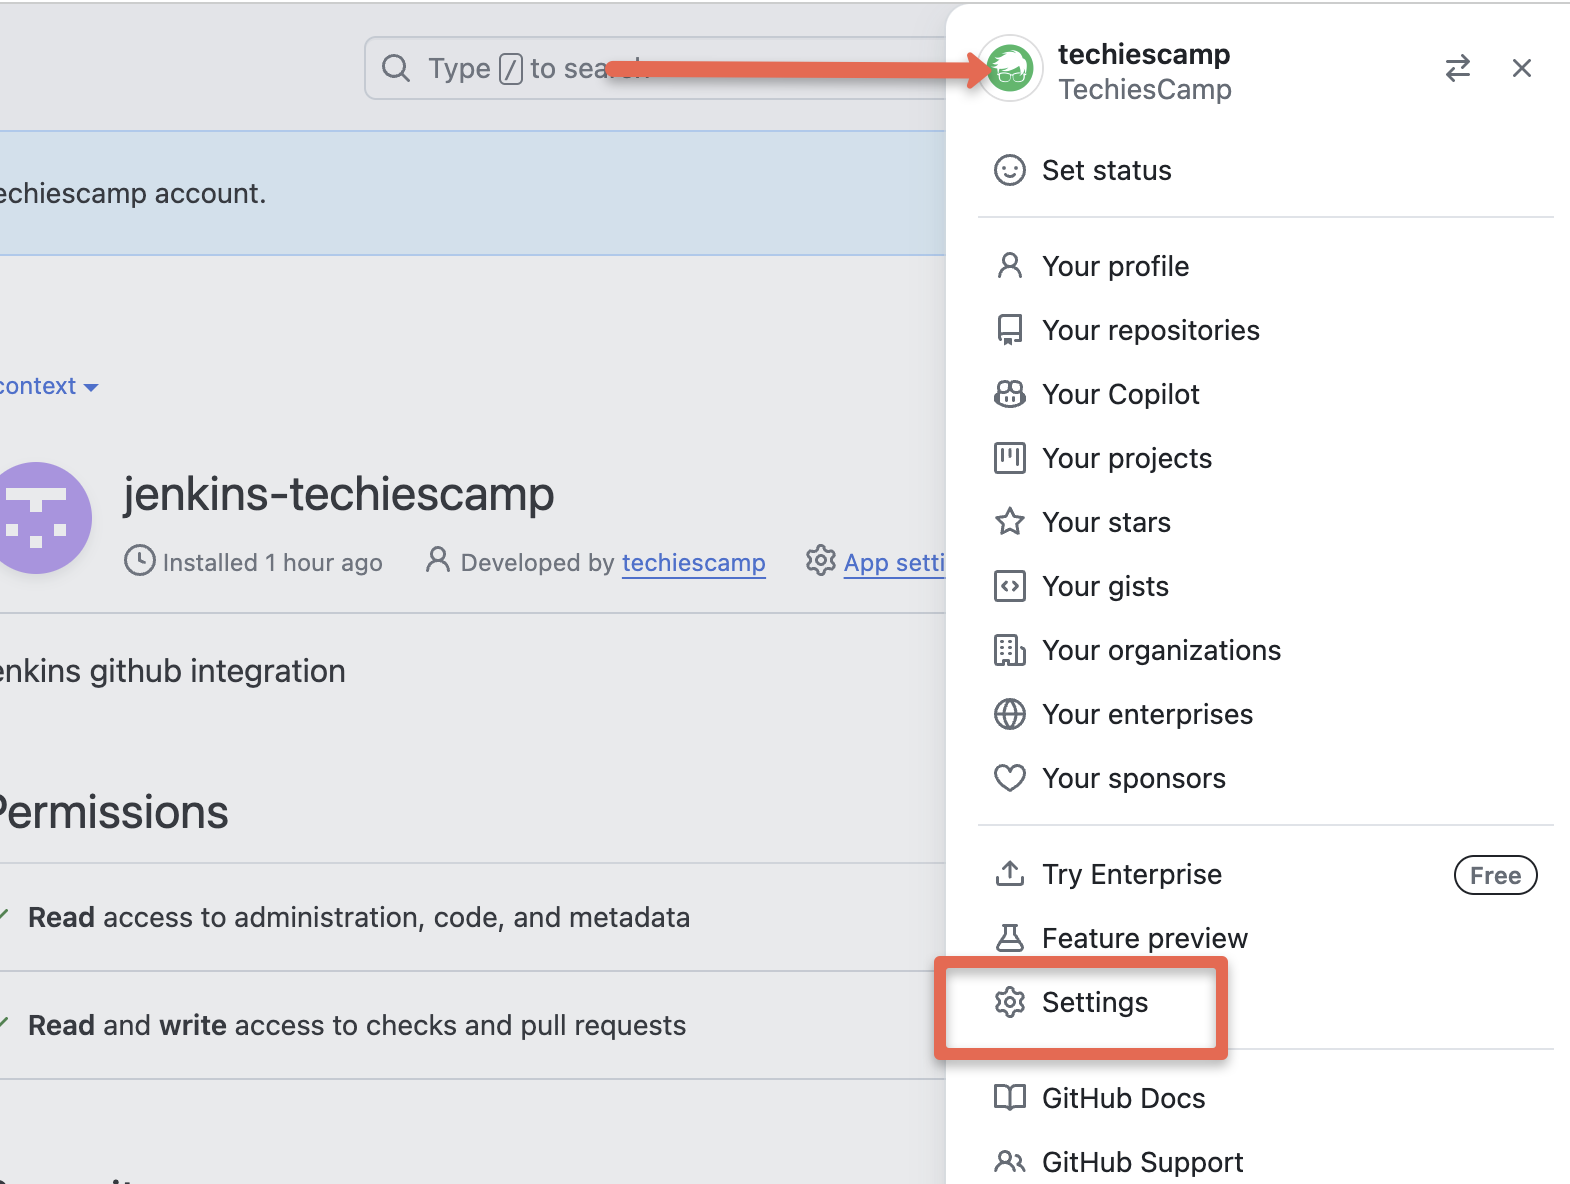
To create a GitHub App, select your GitHub profile and go to Settings as shown below.
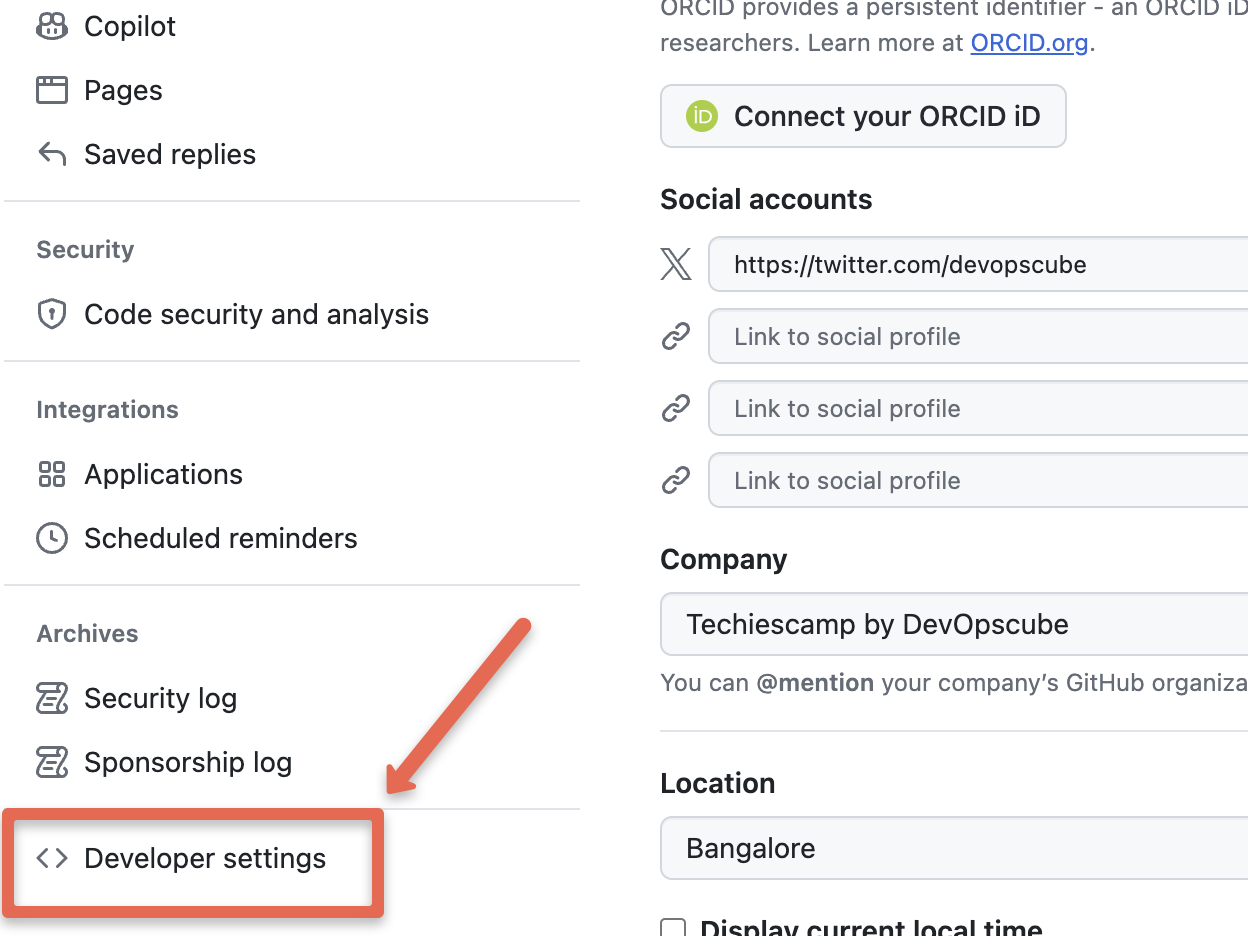
Scroll down and select the Developer settings
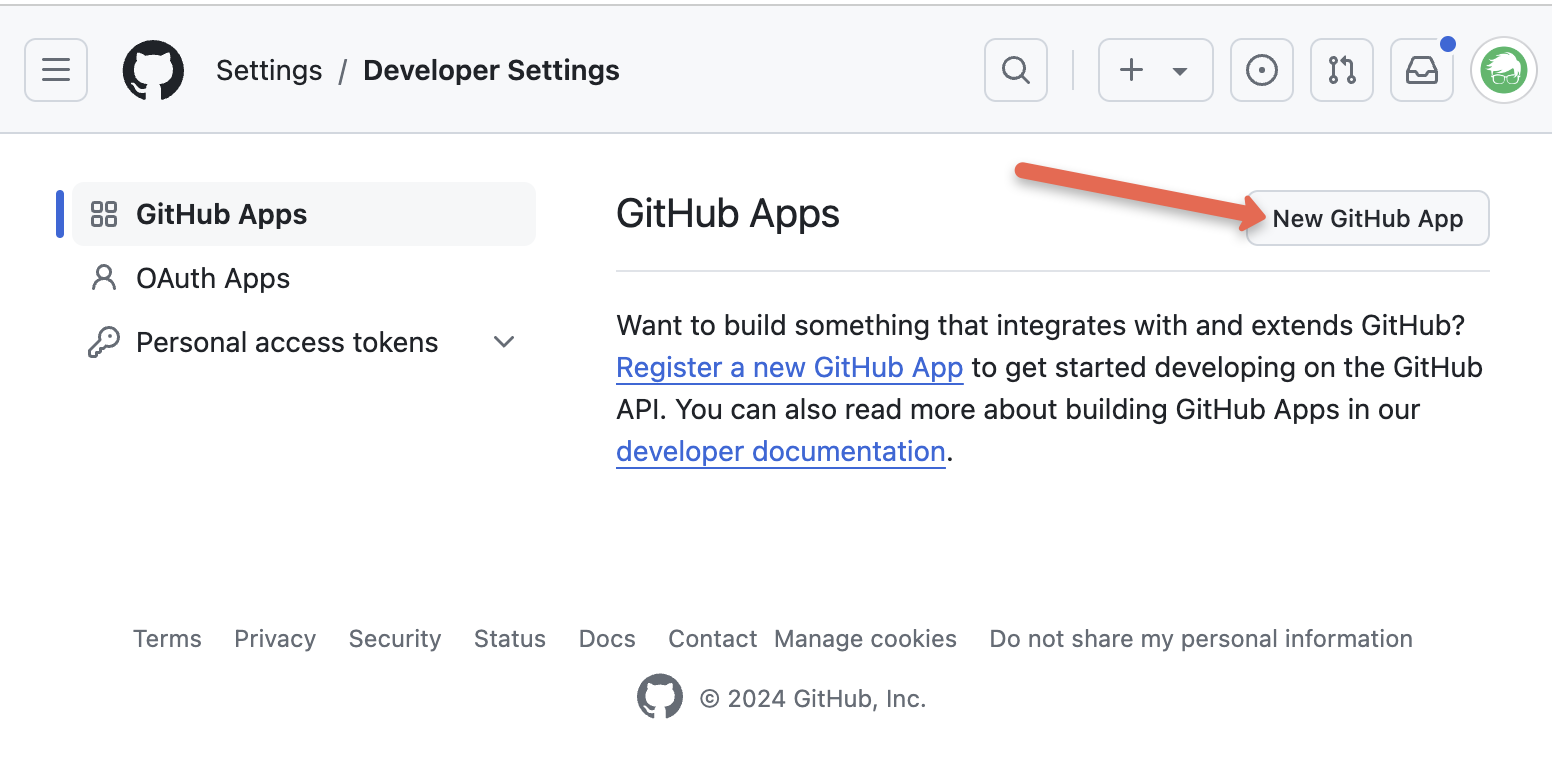
Then click the New GitHub App button to create a new GitHub app
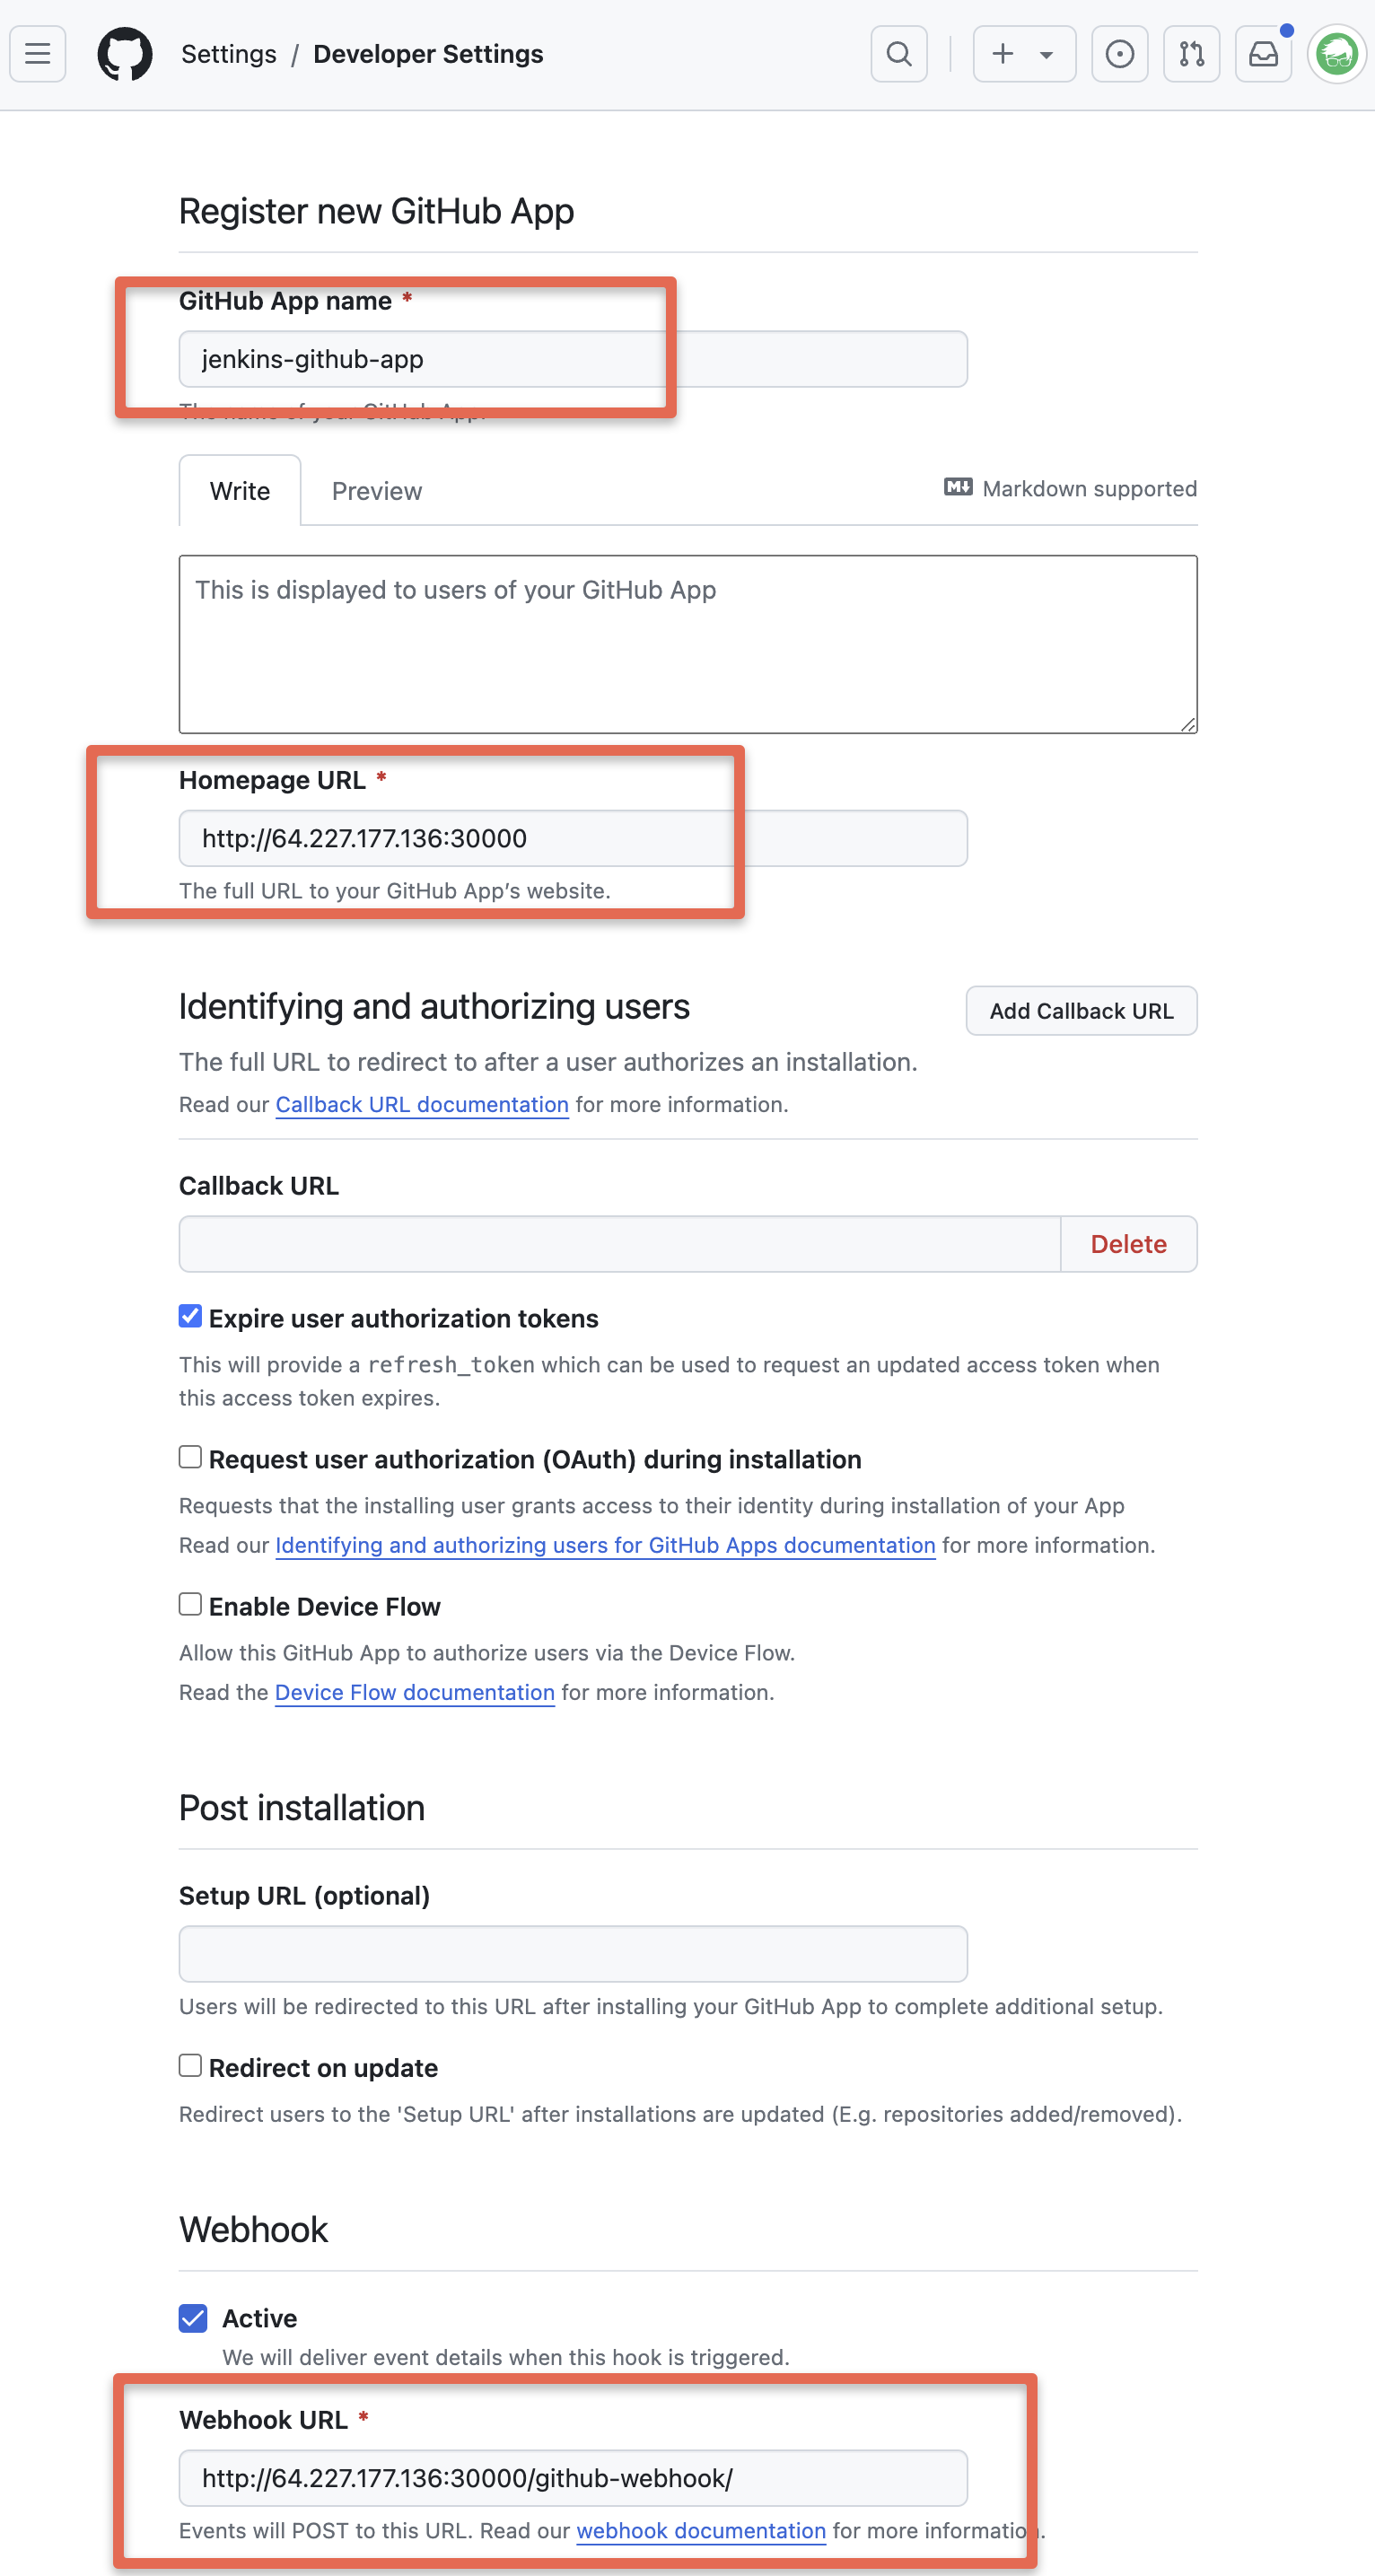
You need to fill out the following details in the configurations.
- GitHub App name: This name has to be unique. For example, jenkins-techiescamp-app. Replace it with the required name.
- Homepage URL: Enter your Jenkins URL.
- Webhook URL: Jenkins URLs with the webhook path (http://64.227.177.136:30000/github-webhook/)
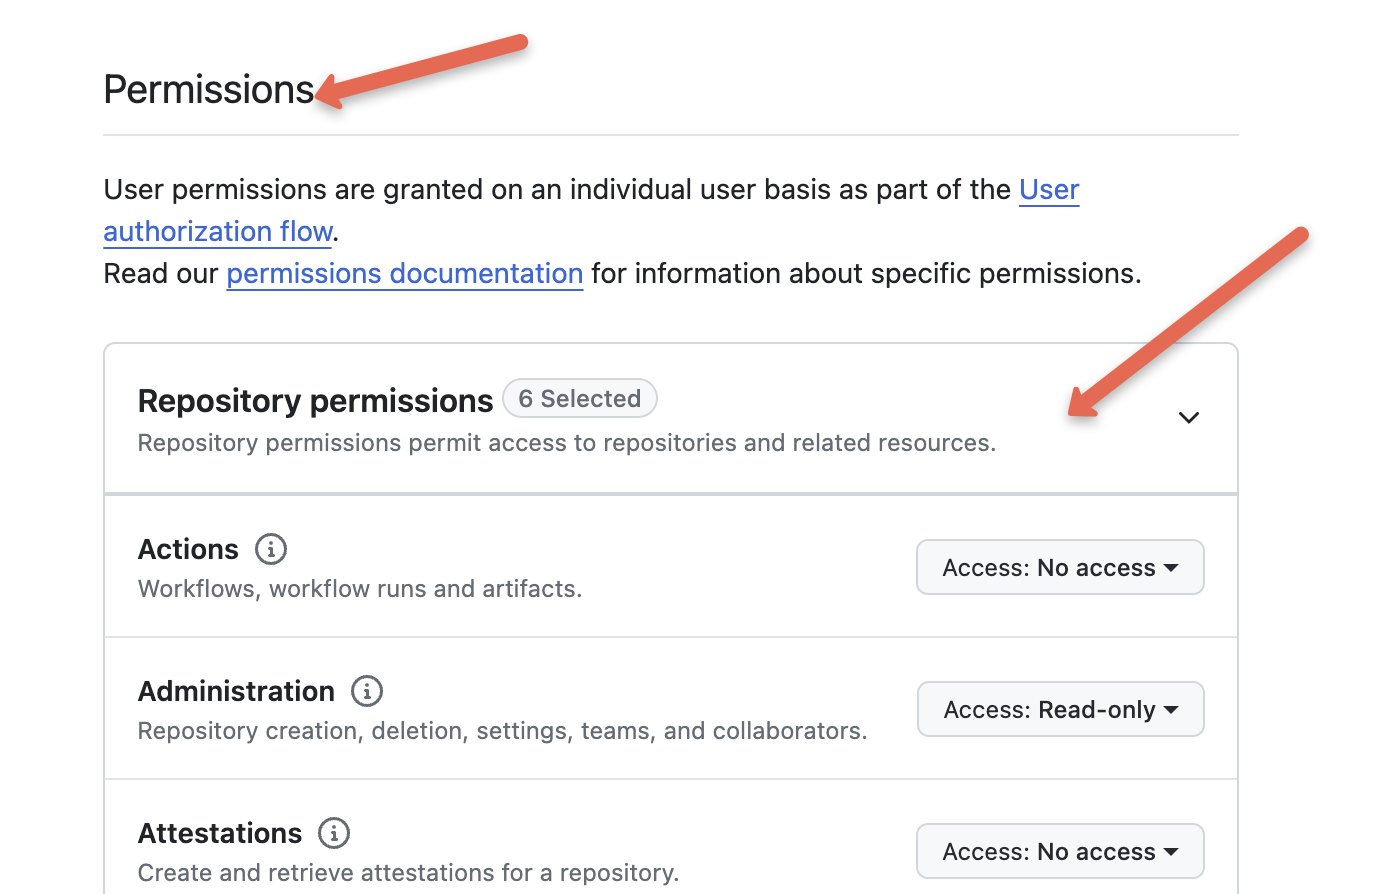
Under Repository permissions, choose the following permissions from the drop-down menu.
- Administration: Read-only
- Checks: Read & write
- Commit statuses: Read & write
- Contents: Read-only (to read the
Jenkinsfileand the repository content duringgit fetch). - Metadata: Read-only
- Pull requests: Read-only
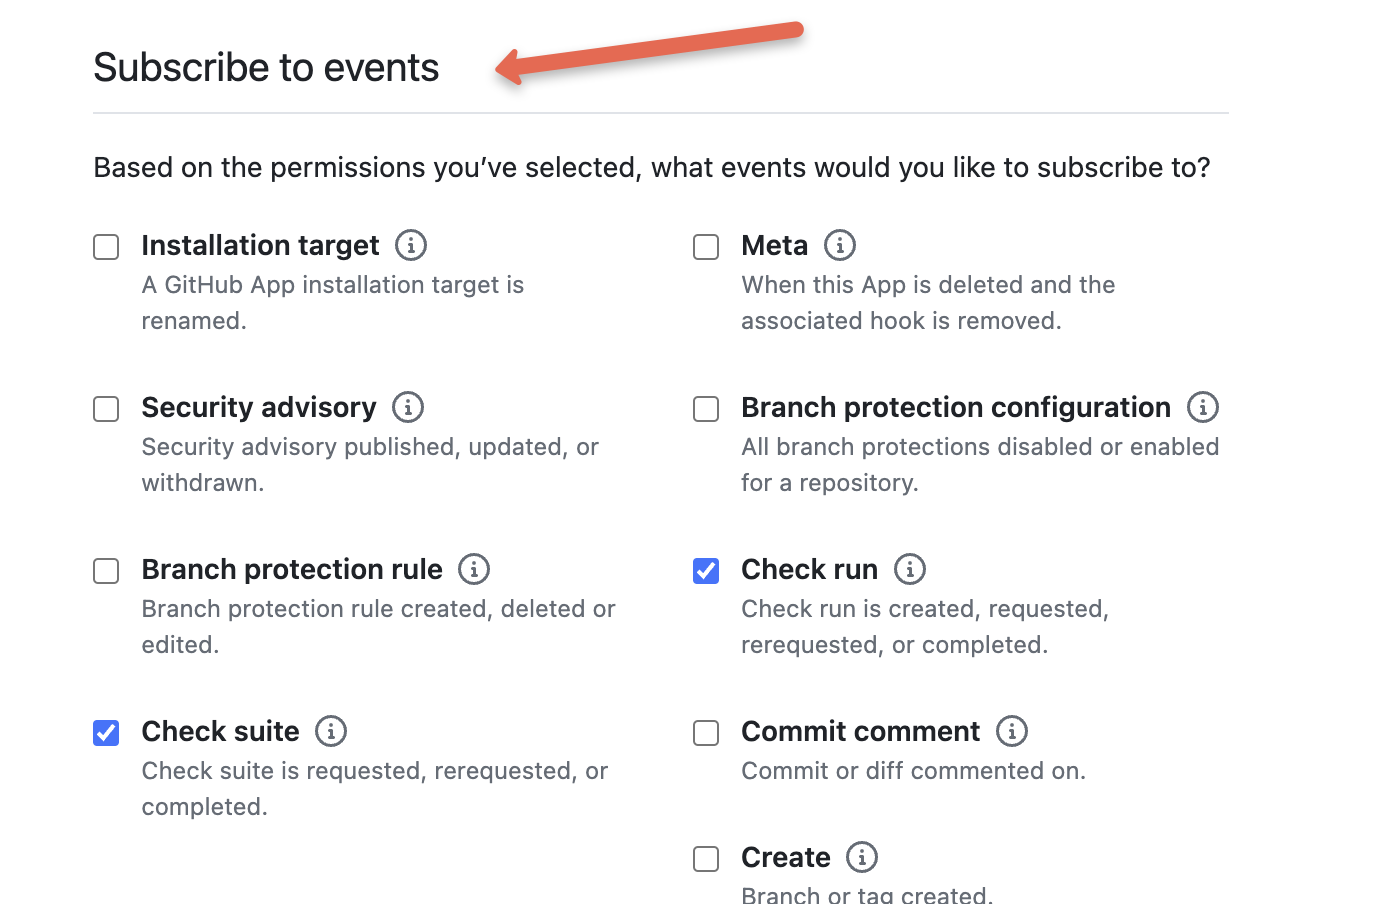
Under Subscribe to events, select the following events:
- Check run
- Check suite
- Pull request
- Push
- Repository
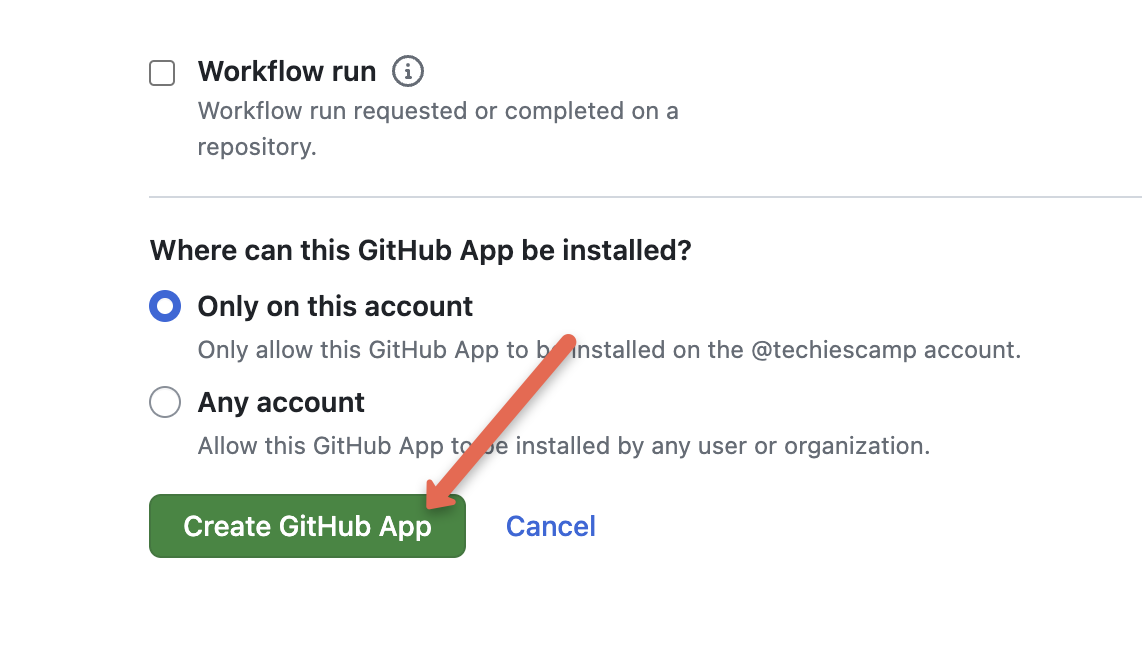
Now, click the Create Github app button.
After creating the app, you will see a notification to generate the private key as shown below.
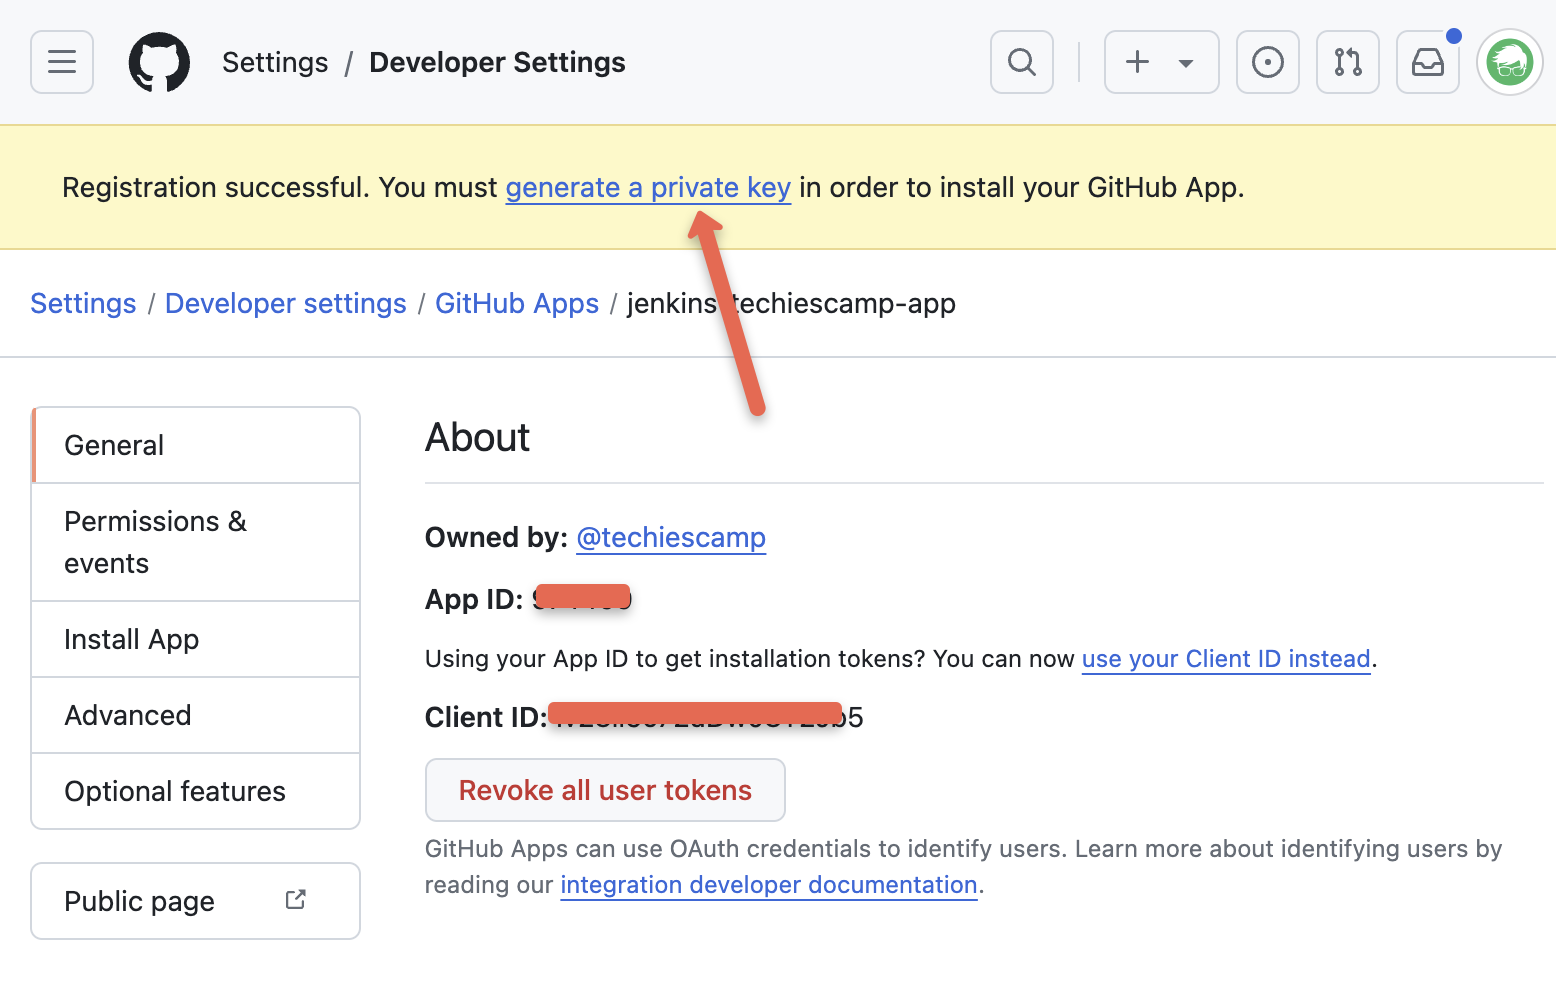
Click on the generate the private key option and click Generate a private key button as given below.
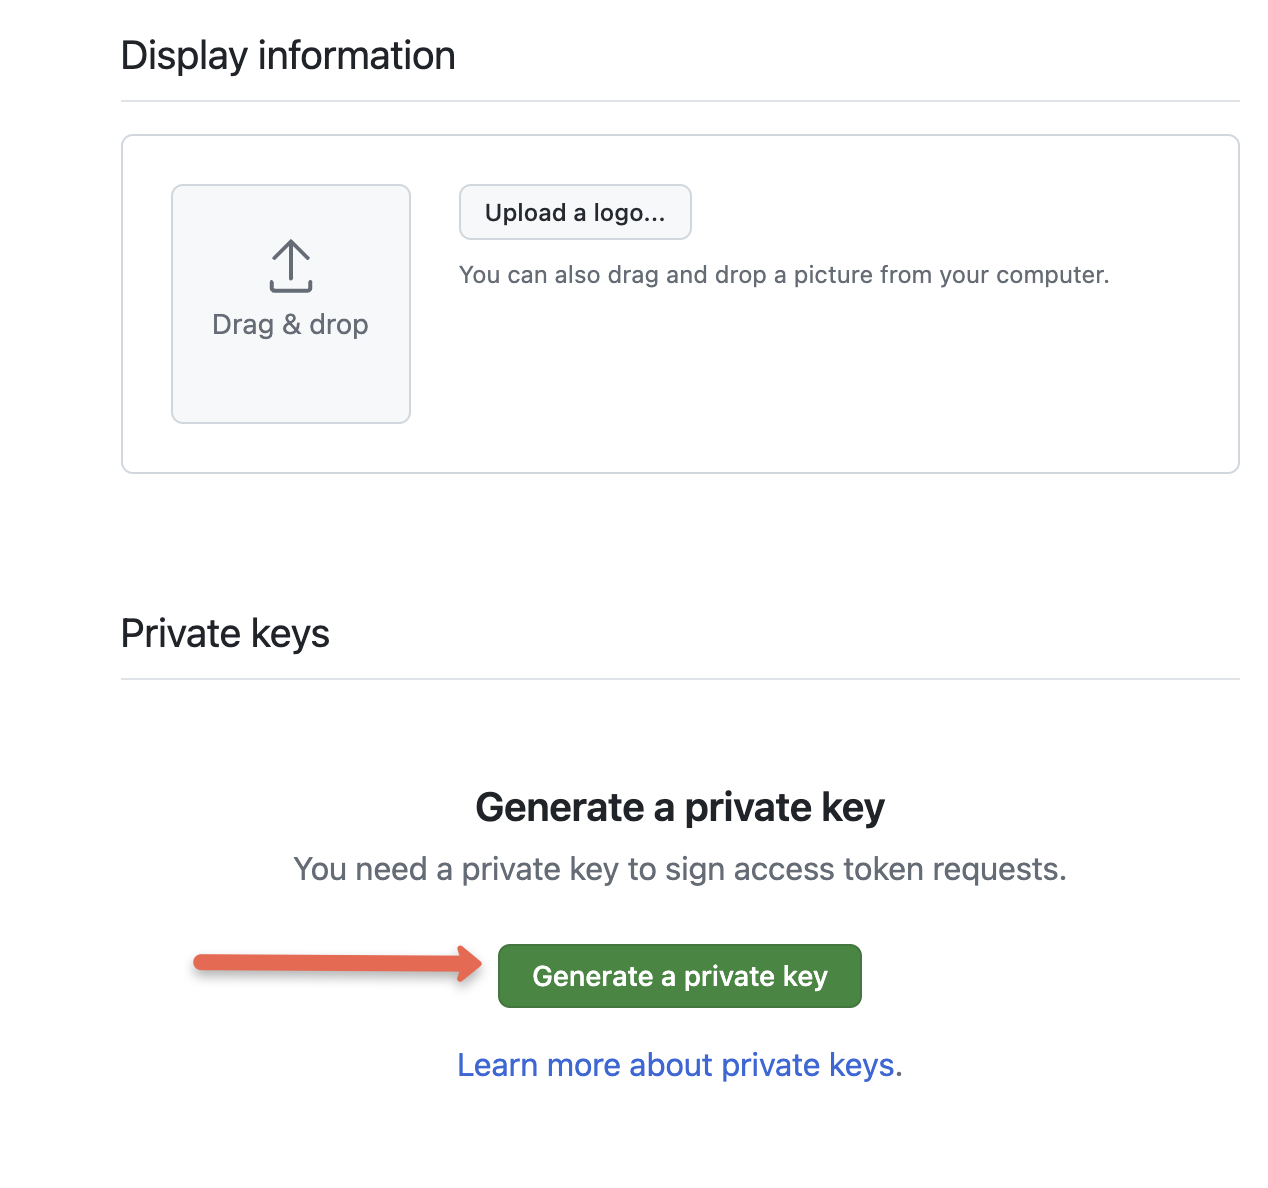
It will download a private key.
Now, you need to convert the key to a format that can be used with Jenkins using the following command. Replace key-in-your-downloads-folder.pem with your downloaded private key.
openssl pkcs8 -topk8 -inform PEM -outform PEM -in key-in-your-downloads-folder.pem -out converted-github-app.pem -nocryptWe need to add the converted key to Jenkins credentials.
Install Github App
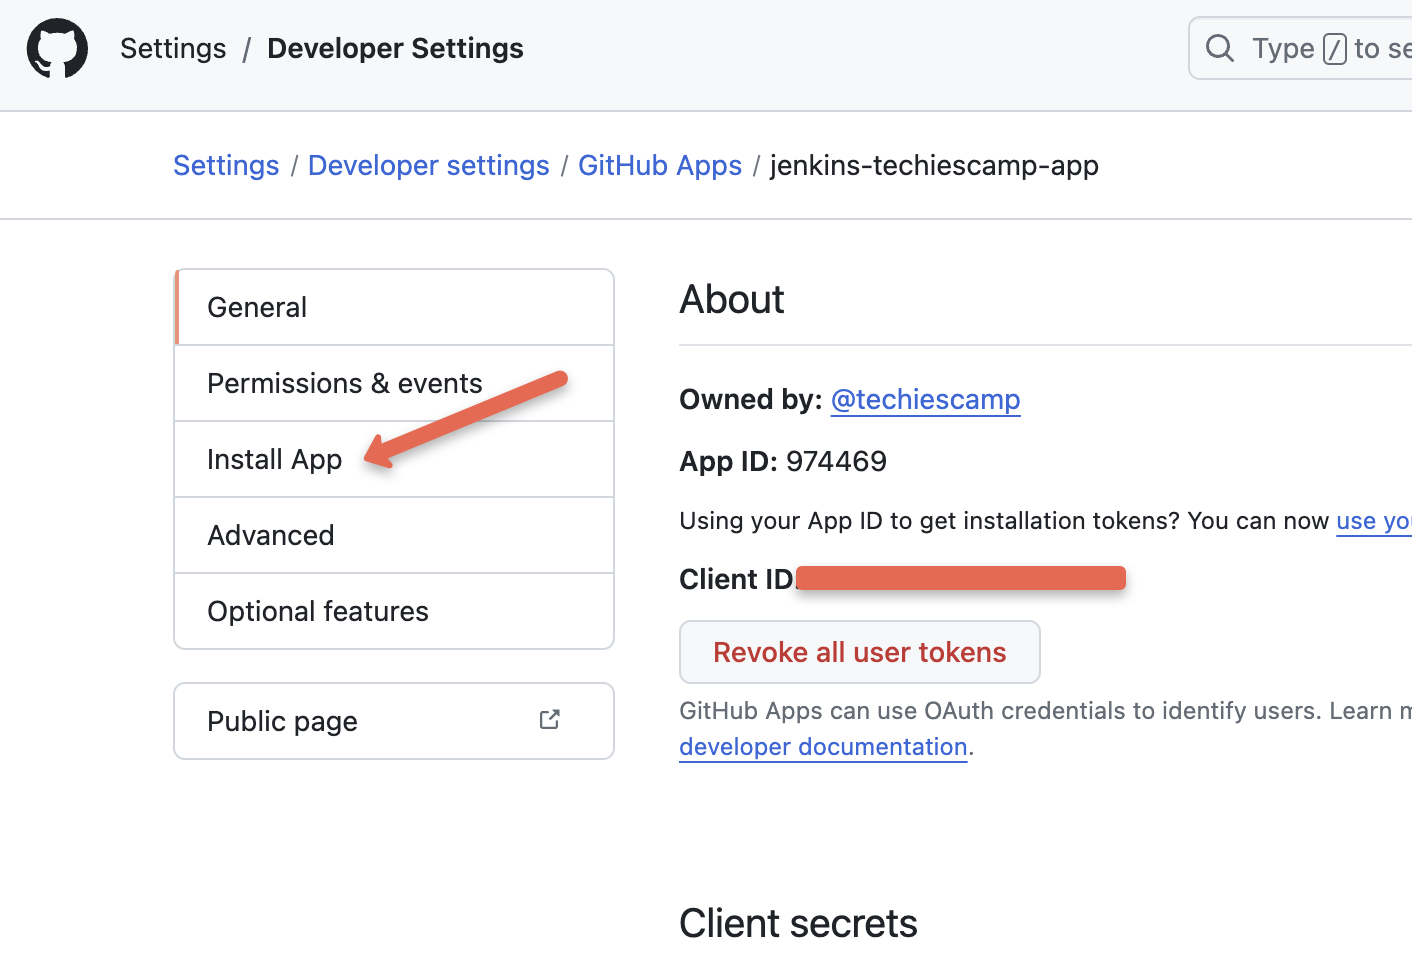
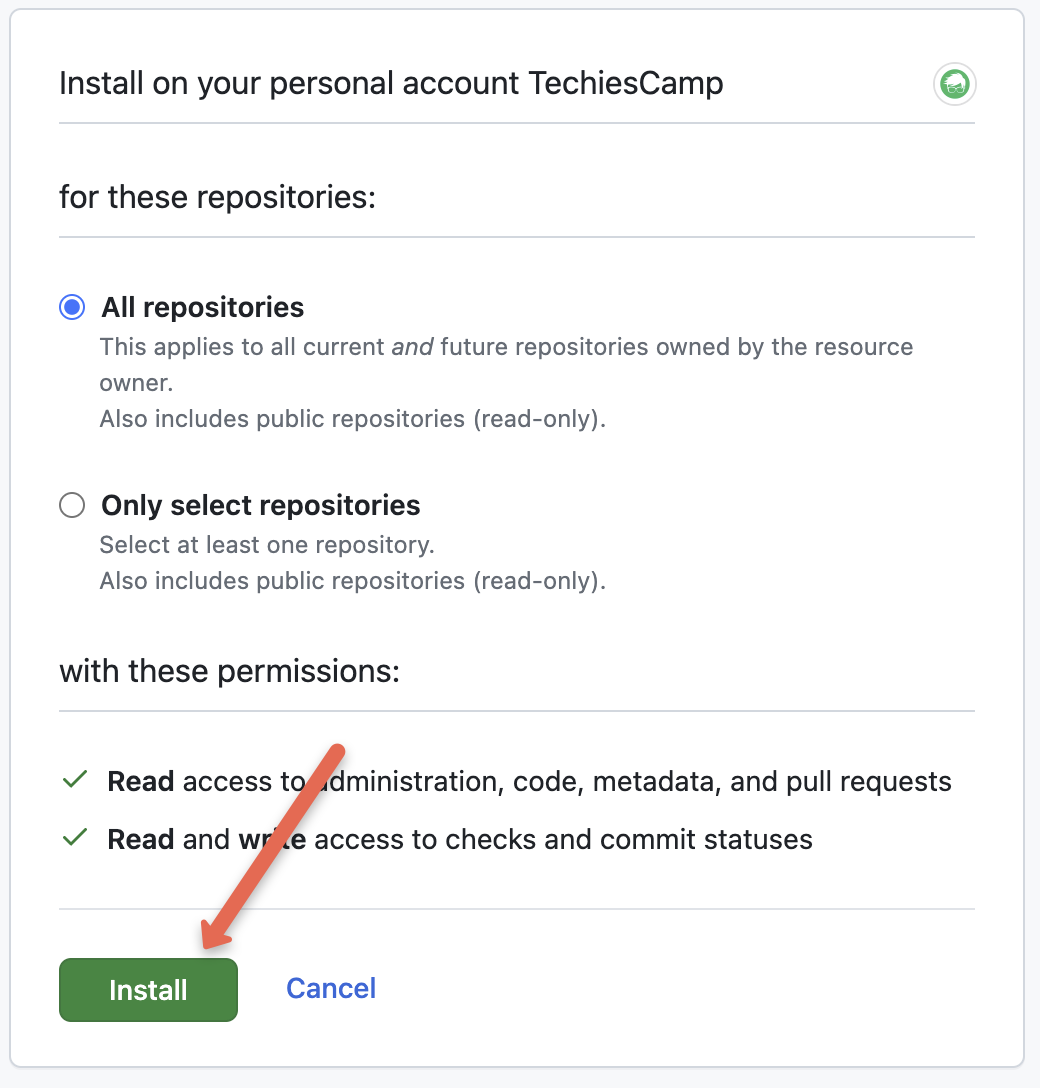
Now, on the app configuration page, you will see an option called Install app, as given below. Click that option to enable this app for all the repositories.
Click Install
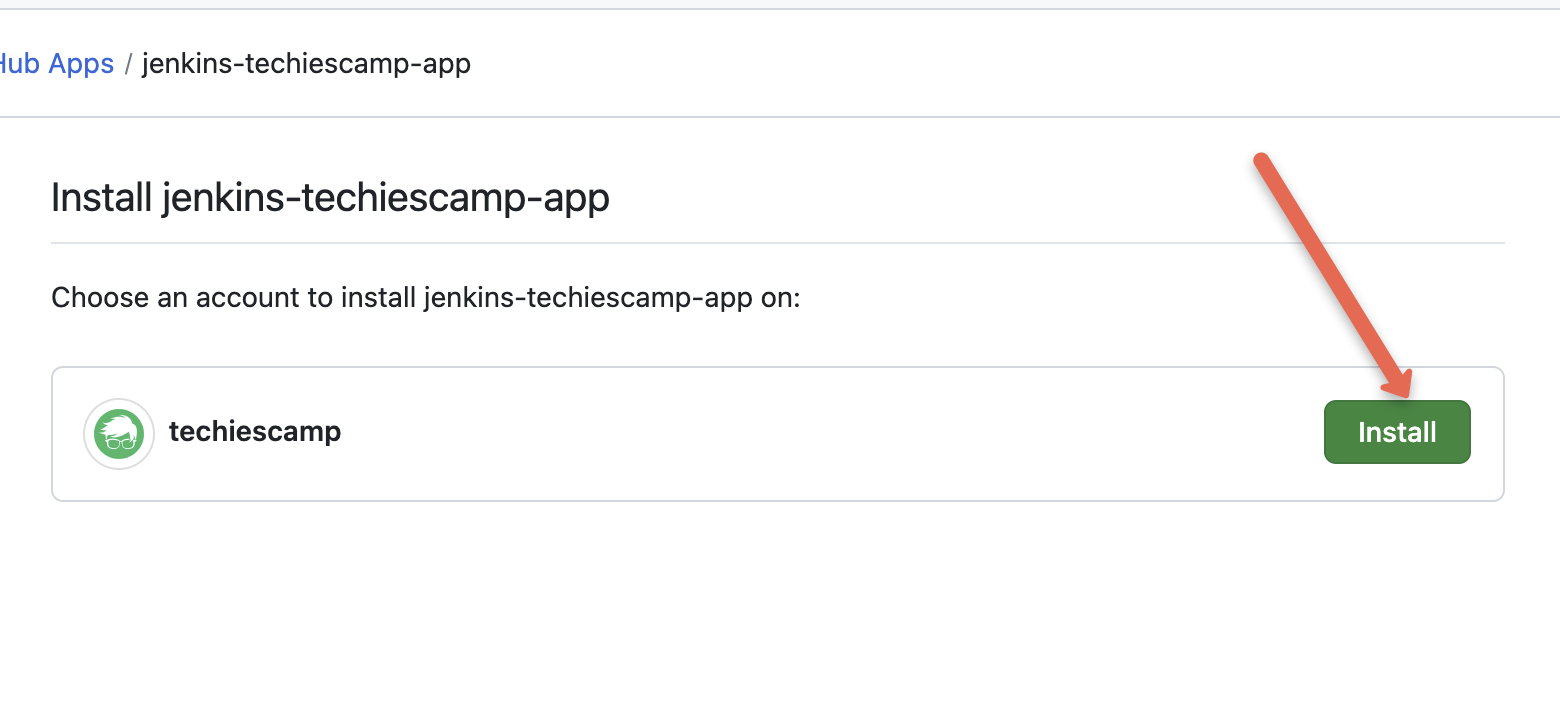
You can choose all or individual repositories you need and then click Install.
Add Private Key to Jenkins Credentials
Now, we need to add the converted PEM key to the Jenkins credentials.
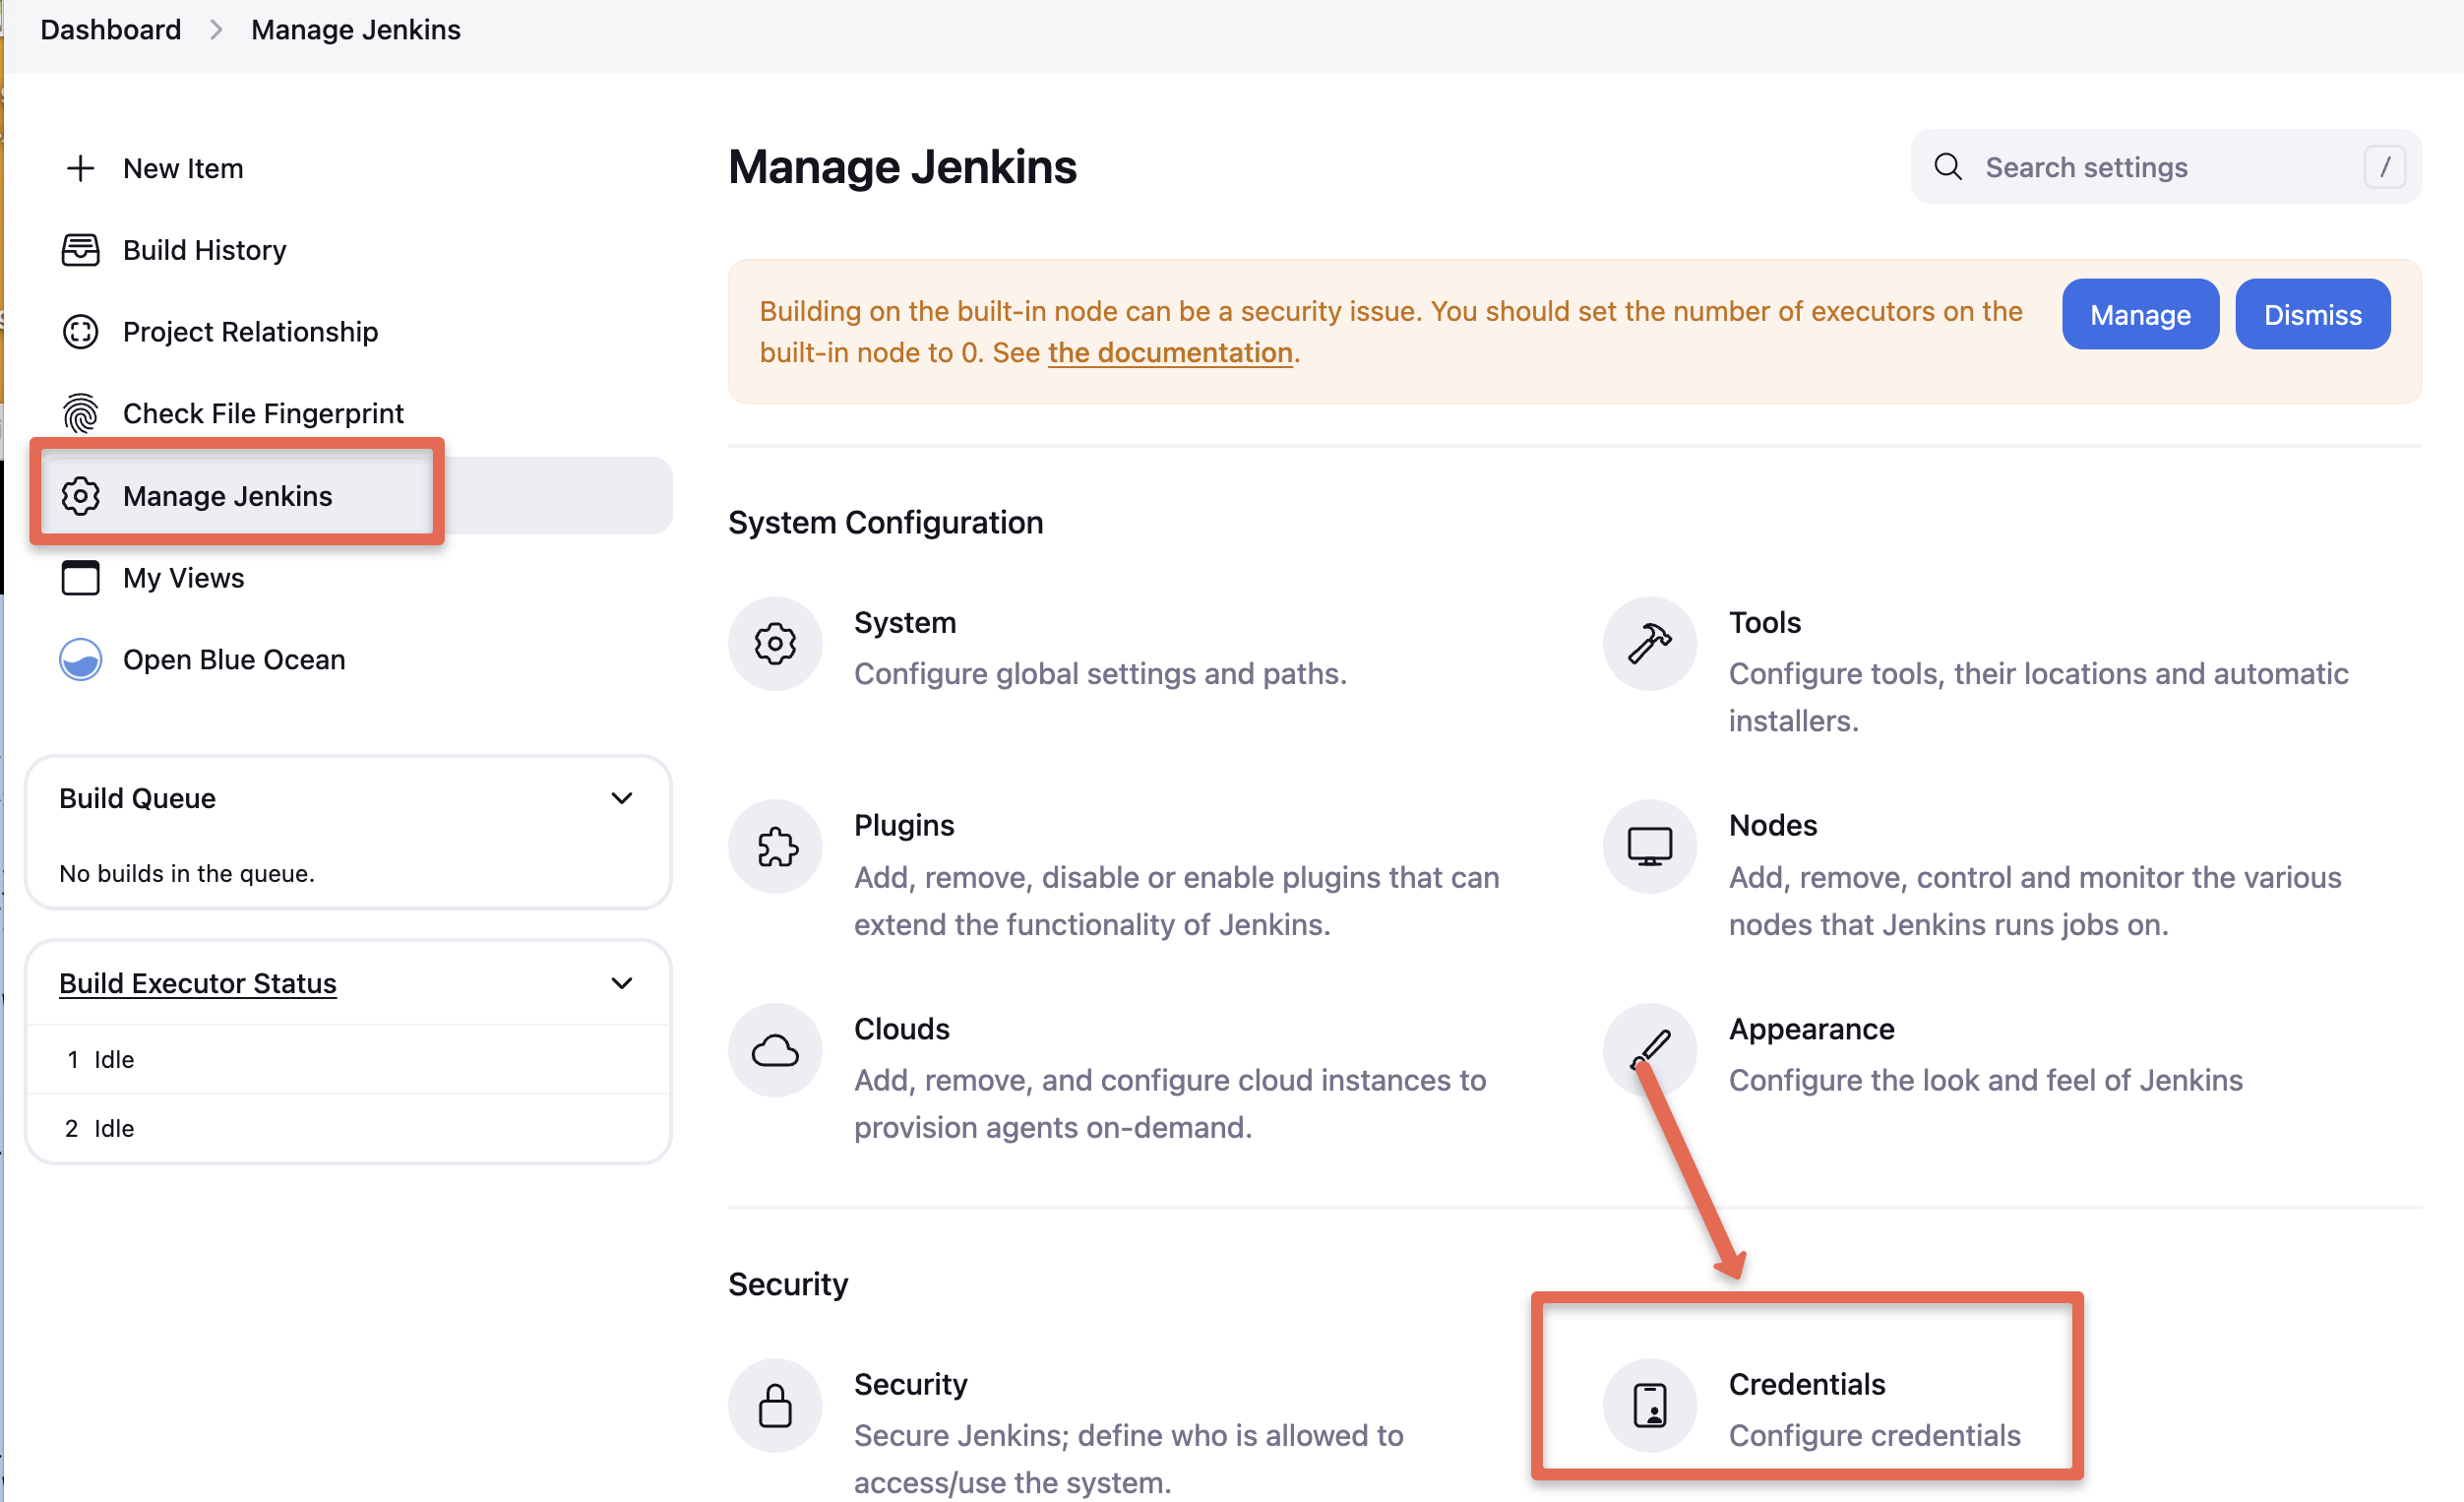
Go to Jenkins Home --> manage jenkins --> Credentials.
Under credentials, select the global option
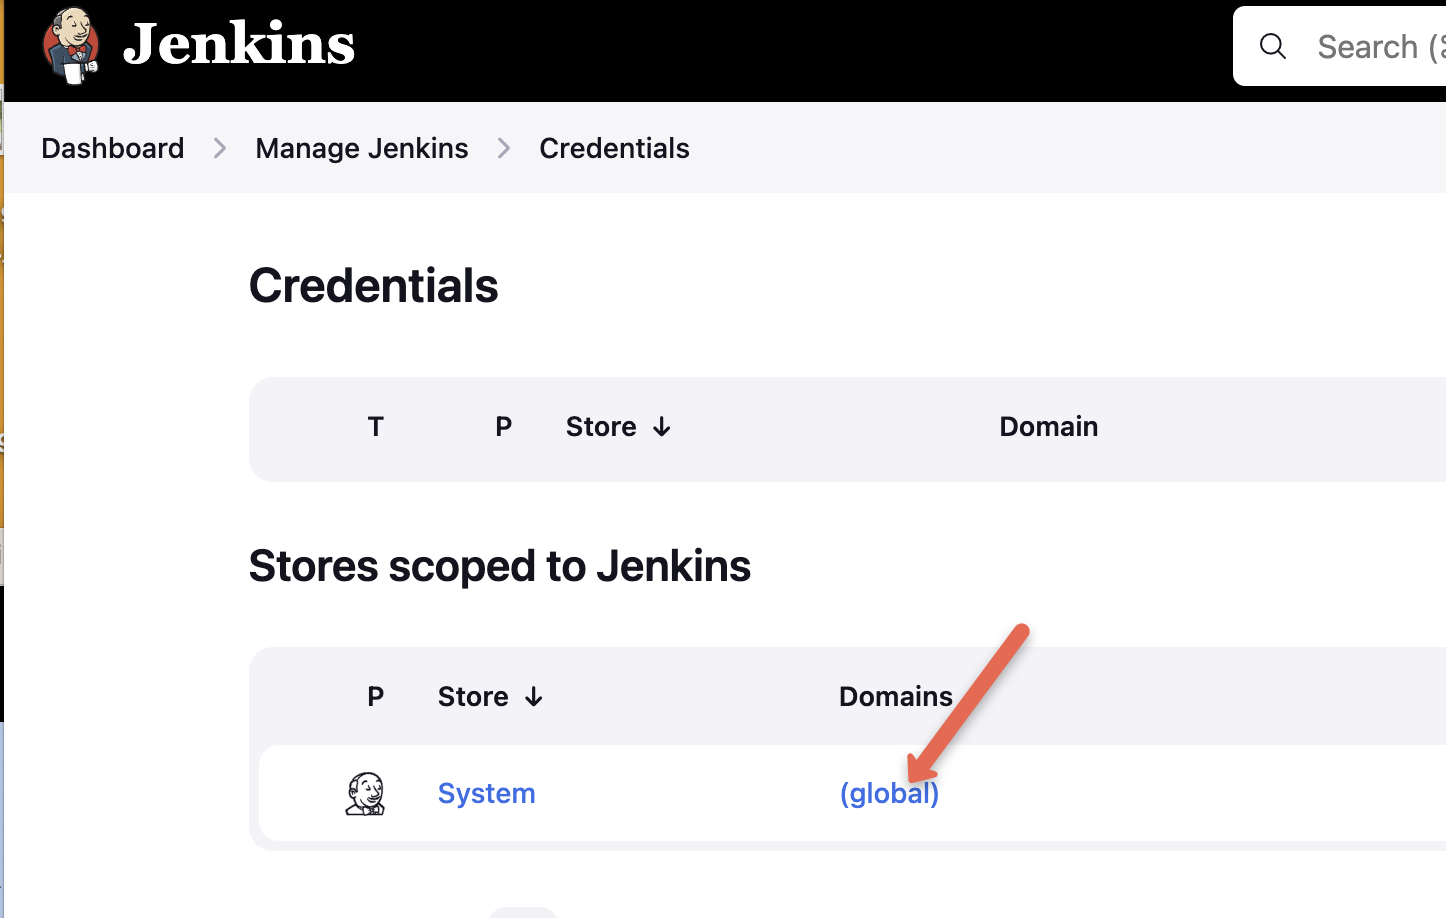
.
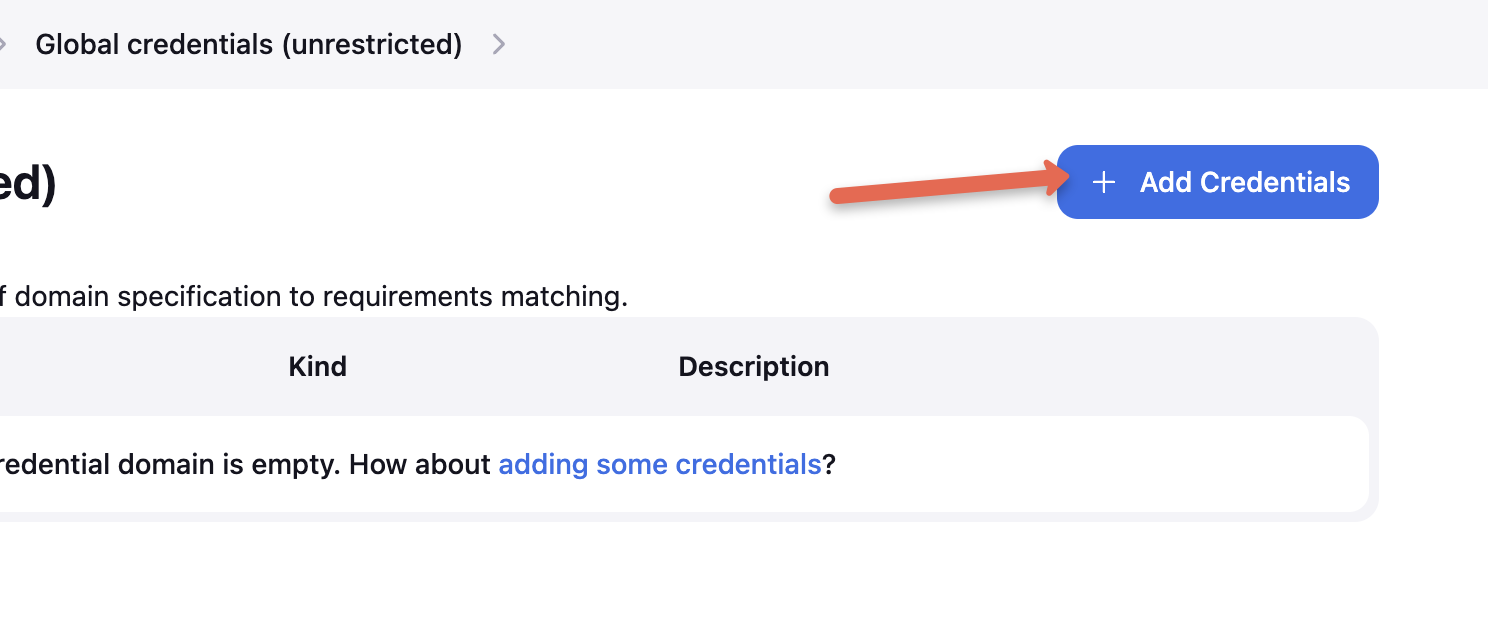
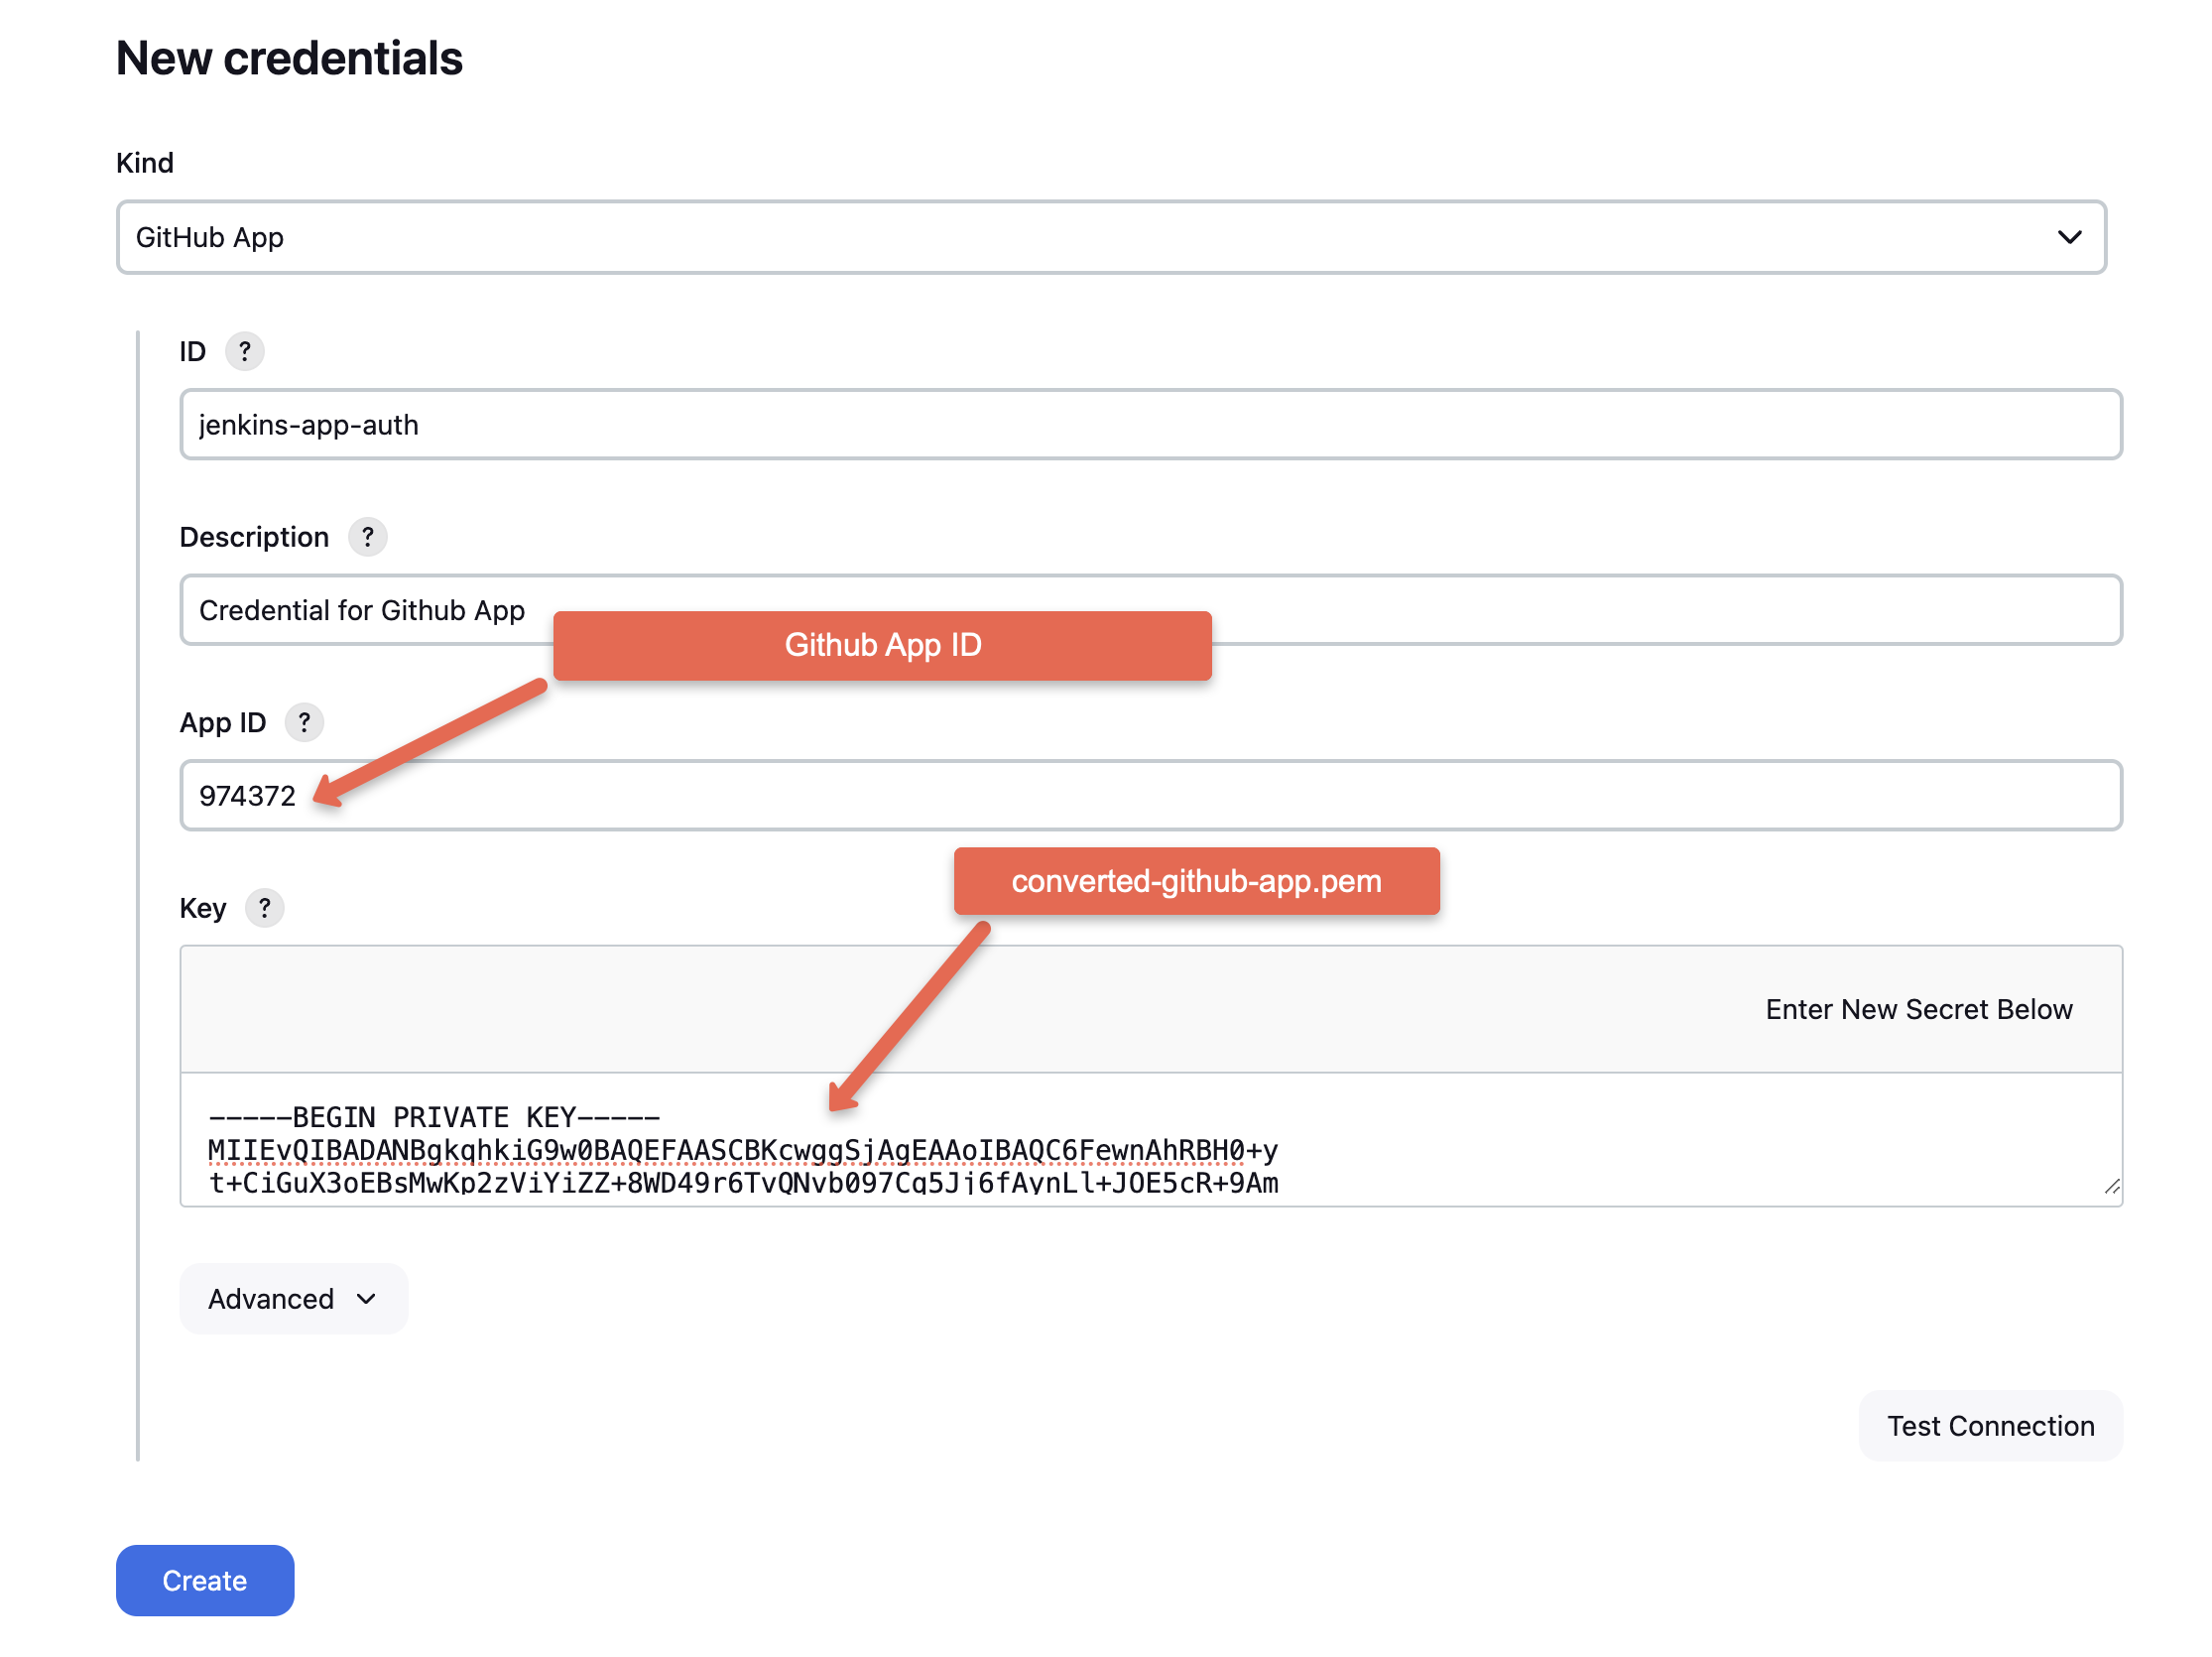
Now you need to choose the Kind as GitHub App.
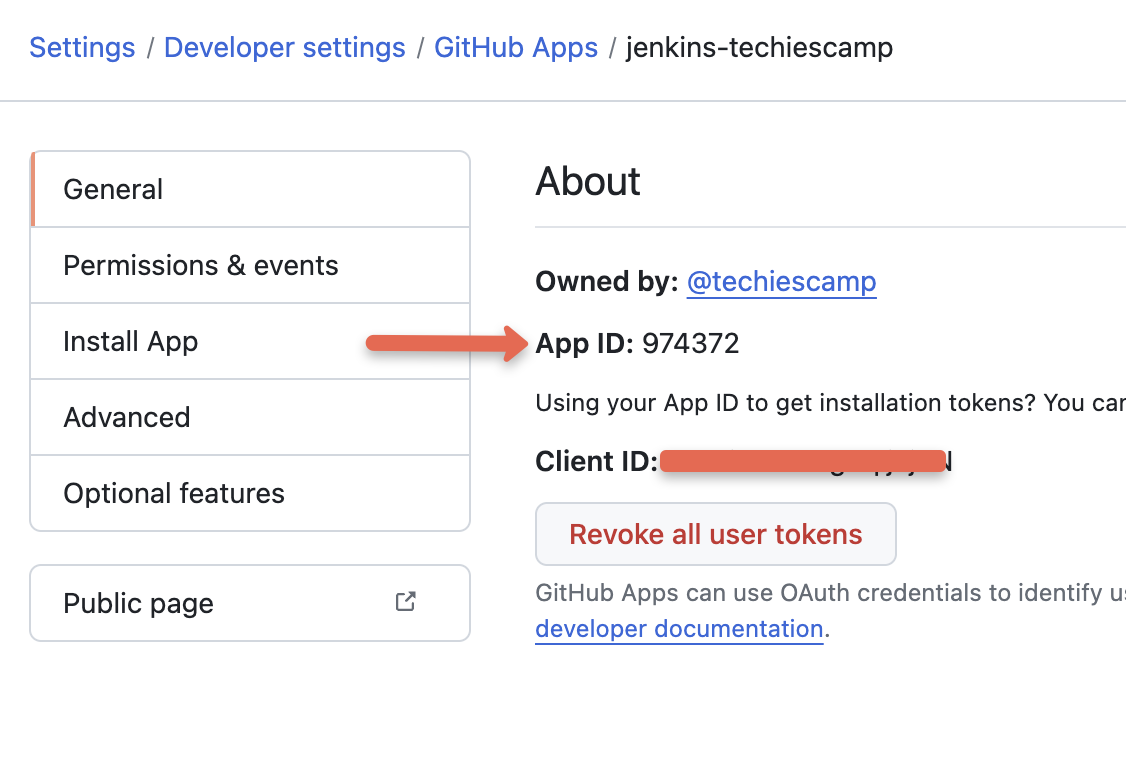
Also we need the Github App ID. You can get it from the Github App configuration as shown below.
In the key field, add the converted-github-app.pem private file contents we converted before, and then click the Create button as shown below.
That's pretty much it.
Now, you can use this credential in the multi-branch pipeline to enable checks during PR.