In this blog, you will learn what EKS Anywhere is and how to set up an EKS Anywhere development cluster and register it to the AWS EKS console using the EKS connector.
What is EKS Anywhere?
EKS Anywhere is an AWS feature to run and manage EKS clusters in on-premises environments. It simplifies the on-premise Kubernetes management and enables a consistent Kubernetes experience in a multi-cloud Kubernetes deployment. Also, you will have full control over the control plane and the worker nodes.
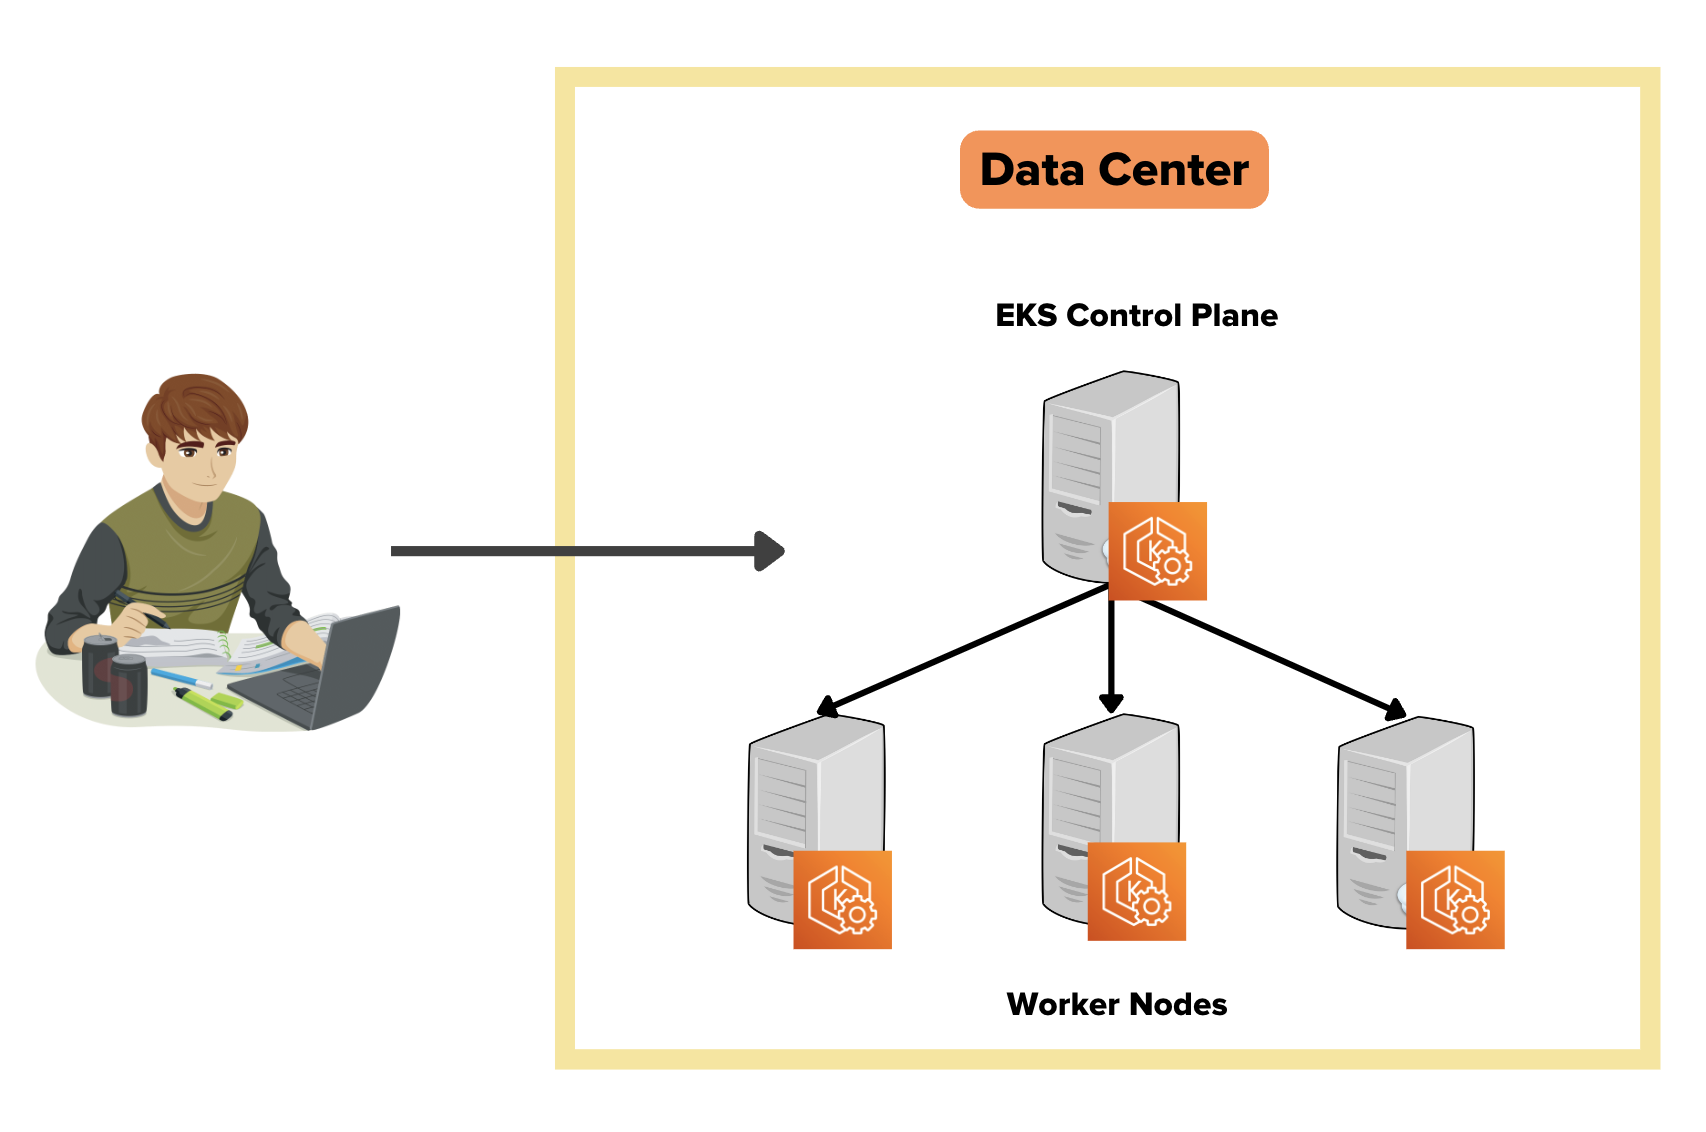
EKS anywhere uses Amazon EKS Distro (EKS-D), a Kubernetes distribution customized and open-sourced by AWS. It is the same distro that powers the AWS-managed EKS. This means that when you install EKS anywhere, it comes with parameters and configurations optimized for AWS.
Also, you can register the EKS anywhere clusters to the AWS EKS console using the EKS connector. Once the cluster is registered, you can visualize all the anywhere cluster components in the AWS EKS console.
EKS connector is a Statefulset that runs the AWS System Manager Agent in your cluster. It is responsible for maintaining the connection between EKS anywhere cluster and AWS.
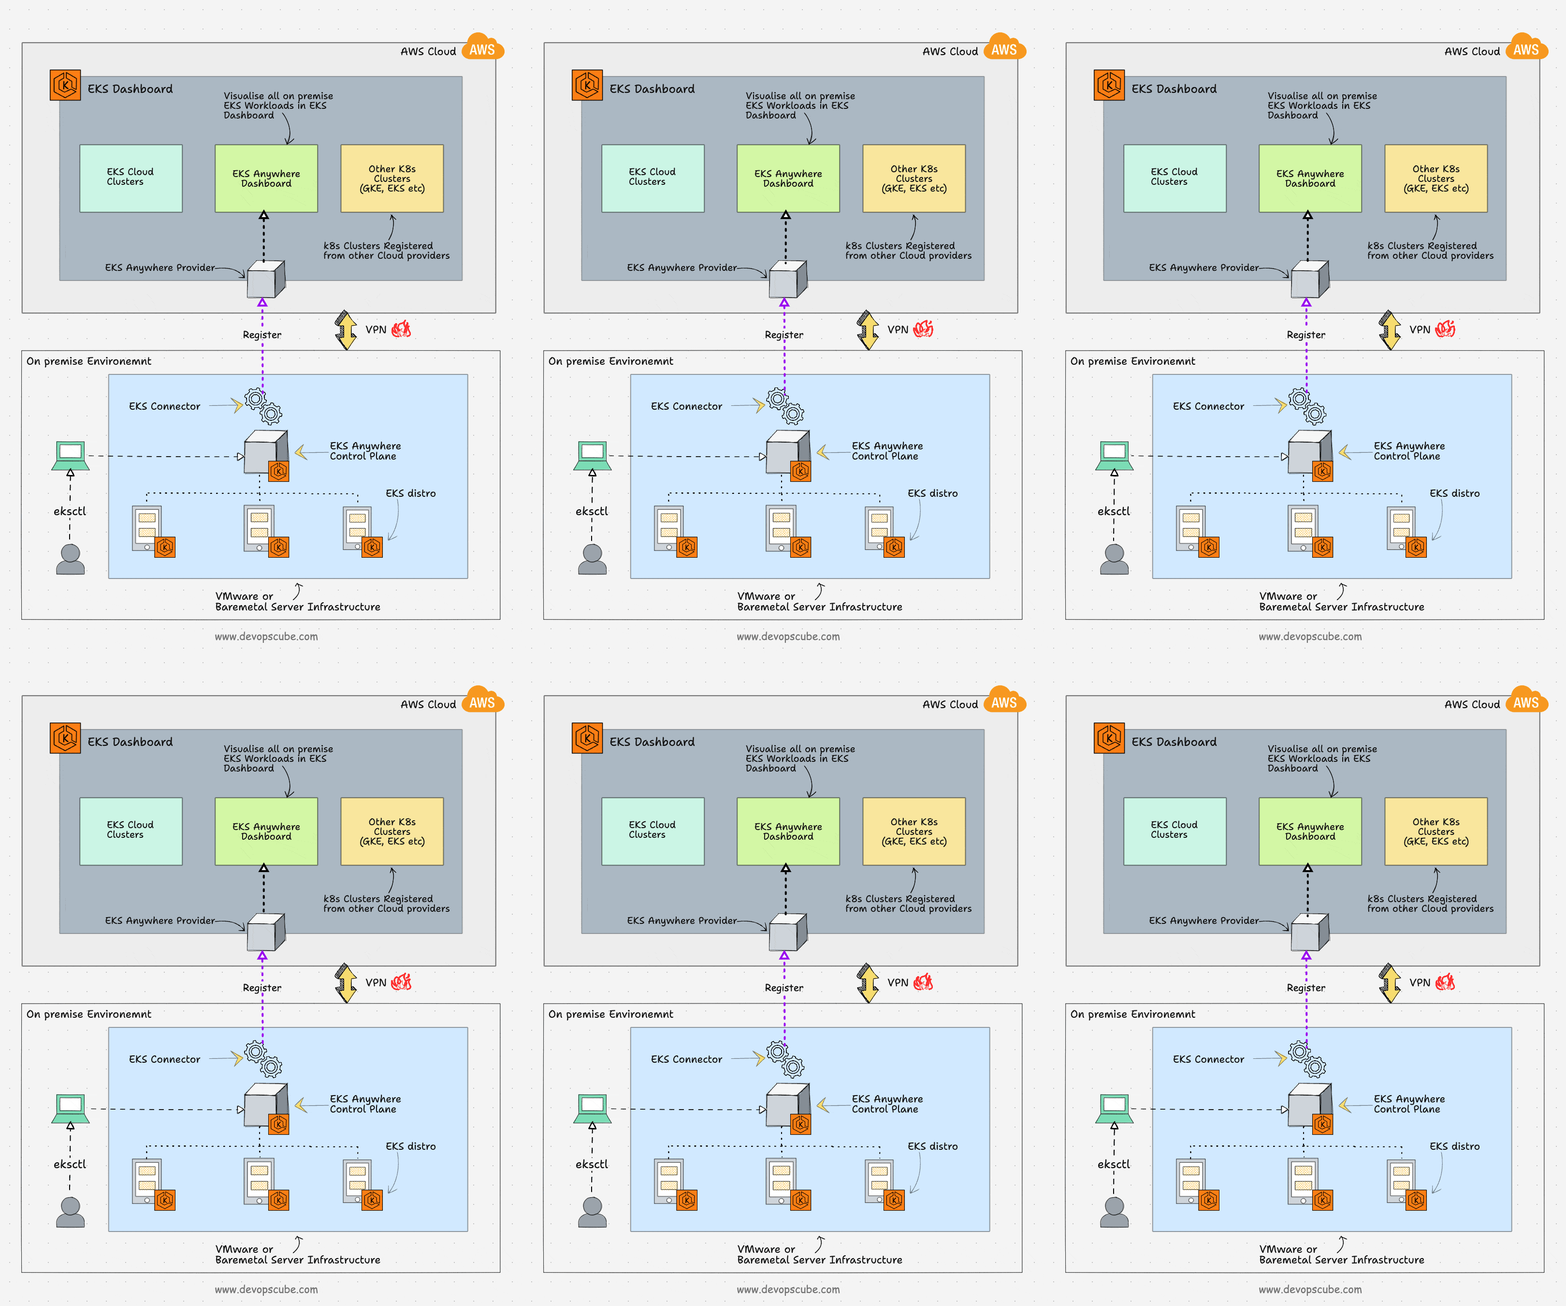
Following the key use cases of EKS anywhere:
- Hybrid cloud consistency: EKS anywhere enables operational consistency across your on-premise and cloud Kubernetes clusters.
- Disconnected environment: You can run EKS anywhere cluster without an internet connection. At the same time, your disconnected clusters will have the same features as the cloud EKS with the EKS-D distro.
- Application modernization: With EKS-D, the administrative overhead of patching and version upgrades is reduced. So you can focus more on the applications.
EKS Anywhere Development Cluster Setup
You can set up EKS anywhere development clusters using Docker on MAC or Ubuntu systems.
Follow the steps given below to set up EKS anywhere development cluster.
Step 1: Install Docker Desktop
Go to Docker downloads and install the Docker desktop on MAC. For Ubuntu use this link to download the deb package
Mac users, open the following file and change deprecatedCgroupv1 to true. And then restart the Docker desktop to apply the changes.
vi ~/Library/Group\ Containers/group.com.docker/settings.jsonOr else you will get the following error.
Error: failed to validate docker desktop: EKS Anywhere requires Docker desktop to be configured to use CGroups v1. Please set `deprecatedCgroupv1:true` in your `~/Library/Group\ Containers/group.com.docker/settings.json` fileStep 2: Install eksctl-anywhere
brew install eks-anywhereStep 3: Generate the cluster configuration
Generate the EKS anywhere cluster configuration using the following command.
CLUSTER_NAME=dev-eks-cluster
eksctl anywhere generate clusterconfig $CLUSTER_NAME \
   --provider docker > $CLUSTER_NAME.yaml
Your cluster configuration would look like the following.
apiVersion: anywhere.eks.amazonaws.com/v1alpha1
kind: Cluster
metadata:
  name: dev-eks-cluster
spec:
  clusterNetwork:
    cniConfig:
      cilium: {}
    pods:
      cidrBlocks:
      - 192.168.0.0/16
    services:
      cidrBlocks:
      - 10.96.0.0/12
  controlPlaneConfiguration:
    count: 1
  datacenterRef:
    kind: DockerDatacenterConfig
    name: dev-eks-cluster
  externalEtcdConfiguration:
    count: 1
  kubernetesVersion: "1.22"
  managementCluster:
    name: dev-eks-cluster
  workerNodeGroupConfigurations:
  - count: 1
    name: md-0

---
apiVersion: anywhere.eks.amazonaws.com/v1alpha1
kind: DockerDatacenterConfig
metadata:
  name: dev-eks-cluster
spec: {}

---
Step 4: Deploy the cluster
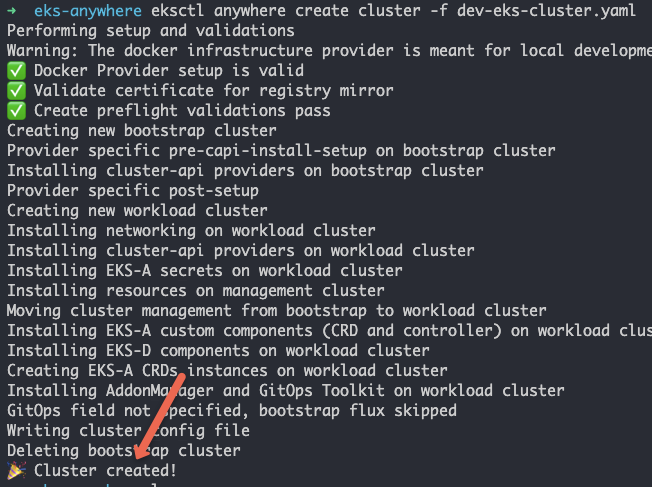
Deploy the cluster using eksctl. It will take a while for the cluster to be provisioned.
eksctl anywhere create cluster -f dev-eks-cluster.yamlYou will get the following output after a successful cluster deployment.
Step 5: Validate the cluster
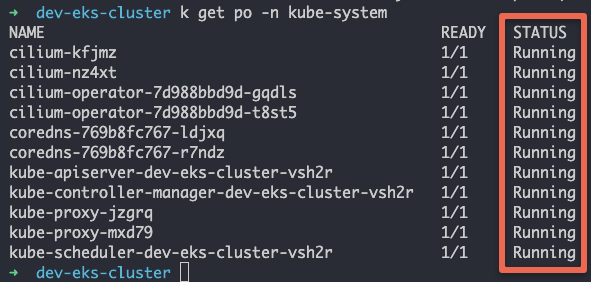
Once the cluster is created you can see a folder named dev-eks-cluster with the kubeconfig file. Let's export the kubeconfig file.
Replace /path/to with the absolute path of the dev-eks-cluster folder location. Or check out the Kubeconfig file guide to know more about kubeconfig file practical usage.
KUBECONFIG=/path/to/dev-eks-cluster/dev-eks-cluster-eks-a-cluster.kubeconfigNow, let's list the pods in the kube-system namespace to validate the cluster. You should see all the pods in running state as shown below.
Step 6: Generate & Deploy EKS Connector Configs
Now that we have a running EKS anywhere development cluster, we will go ahead and register the cluster using the EKS connector.
Note: Before you register the cluster, ensure you have a valid AWS cli configuration with admin privileges in your system. Refer the AWS CLI configuration guide for more details.
Here is the command to generate EKS connector config YAMLs. Replace the region value if you are using a different region.
eksctl register cluster --name dev-eks-cluster --provider EKS_ANYWHERE --region us-west-2 The above command creates the following three YAML files. Where eks-connector.yaml is the EKS connector agent Statefulset YAML
- eks-connector-clusterrole.yaml
- eks-connector-console-dashboard-full-access-group.yaml
- eks-connector.yaml
Let's deploy all the three YAMLs.
kubectl apply -f eks-connector-clusterrole.yaml
kubectl apply -f eks-connector-console-dashboard-full-access-group.yaml
kubectl apply -f eks-connector.yaml
Step 7: Validate EKS Anywhere Cluster Registration On the EKS console
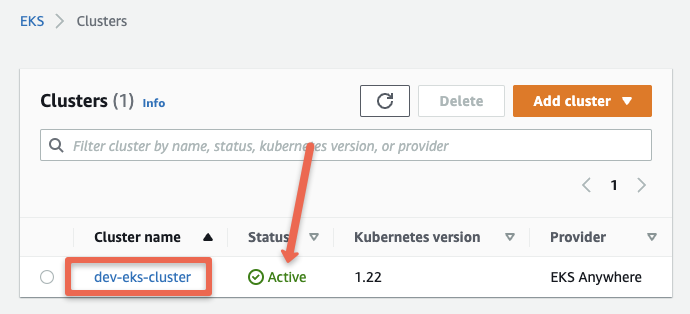
If you head over to the AWS EKS console, you should see the newly registered cluster as shown below.
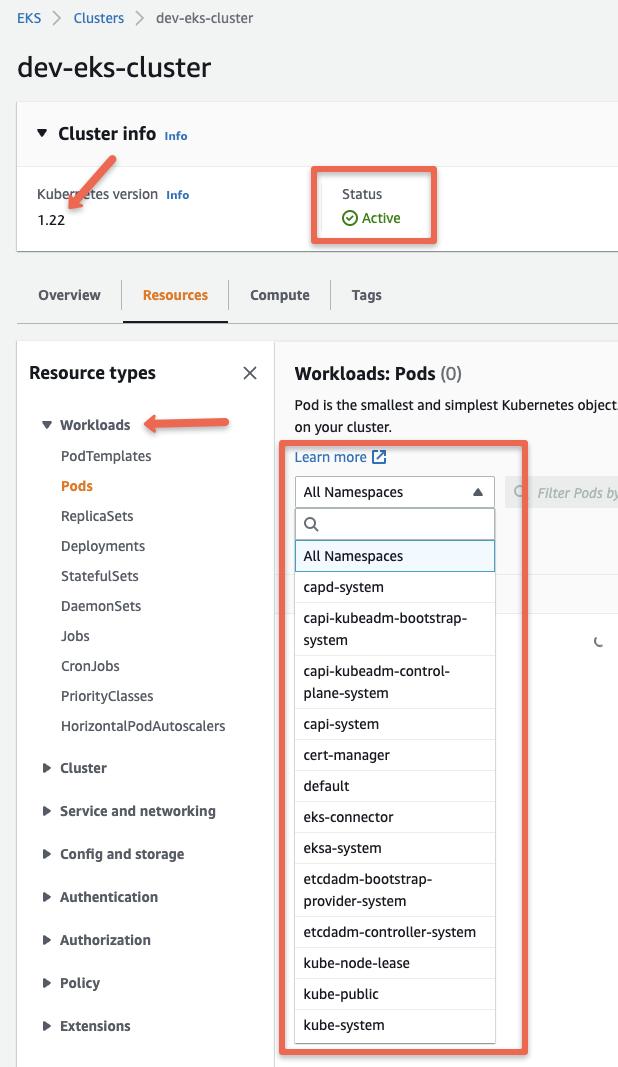
If you click the cluster name, you can view all the information and objects of the EKS anywhere cluster running in your local workstation.
Here is the EKS connector demo I have added to DevOpsCube YouTube Channel.
Conclusion
In this guide, we looked at EKS anywhere Kubernetes development cluster setup. It is pretty easy to get started. Do give it a try.
Also if you are looking for light weight Kubernetes development clusters, checkout my minikube tutorial.
If you are learning Kubernetes, checkout 30+ Kubernetes beginners tutorials.

![EKS Anywhere Cluster Tutorial [Deploy Cluster in 7 Steps]](/content/images/size/w100/2025/03/eks-anywher-1.png)