

In this blog, you are going to learn about the steps to deploy WordPress on Kubernetes cluster with Nginx and MySQL database.
Prerequisites
Here are the prerequisites to deploy WordPress on Kubernetes with Nginx and MySQL
- Kubernetes Cluster
- kubectl
- Cluster with admin permission to deploy applications.
- Install Docker and should have access to a Docker Hub repo (If you are going to create a custom Docker image)
Setup Architecture
The workflow of this setup is given in the below diagram.
You will practically use the following key Kubernetes objects.
- Namespace - This isolates the resources used in this deployment.
- Secret - Used to store MySQL database credentials securely, which will be fetched when deploying MySQL and Wordpress.
- ConfigMap - We will create two configmaps, one for Nginx configuration and the other for MySQL init script.
- PersistantVolumeClaim (PVC) - This creates and attaches PVs to WordPress Applications and MySQL databases to store data.
- StatefulSet - MySQL database is deployed as a statefulset.
- Deployment - WordPress application is deployed as a deployment.
- Services - Exposes Wordpress application to the outside world and exposes MySQL database to Wordpress within the cluster.
- NetworkPolicy - Assign a network policy for MySQL to restrict its incoming traffic.
Manifest Repository
Clone the Kubernetes Projects repository given below which contains every file we are going to use in this deployment.
git clone https://github.com/techiescamp/kubernetes-projects.gitCD into 04-WordPress-deployment and follow the below steps
The directory structure is given below
.
├── Docker
│   ├── Dockerfile
│   ├── php.ini
│   ├── startup.sh
│   ├── wordpress.conf
│   └── wp-config.php
├── mysql-cm.yaml
├── mysql.yaml
├── networkpolicy.yaml
├── nginx-cm.yaml
├── secret.yaml
├── vpa.yaml
└── wordpress.yaml
Steps to Deploy WordPress on Kubernetes with Nginx and MySQL
Note: You can skip the steps 1 & 2 if you only want to try the Kubernetes deployment. Just use the container image provided in the guide.
Let's start the deployment process, follow the below steps one by one.
Step 1: Build a Custom Docker Image of WordPress
In this custom image, we are going to install Nginx instead of Apache webserver and also add the configuration file of Nginx and WordPress.
CD into the Docker folder, you can see the following file
.
├── Dockerfile
├── php.ini
├── startup.sh
├── wordpress.conf
└── wp-config.php
To build the Docker image of WordPress with Nginx, use the Dockerfile which is inside the Docker directory
# Use Ubuntu as the base image
FROM ubuntu:24.04

# Set the Timezone to UTC
ENV TZ=UTC

# Install Nginx, and other necessary Packages
RUN apt-get update && apt-get install -y \
    software-properties-common \
    nginx \
    curl \
    wget \
    sudo \
    unzip \
    && rm -rf /var/lib/apt/lists/*

# Add PHP repository
RUN sudo add-apt-repository ppa:ondrej/php

# Install PHP
RUN apt-get update && apt-get install -y \
    php8.2 php8.2-fpm php8.2-mysql php8.2-cli php8.2-gd \
    && rm -rf /var/lib/apt/lists/*
ADD php.ini /etc/php/8.2/nginx/

# Install Wordpress
RUN wget https://wordpress.org/latest.zip \
    && unzip latest.zip -d /var/www/html/ \
    && rm latest.zip

# Add Nginx config file
RUN rm /etc/nginx/sites-enabled/default
ADD wordpress.conf /etc/nginx/sites-available/
RUN ln -s /etc/nginx/sites-available/wordpress.conf /etc/nginx/sites-enabled/

# Add WordPress config file
RUN rm /var/www/html/wordpress/wp-config-sample.php
ADD wp-config.php /var/www/html/wordpress/wp-config.php

# Change the user and Permission of WordPress root directory
RUN chown -R www-data:www-data /var/www/html/wordpress \
    && chmod -R 755 /var/www/html/wordpress

# Exposing container to port 80
EXPOSE 80

# Copy the startup script and give excuitable permission
COPY startup.sh /usr/local/bin/startup.sh
RUN chmod +x /usr/local/bin/startup.sh

# Command to run the startup script
CMD ["/usr/local/bin/startup.sh"]
This Dockerfile uses ubuntu:24.04 as the base image and sets the timezone to UTC. Then it installs Nginx, PHP, WordPress, and other required packages.
Once the packages are installed the configuration files of Nginx and Wordpress are added and the permission of the Wordpress root directory is changed.
The container is exposed to port 80 and the startup script is added. The command runs the startup script when the container starts.
#!/bin/bash

WP_CONFIG="/var/www/html/wordpress/wp-config.php"

sed -i "s/\${DB_NAME}/${DB_NAME}/g" $WP_CONFIG
sed -i "s/\${DB_USER}/${DB_USER}/g" $WP_CONFIG
sed -i "s/\${DB_PASSWORD}/${DB_PASSWORD}/g" $WP_CONFIG
sed -i "s/\${DB_HOST}/${DB_HOST}/g" $WP_CONFIG

service php8.2-fpm start
nginx -g 'daemon off;'
This is the startup script that uses the SED command to replace the values of the MySQL database name, username, password, and host URL to the WordPress configuration file wp-config.php.
Add runs the command that starts the PHP and Nginx webserver.
Run the below command from the same directory where the Dockerfile is present to build the Docker image.
docker build -t wordpress-nginx:7.0.0 .Step 2: Push the image to DockerHub
First, tag the image using the following command
docker tag wordpress-nginx:7.0.0 techiescamp/wordpress-nginx:7.0.0Now, use the command to push the image to DockerHub. Before pushing, make sure you have logged in to the Docker Hub from the CLI.
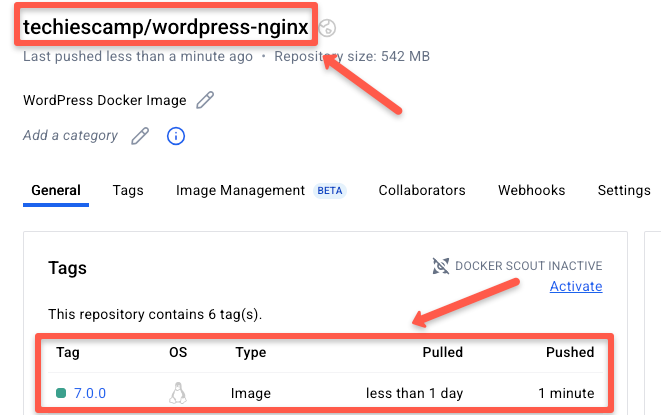
docker push techiescamp/wordpress-nginx:7.0.0Check if your image is pushed into DockerHub as shown below.
Step 3: Create a Namespace
CD into 04-WordPress-deployment and run the below commands, you will find all the manifest files inside the 04-WordPress-deployment directory.
Let's start by creating a WordPress namespace to isolate the resources we are going to deploy in the cluster.
Run the following command to create the namespace wordpress.
kubectl create ns wordpressSince we are going to create every object inside the WordPress namespace, let's set the namespace WordPress as the default namespace so that we don't have to specify the namespace every time we use the kubectl command.
Run the following command to set the WordPress namespace as the default namespace.
kubectl config set-context --current --namespace=wordpressStep 4: Create Secret
The next step is to create a secret with a database admin password, username, password, and database name.
CD into the 04-WordPress-deployment directory and run the secret.yaml to create a secret on the WordPress namespace.
apiVersion: v1
kind: Secret
metadata:
  name: mysql-cred
  namespace: wordpress
type: Opaque
data:
  admin-password: YWRtaW5AMTIz
  username: Y3J1bmNob3Bz
  password: Y3J1bmNob3BzQDEyMw==
  db-name: d29yZHByZXNzX2Ri
We will be passing this secret as environment values in both WordPress and MySQL deployment.
Make sure to change the data in secret with your values, you can see the data are given in base64-encoded values.
You can use the echo command with base64 to encode your data, the echo command will give the encoded values of your data. The command to encode your data is given below
echo -n '<data>' | base64For example, if I set my admin-password as admin@123, then the echo command will be
echo -n 'admin@123' | base64You will get an output as given below

Run the following command to create the secret.
kubectl apply -f secret.yamlTo verify if the secret is created, run the following command
kubectl get secretYou will get the following output
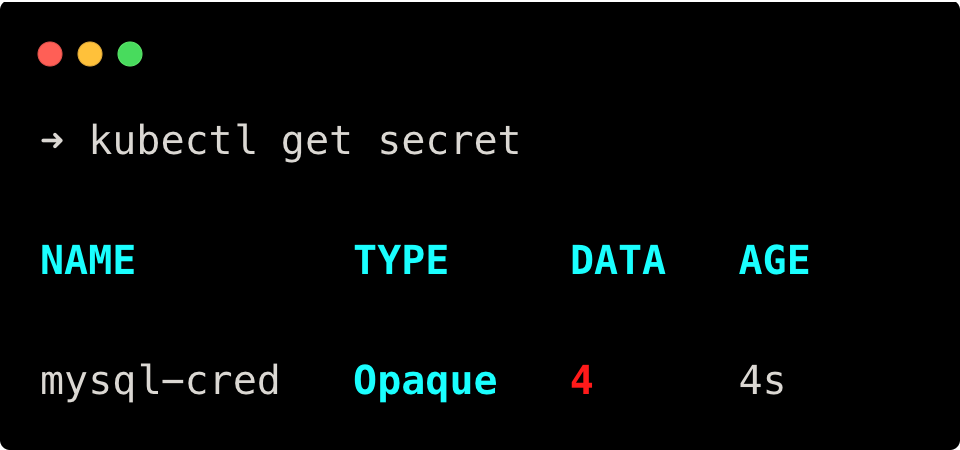
Step 5: Create ConfigMap
Now, let's create two configmap one for MySQL and one for Nginx.
Create Nginx ConfigMap
First, create configmap for Nginx, and run the nginx-cm.yaml file to create configmap on the WordPress namespace.
apiVersion: v1
kind: ConfigMap
metadata:
  name: nginx-configmap
  namespace: wordpress
data:
  wordpress.conf: |
    server {
      listen 80;

      root /var/www/html/wordpress;
      index index.php index.html index.htm;

      server_name localhost:30004;

      location / {
        try_files $uri $uri/ /index.php?$args;
      }

      location ~ \.php$ {
        include snippets/fastcgi-php.conf;
        fastcgi_pass unix:/var/run/php/php8.2-fpm.sock;
        fastcgi_param SCRIPT_FILENAME $document_root$fastcgi_script_name;
        include fastcgi_params;
      }
    }
This configmap contains the Nginx configuration file which configures Nginx with Wordpress to serve the Wordpress files on the web.
server_name localhost:30004;Make sure to update your Domain name or IP on this file instead of localhost:30004.
Run the following command to create configmap for Nginx
kubectl apply -f nginx-cm.yamlCreate MySQL ConfigMap
Next, create the configmap for MySQL, and run the mysql-cm.yaml file to create the configmap on the WordPress namespace.
apiVersion: v1
kind: ConfigMap
metadata:
  name: mysql-configmap
  namespace: wordpress
data:
  init.sql: |
    CREATE USER '$MYSQL_USER'@'%' IDENTIFIED BY '$MYSQL_PASSWORD';
    GRANT ALL PRIVILEGES ON '$MYSQL_DATABASE'.* TO '$MYSQL_USER'@'%';
    FLUSH PRIVILEGES;
This configmap contains the SQL command to create a new user and password and also has the command to grant all privileges to the user on the specified database.
Run the following command to create configmap for MySQL
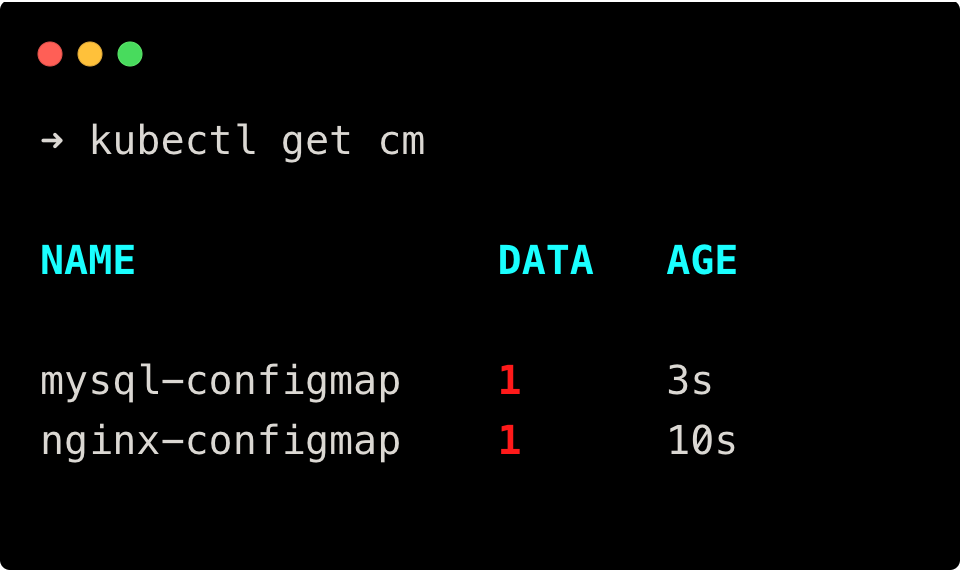
kubectl apply -f mysql-cm.yamlNow, run the following command to check if the configmaps are created
kubectl get cmYou will get the following output.
Step 6: Deploy MySQL Database
Now, that the PVC and ConfigMap have been created, it is time to deploy MySQL database and WordPress.
First, we are going to deploy the MySQL database, and run the mysql.yaml file to deploy the database on the WordPress namespace.
apiVersion: apps/v1
kind: StatefulSet
metadata:
  name: mysql
  namespace: wordpress
spec:
  serviceName: "mysql"
  replicas: 1
  selector:
    matchLabels:
      app: mysql
  template:
    metadata:
      labels:
        app: mysql
    spec:
      containers:
      - name: mysql
        image: mysql:latest
        env:
        - name: MYSQL_ROOT_PASSWORD
          valueFrom:
            secretKeyRef:
              name: mysql-cred
              key: admin-password
        - name: MYSQL_USER
          valueFrom:
            secretKeyRef:
              name: mysql-cred
              key: username
        - name: MYSQL_PASSWORD
          valueFrom:
            secretKeyRef:
              name: mysql-cred
              key: password
        - name: MYSQL_DATABASE
          valueFrom:
            secretKeyRef:
              name: mysql-cred
              key: db-name
        volumeMounts:
        - name: mysql-volume
          mountPath: /var/lib/mysql
        - name: mysql-config
          mountPath: /docker-entrypoint-initdb.d
        resources:
            requests:
              memory: "256Mi"
              cpu: "100m"
            limits:
              memory: "512Mi"
              cpu: "200m"
        livenessProbe:
          tcpSocket:
            port: 3306
          initialDelaySeconds: 30
          periodSeconds: 10
          timeoutSeconds: 5
          successThreshold: 1
          failureThreshold: 3
        readinessProbe:
          tcpSocket:
            port: 3306
          initialDelaySeconds: 30
          periodSeconds: 10
          timeoutSeconds: 5
          successThreshold: 1
          failureThreshold: 3
      volumes:
        - name: mysql-config
          configMap:
            name: mysql-configmap
  volumeClaimTemplates:
    - metadata:
        name: mysql-volume
      spec:
        accessModes: ["ReadWriteOnce"]
        resources:
          requests:
            storage: 2Gi
---
apiVersion: v1
kind: Service
metadata:
  name: mysql-service
  namespace: wordpress
spec:
  type: ClusterIP
  selector:
    app: mysql
  ports:
    - protocol: TCP
      port: 3306
      targetPort: 3306
This file deploys a mysql statefulset database on the wordpress namespace which uses the latest MySQL container image.
The environment variable gets the values from the secret we created in Step 2 and the configmap gets the values during startup.
The docker-entrypoint-initdb.d directory is part of the MySQL image. Any MySQL scripts placed in this folder will be executed during MySQL startup. It is primarily used for running database initialization scripts.
In our setup, we placed an init script (init.sql) in this folder through a ConfigMap (mysql-configmap). init.sql creates the username and password, and gives the user all privileges on the Wordpress db.
The script retrieves the username and password from environment variables set by the secret object using secretKeyRef
And it also creates a PVC and mounts the PV on the /var/lib/mysql directory.
Also, I have added health checks for MySQL:
- livenessProbe – This checks if MySQL is up and running by using a TCP socket check on port 3306.
- readinessProbe – This checks if MySQL is ready to accept traffic.
Then, this file also creates a Service that exposes the database on port 3306.
Run the following command to deploy MySQL and its service
kubectl apply -f mysql.yamlNow, run the following commands to check if the MySQL StatefulSet and its service is deployed
kubectl get sts

kubectl get svc
You will get the following output.

Step 7: Deploy WordPress
After you finish deploying the MySQL Database, the next step is to deploy the WordPress application by running the file wordpress.yaml.
apiVersion: v1
kind: PersistentVolumeClaim
metadata:
  name: wordpress-pvc
  namespace: wordpress
spec:
  accessModes:
    - ReadWriteOnce
  resources:
    requests:
      storage: 2Gi
---
apiVersion: apps/v1
kind: Deployment
metadata:
  name: wordpress
  namespace: wordpress
spec:
  replicas: 1
  selector:
    matchLabels:
      app: wordpress
  template:
    metadata:
      labels:
        app: wordpress
    spec:
      securityContext:
        fsGroup: 33
      containers:
        - name: wordpress
          image: techiescamp/wordpress-nginx:7.0.0
          env:
            - name: DB_HOST
              value: mysql-service.wordpress.svc.cluster.local
            - name: DB_USER
              valueFrom:
                secretKeyRef:
                  name: mysql-cred
                  key: username
            - name: DB_PASSWORD
              valueFrom:
                secretKeyRef:
                  name: mysql-cred
                  key: password
            - name: DB_NAME
              valueFrom:
                secretKeyRef:
                  name: mysql-cred
                  key: db-name
          ports:
            - containerPort: 80
              name: wordpress
          resources:
            requests:
              memory: "256Mi"
              cpu: "100m"
            limits:
              memory: "512Mi"
              cpu: "200m"
          volumeMounts:
            - name: nginx-config-volume
              mountPath: /etc/nginx/conf.d
            - name: wordpress-persistent-storage
              mountPath: /var/www/html/wordpress/wp-content/uploads
          readinessProbe:
            httpGet:
              path: /wp-login.php
              port: 80
              scheme: 'HTTP'
            initialDelaySeconds: 30
            periodSeconds: 10
            timeoutSeconds: 5
            successThreshold: 1
            failureThreshold: 3
          livenessProbe:
            httpGet:
              path: /wp-admin/install.php
              port: 80
              scheme: 'HTTP'
            initialDelaySeconds: 60
            periodSeconds: 10
            timeoutSeconds: 5
            successThreshold: 1
            failureThreshold: 3
      volumes:
        - name: nginx-config-volume
          configMap:
            name: nginx-configmap
        - name: wordpress-persistent-storage
          persistentVolumeClaim:
            claimName: wordpress-pvc
---
kind: Service
apiVersion: v1
metadata:
  name: wordpress-service
  namespace: wordpress
spec:
  type: NodePort
  selector:
    app: wordpress
  ports:
    - name: http
      protocol: TCP
      port: 80
      targetPort: 80
      nodePort: 30004
First, this application creates a PVC for the WordPress application.
Then it deploys the WordPress application on the WordPress namespace which uses the techiescamp/wordpress-nginx:7.0.0 container image we created in Step 1.
The environment variable gets the values from the secret we created in Step 2 and the startup script inside the container image fetches the values and updates them on the /var/www/html/wordpress/wp-config.php/uploads Wordpress configuration file.
It mounts the data on the configmap nginx-cm we created in Step 3 on the directory /etc/nginx/conf.d and mounts the PV on the /var/www/html/wordPress/wp-content/uploads directory.
In the resource configuration, the container’s resource request is set to 256Mi memory and 100m CPU, and the limit is set to 512Mi memory and 200m CPU.
Also, I have added health checks for this application:
- readinessProbe – This checks if the application is ready to accept traffic using the readiness path /wp-login.php. If this probe fails, it won’t receive any traffic.
- livenessProbe – Checks if the application is up and running using the liveness path /wp-admin/install.php. If the probe fails, Kubernetes will restart the pod.
Then, this file also creates a Service that exposes WordPress to the outside world using nodeport 30004.
Run the following command to deploy the WordPress.
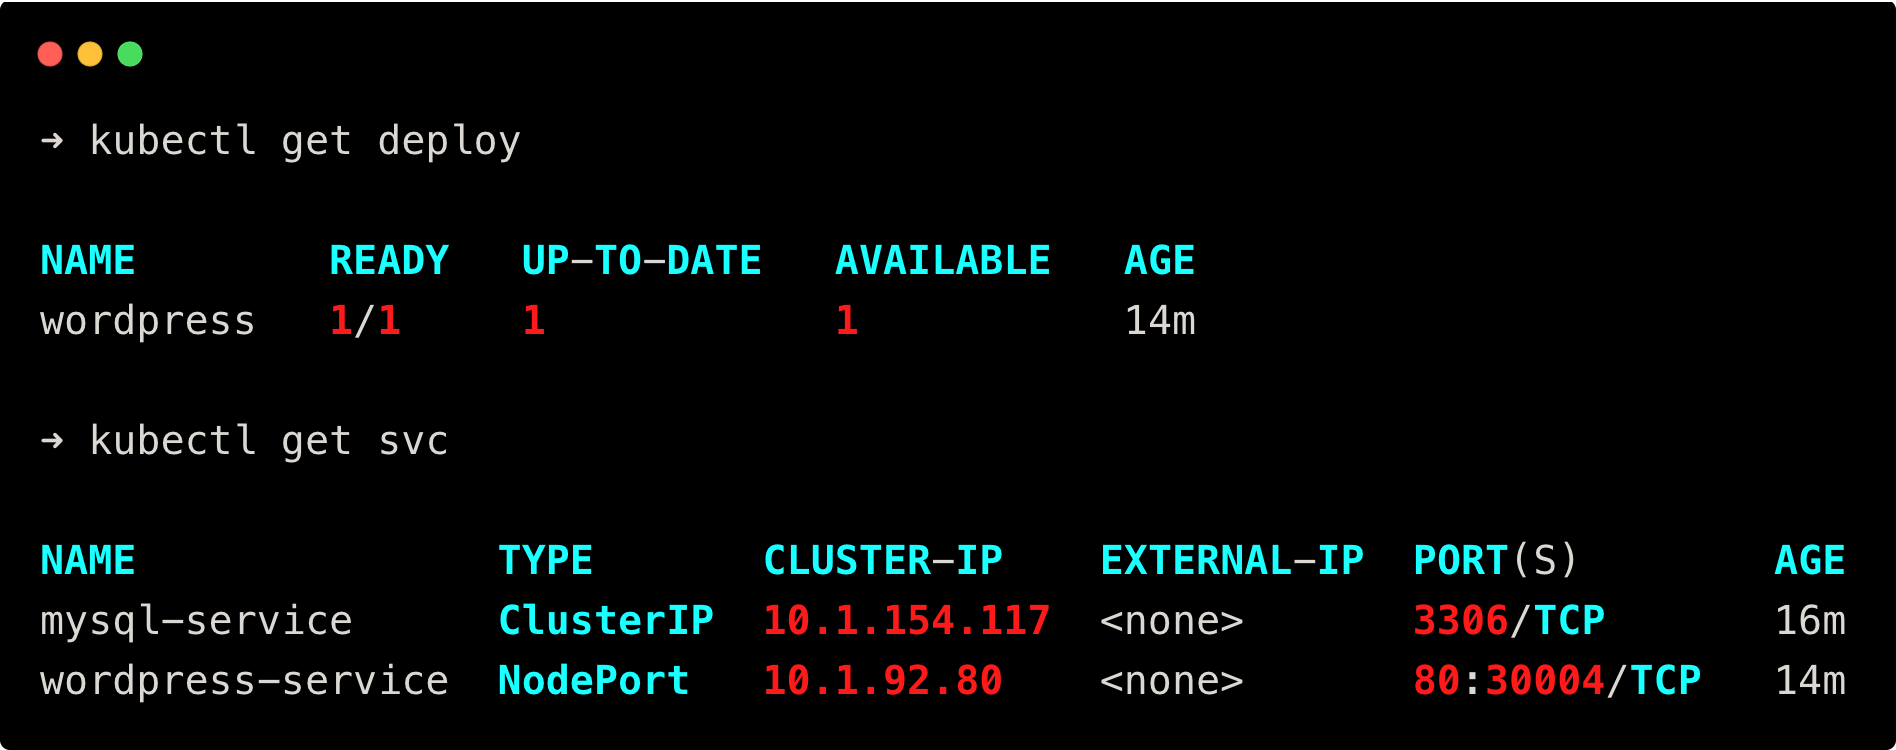
kubectl apply -f wordpress.yamlNow, run the following commands to check if the WordPress deployment and its service is deployed.
kubectl get deploy

kubectl get svc
You will get the following output.
Since WordPress and MySQL have been created, check the status of PVC and PV using the following commands
kubectl get pvc

kubectl get pv
You will get the following output.
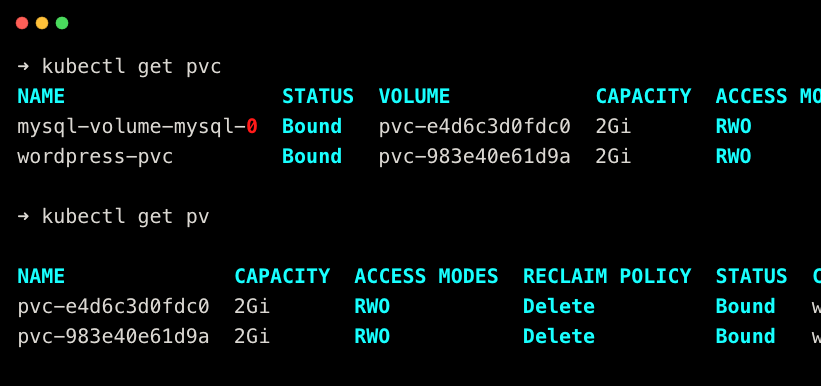
As you can see, the PVC is in a bound state, and two PV for WordPress and MySQL have been created.
Step 8: Create a NetworkPolicy
Now, that MySQL and Wordpress are deployed, create a NetworkPolicy for MySQL running the networkpolicy.yaml file
apiVersion: networking.k8s.io/v1
kind: NetworkPolicy
metadata:
  name: mysql-network-policy
  namespace: wordpress
spec:
  podSelector:
    matchLabels:
      app: mysql
  policyTypes:
    - Ingress
    - Egress
  ingress:
    - from:
        - podSelector:
            matchLabels:
              app: wordpress
      ports:
        - port: 3306
  egress:
    - {}
This file creates a Networkpolicy for MySQL on the WordPress namespace.
The mysql-network-policy only allows incoming traffic from the pod labeled as wordpress through port 3306 and allows all outgoing traffic.
Run the following command to deploy the NetworkPolicy.
kubectl apply -f networkpolicy.yamlTo check if the NetworkPolicies are created, run the following command
kubectl get netpolYou will get the following output.
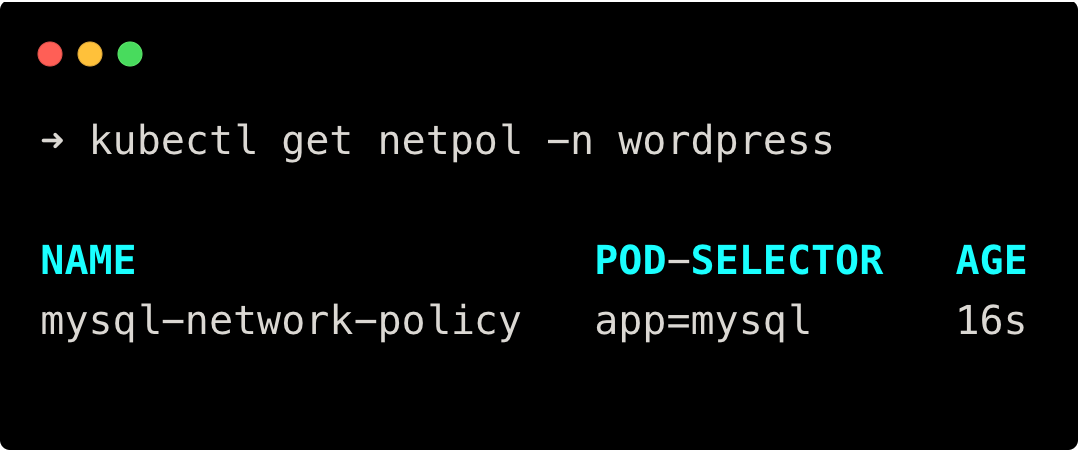
Step 9: Log in to WordPress UI
Once every object has been created, try to access WordPress on the browser by searching on the browser as {node-IP:nodeport} or if you have configured the Ingress Controller, search the Domain name on the browser.
Since I have deployed using NodePort, I am going to use the node-IP:nodeport.
You can see a tab to select the language and will get the following on the browser.
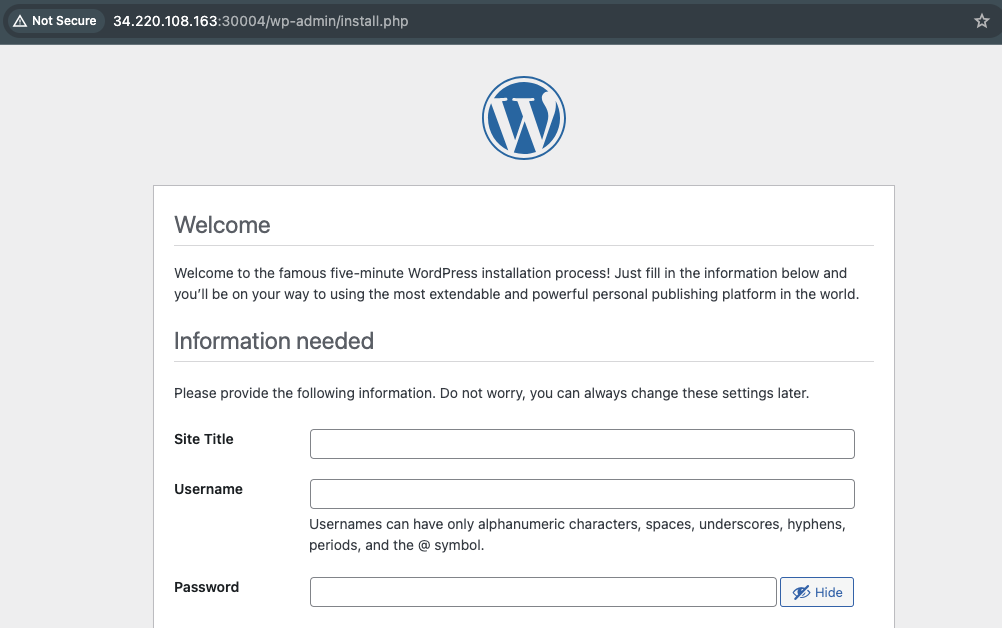
After specifying the site title, username, password, and Email, it will be forwarded to the WordPress dashboard as shown below

Step 10: Clean Up the Setup
Once you are done with the setup, run the following command inside the 04-WordPress-deployment to delete all resources
kubectl delete -f .This command will delete all the resources created by the manifest files inside the 04-WordPress-deployment directory.
Conclusion
In this blog, we have seen the steps to deploy WordPress on Kubernetes clusters with Nginx and MySQL databases.
Not just an installation, also added NetworkPolicy, and Probes like readiness and liveness probes to WordPress and MySQL as best practices.
I hope this blog gives you a clear understanding of deploying WordPress on Kubernetes clusters with Nginx and MySQL databases, as well as the objects used in this setup.
