

In this blog, you will learn how to configure and manage multiple Kubernetes clusters using Argo CD with step-by-step instructions.
Argo CD is a CD tool that has an amazing feature called multi-cluster support, which means you can deploy and manage applications not only in the cluster where Argo CD is installed but also in other external clusters.
Argo CD will act as a central hub for every cluster, and Argo CD continuously sends API calls to every available cluster to keep them in sync and to check their health status.
There is no specific limit to adding clusters to Argo CD. However, the cluster where Argo CD is deployed should have the required resources to handle the API calls sent and received from other clusters configured to it.
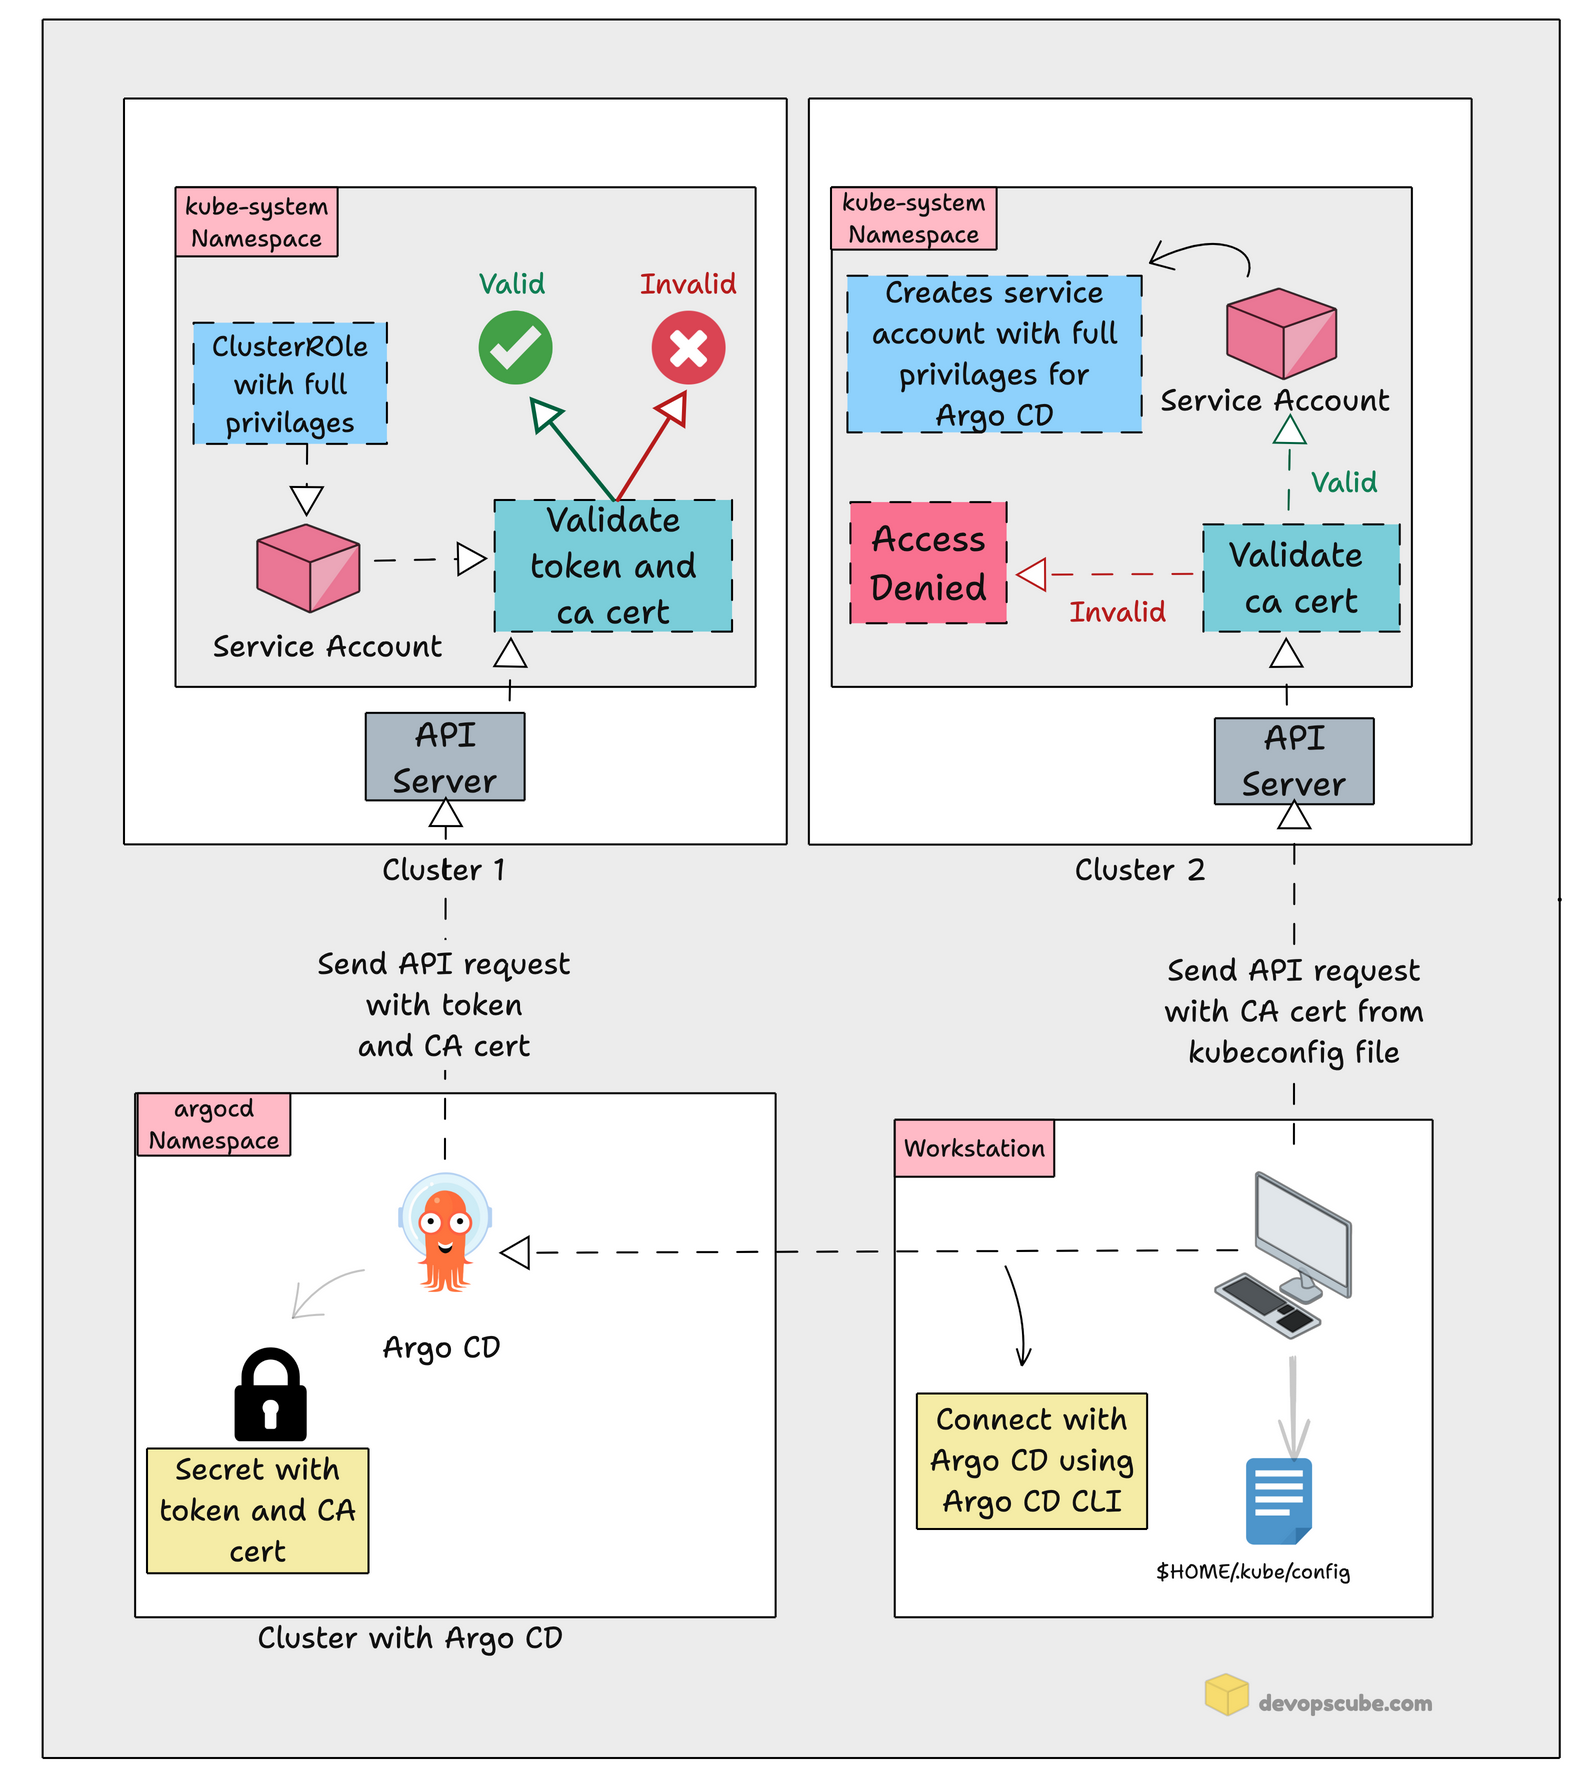
The image below shows the two methods we can use to add a cluster to Argo CD.
Setup Prerequisites
The following are the prerequisites for the setup.
- A running Argo CD setup
- Kubernetes Clusters with permission to create ClusterRole
- Argo CD CLI
- Kubectl is configured on your workstation.
Configuring Multiple Clusters to Argo CD
To configure multiple clusters in Argo CD there are primarily two methods. They are
- Using Argo CD Custom Resource Definitions (CRD)
- Using Argo CD CLI With Kubecofig files
Let's look at each method in detail.
Method 1: Argo CD CRD Method
Let's see how to add multiple Kubernetes clusters to Argo CD using the CRD method.
For the setup, I am using three Kubernetes Clusters. One Cluster has Argo CD installed, and the other two clusters will be added to Argo CD using the CRD method.
Follow the below steps to add multiple clusters to Argo CD using the CRD method.
In the below steps, do Step 1 and Step 2 on the clusters you are going to add to the Argo CD and Step 3 in the Argo CD cluster.
Step 1: Create a Service Account
First, log in to Cluster which you need to add to Argo CD and start the RBAC configuration, create a YAML file, and copy the below content
apiVersion: v1
kind: ServiceAccount
metadata:
  name: argocd-manager
  namespace: kube-system
---
apiVersion: rbac.authorization.k8s.io/v1
kind: ClusterRole
metadata:
  name: argocd-manager-role
rules:
- apiGroups:
  - '*'
  resources:
  - '*'
  verbs:
  - '*'
- nonResourceURLs:
  - '*'
  verbs:
  - '*'
---
apiVersion: rbac.authorization.k8s.io/v1
kind: ClusterRoleBinding
metadata:
  name: argocd-manager-role-binding
roleRef:
  apiGroup: rbac.authorization.k8s.io
  kind: ClusterRole
  name: argocd-manager-role
subjects:
- kind: ServiceAccount
  name: argocd-manager
  namespace: kube-system
This file will create a serviceaccount, a clusterrole with full cluster privileges, and bind the clusterrole to the serviceaccount.
We are giving full cluster privileges because Argo CD needs full privileges on the cluster to create, delete, and manage applications on any namespace with the required resources.
Step 2: Create a Secret
The next step is to create the Bearer Token and configure it to the service account we created in Step 1.
Create another YAML file and copy the content below. This will create a token for the service account argocd-manager.
apiVersion: v1
kind: Secret
metadata:
  name: argocd-manager-token
  namespace: kube-system
  annotations:
    kubernetes.io/service-account.name: argocd-manager
type: kubernetes.io/service-account-token
Once the secret has been created save the token and CA certificate as variables so that we can use them in the next step.
Run the following command to save the bearer token and CA certificate as a variable
ca=$(kubectl get -n kube-system secret/argocd-manager-token -o jsonpath='{.data.ca\.crt}')

token=$(kubectl get -n kube-system secret/argocd-manager-token -o jsonpath='{.data.token}' | base64 --decode)
Step 3: Create a Secret in the Argo CD Cluster
To complete the RBAC configuration, log in to the Argo CD cluster and create a Secret with the data Argo CD needs to connect with other clusters.
Run the following command to create the secret
cat <<EOF | kubectl apply -n argocd -f -
apiVersion: v1
kind: Secret
metadata:
  name: cluster1-secret
  labels:
    argocd.argoproj.io/secret-type: cluster
type: Opaque
stringData:
  name: cluster-1
  server: https://B66A3A2BB2.**************
  config: |
    {
      "bearerToken": "${token}",
      "tlsClientConfig": {
        "serverName": "B66A3A2BB2.************",
        "caData": "${ca}"
      }
    }
EOF
In this command, make sure to update your cluster endpoint in the above command.
Also, you can see it gets the bearer token and CA certificate from the variable we created in Step 2.
Repeat the same steps to the cluster you need to add to Argo CD and change the secret name and cluster name when configuring the other clusters.
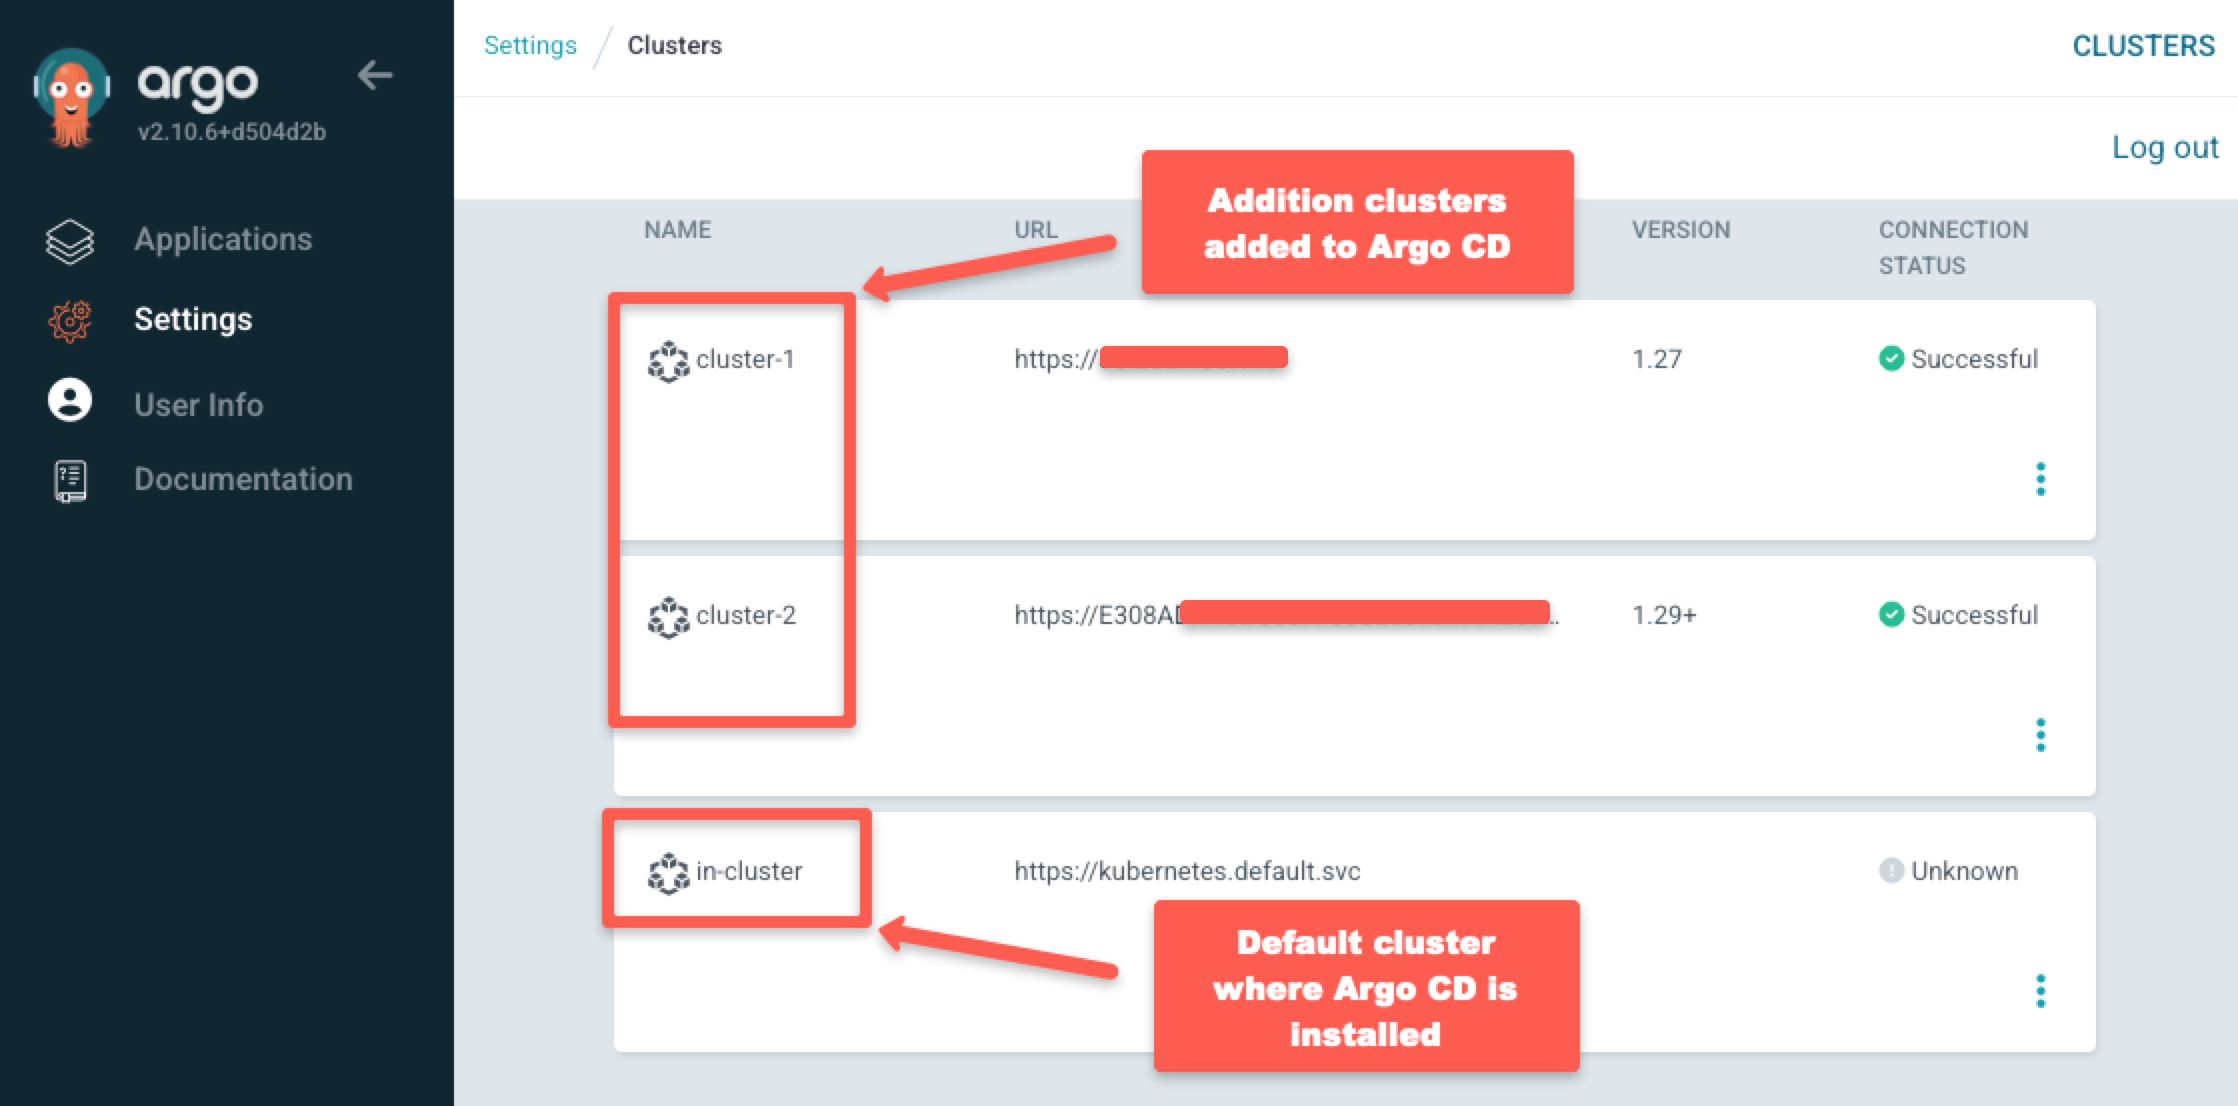
Once you have run the above command, if you check under the option Setting->Clusters on Argo CD UI, you can see a new cluster as shown below
If you want to deploy an application on the new cluster, you can select between clusters while adding a NEW APP as shown below

After selecting the NEW APP button a new page will open, scroll down to the DESTINATION tag where you can select between available clusters as shown below
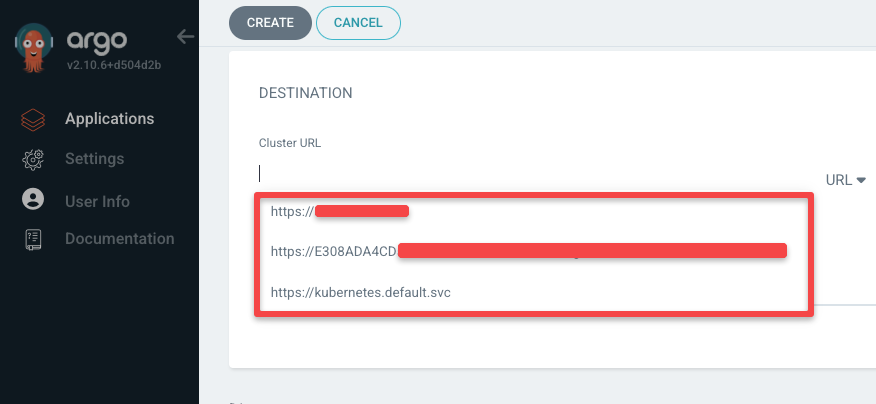
Using the DESTINATION tab you can select the cluster in which you want to deploy the application using Argo CD.
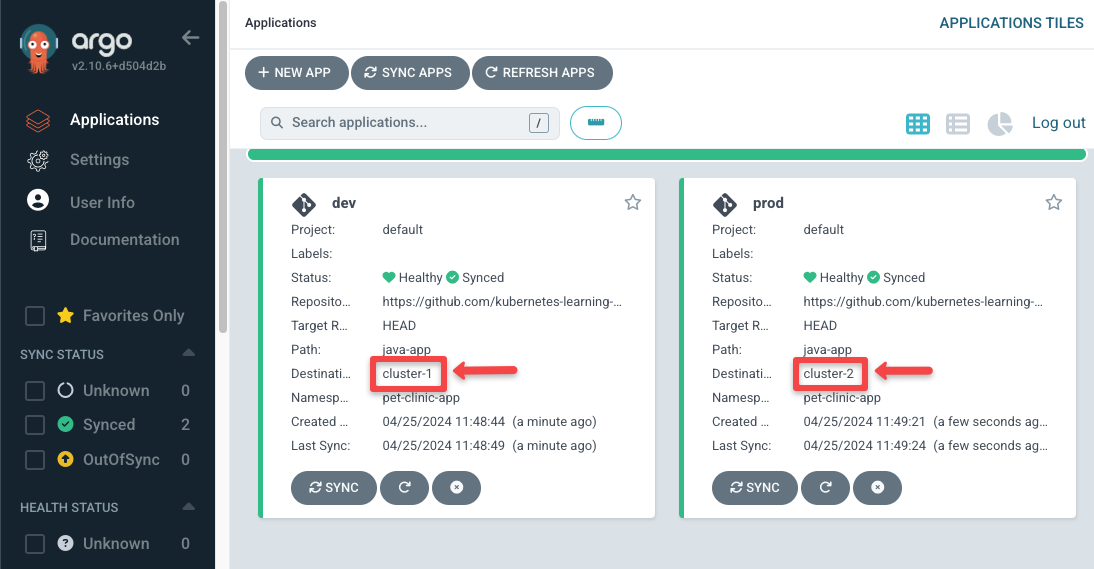
You can see in the above image the two applications are deployed in two different clusters.
Method 2: Using Argo CD CLI with Kubeconfig File
You can also configure multiple clusters from the Kubeconfig file you have on your workstation assuming you have the Argo CD CLI configured on your system.
Argo CD CLI can read the contexts from the Kubeconfig file and use the credentials from the Kubeconfig.
For the setup, I am using two AWS EKS clusters from the same account, you can use the cluster of any Cloud platform.
Step 1: Login to Argo CD
Make sure that you have updated the cluster details to the kubeconfig file and logged into Argo CD using Argo CD CLI, if not run the following command to log in to Argo CD.
argocd login <url>:<port> --username <username> --password <password>With this command, you can log in to Argo CD using the username and password.
Step 2: Get the Context of the Cluster
Once you have logged in to Argo CD, you need to find the context of the cluster you need to add to Argo CD.
Run the following command to get the context from the kubeconfig file
kubectl config get-contexts -o nameYou will get the list of cluster contexts that are configured in the kubeconfig file.
Step 3: Add the Cluster
To add the cluster to Argo CD, use the context of the running cluster you got from the previous step on the below command
argocd cluster add --kubeconfig <path-of-kubeconfig-file> --kube-context string <cluster-context> --name <cluster-name>Make sure to add the cluster context in the above command.
This command will create a service account Argo CD-manager on the cluster you specify in the above command with full cluster privileges, so make sure you have the required permissions on the cluster.
If adding the cluster to Argo CD is successful you will get the following output in return
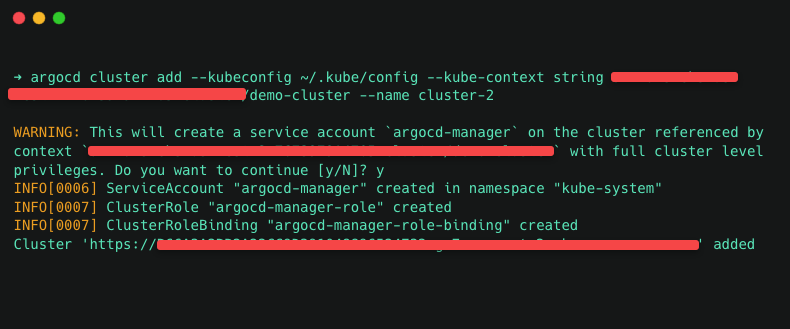
After getting the above output, you can see a new cluster has been added to Argo CD in the UI.
Conclusion
In this blog, you learned two methods of adding multiple clusters to Argo CD, one is using the Argo CD CRD method, and another method is using Argo CD CLI.
I hope you find this blog useful for adding multiple clusters to Argo CD using simple steps.
If you face any issues during the configuration, do let us know in the comments section. We will take a look.
