

In this blog, you will learn how to use the AWS SSM(Systems Manager) session manager to access Private EC2 instances.
AWS Systems Manager Session Manager is a feature that allows you to securely connect to your EC2 instances without needing a public subnet, public IP, or SSH access.
AWS Systems Manager Workflow
The following image shows the private EC2 access workflow using the AWS Systems Manager.
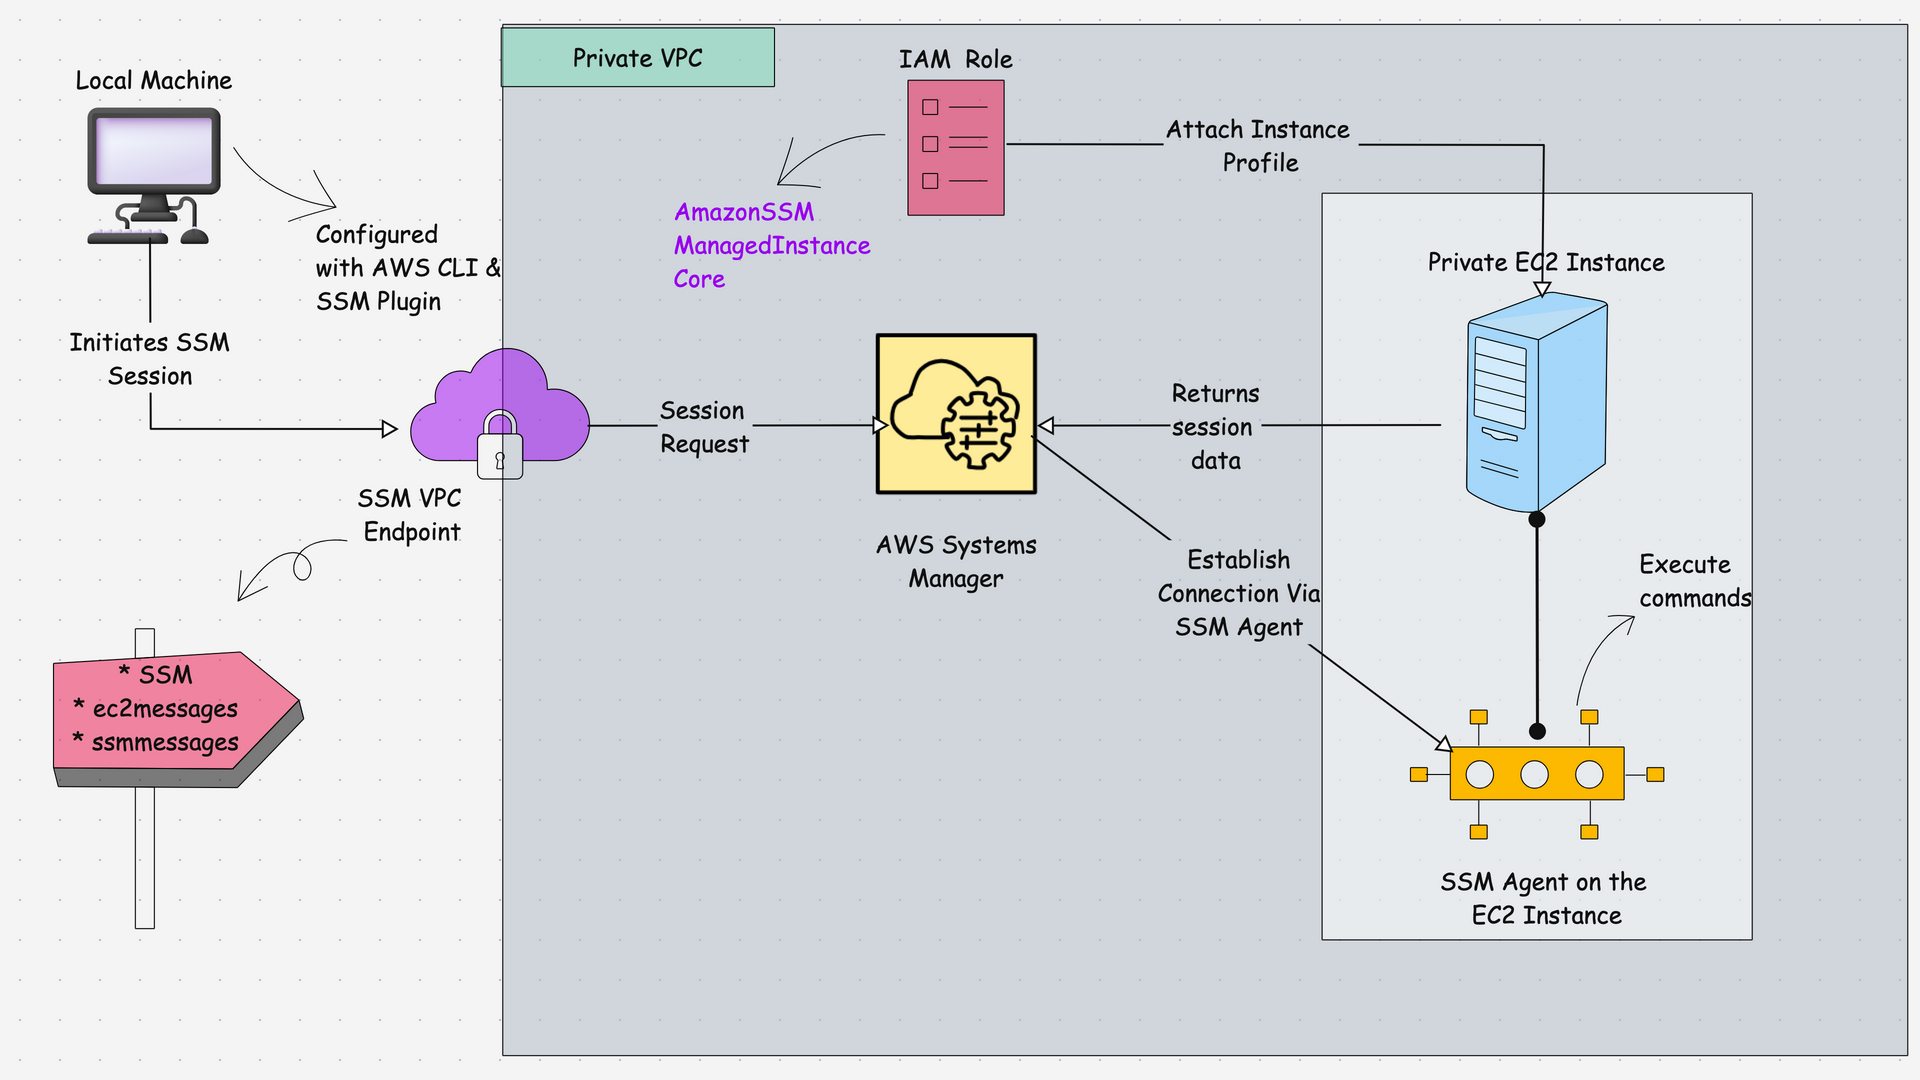
Here is how the session manager works.
- The user initiates the SSM session from the local machine CLI. The local machine should have AWS CLI installed with Session Manager Plugin.
- The EC2 instance will have the SSM Agent inside it (most of the instances will have the agent by default, if not, need to install manually)
- The request will go to the AWS Systems Manager service first and inside the VPC (via VPC endpoints). The the SSM communicates with the SSM Agent present inside the instance.
- The EC2 instance sends session data to AWS Systems Manager, which then securely sends it to the local machine. This allows the user to access the EC2 instance without requiring a public IP address or an open SSH port.
Now, let's look at how to configure and set up Session Manager with a practical example.
Follow the steps below, where we create a VPC from scratch and configure all the necessary network settings, IAM roles, and permissions for Session Manager to work from both the AWS Web Console and a user's laptop using the AWS CLI.
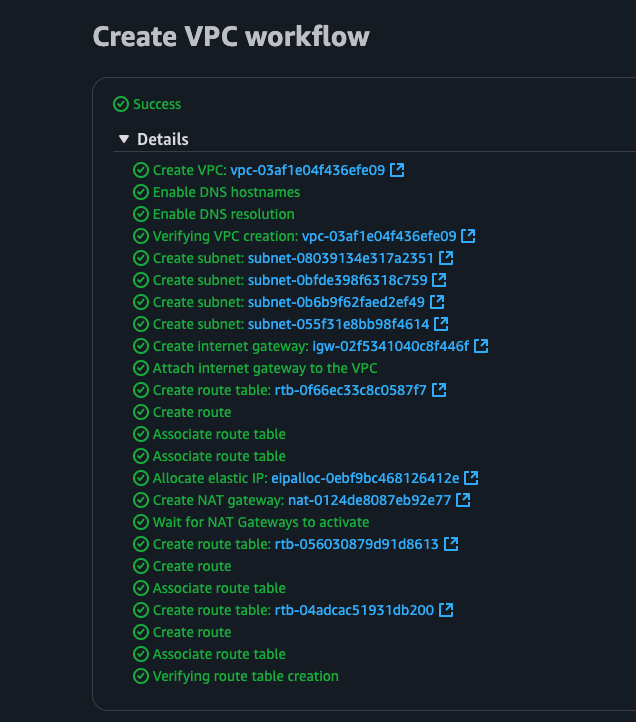
Step 1: Create a VPC with Private Subnets.
Navigate to the VPC console and click Create VPC the button to create a new VPC, if you already have a VPC, you can use that as well.

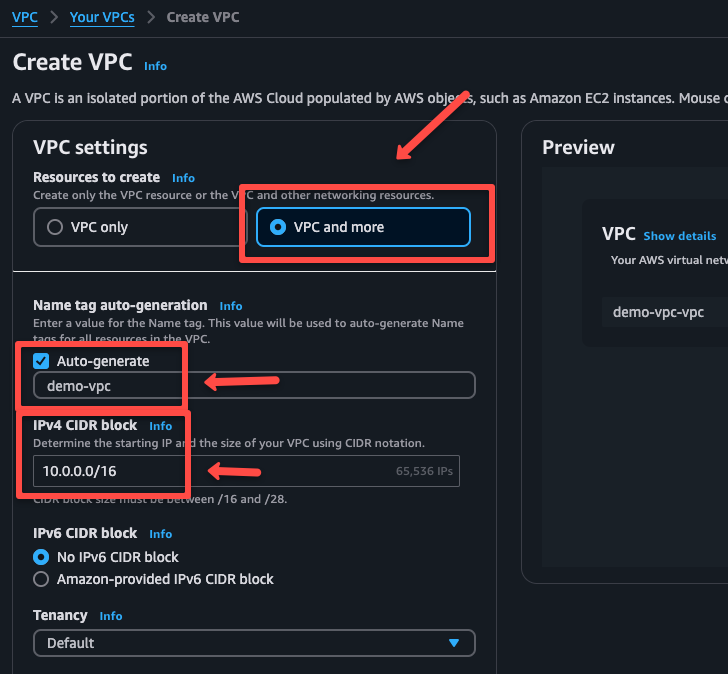
In the VPC creation page, choose the VPC and more option, which will help to create the required configurations in a simple manner.
Give a name for the VPC and choose the VPC CIDR range, for now I have chosen the range of 10.0.0.0/16
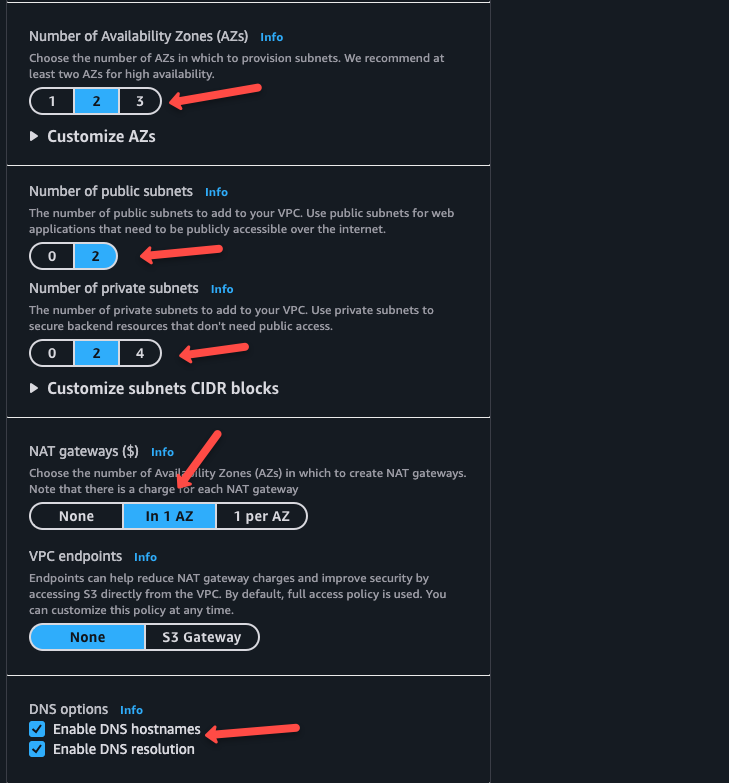
Choose the required number of availability zones and public and private subnet counts.
None.NAT will help the private network to access the internet without public IP
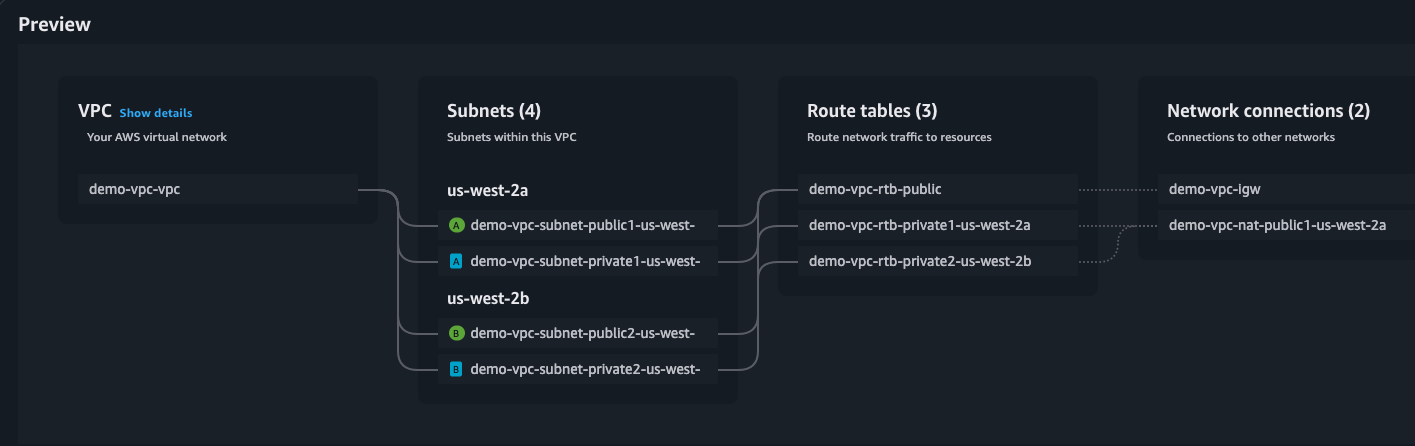
You can see the preview diagram on the right side section, which will help to understand the architecture.
The VPC creation will take a few minutes to complete.
We have created two public and private subnets, but we are only going to use the private subnets.
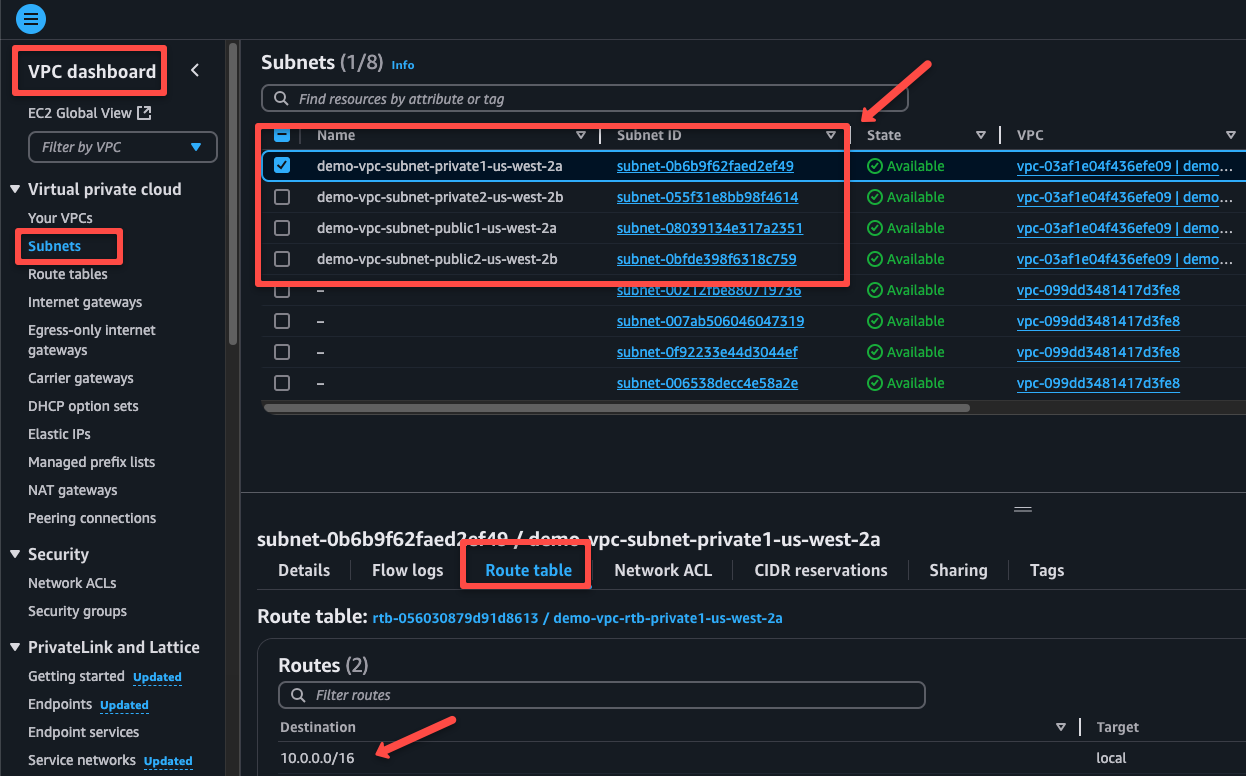
For this demo, I will choose the first private subnet which is situated in the us-west-2a region, but you can choose any private subnet.
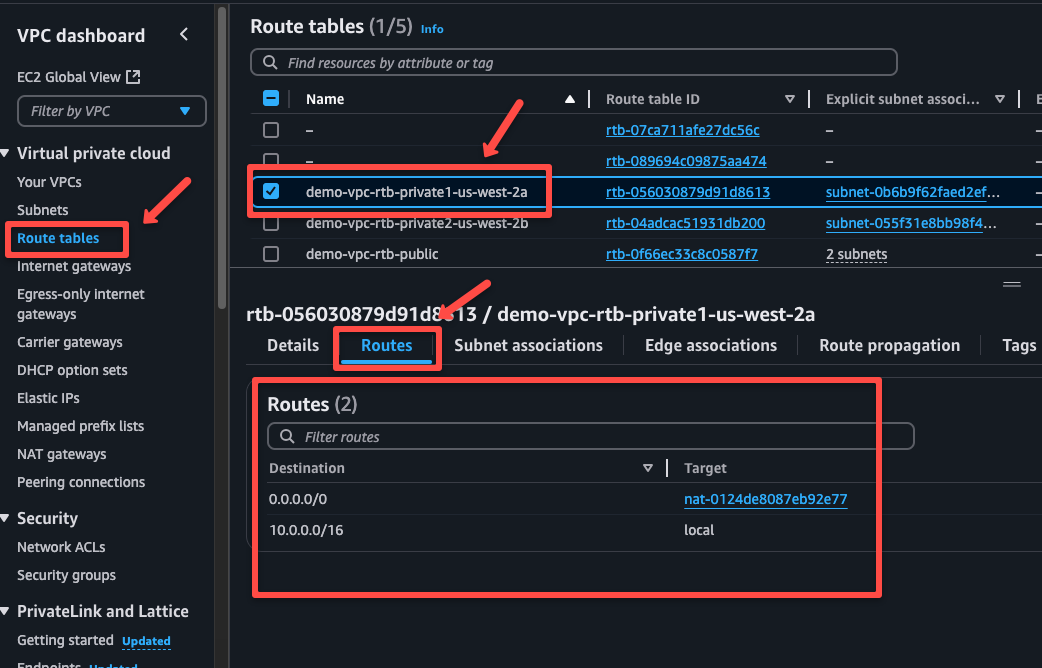
Navigate to the Route tables of the VPC.
On the Routes tab, we can see one rule, which only helps to route the traffic internally, and the other is the NAT gateway, which is for accessing internet from private instances.
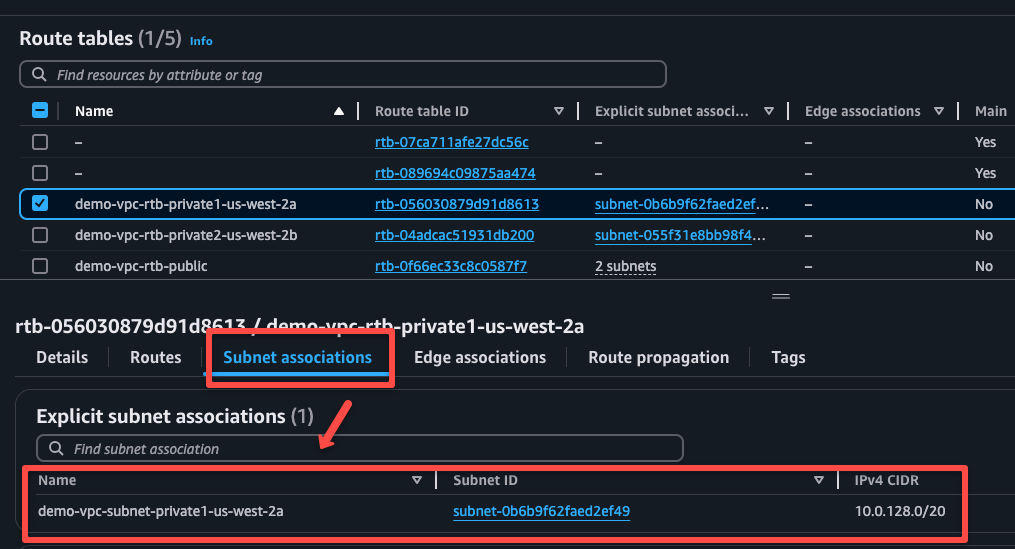
On the Subnet Associations tab, we can see that the two private subnets are associated.
Step 2: Create a Private VPC Endpoint
Since we don't have internet access but want to connect the AWS SSM service securely, we need Private VPC Endpoints.
We are creating three endpoints: ssm, ssmmessages, and ec2messages.
- SSM VPC Endpoint: Primary endpoint for the communication, which helps send the commands to the SSM.
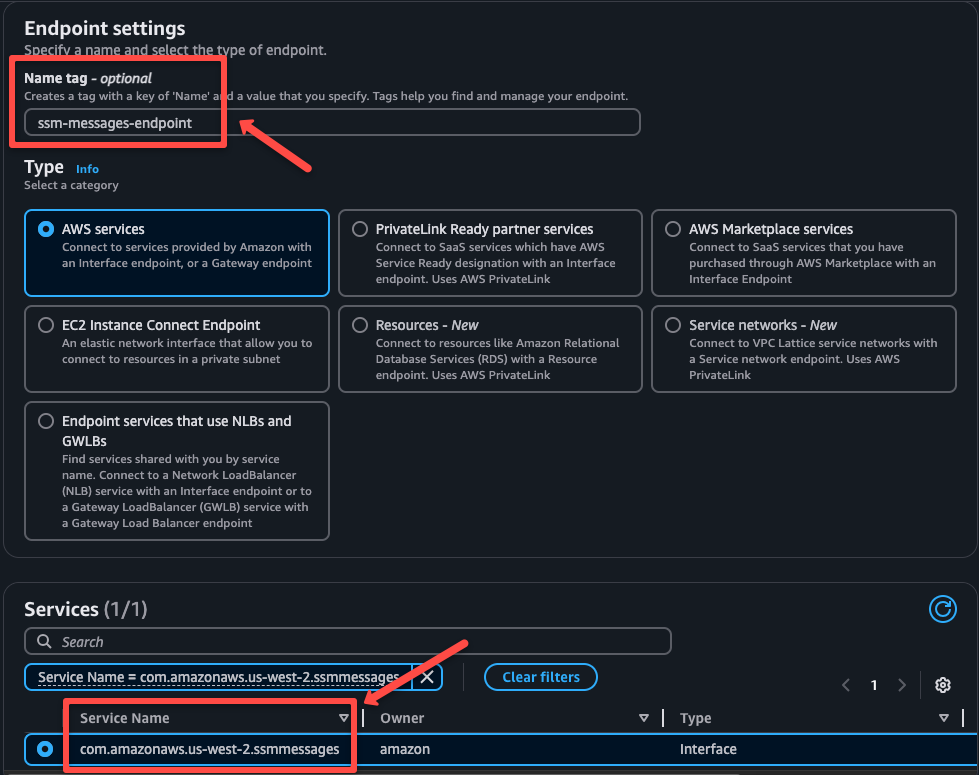
- SSM Messages VPC Endpoint: This is where you send and receive the communication output between SSM components such as the SSM Agent, Systems Service, etc.
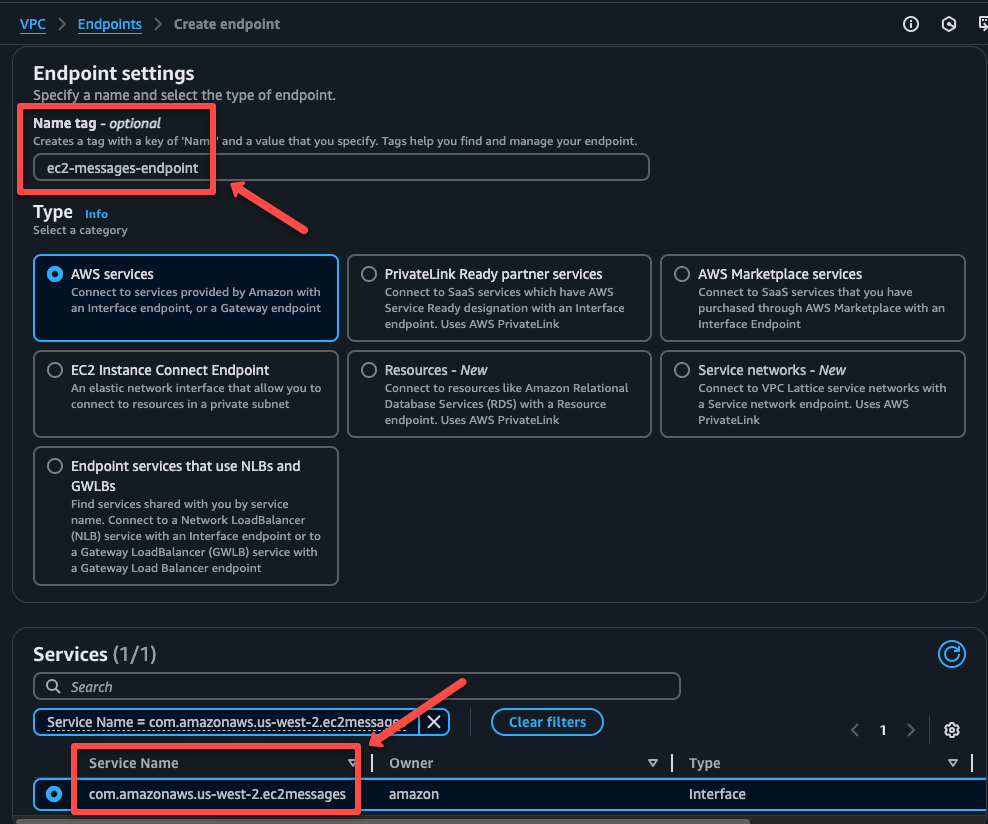
- EC2 Messages VPC Endpoint: Send and receive communication between EC2 and other AWS services.
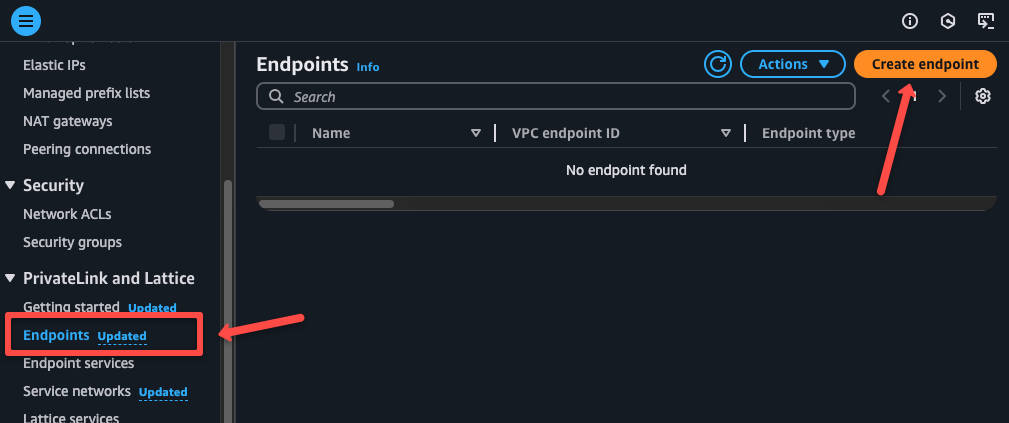
To create a VPC Endpoint, go to the VPC dashboard, navigate to the Endpoints, and click Create Endpoint.
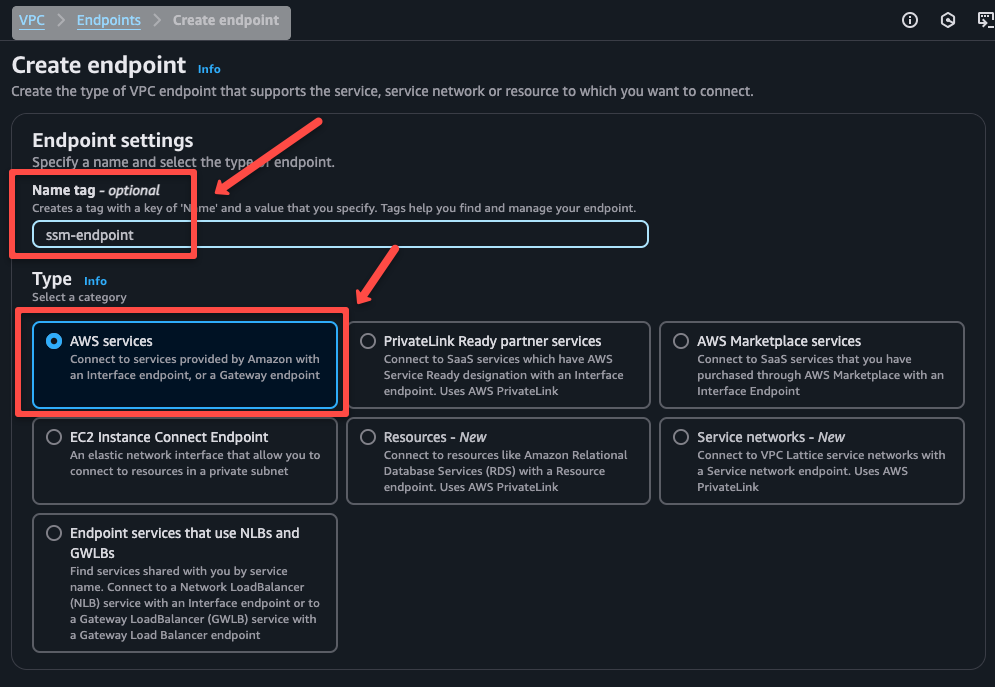
In the Endpoint settings, provide an endpoint name and select the AWS services from the Service category.
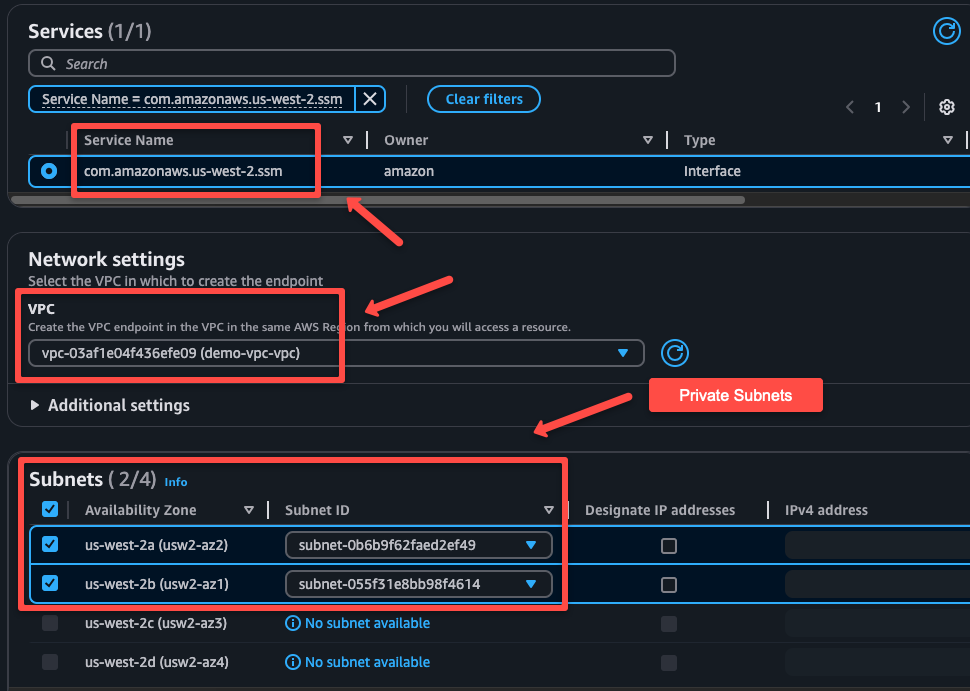
In the Services section, select the service name com.amazonaws.us-east-1.ssm and select the VPC and the private subnets.
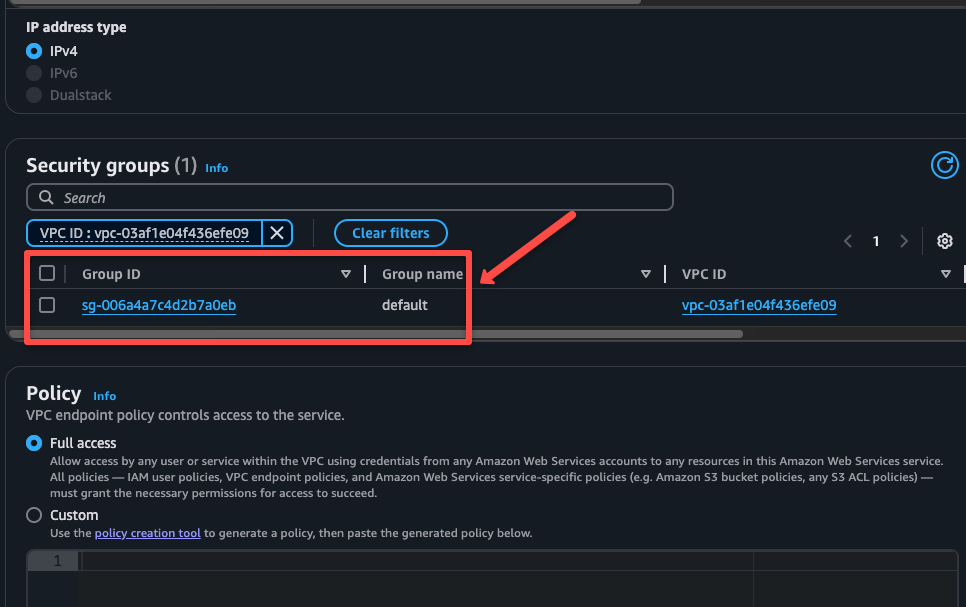
In the Security Groups section, I am choosing the default one of the VPC Security groups.
We have to create two more endpoints, same as above, one is SSM Messages.
The third endpoint is for the EC2 Messages service.
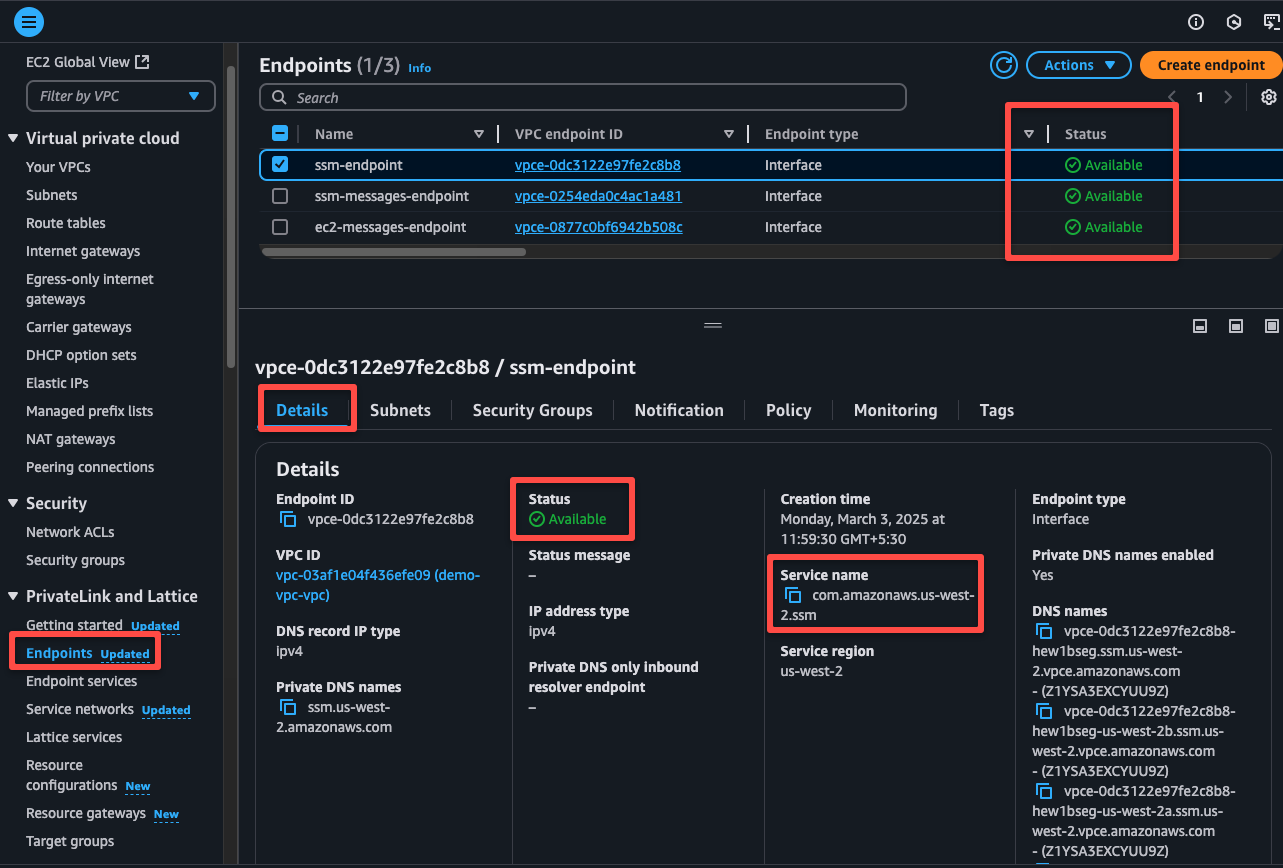
The endpoint creation will take a few seconds to complete after we see the status as active and more details about it on the Details tab.
Step 3: Default Security Group
When creating a VPC, a Security group will also be created with a rule for internal routing.
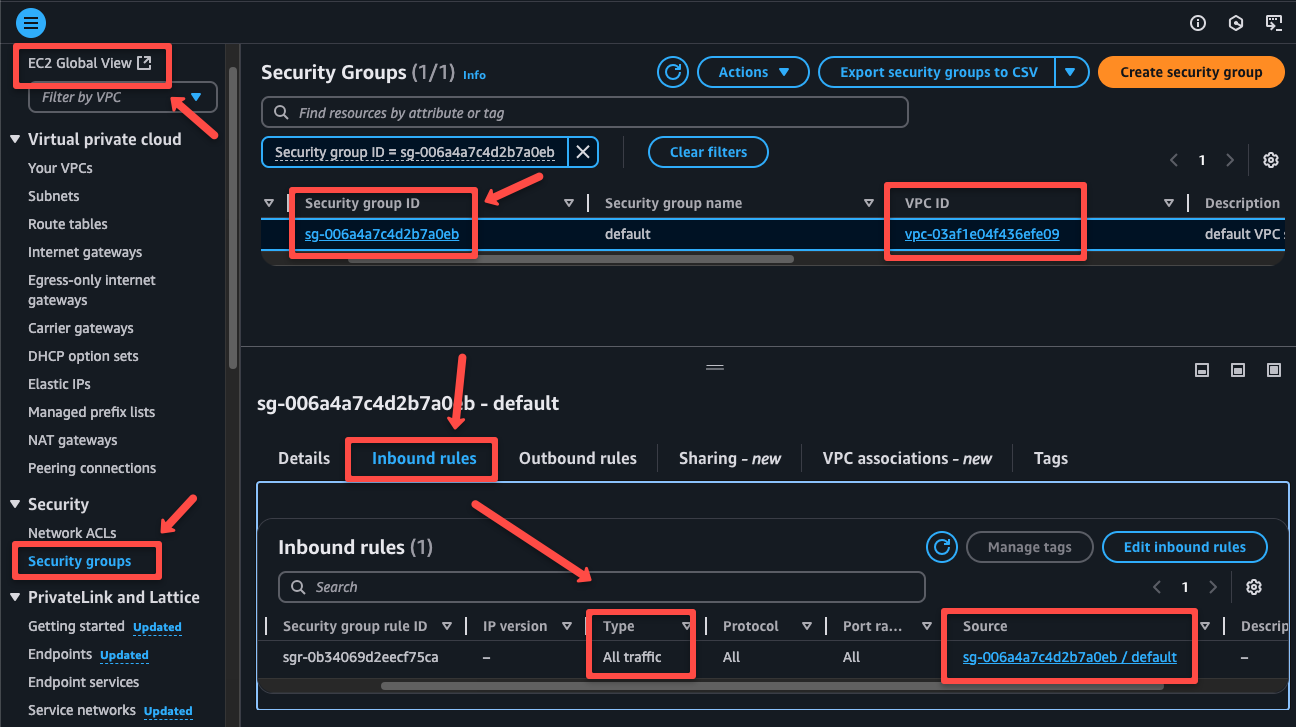
We can see that only one rule is present in the inbound traffic, which is only for internal incoming traffic.
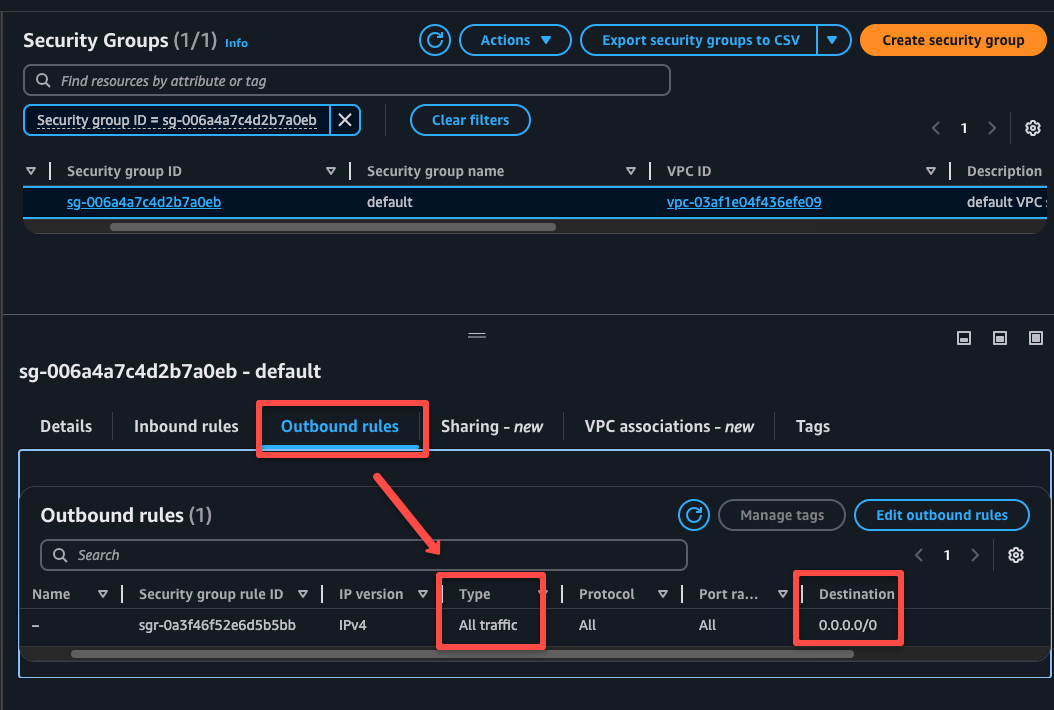
The outbound rule indicates that the traffic can go from the VPC to anywhere.
Step 4: Create an Instance Profile (IAM Role)
We need to create an instance profile for the private EC2 instance.
We already have an AWS-managed IAM Policy AmazonSSMManagedInstanceCore for the instance profile with the required permissions.
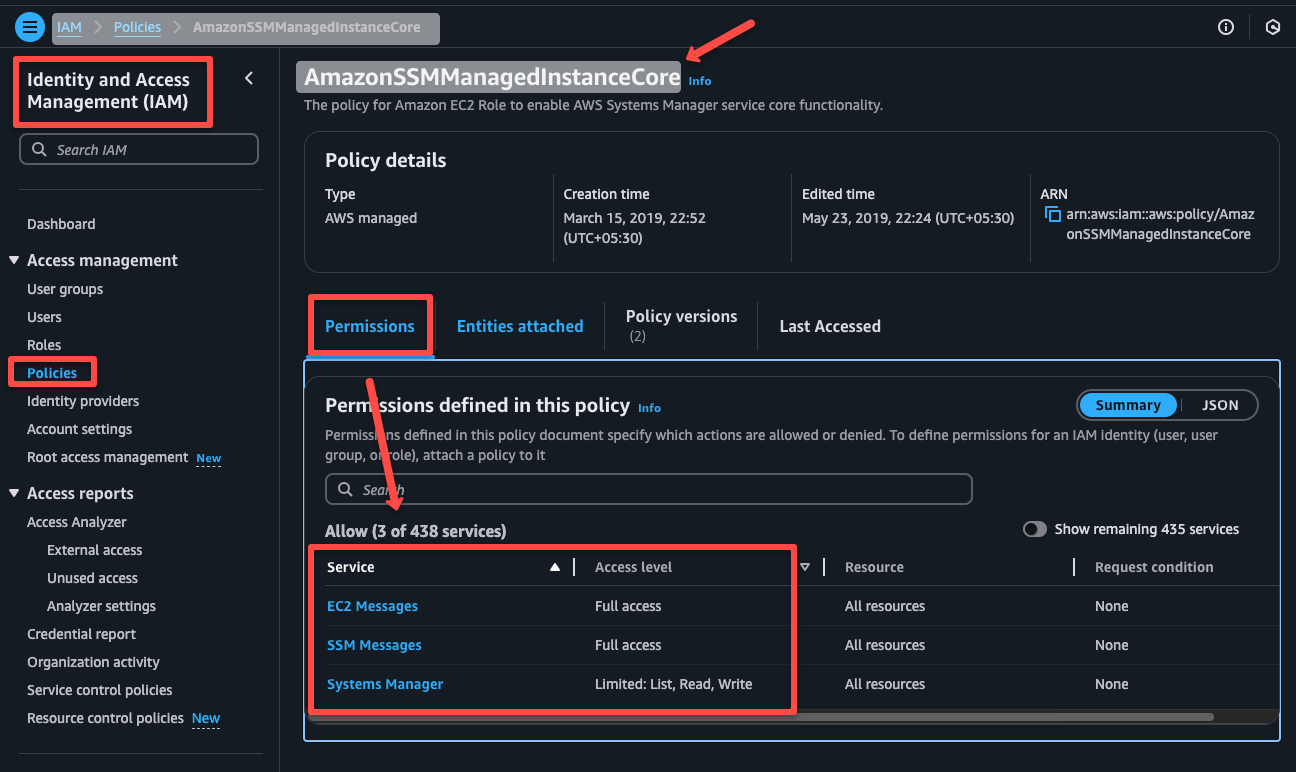
We are creating an IAM Role with this IAM Policy AmazonSSMManagedInstanceCore
Select the Roles tab in the IAM Dashboard and click Create role to create a new one.
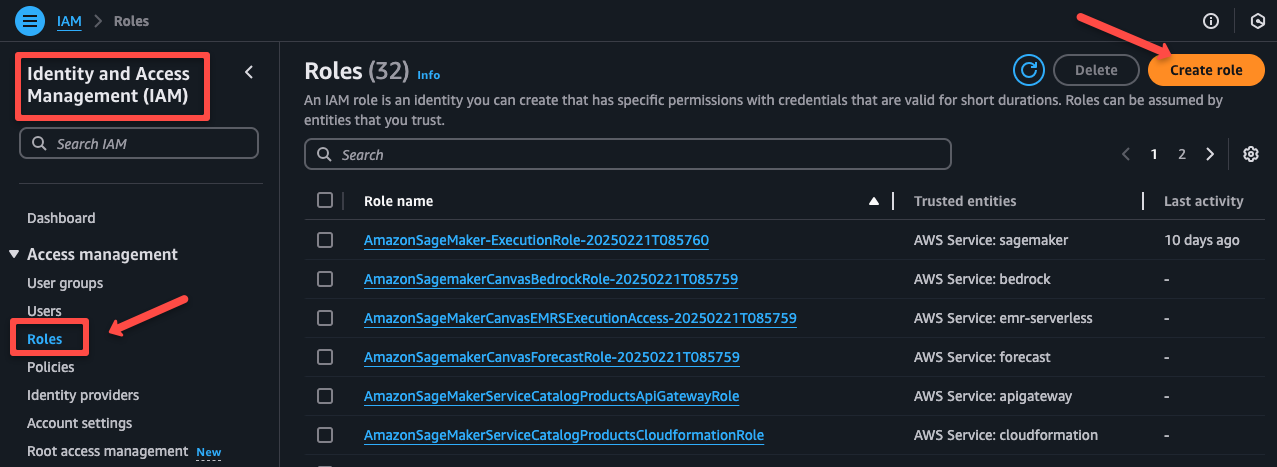
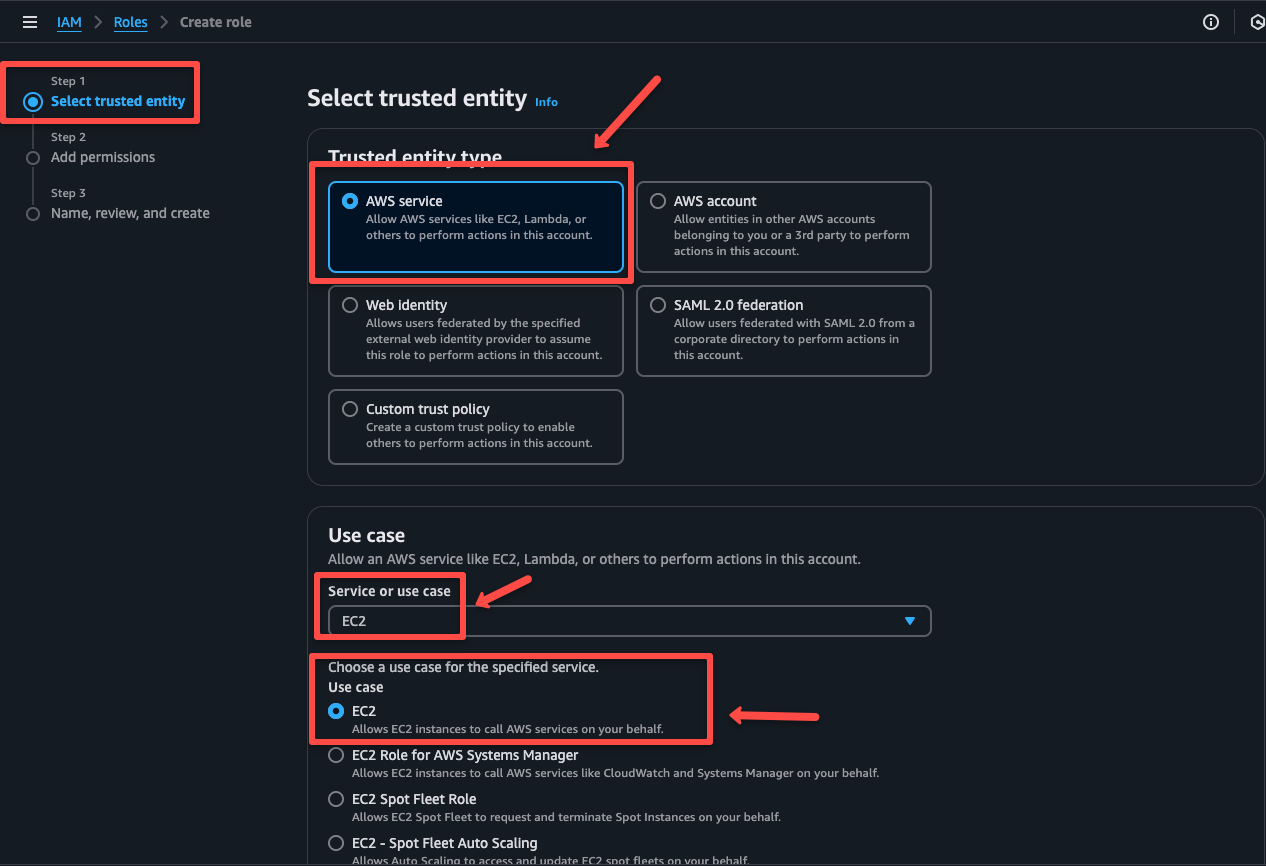
On the next page,
Choose the AWS service under the Trusted entity type. Under use case select EC2.
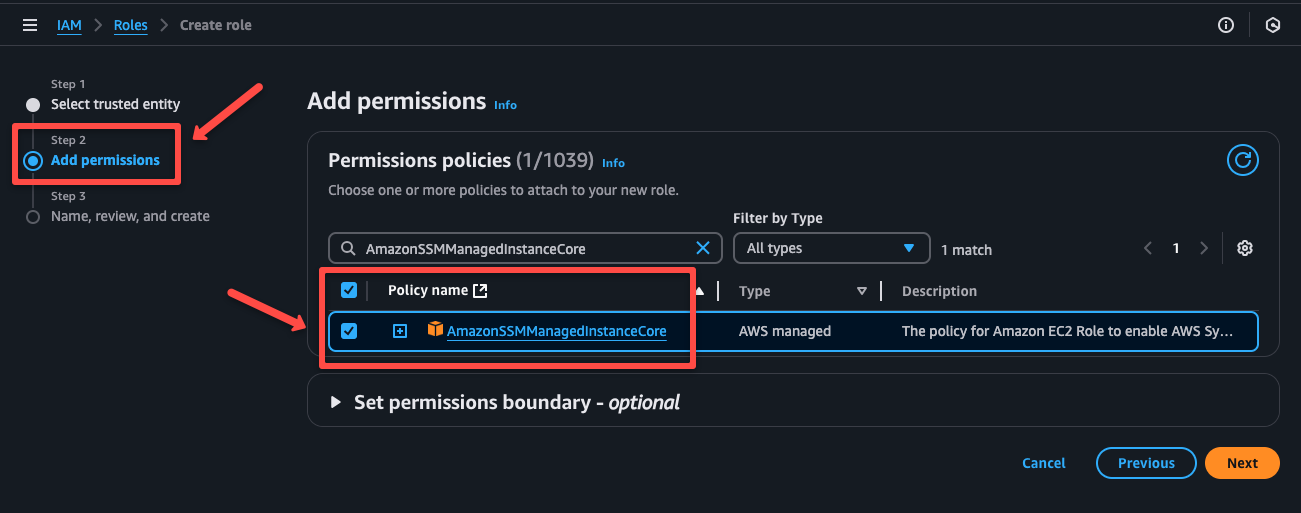
On the next page, we need to select the IAM Policy AmazonSSMManagedInstanceCore to attach with the IAM Role.
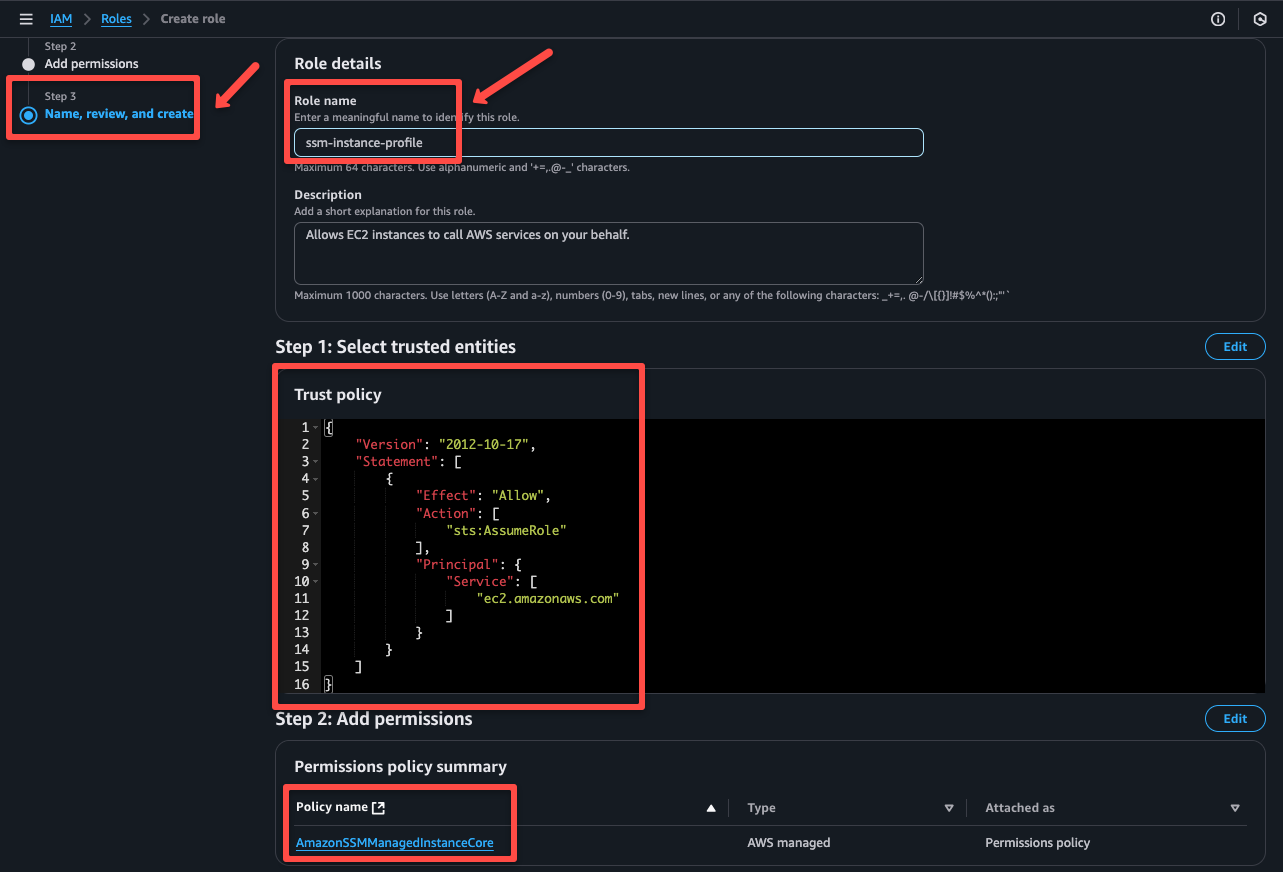
The next step is to provide a name to the Role and ensure the Trust Policy and the IAM Policy that we attach to the Role.
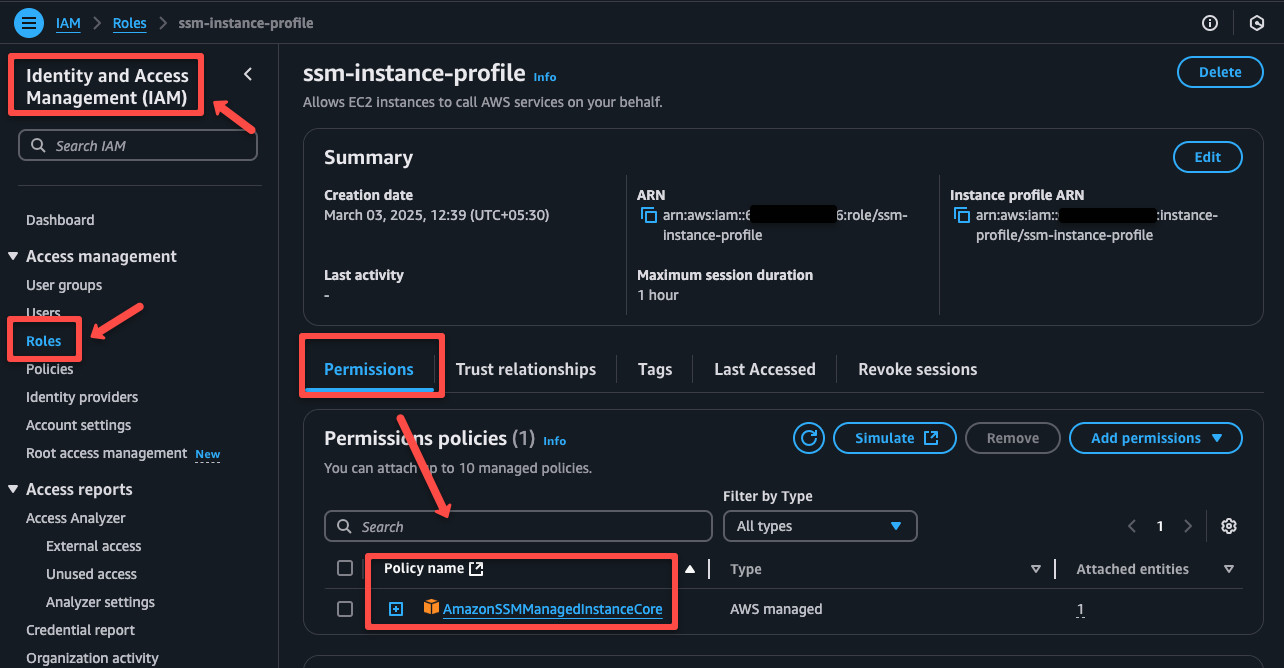
Now that the required IAM role is ready, we can check the configurations from the IAM console.
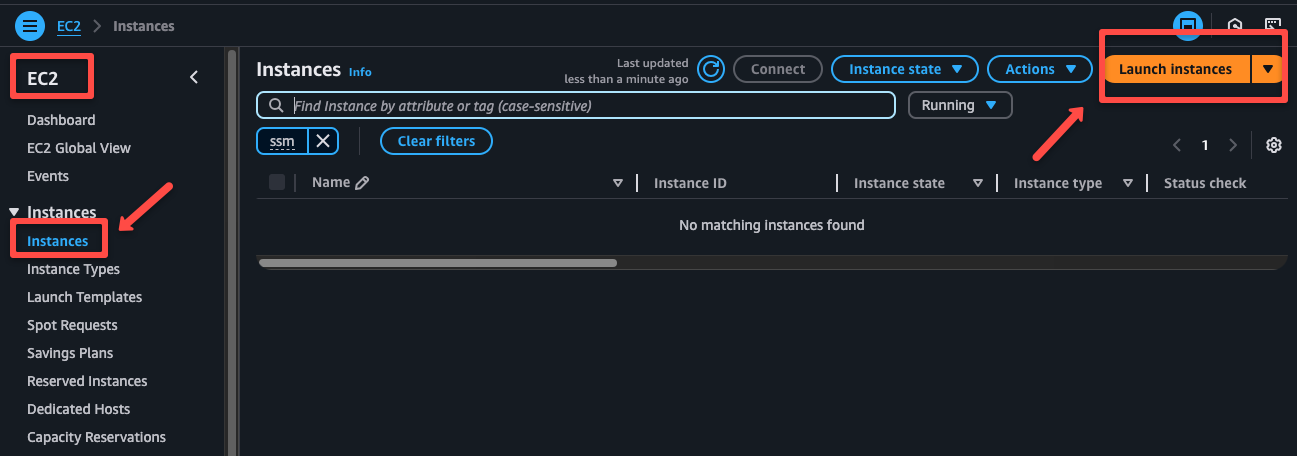
Step 5: Create a Private EC2 instance
We can create a private EC2 instance with the instance profile.
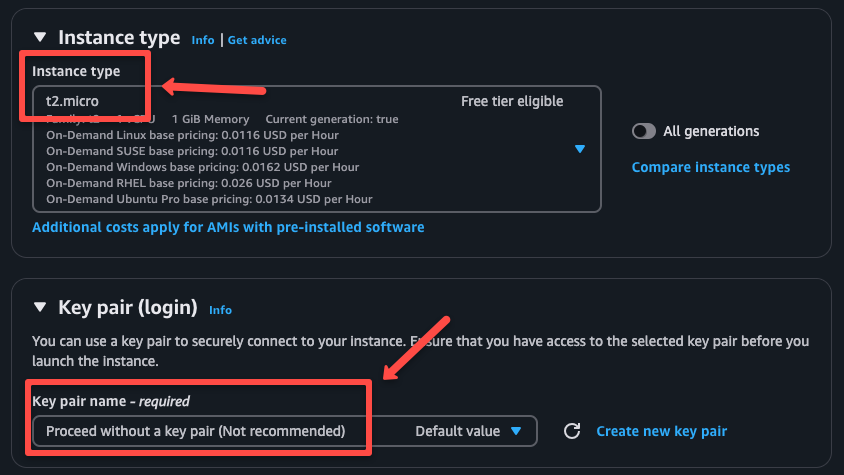
I am creating an Amazon Linux instance for demo purposes, but you can choose any.
The SSM Agent should be present in the instance, but most AWS instances come with it by default.

Please refer to the official documentation to view the list of preinstalled SSM agent AMIs.
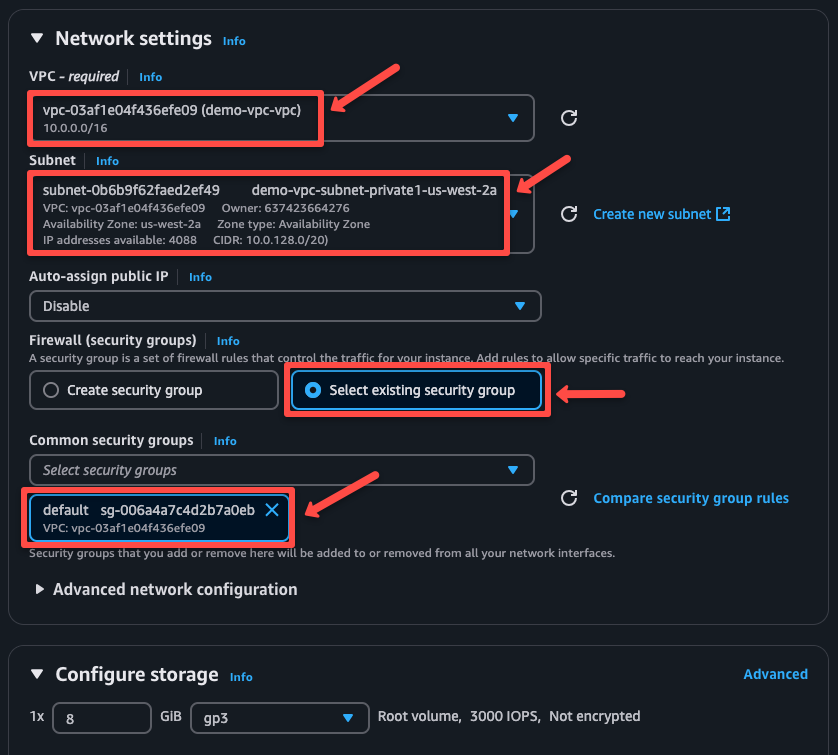
In the Network settings section, choose the correct VPC, private subnet, and security group.

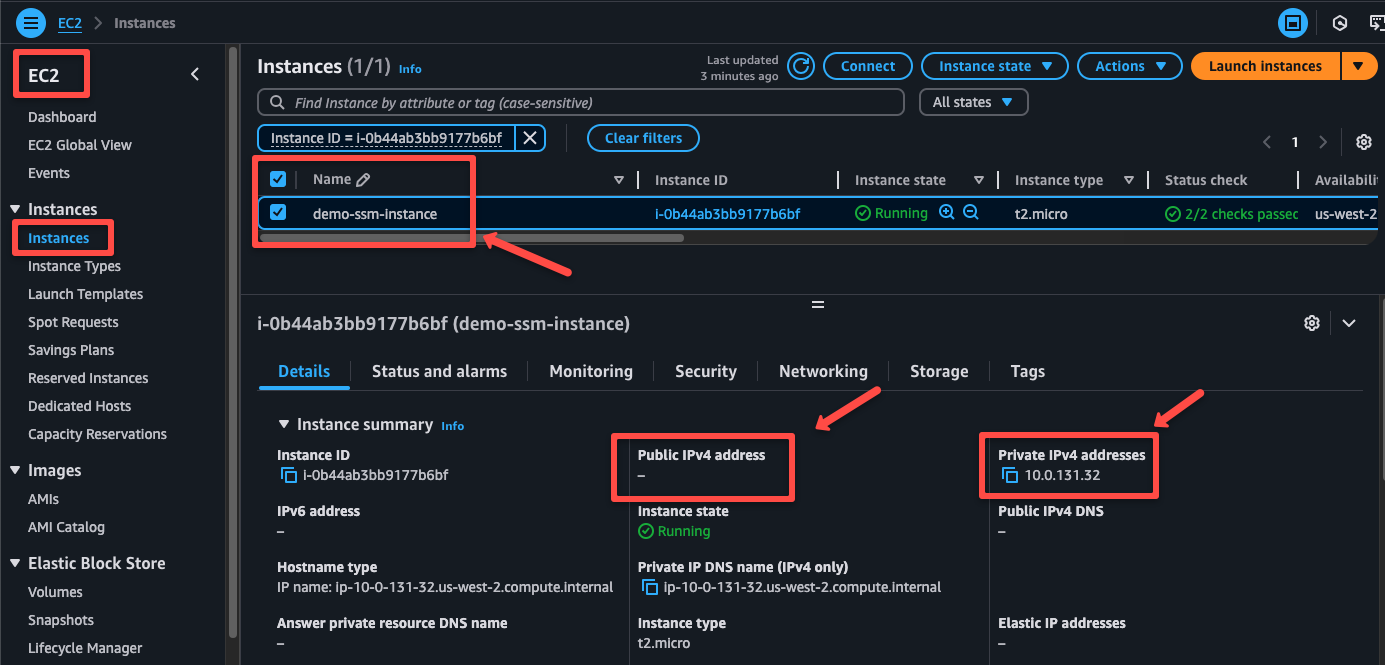
Wait until the instance state is running.
Step: AWS Systems Manager to access the Instance
After the EC2 instance creation is completed, it can be seen in the AWS Systems Manager dashboard under the Fleet Manager section.
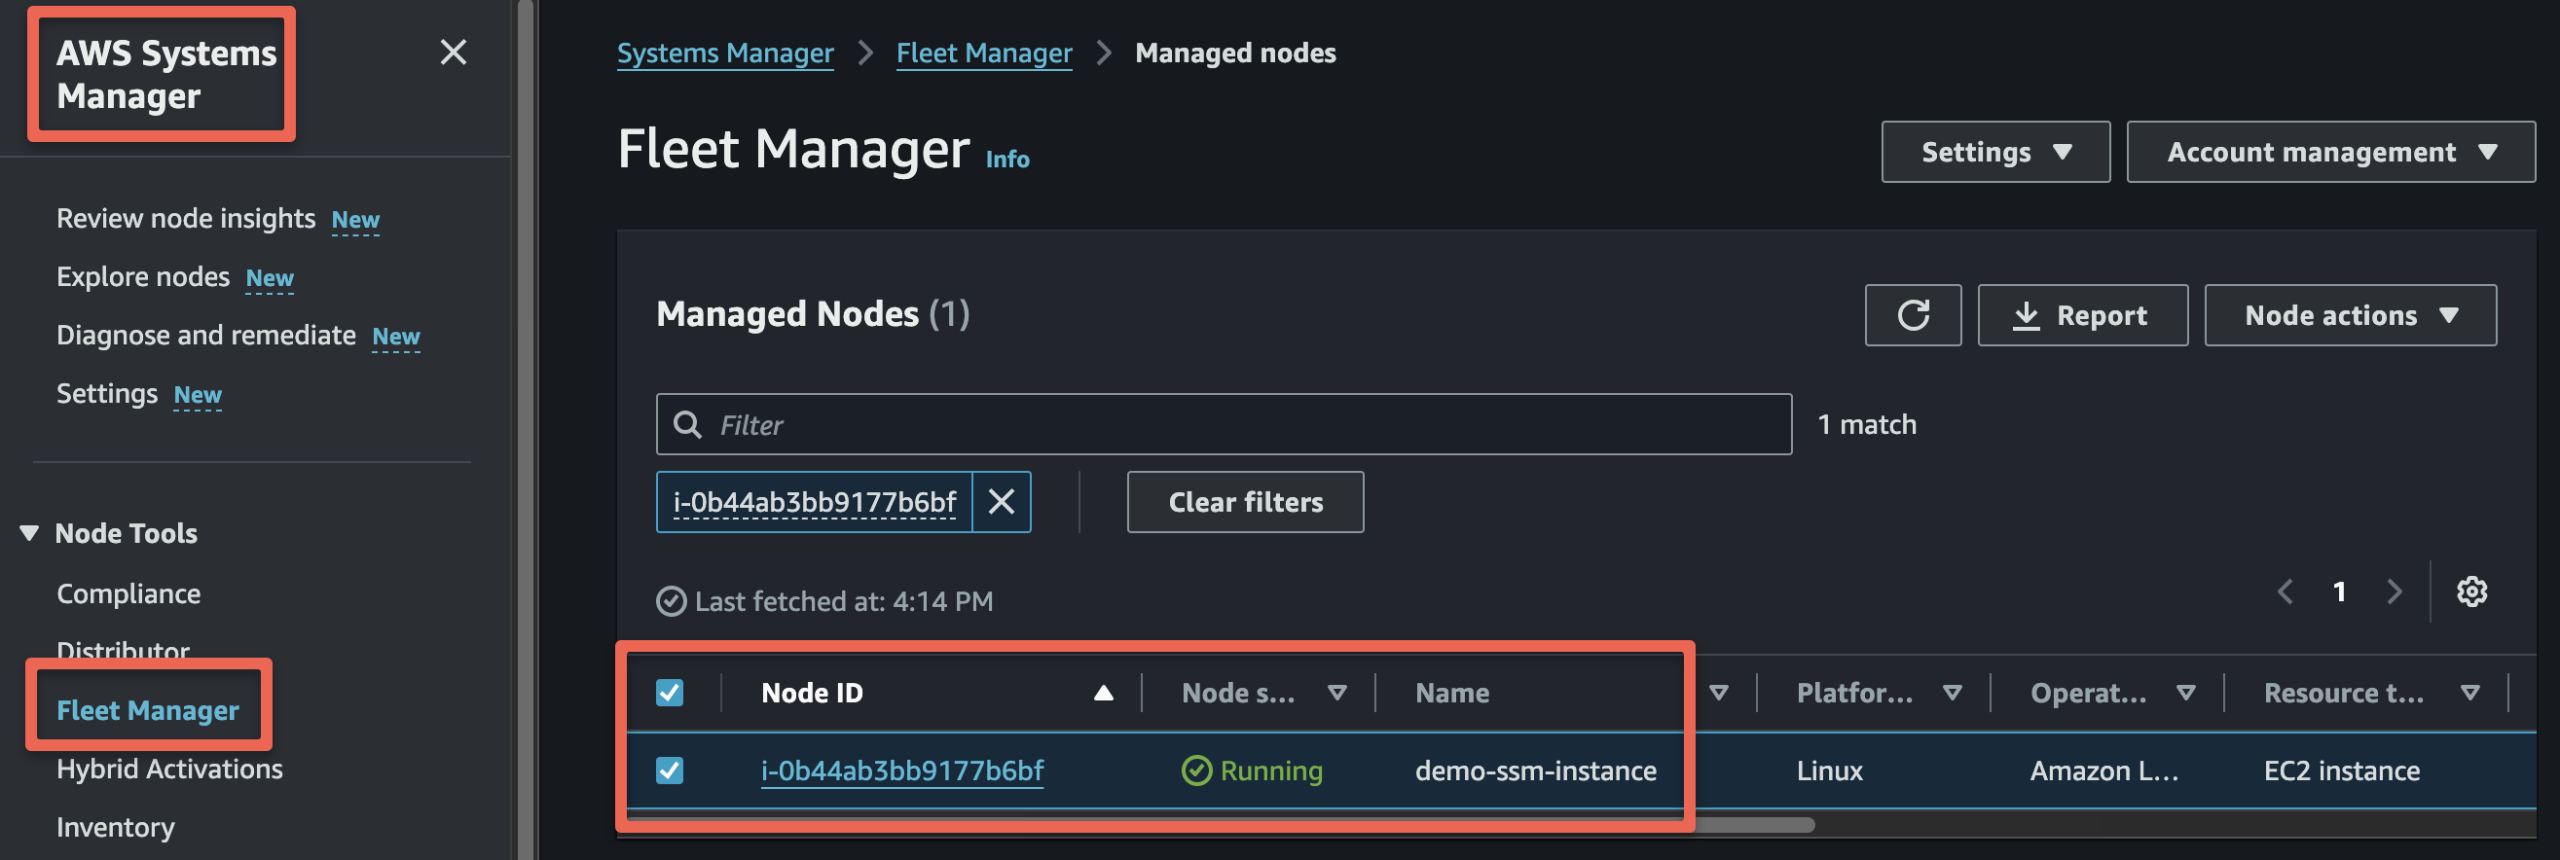
We can get more detailed information if we click the Node ID.
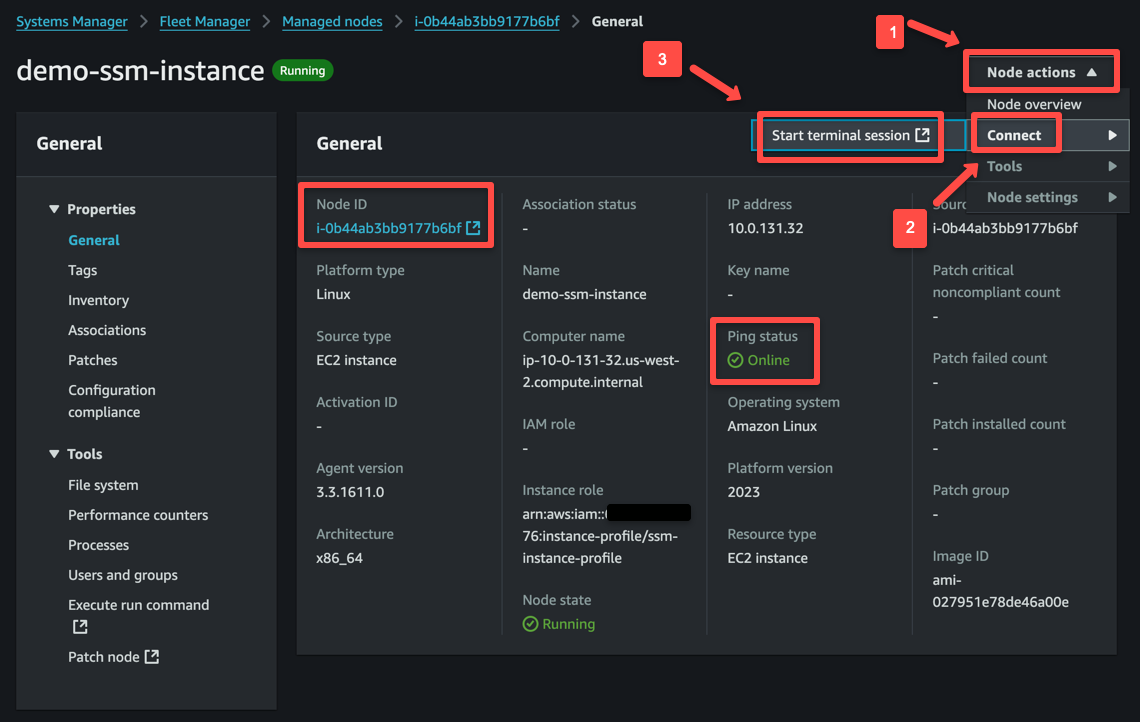
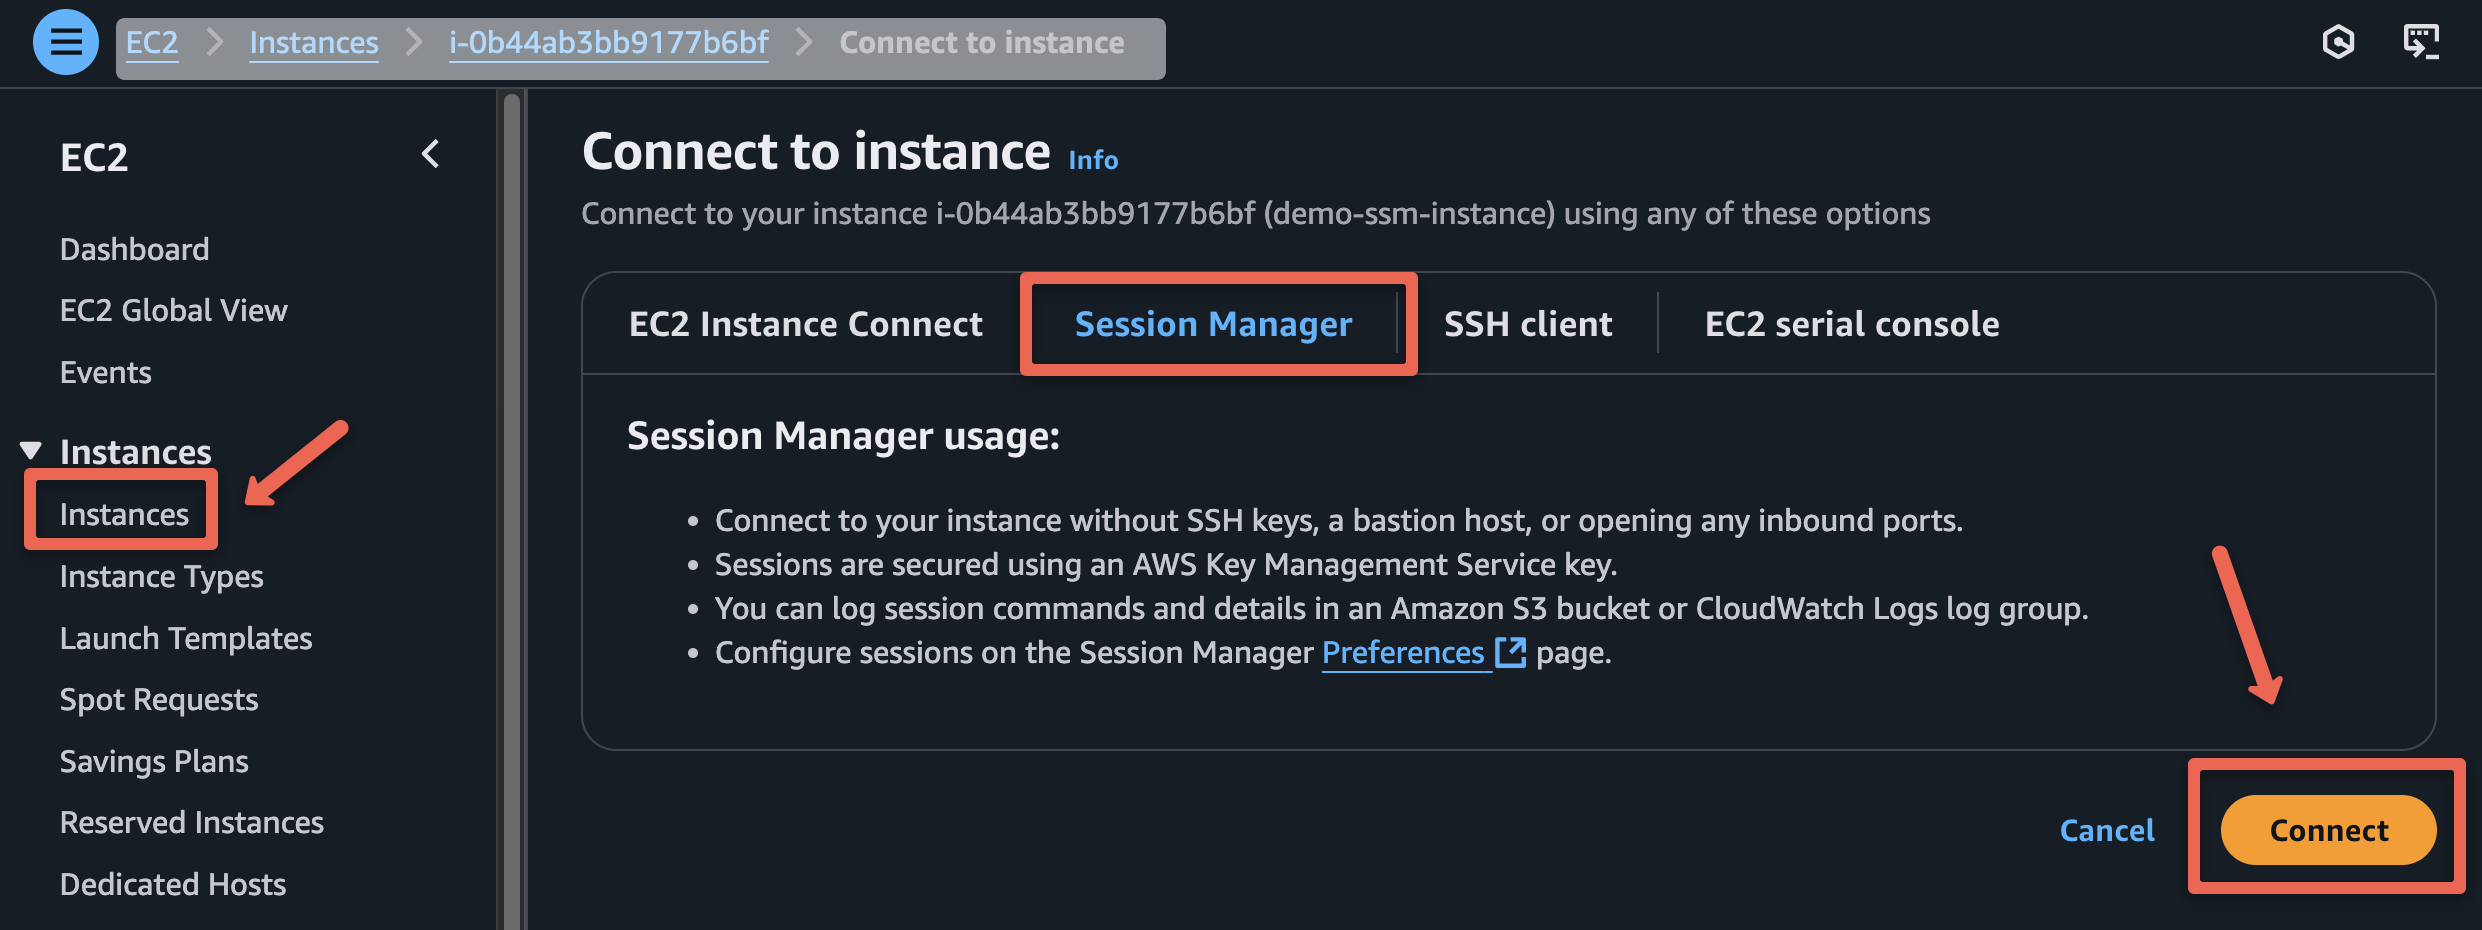
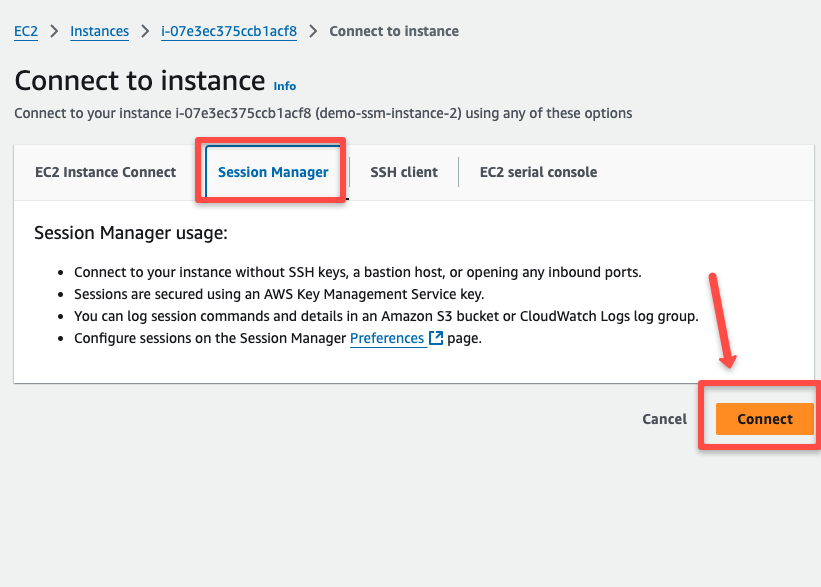
To connect the instance via SSM, we can use the Start terminal section from the Node actions or the Session Manager section of the EC2 instance
Now, we can access the instance without accessing the subnet from the internet.
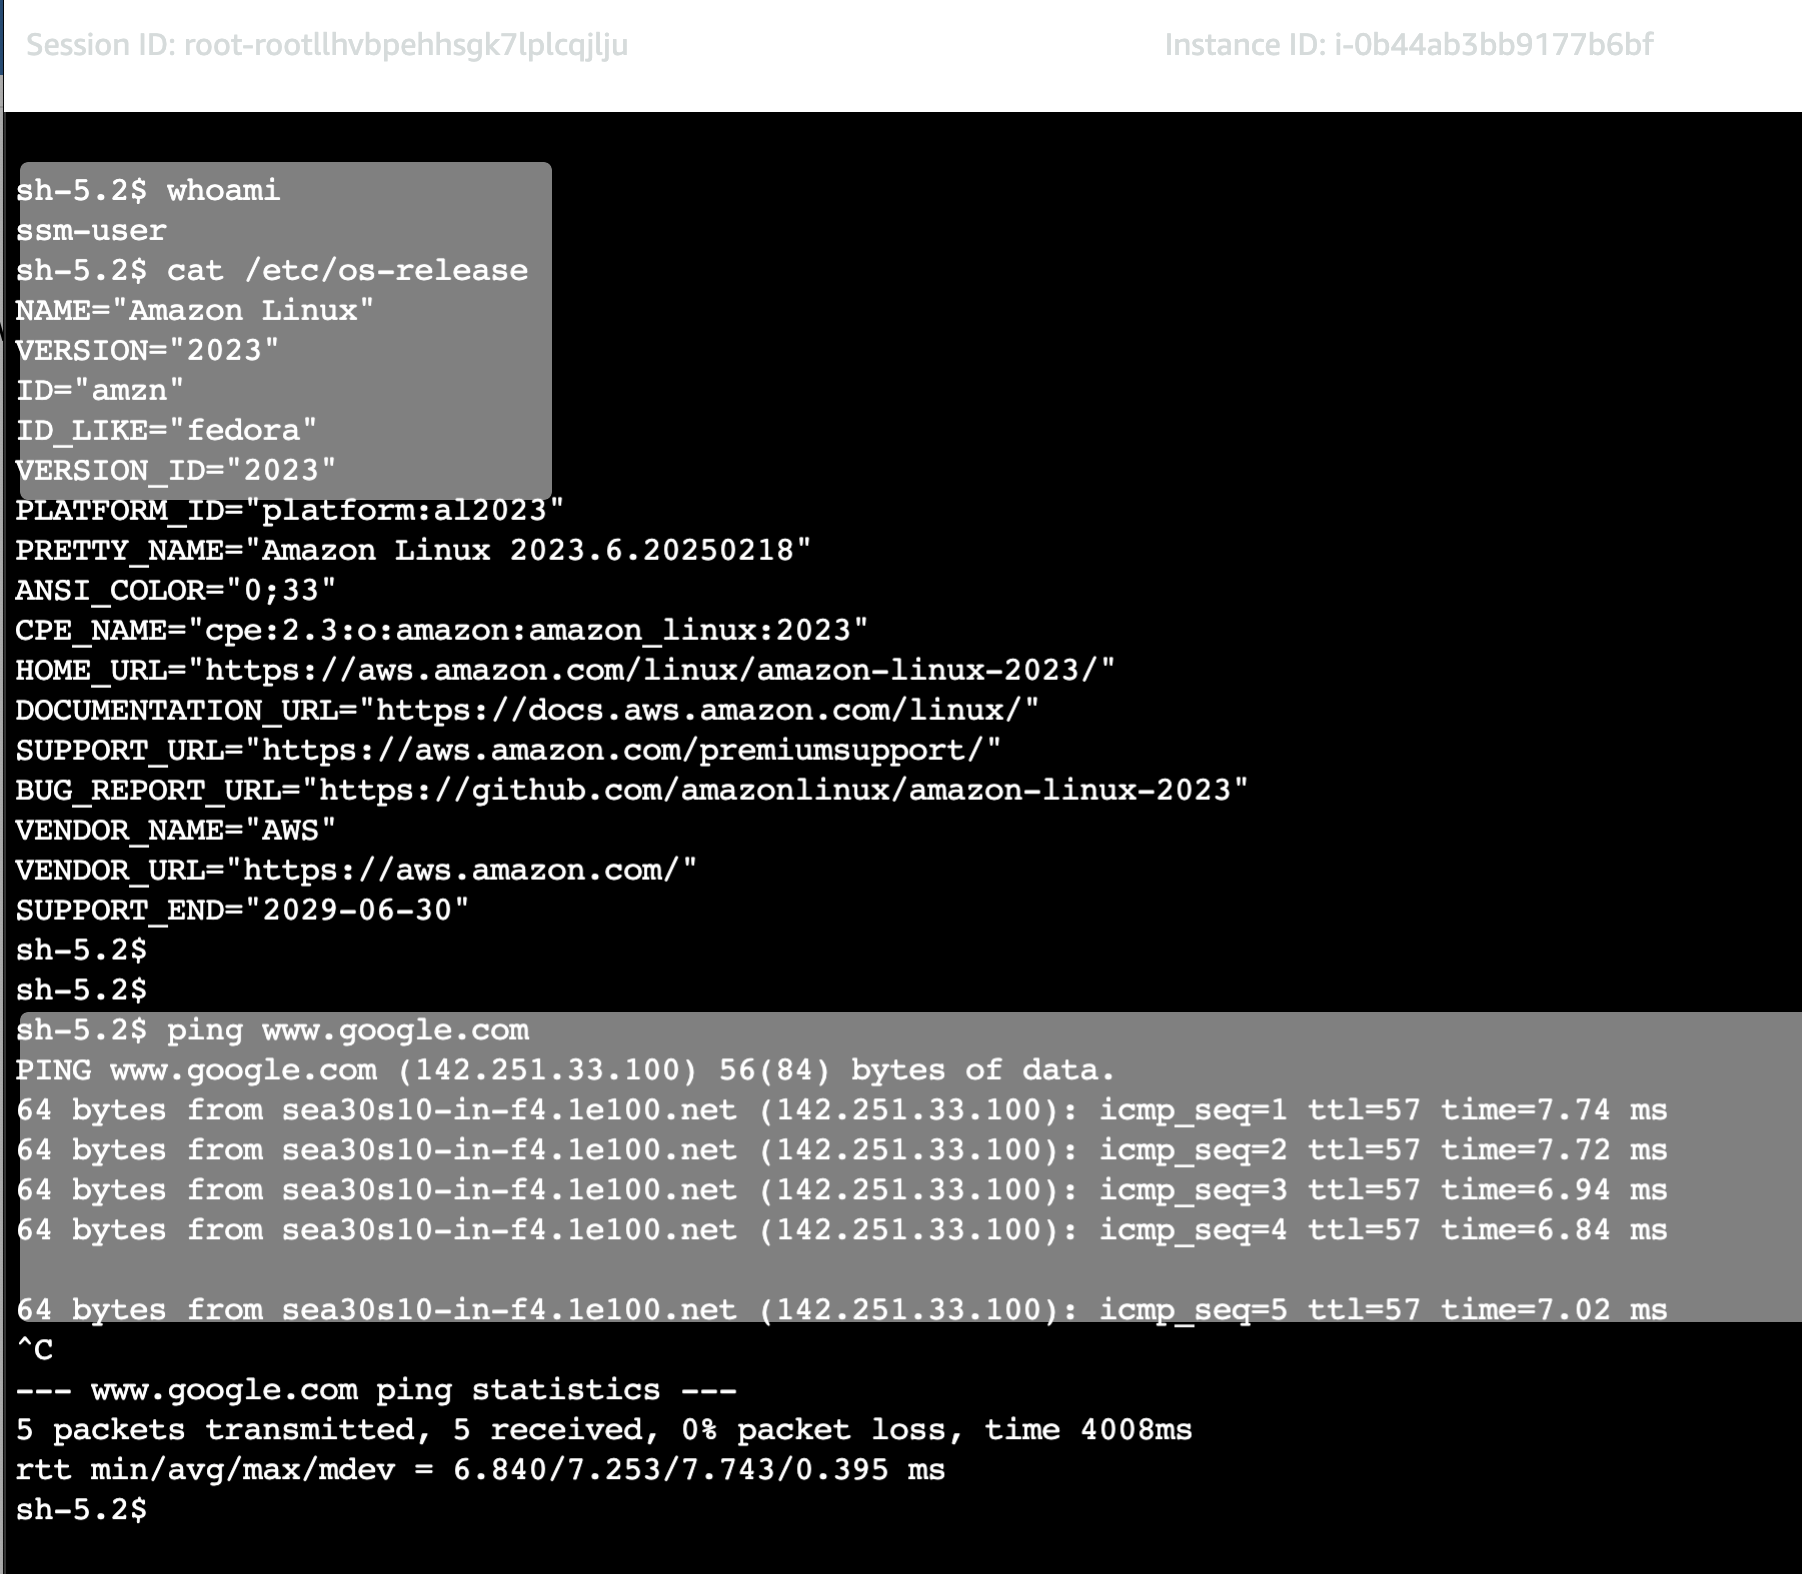
We haven't provided a key or even SSH access to this instance, so no other methods will work to connect with this private instance.
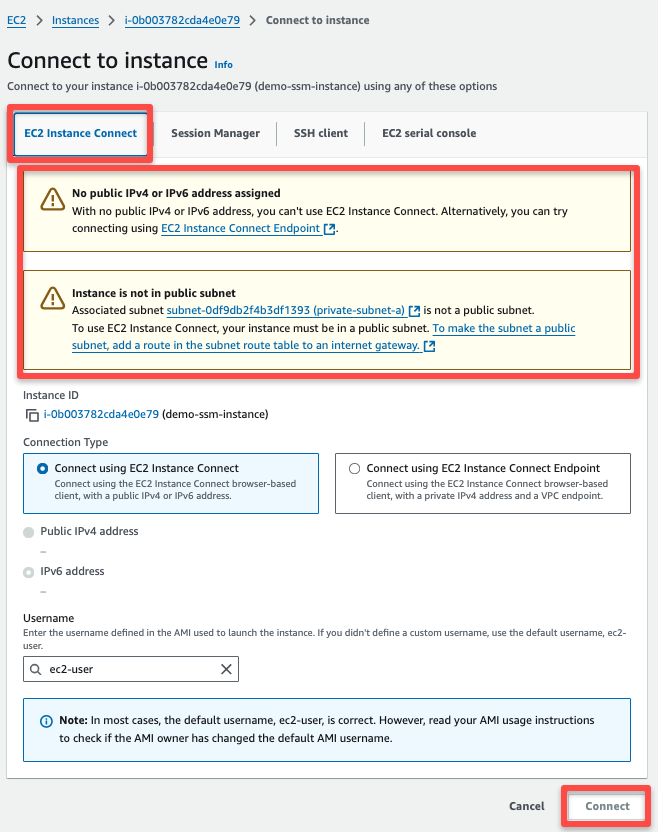
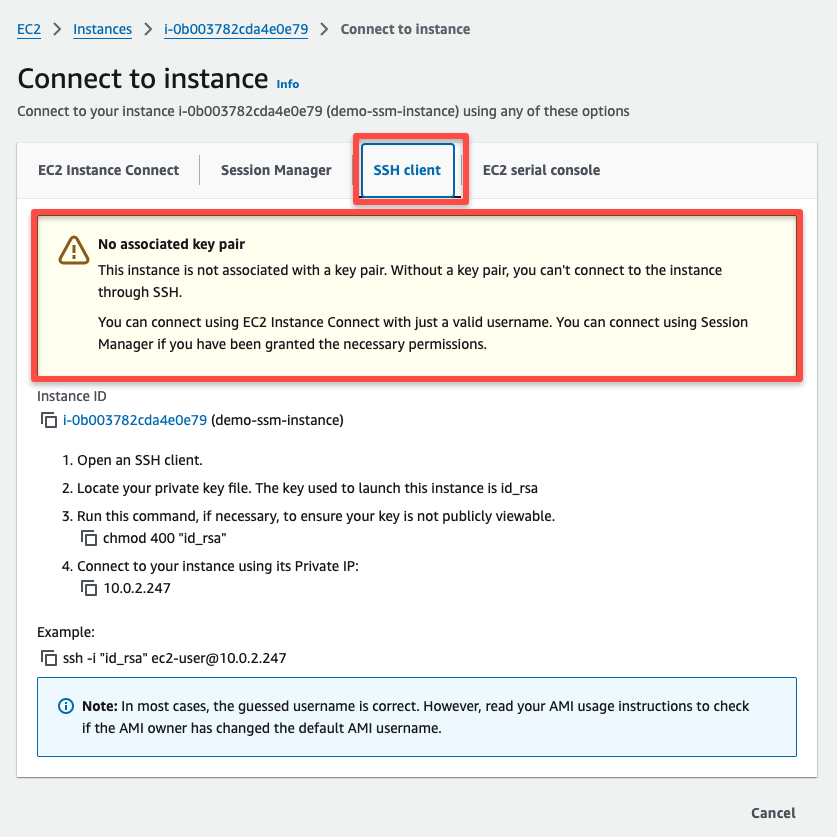
In the SSH client connect method, we can see the warning of the no key association.
How do we configure the SSM on the existing EC2 Instance?
If you already have a private EC2 instance but the instance profile was not attached when you created it, we can also attach the instance profile after the deployment.
I have created another Private EC2 instance with no instance profile.

If we check the Session Manager section, we can't able to connect the instance using the SSM.
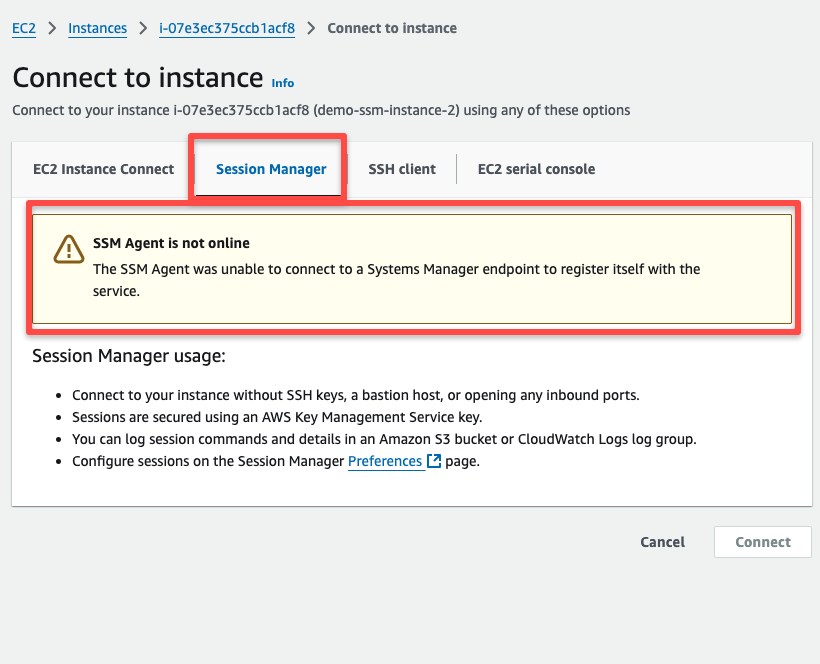
We need to attach the instance profile with this existing Private EC2 instance.
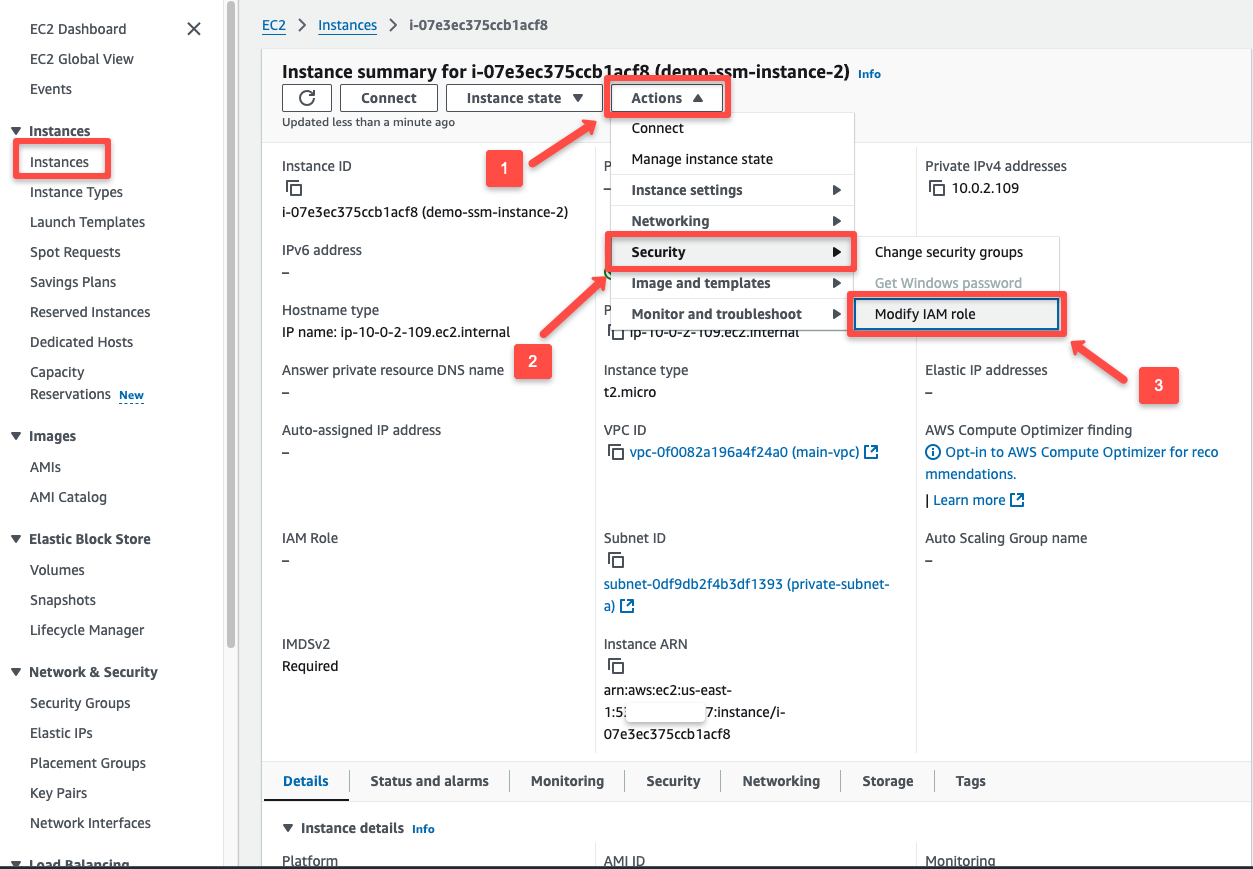
To attach the IAM Instance Profile to an existing cluster, in the instance dashboard, select Security in the Actions tab and select Modify IAM role.
On the next page, select the Instance Profile we have already created and click the Update IAM role button.
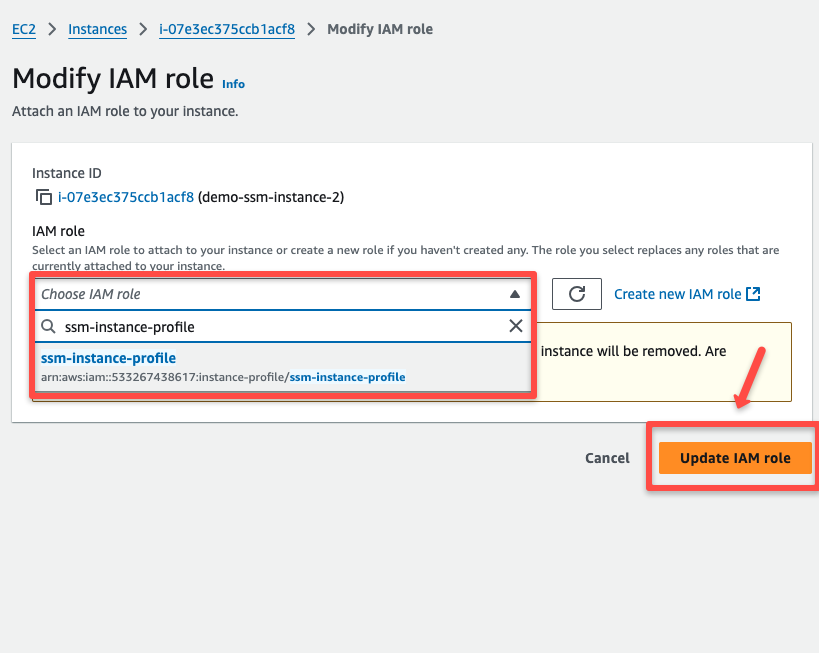
The associated Instance Profile will take a few minutes to update with the EC2 instance.
After that, if you check the Session Manager tab of the connection dashboard, you will see the connect button.
How to access the EC2 instance using AWS SSM from the local machine?
To access the instance from the local machine, need to install the SSM client.
For Mac,
brew install session-manager-pluginOnce the installation is completed, we can connect the instance from the local machine via CLI.
aws ssm start-session --target <INSTANCE_ID> --region <REGION>We can perform port forwarding if you have installed something in the private instance and want to access its dashboard from the local machine.
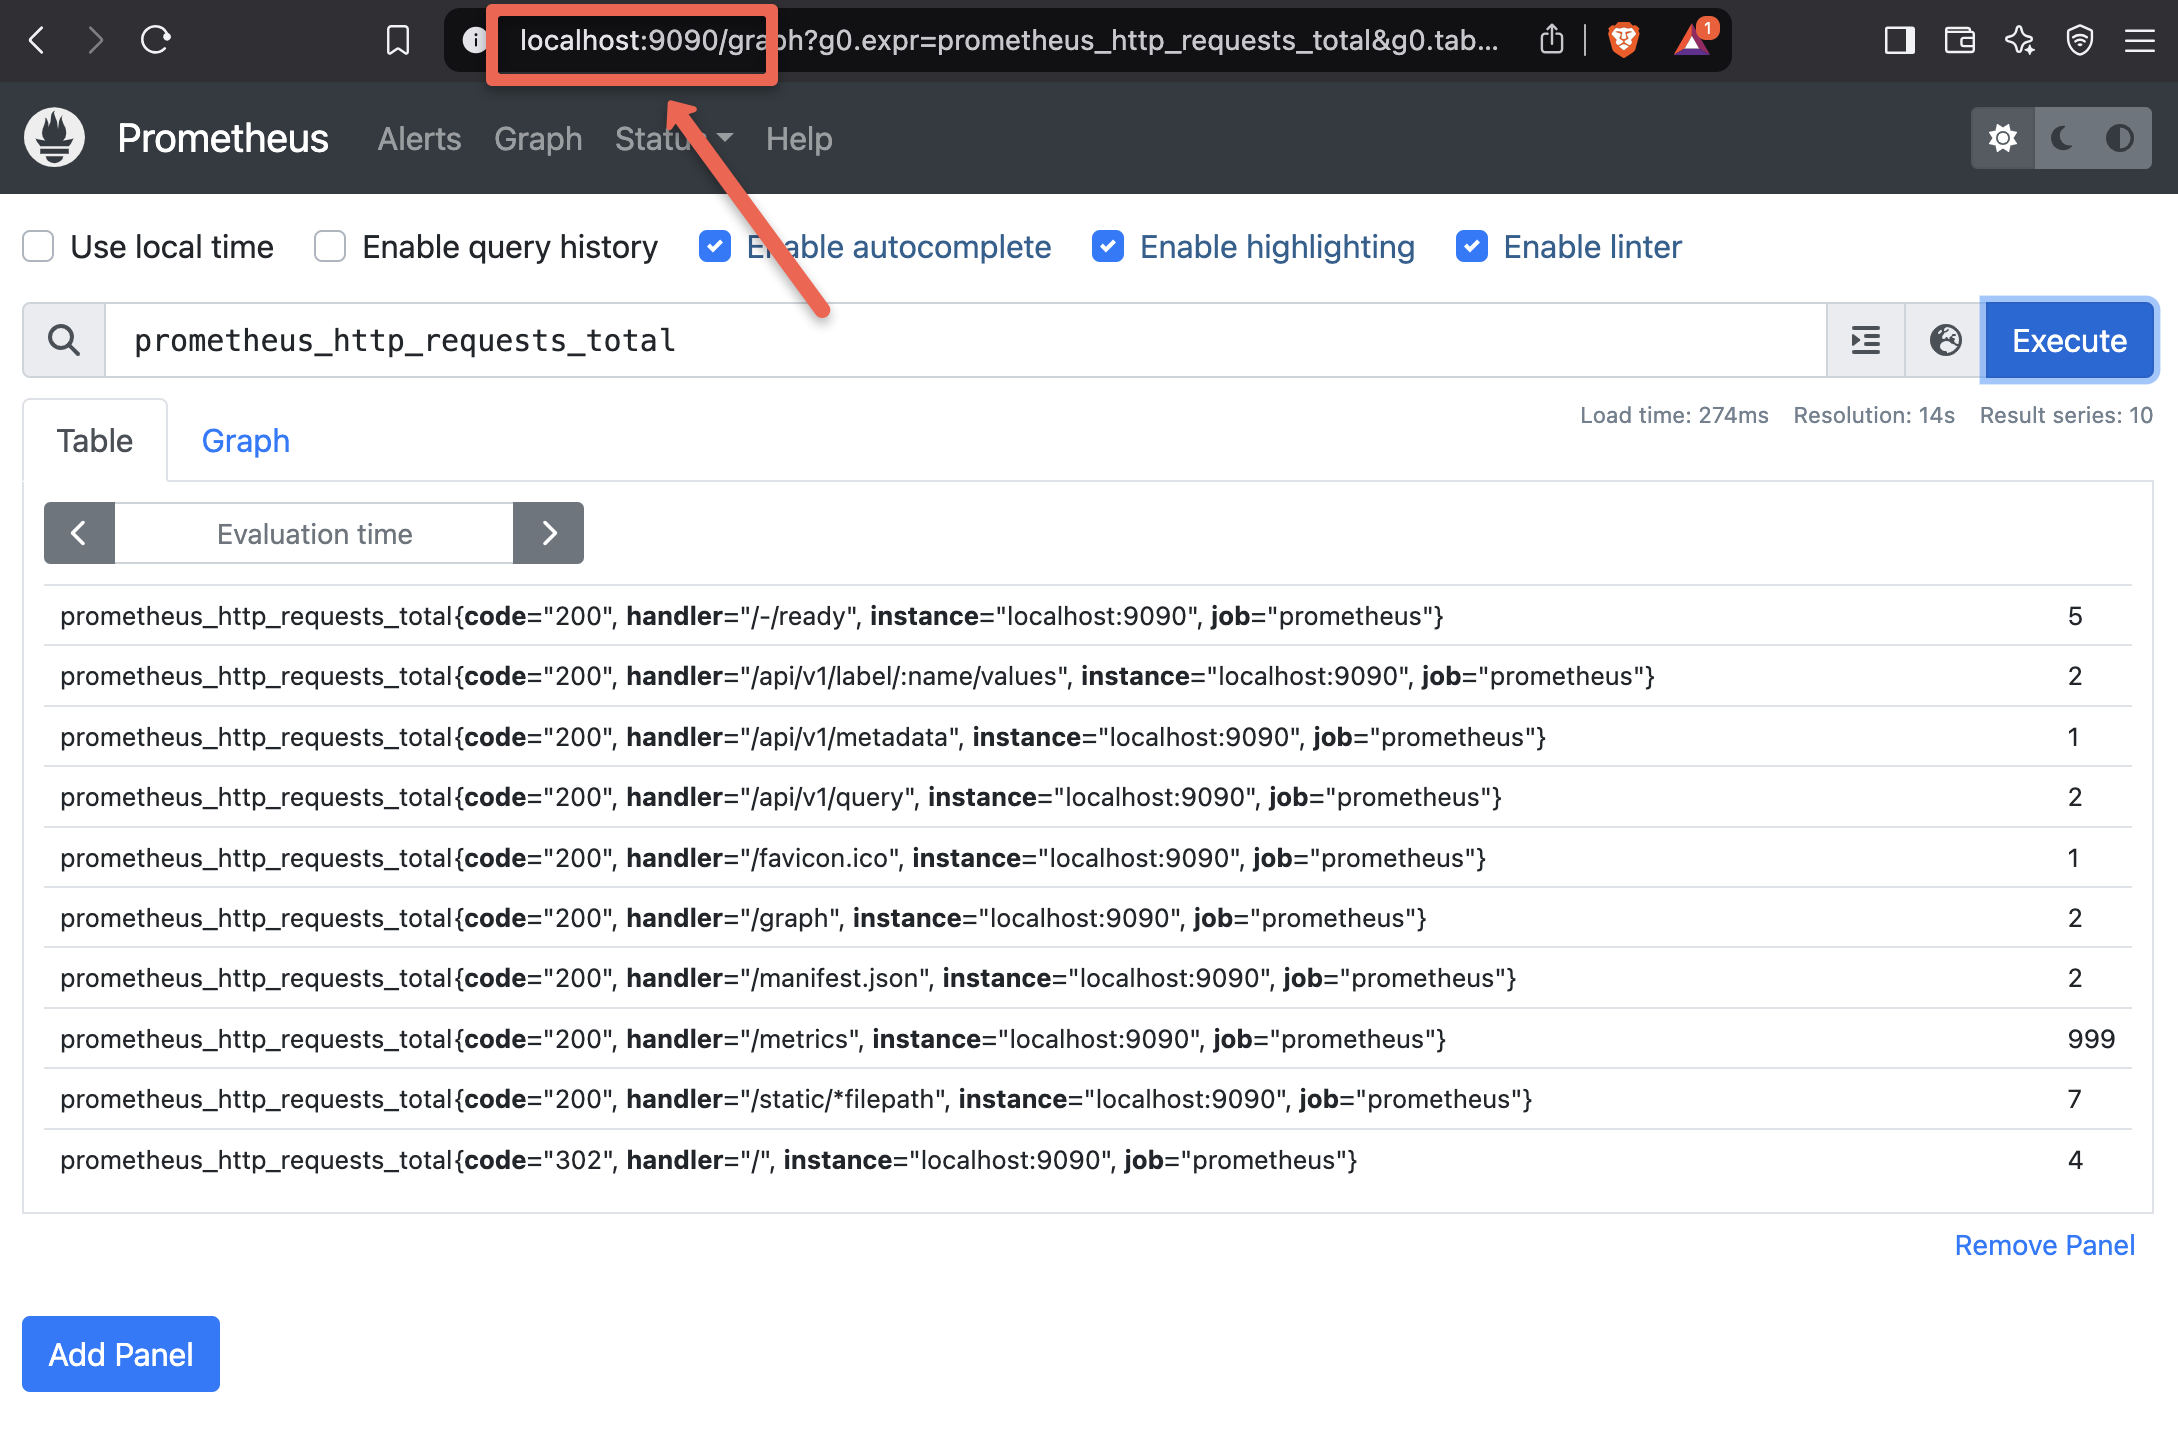
For example, I have installed Prometheus in a private EC2 instance, and need to access the dashboard from the local machine.
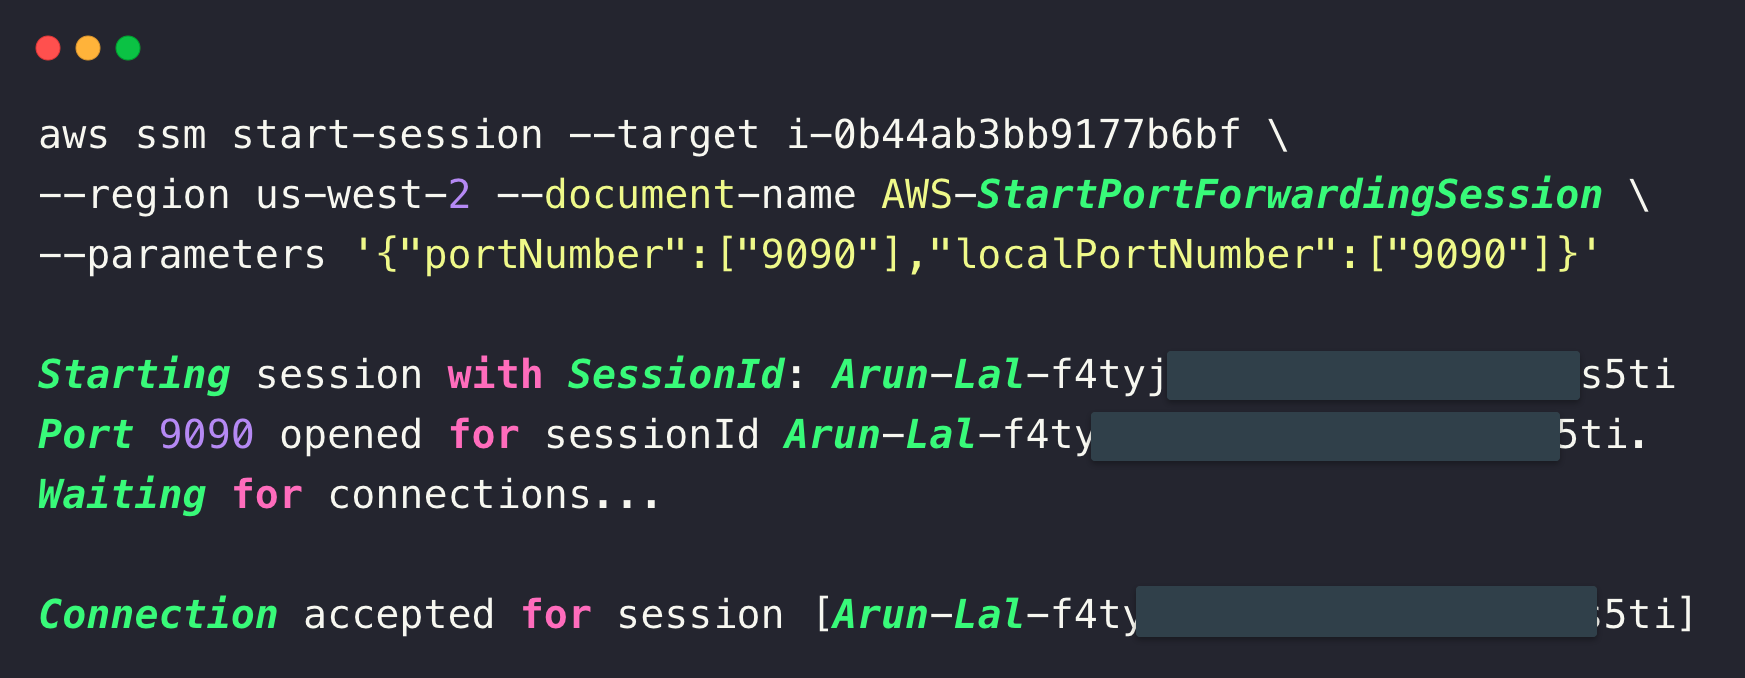
To see the dashboard from the local machine by port forwarding, use the following command.
aws ssm start-session --target <INSTANCE_ID> --region <REGION> --document-name AWS-StartPortForwardingSession --parameters '{"portNumber":["9090"],"localPortNumber":["9090"]}'The port number will be changed depending on the deployment inside the server.
To access the dashboard, open any browser from the local machine, and paste the URL http://localhost:9090
Conclusion
We have explored only one use case of the AWS Systems Manager, but we can do various things that make it possible to use it as a secure configuration manager for the EC2 instances and for operation, application, and change management.
Check all the options the SSM provides and utilize them for your needs.
