In this blog, I have explained different methods to disable wordpress website from Google indexing when you work with private, staging or testing websites.
A staging or testing website is necessary for every WordPress website that needs continuous development and updates.
I personally have staging websites for all the WordPress websites I manage. Whenever there is a plugin update, theme update, code customization, or trying out a new plugin, I always test it on my staging website first.
Ideally, your staging website is a replica of the live website with most of its content. And you don’t want Google to index the staging website and end up with duplicate content issues. Duplicate content would hurt your website's SEO.
noindex, nofollow To Disallow Search Engine Crawlers
For Google search engine robot not to index a page and not to follow links in the page, it should have noindex, nofollow in the page Robots meta tag as given below.
<meta name="robots" content="noindex, nofollow" />In the WordPress staging website, we need this tag on every page to disallow Google search engine bots from indexing the page.
You can follow any of the methods given below to enable these tags on your staging website. I have given step-by-step guides on implementing every method.
Method 1: Disable Search Engine Visibility in WordPress Setting
WordPress has a native setting to discourage search engines from indexing the web pages.
To enable the option, go to Settings--> Reading and you will find an option called Search Engine Visibility. Select the checkbox and save the settings as shown below.
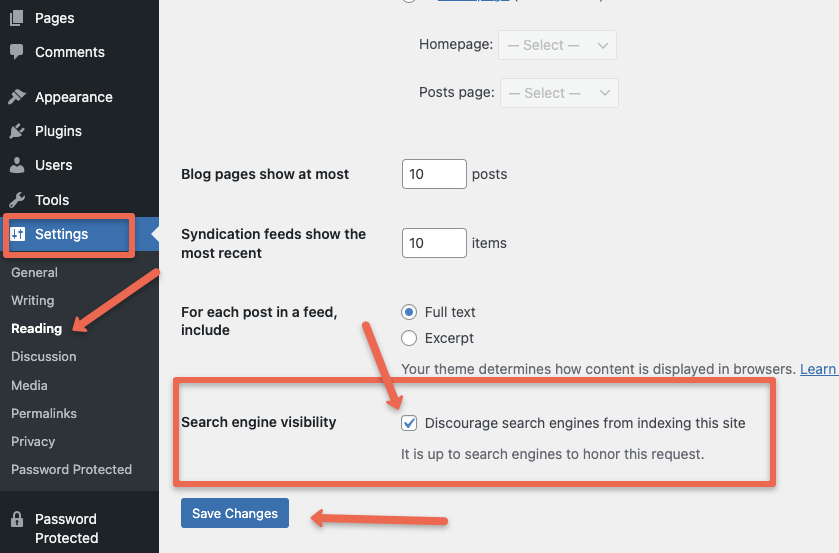
WordPress has a note saying "It is up to search engines to honor this request." So it's not a guarantee that google will stop indexing your website.
Method 2: Password Protect the Staging Website
Using password protection is one of the best ways to discourage Google from indexing the staging website. In fact, Google recommends this approach. If you enable password protection for the whole website, the content can be accessed only using a password.
You can implement password protection using the free Password Protected WordPress plugin. It automatically adds noindex,nofollow meta tag to all the Password Protected content.
Follow the steps given below to set up password protection for the whole staging website.
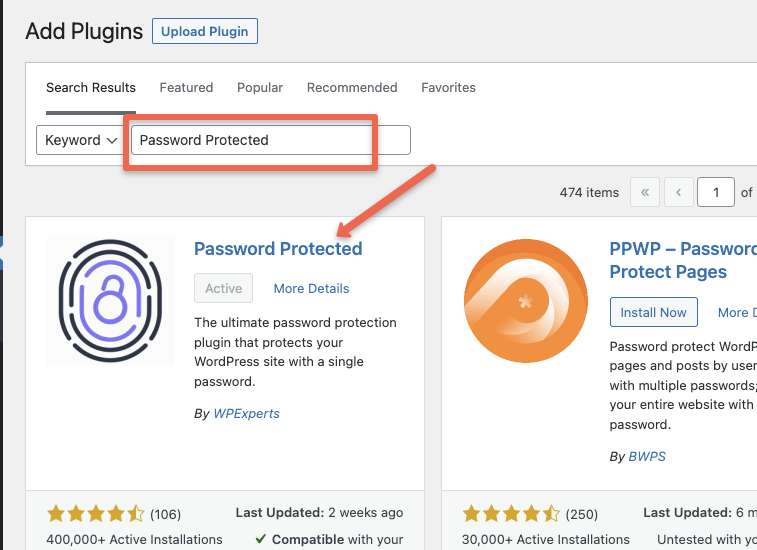
Step 1: Search for Password Protected plugin from the WordPress plugins option. Install and activate the plugin.
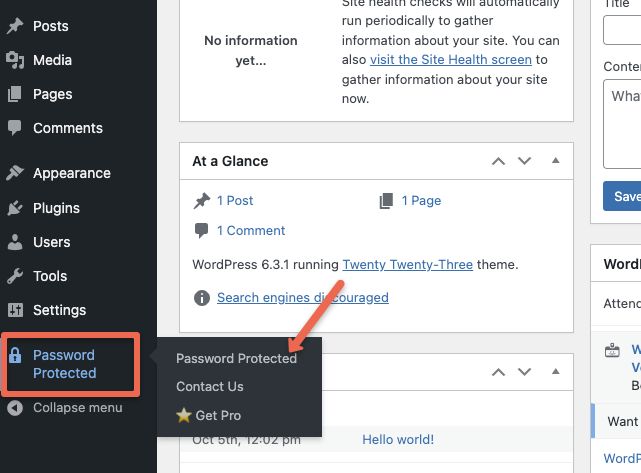
Step 2: You will find the password protected option in the sidebar. Select the password protected settings as shown below
Step 3: In the settings, enable the password protected status and create a new password as shown in the image below.
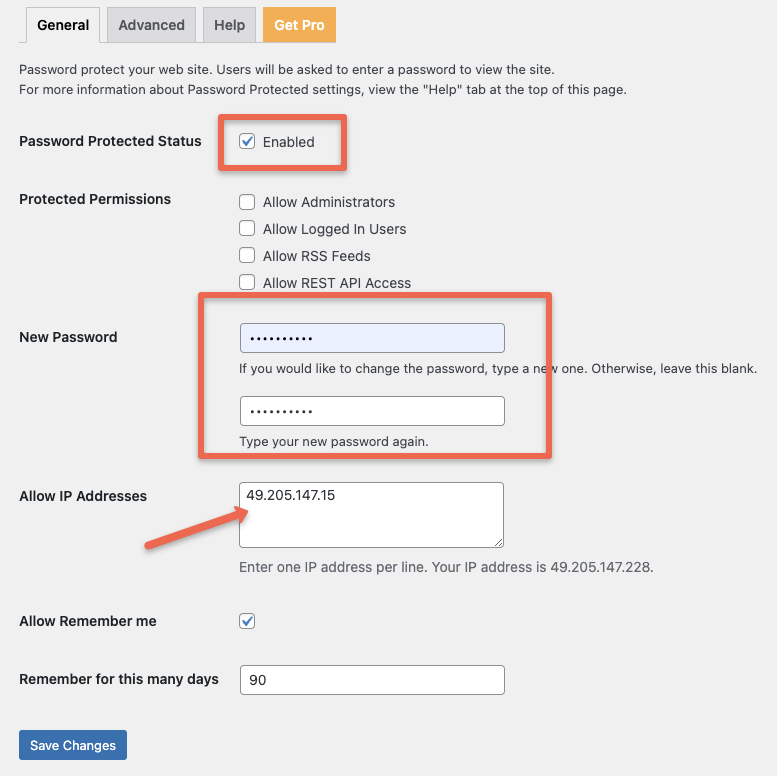
You can whitelist only your IP in the Allow IP Addresses field. So you don't need a password to access the staging website. You can get the public IP of your system by searching What is my IP in Google search as shown below.
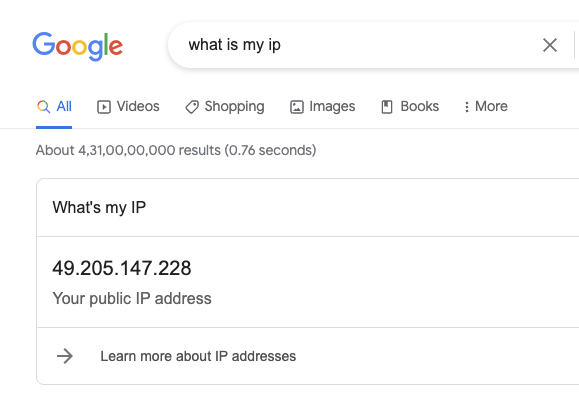
Now your staging website is password protected and its content can be accessed by anyone with the password or a whitelisted IP. Google search bots cannot access the content. This way the staging website content doesn't get indexed.
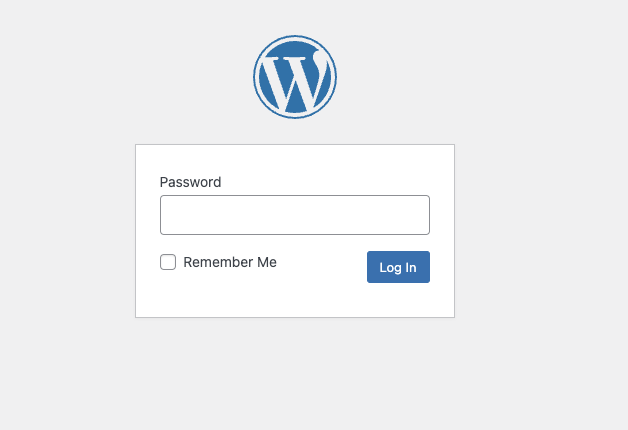
To test this, try to open the staging website in a guest profile or incognito mode. You will see a page asking for a password as shown below.
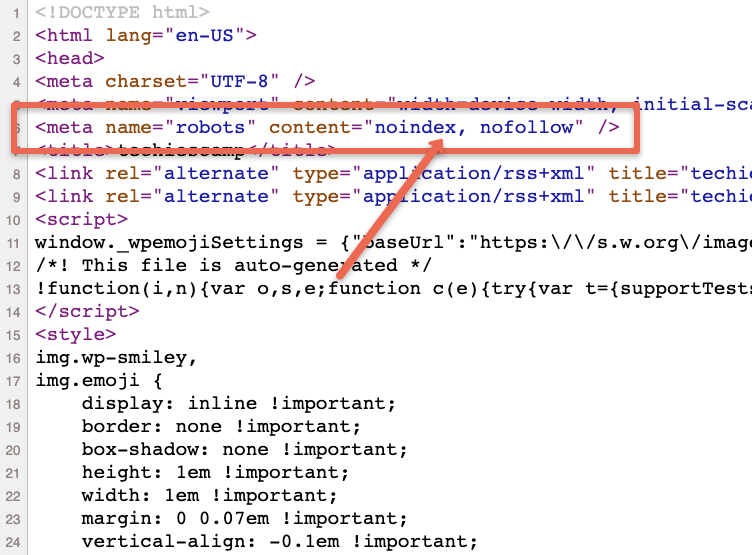
To test it, after providing the password, try inspecting any of the pages and you will see the noindex, nofollow meta description as shown below.
I personally use this plugin for one of my standalone staging websites.
Method 3: Use the WP-Staging Plugin
If you want to create a staging website on the same server without the staging site getting indexed, WP-Staging plugin is a great option.
It will help you clone the entire website and set up a staging website in just one click. And the staging website by default has the noindex, nofollow tag added to it. So you don't have to worry about the staging URL getting indexed in Google.
Method 4: Block Search Engine Bots in Robots.txt file
You can block search engine bots using the robots.txt file present in your WordPress root directory. You need to add the following to the robots.txt file.
User-agent: *
Disallow: /
If you don't have the robots.txt file, you need to create one.
If you are using the Rank Math SEO plugin, you can directly edit it using the settings as shown below.
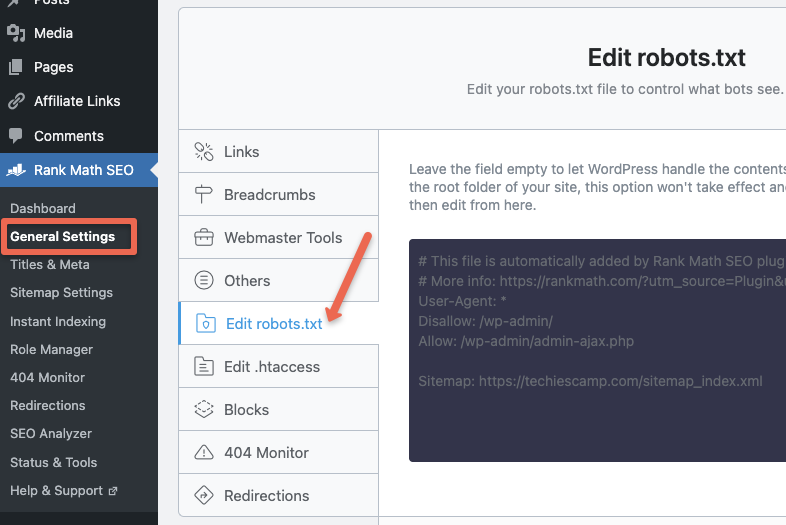
If you are using the Yoast SEO plugin, you will find the robots.txt file editing option under Tools --> File Editor Option.
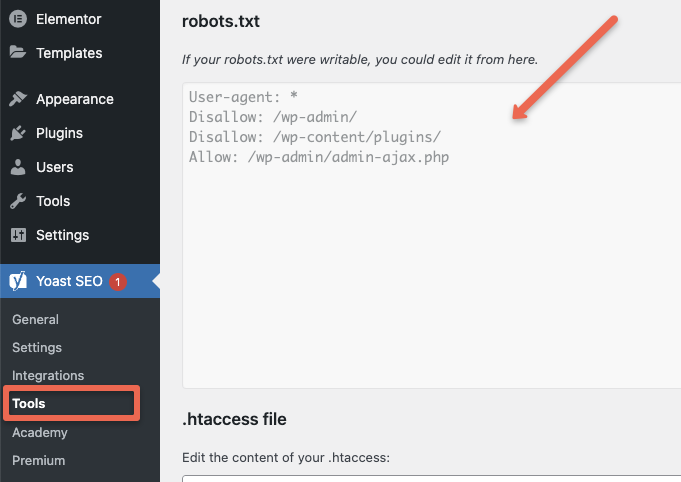
If you are using managed WordPress hosting, you can use an FTP tool to create/edit the file.
Removing Indexed Staging Website Pages From Google
For some reason, if your staging website pages have been indexed by Google, you can get it removed
I did some research on Google blog and found out the recommended methods to remove the indexed pages from Google as shown in the image below.
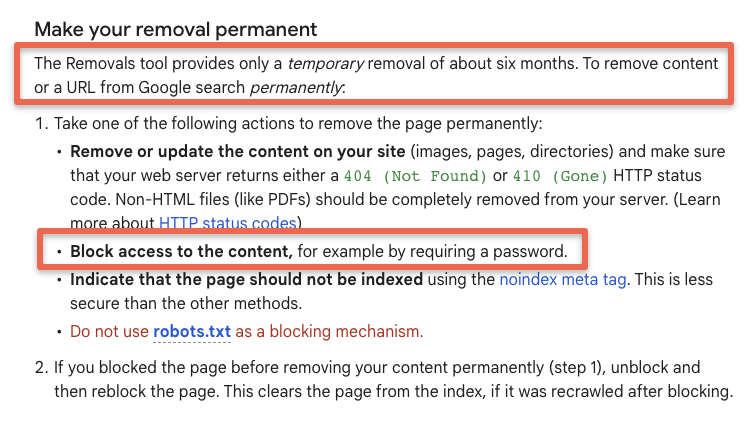
The first step is to submit the removal request through the Google search console. You will find the Removals option as shown below.
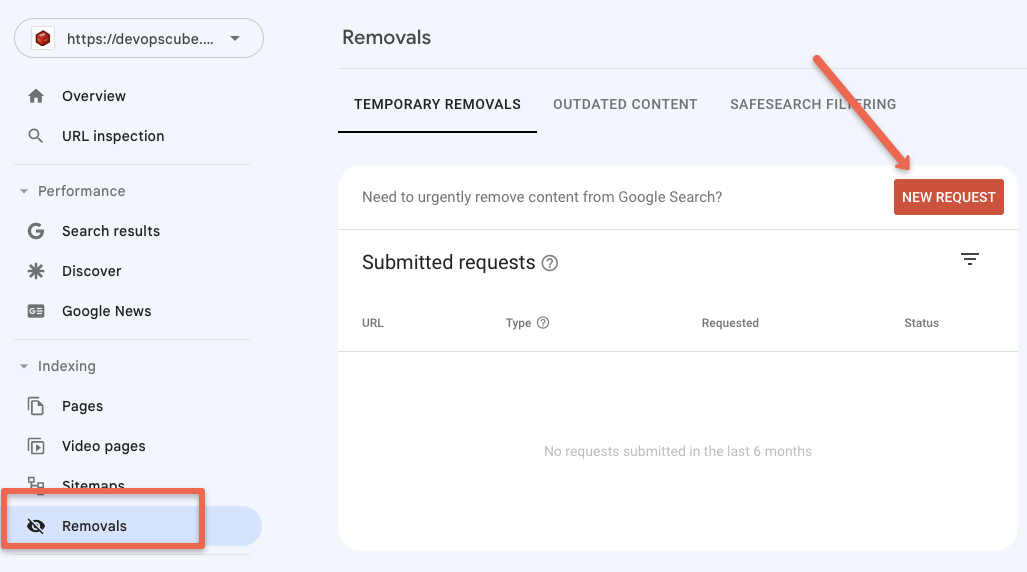
Next, ensure you have made your content private using password-protected mechanism so that Google will not re-index it again. Google blog itself says that implementing noindex tag is not a secure mechanism for already indexed pages.
Conclusion
When you set up a WordPress staging website, always ensure it is not getting indexed by following the steps explained in the blog.
We looked at different methods to stop Google from crawling the WordPress staging websites. Choose a method that is comfortable for you.
For pages that are already indexed, make sure to follow the Google guidelines I've explained to make the removals permanent
Hope this blog helps. If you have any questions or suggestions drop a comment below.

