


In this blog, learn how to set up the Azure OpenAI service, deploy custom OpenAI models and test it using API endpoint and token.
By the end of this guide, you will have learned how to:
- Create and configure a new Azure OpenAI resource
- Navigate the Azure AI Foundry to deploy a specific large language model, such as
o4-mini. - Test your model's chat completions using both a
curlcommand and a Python script. - Monitor the token usage of your model deployments.
- Understand the key advantages of using Azure OpenAI over the standard OpenAI API and more..
Lets get started.
What is Azure OpenAI?
Before we get into the hands-on guide, let’s first understand what Azure OpenAI is.
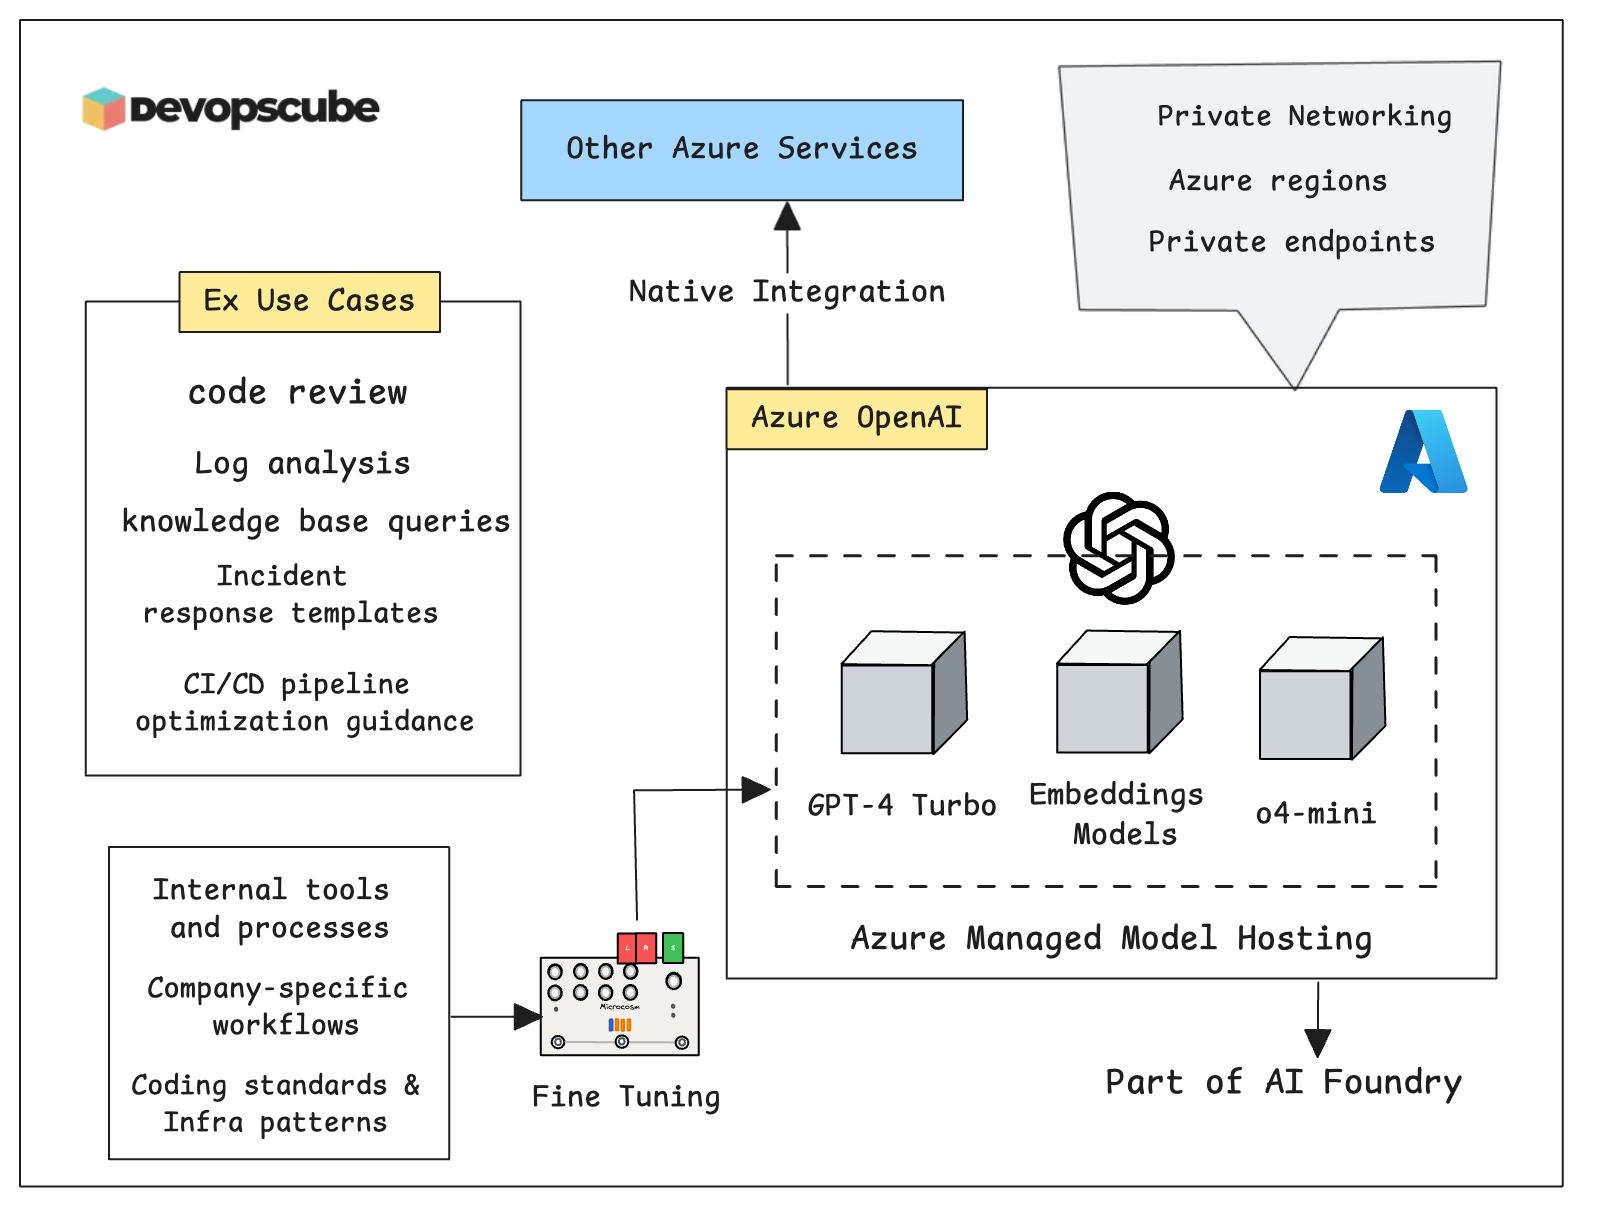
Azure provides a cloud-based service to access OpenAI's Large Language Models (LLMs), including GPT-3, GPT-4, and embedding models.
Since it runs on Microsoft Azure’s cloud infrastructure, you can integrate it with other Azure services, security features, and infrastructure.
With Azure OpenAI, you can fine-tune OpenAI models like GPT-3.5 using your own data to meet your model requirements. However, this feature is only available in select Azure regions, so availability may vary depending on your location.
Also, Microsoft Azure is currently the only cloud provider that offers OpenAI’s models as a fully managed, hosted service through Azure OpenAI.
If you want to understand enterprise use cases for Azure OpenAI, please read this official Azure blog.
Setup Prerequisites
Here is what we are going to do in high level.
- Azure OpenAI resource creation
- Deploy model using Azure Foundry
For this,
Ensure you are a privileged user (e.g., with Contributor role) or owner on the Azure cloud to create and manage the Azure OpenAI service.
Also, you must have access to the Azure portal (UI)
Create Azure OpenAI Resource
The first step is to create a Azure OpenAI resource.
The resource serves as your gateway to OpenAI models through Azure's infrastructure. It provides the endpoint URL and authentication keys needed to make API calls.
Follow the steps below to create the OpenAI service.
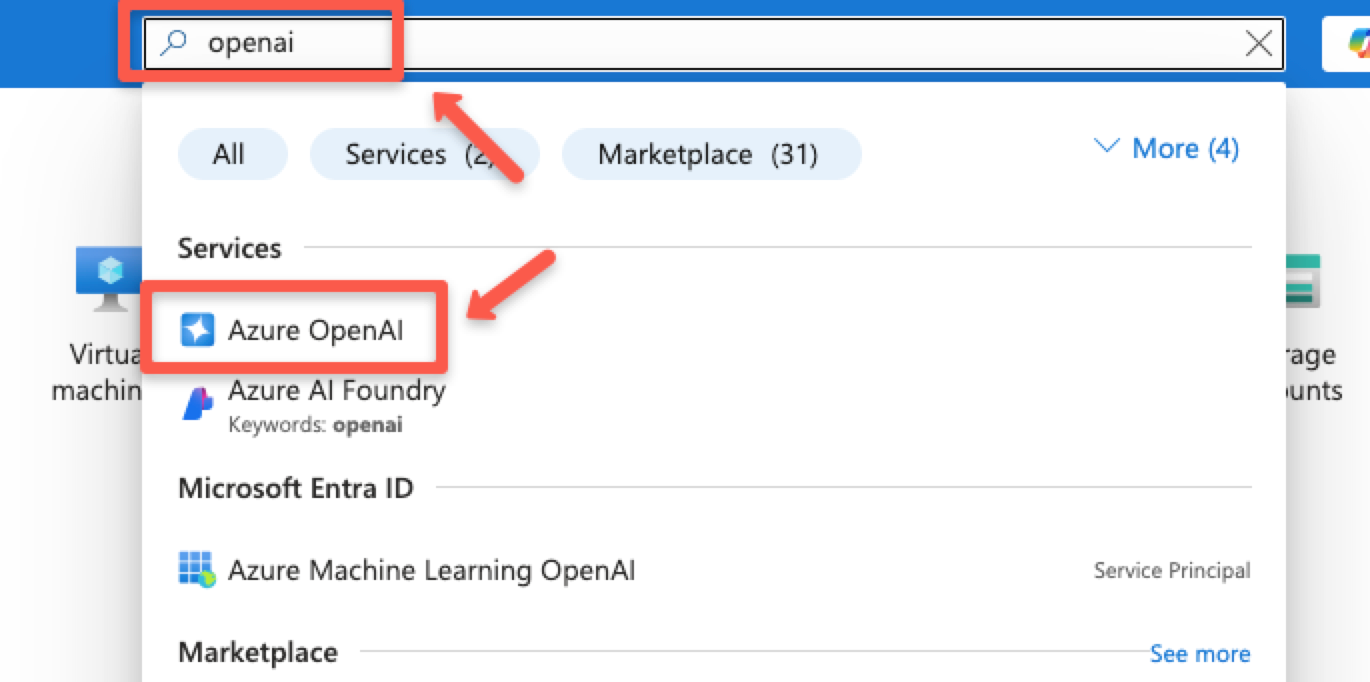
In the search bar, type Azure OpenAI and select the OpenAI service.
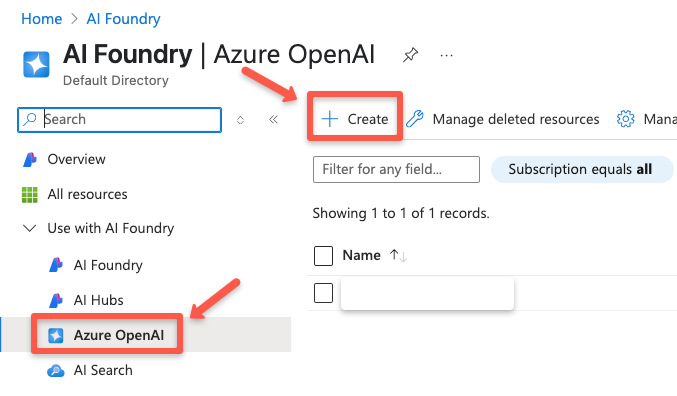
Click the + Create button to create a new OpenAI resource.
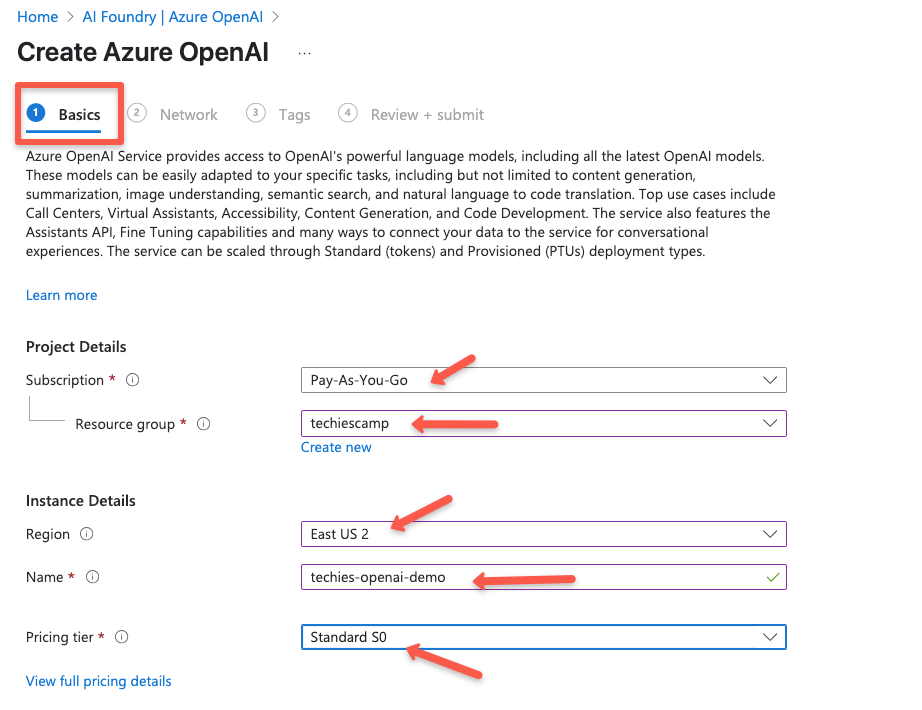
On the Basics page, select the Subscription, Resource Group name (create one if you dont have one), Region, Name, and the Pricing tier. I am going with Standard (On-Demand) pricing tier.
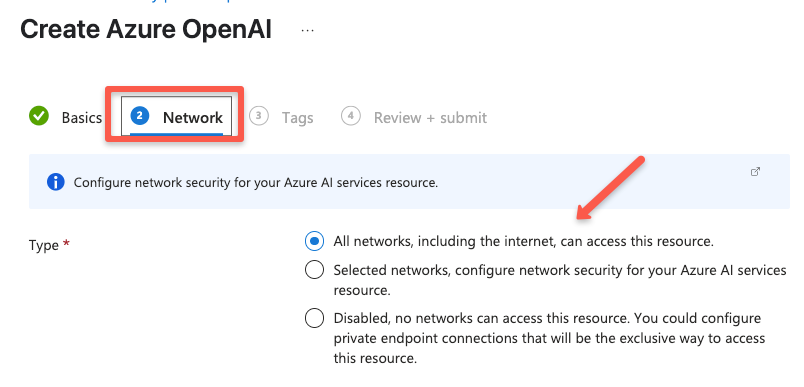
On the Network page, you can control who can access your Azure OpenAI resource. For this demo, I'm choosing "All networks" to keep it simple and accessible from anywhere.
1. Selected networks – to allow access only from specific IPs or virtual networks.
2. Private endpoints – for the highest security, where access is only allowed through your private Azure network.
Choose the option that fits your use case and security needs.
On the Tags page, you can add the necessary tags, and on the Review + submit page, you can see the preview of the configuration.
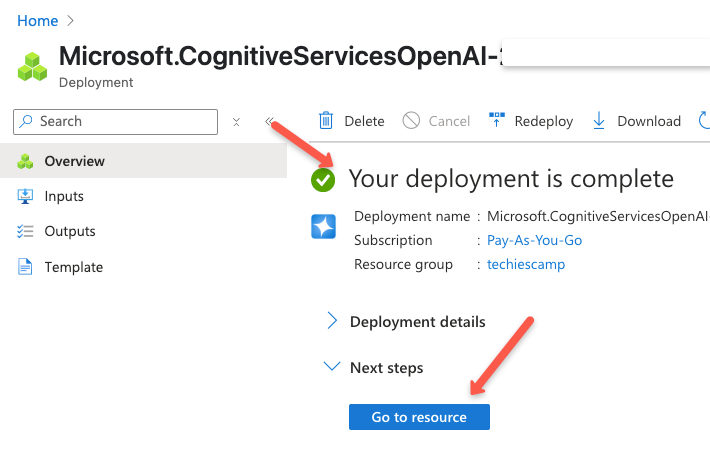
Once verification is completed, click the Create button to create the OpenAI resource. It will take a minute or two for the deployment to be ready.
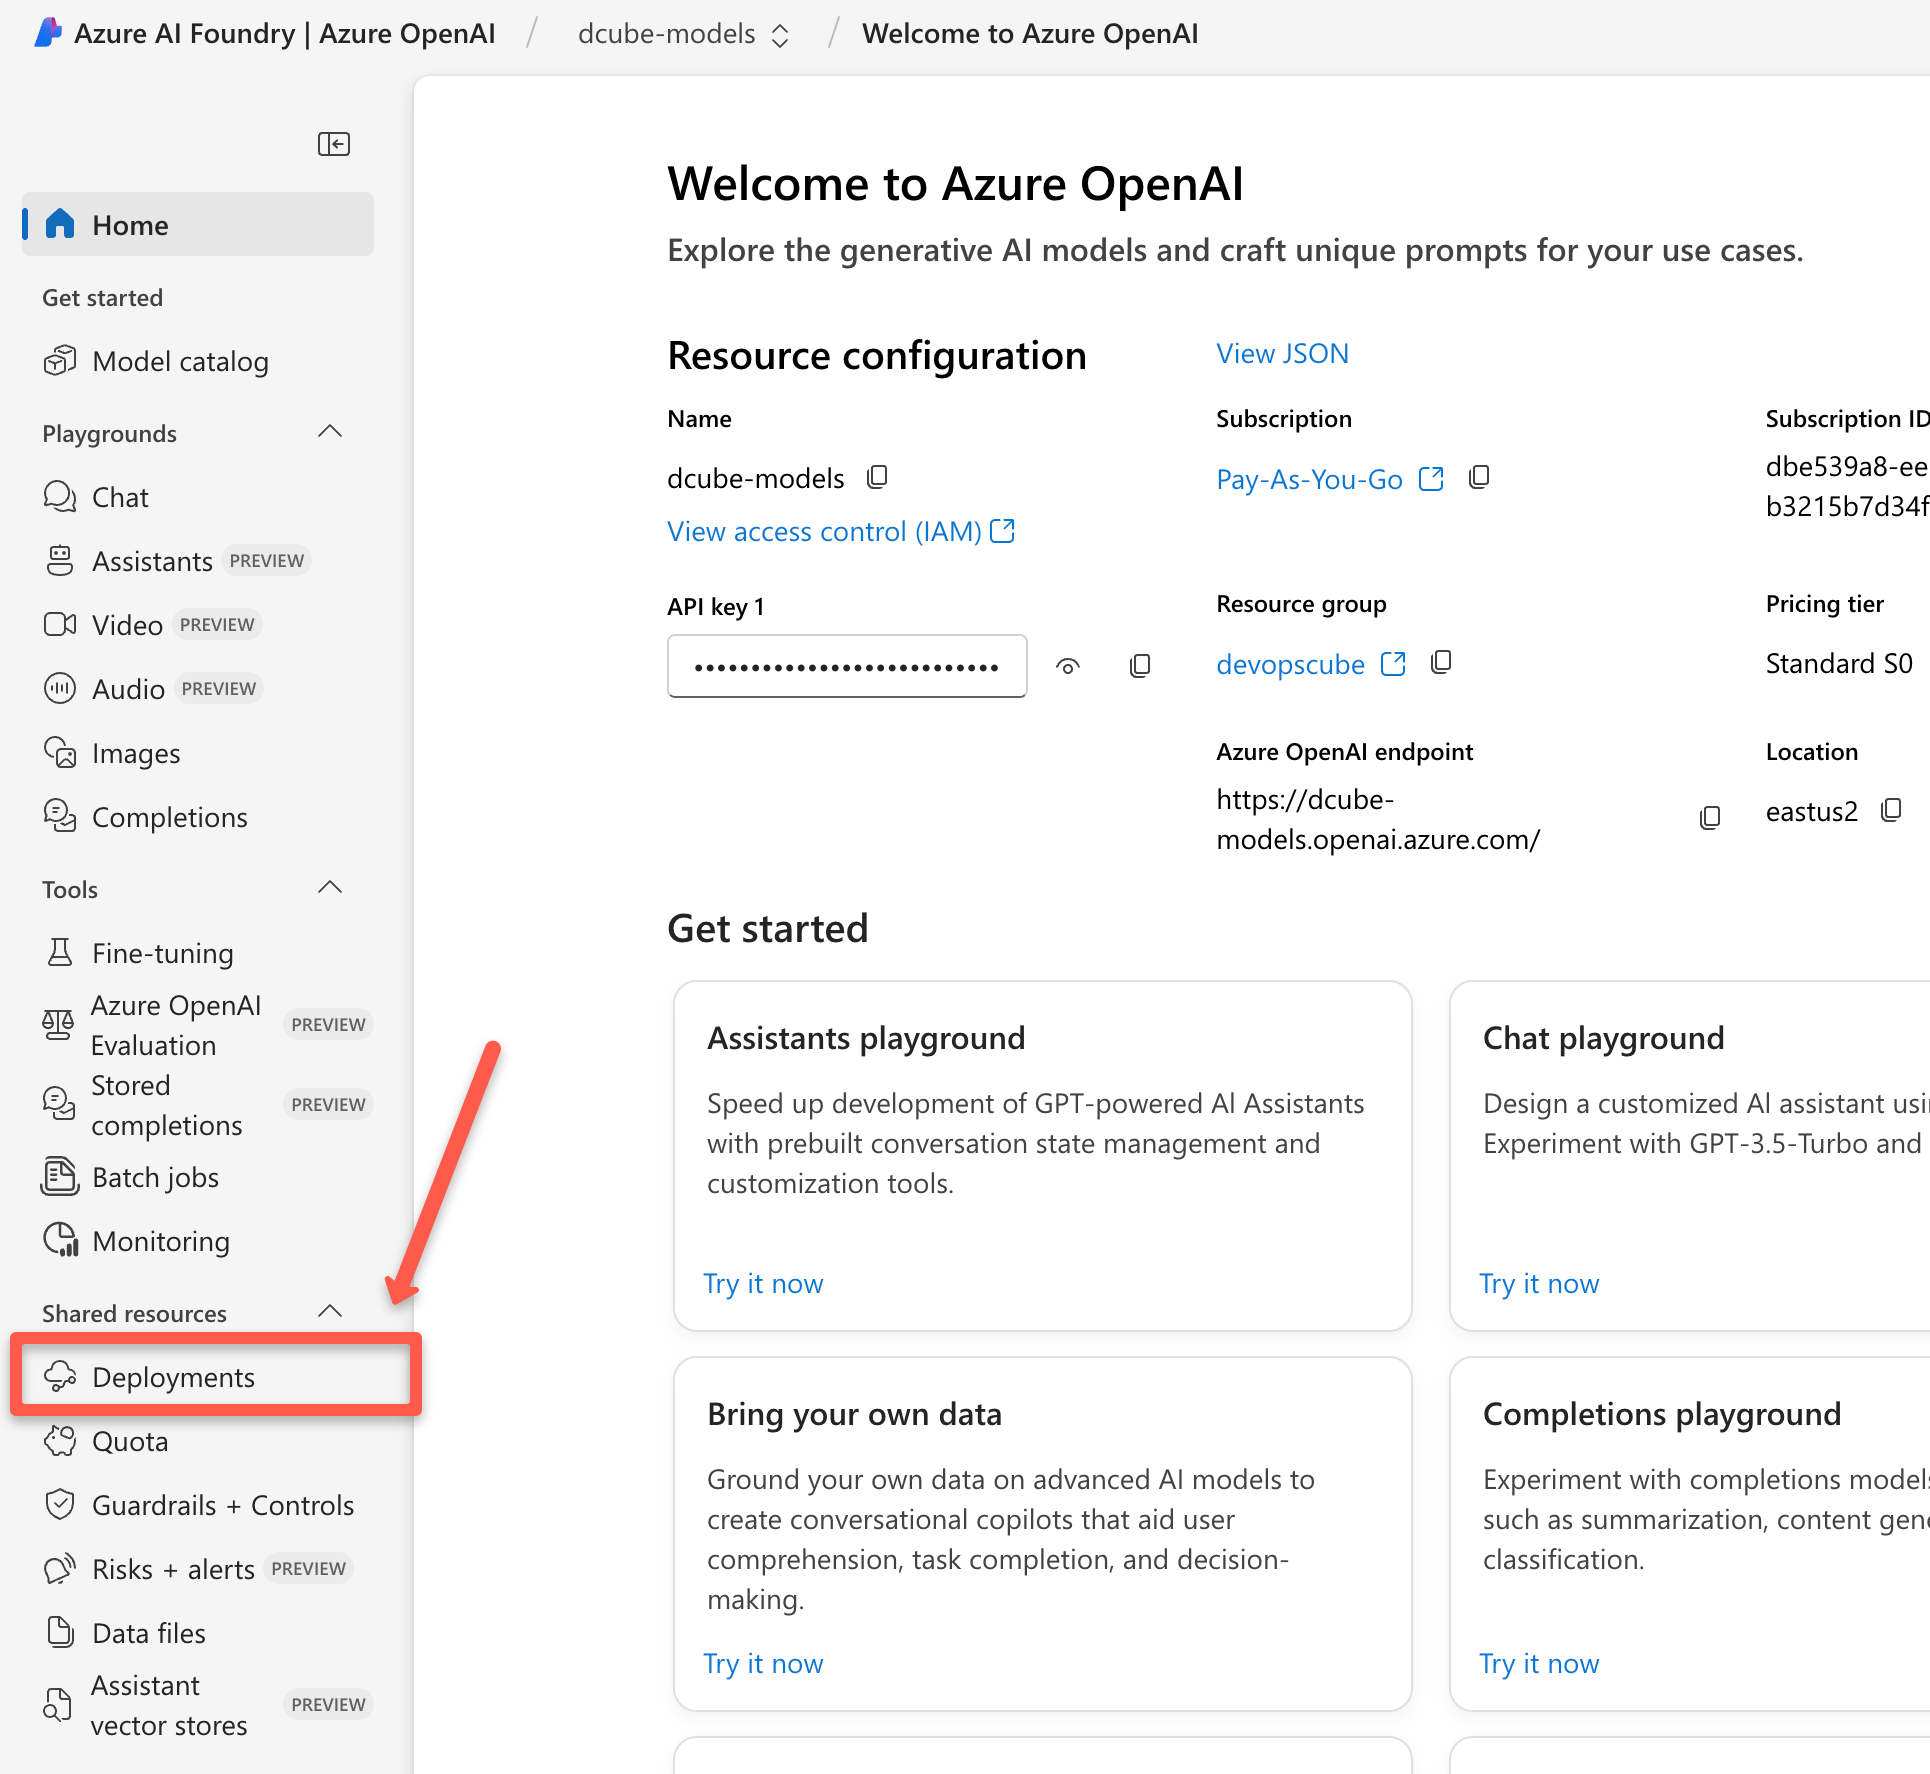
Once the deployment is successfully completed, you can go to the overview page of the resource.
In the next page you will find options to get the generic API endpoint and keys under the develop option.
For example, the endpoint typically looks like:
https://<resource-name>.openai.azure.com/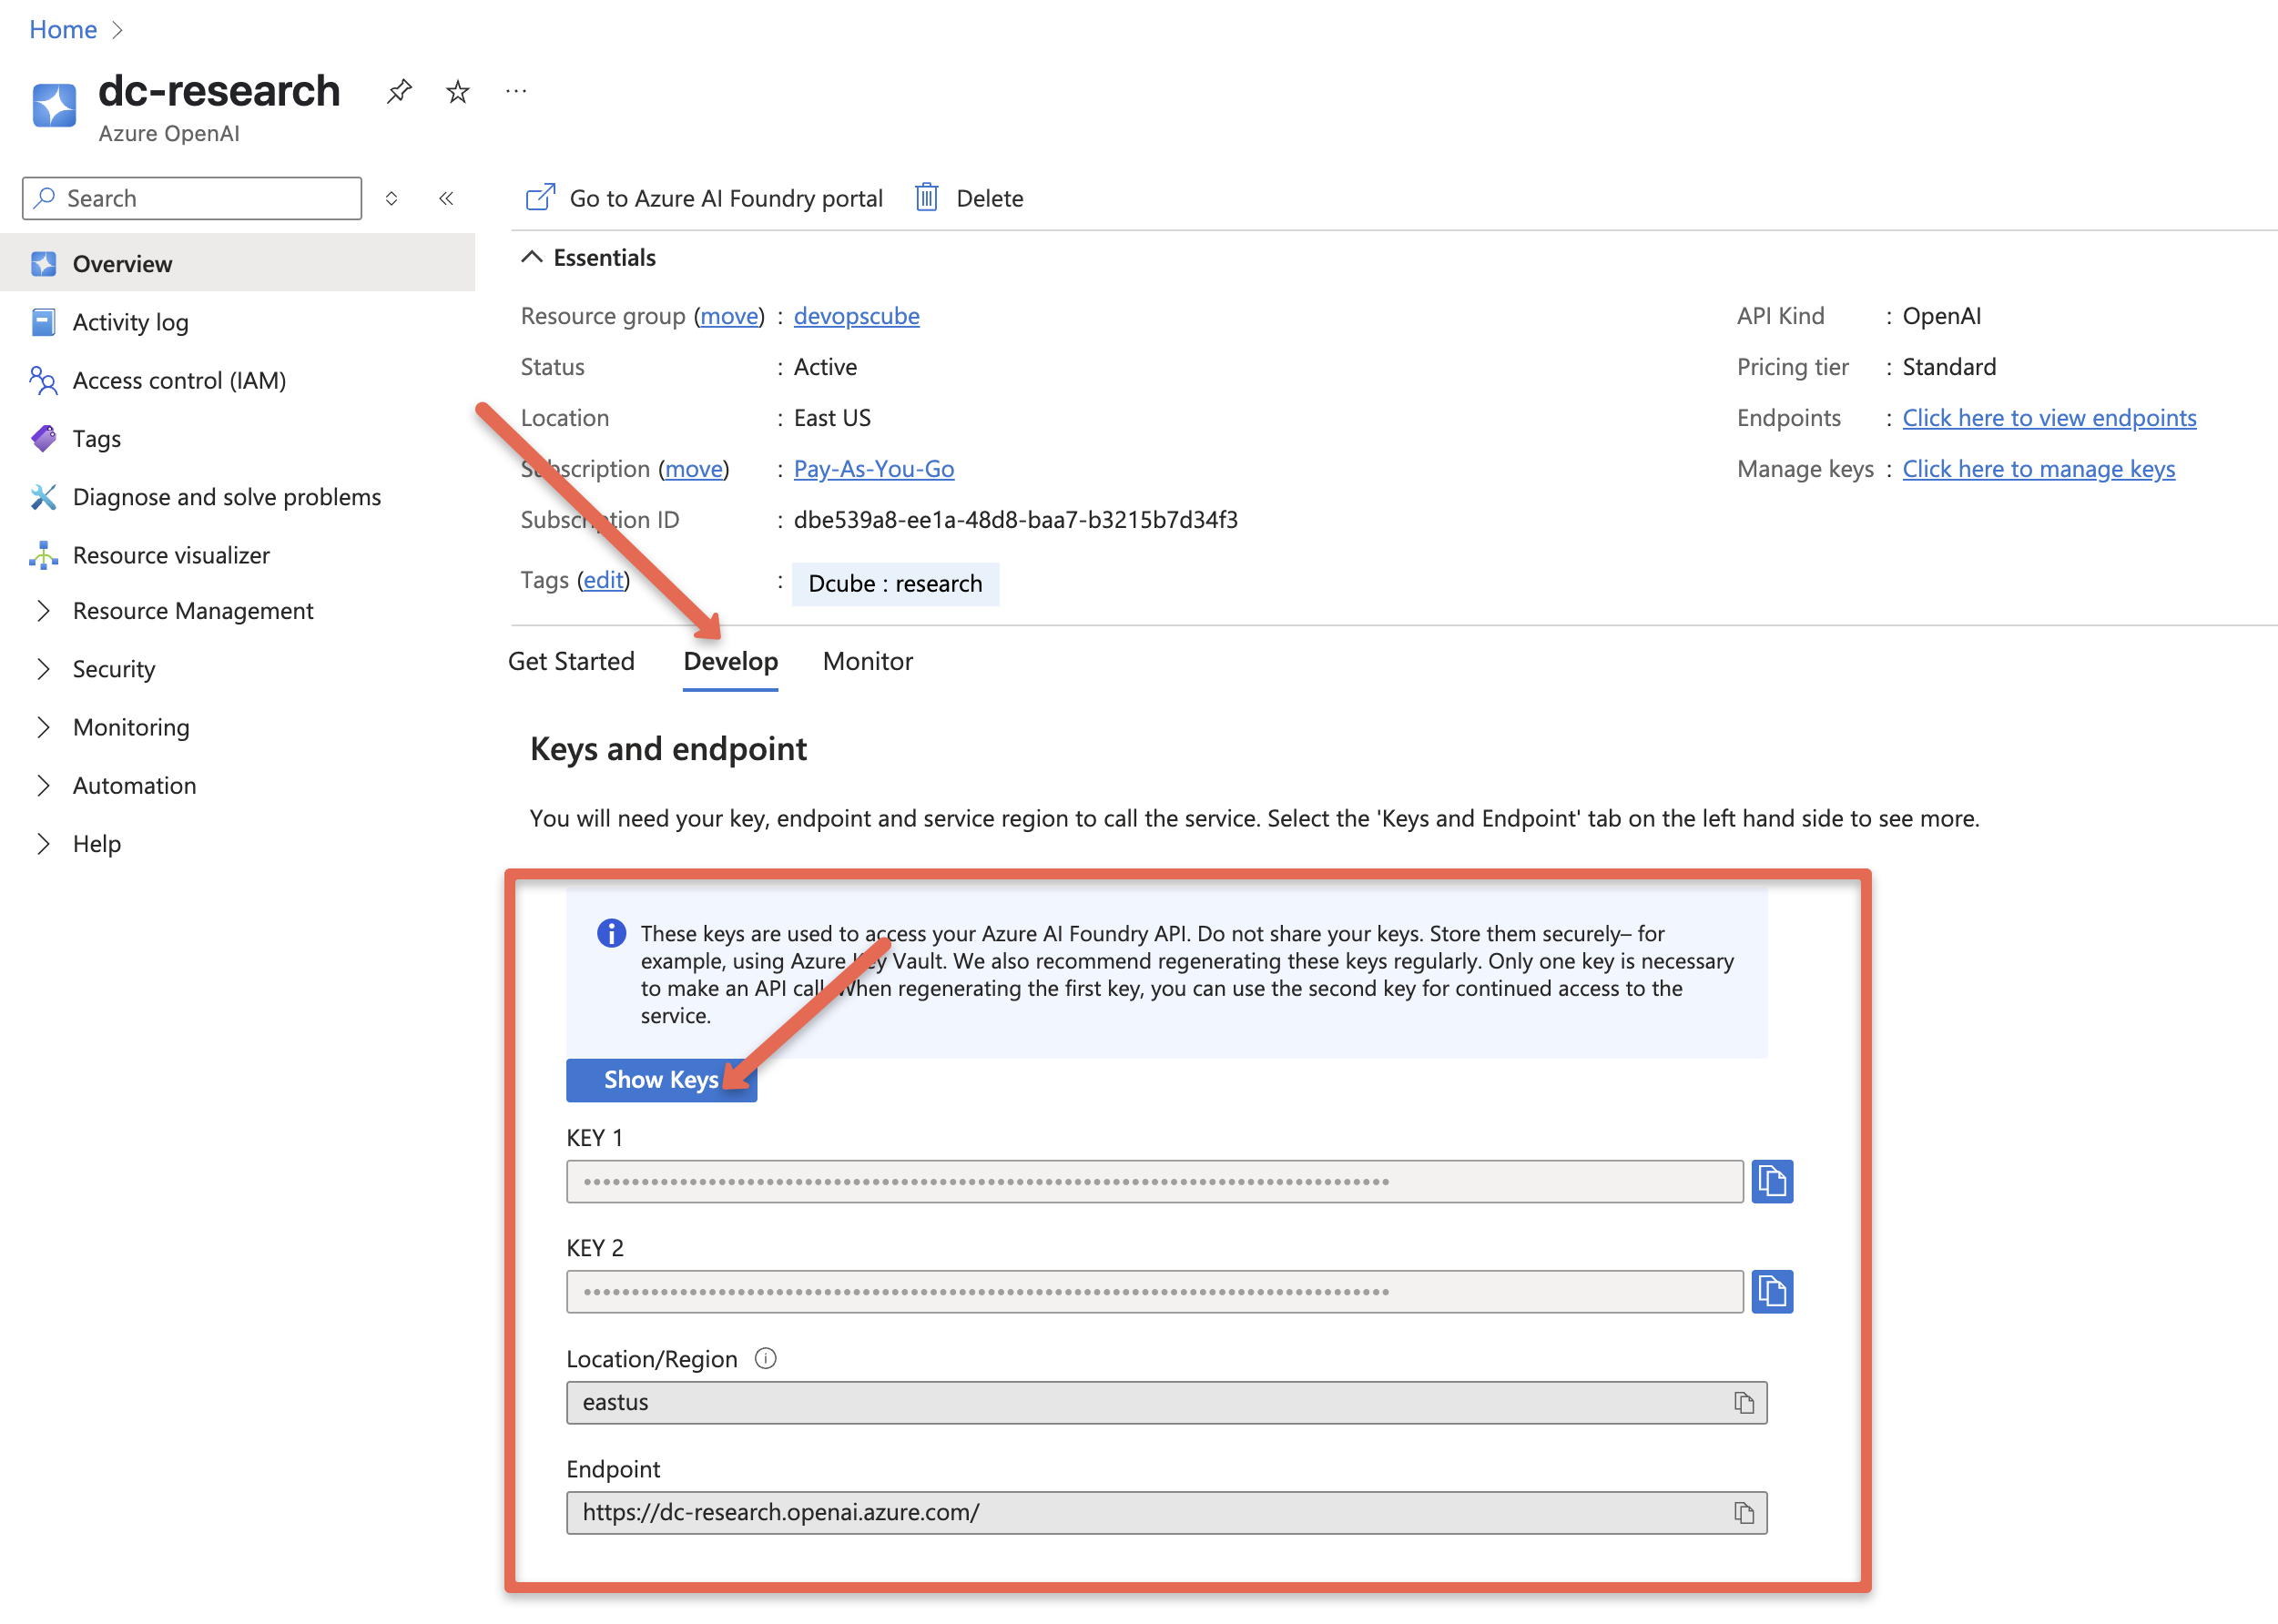
Now that the resource is created, you need to deploy the specific models you want to use with the endpoint.
Deploying a Model
The next step is to deploy a model that we need to use with the created API endpoint.
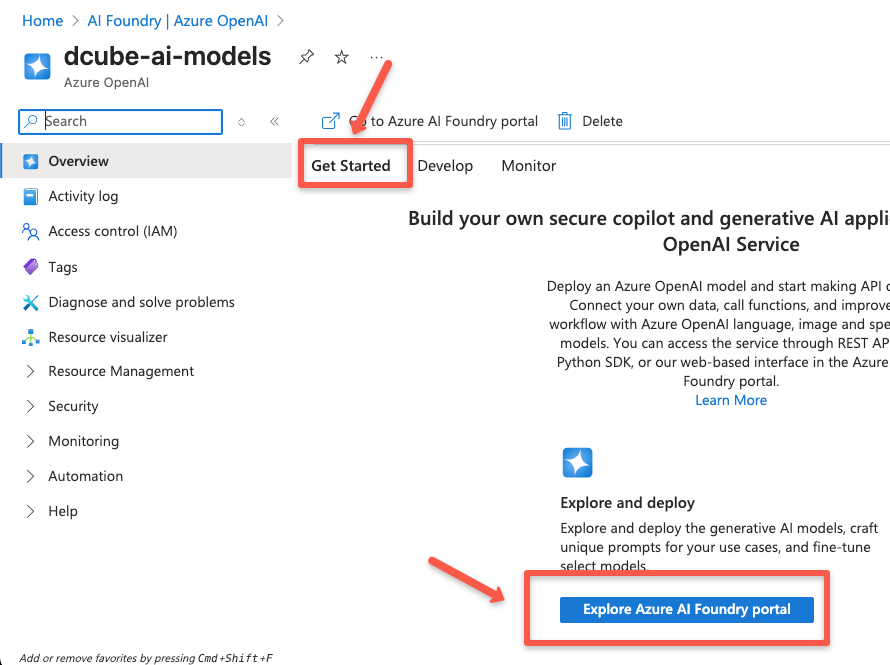
To do this, head over to Azure AI Foundry portal, which is a dedicated page to manage the Azure AI services.
Next, you may be asked to log in and then provide the same email address you used to sign in to the Azure cloud.
Then choose the Deployments option from the left pane.
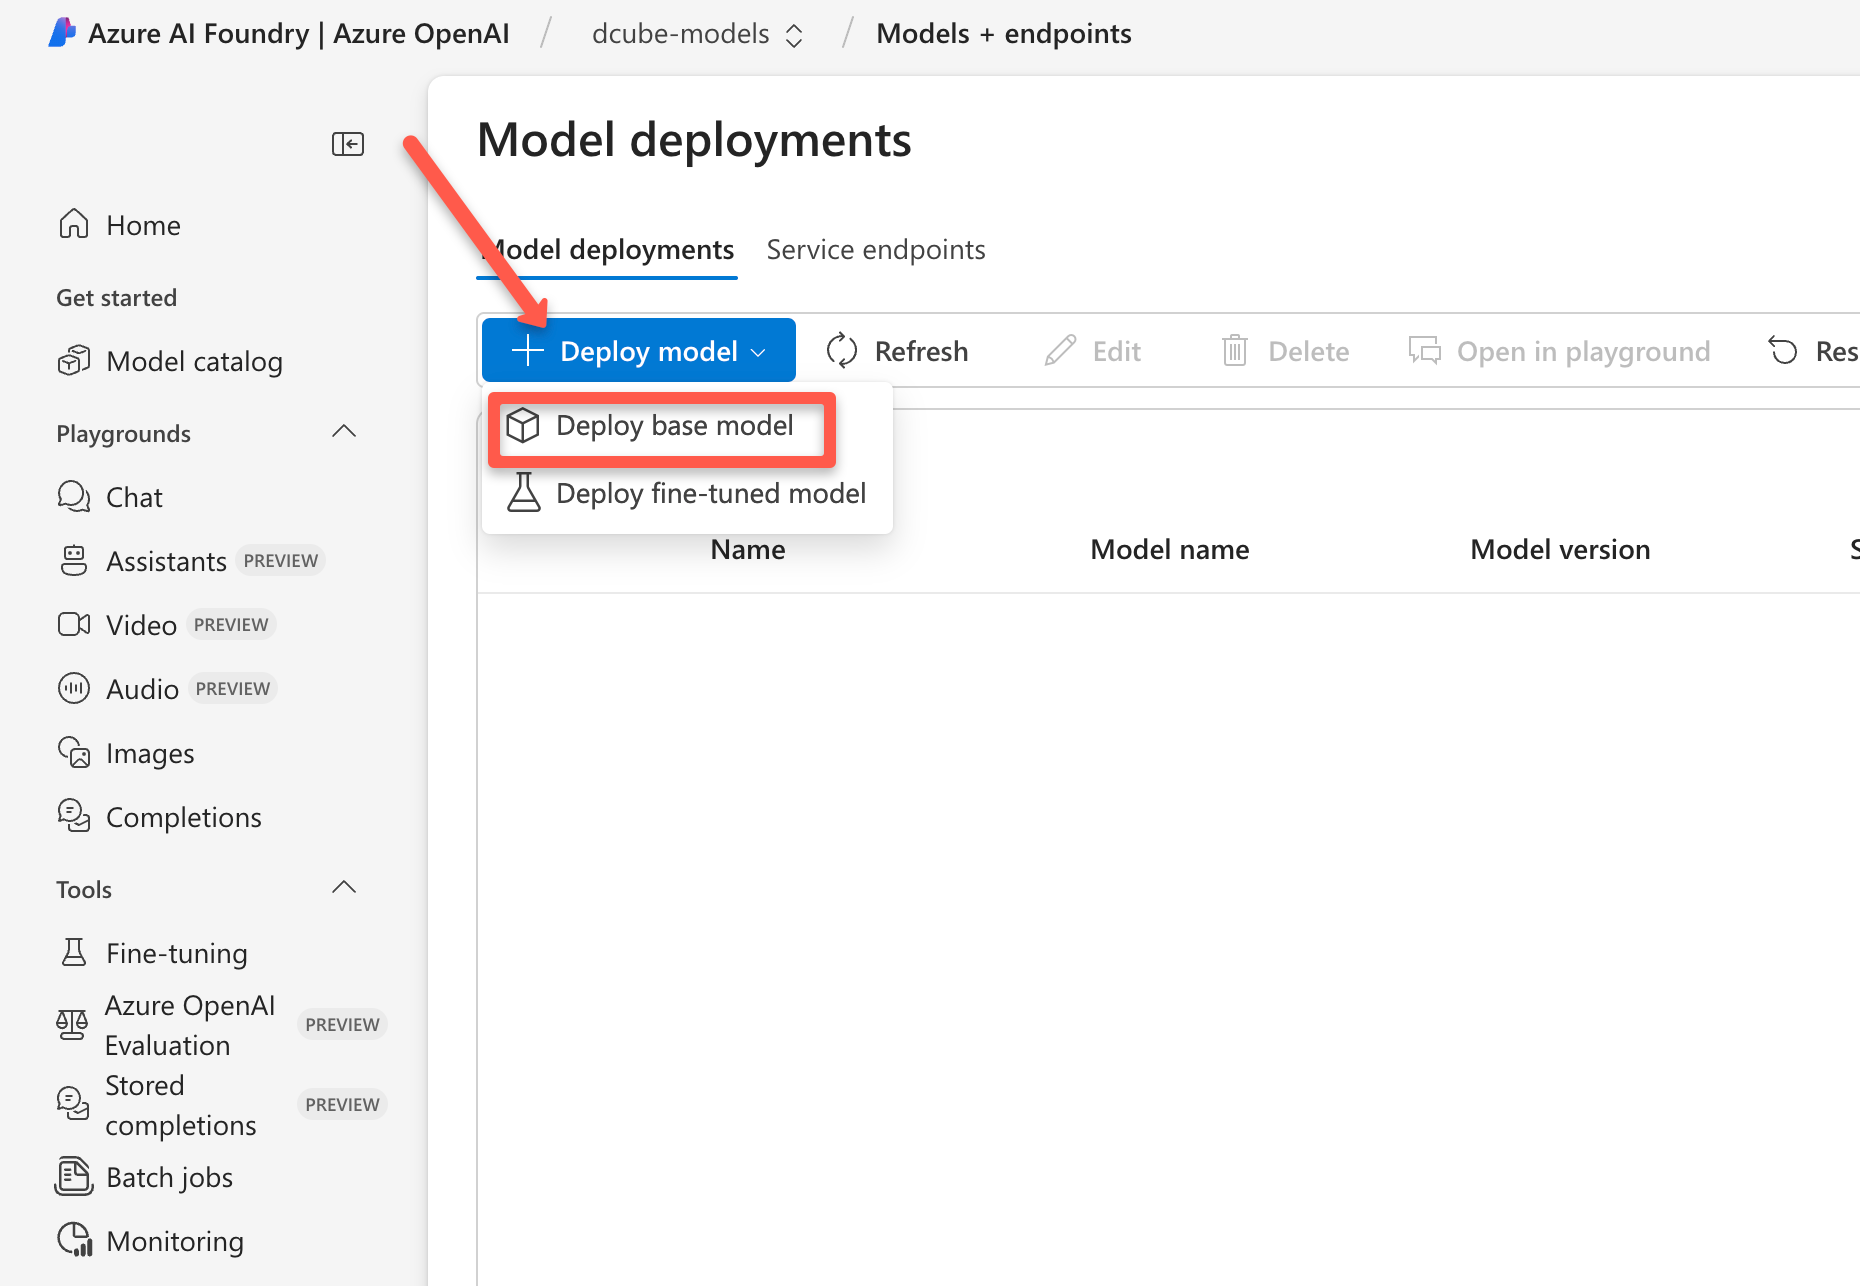
Click Deploy Model option and select the Deploy base model.
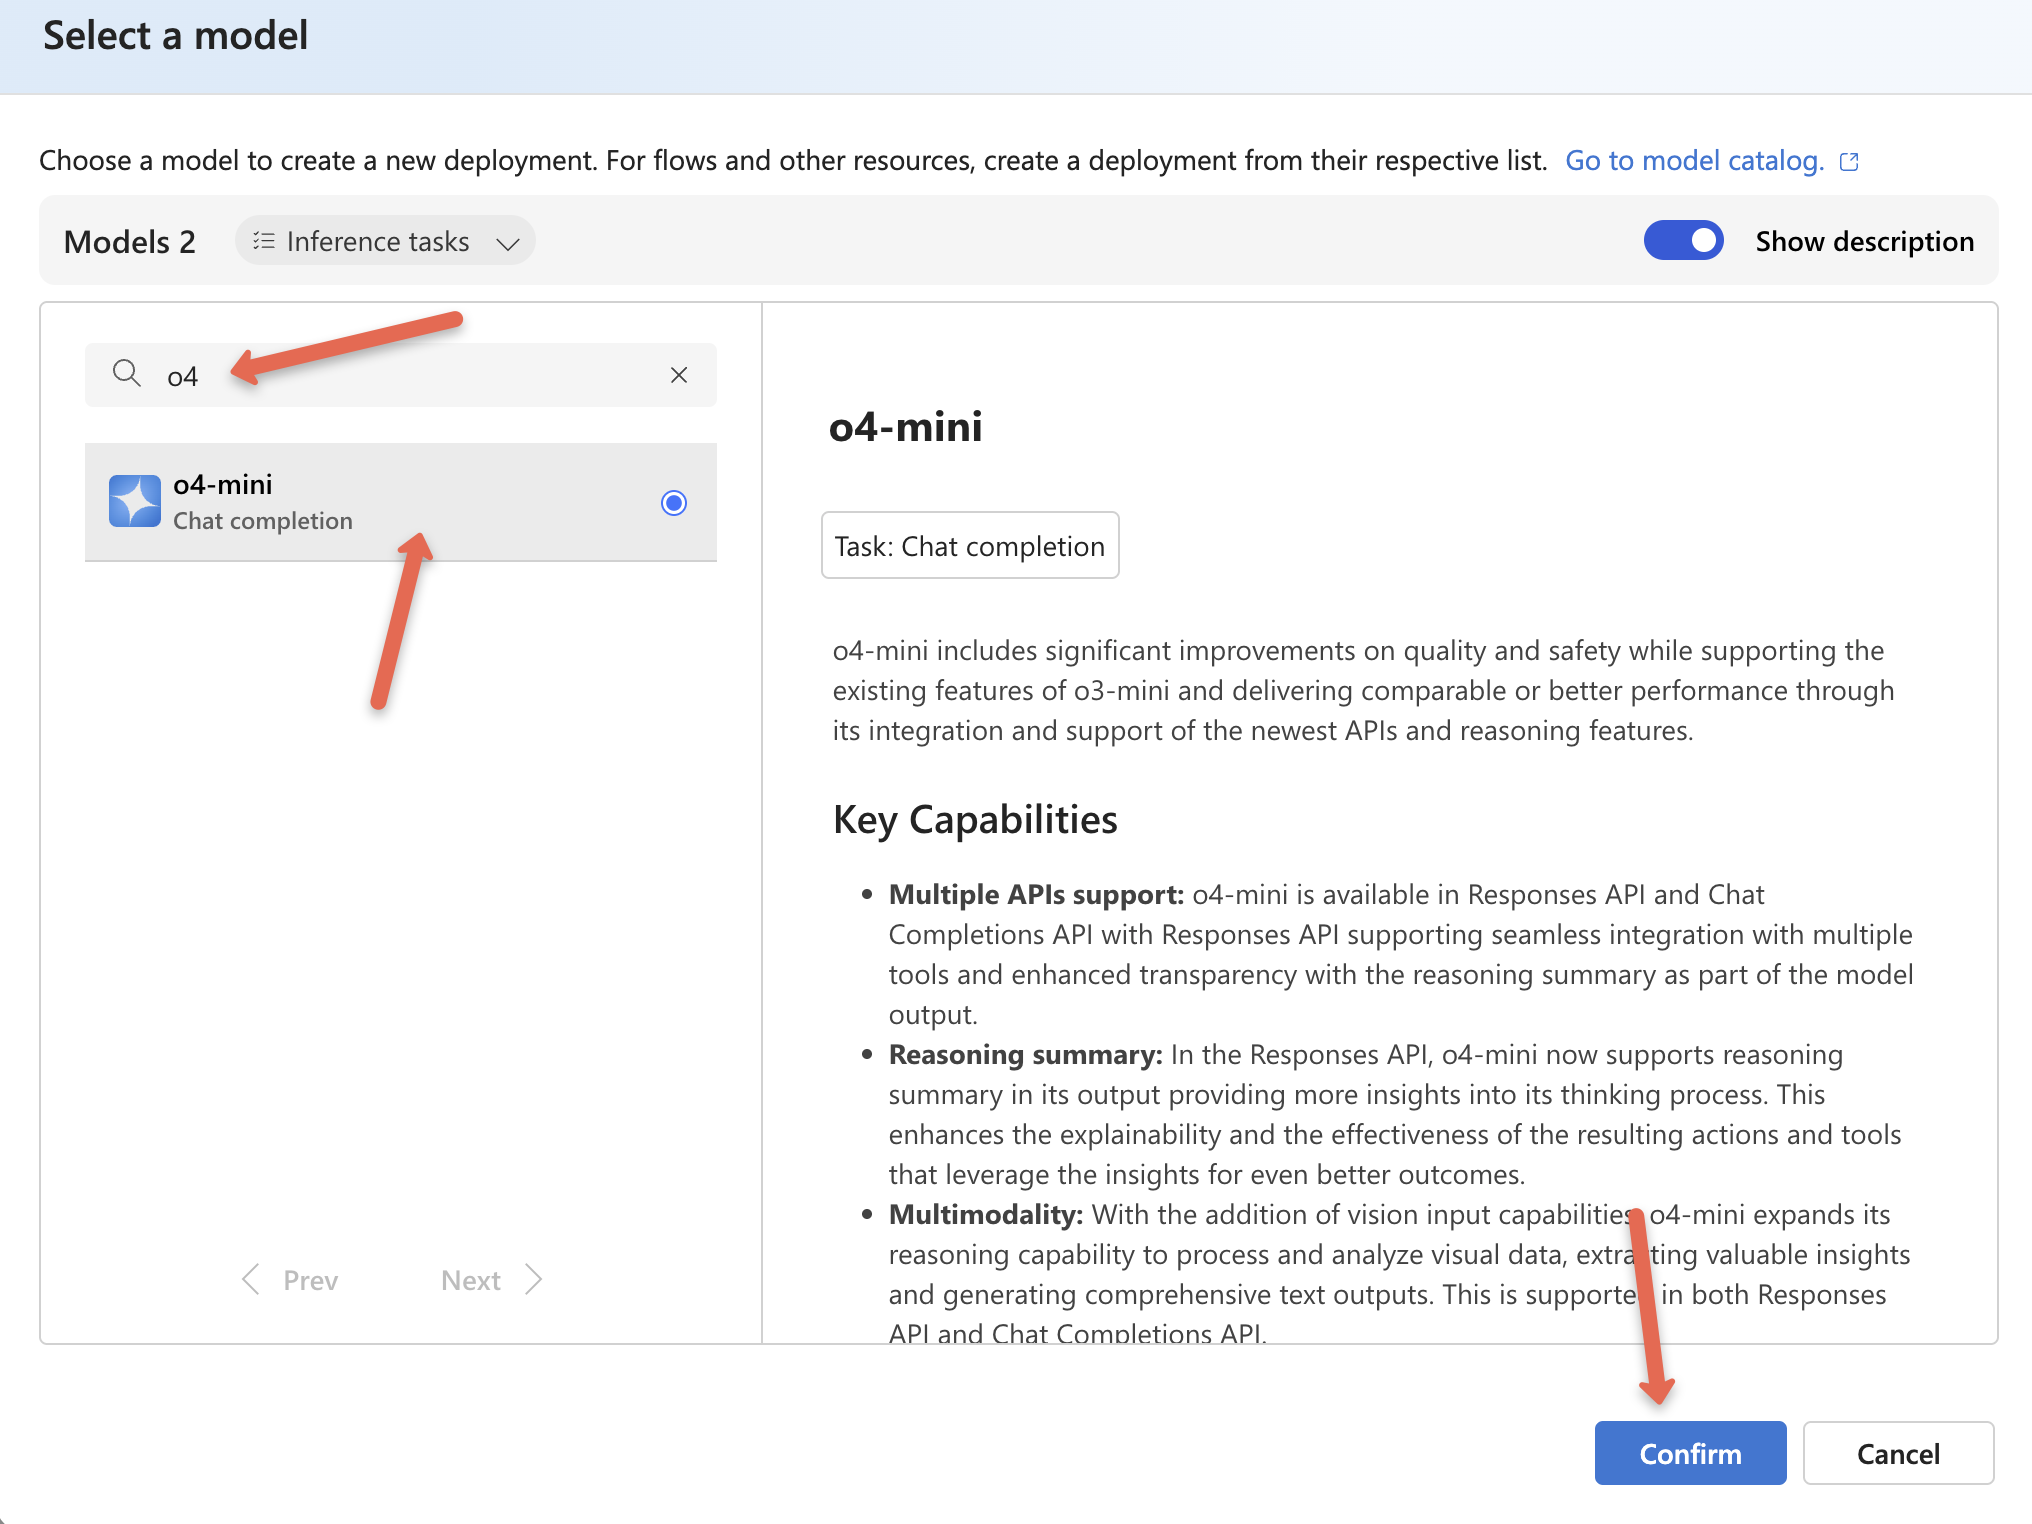
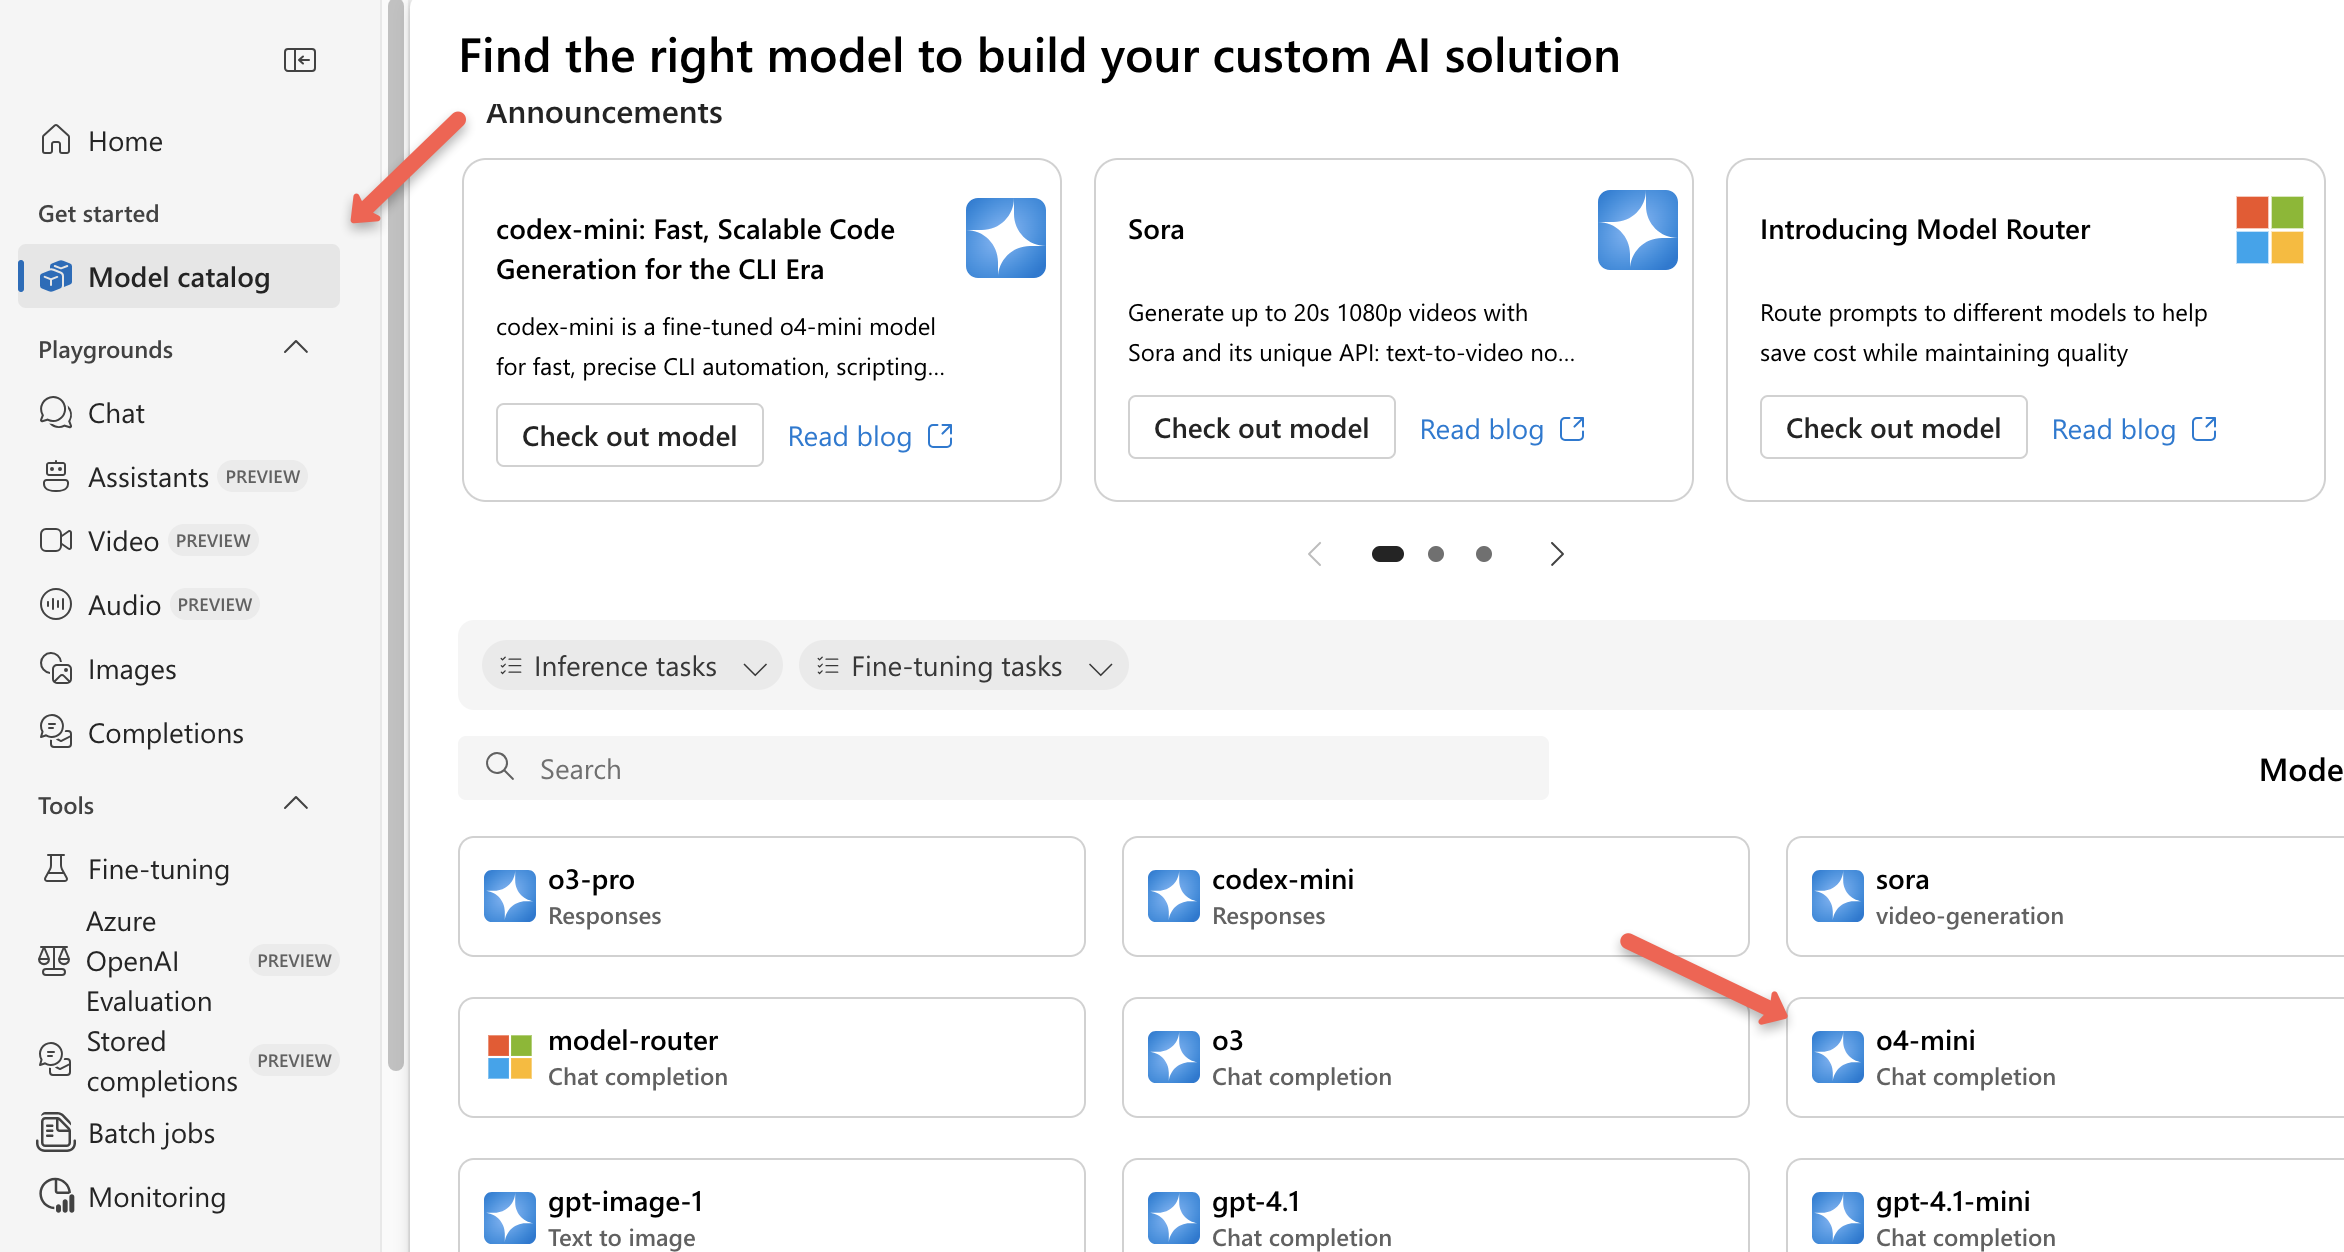
You will be prompted to select the model. You can search for an OpenAI model in the search box as shown below. Here I have selected o4-mini (Great for fast, low-cost tasks. Good balance of speed and intelligence)
After selecting a model, click confirm.
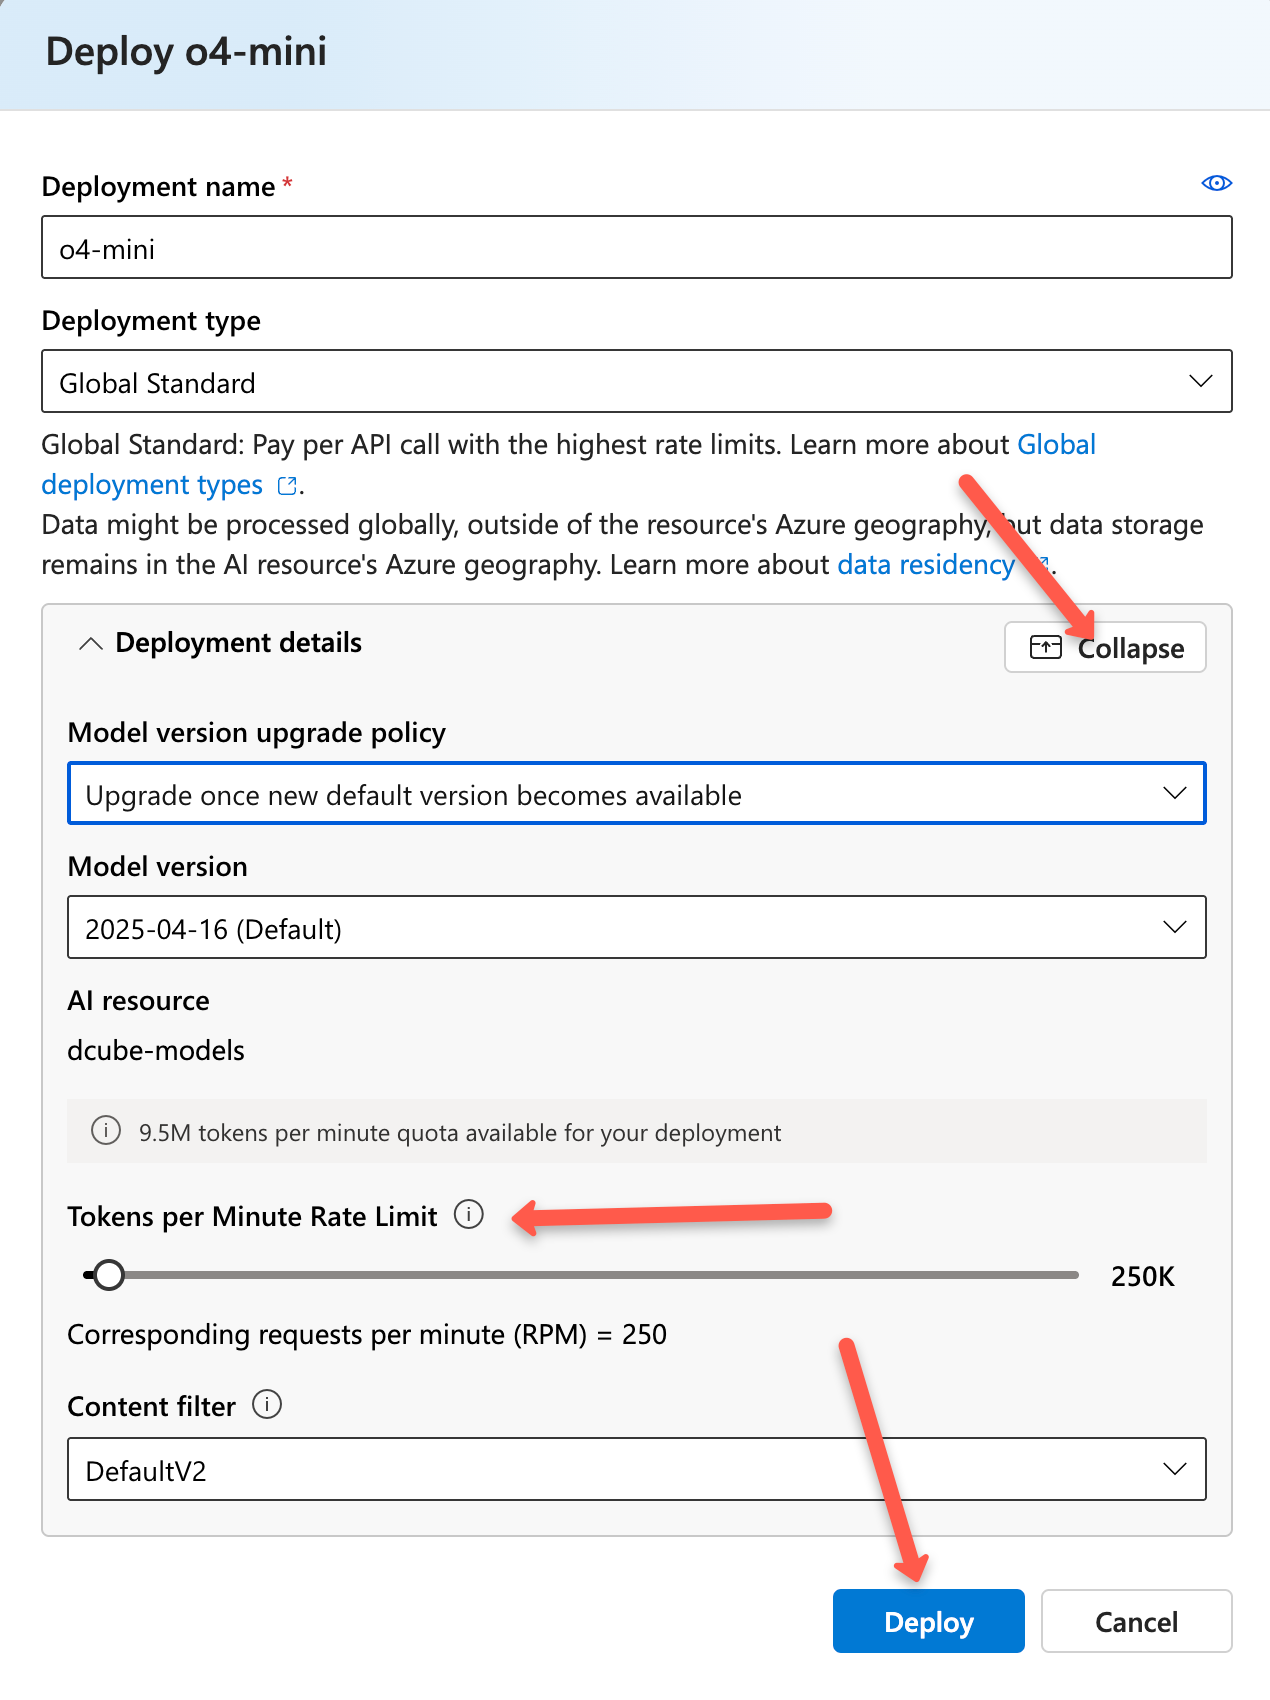
In a few seconds, you'll be prompted to deploy the model. In the popup, you’ll find key deployment settings like deployment type, model version, upgrade policy, token rate limits, and content filters.
The default Deployment type is Global Standard, meaning the model runs on Azure's global infrastructure.
The model version upgrade policy lets you decide when to switch to newer versions, either on release or expiry of the current one. You can also choose a specific model version if needed.
The token-per-minute rate limit controls how many tokens can be processed per minute for both input and output. Content filters help block harmful or inappropriate content in queries and responses.
Now go ahead and deploy it.
Once the deployment is complete, you'll see options to test the model using the playground, API endpoint, and keys. You'll also get code snippets for Python, JavaScript, and other languages, as shown below.
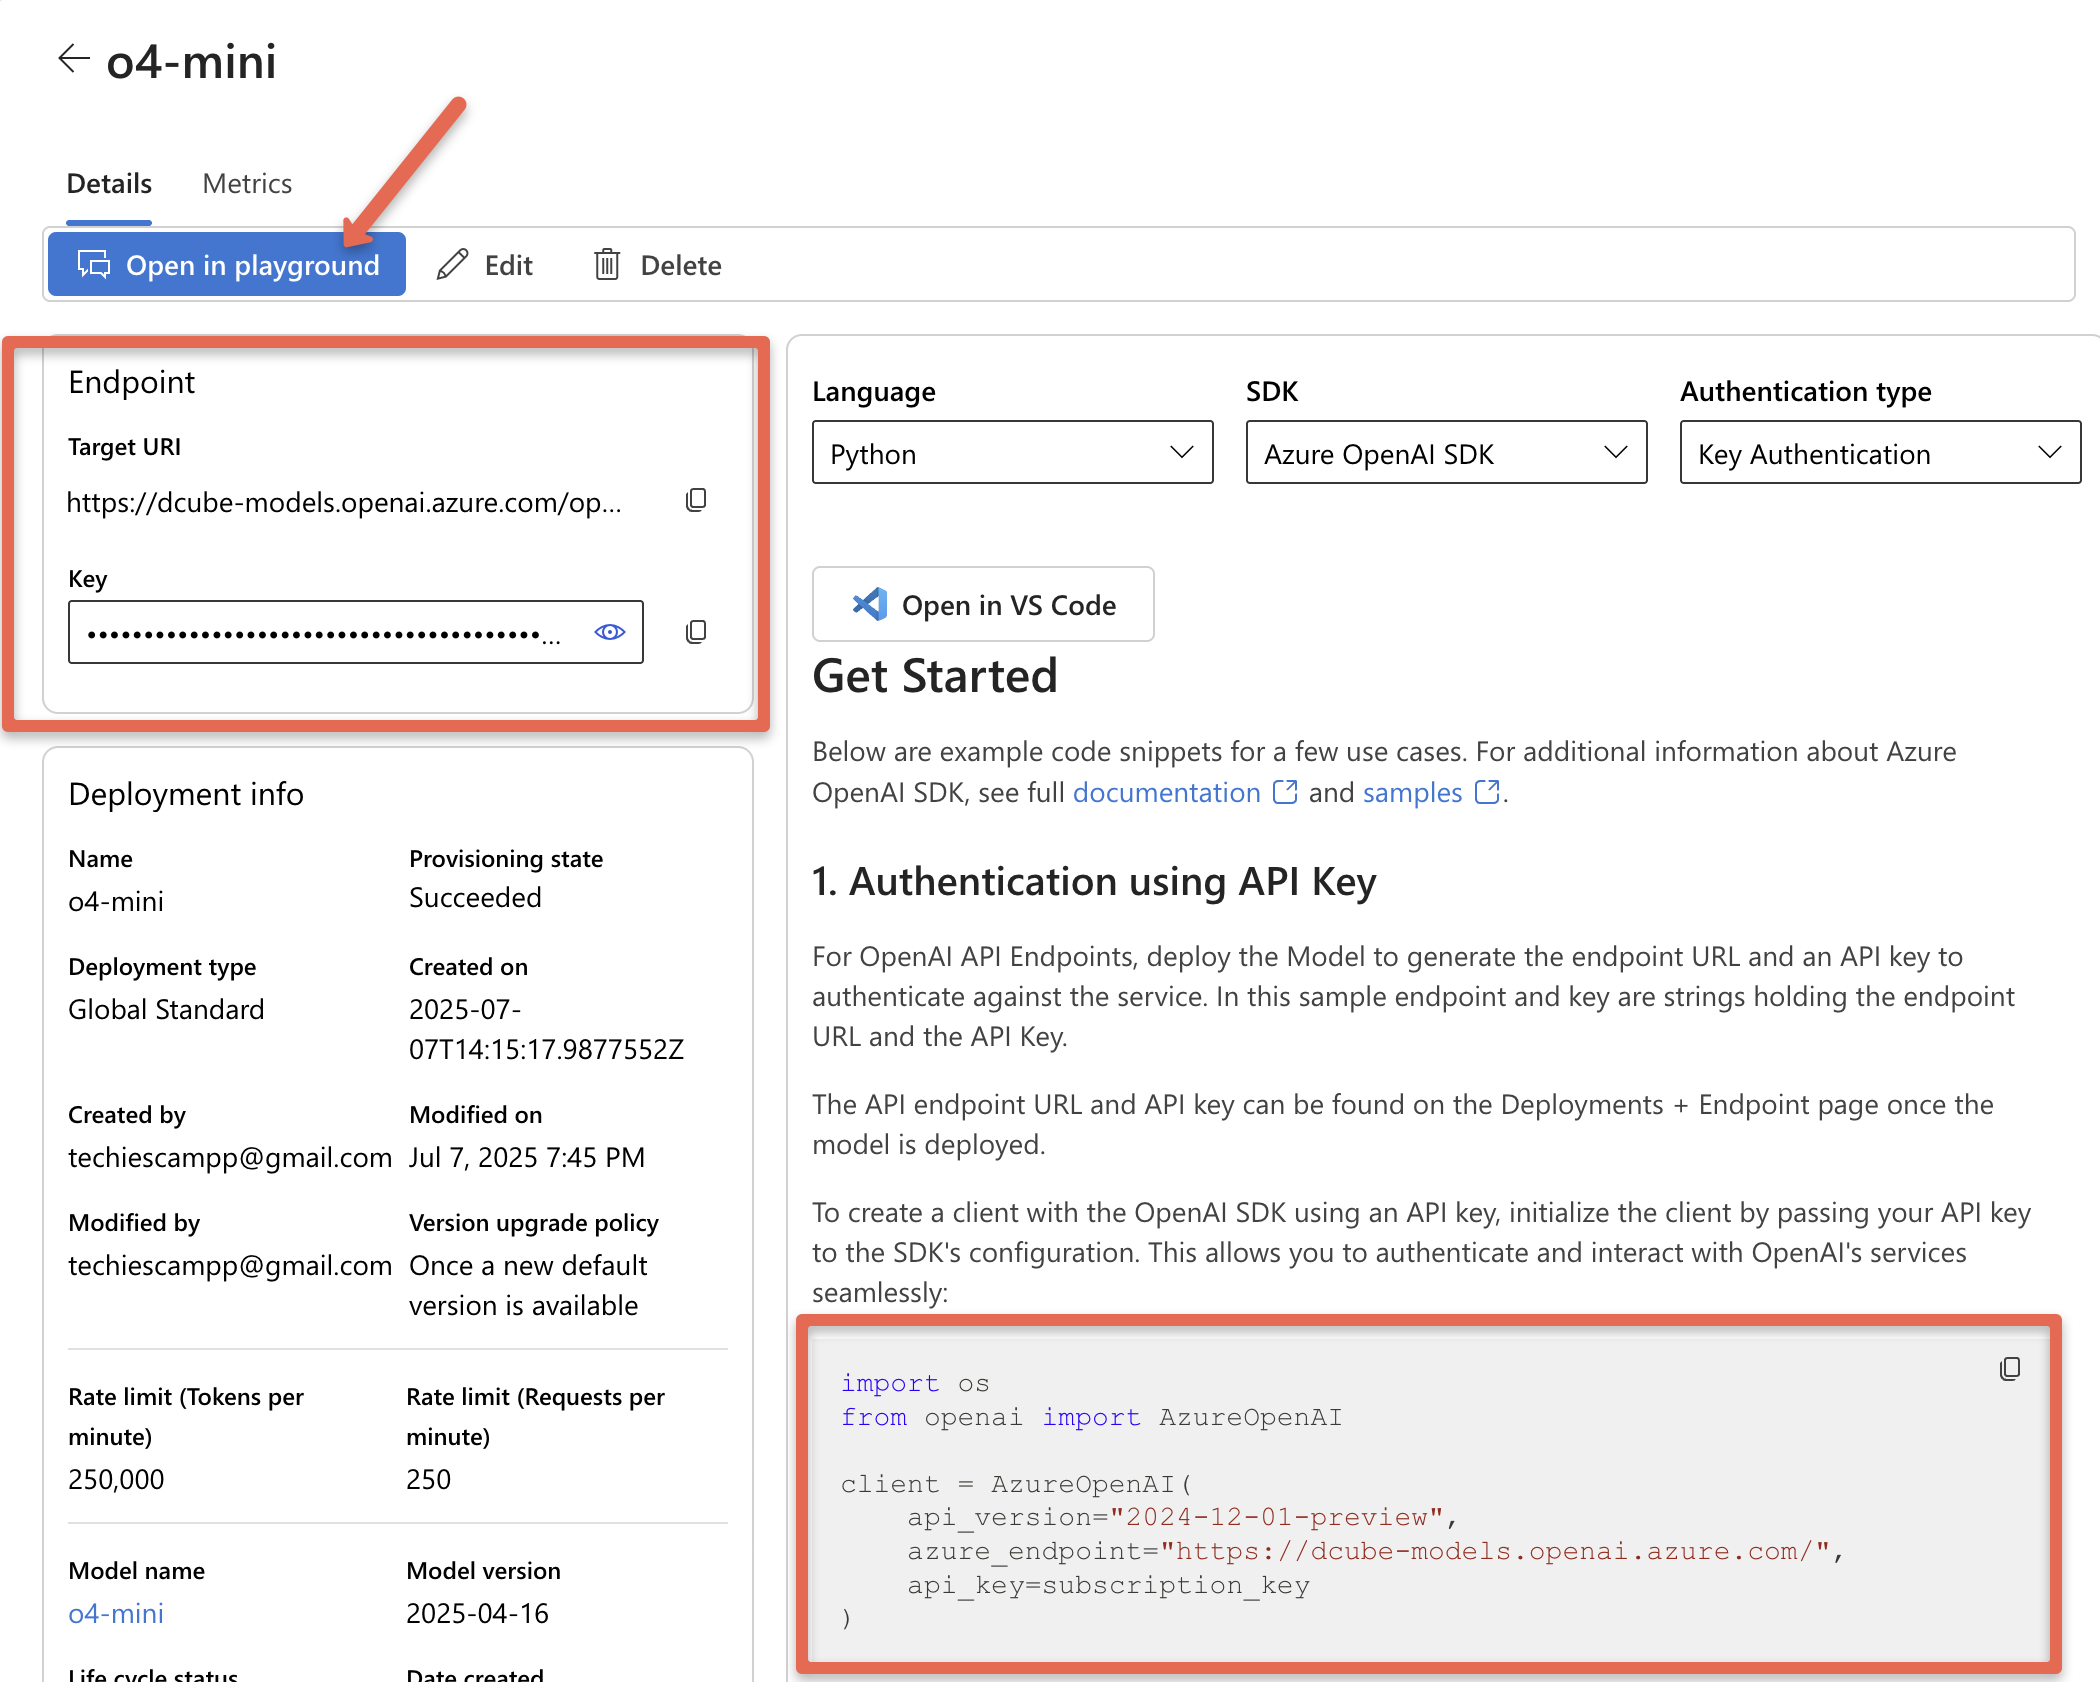
If you open the playground, you can interact with the model directly and adjust parameters like token limits and reasoning depth. It also includes a token counter that tracks API usage, helping you monitor both consumption and costs.

In the same way, you can deploy additional models based on your requirements and access them using their respective API endpoints and tokens.
You can check out all the available models from the model catalogue.
Now that we've validated the model, let's go over how to use the model's API endpoint along with the API token to test it.
How to use the Azure OpenAI APIs?
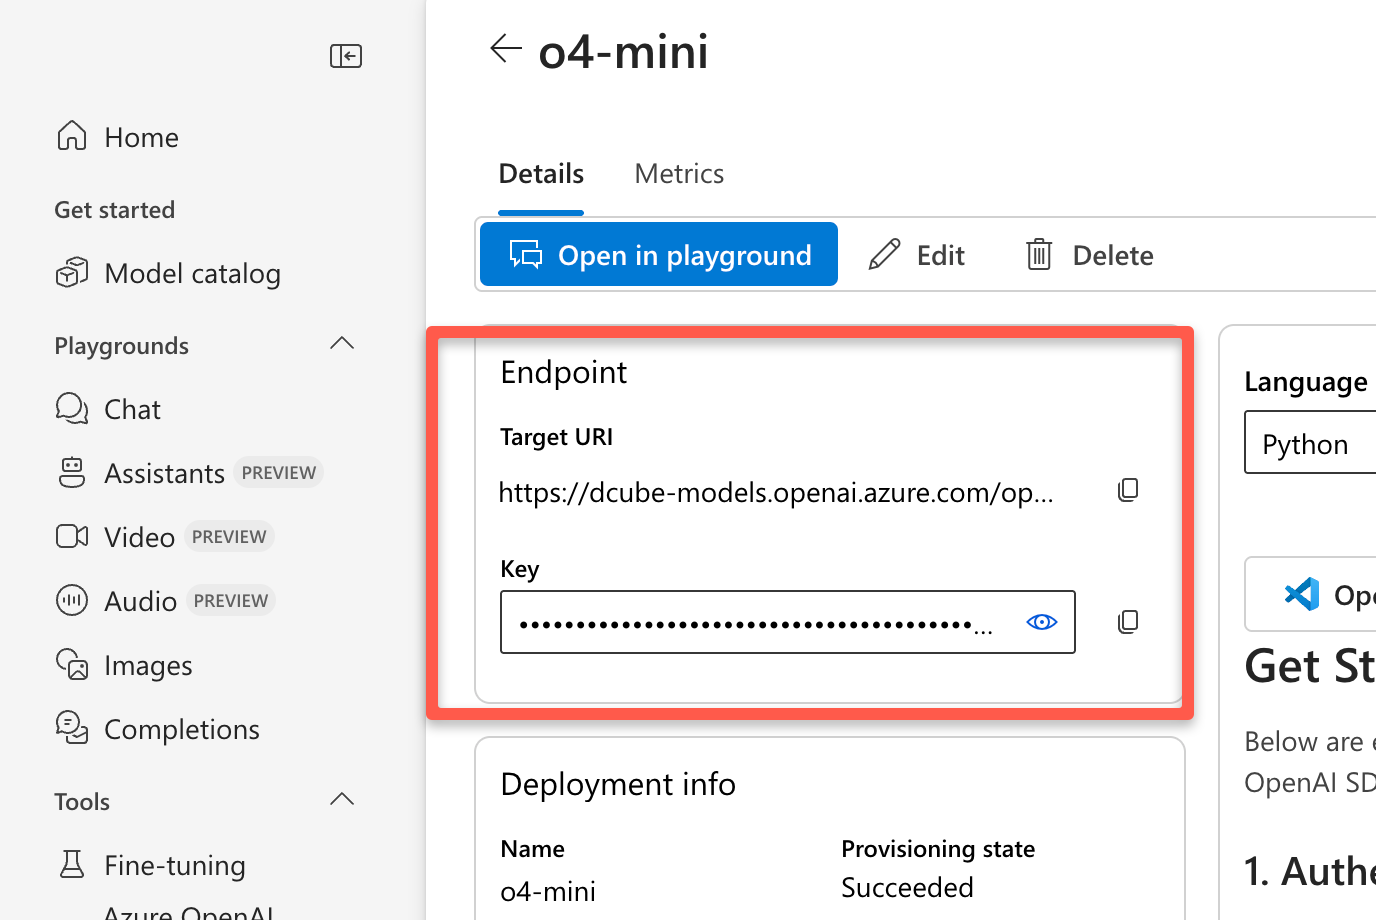
In a real-world scenario, we typically use the model's API endpoints within our applications, like chatbots or Retrieval-Augmented Generation (RAG) systems. As mentioned earlier, under the deployment section, you can find the model's API endpoint and your API key.
API Call Using curl
First lets test the API call using curl command.
To start, store your API key as an environment variable on your local machine:
export AZURE_OPENAI_API_KEY=<YOUR API KEY>To make an API call, you’ll need the following details:
- OpenAI Resource Name (e.g., dcube-models)
- Deployment Name (e.g., o4-mini)
- API Version (e.g., 2024-12-01-preview)
The following CURL command sends a request to Azure OpenAI model deployment to generate a response in a chat format.
curl https://<OPENAI RESOURCE NAME>.openai.azure.com/openai/deployments/<DEPLOYMENT NAME>/chat/completions\?api-version\=<VERSION NAME> \
  -H "Content-Type: application/json" \
  -H "api-key: ${AZURE_OPENAI_API_KEY}" \
  -d '{
        "messages": [
          {"role": "system", "content": "You are a DevOps Engineer."},
          {"role": "user", "content": "Just need the exact command to perform telnet using curl."}
        ],
        "max_completion_tokens": 1000
      }' | jq
"max_completion_tokens": 1000 sets the upper limit on the number of tokens (words/parts of words) the model can use in its response.
You’ll get an output similar to the one below. Look for the content section where the model’s actual response to your prompt will appear. Here’s a trimmed version showing just that part:
.
.
.
      "finish_reason": "stop",
      "index": 0,
      "logprobs": null,
      "message": {
        "annotations": [],
        "content": "You can use curl’s built-in TELNET support. For example, to “telnet” to host 192.168.1.10 on port 23:\n\ncurl -v telnet://192.168.1.10:23\n\nExplanation:  \n- -v             : verbose (shows the negotiation and connection info)  \n- telnet://…    : tells curl to use the TELNET protocol  ",
        "refusal": null,
        "role": "assistant"
.
.
.
API Call Using Python
If you want to test Azure OpenAI API calls programmatically, you can try the Python example below.
I am using the same sample code provided by Azure on the deployment details page.
Create a Requirements file for the Packages
vim requirements.txt
Add the following contents inside the file
openai~=1.60.2
Before installing the packages, create a venv.
python3 -m venv venv
source venv/bin/activate
Install the Packages
pip install -r requirements.txtCreate a Python script to query the OpenAI deployment via API
vim main.pyAdd the following contents. Replace <your-endpoint> with your model endpoint.
import os
from openai import AzureOpenAI

endpoint = "<your-endpoint>"
model_name = "o4-mini"
deployment = "o4-mini"

subscription_key = os.getenv("AZURE_OPENAI_API_KEY")
api_version = "2024-12-01-preview"

client = AzureOpenAI(
    api_version=api_version,
    azure_endpoint=endpoint,
    api_key=subscription_key,
)

response = client.chat.completions.create(
    messages=[
        {
            "role": "system",
            "content": "You are a senior DevOps engineer helping beginners.",
        },
        {
            "role": "user",
            "content": "How do I set up CI/CD using GitHub Actions for a Node.js app?",
        }
    ],
    max_completion_tokens=100000,
    model=deployment
)

print(response.choices[0].message.content)
In the above code we are loading the subscription_key from an environment variable instead of hardcoding it. So you need to export the key using the following. Replace <YOUR-KEY> with your subscription key.
export AZURE_OPENAI_API_KEY=<YOUR-KEY>To run the code, use the following command.
python3 main.pyOn a successful execution you will get an output like the following.
$ python3 main.py

Here’s a complete walk-through for adding CI/CD to your Node.js app with GitHub Actions. We’ll cover:

 1. Prerequisites
 2. Writing basic tests
 3. Creating your workflow file (`.github/workflows/ci-cd.yml`)
 4. Caching `node_modules`
 5. Running lint & tests (CI)
 6. Deploying (CD) – example to Heroku

.
.
.Monitoring Token Usage
One of the best ways to optimize the Azure OpenAI usage is to monitor the resource.
There is a dedicated monitoring page to track the token usage and the performance of the model deployment.
To get started, navigate to the Monitoring section and select the deployment to see the graph based on the metrics.
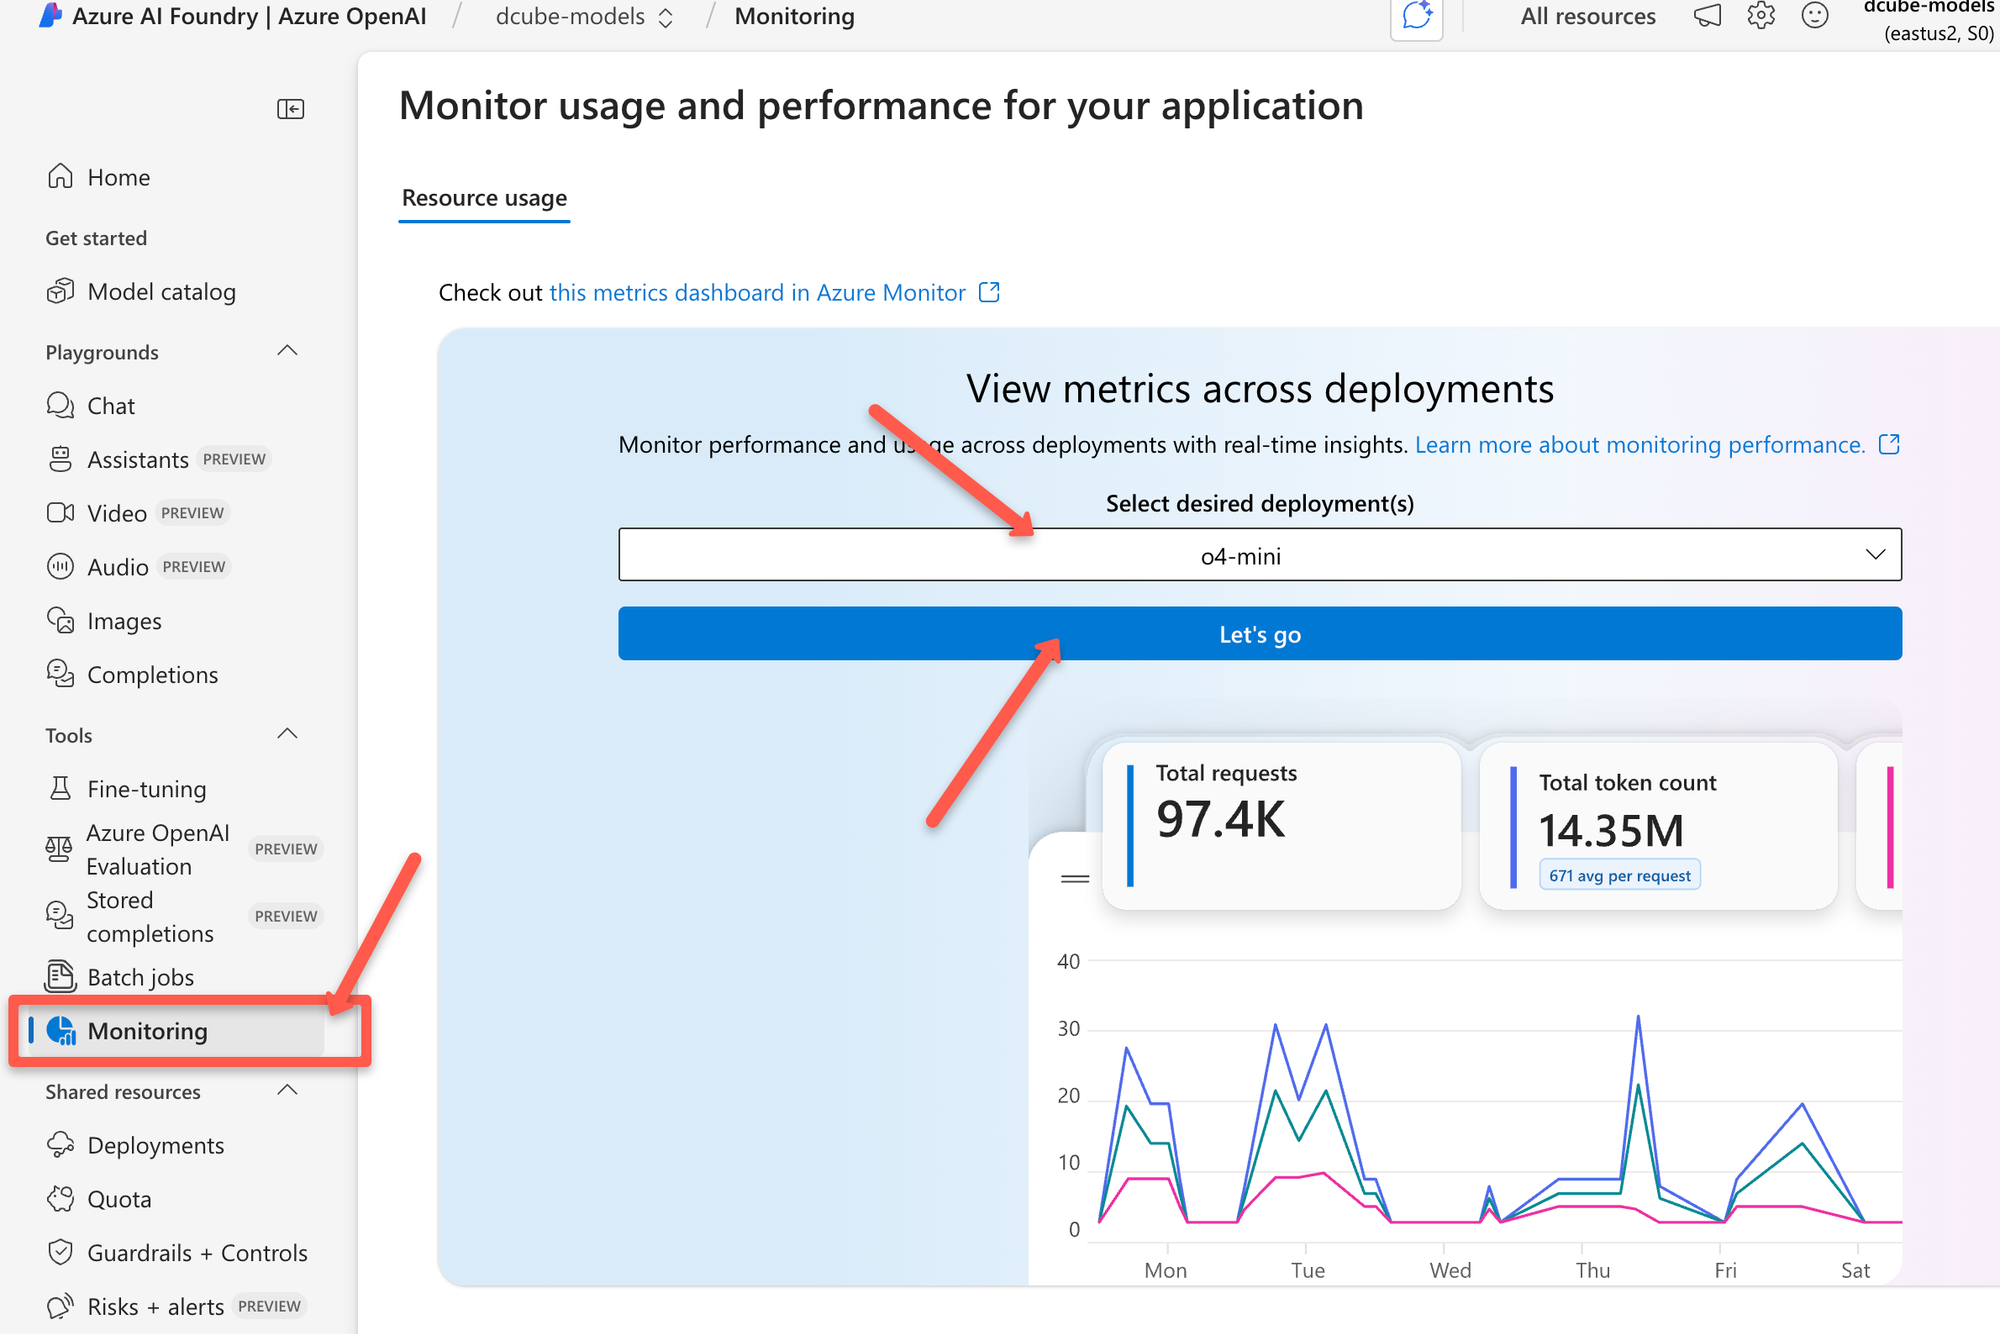
Now, if you select the model deployment, it’ll show the total number of requests and how many tokens have been used.
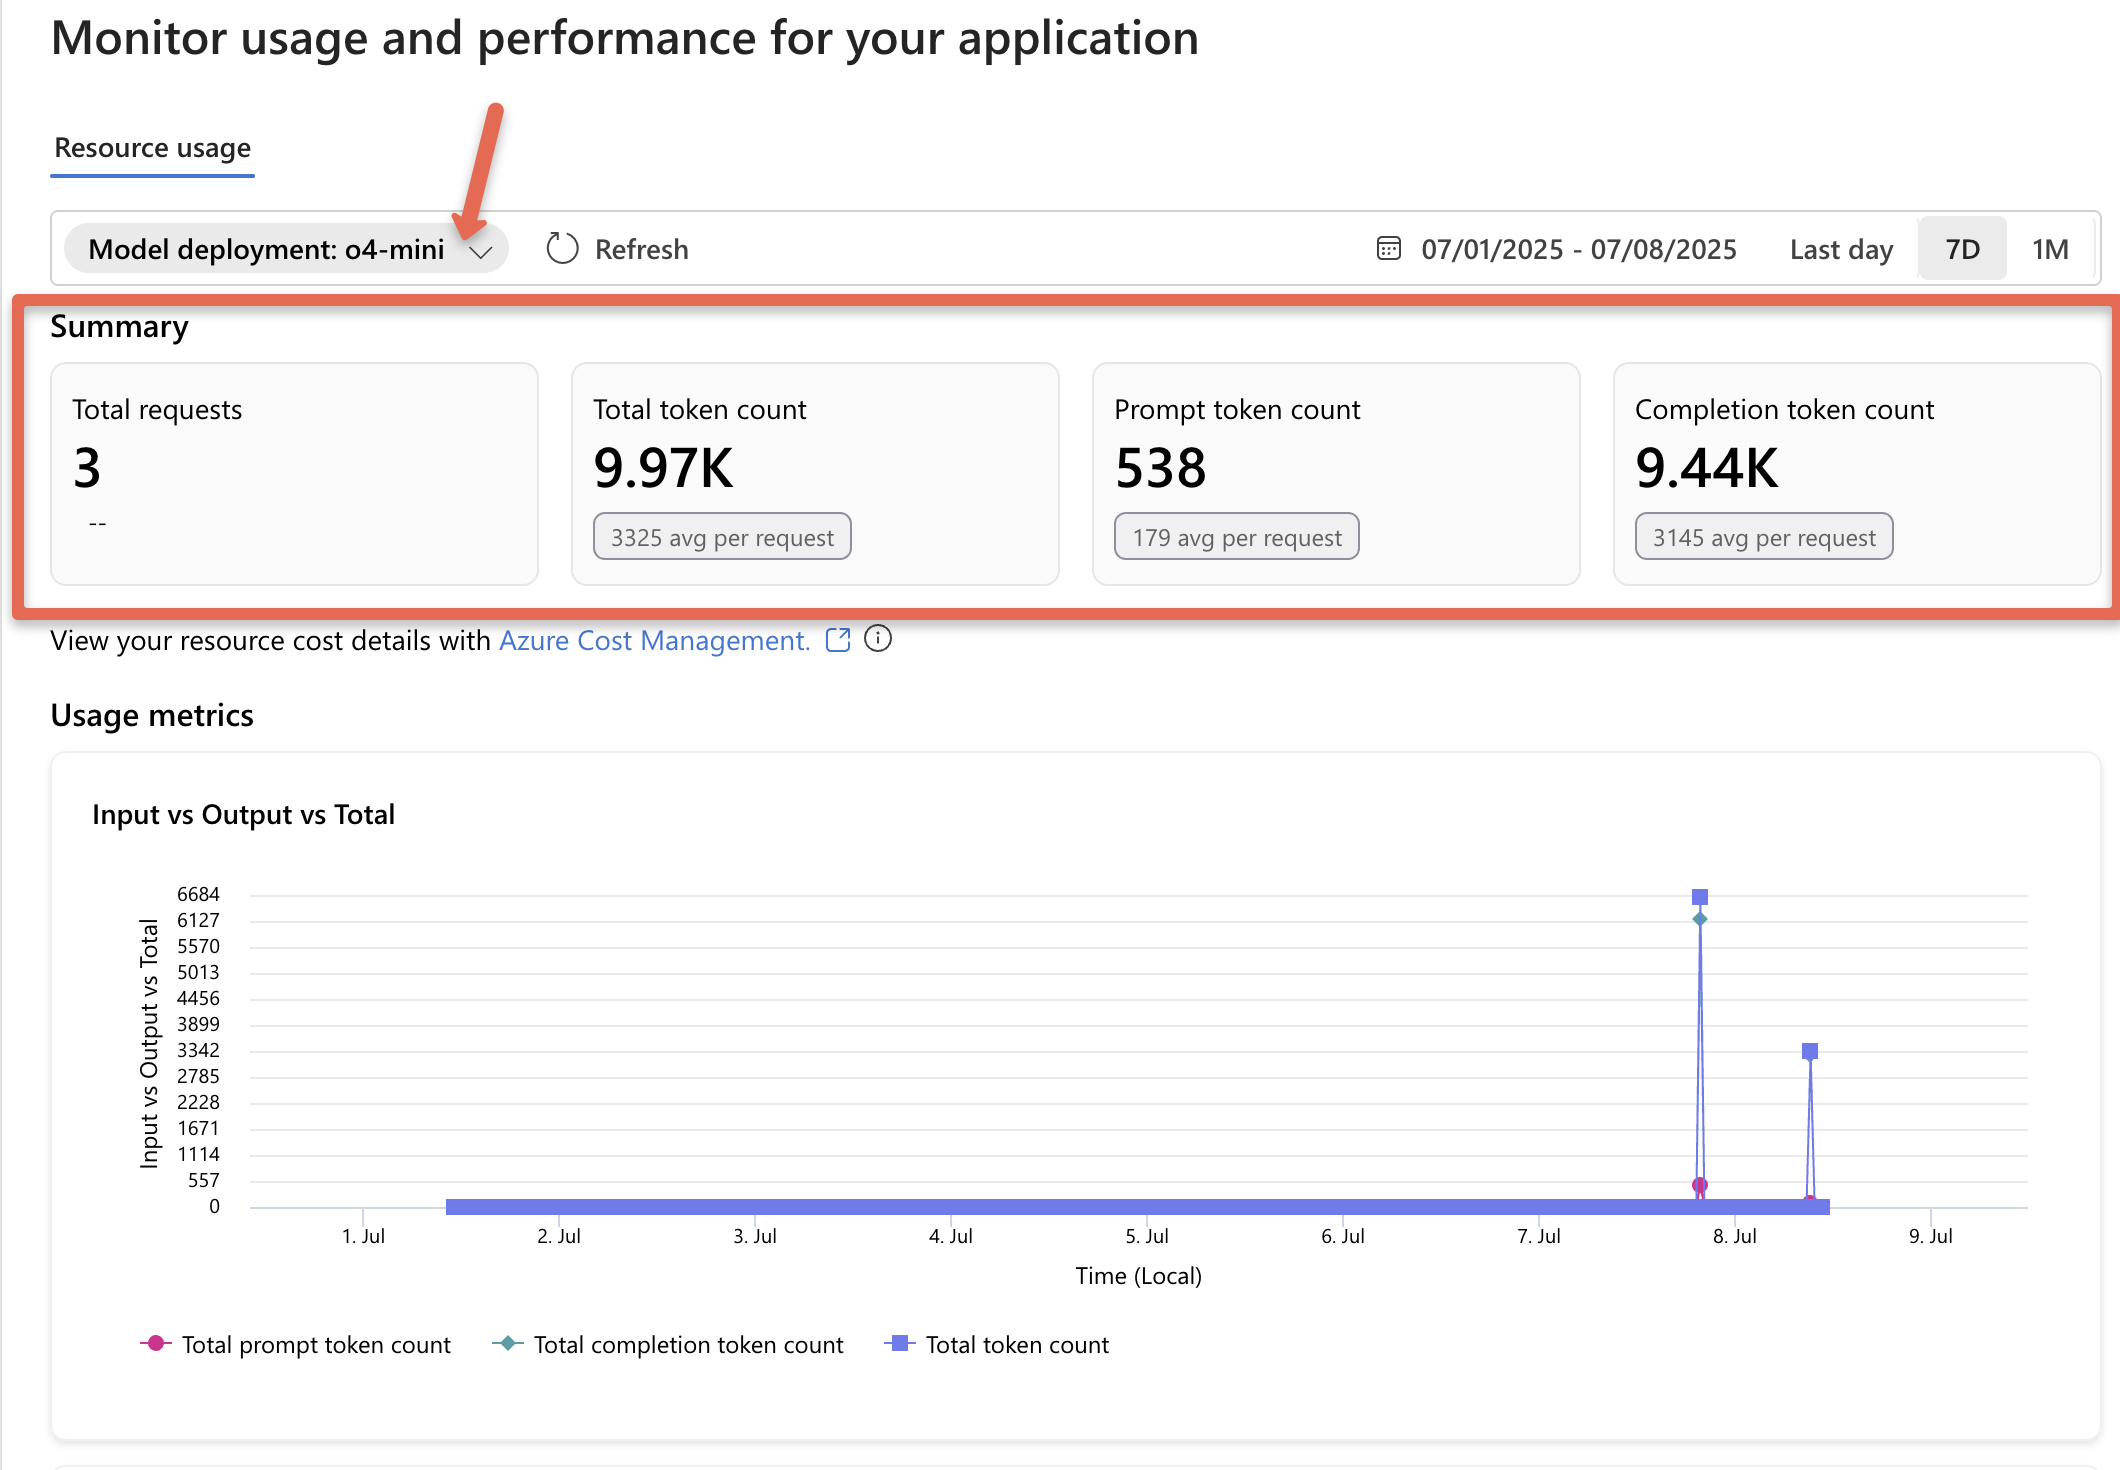
In the screenshot above, you’ll see the following token details.
- Prompt token count: This is the number of tokens in the text you send to the model.
- Completion token count: These are the tokens in the model’s response.
- Total token count: This is just the sum of prompt and completion tokens.
Tokens are the basic units that language models use to process text. They represent pieces of words, whole words, or even parts of words. The following image illustrates how text gets broken down into tokens by language models.
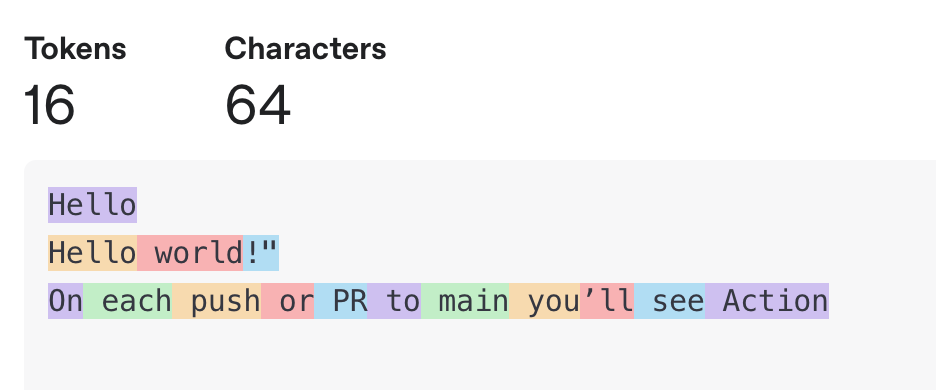
Checkout OpenAI Tokenizer to know more.
Configuring Security and Compliance
Protecting data in enterprise environments is very important, and the service must follow all required rules and regulations.
By default, Azure OpenAI comes with a built-in content filter, but you can customize it using Guardrails + Controls to better fit your specific needs.
To get started, navigate to the Guardrails + Controls for the security configurations.

Go to the Try it out section to see the available content filtering for text and image, though we can customize the filtering as well.
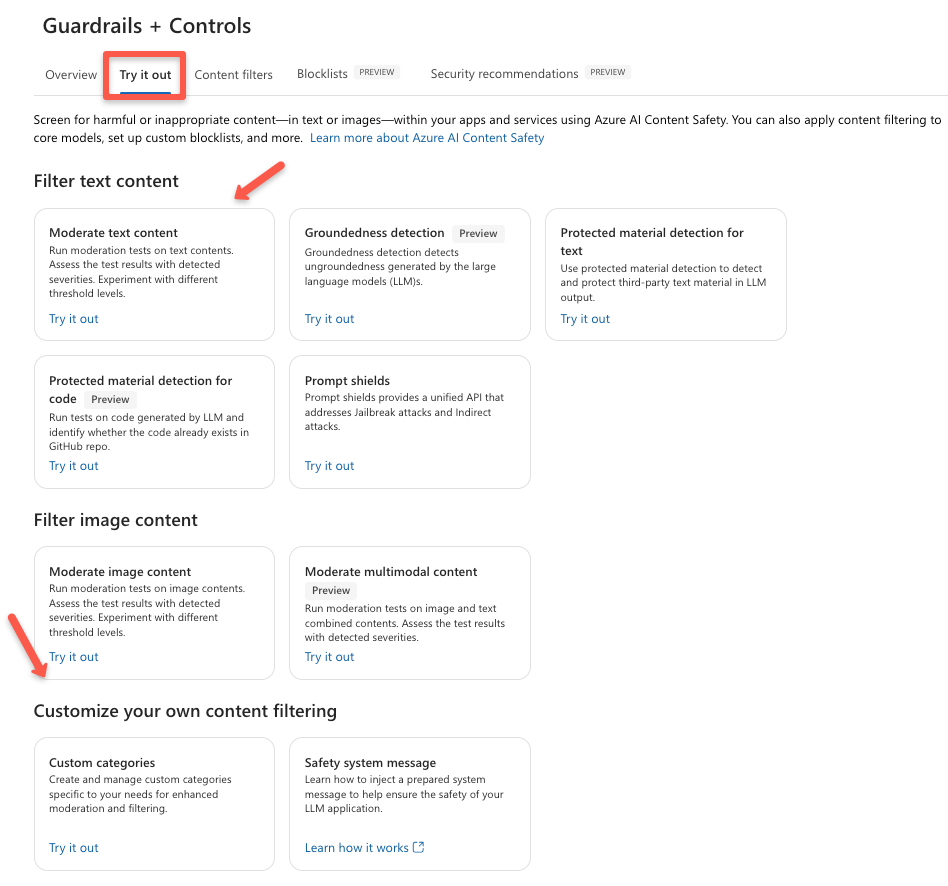
We can even set the level of the content filtering to low to high based on our use case.
Azure OpenAI Pricing
You can navigate to the Model catalog , and select the model to see the complete details of that model.
Then from details, click the See direct from Azure pricing
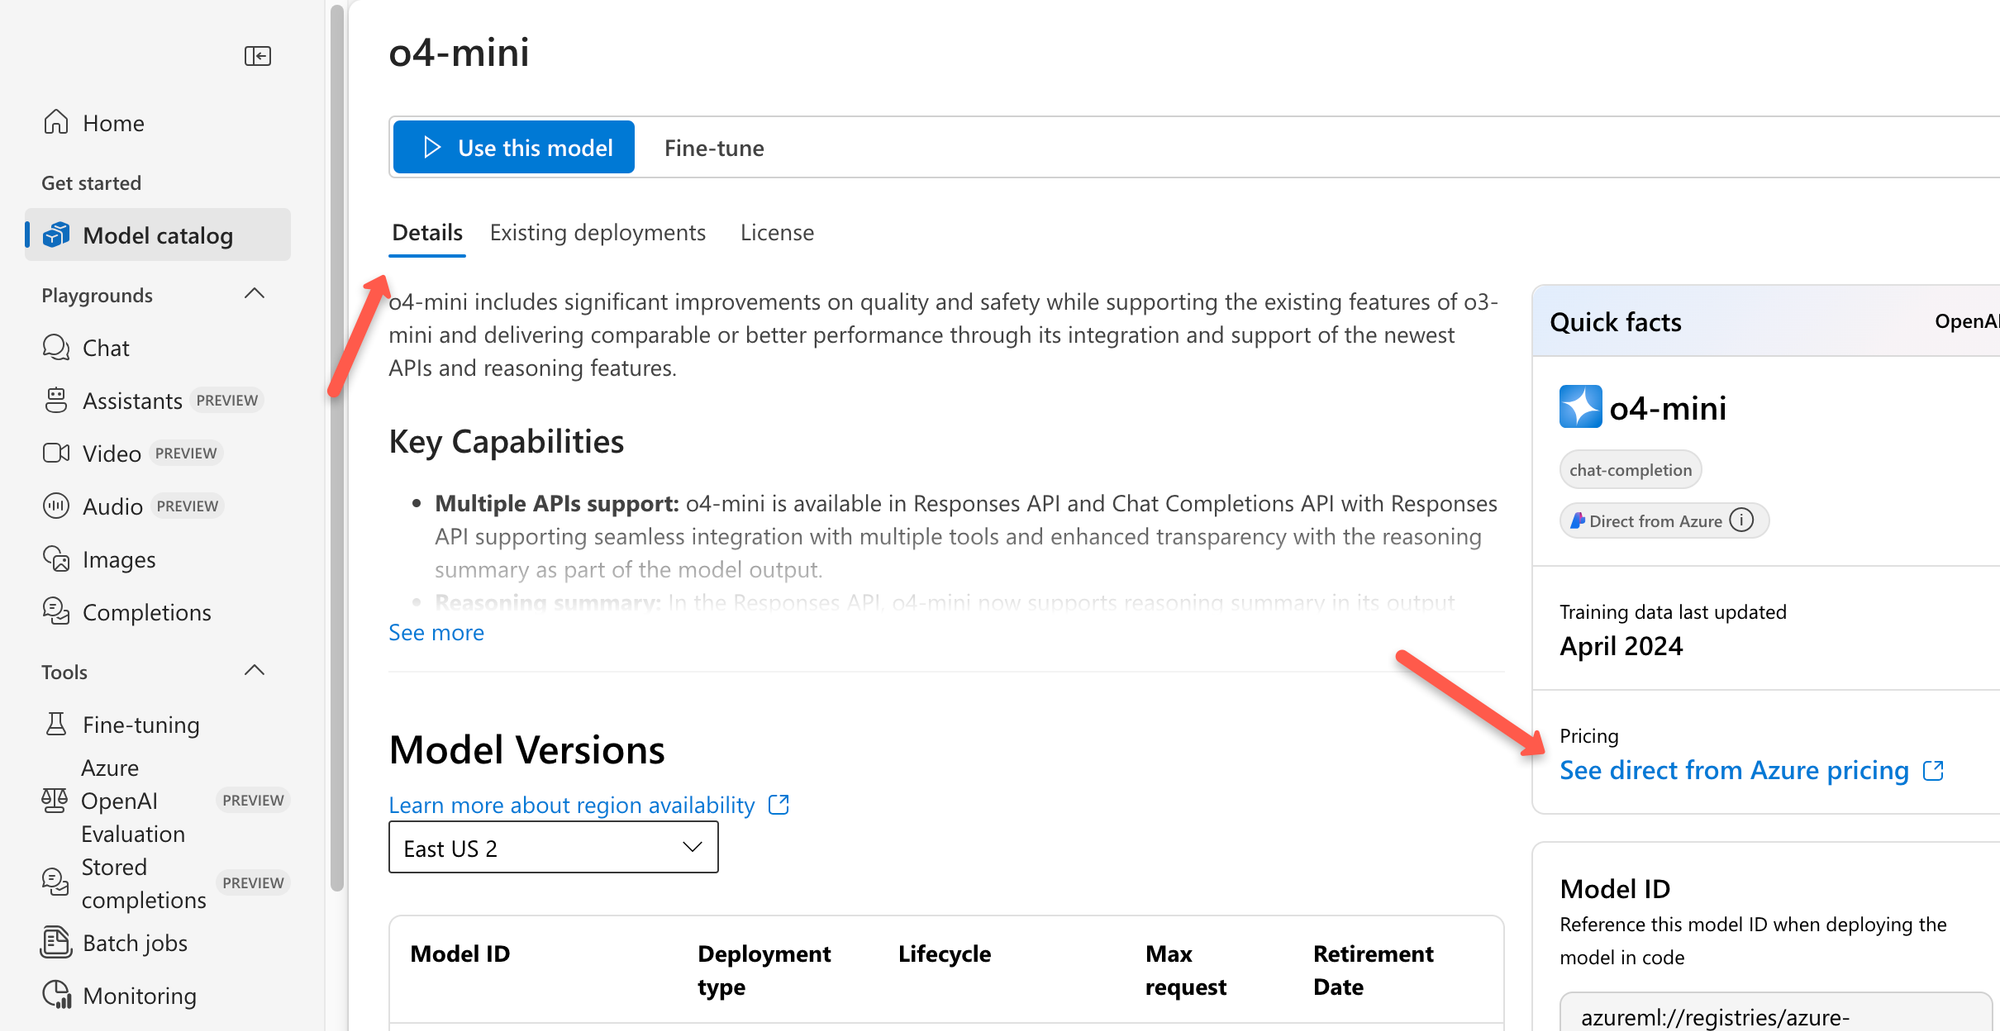
On the next page, you will get the link to open the Azure OpenAI Service pricing page.
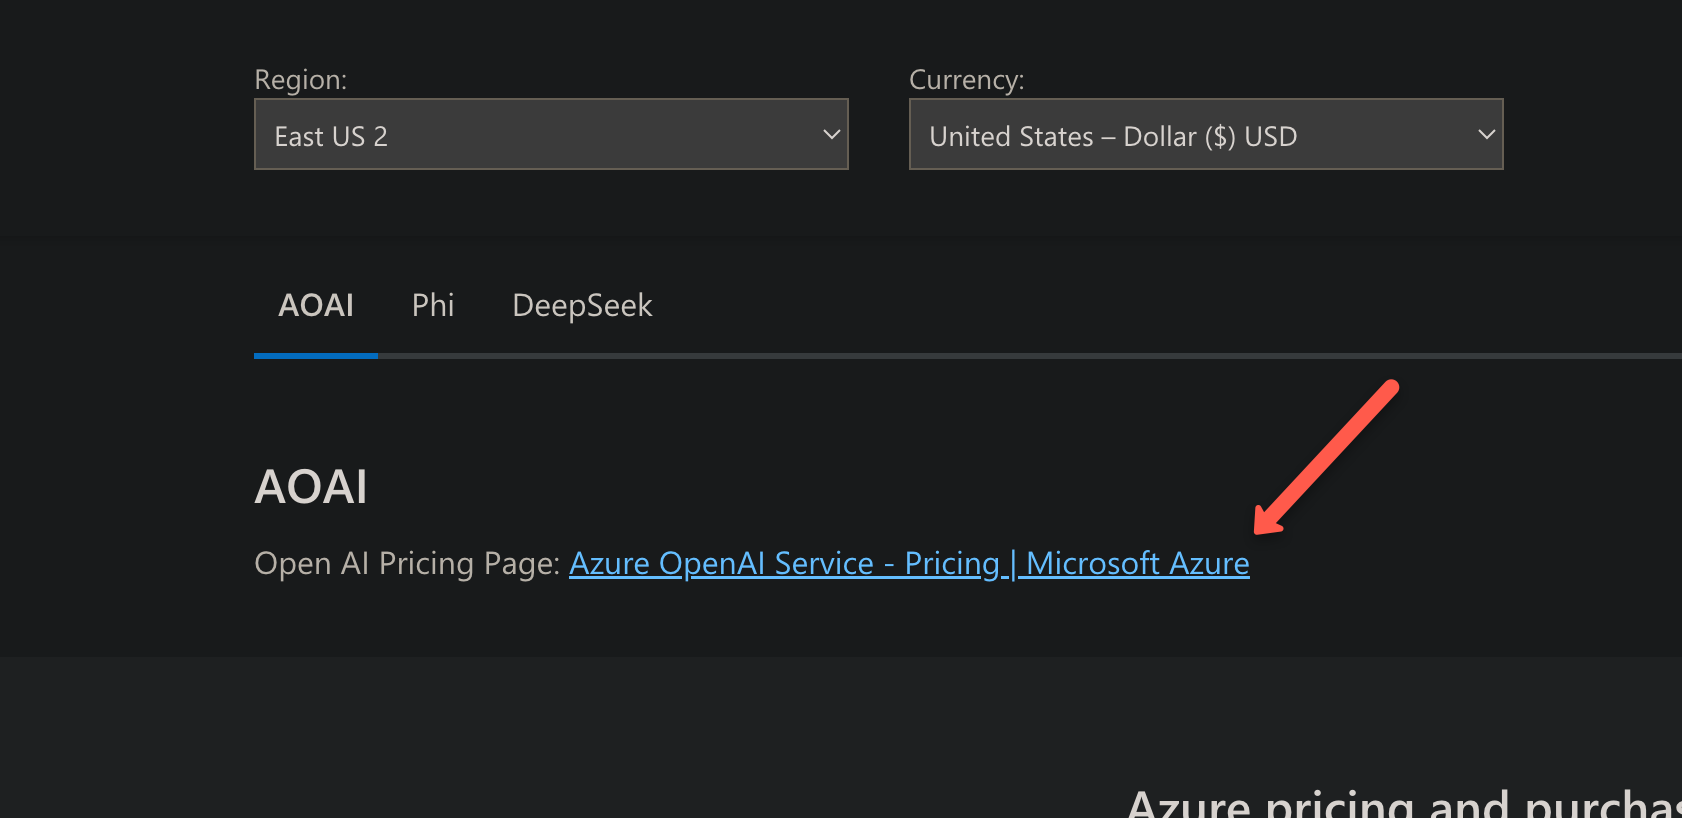
Clicking it will take you to another page where you can see the pricing of the model.
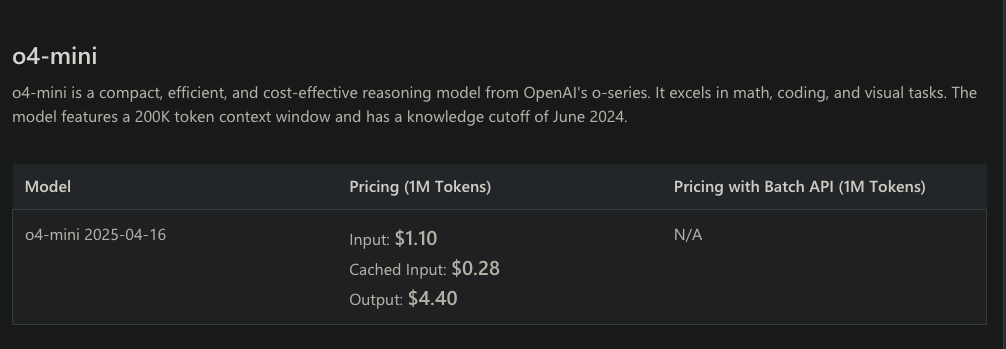
Not only this, we can see the region wise price and the fine tuning price as well on this page.
So how do we calculate OpenAI cost for text generation?
Features of Azure OpenAI Service
Azure offers a couple of features to manage and secure the OpenAI
- Fine Tune Models: We can select and use the trained models, though we can even train those models with our datasets for our use case.
- Content Safety and Filtering: We can restrict the input and output of the model to avoid the harmful queries and outputs, or even the content that violates the organization's compliance.
- Scalability and Availability: Azure OpenAI will automatically scale based on the workload requirements.
- Batch Job: Azure OpenAI can process batch jobs. For example, if we want to analyze thousands of user reviews, we can create this as a batch job, so that OpenAI will process all the requests and give the complete output.
- We can even set the Provisioned Throughput Units (PTUs), meaning the processing capacity, if we already know the workload volume.
- Azure OpenAI is a region based service, so we can setup in the nearest region for the highest availability.
Azure OpenAI Best Practices
The following are some of the best practices.
- Choose the right model based on your use case, because it has cost-effective models (like o4-mini)
- Optimize the token usage using the prompt engineering, so that we can reduce the cost.
- Store the API key in a secure vault like Azure Key Vault and rotate the keys periodically to avoid accidental exposure.
- Set the token limit so that we can avoid unnecessary overusage.
- Monitor and set alerts for the usage so that we can track the cost and performance.
Azure OpenAI vs OpenAI API
So, how is Azure OpenAI different from OpenAI's direct API?
Azure OpenAI runs on Microsoft Azure’s secure cloud infrastructure, with private endpoints, VNets, enterprise-grade compliance and enterprise-level uptime commitments.
While the OpenAI API operates on OpenAI’s own servers based in the US.
Azure OpenAI has native integration with Azure services (Cognitive Services, Logic Apps, Power Platform etc)
This makes Azure OpenAI a better fit for enterprise environments, especially when data location and compliance are key concerns. Organizations can keep data within their selected Azure region, which helps meet regulatory requirements like GDPR or HIPAA.
In contrast, the OpenAI API might not align with stricter enterprise policies around data handling and compliance.
Cleaning Up Your Resources
It's really important to clean up any resources you're not using.
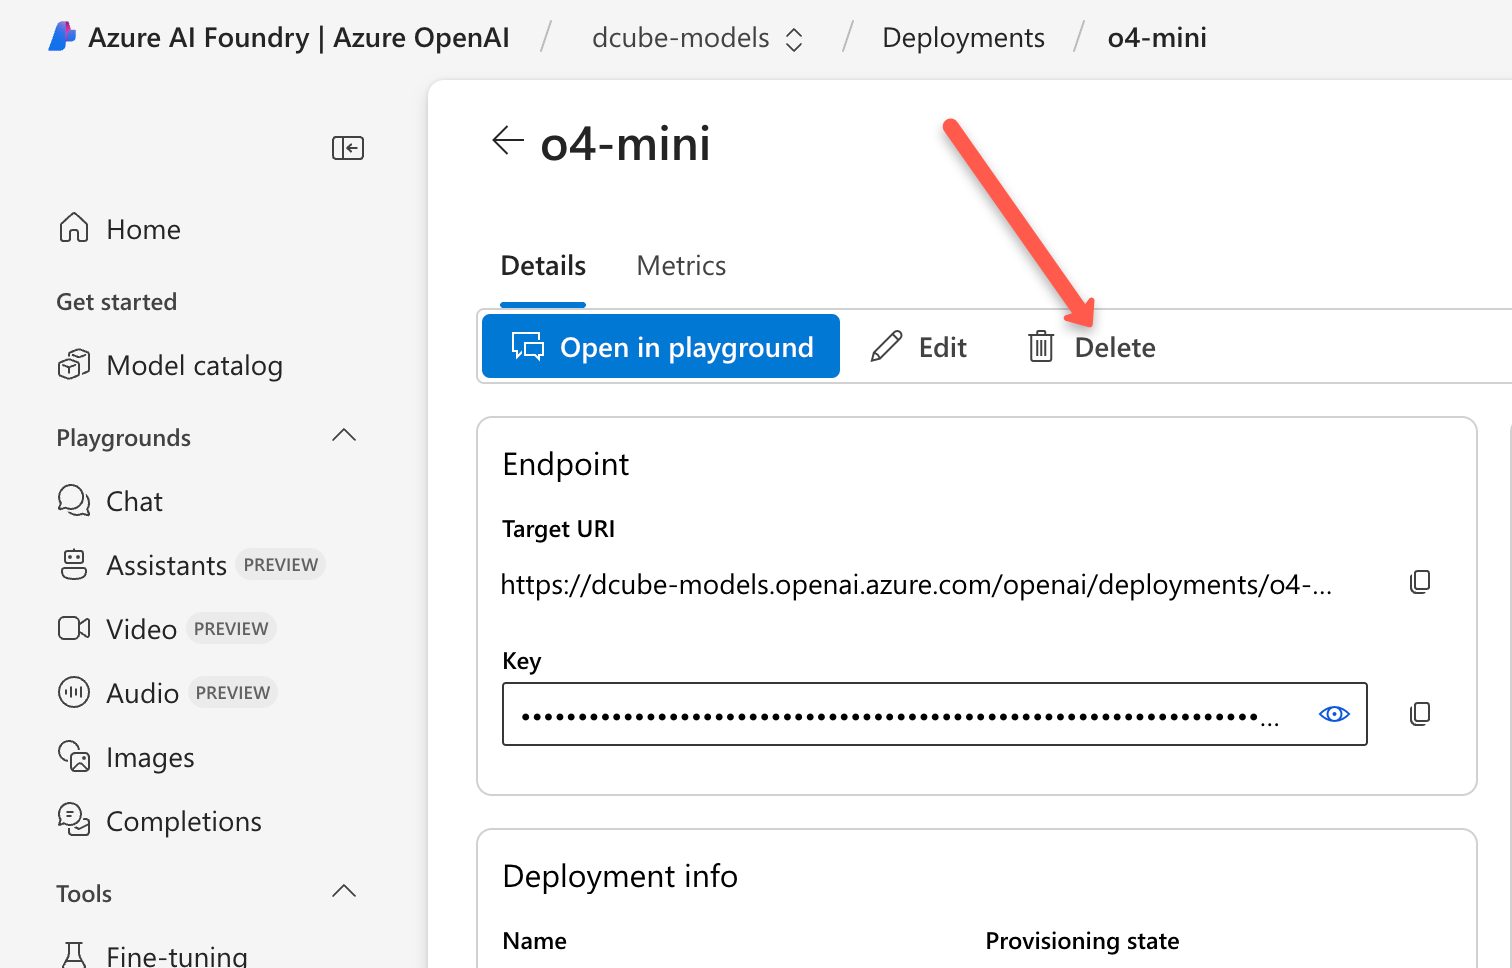
Once you're done learning and no longer need the model deployment, go to the deployment page and delete it.
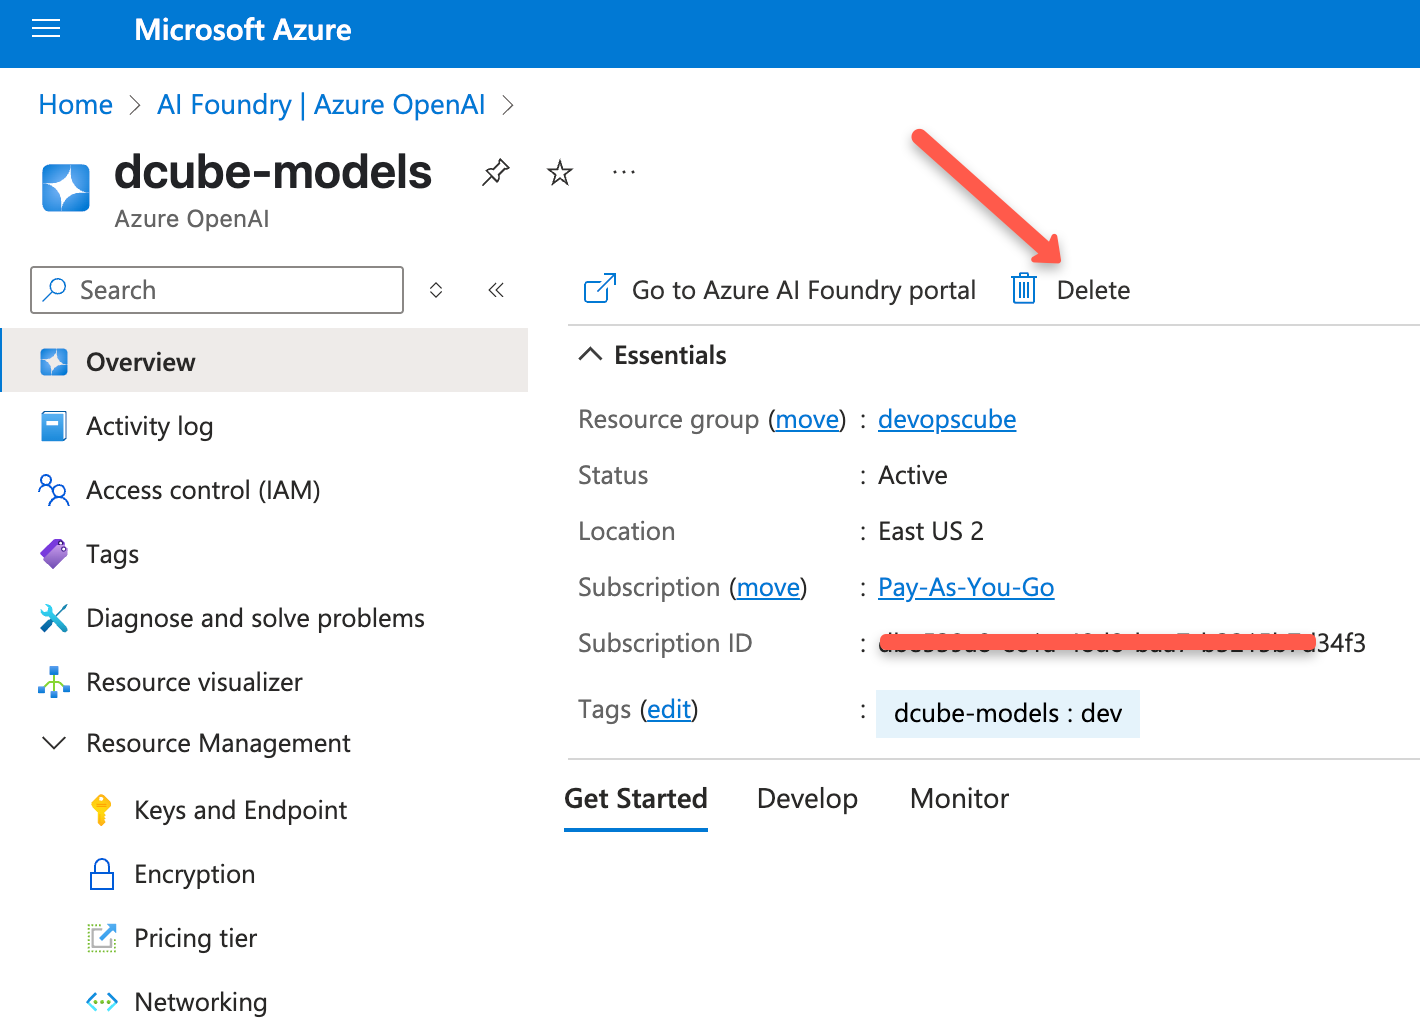
After you delete the deployments, you can also delete the resource you created in Azure OpenAI.
Conclusion
Now that you’ve set up Azure OpenAI, deployed a model, tested it with curl and Python, and checked out how token usage works, you’ve covered the essentials.
Also, you also got a glimpse of how Azure takes care of security and compliance right out of the box.
Here is what you should do next.
Start building chatbots, internal tools, or DevOps assistants using the AI features.
And this is just the beginning. Keep exploring, test out different models, and watch for upcoming guides on fine-tuning and getting things ready for production.