

In this blog, you will learn to migrate AWS RDS data from one account to another using AWS DMS (Database Migration Service).
In this guide, we focussed in PostgreSQL RDS databases. However, you can use this workflow and steps for any Database type.
For the migration we will make user of AWS Database Migration Service (DMS).
Database Migration Service Workflow
The following image shows the workflow of database migration using AWS DMS.
DMS replication instance
First you need to understand about DMS replication instance. It is launched by AWS user which supports different instance classes (e.g., dms.t2.medium, dms.c5.large).
The size of the replication instance should be based on factors like data volume, workload, migration type (full load vs. ongoing replication), and performance requirements.
The DMS replication instance is responsible for,
- Data Extraction (reading from source database)
- Data Transformation (performs light transformations if required)
- Data Loading (Writes to target Database)
- Ongoing Replication ( For the replication instance to continuously replicate changes from the source to the target until cutover)
In this guide, we are going to do the following.
- The DMS replication instance will read the data from the source database via its endpoint.
- The VPC Peering connection will establish the private communication between the source and destination network.
- The replication instance will write the data to the destination database through the destination endpoint.
Steps For AWS RDS Cross Account Data Migration Using AWS DMS
Follow the steps to migrate AWS RDS data from one account to another using AWS DMS.
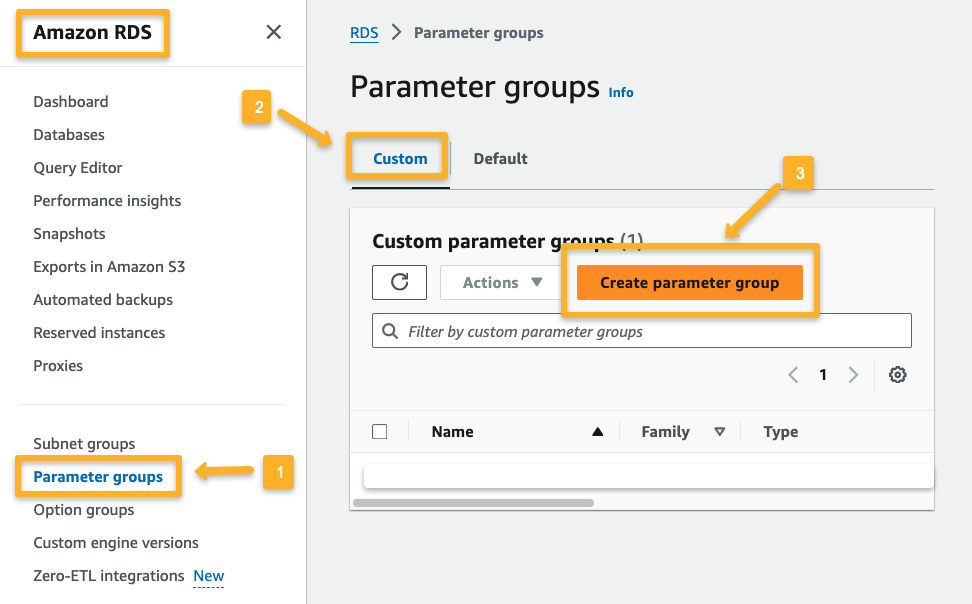
Step 1: Source RDS Parameter Group
The RDS Parameter Group is where we can pre-defined the database configurations.
By default, RDS creates a Parameter Group for each Database, but we can use a dedicated parameter group if we want a custom configuration.
I already have an RDS PostgreSQL database with data and have used a custom Parameter group.
To create a parameter group, follow the steps below.
In the next window, provide the following information.
- Engine type: A list of Database types will be available; choose the appropriate one.
- Parameter group family: The parameter group family should be the same version as the database.
- Type: Two types of Parameter Groups is available,
- DB Parameter Group: For Database instance
- DB Cluster Parameter Group: For Database cluster

The parameter group is now ready, and you can modify the parameters as required.
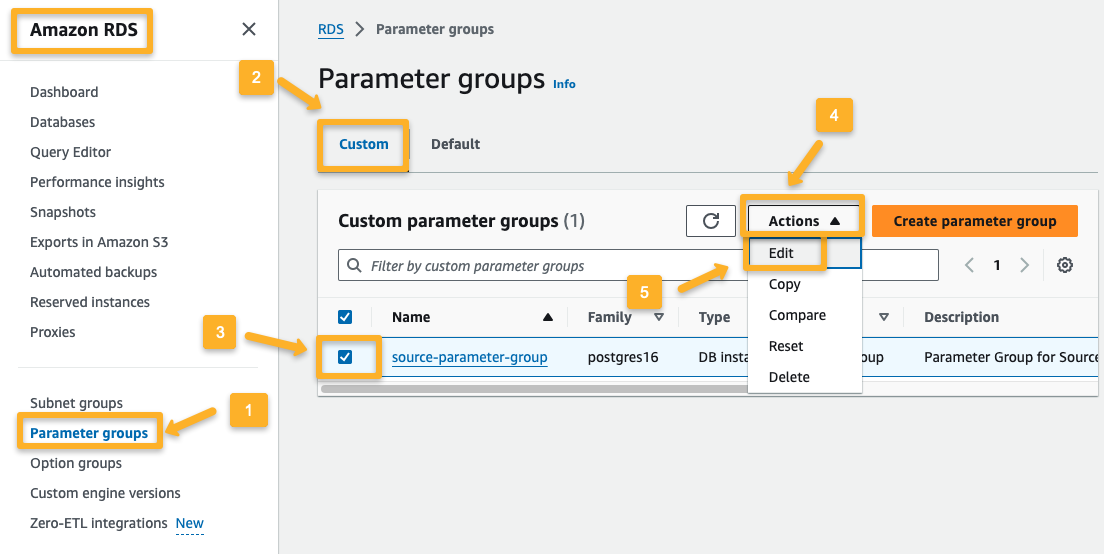
I have modified the following parameters.
rds.logical_replication = 1
max_wal_senders = 10
max_replication_slots = 10
wal_sender_timeout = 0
max_worker_processes = 8
max_logical_replication_workers = 8
max_parallel_workers = 8
Here's what these parameters do:
- rds.logical_replication: Enable replication between databases.
- max_wal_senders: Maximum number of senders to transfer the changed data from the source to the destination.
- max_replication_slots: Maximum number of slots to store the changed data to transfer.
- wal_sender_timeout: Time to wait for the idle state senders.
- max_worker_process: The server can support the maximum number of background processes simultaneously within the database.
- max_logical_replication_workers: Maximum number of logical replication workers to copy data from one database to another.
max_parallel_workers: Maximum number of workers the system supports for the parallel operations.
Step 2: Source Database
I already have data in an RDS PostgreSQL database.

Since this database has no public IP, it can only communicate with the internal network.
I created an EC2 instance within the same network to connect and verify the available database data.

Use the following command to install the PostgreSQL Client on Amazon Linux 2023.
sudo dnf install postgresql15Once the installation is completed, log in to Postgres using the following command.
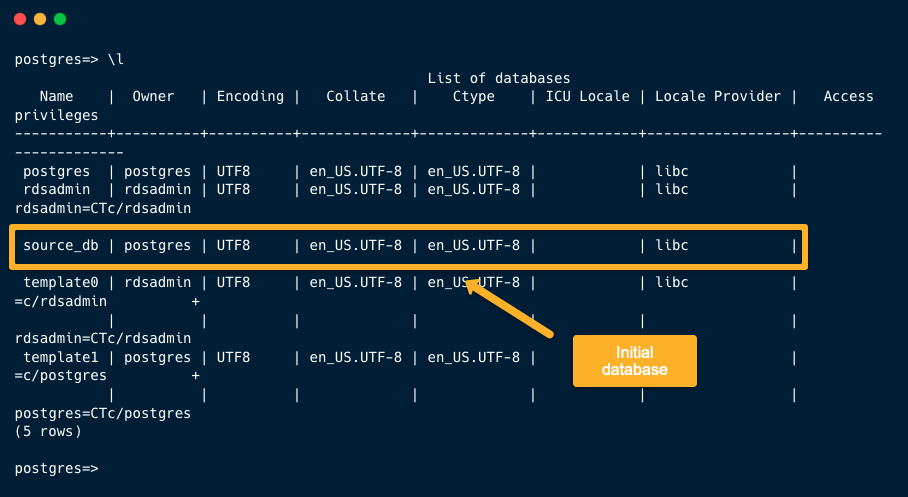
psql -h <END_POINT> -p <PORT> -U <MASTER_USER_NAME> To list the available databases, use the following command.
\lThe source_db has data, so describe it to see what is inside.
To connect to the soure_db database
\c source_dbNow, list the tables inside the database
\dt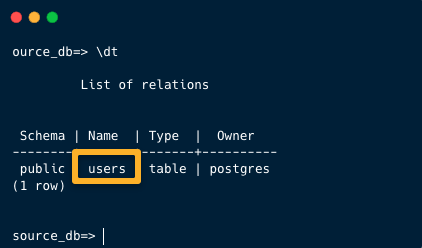
To describe the available data in the table.
SELECT * FROM users;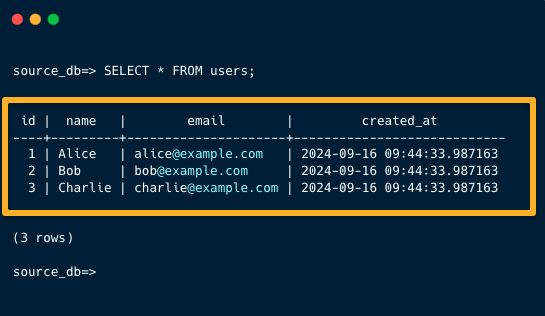
Step 3: Virtual Private Network (VPC) for Both Accounts
We need a VPC in both accounts, and the VPC CIDR values should be different.
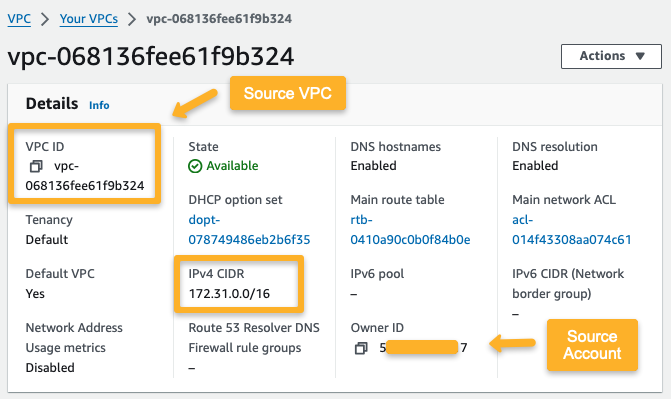
Source Account
Here, the source account VPC CIDR is 172.16.0.0/16, and the region I have chosen is the us-east-1
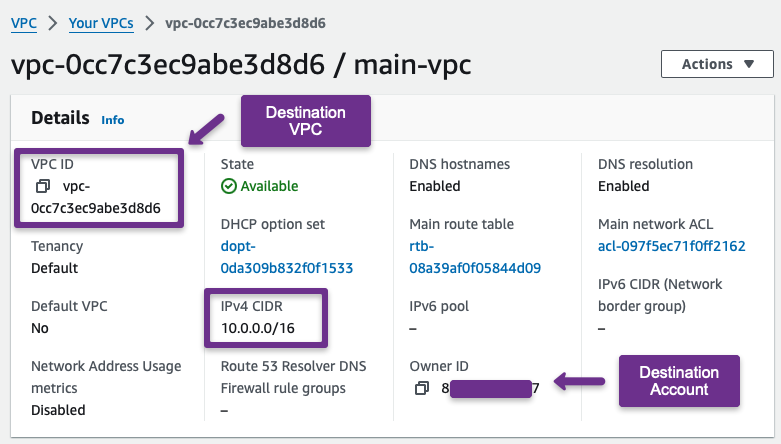
Destination Account
For the destination account, I have chosen the 10.0.0.0/16 CIDR VPC, and the region is us-east-1
Step 4: VPC Peering
We can establish private communication between the two networks using a peering connection.
Source Account
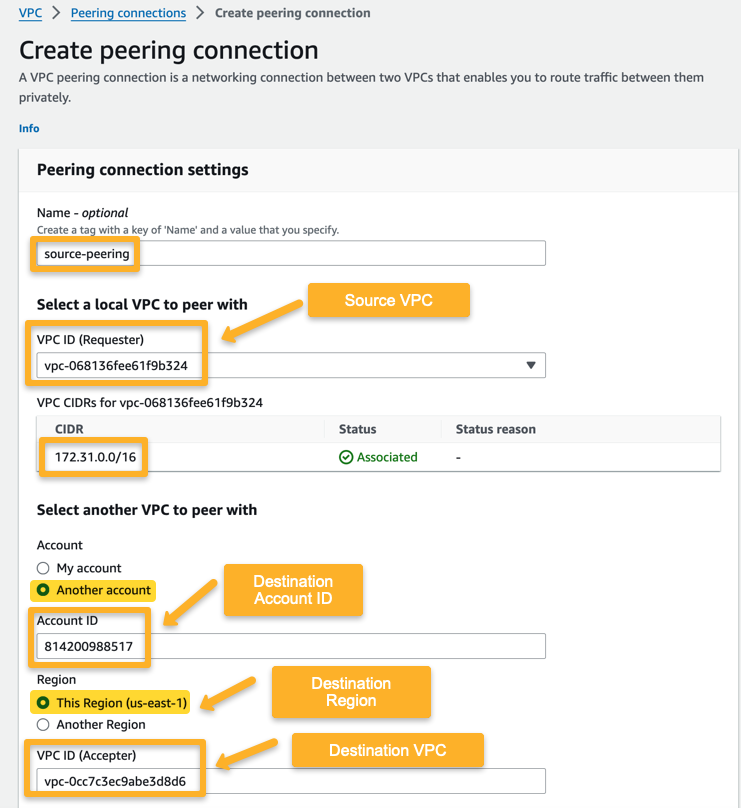
We first need to establish the peering connection request from the source VPC.
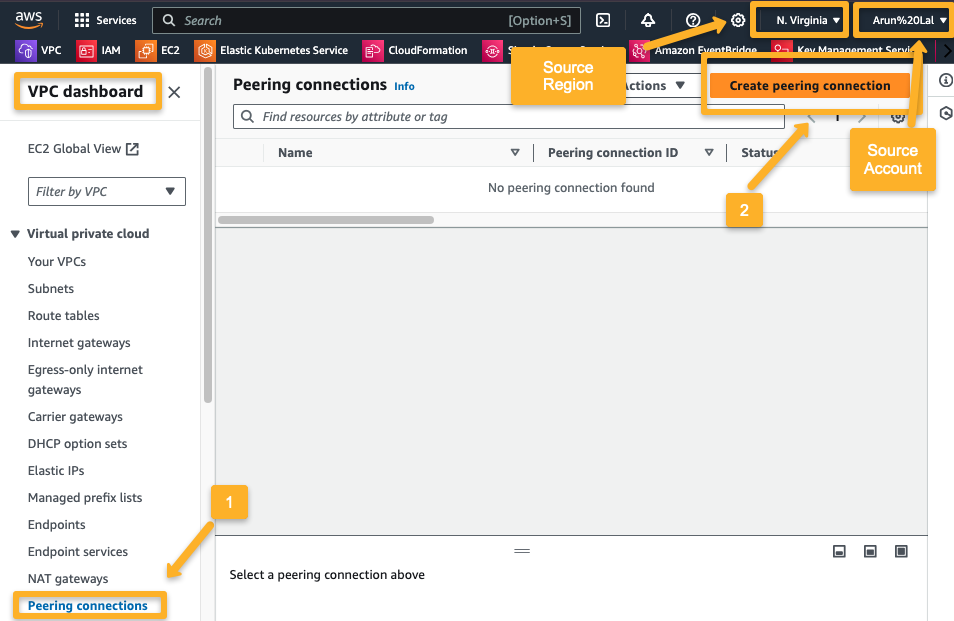
On the next page, provide the required information.
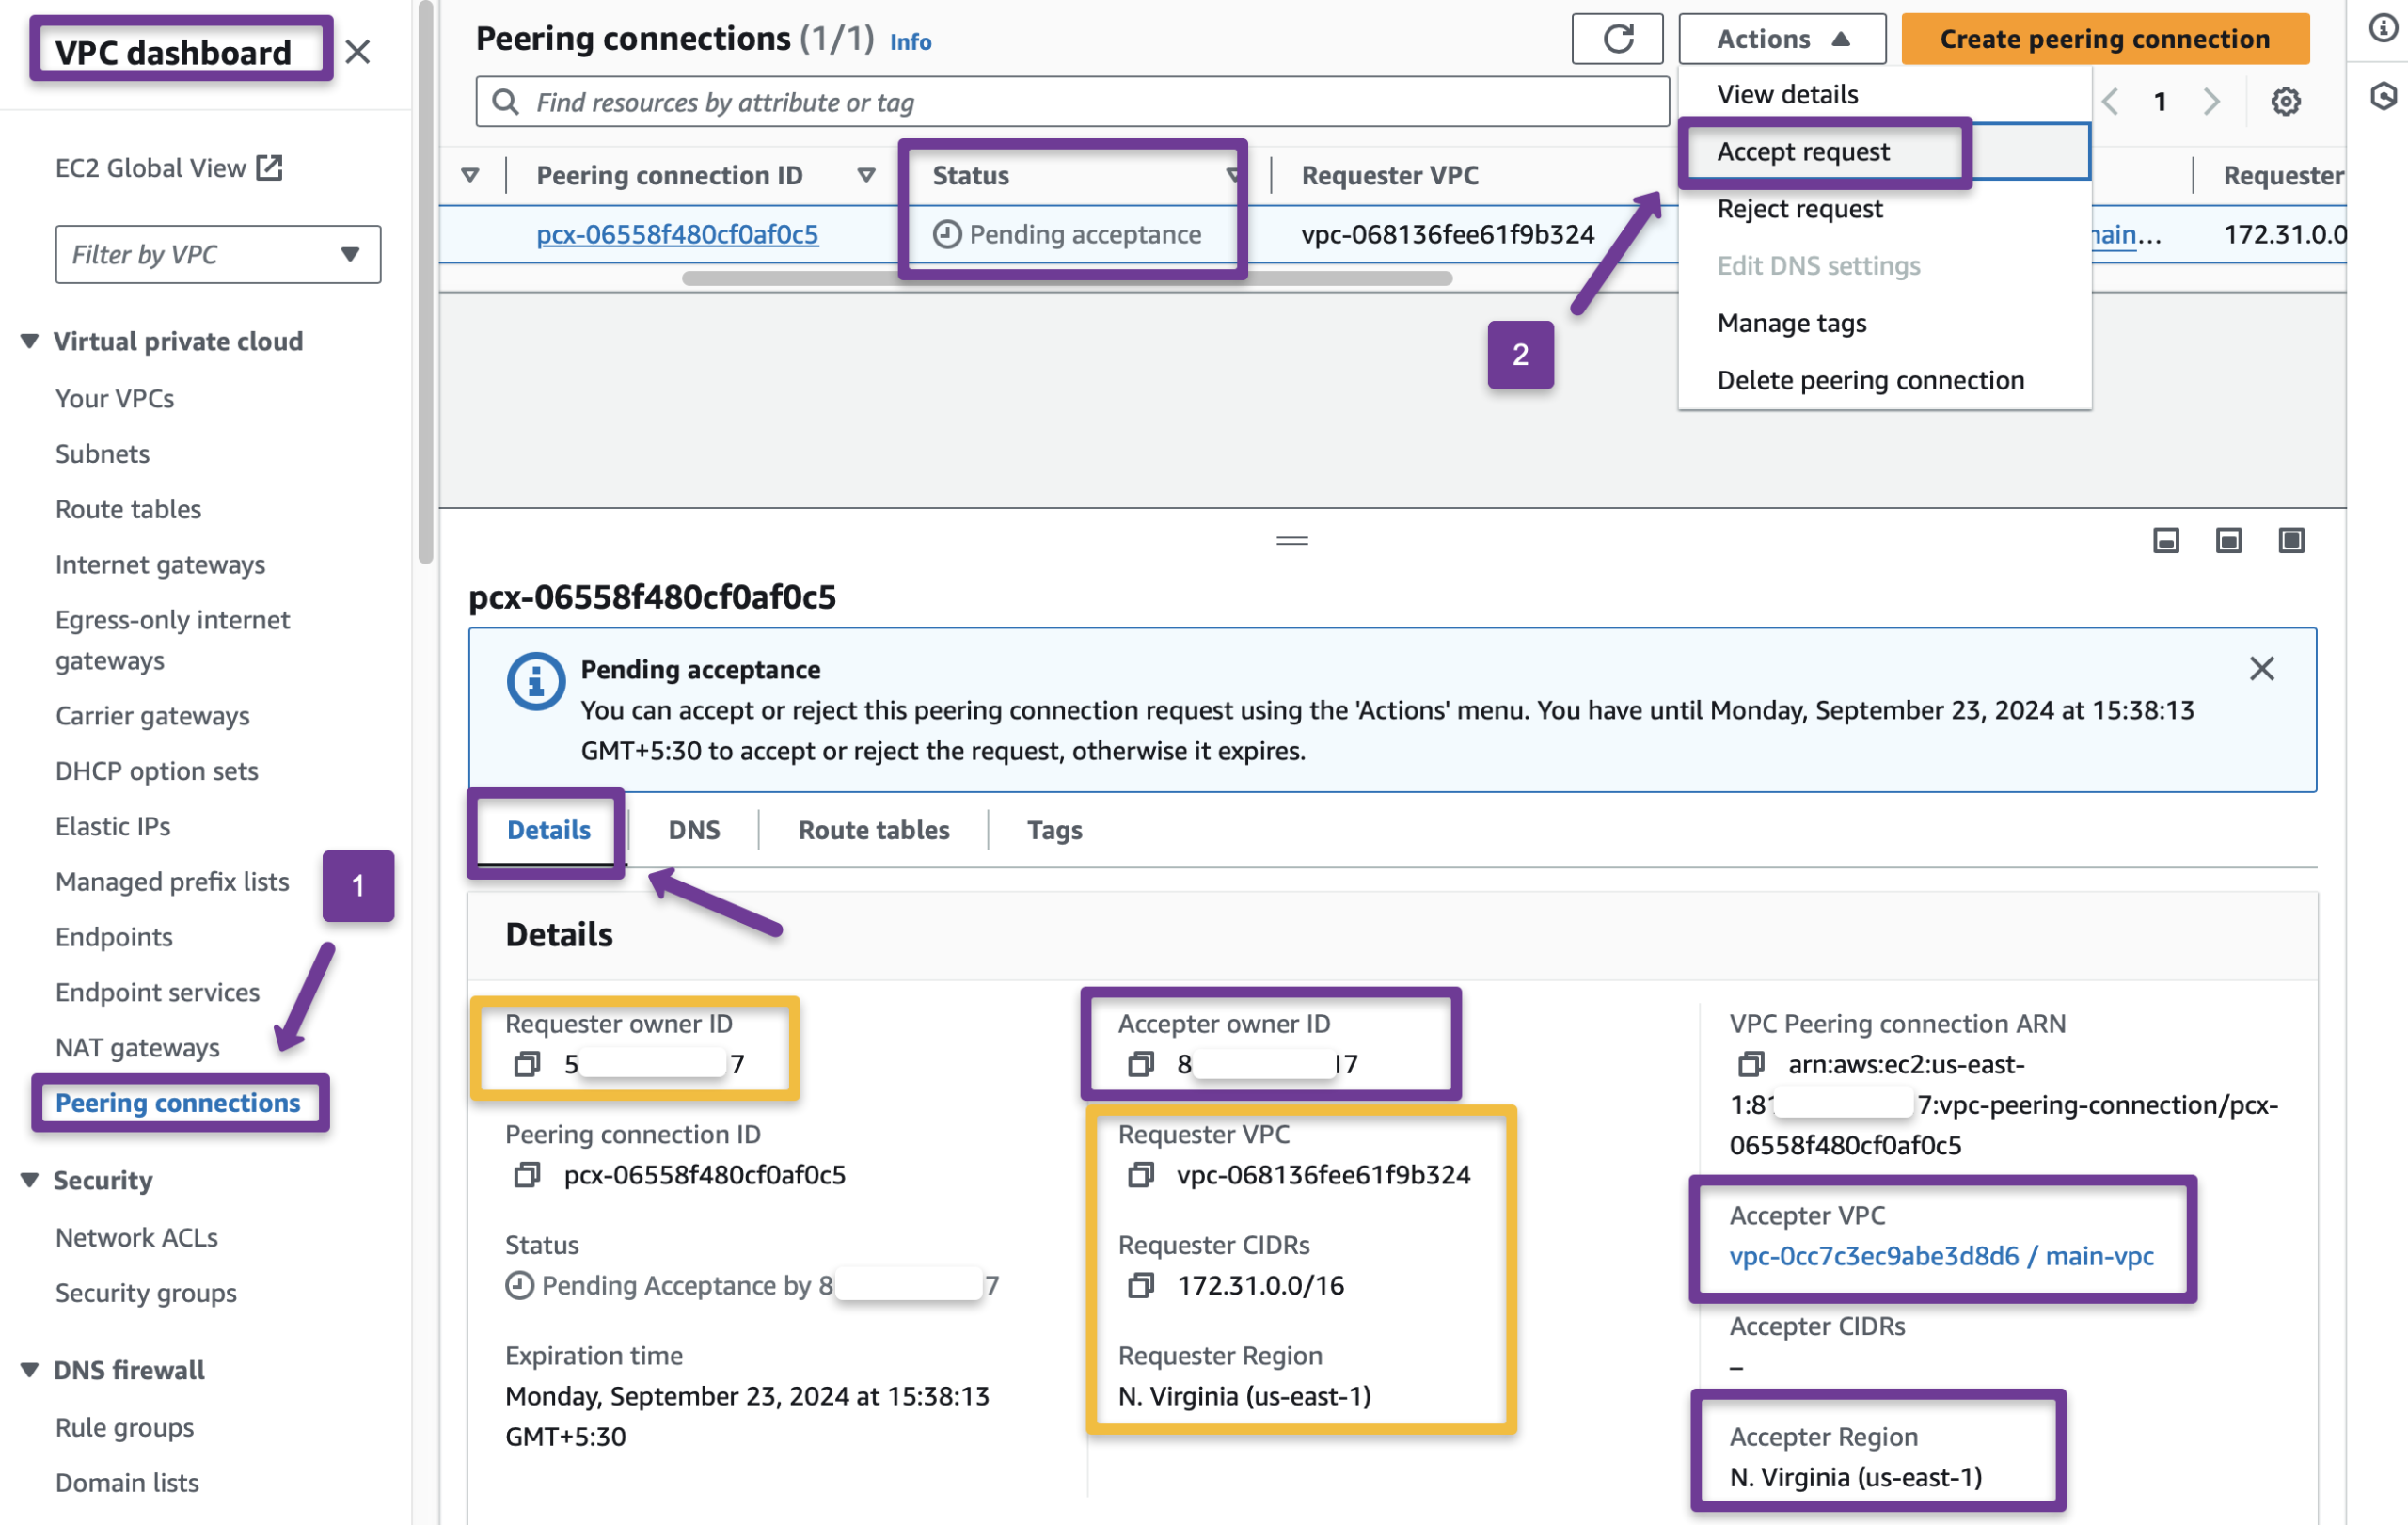
After creating the peering connection, the request will go to the destination account, so we need to accept the request from the destination account.
Destination Account
Accept the peering request from the source account.
Step 5: Update Route Table
We need to modify both VPC Route Tables to route the traffic between the two networks through the peering connection.
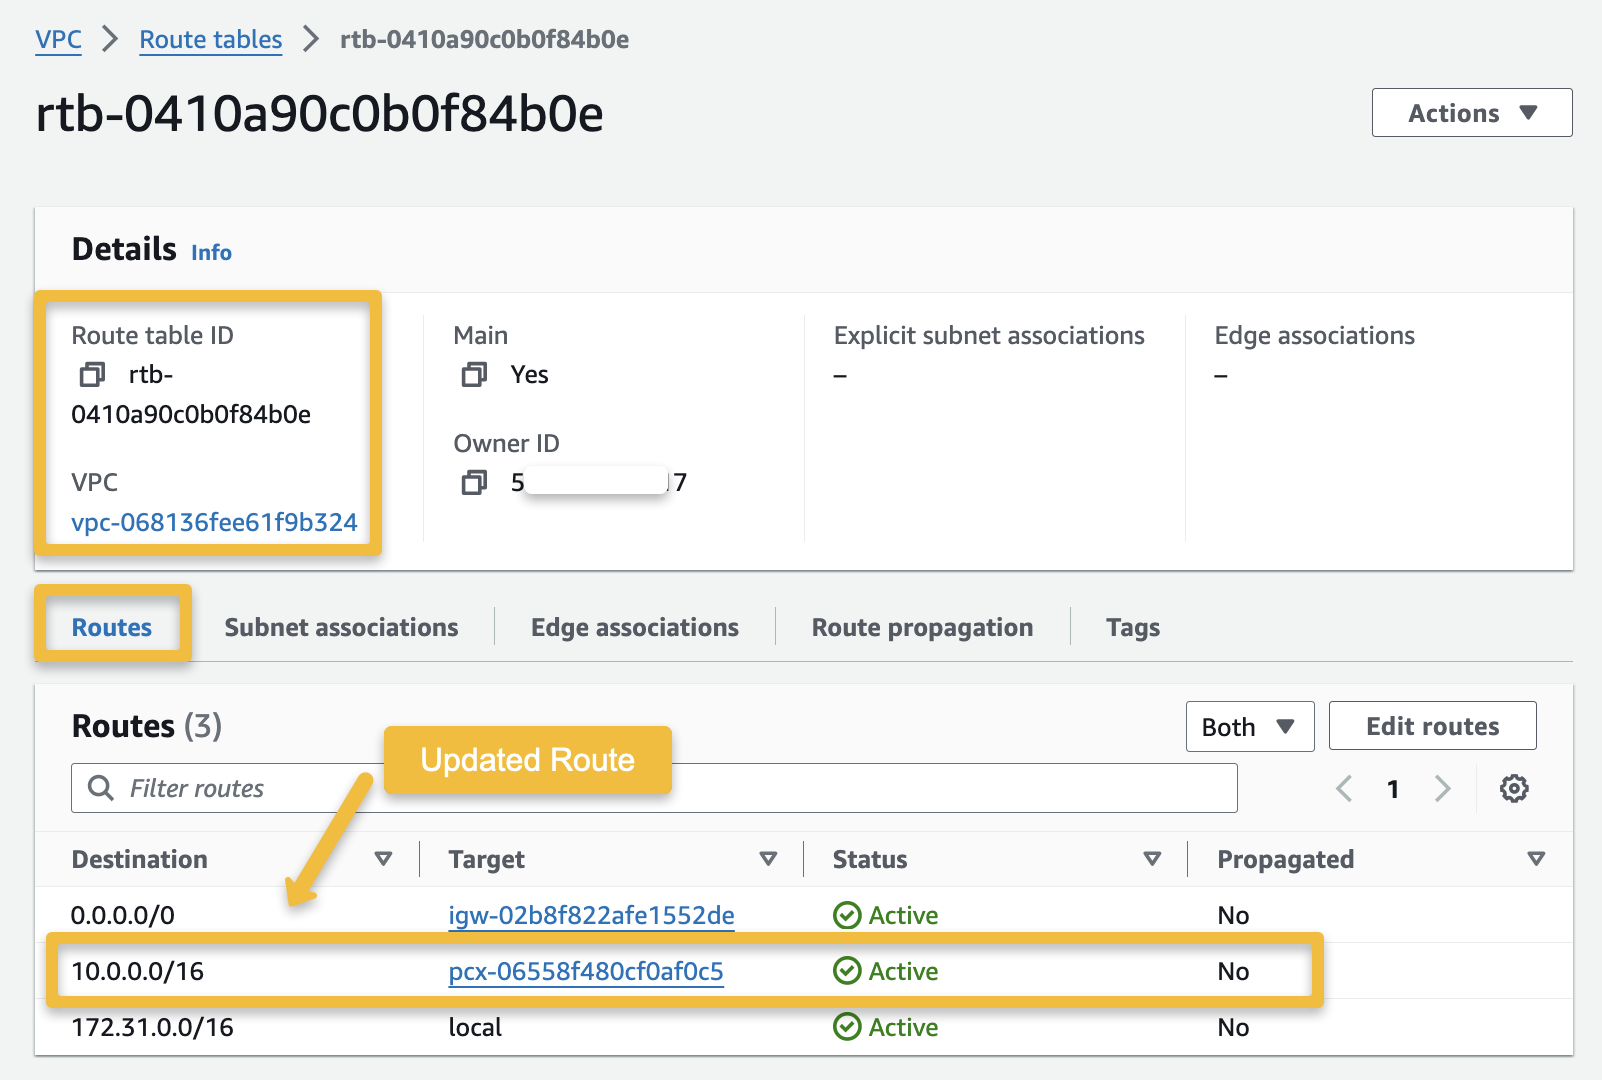
Source Account
First, we updated the source account’s VPC Route Table Rules.
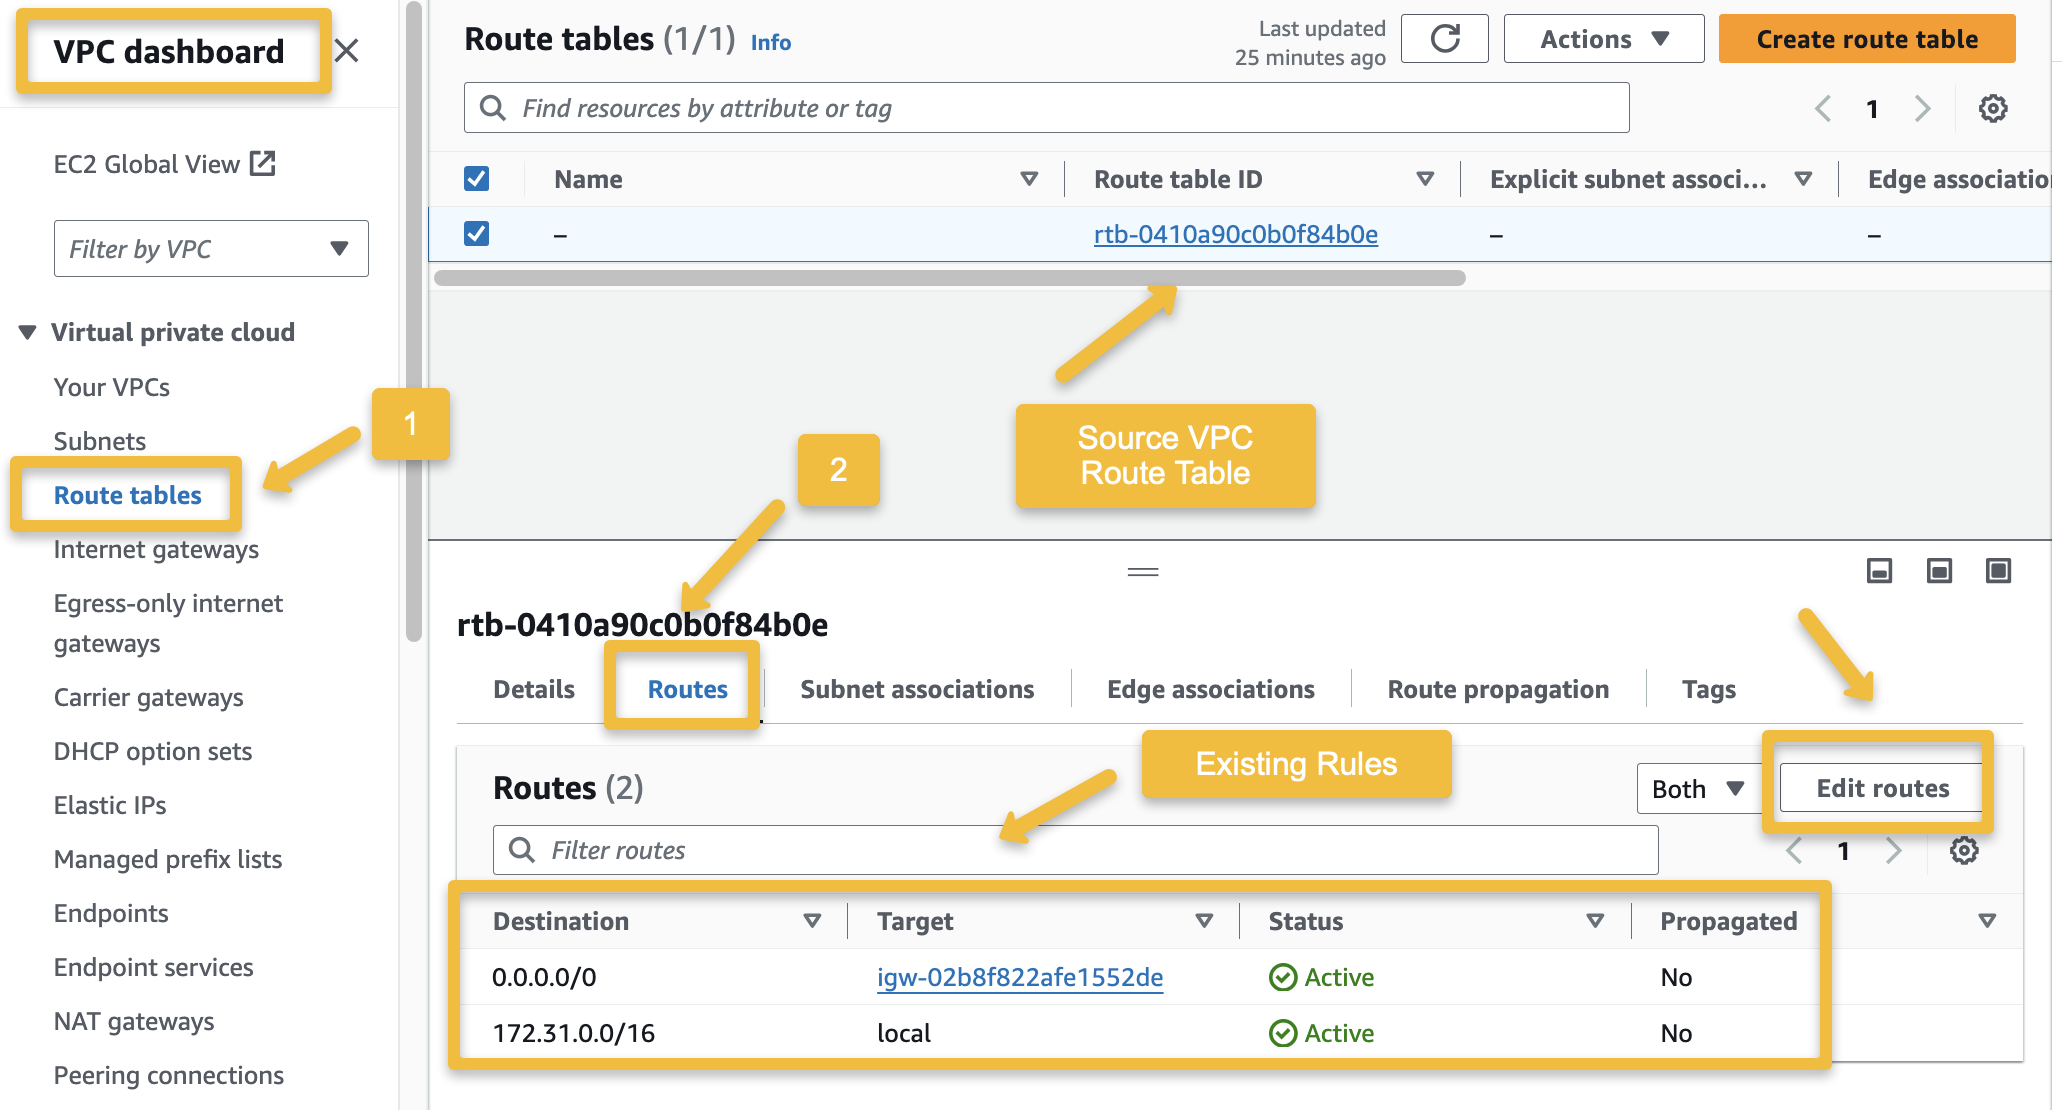
Edit routes to add new routes; in the new route, the Destination is the destination VPC CIDR 10.0.0.0/16 , and the Target is the Peering Connection.
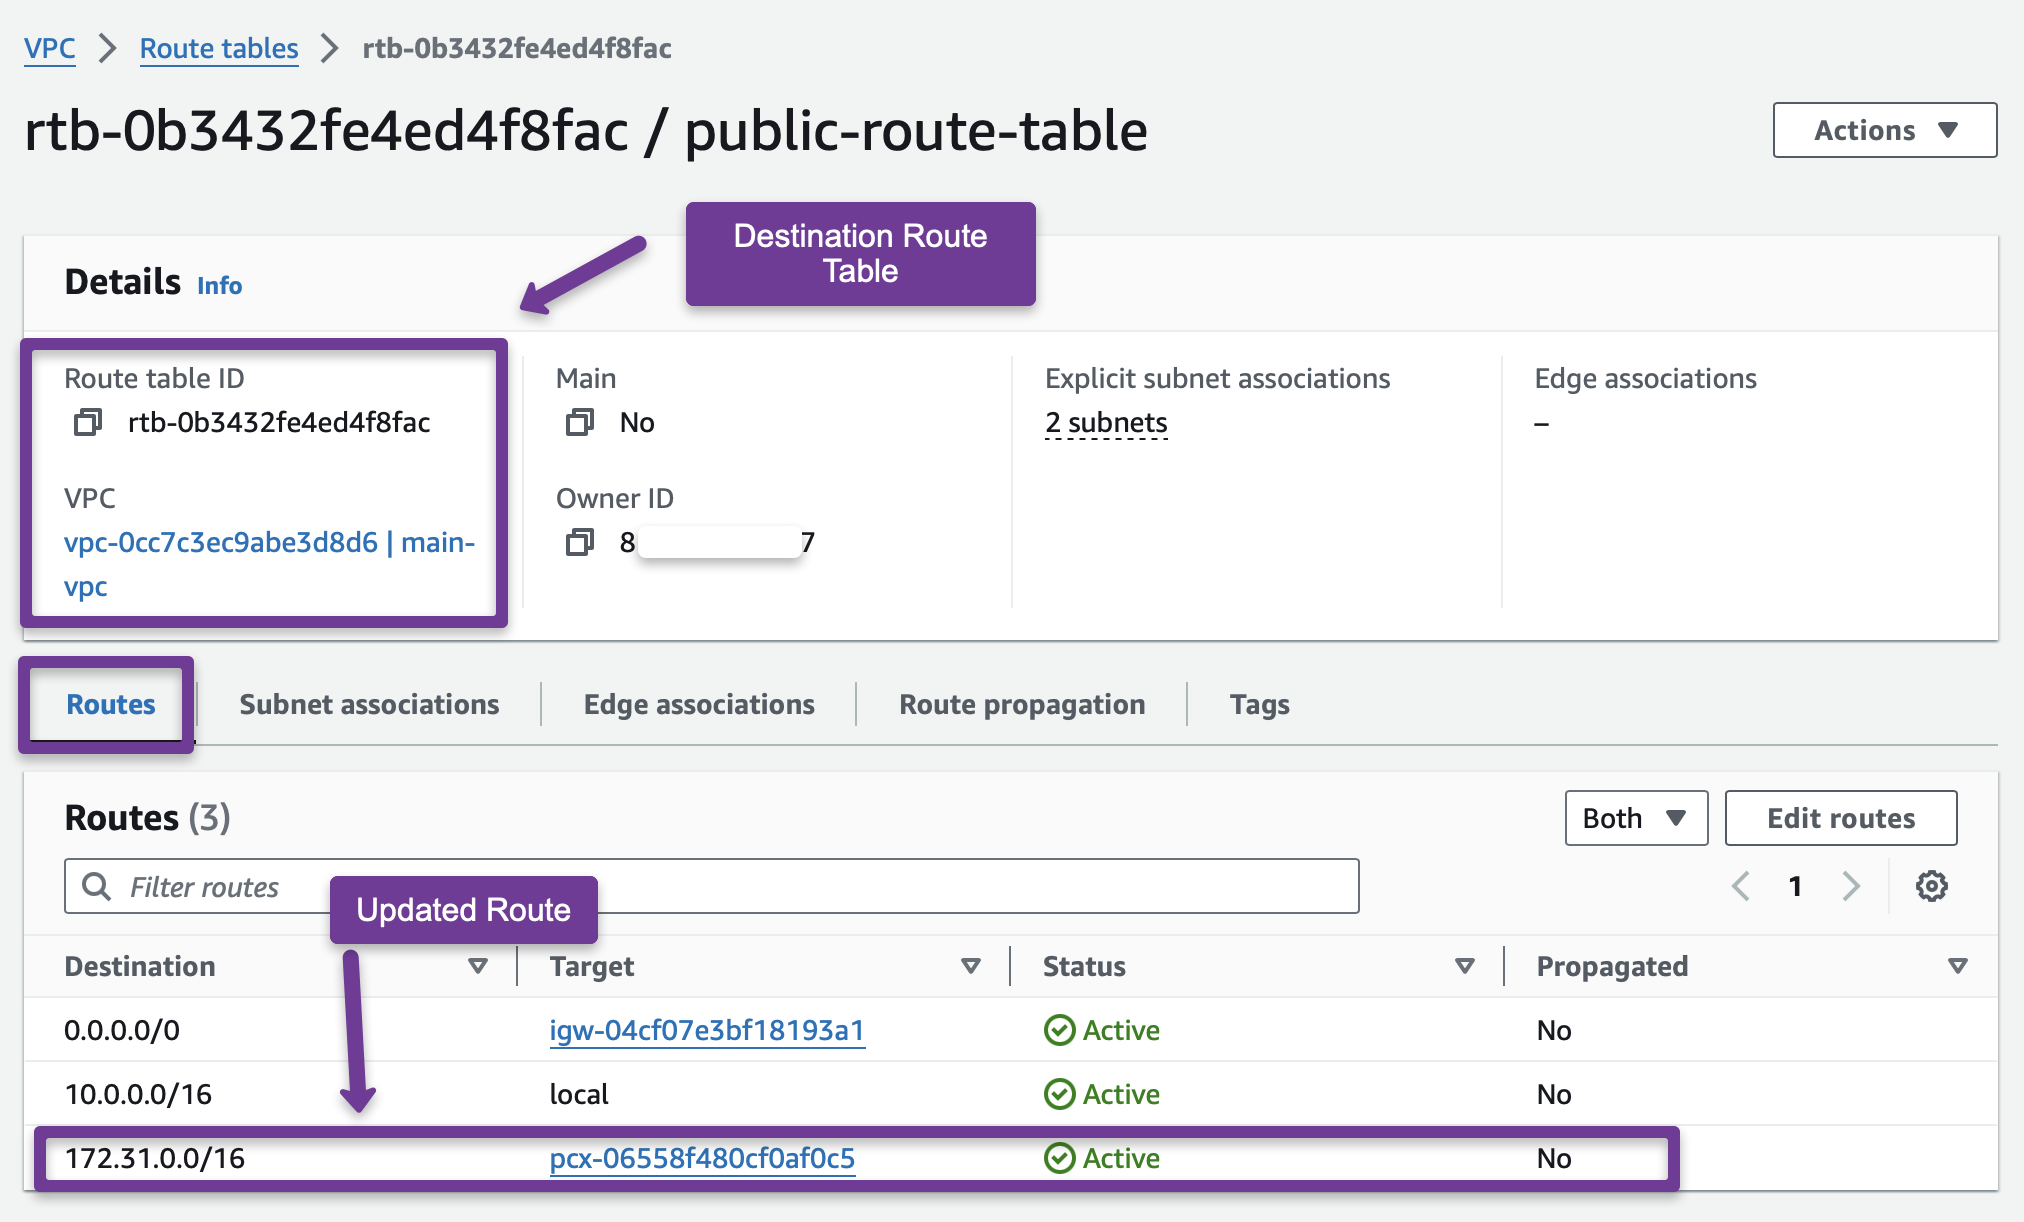
Destination Account
We update the destination account Route table with the source VPC details.
Step 6: Create Destination Database
An RDS database will be created in the second AWS account, the us-east-1 region.
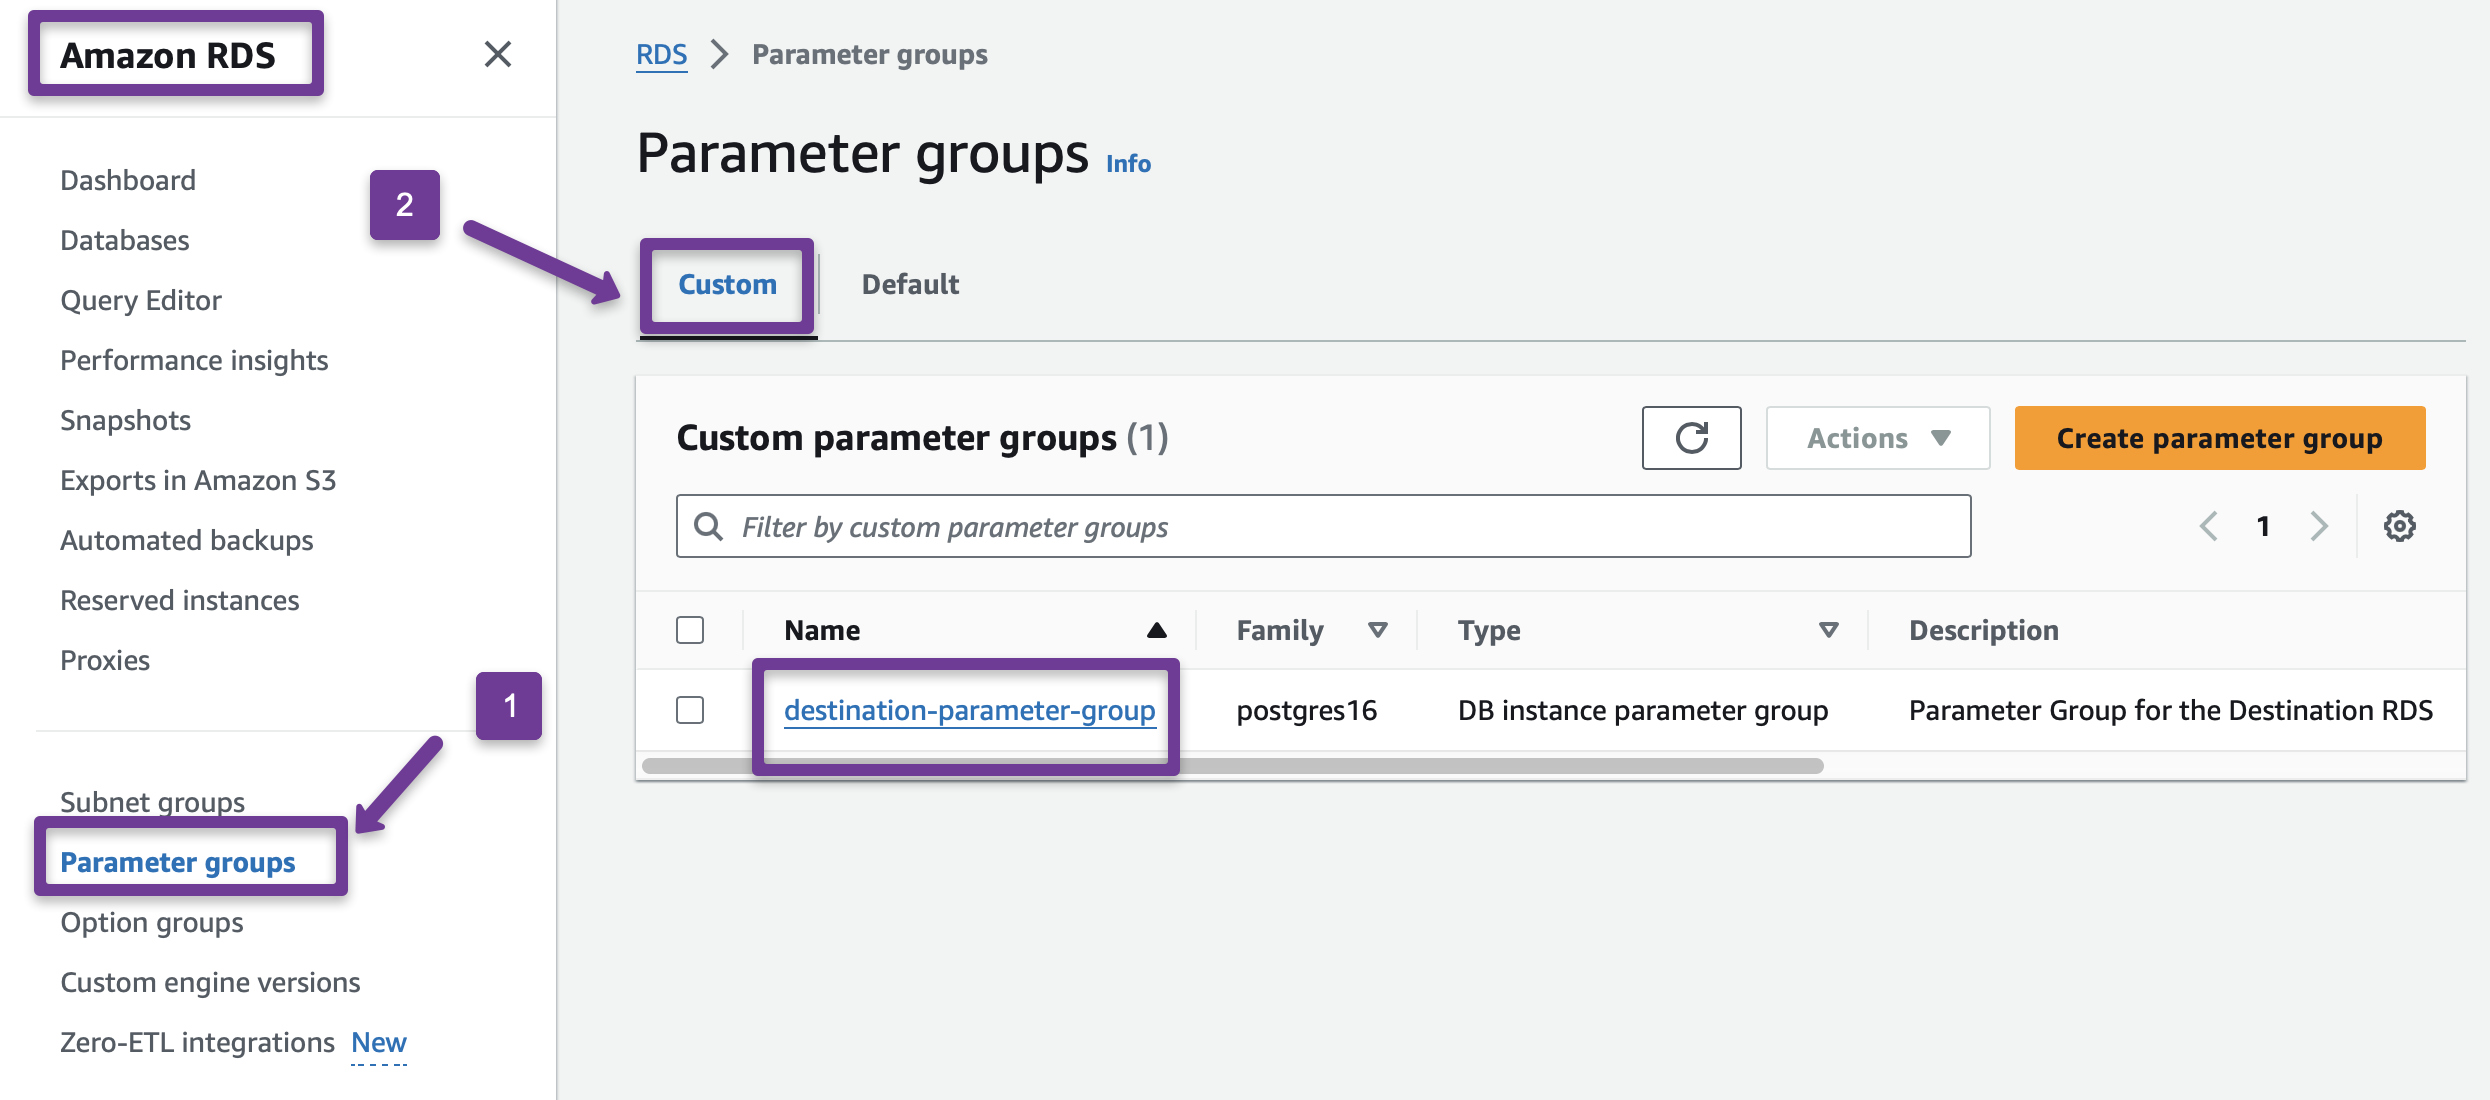
I created the same parameter group in the destination account with the same configurations.
I am provisioning a smaller database in the destination account because I have very little data in the source account to migrate.
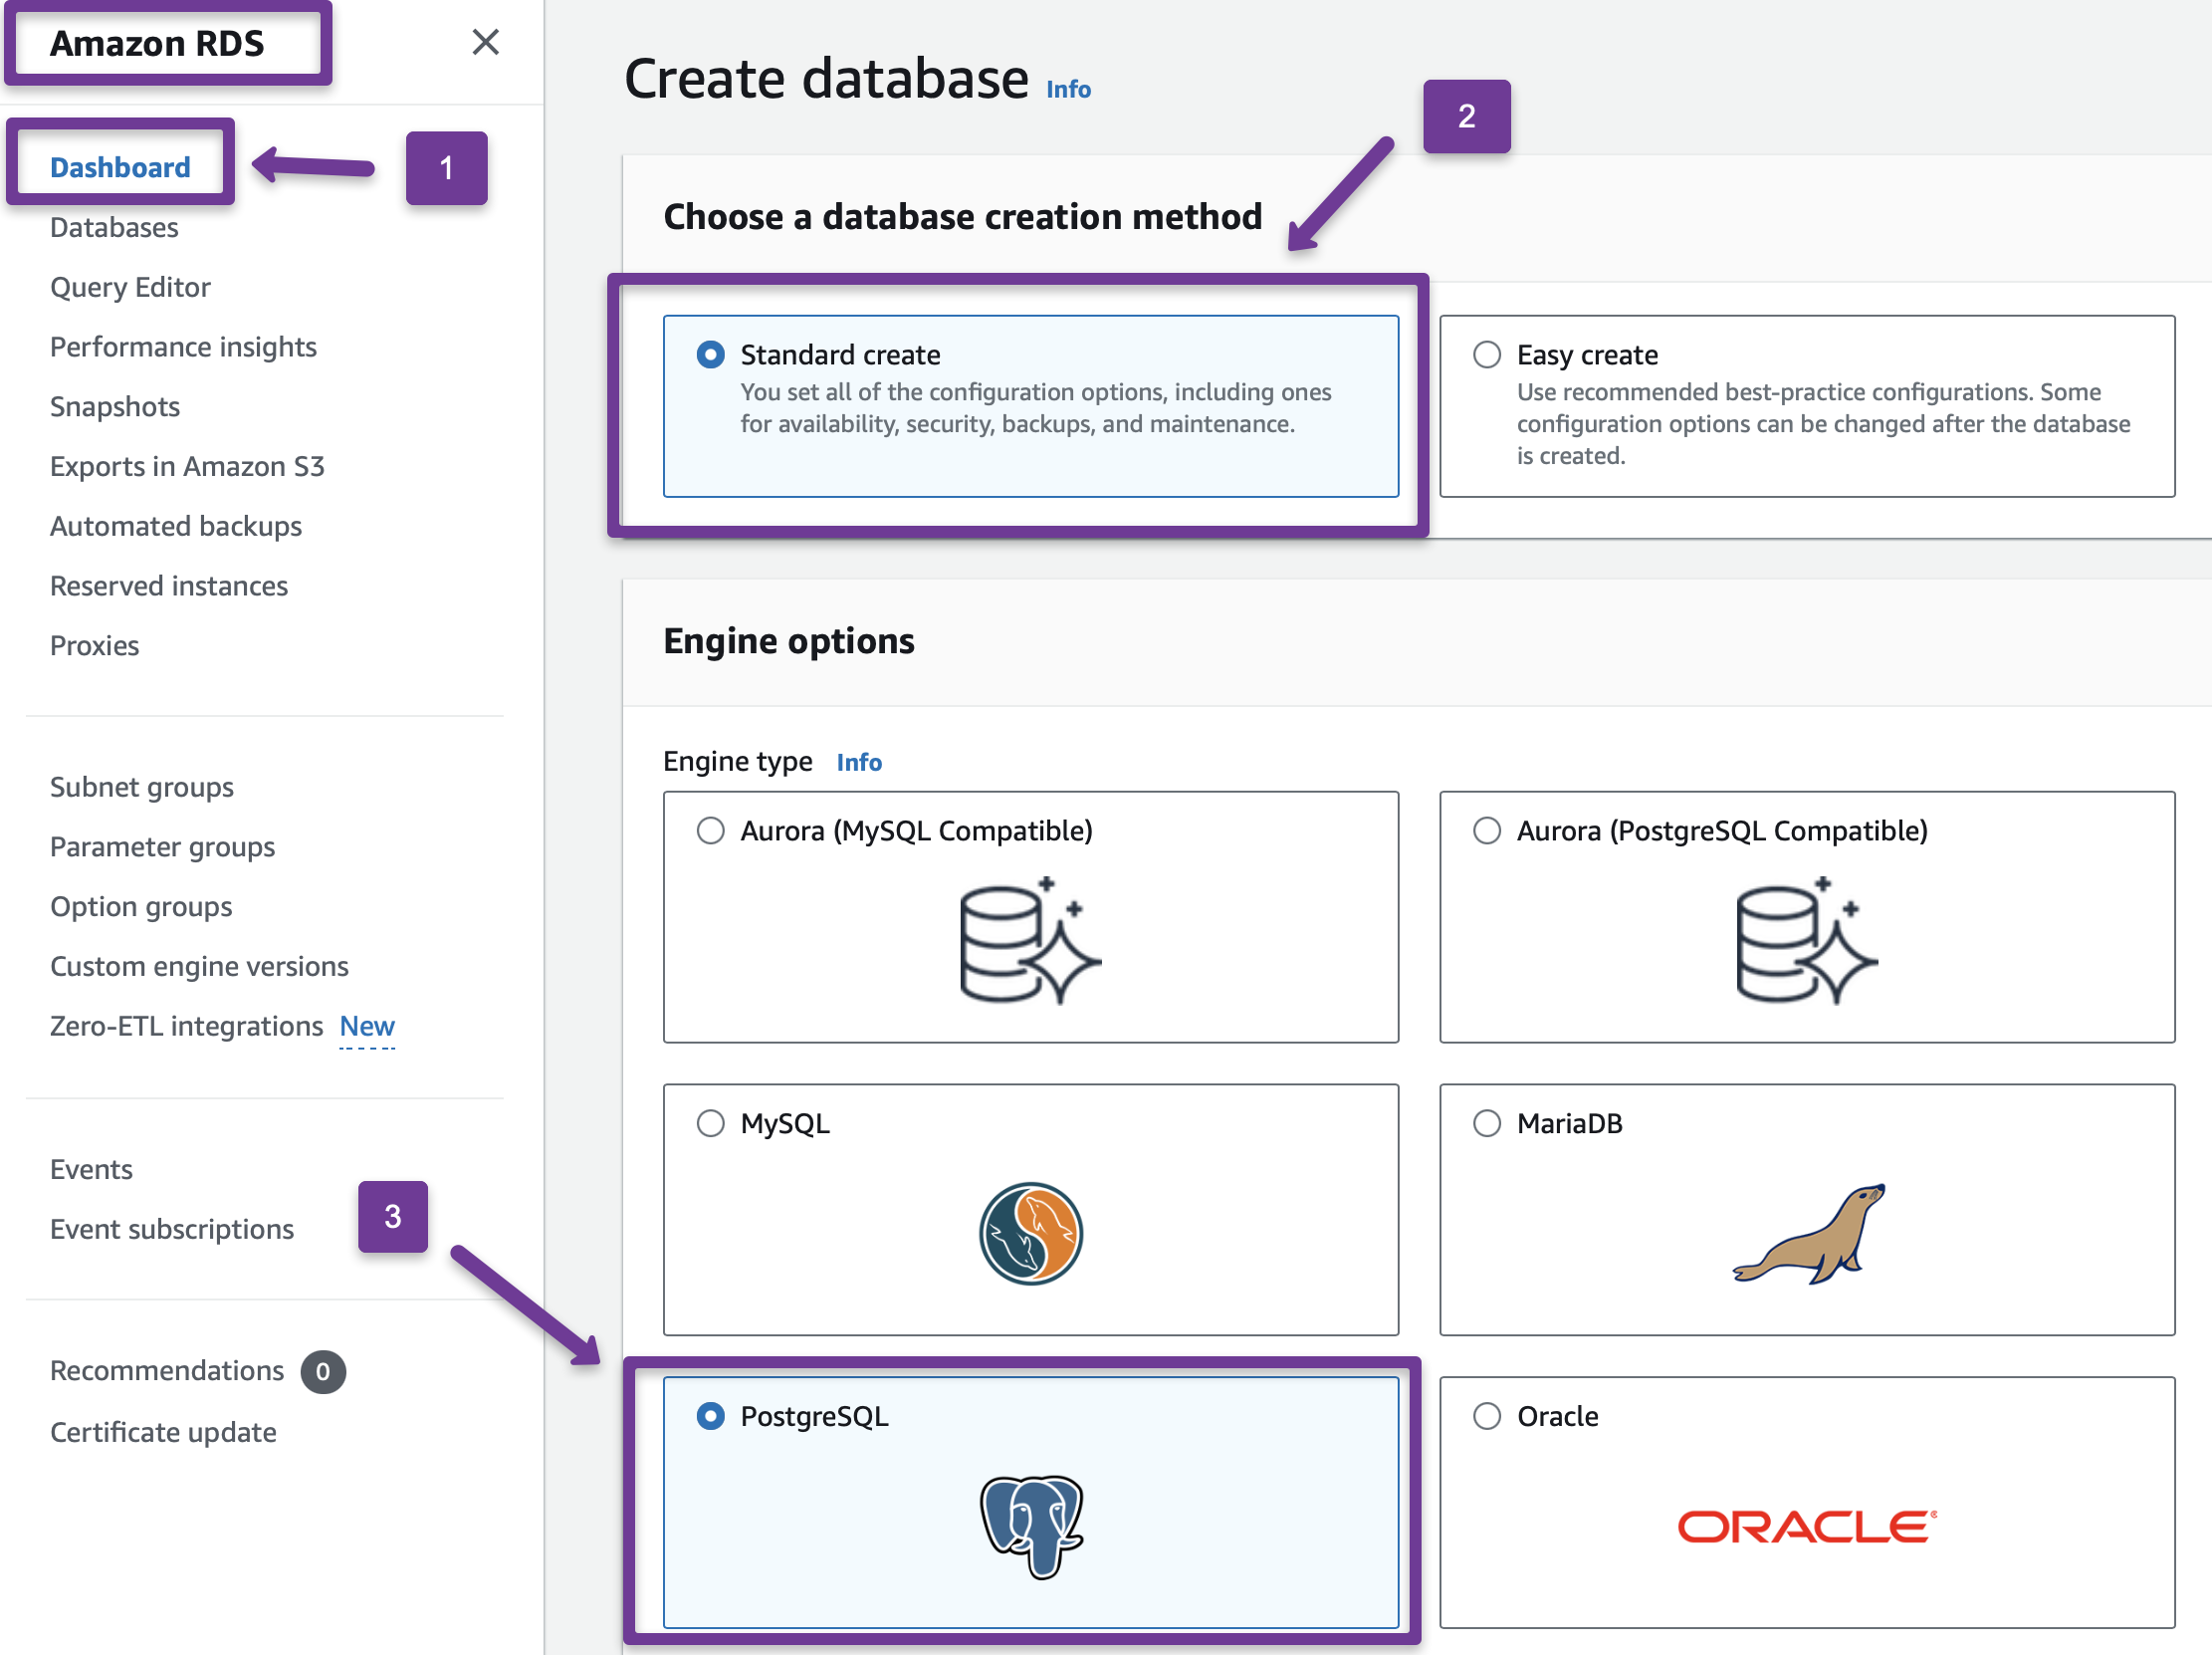
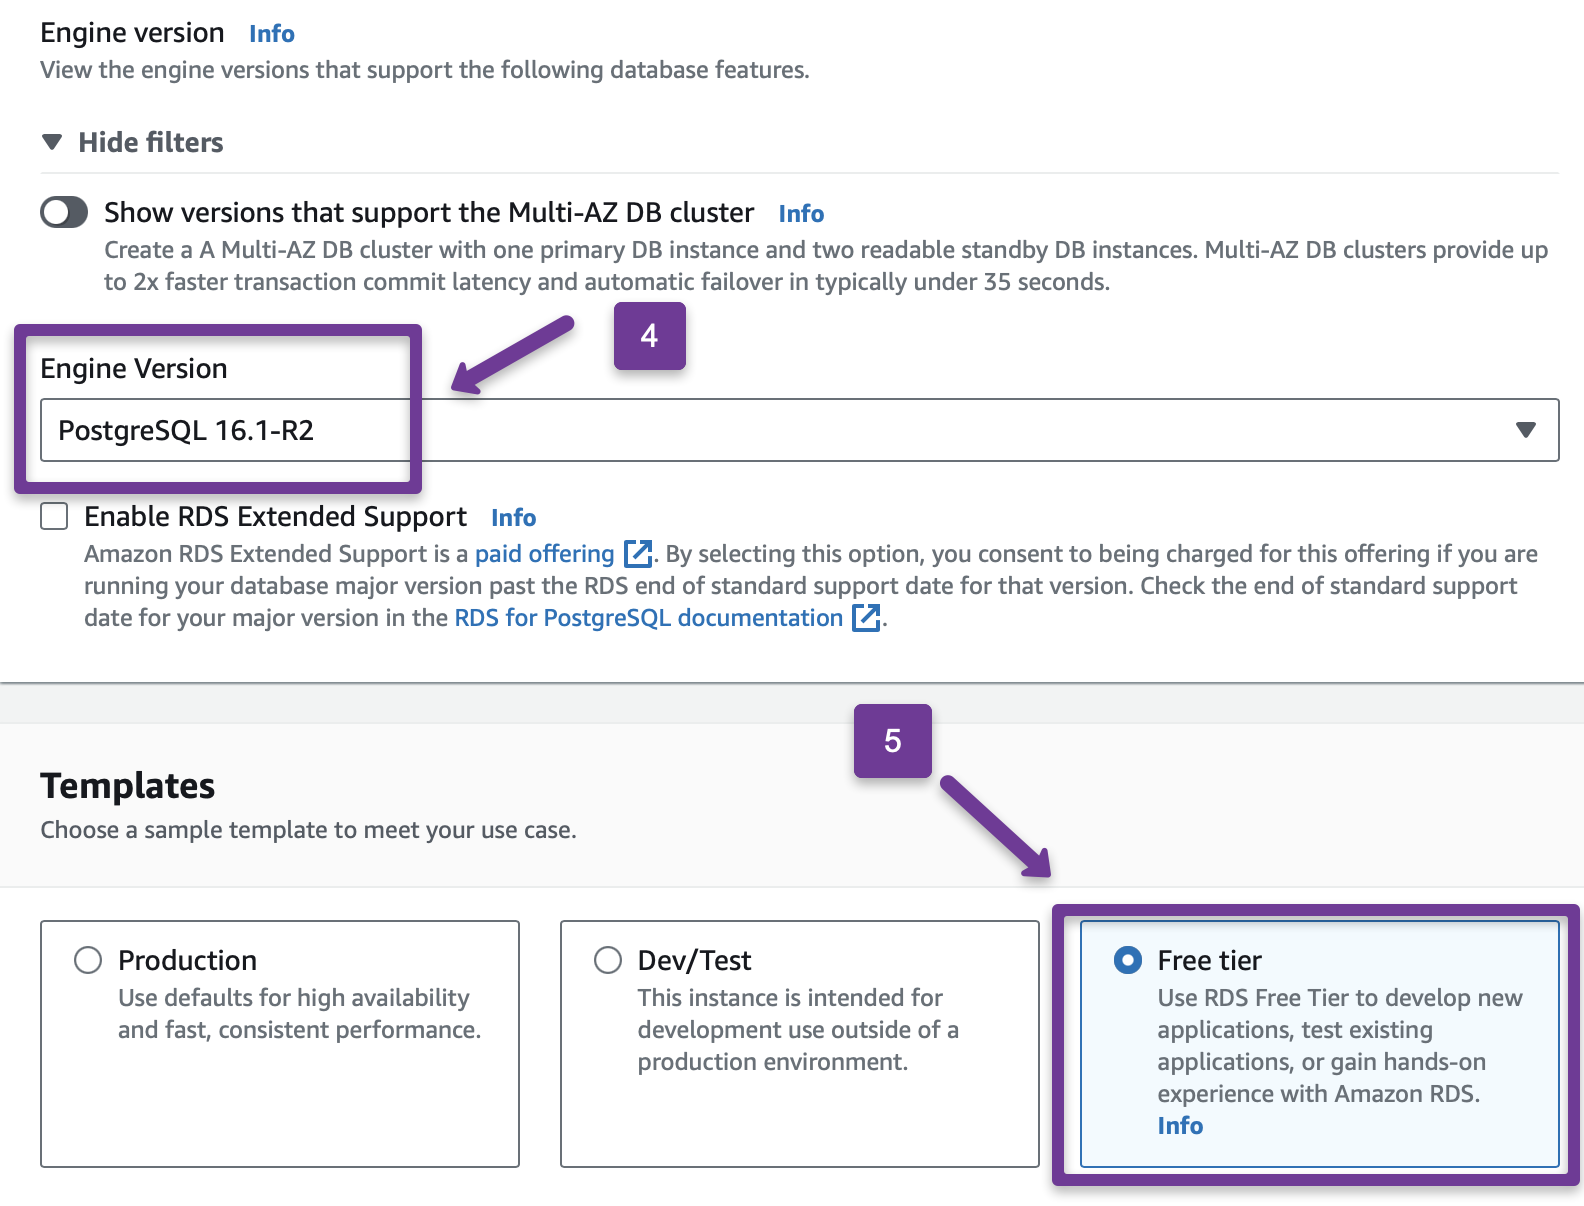
Choose the correct Database Engine version and the Template.
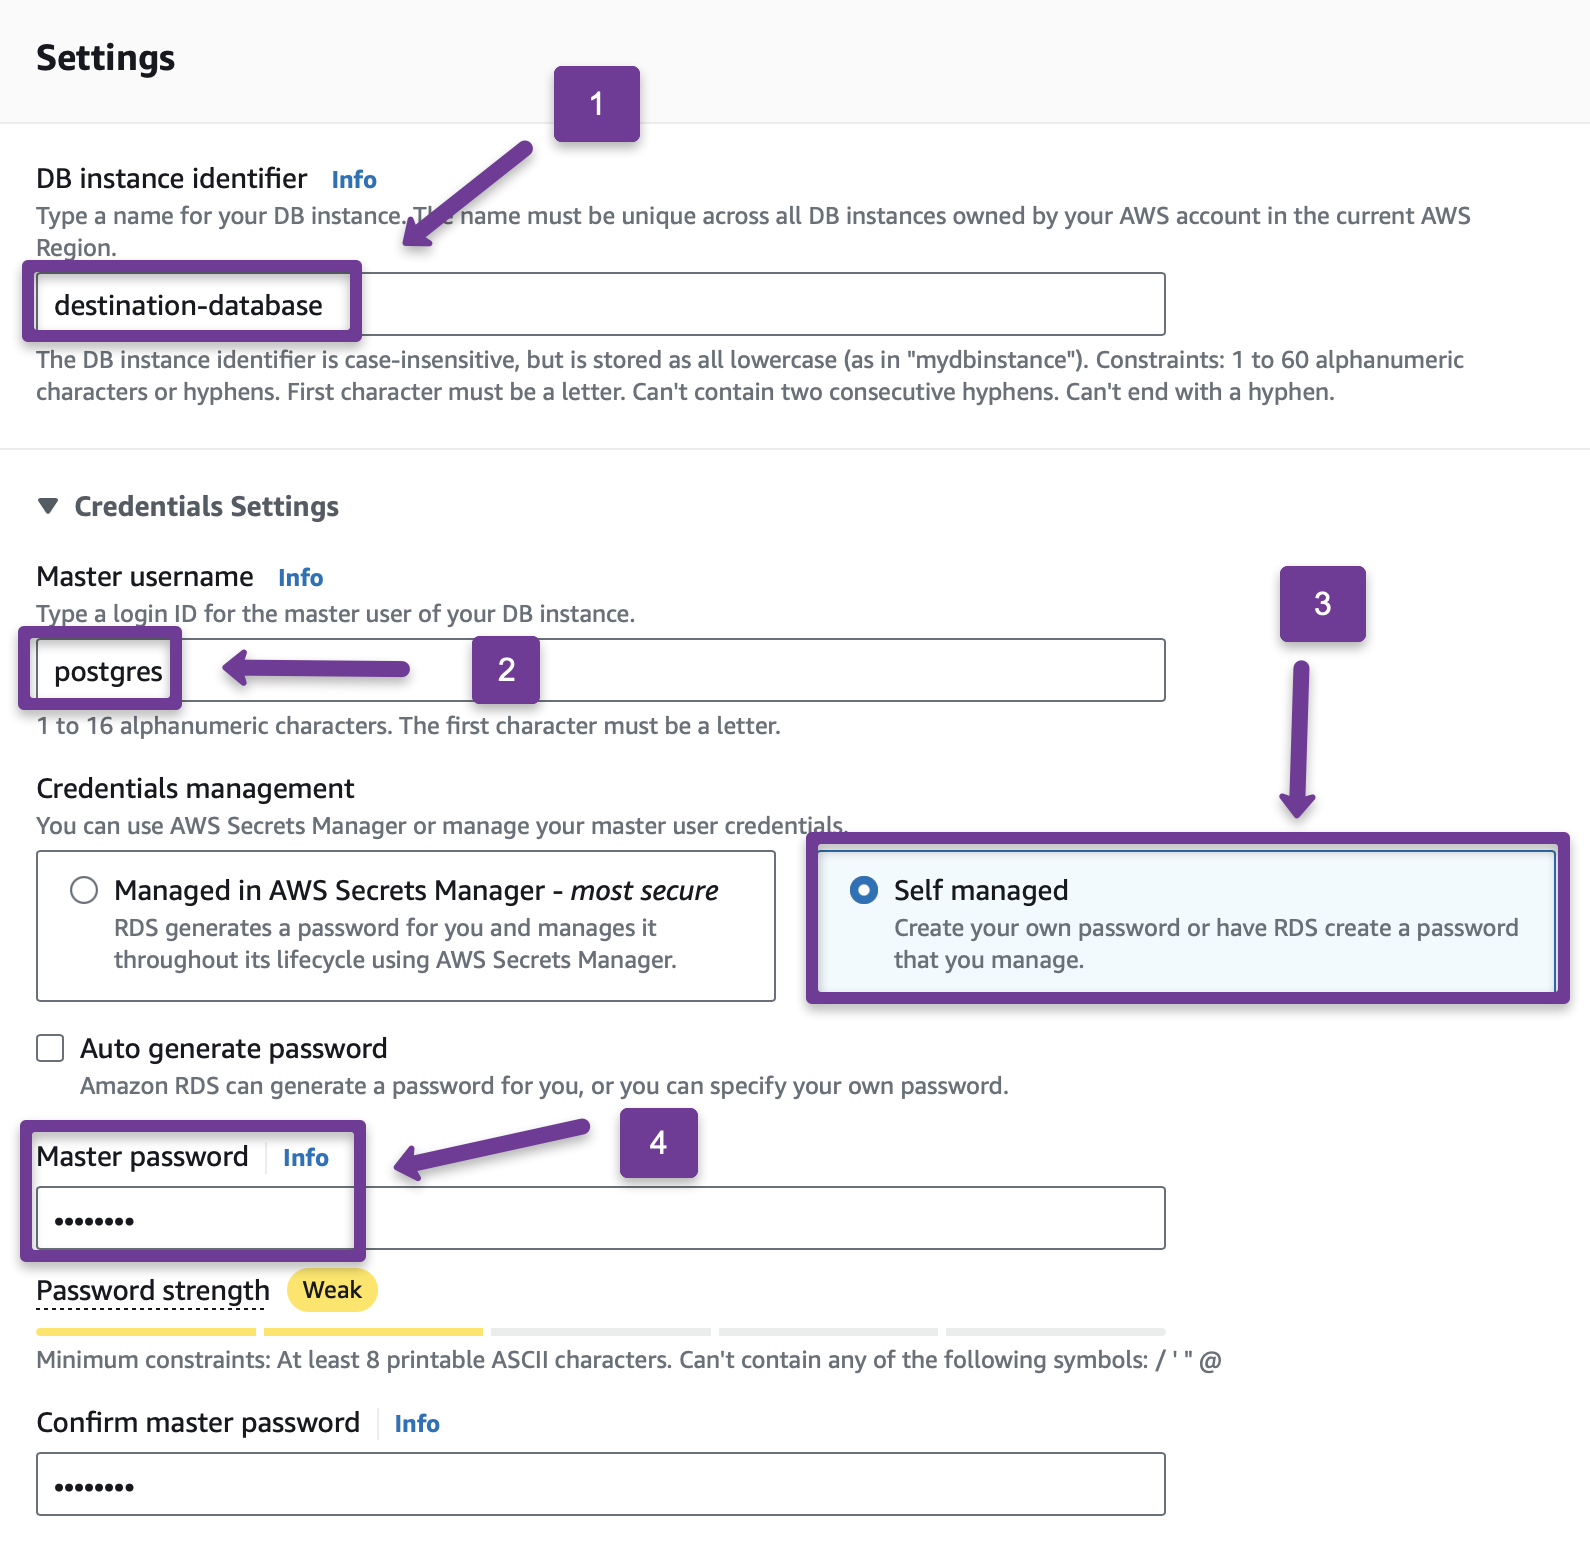
Settings section
Provide names for the DB instance identifier and Master username. I have selected the Self-managed option in Credentials management, so I have to provide the password for the RDS manually.
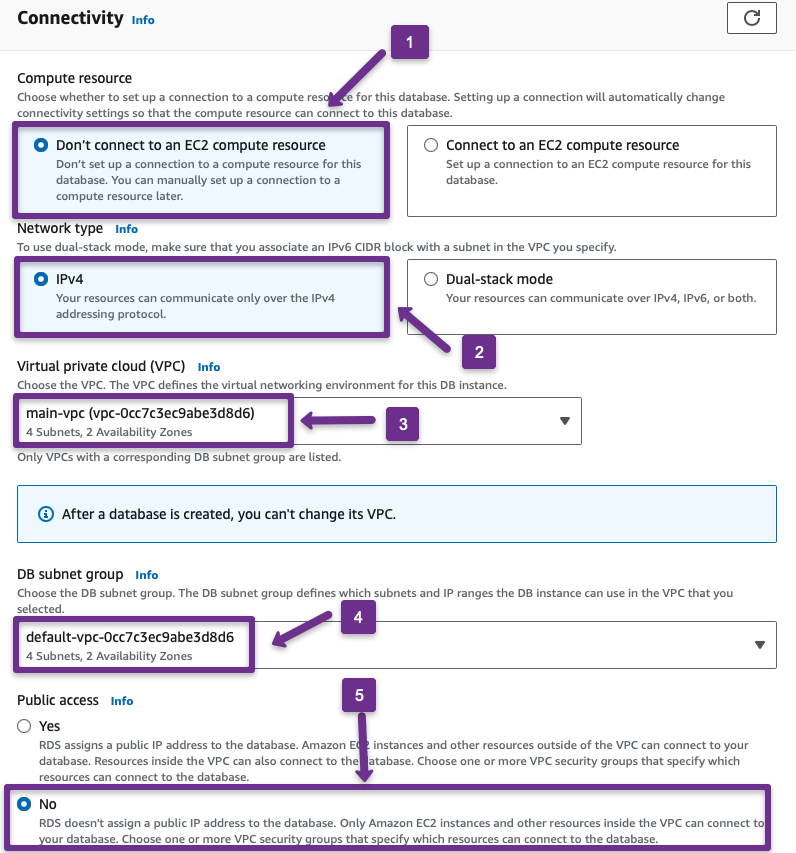
In the Connectivity section, select the VPC that has been Peered with the source account.
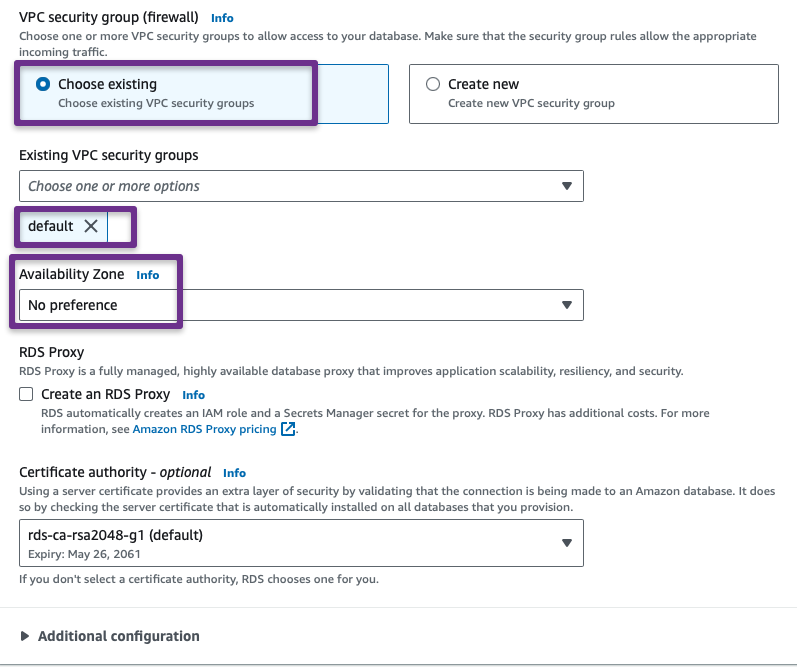
I am using the custom parameter group for the destination database.
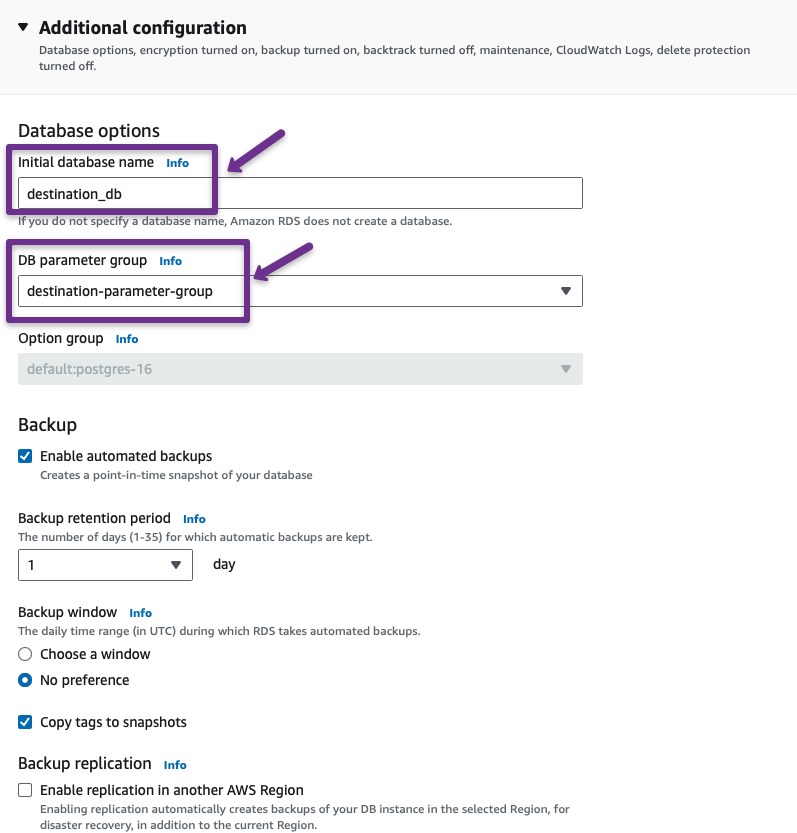
These are the only changes I have made in the destination database; the remaining configurations are by default.
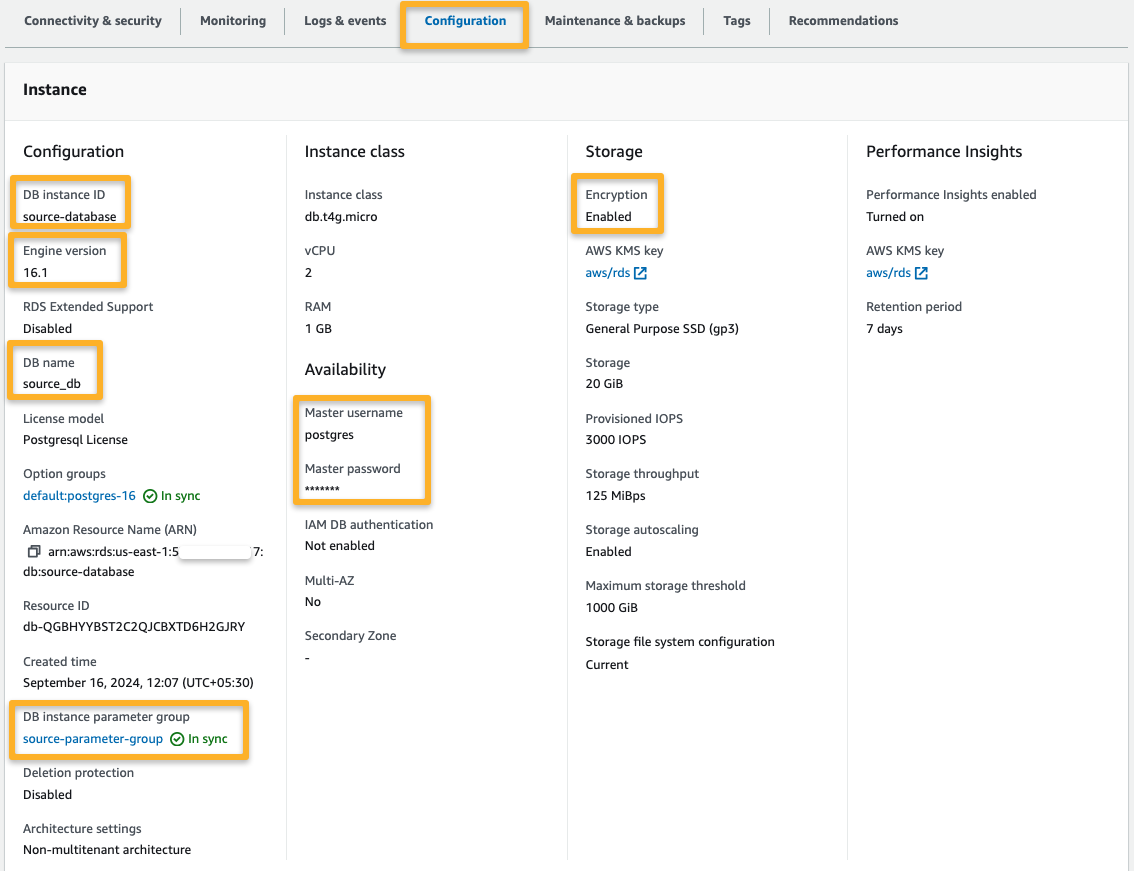
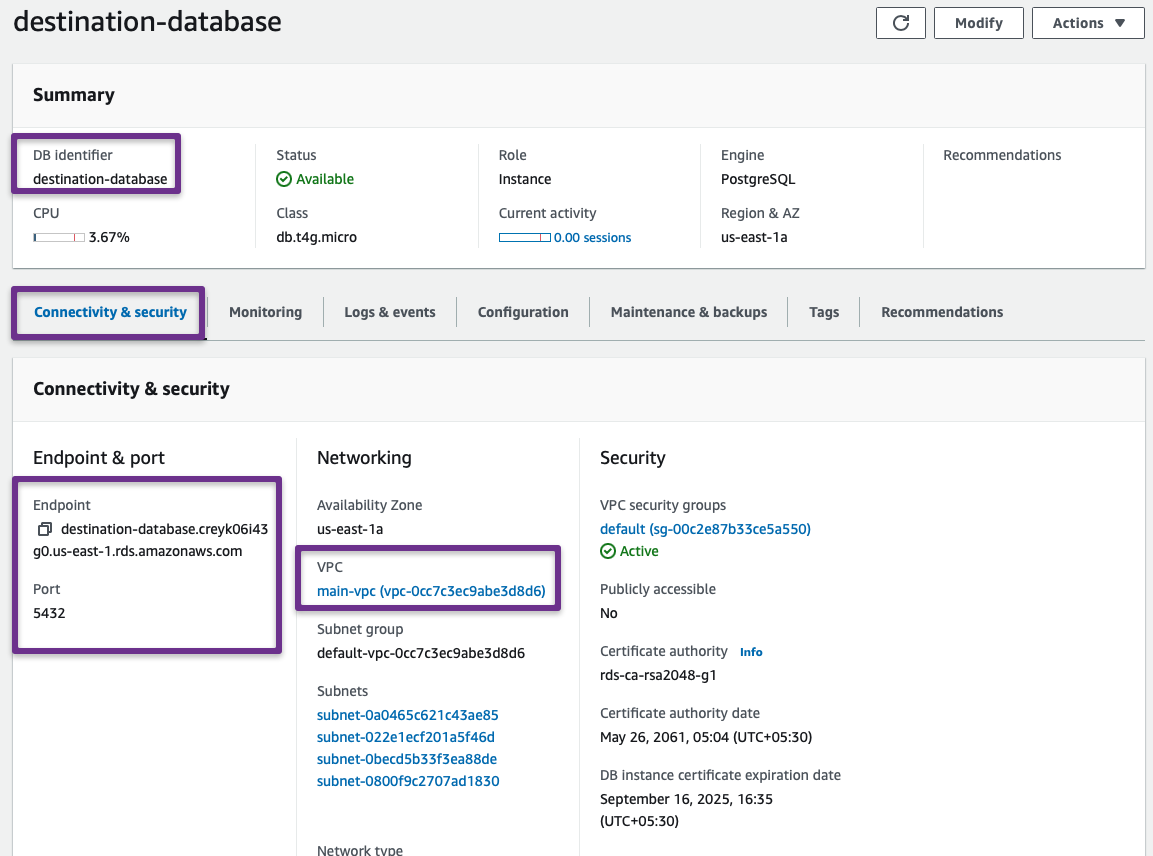
The database will take a few minutes to up. Then, note down the destination database's DB Identifier, Endpoint, and Port.
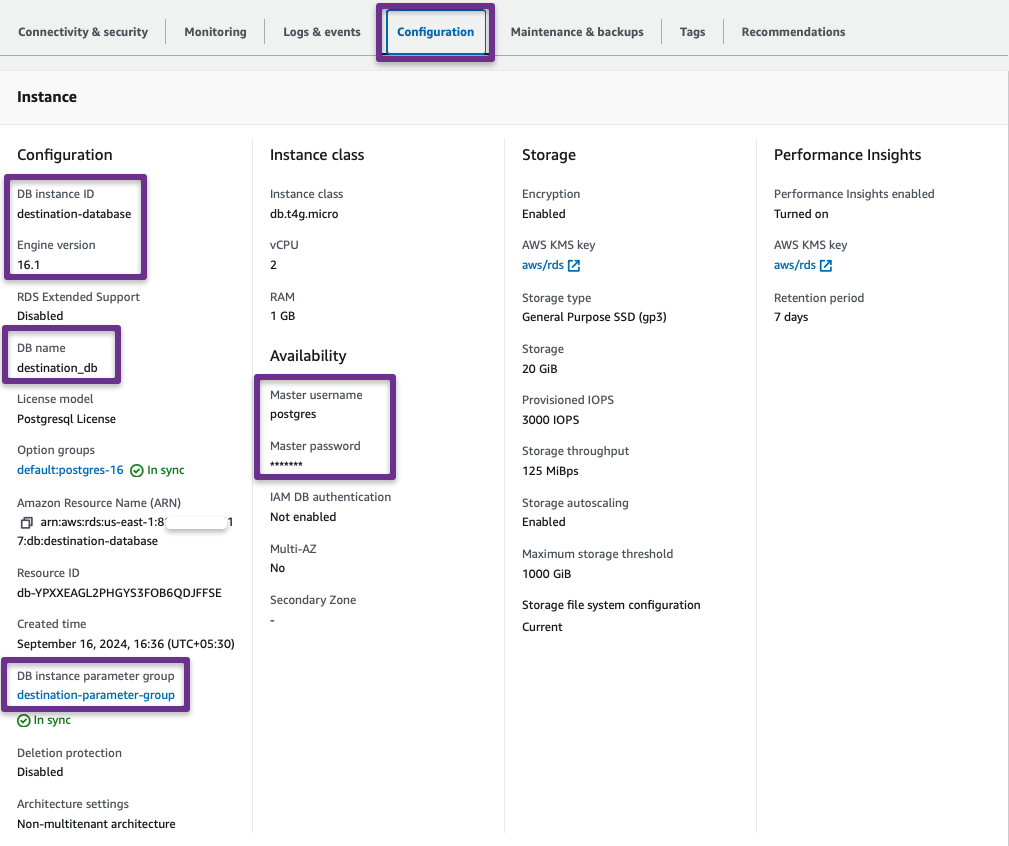
From the Configuration tab, note down the DB name and Master username.
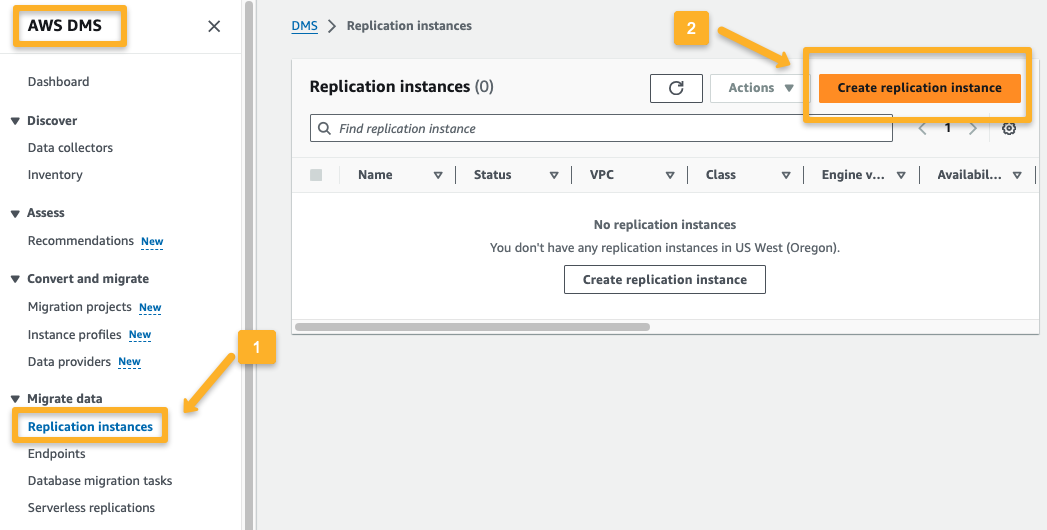
Step 7: Create a DMS Replication Instance
The replication instance is a server that migrates data from the source database to the destination database.
The replication instance should be created on the source account to read the data from the source effectively.
In the Settings, provide the instance configuration details such as Instance Class, Version, etc.
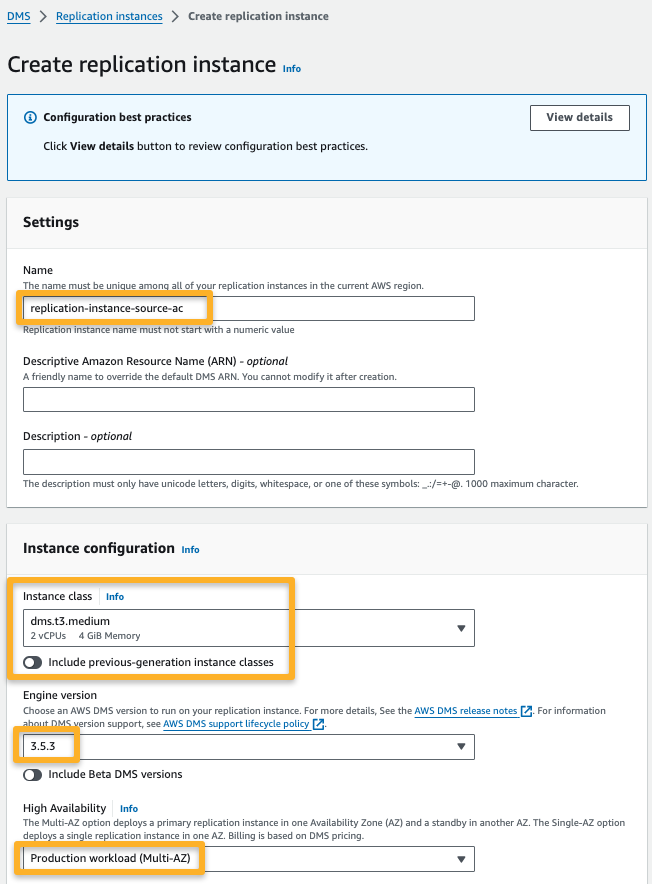
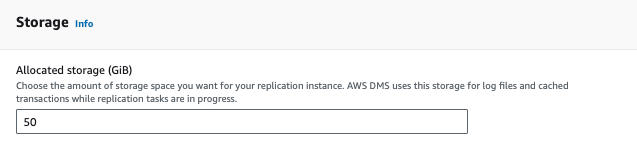
Choose the appropriate storage for the replication instance.
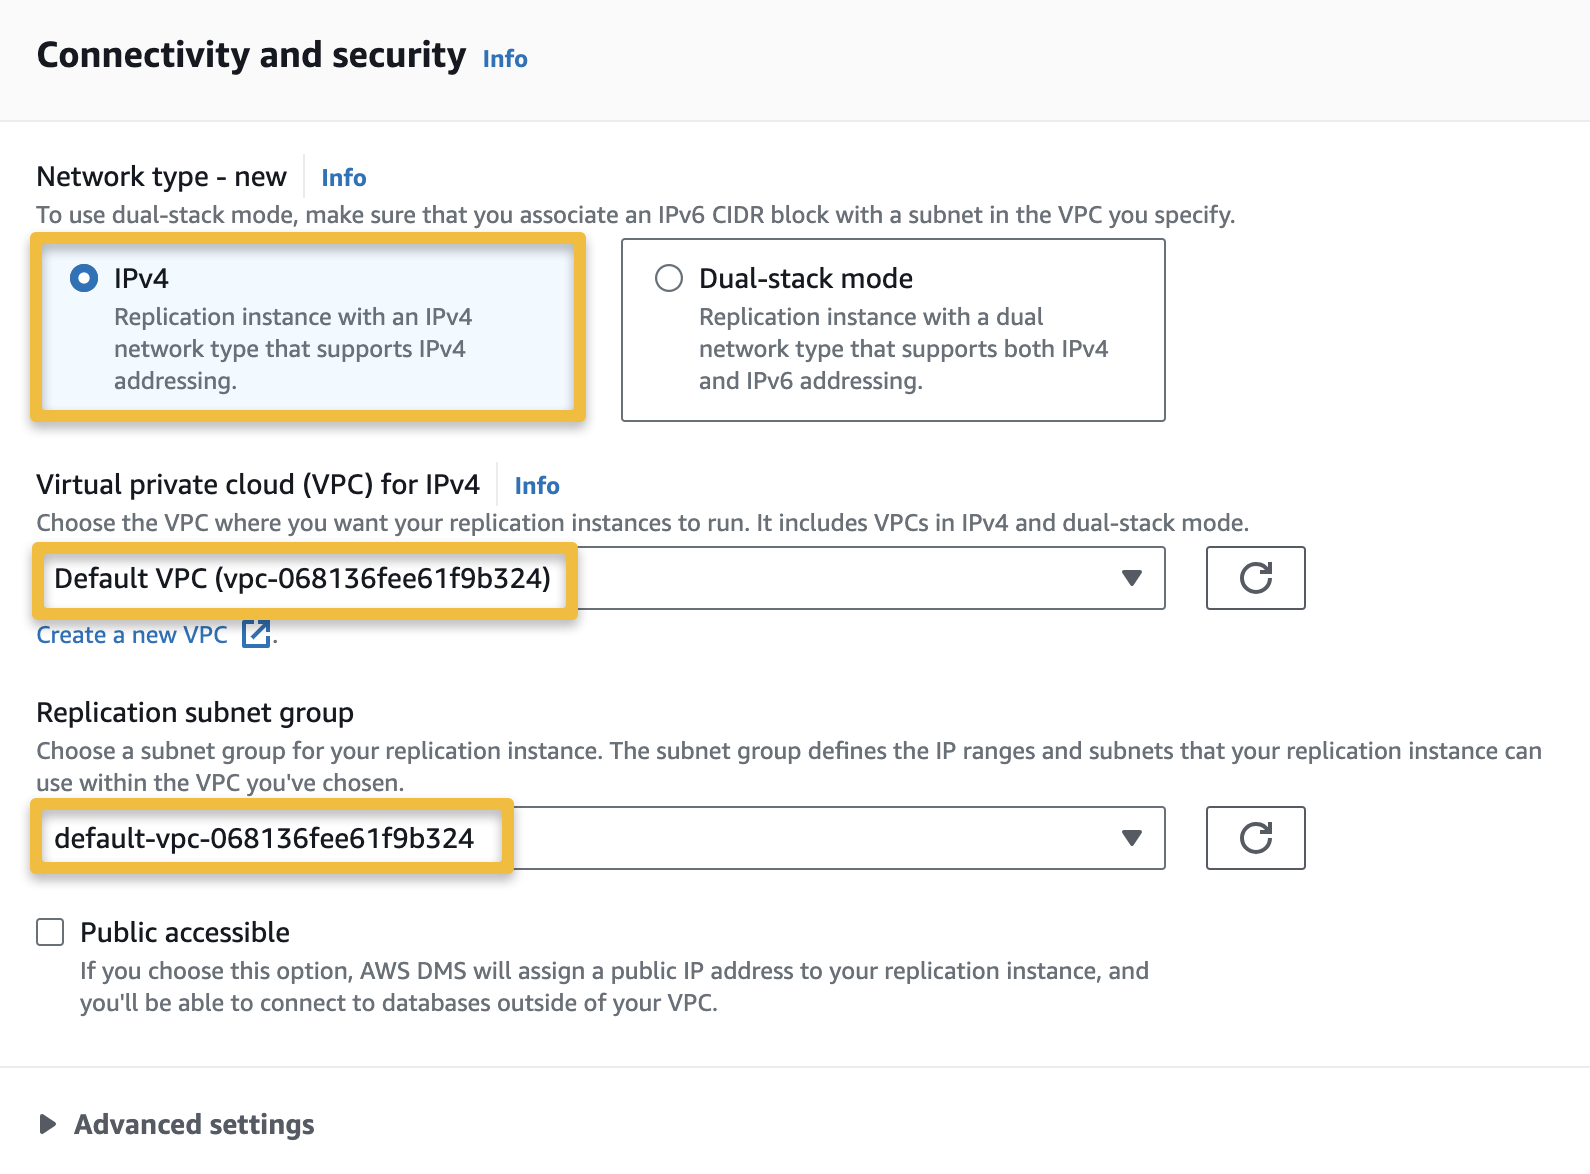
In the Connectivity and Security section, configure the VPC, Subnet, and accessibility configurations.
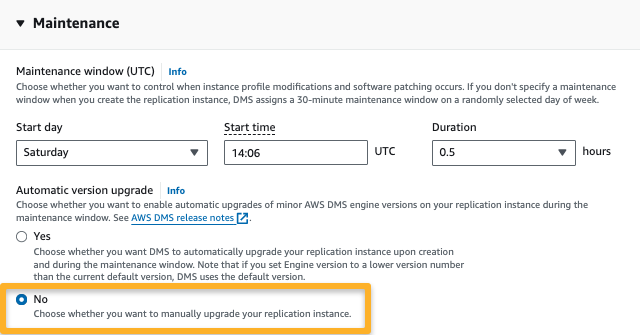
I have selected the manual replication instance upgrade method in the Maintenance section.
It will take a few minutes for the status to be available for the replication instance.

Step 8: Create a DMS Endpoint
First, we need to create an endpoint for the source
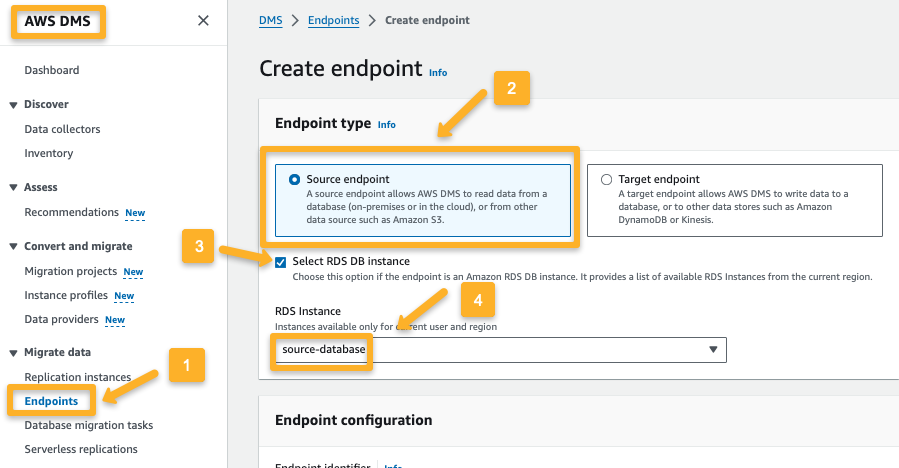
In the Endpoint Configuration, you need to provide the source RDS Identifier, engine type, user name, and password
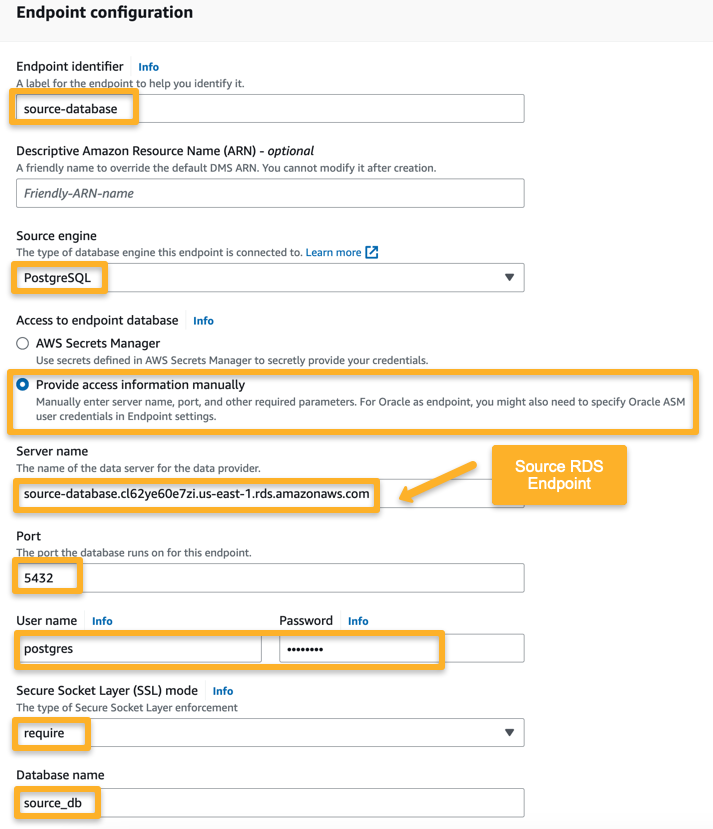
Finally, click the Run test; if it is successful, the endpoint is properly configured with the replication instance
We need to repeat the same process as the source endpoint to create a destination endpoint.
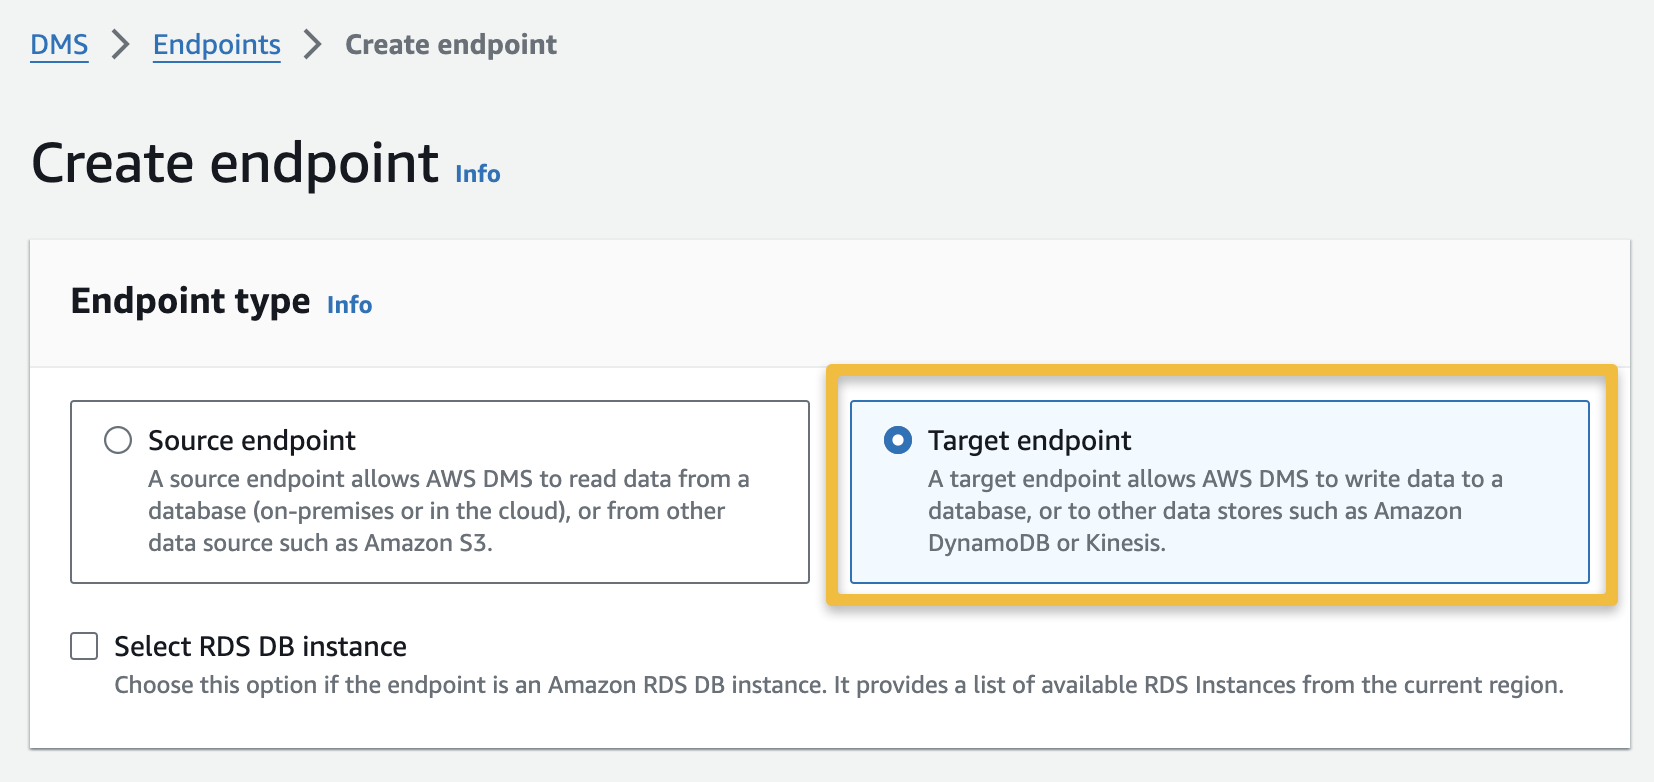
On the Endpoint configuration, you need to provide all the details manually.
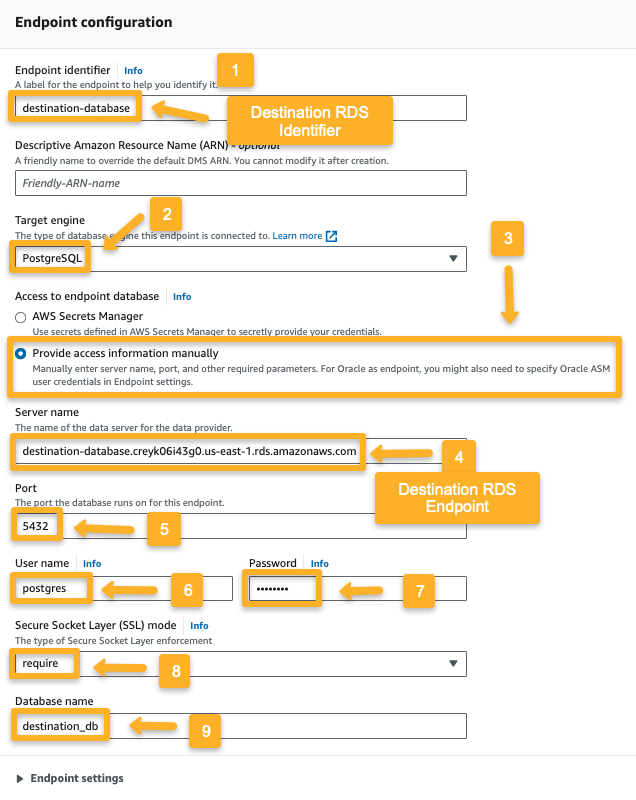
Finally, a run test will be conducted to ensure the configurations are properly done.
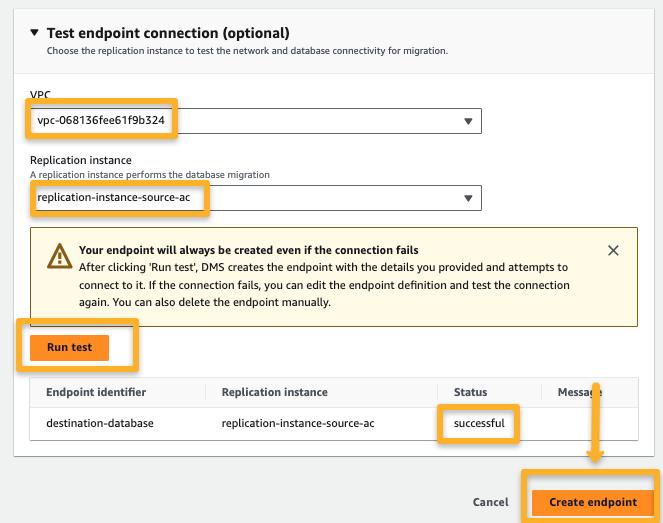
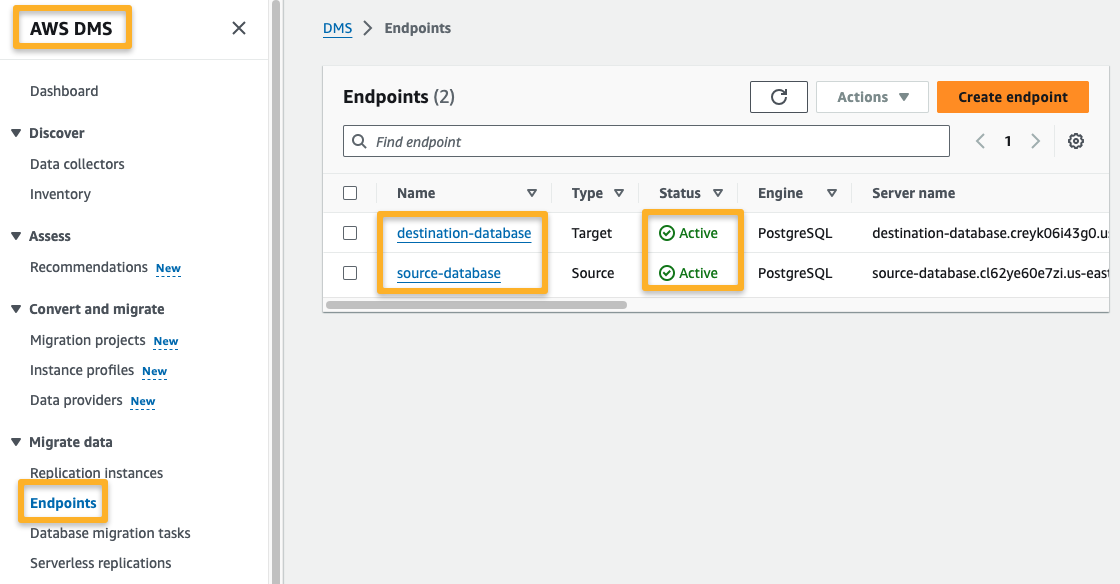
Both endpoints are configured, so we need to create a data migration task.
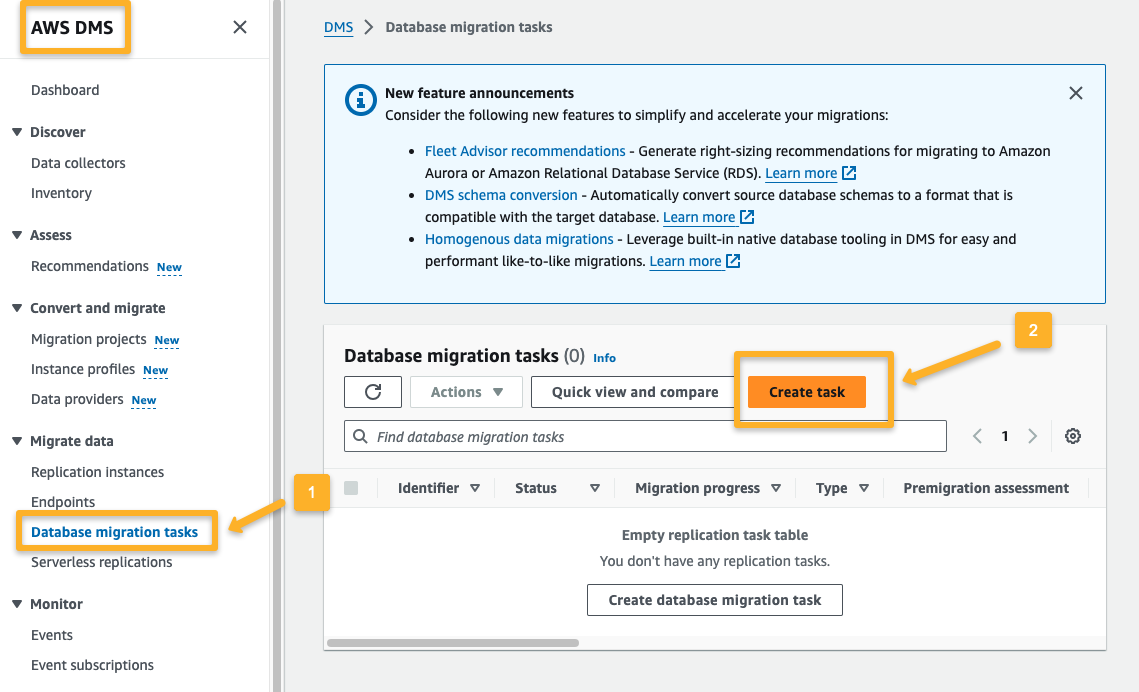
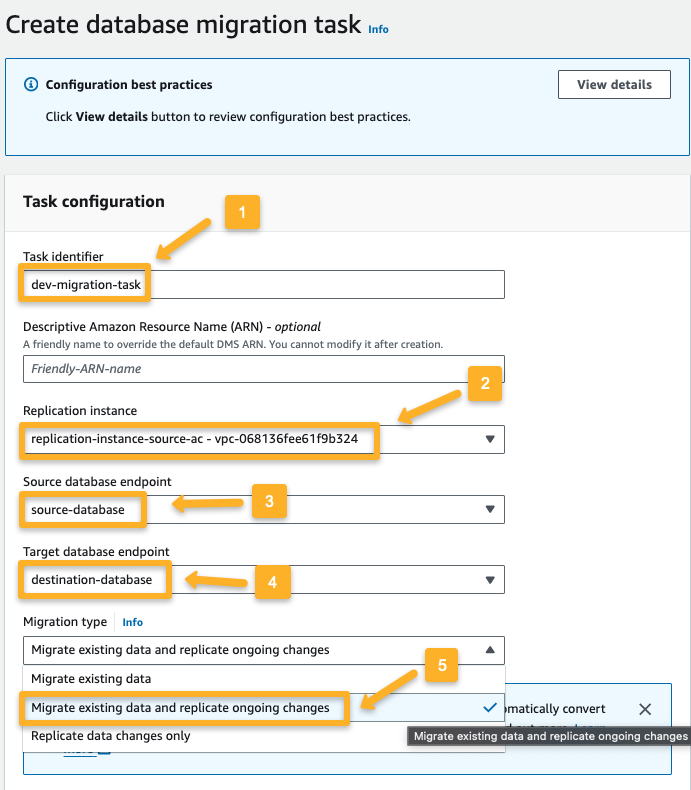
Step 9: Create a Data Migration Task
After configuring the source and destination endpoints, we must create a migration task to initiate the migration.
In the Task configuration section, we need to configure the Replication instance and source and destination endpoints.
Three migration types are available; we choose the one that migrates existing data and replicates ongoing changes.
So, any changes in the source database after the migration will also be reflected in the destination database.
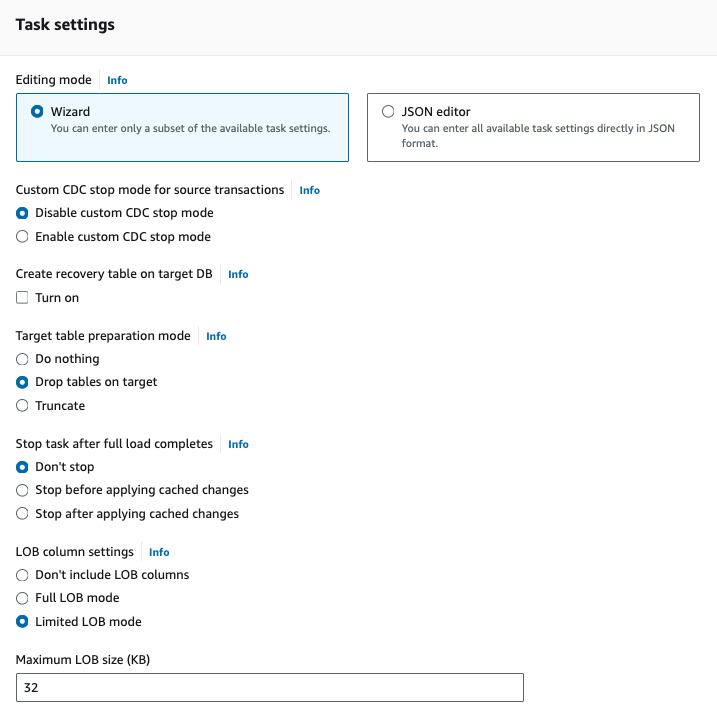
On the Task setting, I am going with the default configuration: Change Data Capture's stop mode is disabled, the creation of a recovery table on the target DB is disabled, etc.
I have turned off the data validation, but turning it on will ensure that the source and destination data are properly synced.
Also, the Task logs can be enabled to make alarms and notifications from the CloudWatch.
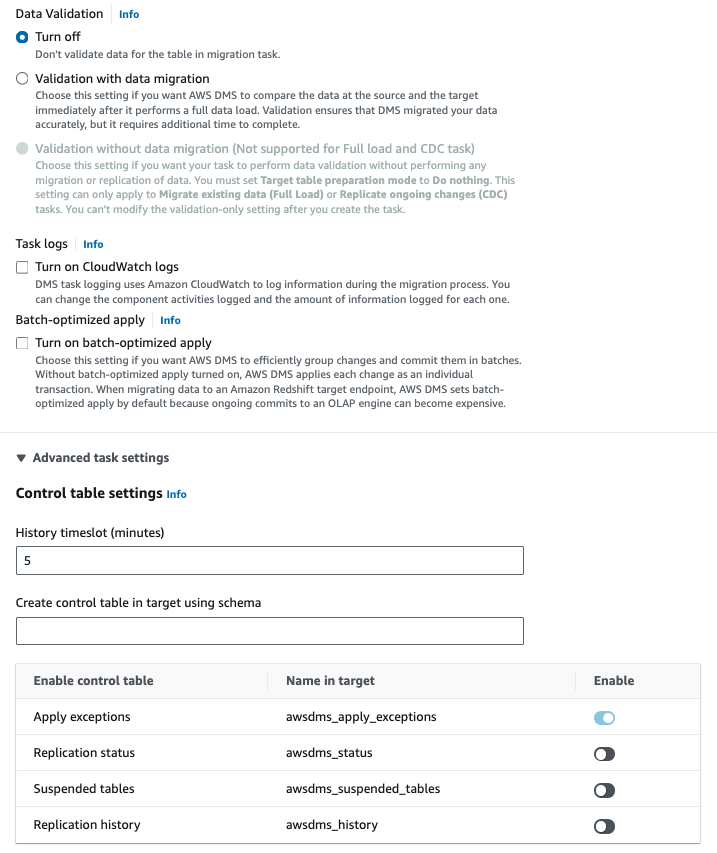
The Control table settings will create a database in the destination RDS containing information about the migration process.
In the Table mappings section, we can use the Selection Rules to filter the migration process by including or excluding tables, schemas or databases.,
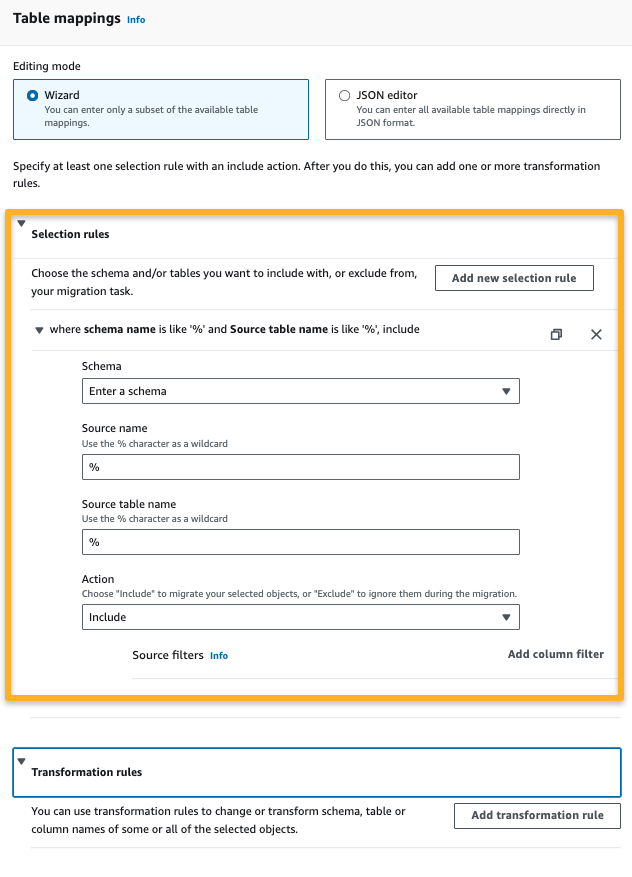
Premigration assessment will help identify possible issues before the migration starts, such as performance, compatibility, configuration, etc.
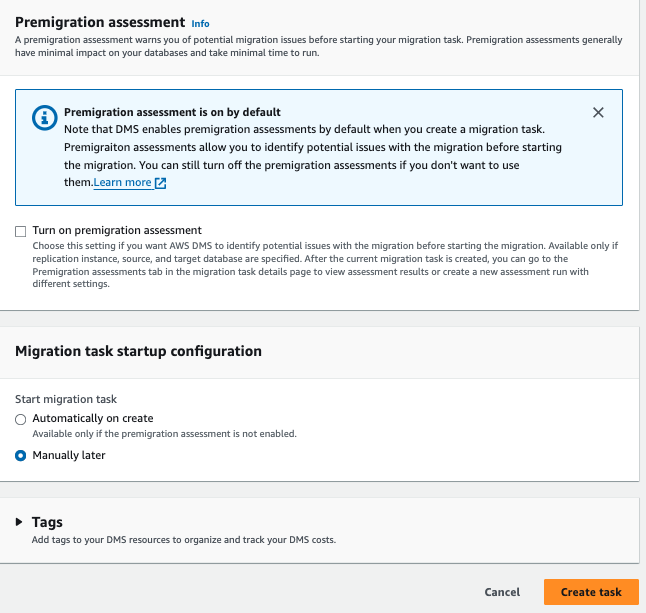
After the task is created, migration will automatically start.
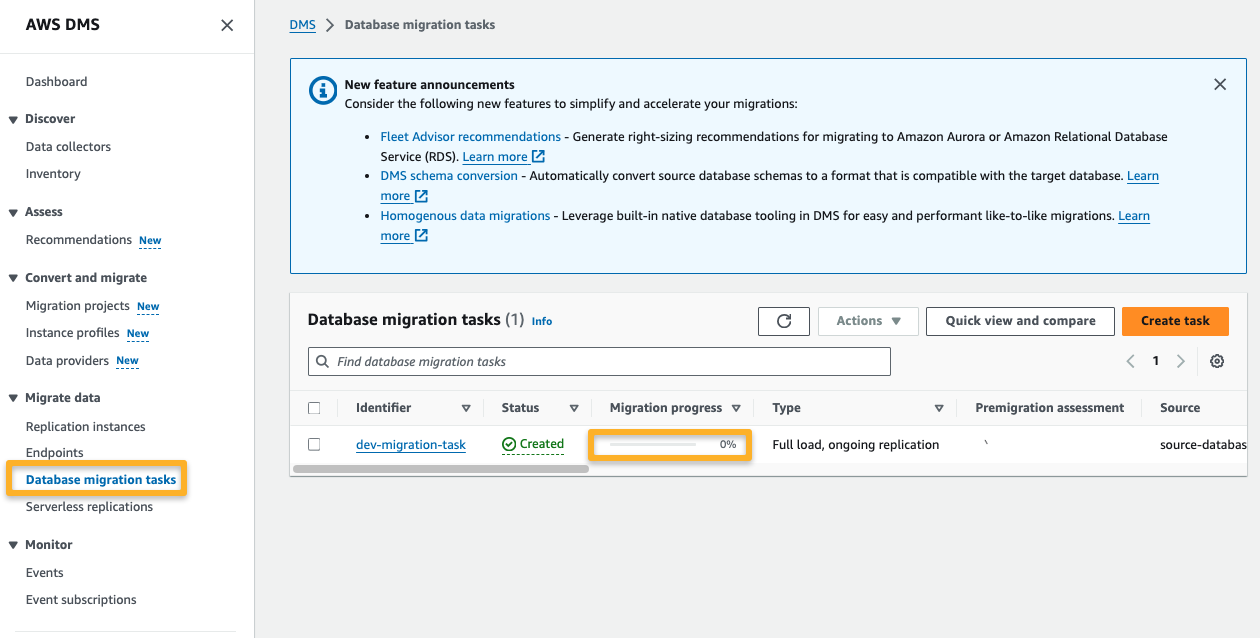
Note: If the migration is not started after few minutes, try using restart the task.
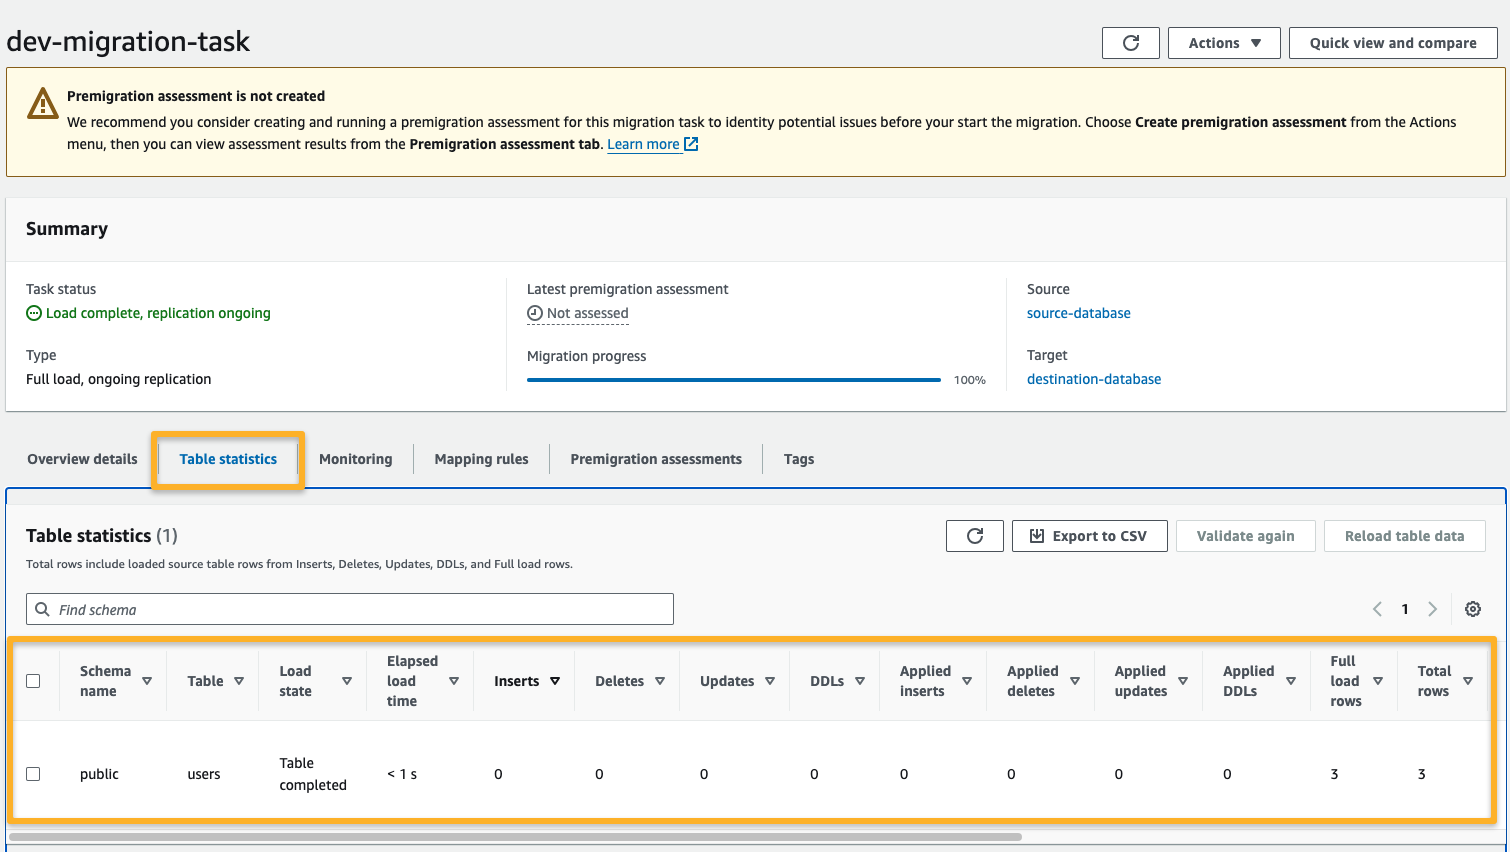
After the successful migration, you can see the following output.
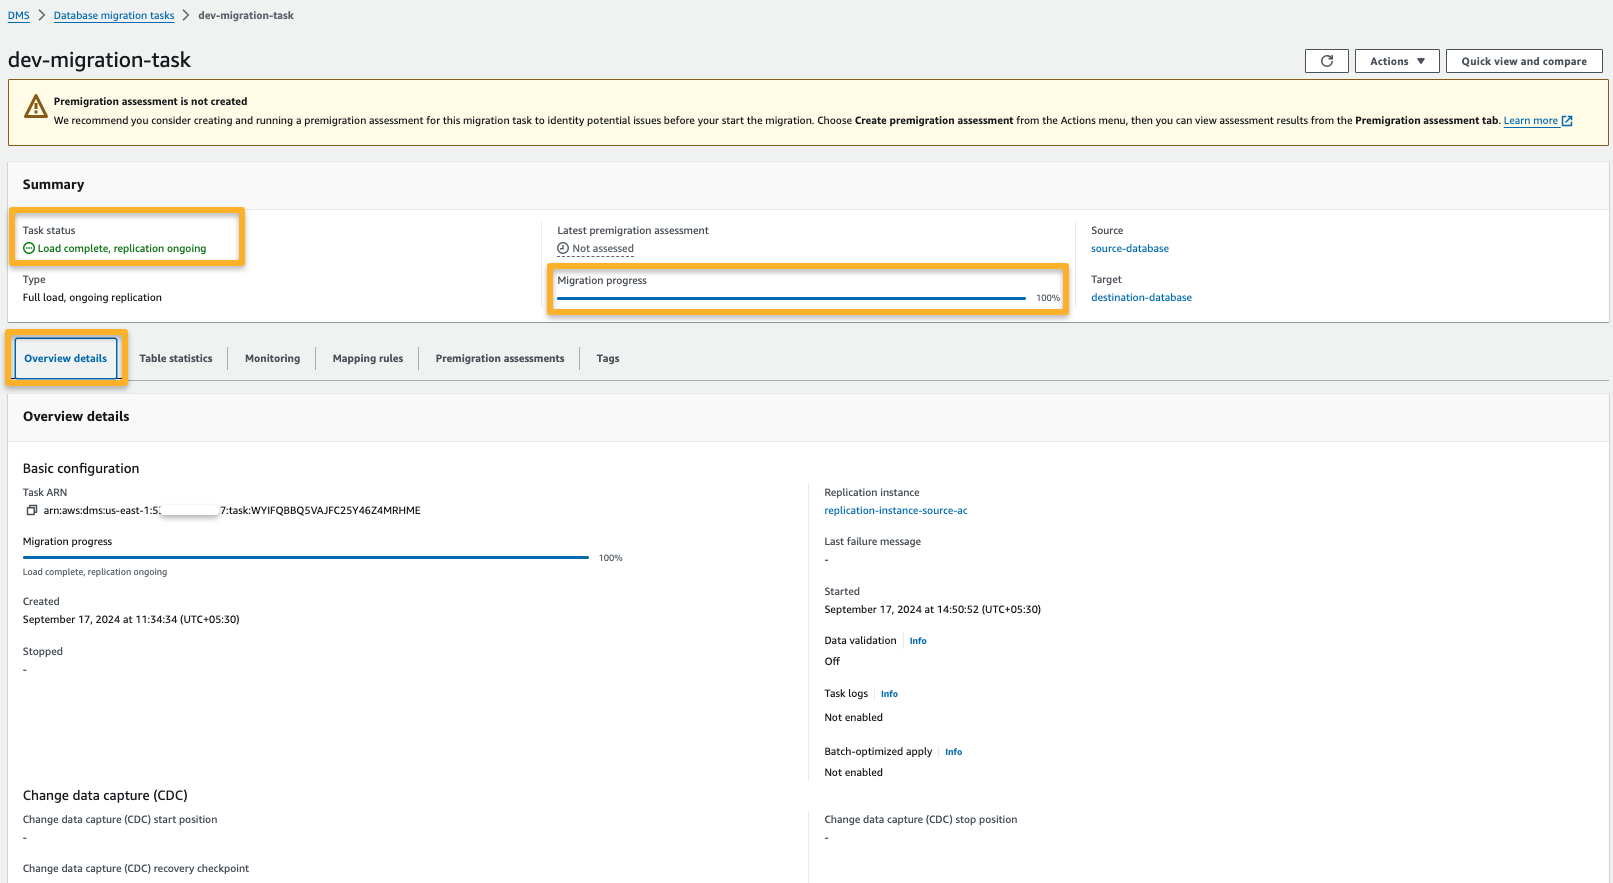
We can see more transfer details in the Task Statistics tab.
Step 10: Validate the RDS to RDS Migration
We need to connect the RDS with an EC2 instance to view the migrated data from the destination account.
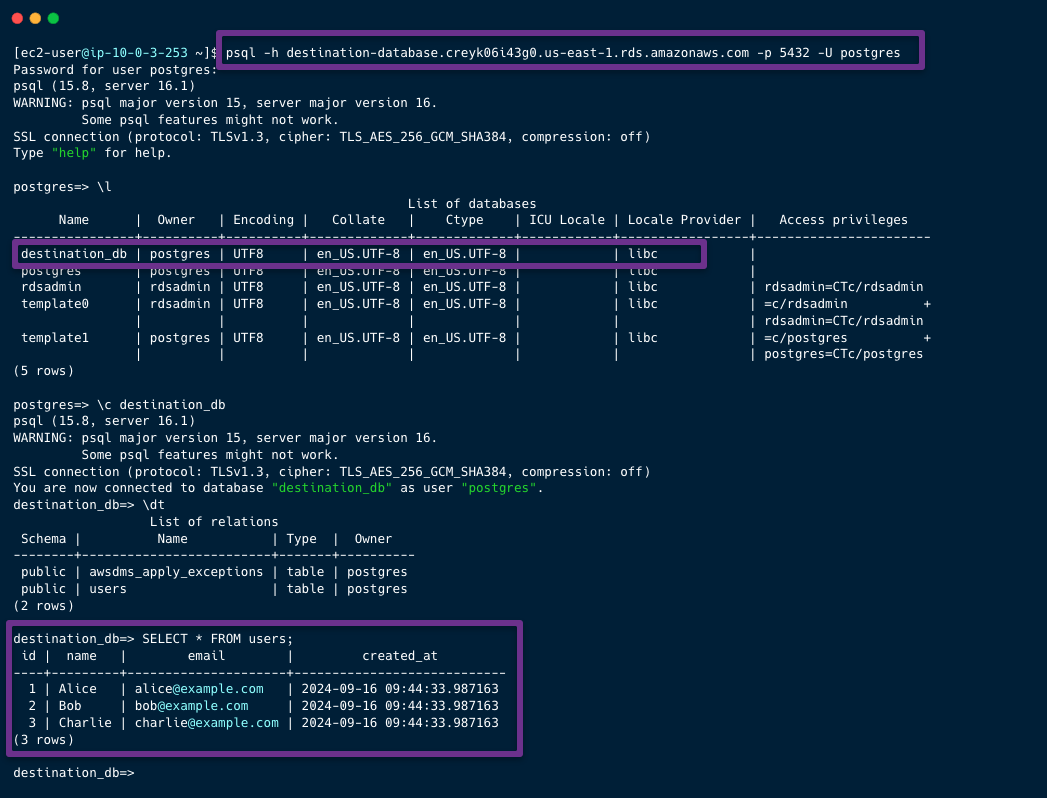
The data is successfully migrated from the source account to the destination account.
The migration task won't stop until we stop it. It will keep syncing the data from source to destination, so if any new data is added or modified, it will reflect in the destination RDS.
Conclusion
The AWS Database Migration Service is a built-in service for migrating data between RDSs. Many more configurations are available to fulfill our requirements.
DMS can do continuous replication and migrate the data between different types of databases.
Serverless migration and convert data migration are also available in DMS.
