

Version control systems are repositories used to version your code/scripts collaboratively with the advantages of tracking changes as features added, files deleted, etc.
Version control systems are not limited to developers. In this DevOps era, developers and the operations team should have good knowledge about version control systems like Git.
This post will cover the basic Git commands and workflows that you can use with your projects.
Git Basics for Developers/Administrators
You can install git on your workstation from here - Git Download ( Windows, OSX, Linux).
Creating a repository
Create a project directory and cd into it. Execute the following git command from the directory to create a git repository.
ubuntu@devopscube:~$ mkdir demorepo && cd demorepo
ubuntu@devopscube:~/demorepo$ git init
Initialized empty Git repository in /home/ubuntu/demorepo/.git/
ubuntu@devopscube:~/demorepo$
Checking out a repository
You can create a copy of your git repository using the clone command. Execute the following command to clone your project directory.
git clone /path/to/project-repositoryubuntu@devopscube:~$ mkdir repo-copy && cd repo-copy ubuntu@devopscube:~/repo-copy$ git clone /home/ubuntu/demorepo Cloning into 'demorepo'... ubuntu@devopscube:~/repo-copy$ ls demorepo ubuntu@devopscube:~/repo-copy$Git Workflow
Every git repository has three trees. A working directory, Index and Head.
Working directory: It contains the actual project files.
Index: It is the staging area where you add the project files that needs to be committed.
Head: Head is where the reference to you previous commit exists.
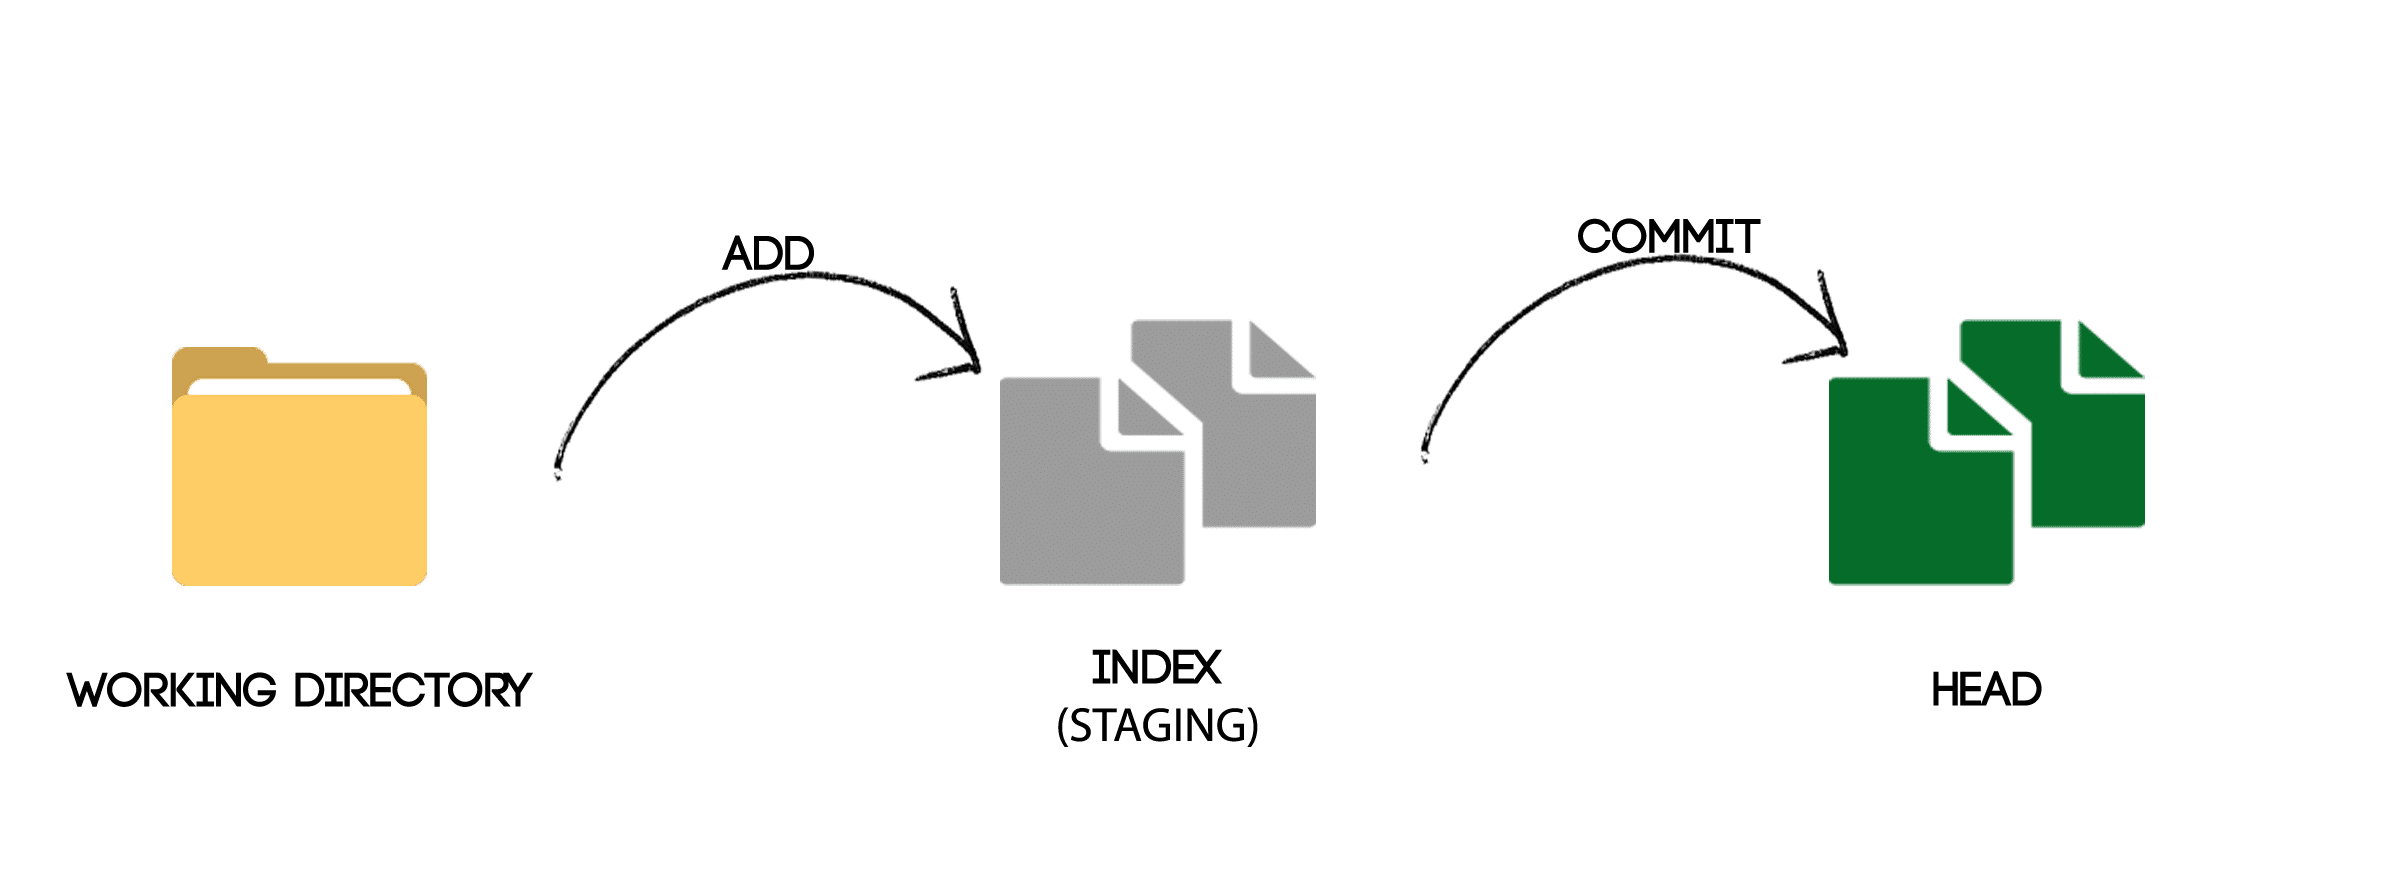
Adding file to the staging area: (add)
When you create new files in your project directory, you need to add it to the staging area. Execute the following command to add the files to the staging area.
git add <filename>Let’s say you want to add all the files in your project directory to the staging area. Execute the following command to do the same
git add --allCommitting new changes to the repository (commit):
Once you have added all the files to the staging area, you can commit the changes with a reference message using the “-m” flag as shown below.
git commit -m “my first commit” Once committed, a version of your project files will be versioned in your local repository. The next step is to push your code to a remote centralized repository. The best online source code repository is Github. It offers both public and private repositories.
You can sign up for a Github account here.
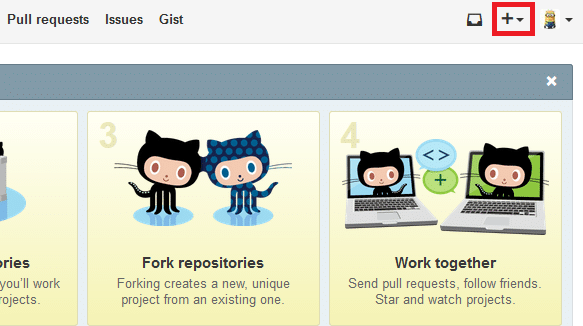
Once signed up create a repository with your project name using the + option available at the top navigation bar. Create a repository without initializing the README.md file.
Once you create a repository, you will be redirected to a page with the commands you need to execute on your local repository. There are two sections of commands as shown below.
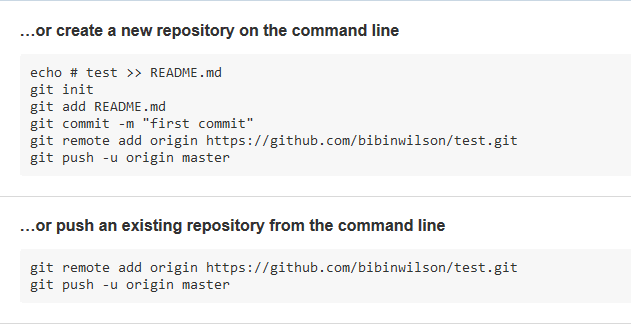
If you have already committed your code to your local repository, you should leave the first part and execute the commands in the second part.
But, if you are going to start a new project, execute all the commands in your project folder as mentioned in the first sections.
There are two important commands you need to execute to push your code to a remote Github repository.
git remote add origin https://github.com/<user-name>/<repo-name>.git
git push -u origin master
The first command will add the remote repository URL to your local git repository. The second command will push the local repository code to the remote repository mentioned in the first command. You will be asked to enter the username and password of Github after executing the second command. Once authenticated, your local repository code will be pushed to the remote Github repository.
Branching:
Let’s say you want to work on a new feature for your project without affecting the initial version. For this, you can make use of Git’s branching feature.
A git branch is nothing but a clone of your original code. Once you added the feature and tested the code, you can merge your branch with the new functionalities to the master branch (last version).
You can create a branch using the following git command.
Syntax: git checkout -b <branch-name>Example: git checkout -b signup-functionOnce you have checkout to a new branch, all the commits you make will be committed to the branch you have created locally. To push your branch to Github upstream repository, execute the following command.
Syntax: git push origin <branch-name>Example: git push origin signup-functionIf you want to make changes to your master branch, execute the following command.
git checkout masterOnce you have tested the new feature in your new branch, the next step is to merge it with the master branch. You can do that using the following commands.
git checkout master
git merge <branch-name>Replacing the local repository with a remote repository:
If you think you don’t want all the local commits and changes of your local server, you can roll back to the remote server contents using git fetch command. The syntax is as follows.
git fetch origin
git reset --hard origin/master
Other resources:
Conclusion
We have covered the basics to get started with Git. Let you know your through and tips in the comments section.
