

In this blog, I will walk you through step-by-step instructions to setup a custom domain for your Beehiiv publication.
I personally run two newsletters with Beehiiv. During the setup of a custom domain for one of my publications, I documented the steps so that it would be easy for you.
Overall, here is what you need to do.
- Verify domain
- Connect the domain to beehiiv using DNS records
- Add DNS records for email
Prerequsites
- An active Beehiiv Publication
- A valid domain name with a Domain registrar. For example Hostinger, Godaddy etc.
Let's get started with the setup.
Configure Custom Domain
Follow the steps below to setup a custom domain
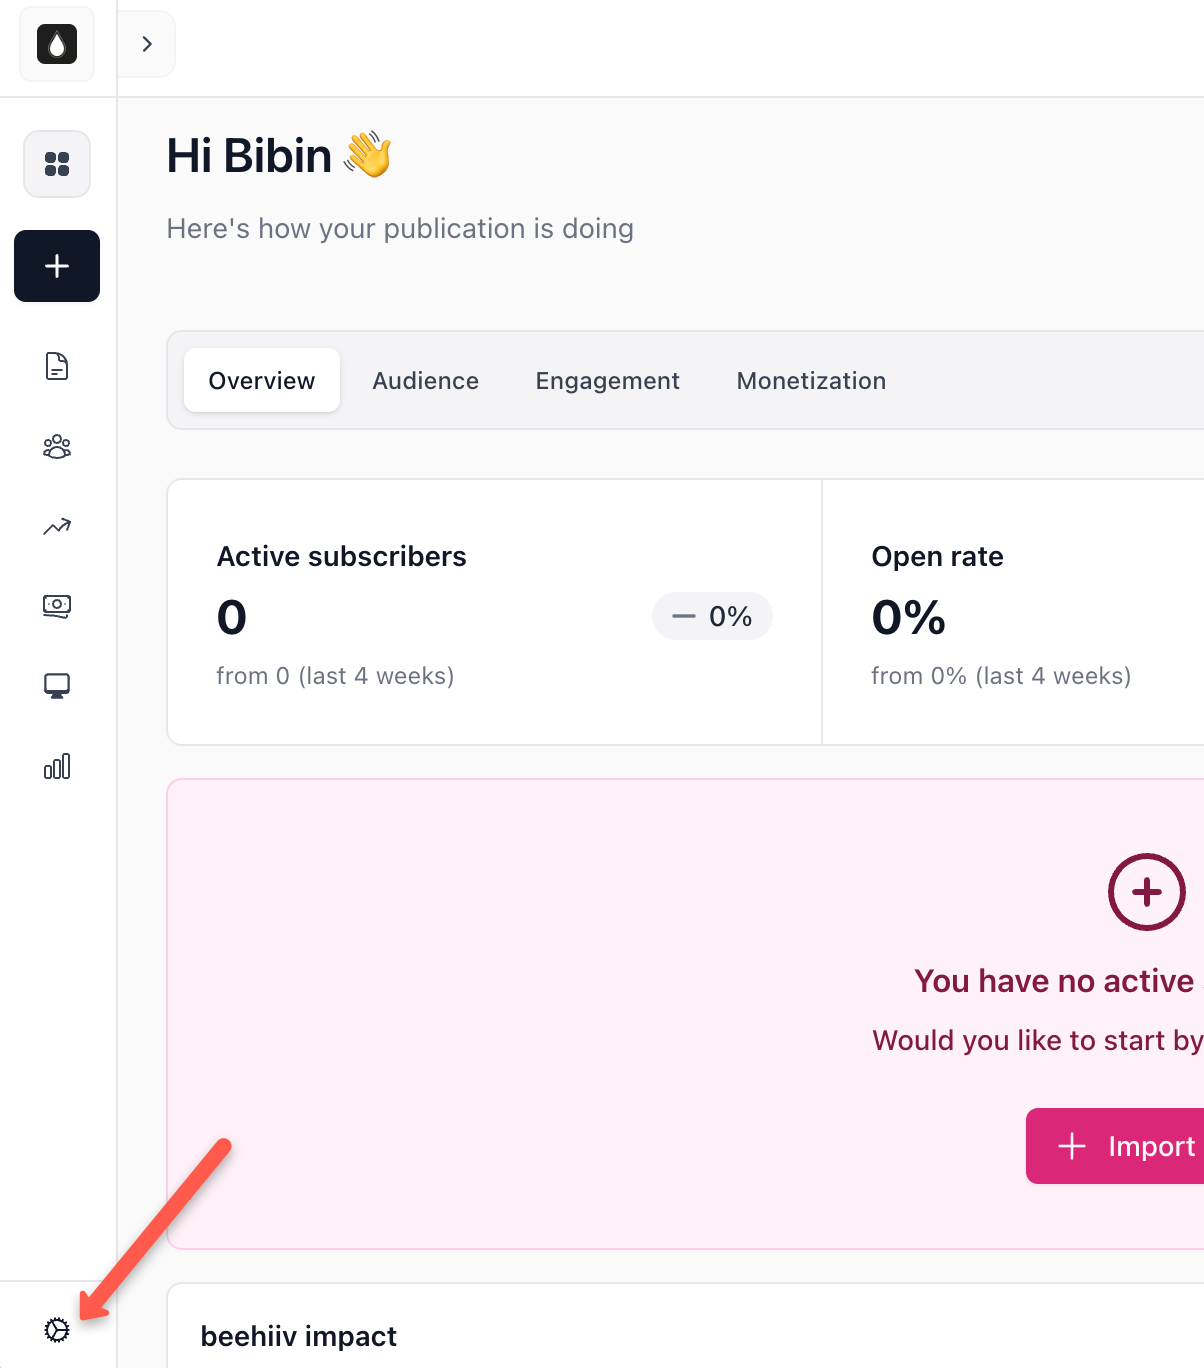
Step 1: Open Settings in Beehivv
From your Beehiiv dashboard, click on the settings icon in the left-side corner at the bottom.
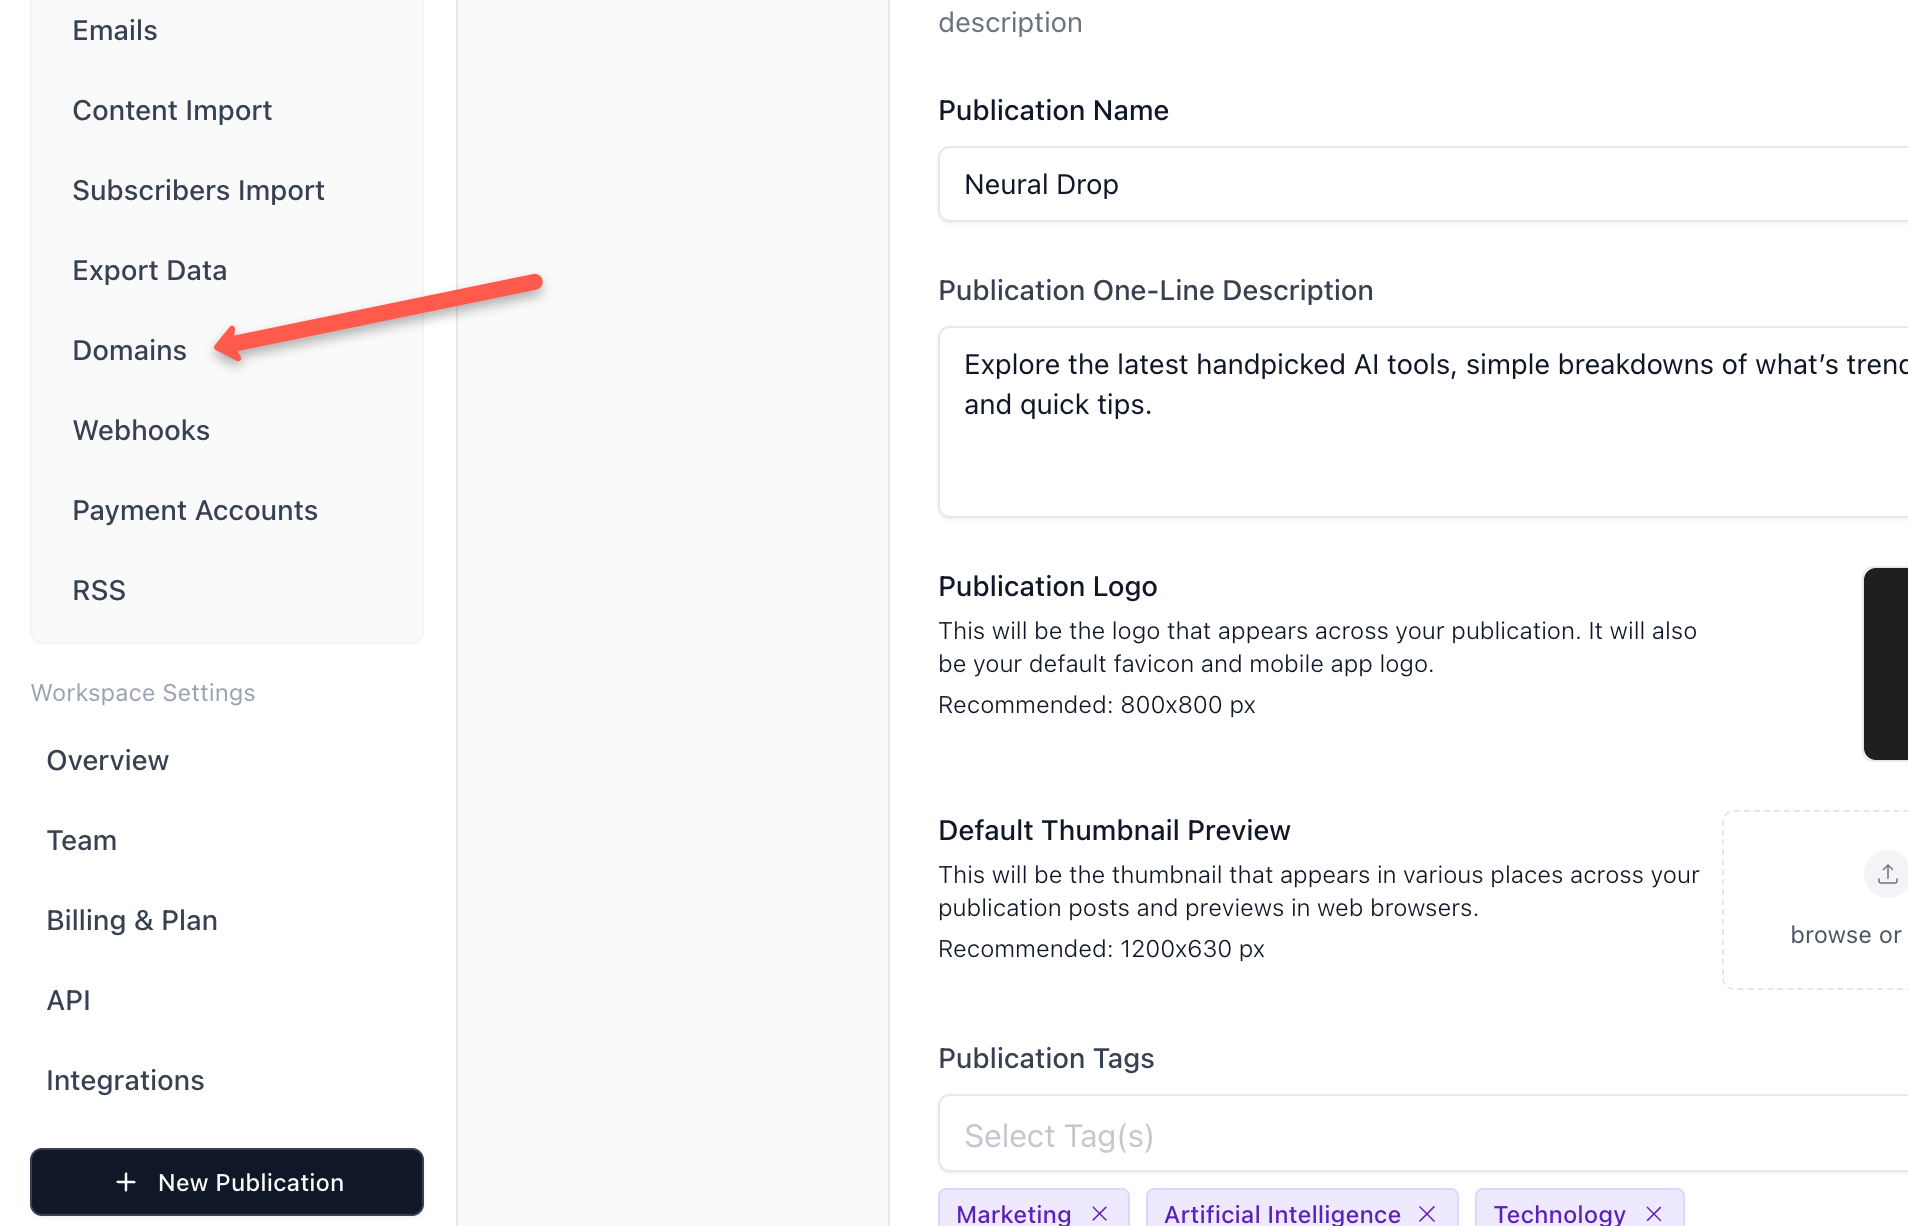
Step 2: Go to Domain Settings
On the left sidebar, you will find the domain option under the settings menu, and click it.
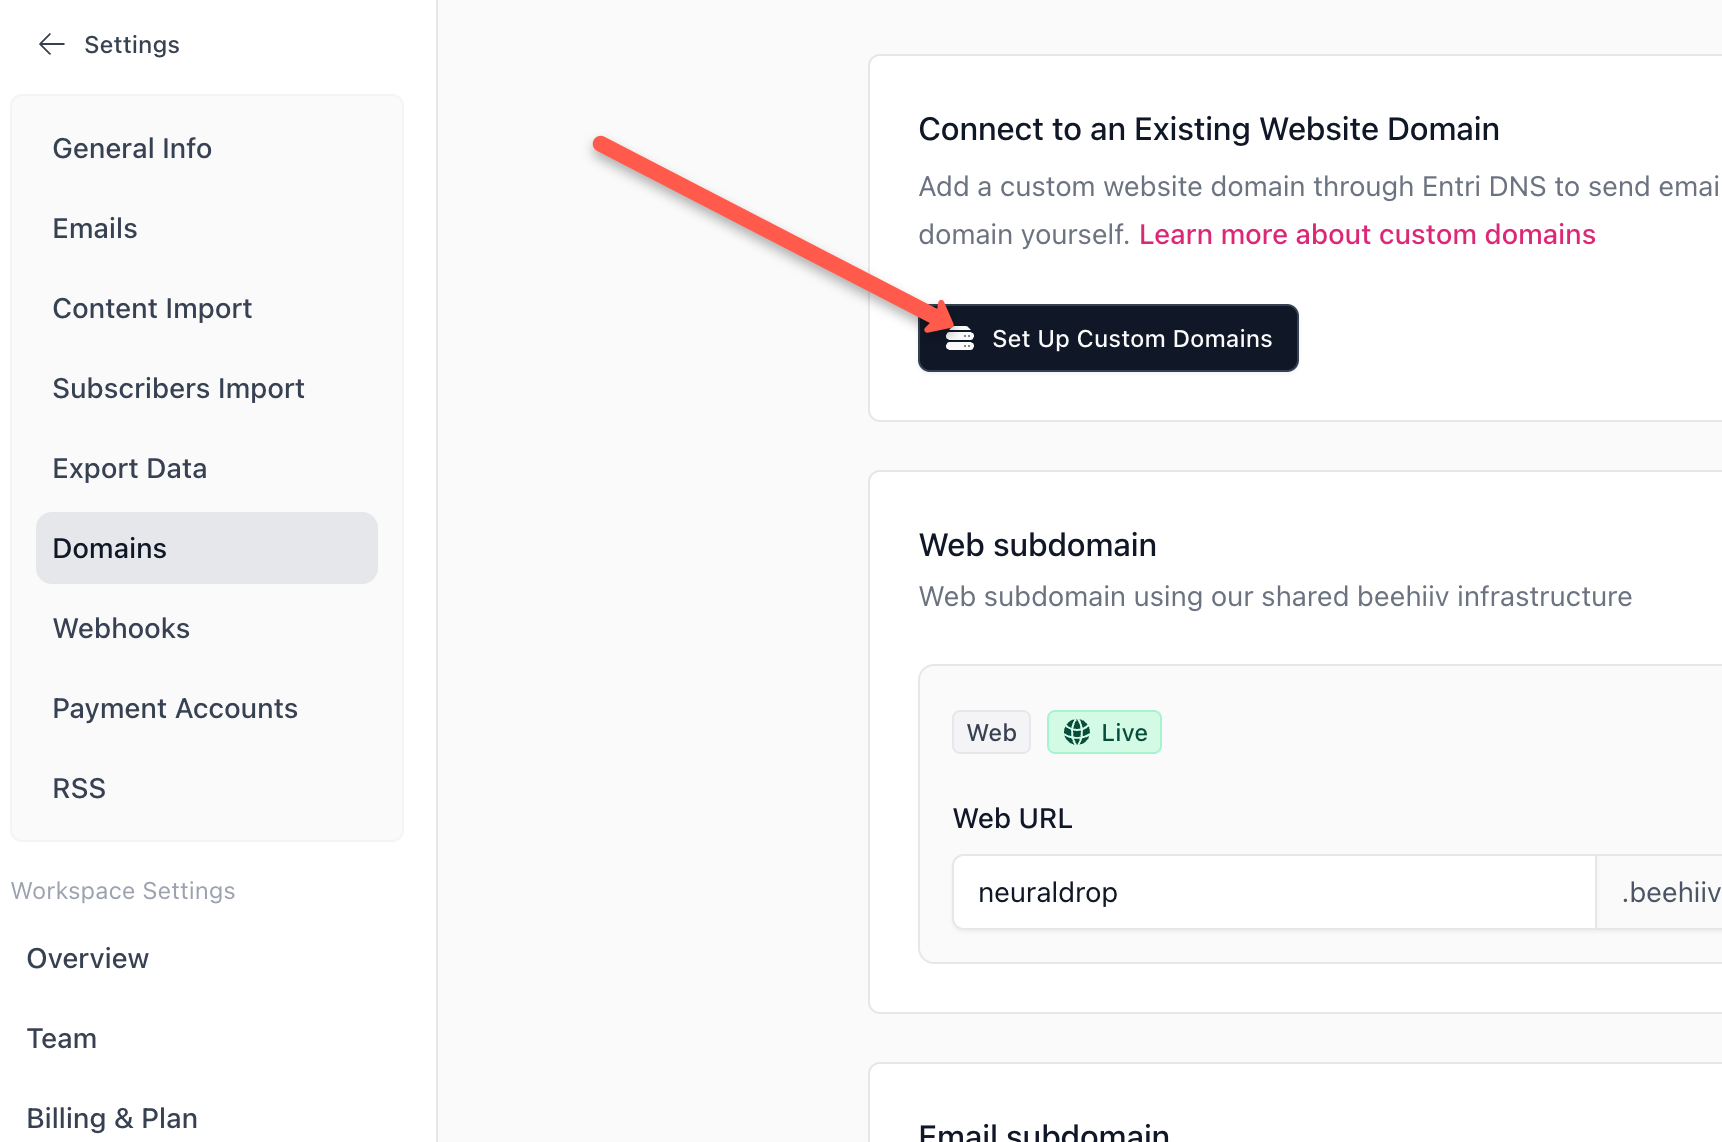
Step 3: Enter your Custom Domain
Click on the 'setup custom domains' button, where you need to enter your domain.
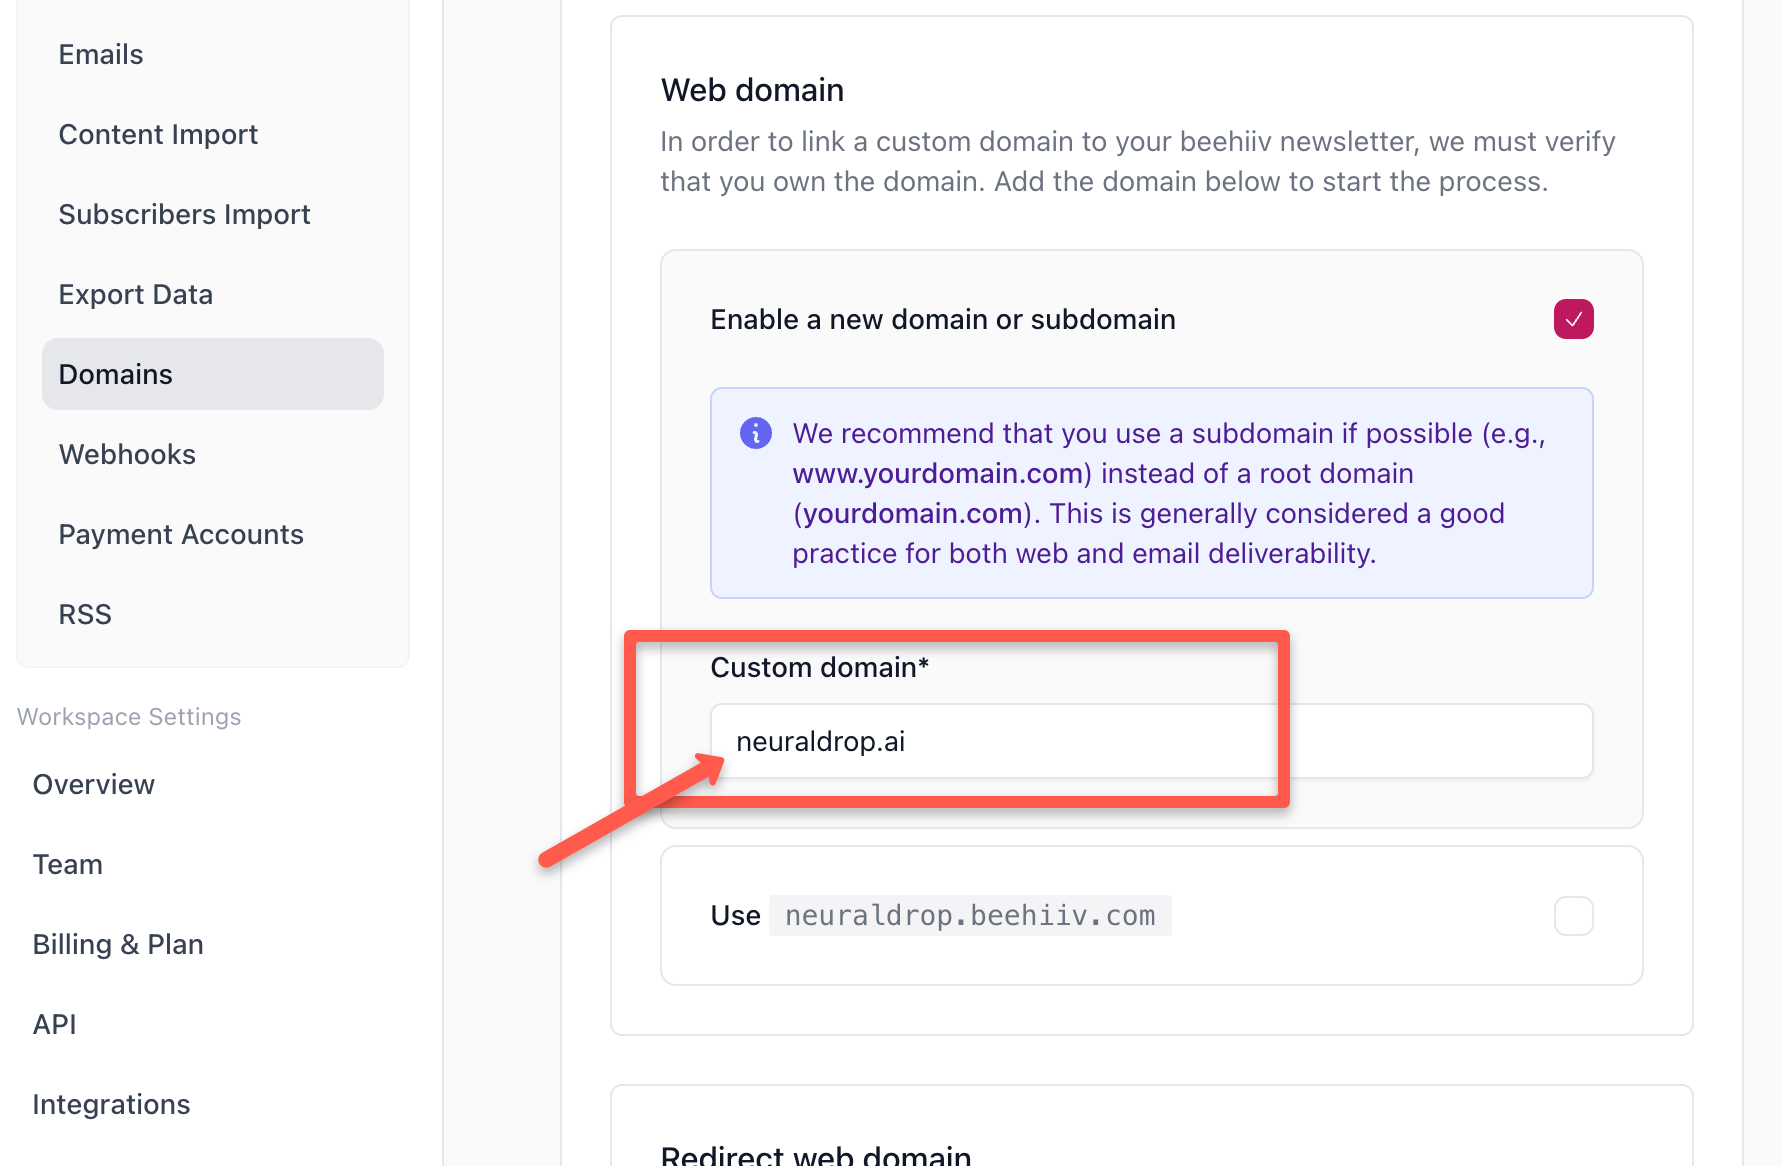
Step 4: Enter your Domain
In the box, type your custom domain name and continue.
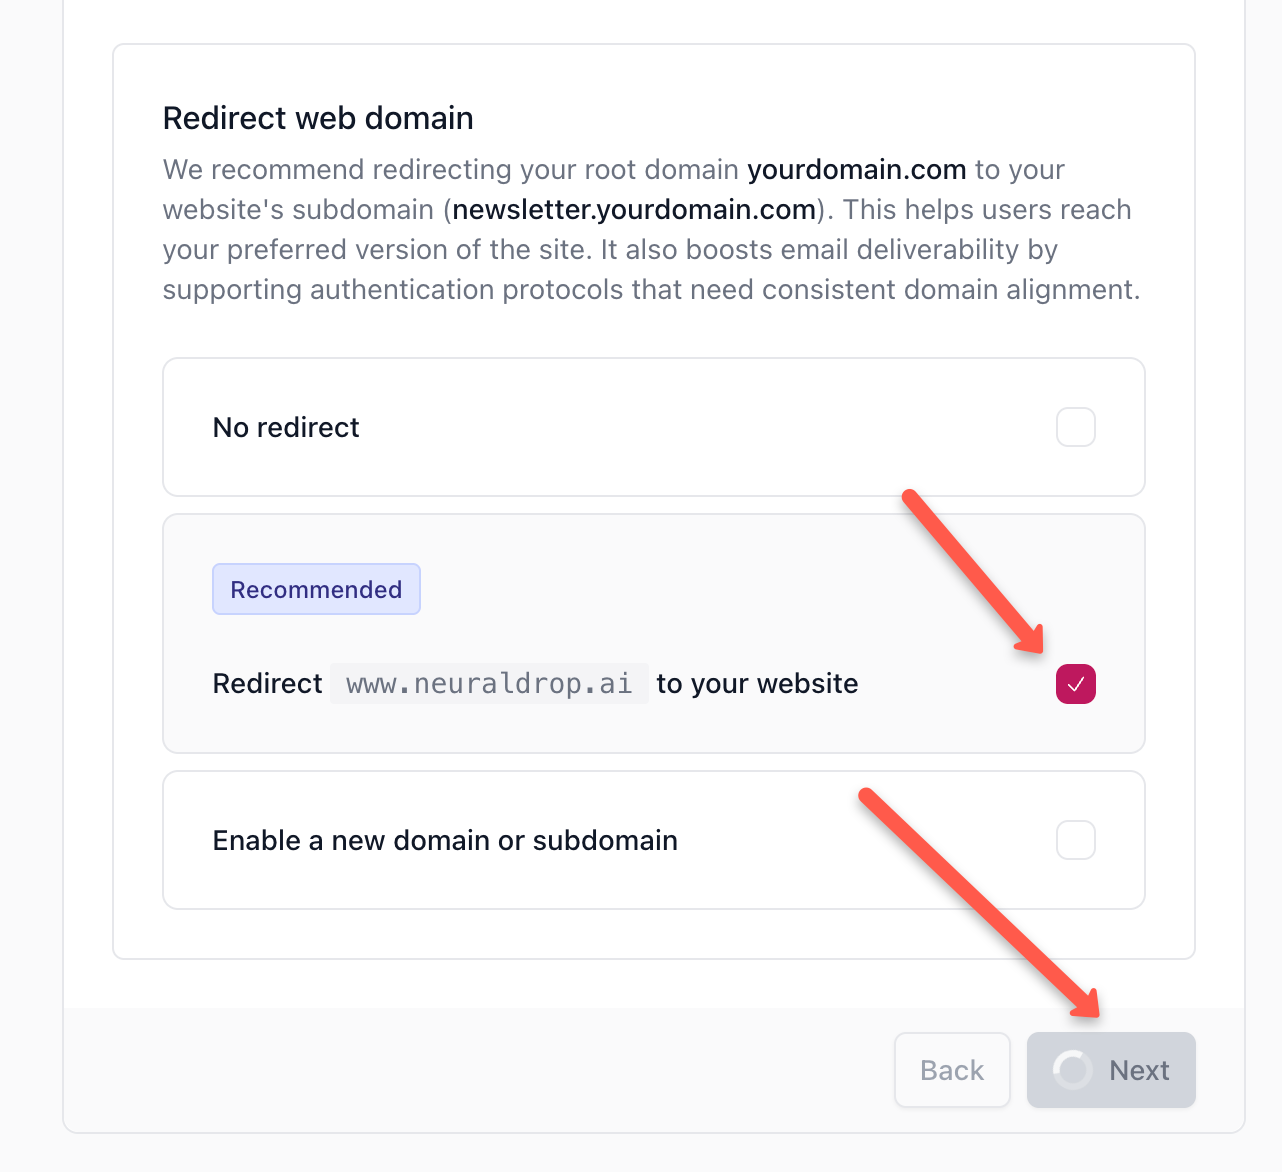
Step 5: Enable WWW Redirect
Enable the recommended www redirect option, so that the newsletter will work for both www and non-www versions of the domain name.
Then click next to continue.
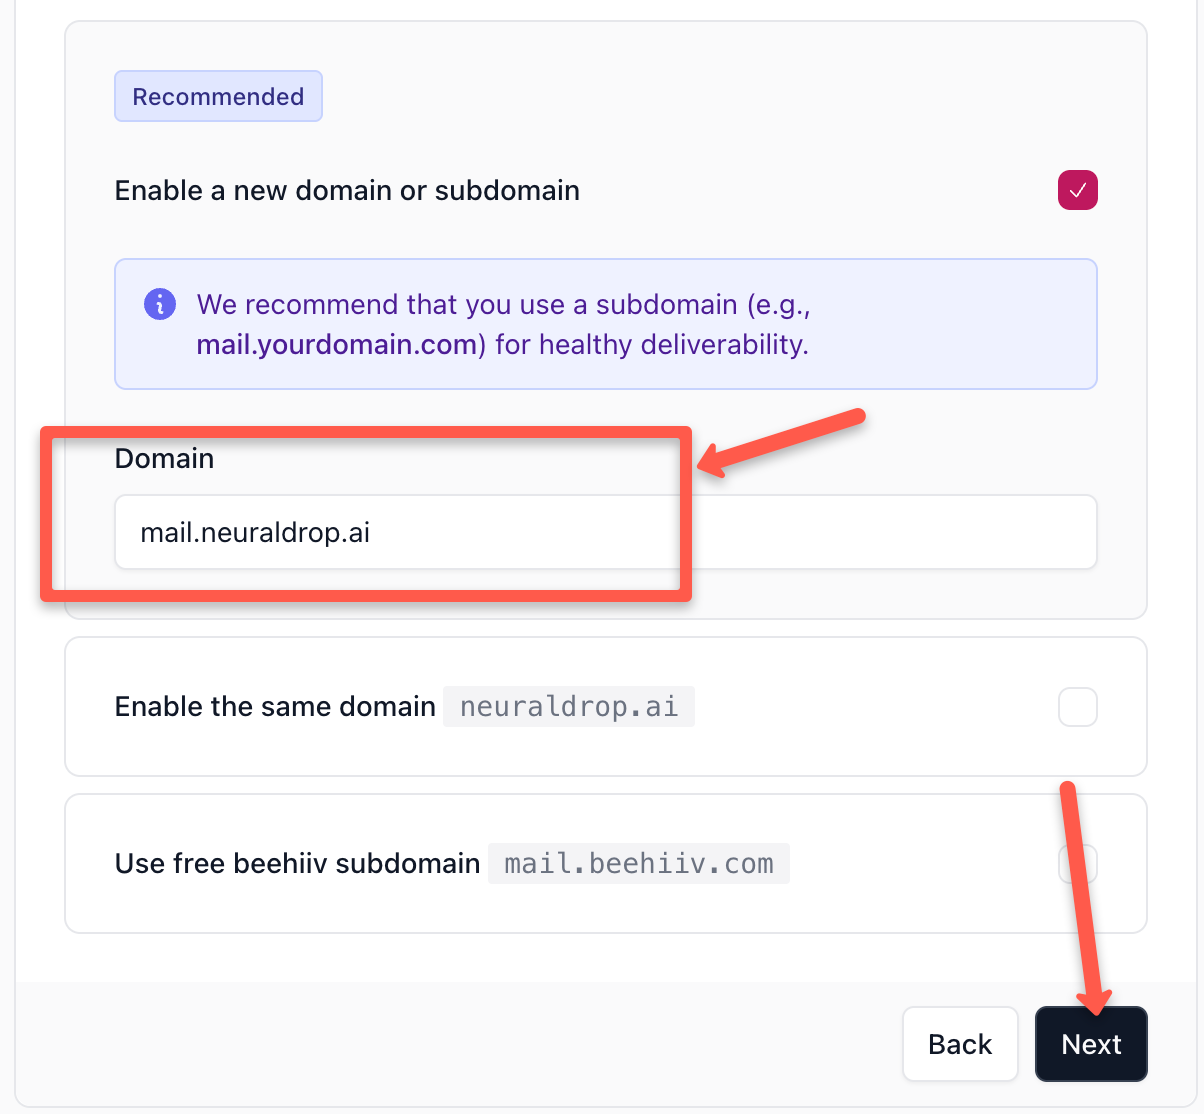
Step 6: Use Recommended Subdomain for email
Use the recommended subdomain with mail (e.g., mail.yourdomain.com) for sending and receiving emails, as shown in the image below.
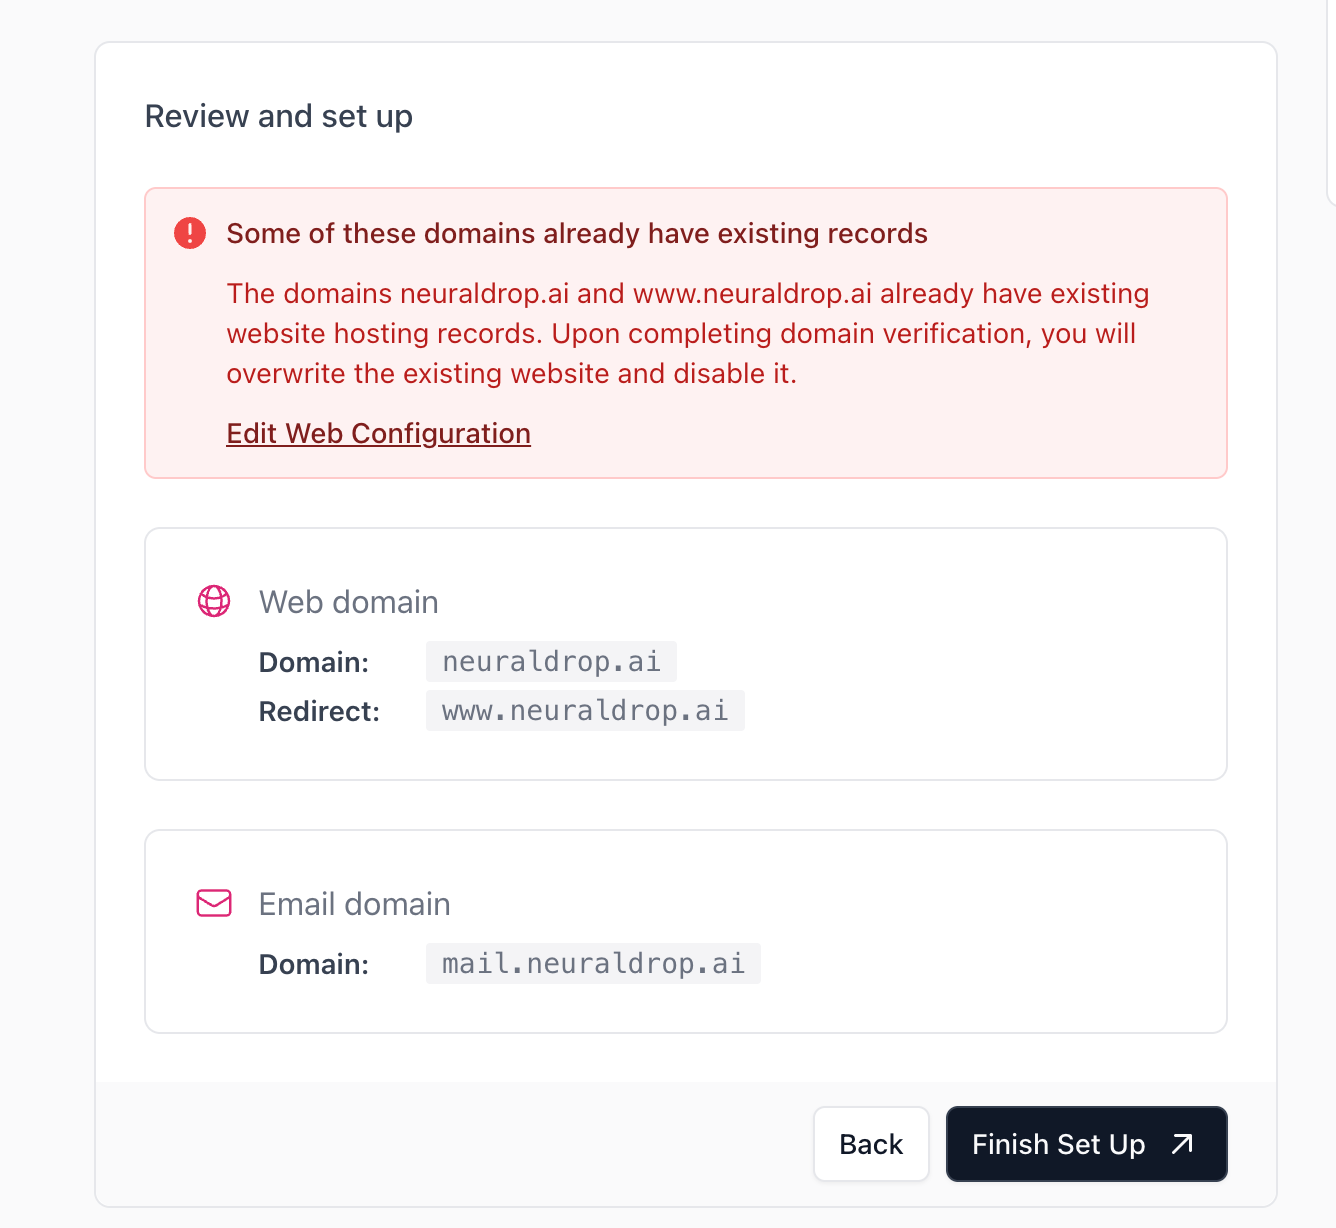
Step 7: Review and Confirm
Lastly, review your domain name and settings you made. Once everything looks correct, click Finish Setup.
The next step is to verify the domain ownership with Beehivv.
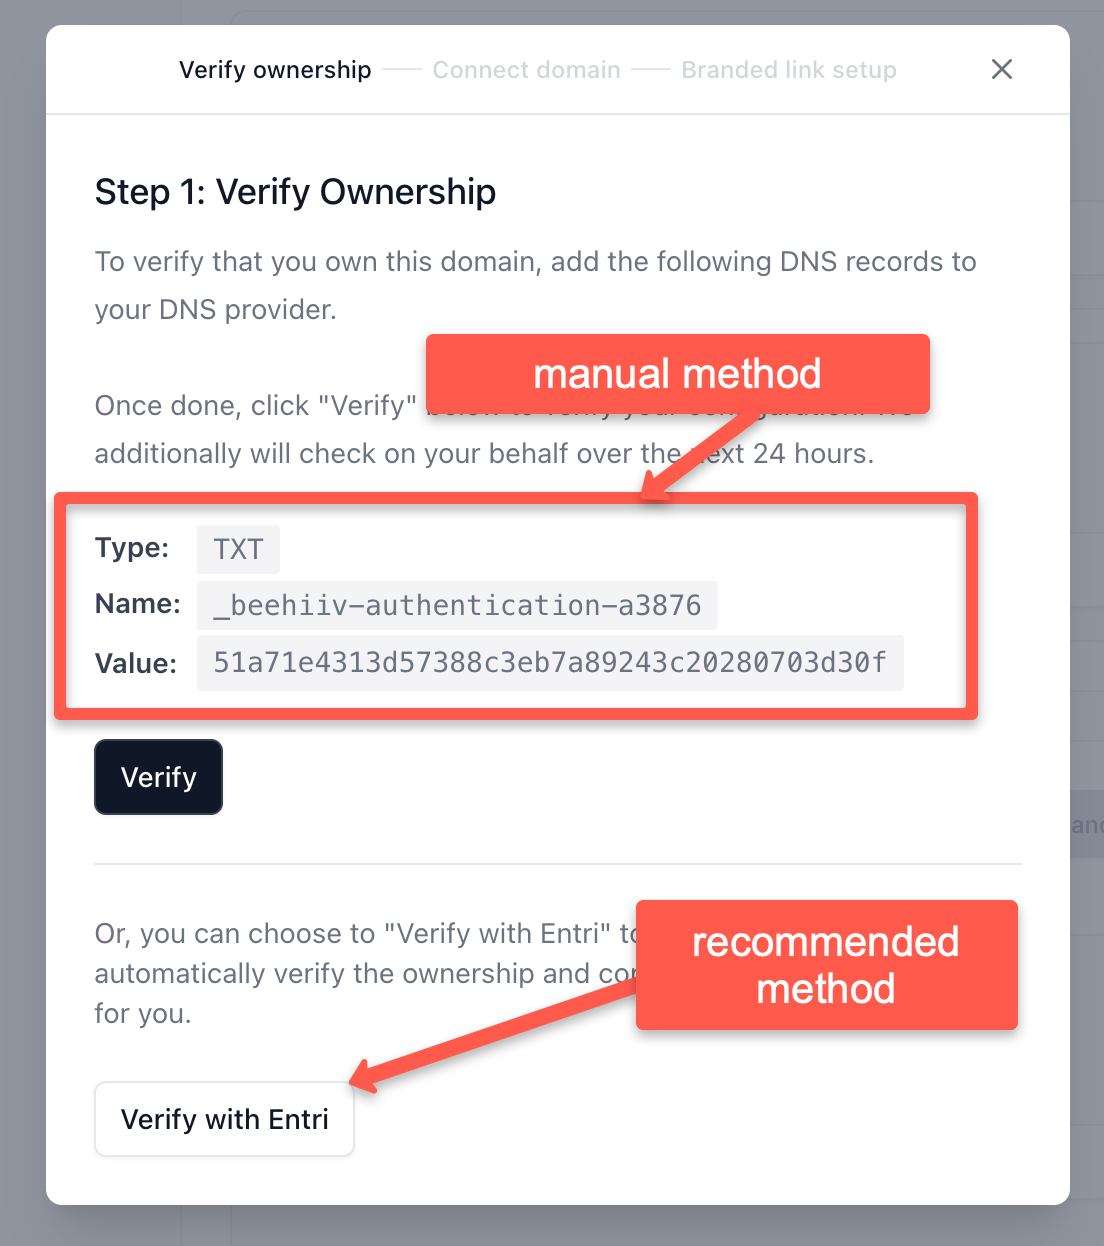
Verify Domain Ownership
Next, you will be prompted to verify the domain identity. Click Proceed with verification.
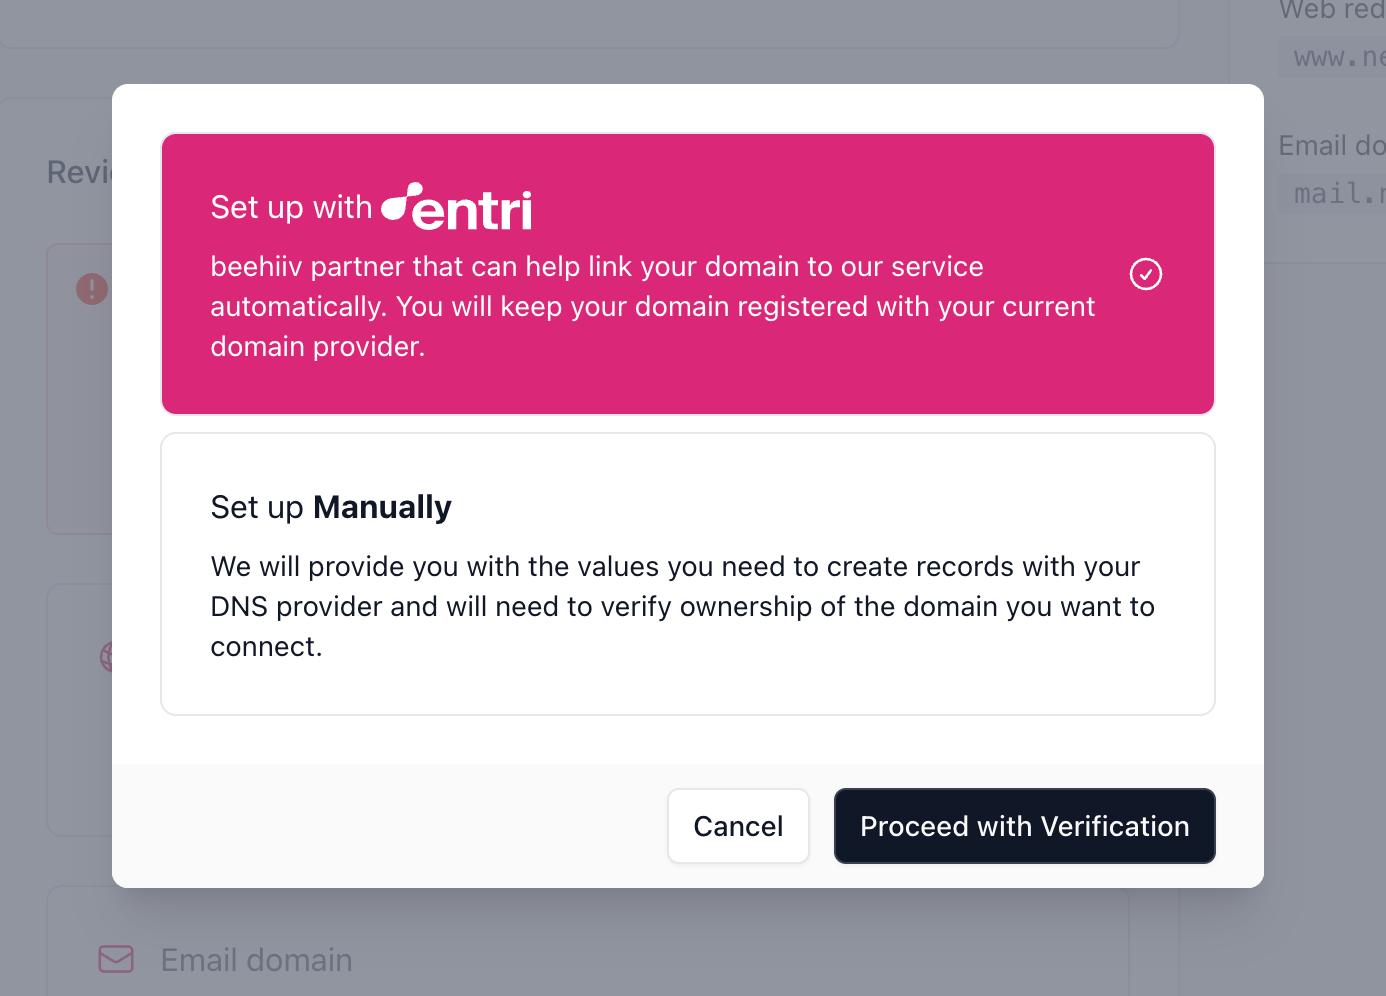
Choose any of the following verification methods.
- Update the given TXT record with your domain settings on your domain registration page.
- Use the "verify with Entri" option
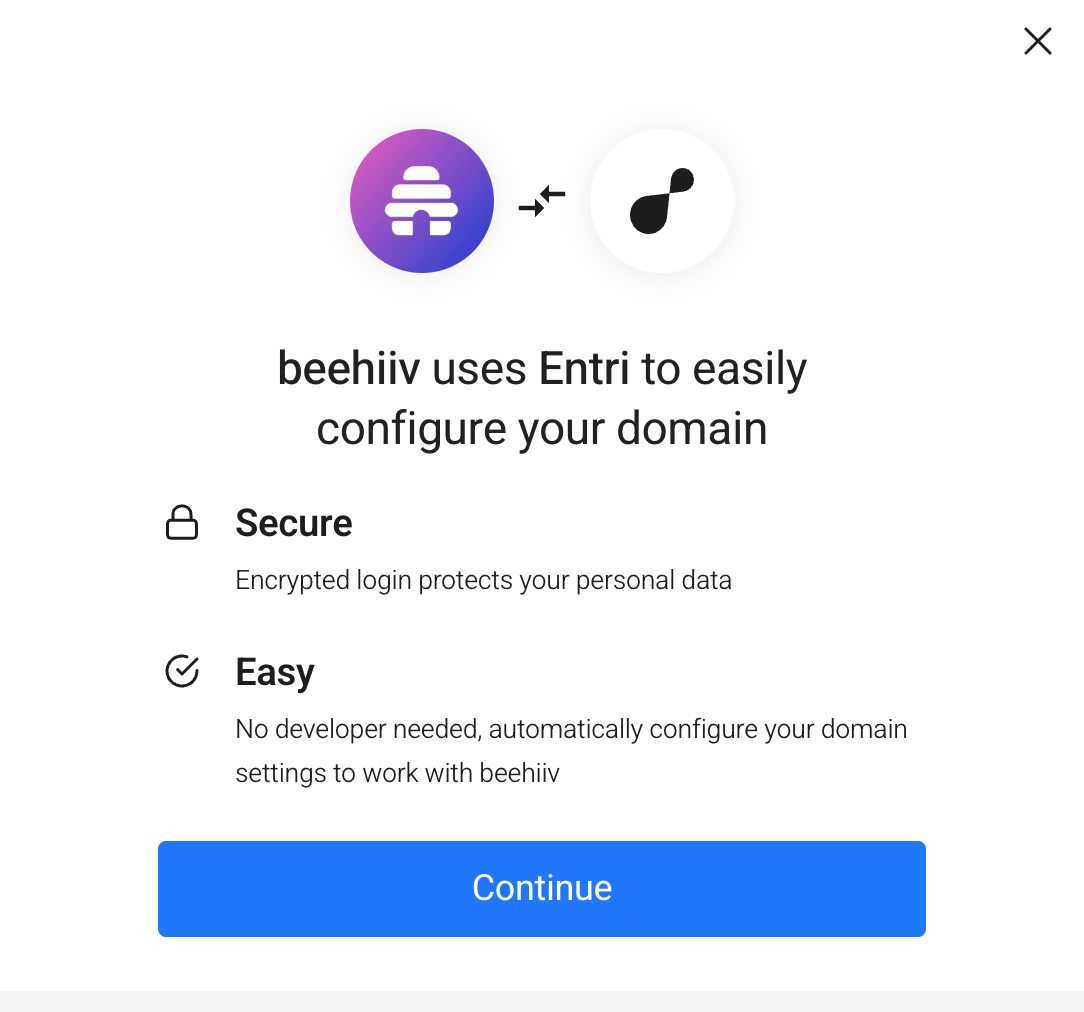
Verification With Entri
Beehiiv uses Entri to configure your domain easily, which will automatically verify ownership.
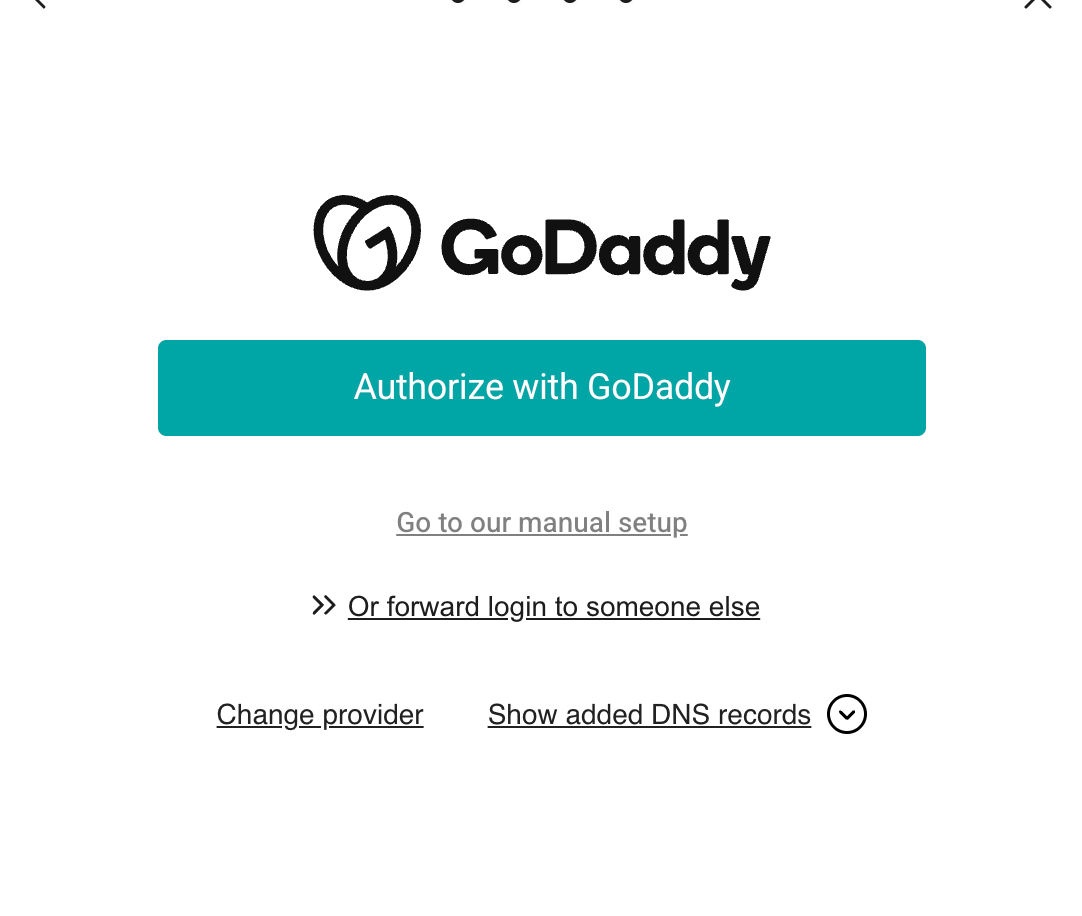
GoDaddy authentication page.
Click on the 'Authorize with GoDaddy' to authorize your domain.
Once verified, you will get the success message as shown below.

Connect Domain
The next step is to connect the domain to beehiiv.
In the domain settings, click the action required option.
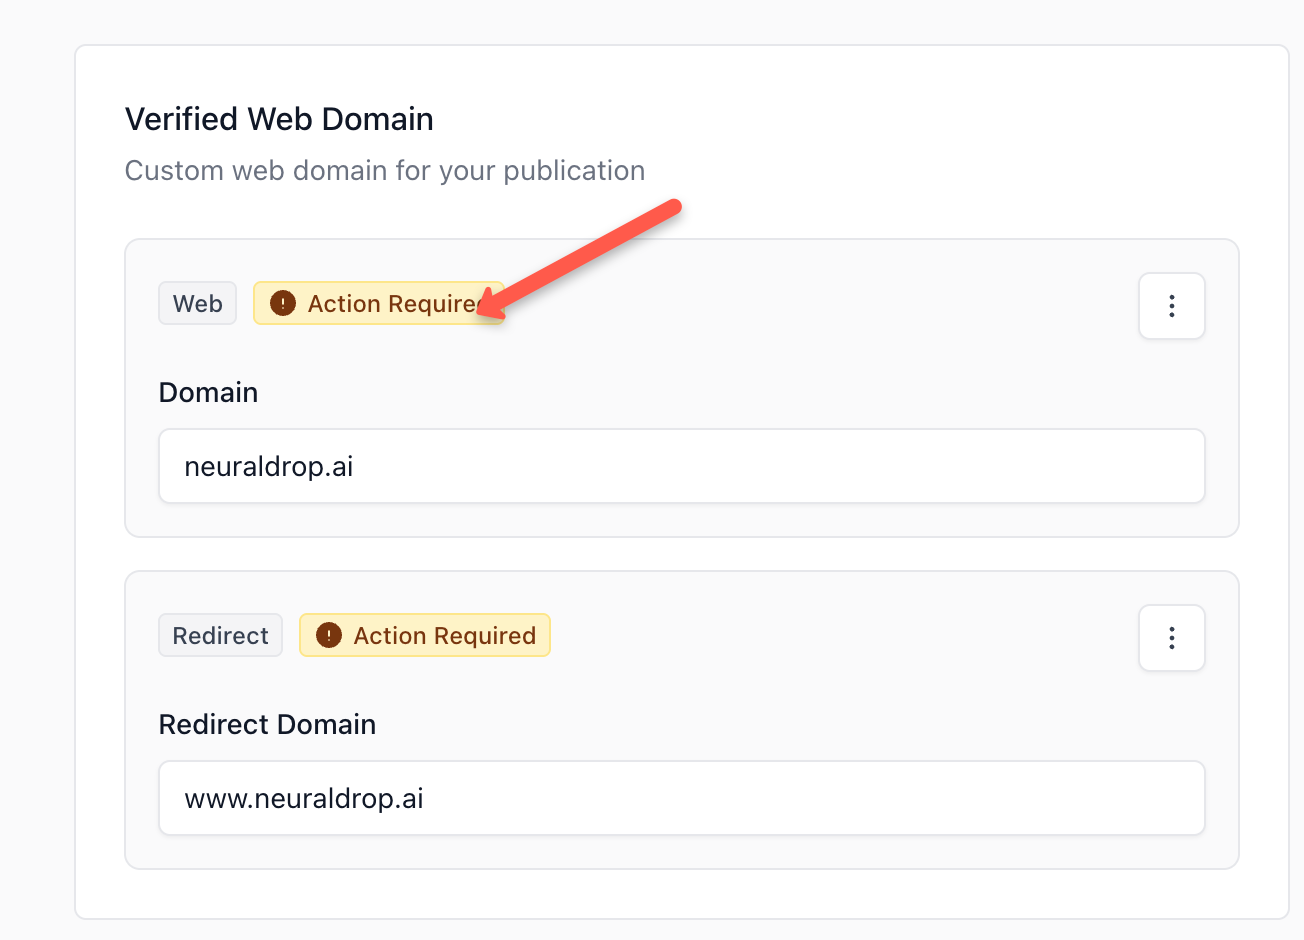
In the next step, you will get an option with A and CNAME records that need to be updated in your domain settings with your domain registrar.
A better option is to use verify with the Entri option, which will automatically update the records for you. If you don't use Entri, you need to manually update these DNS records in your domain registrar's domain settings.
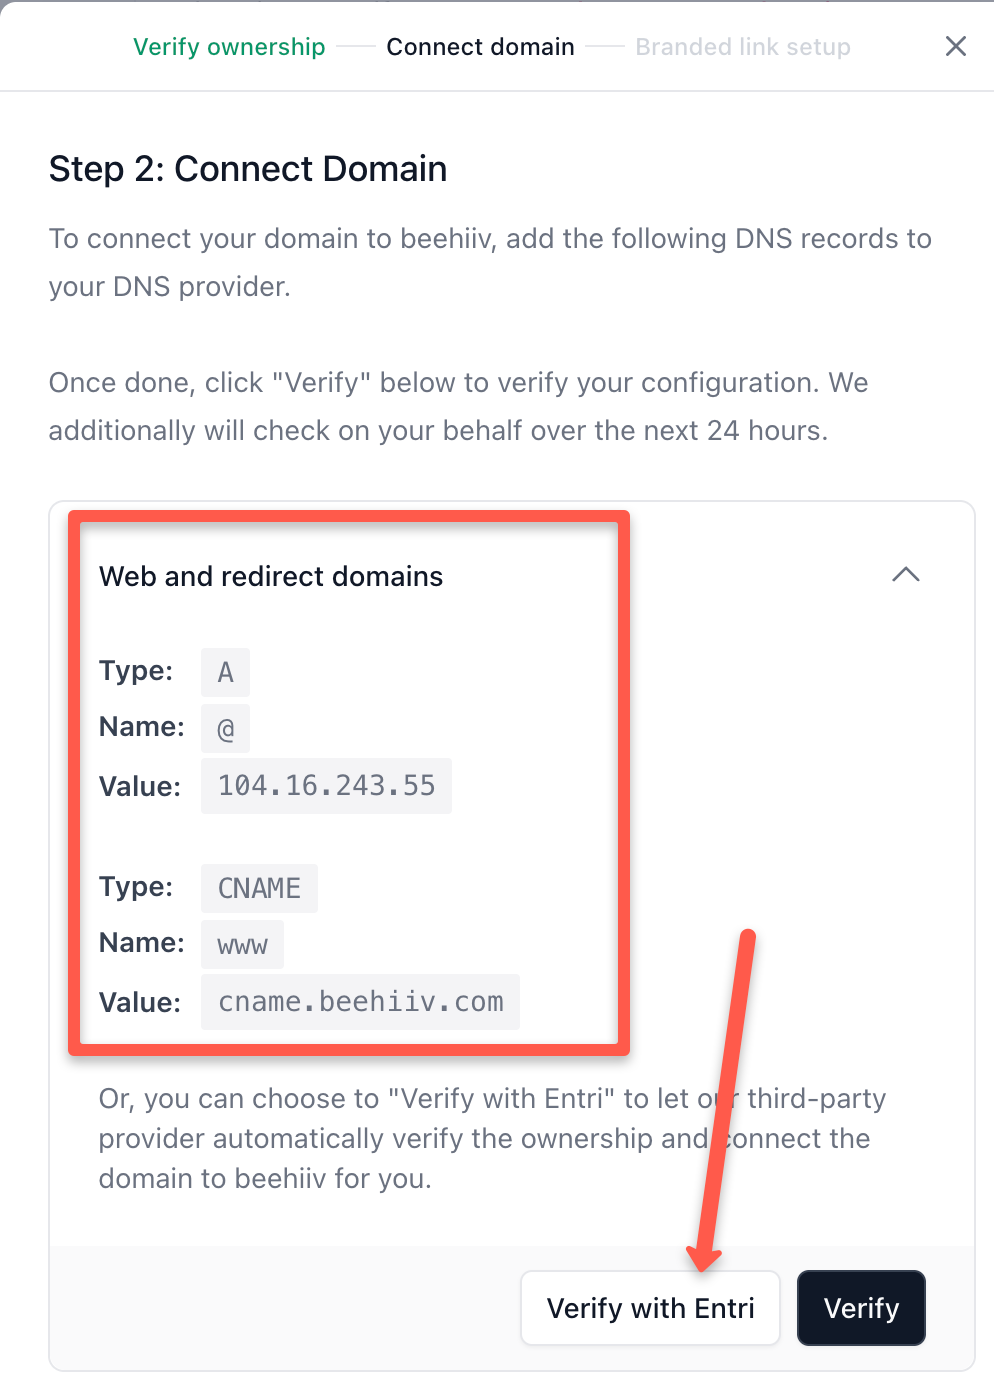
Once you authenticate your domain registrar with Entri, it will automatically update the DNS records.
Once configured, click the verify button in Beehiiv to verify the connection.
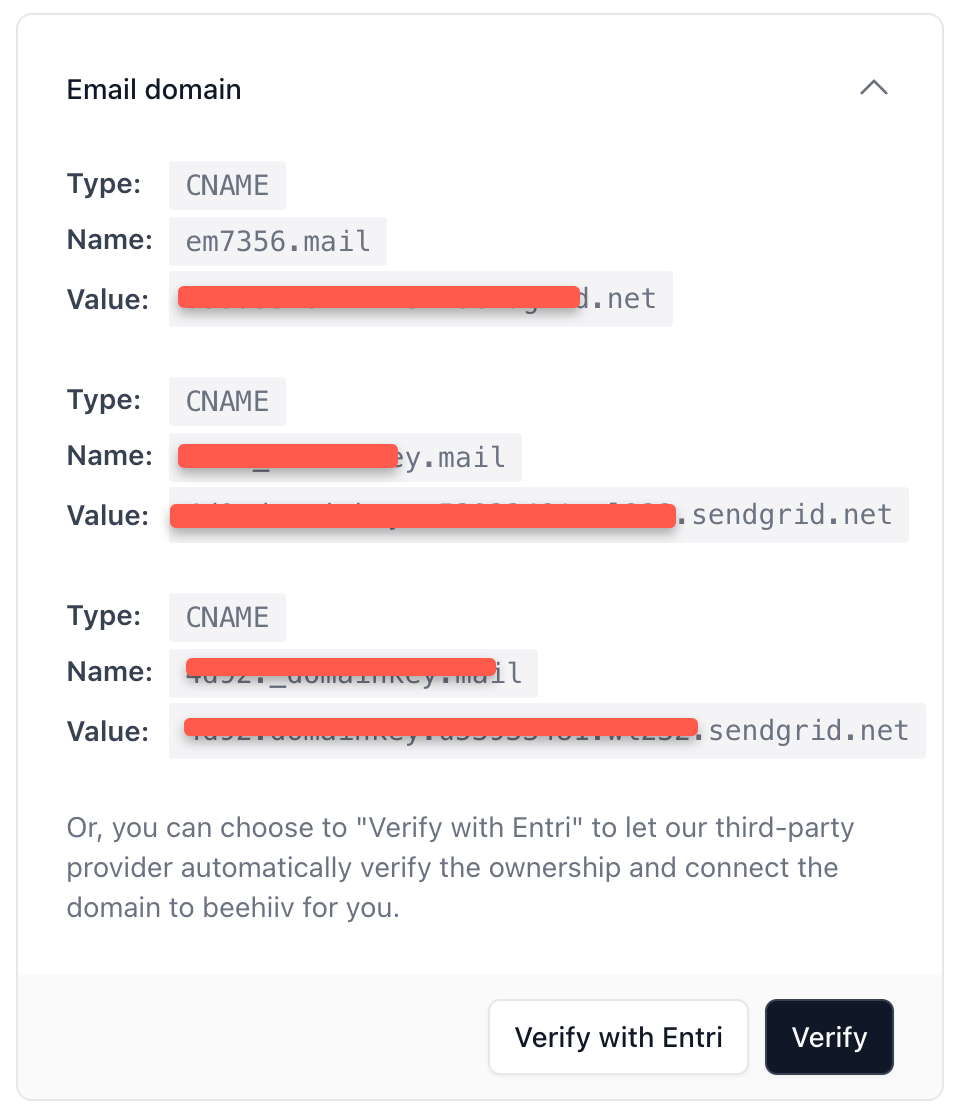
Verify Email Domain
Once verified, you will be prompted for email verification as shown below. You can use Entri to automatically add the email domain records to your domain settings.
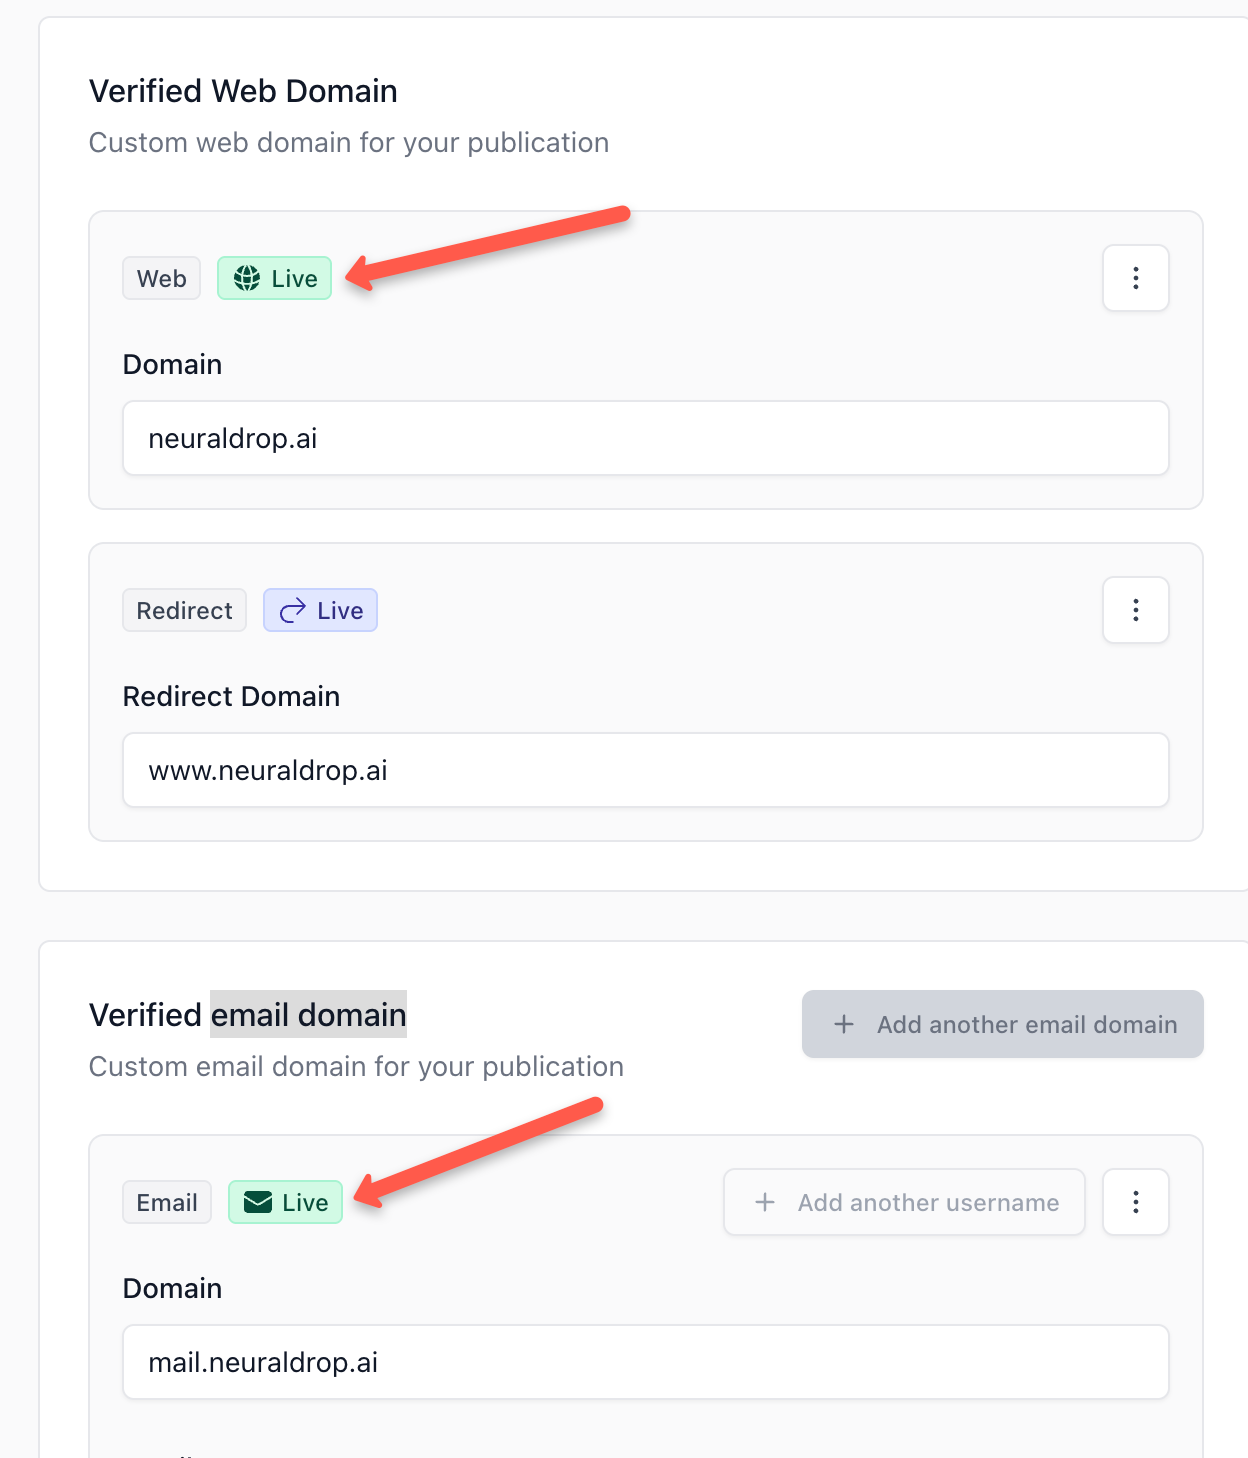
Once verified, you will see both the domain and email in live status as shown below.
That's it!
Now you have linked your custom domain to your Beehiiv publication.
Conclusion
In this guide, I have shown how to setup a custom domain for the Beehiiv publication with easy steps.
If you have any doubt on this setup guide, drop them on the comment!
Are you new to Beehiiv, and want to know the platform well, check out our detailed Beehiiv Review.
And also if you are planning to upgrade your Beehiiv subscription, checkout the Beehiiv Promo code post, where you added exclsuive discount for DevOpsCube readers.