

In this tutorial, you'll learn how to authenticate with Azure using a service principal (one of the common authentication methods).
By default, the Azure CLI uses an interactive login method.
When you run az login in the CLI, it opens an interactive web page where you enter your email and password to sign in. While this approach is simple and straightforward, it's not ideal for CI/CD workflows or secure automation.
For better security and automation, it's recommended to use alternative methods like Azure App registration with a client secret or a certificate. These options offer more control and are better suited for non-interactive, secure environments.
Setup the Azure App Registration and Service Principal
The steps below will guide you through creating an app registration on the Azure Entra ID and configuring the service principal to access the services.
Step 1: Create an Azure App Registration
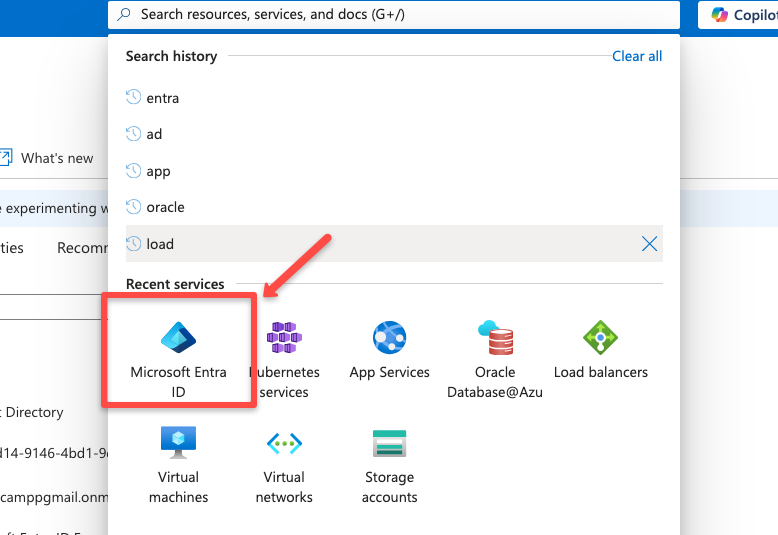
Open Microsoft Entra ID from the main console dashboard.
Azure Entra ID is the identity and access management service of the Azure cloud.
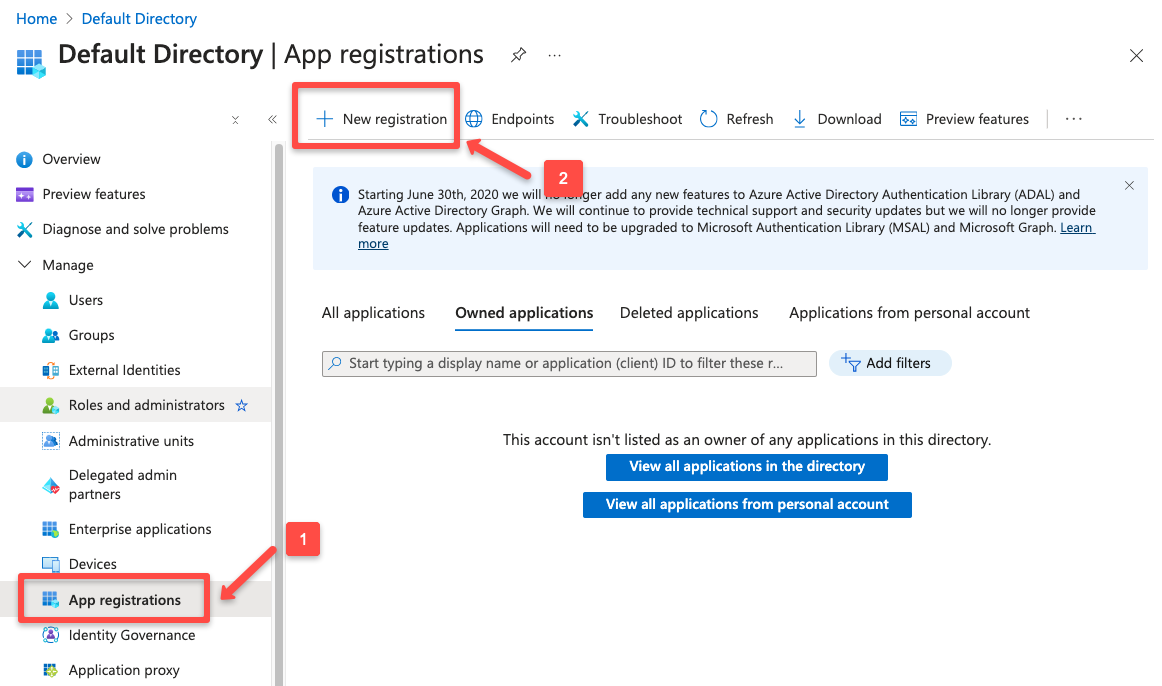
The Entra ID dashboard displays all IAM and Azure-related services. From the left-hand panel, select App Registrations.
Azure App Registration is essentially the process of assigning an identity to your application.
For instance, if your app needs to interact with specific Azure services, it first needs a recognizable identity in Azure. This allows Azure to authenticate and authorize the app properly.
During the registration process, Azure generates a unique Application (client) ID, which is a key component used for authentication and access control.
Give a name for the App Registration and select the account type from the list of supported account types.
Account types will define who is allowed to access your application.
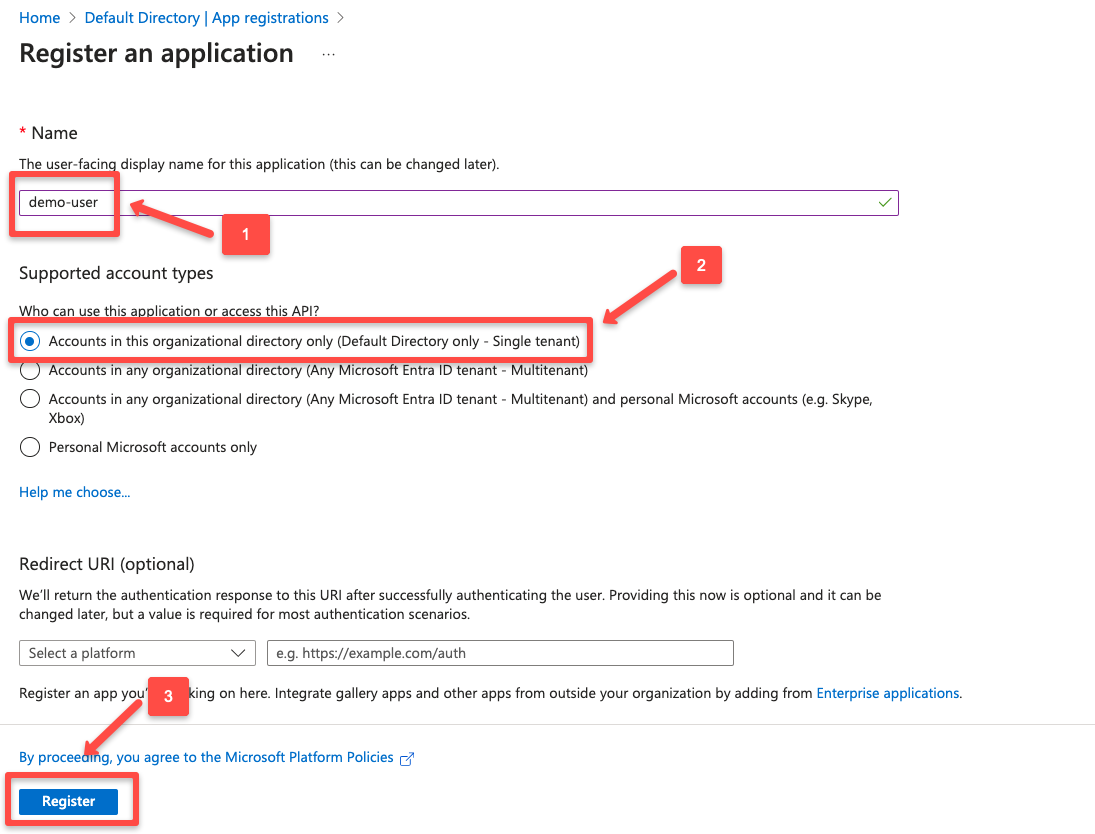
I have chosen the Single tenant type because I want the application to be used only by users in the specific Entra ID tenant.
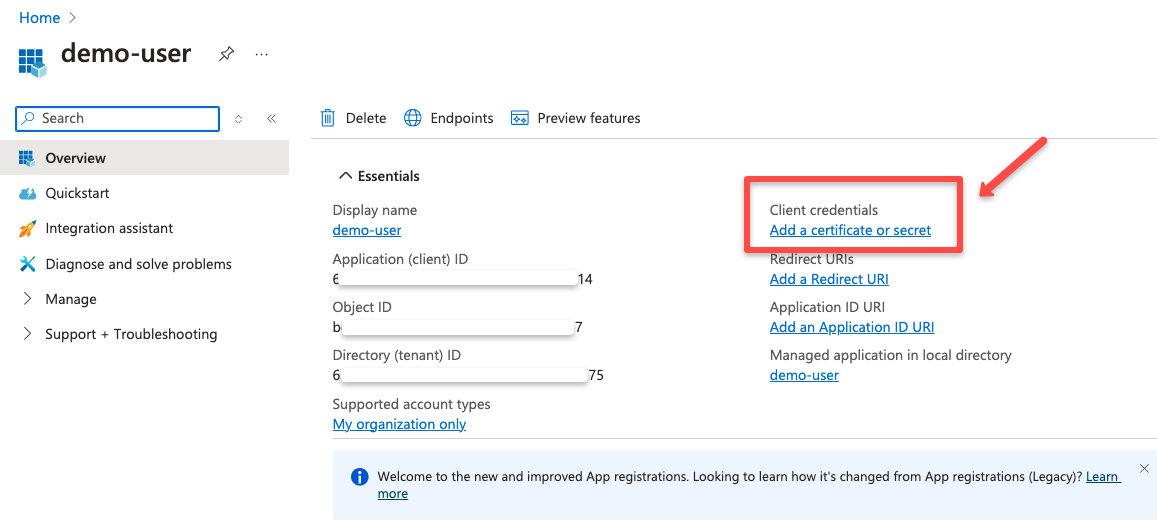
Once the registration is completed, you can see the Application (client) ID and the Directory (tenant) ID.
Note them down for the upcoming configuration.

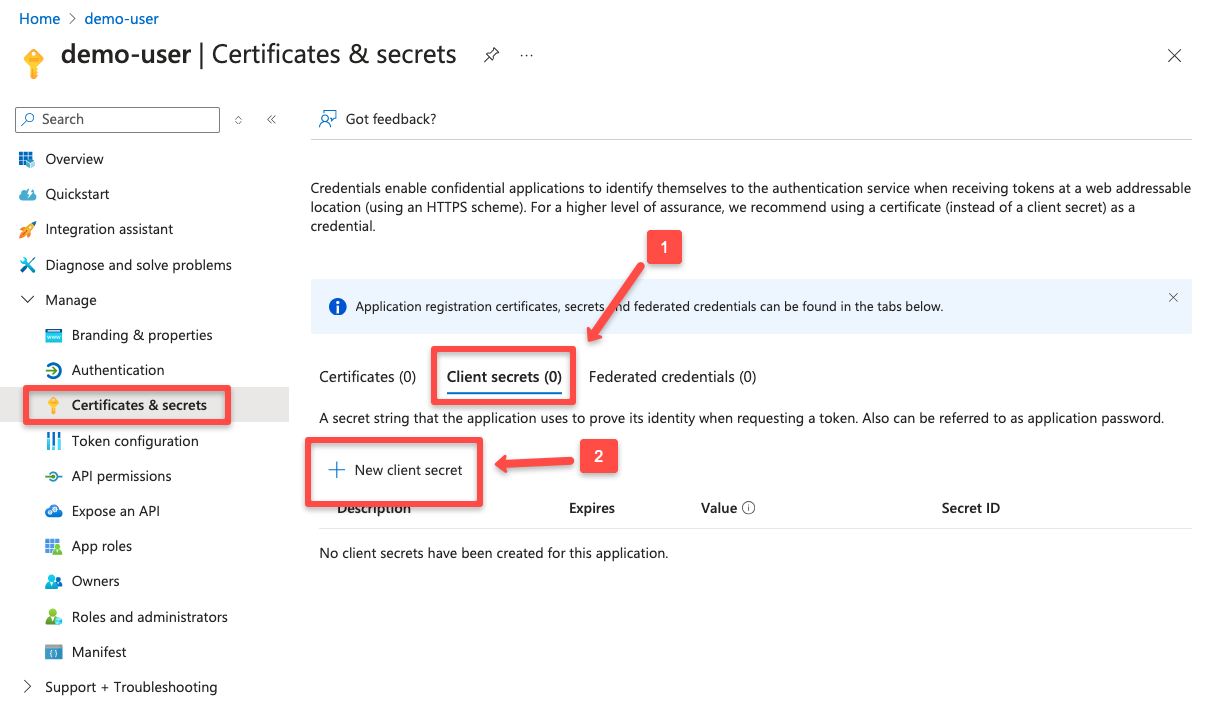
Next, we need to create client credentials for secure authentication.
Note: When you create the App Registration, a Service Principal also be associated with that, you can verify on the Enterprise application section or if you already have CLI access, you can use the following comand `az ad sp list --display-name <APP_REGISTRATION_NAME>Step 2: Create Client Credentials
Client credentials are required to authenticate App Registration and Microsoft Entra ID.
Azure supports various credential options for App Registration, such as certificates, secret tokens, and federated credentials.
For this, I am choosing the Client secret option.
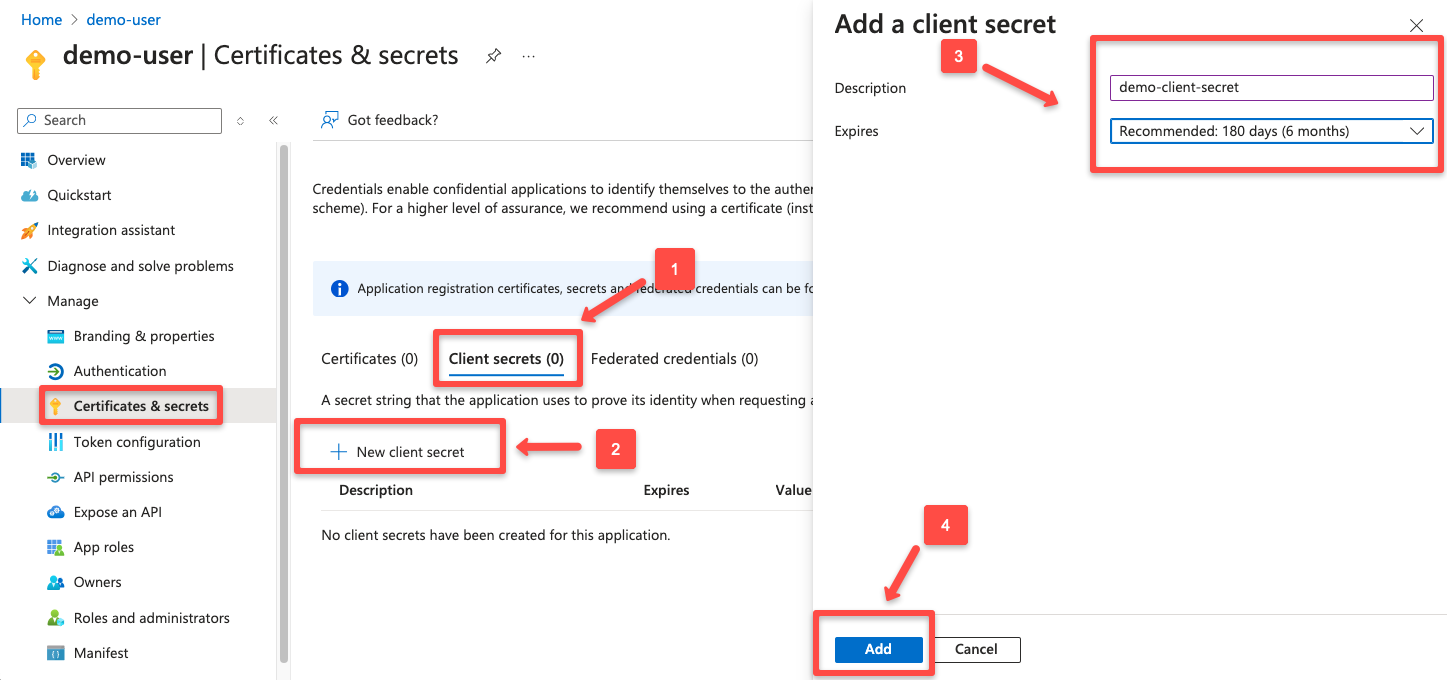
Note:Certificatesis the more secure method than theSecretsbut you need to locally generate the certificates and import them for the configuration.
On the next page, you need to give a description of the secret and the expiration date for the secret token.
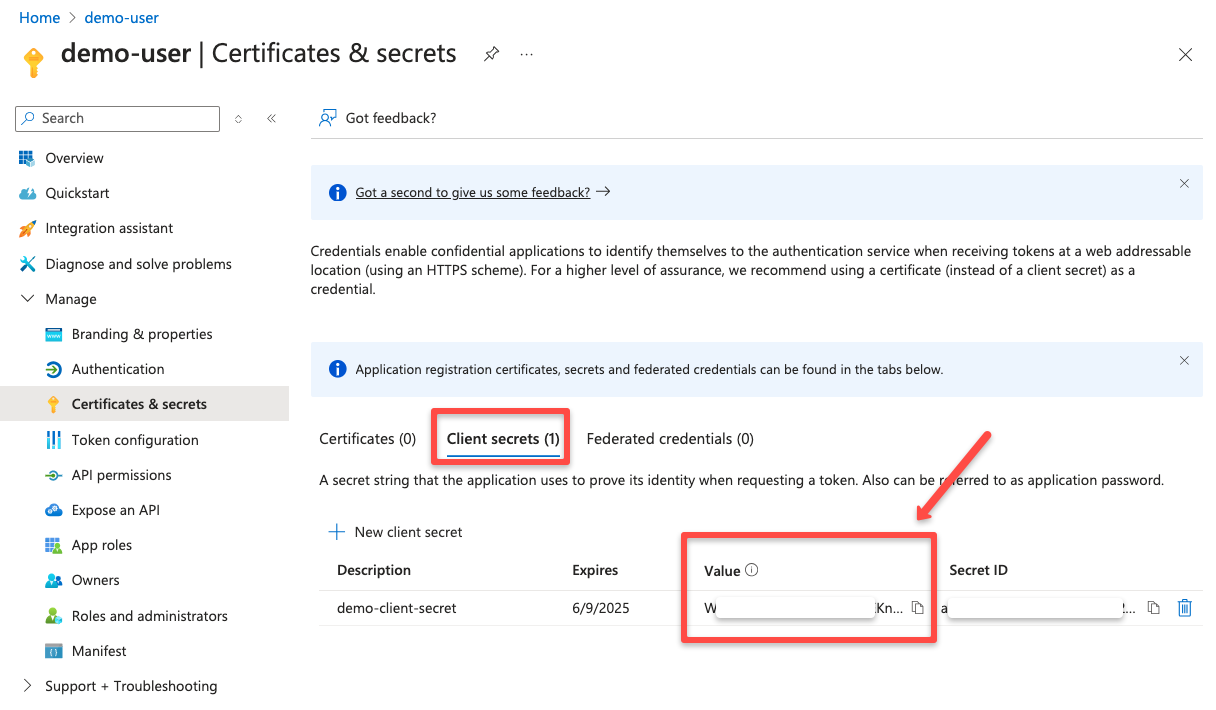
Once the client secret is created, you can see that in the Certificates & secrets dashboard.
Note down the secret value for the authentication, first time only you can see the secret value so save it somewhere safe.
Step 3: Add Permission to the App Registration
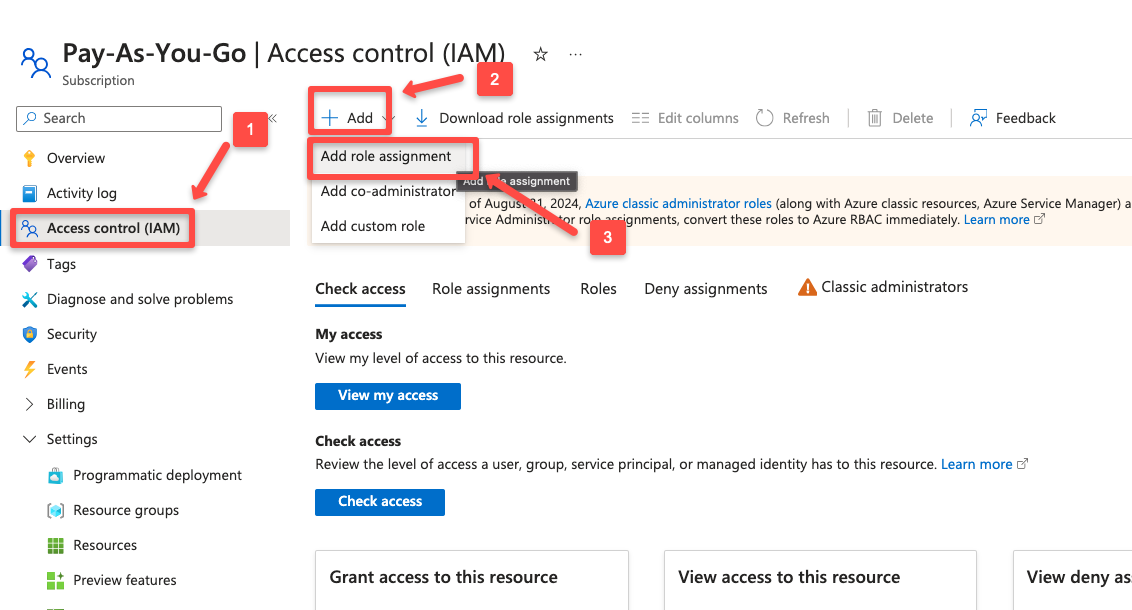
We need to assing a role with required permission to the Service Principal associated with the App Registration on the specific Azure subscription.
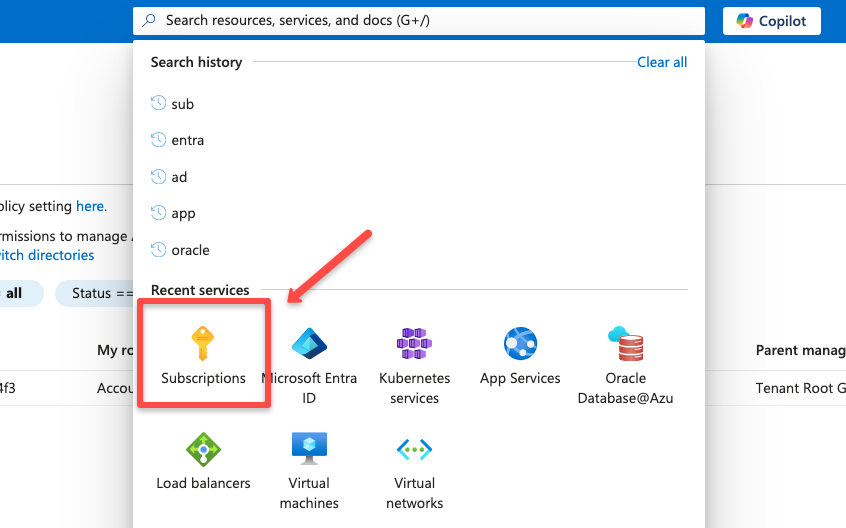
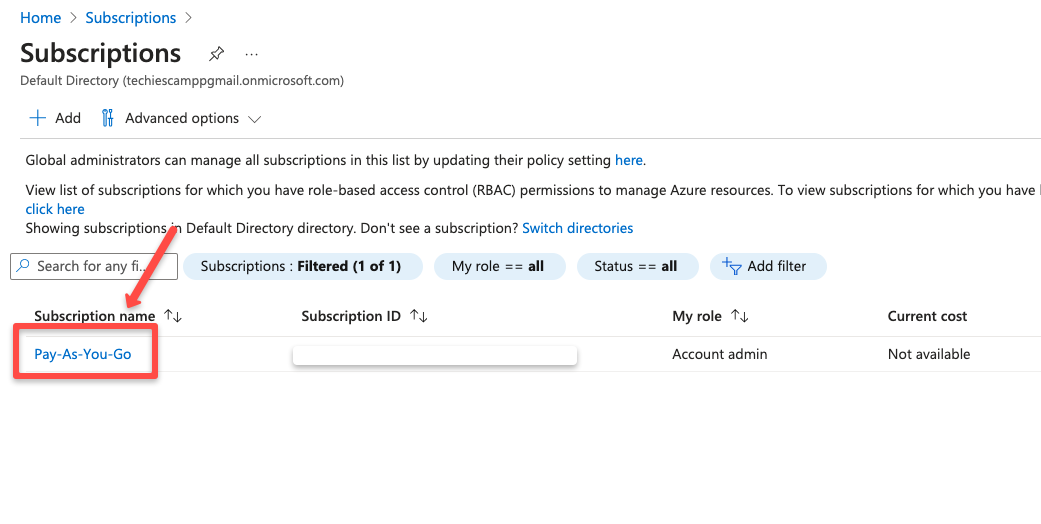
Navigate to the Azure subscription console.
Select the specific subscription if you have multiple subscriptions.
Open the Access control (IAM) from the left side navigation panel.
Click the + Add button at the top of the pane, and from the dropdown menu, select the Add role assignment.
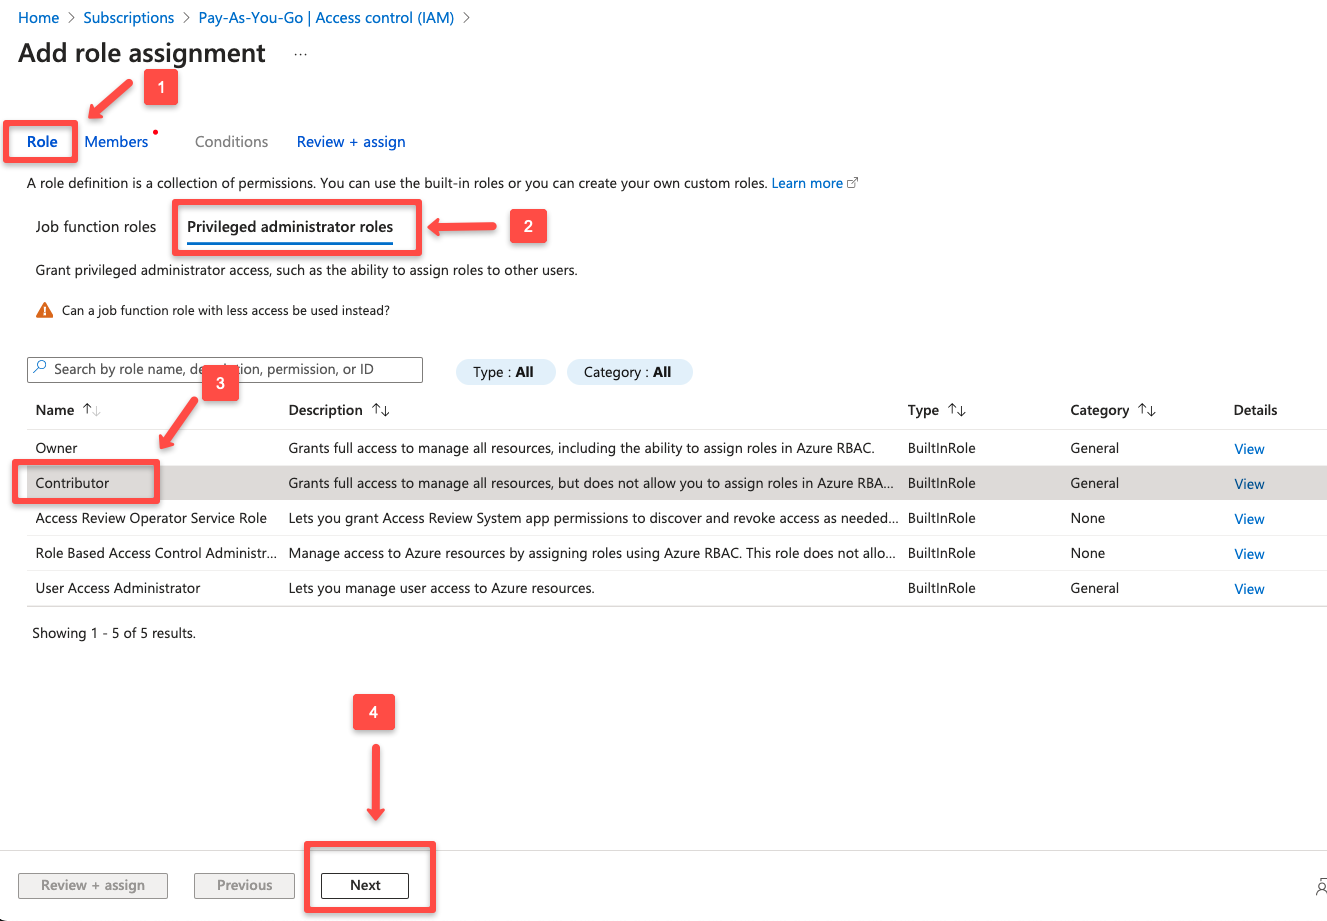
On the next page, under the Role tab, we can see the list of job function roles and privileged administrative roles.
From the Privileged administratior roles , selecting the Contributor role and click next
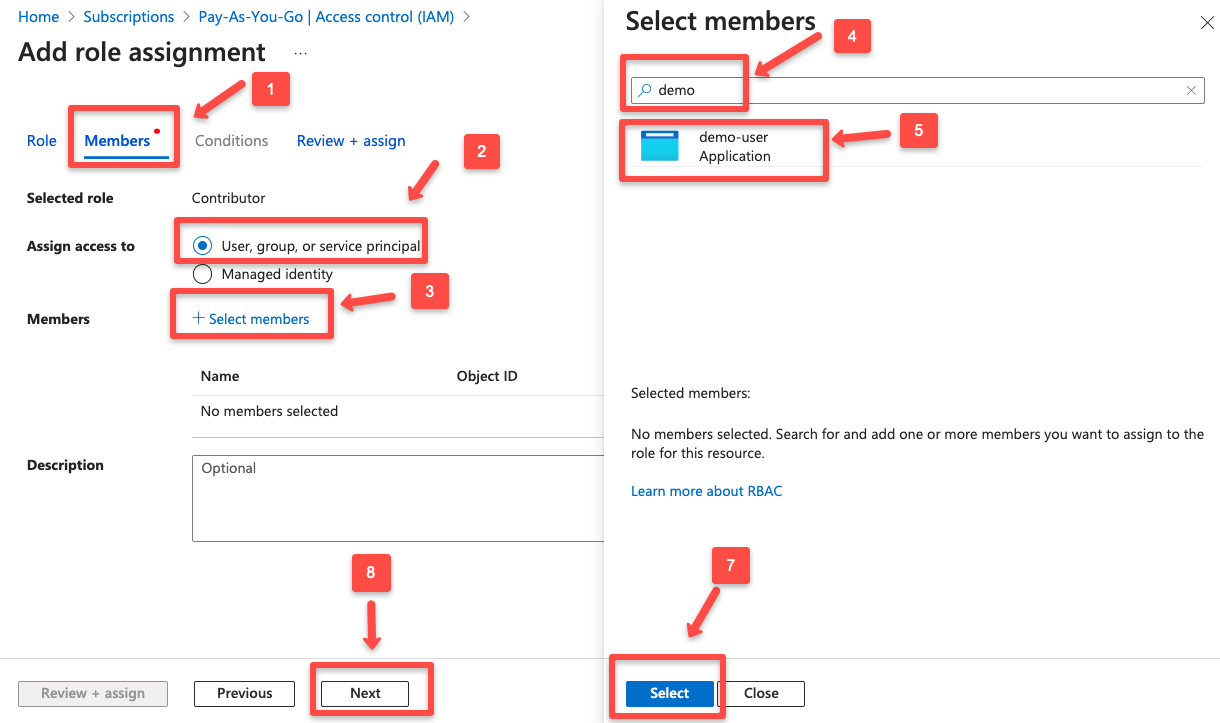
On the next page, we need to decide whom should we need to assign this role. (user, group, or service principal)
In our case, it is the Service Principal.
When we create a single tenant App Registration, the Service Principal will also be created and the name will be the same as the App Registration.
On the Members section, click + Select members
On the search menu, search with the App Registration name, and the search result will display the Service Principal associated with the App Registration.
In the final stage which is Review + assign, you can see the Role, Scope, and the Service Principal.
Once the review is completed, click the assign button.
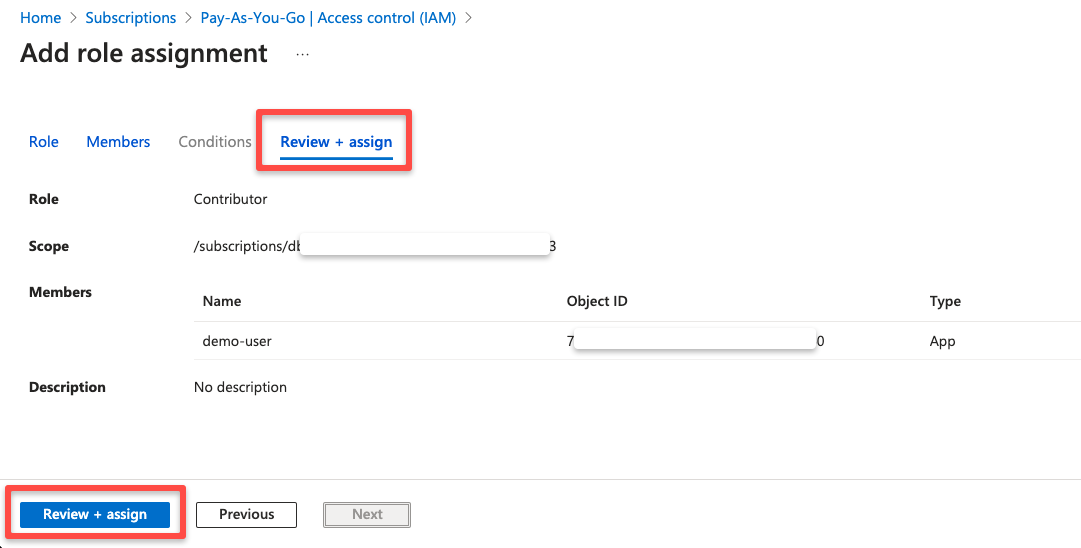
Now, we have successfully assigned the Contributor role to the Service Principal associated with the App Registration.
Step 4: Authenticate Azure CLI with the Service Principal
Install the Azure CLI on the local workstation.
Refer to the official documentation for the installation instructions.
Once the installation is complete, use the following command to authenticate the Azure CLI with the Service Principal, so that we can access Azure resources from the local workstation.
az login --service-principal -u <Application (client) ID> -p <Client Secret Value> --tenant <Directory (tenant) ID>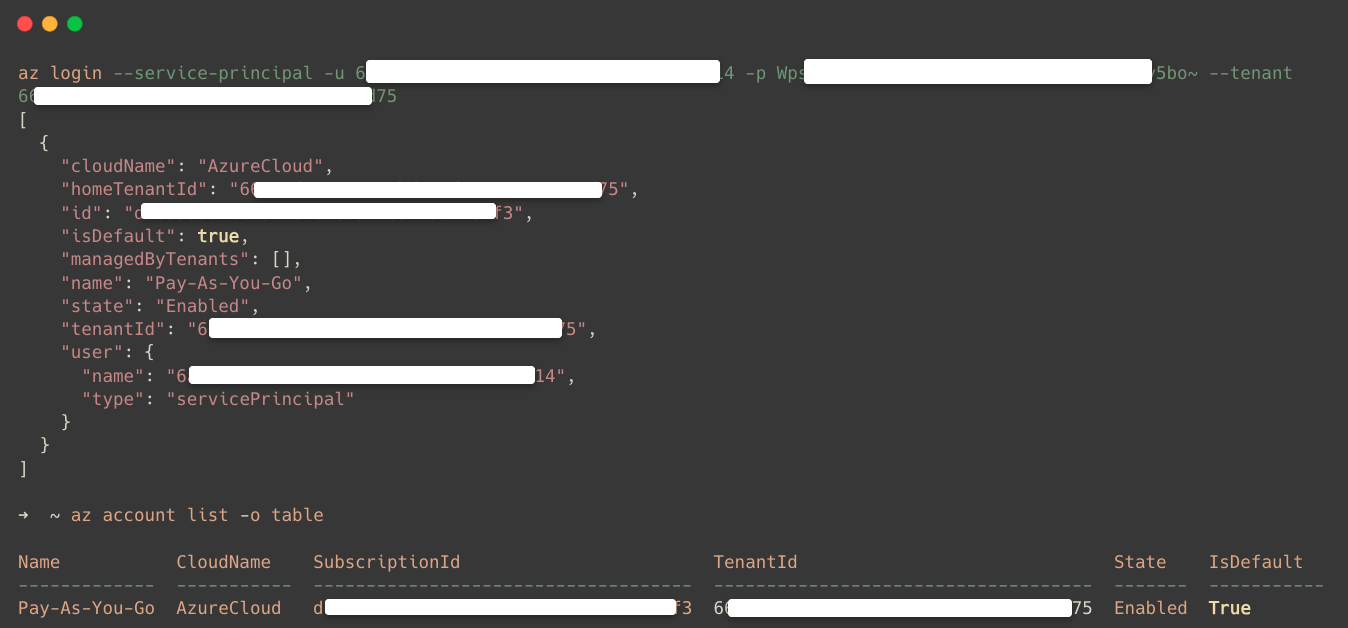
Conclusion
To sum up, this blog walked through creating an Azure App Registration, setting up client credentials (Secret instead of email ID and password), and assigning a role to the Service Principal for CLI access.
With this setup, we've enabled a non-interactive login method that's perfect for automation tasks like scripting and CI/CD.
This means we can now create and manage Azure resources seamlessly, without ever needing to use the portal.
If you face any errors or need any clarification, do drop a comment! We will be happy to share our insights.
