This guide explains the steps to install and configure latest Magento 2.x on a Linux ec2 cloud server or a VPS. We will be doing the following.
- Setting up LAMP Stack (Mysql version 5.6 or later)
- Setting up Database and user (CLI and PHPMyAdmin)
- Setting up Magento 2.0 using composer.
I am using an Ubuntu 14.04 LTS server from Amazon ec2. This tutorial will work on any cloud or VPS having a Ubuntu server.
Setup LAMP Stack
1. Update the Server
sudo apt-get update -y2. Install apache
sudo apt-get install apache23. Install MySQL server and the PHP module for MySQL. During installation, MySQL would prompt for the password for the root user. Set a strong password.
sudo apt-get install mysql-server-5.6 php5-mysql4. Create MySQL database directory using the following command.
sudo mysql_install_db5. Run the MySQL secure installation command.
sudo mysql_secure_installationThe above command would prompt for the root password. Enter the root password and proceed with the options given in the output below.
Enter current password for root (enter for none):

Change the root password? [Y/n] n
 ... skipping.

Remove anonymous users? [Y/n] y
 ... Success!

Disallow root login remotely? [Y/n] y
 ... Success!

Remove test database and access to it? [Y/n] y

Reload privilege tables now? [Y/n] y
 ... Success!
6. Install PHP.
sudo apt-get install php5 libapache2-mod-php5 php5-mcrypt7. Open /etc/apache2/mods-enabled/dir.conf file using vi or nano editor.
sudo vi /etc/apache2/mods-enabled/dir.confThe file would look like the following.
DirectoryIndex index.html index.cgi index.pl index.php index.xhtml index.htmMove index.php to first so that the file would look like the following.
DirectoryIndex index.php index.html index.cgi index.pl i index.xhtml index.htm8. Restart apache server.
sudo service apache2 restart
9. To know all the PHP details, create a file named info.php
sudo vi /var/www/html/info.phpCopy the following contents on the info.php file.
<?php
phpinfo();
?>
Now, if you browse to http://<Server-IP>/php.info, you will be able to see all the PHP configuration details.
Install and Configure PhpMyAdmin
PhpMyAdmin is a great utility for managing databases through GUI. Follow the steps carefully for setting up PhpMyAdmin.
1. Install PhpMyAdmin
sudo apt-get install phpmyadmin -yWhen it prompts for web server, press space bar and select apache2 and press enter. For Configure database for PHPMyAdmin, press enter. Password of the database's administrative user, enter the root password for MySQL that you created during MySQL installation. Enter the same password for confirmation.
2. Enable PHP mcrypt module.
sudo php5enmod mcrypt3. Restart the web server.
sudo service apache2 restartNow you can access the PhpMyAdmin Web UI by visiting the ec2 public IP address followed by PHPMyAdmin as shown below.
http://<server-IP>phpmyadminYou can use the MySQL root credentials to log in to PHPMyAdmin account.
Create Magento User and Database
You can create MySQL user and Database using the command line as well through PhpMyAdmin. Using PHPMyAdmin is self-explanatory. If you want to use the command line for creating the user and database, you can follow the steps given below.
- Sign into MySQL client using the root user and password.
mysql -u root -p- Create database Magento.
CREATE DATABASE magento;- Create a magento_admin with a strong password. Replace "password" with your strong password.
CREATE USER magento_admin@localhost IDENTIFIED BY 'password';- Grant all privileges to magento_admin for Magento database. Replace password accordingly.
GRANT ALL PRIVILEGES ON magento.* TO magento_admin@localhost IDENTIFIED BY 'password';- Flush all the privileges and exit the MySQL CLI.
FLUSH PRIVILEGES; exitSetting up Magento
In this section, we will configure Magento using LAMP stack. Follow the steps carefully.
- Create a file called magento.conf in the apache sites available folder.
sudo vi /etc/apache2/sites-available/magento.confCopy the following content on the file.
<VirtualHost *:80>
 DocumentRoot /var/www/html
 <Directory /var/www/html/>
 Options Indexes FollowSymLinks MultiViews
 AllowOverride All
 </Directory>
</VirtualHost>- Enable our new conf and disable the default conf using the following commands.
sudo a2ensite magento.conf
sudo a2dissite 000-default.conf- Reload the apache service.
sudo service apache2 reload- Open php.ini file to increase the memory_limit parameter to 512M (default 128M).
sudo vi /etc/php5/apache2/php.iniFind memory_limit parameter and set it to 512M and save the file.
memory_limit = 512M- Install required PHP modules for Magento.
sudo apt-get -y install libcurl3 php5-curl php5-gd php5-mcrypt php5-intl php5-xsl- Enable rewrite, mcrypt module and restart the apache server.
sudo a2enmod rewrite sudo php5enmod mcrypt sudo service apache2 restartSetup Magento 2.X
- Install Composer.
curl -sS https://getcomposer.org/installer | sudo php – --install-dir=/usr/local/bin --filename=composer- Create a Magento marketplace account and get public and private access keys from your account. Refer this link for getting the public and private keys
- Create an auth.json file
sudo vi /root/.composer/auth.jsonCopy the following content on to the file with your public and private key.
{
"http-basic": {
      "repo.magento.com": {
         "username": "edd45269f04a6ca51cbbbed2fedab26b",
         "password": "ef88687a5cf5d109c5540ff401b0b903"
      }
   }
}- Get the latest Magento binaries using git.
If you don't have git installed, install it using the following command.
sudo apt-get install git -yClone the magento2 community version code to Magento directory.
git clone -b 2.0 https://github.com/magento/magento2.git magento- Copy all files to /var/www/html directory using rysync.
sudo rsync -avP magento/. /var/www/html/- CD into /var/www/html folder and install all the required Magento modules using composer.
cd /var/www/html composer install- Change the owner of /var/www/html to www-data.
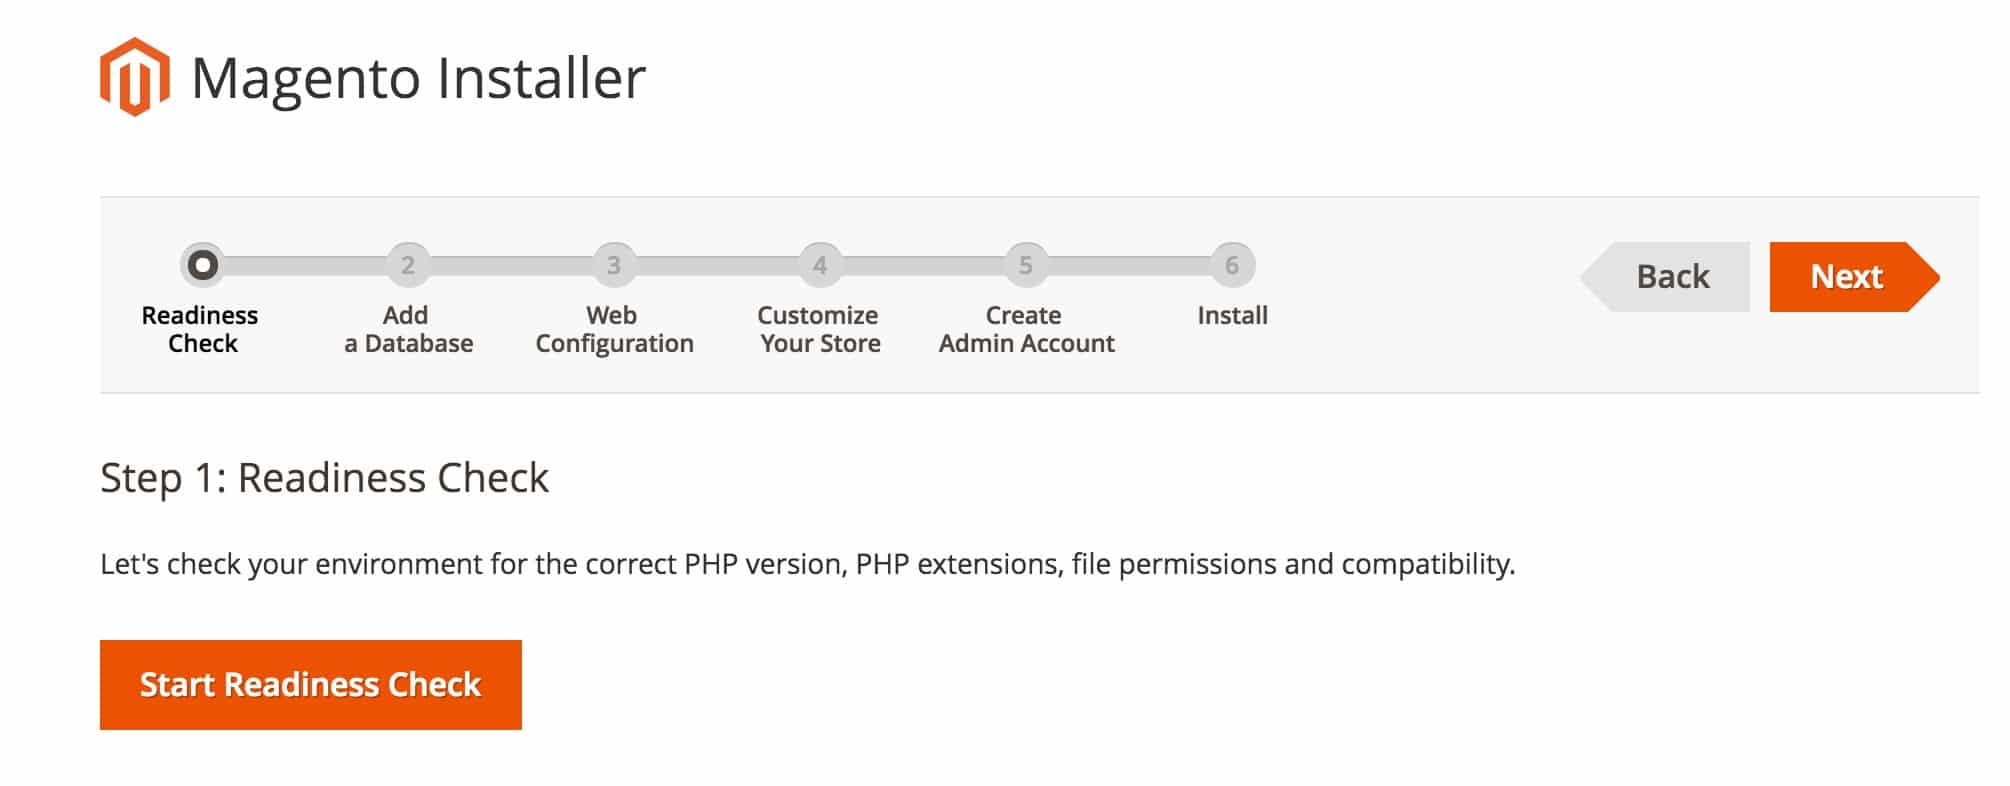
sudo chown -R www-data:www-data /var/www/html/- Visit the public IP of your server. You will see the Magento setup page as shown below.

- Click agree and setup. Click next for database settings.
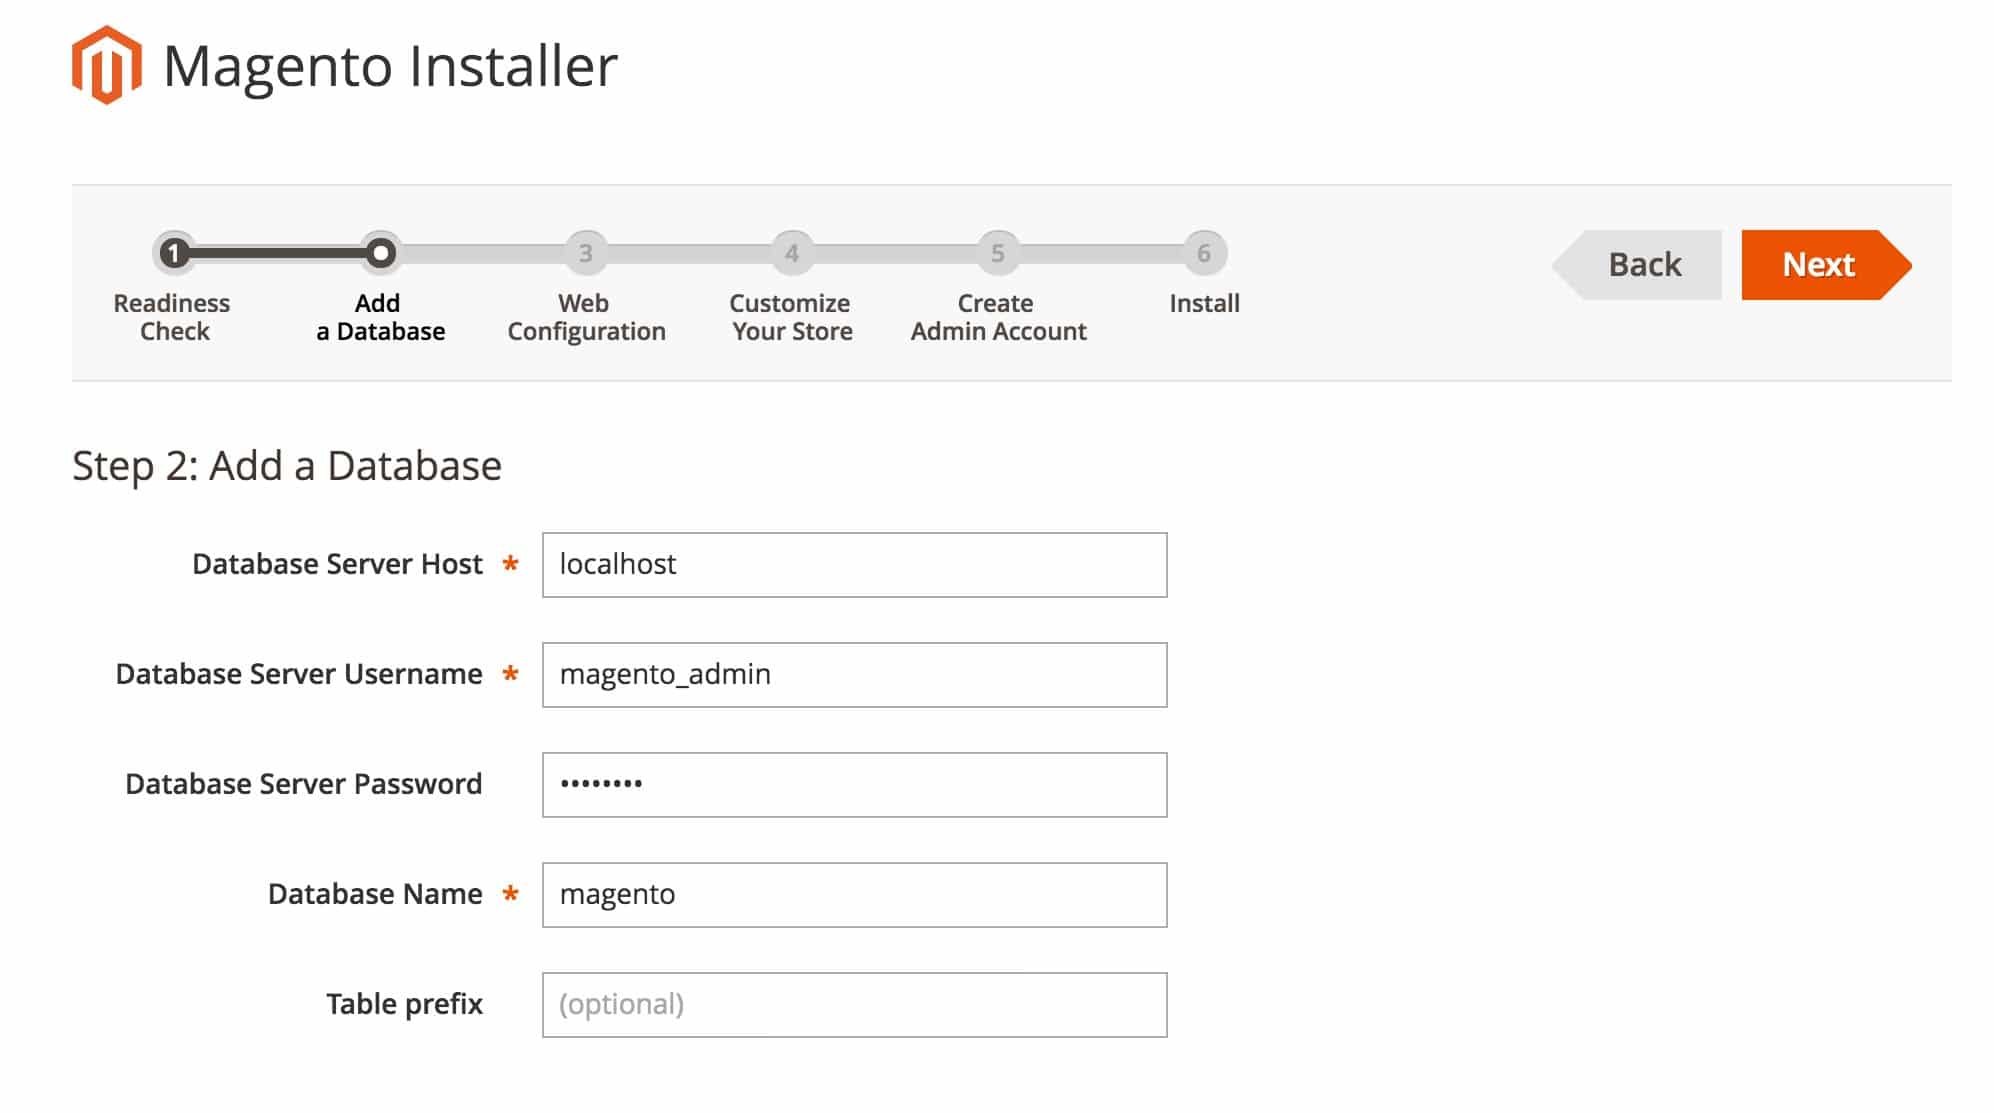
- Enter the database username , password and database name you have created under MySQL configuration as shown below. Click next after entering the details.
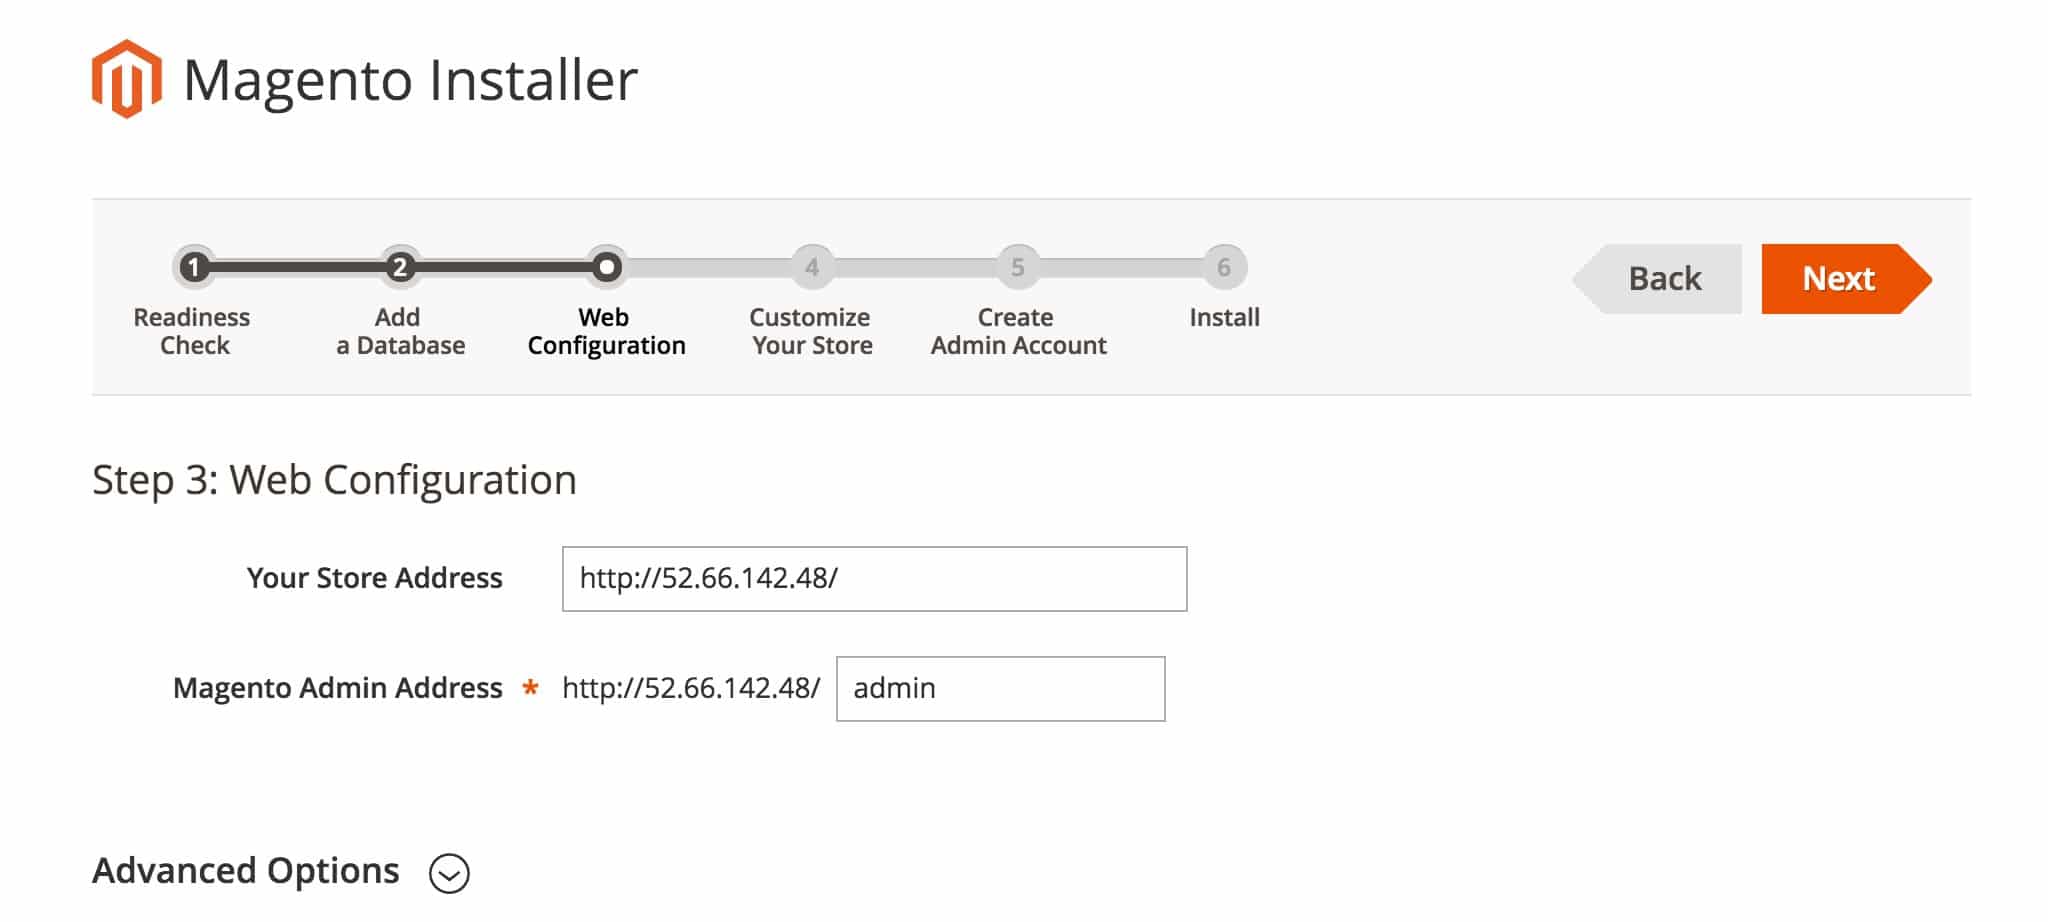
- Next page, you can see the store and admin page address. You can customize the admin age path. If you have a domain name, you can map the domain name to the IP address.
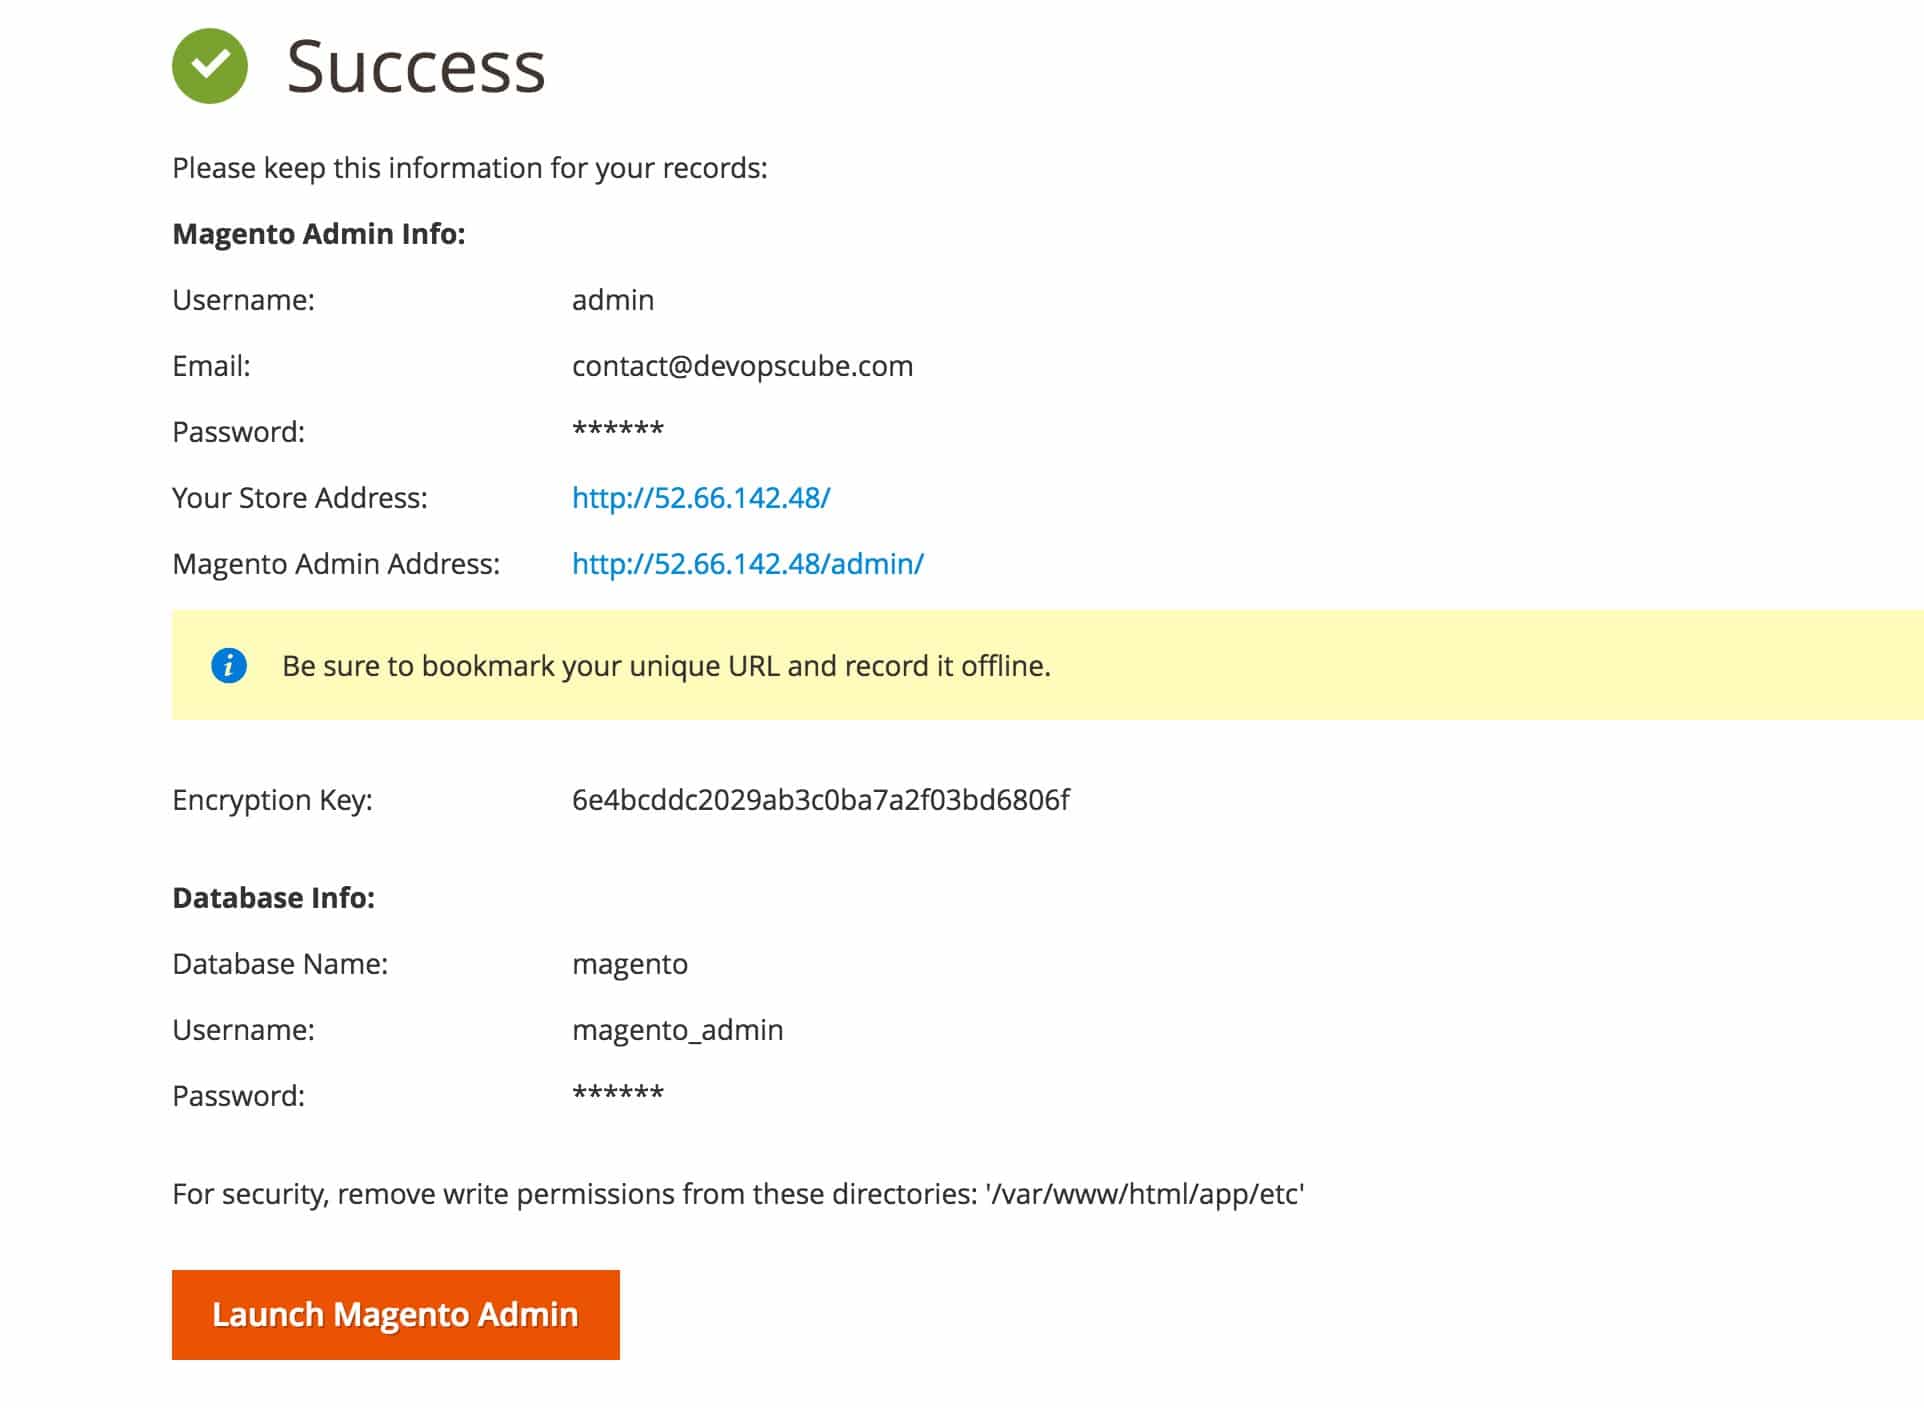
From this point, you can click next and fill in the details. In the last page, click "Install" option. Once installed, you will get all the details of your Magento site as shown below.