

In this blog, you will learn how to checkout a git pull request using step-by-step instructions.
Git Checkout Pull Request Steps
You might need to check out an unapproved pull request for several reasons. In most cases, the automated CI/CD workflow takes care of testing the changes. However, when there is a pull request for a breaking change, you might want to test the changes separately before merging them to the desired branch.
Step 1: Get the Pull Request Number
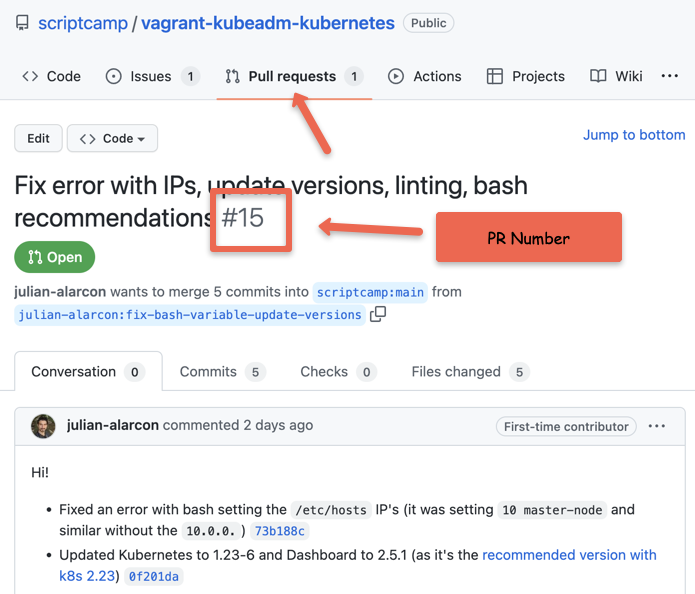
First, get the pull request number from the Pull request details. It you are using Github, you can easily get the pull request number from the GUI as shown below.
If you are using Github CLI, you can get the PR number by executing the following command from the repo directory.
gh pr listStep 2: Fetch origin With Pull Request number
Now that you have the PR number, you can fetch all the changes locally from the origin to a local git branch using the following command.
Replace 15 with your PR number and test-branch with the desired branch name.
git fetch origin pull/15/head:test-branchStep 3: Checkout the Pull Request Local Branch
Now checkout the test-branch where you have all the changes from the pull request.
git checkout test-branchWith this local test branch, you can run all your tests and even try making changes. Once you are done with the testing, you can review the pull requests again if changes are required and merge them to the desired branch.
Conclusion
You can checkout a git pull request in three easy steps as shown in this article. If you are building a CI/CD pipeline for application or infrastructure code, always integrate automated testing on every PR so that you dont have to manually test it and avoid wrong configurations getting merged to deployment branches.
Also, learn how to checkout a specific git commit and how to checkout a git tag.
