> ## Content Index
> Fetch the complete content index at: https://devopscube.com/llms.txt
> Use this file to discover other available public pages before exploring further.
# Install Wordpress on Ubuntu Server(Step-by-Step Guide)
- URL: https://devopscube.com/wordpress-installation-guide/
- Published: 2024-03-20T01:37:00.000Z
- Updated: 2026-06-02T09:19:08.000Z
- Author: Aswin Vijayan
- Tags: HOW TO GUIDES, TUTORIAL, WORDPRESS, #Migrated-1741795015845, #wp, #wp-post, #Import 2025-03-12 15:57, #blog
This WordPress installation guide helps you to install and configure the latest WordPress on an Ubuntu Linux box. It covers Apache, [MariaDB](https://devopscube.com/install-mariadb-on-ubuntu/), PHP, and Wordpress configurations.
## Wordpress Installation On Ubuntu Server
This installation guide covers the following.
1. Installation and configuration of [Apache2](https://httpd.apache.org/?ref=devopscube.com)
2. Installation and configuration for [MariaDB](https://mariadb.org/?ref=devopscube.com)
3. Installation and configuration of PHP and Apache modules.
4. WordPress Apache configurations with a domain name.
5. Accessing the [WordPress](https://wordpress.org/?ref=devopscube.com) dashboard.
💡
If you are looking for easy wordpress setup, checkout [Wordpress setup on Bluehost hosting](https://devopscube.com/setup-wordpress-on-bluehost/)
## How to install Wordpress on Ubuntu Server?
Follow the steps given below for the complete WordPress setup on Ubuntu 23.04
## Install and Configure Apache 2
**Step 1:** Login to the server and [update the package repos](https://askubuntu.com/questions/222348/what-does-sudo-apt-get-update-do?ref=devopscube.com).
```
sudo apt-get update -y
```
**Step 2:** Install Apache2**,**
```
sudo apt-get install apache2 -y
```
**Step 3:** Execute the following command to disable anonymous directory listing.
```
sudo sed -i "s/Options Indexes FollowSymLinks/Options FollowSymLinks/" /etc/apache2/apache2.conf
```
**Step 4:** Start, enable, and check the status of Apache2
```
sudo systemctl stop apache2
sudo systemctl enable apache2
sudo systemctl start apache2
```
## Install and Configure MariaDB
**Step 1:** Install the Marais DB database server and client
```
sudo apt-get install mariadb-server mariadb-client -y
```
**Step 2:** Use the following commands to start, stop, enable, and check the status of the MariaDB service.
```
sudo systemctl stop mysql
sudo systemctl start mysql
sudo systemctl enable mysql
sudo systemctl status mysql
```
**Step 3:** Setup the root admin password for the database using mysql\_secure\_installation command. It will prompt you to set up the new password.
```
sudo mysql_secure_installation
```
Use the following options for the prompt.
```
Enter current password for root (enter for none): Just press the Enter
Set root password? [Y/n]: Y
New password: Enter password
Re-enter new password: Repeat password
Remove anonymous users? [Y/n]: Y
Disallow root login remotely? [Y/n]: Y
Remove test database and access to it? [Y/n]: Y
Reload privilege tables now? [Y/n]: Y
```
**Step 4:** Restart the database server for the changes to take effect.
```
sudo systemctl restart mysql
```
## Setup and Configure PHP
**Step 1:** Install PHP 8 and its related modules.
```
sudo apt-get install php8.2 php8.2-mysql libapache2-mod-php8.2 php8.2-cli php8.2-cgi php8.2-gd
```
**Step 2:** Open /etc/php/8.2/apache2/php.ini file
```
sudo vi /etc/php/8.2/apache2/php.ini
```
Add the following contents to the file.
```
file_uploads = On
allow_url_fopen = On
memory_limit = 256M
upload_max_filesize = 150M
max_execution_time = 350
date.timezone = America/Chicago
```
## Configure Database For Wordpress
**Step 1:** Login to the database using the password you set for root.
```
sudo mysql -u root -p
```
**Step 2:** Create a database named "wordpress-db"
```
CREATE DATABASE wordpress_db;
```
**Step 3:** Create a new database user named "wordpress-admin" and set a custom password. This user will be used in the WordPress configuration.
```
CREATE USER 'wordpress-admin'@'localhost' IDENTIFIED BY 'your_password_here';
```
**Step 4:** Grant all privileged on wordpress-db for wordpress-admin user. Replace the password you set for wordpress-admin.
```
GRANT ALL ON wordpress_db.* TO 'wordpress-admin'@'localhost' IDENTIFIED BY 'your-password-here' WITH GRANT OPTION;
```
**Step 5:** Flush all privileges and exit the db shell.
```
FLUSH PRIVILEGES; exit
```
## Setup and Configure Wordpress
**Step 1:** Download the latest WordPress
```
wget https://wordpress.org/latest.tar.gz
```
**Step 2:** Untar the WordPress files
```
tar -xvf latest.tar.gz
```
**Step 3:** Move the WordPress folder to /var/www/html folder.
```
sudo mv wordpress /var/www/html/wordpress
```
**Step 4:** Change the ownership of the wordpress folder to www-data
```
sudo chown -R www-data:www-data /var/www/html/wordpress/
```
**Step 5:** Change the folder and file permissions using the following command. Folders should have 755 permission, and files should have 644 permission.
```
find /var/www/html/ -type d -print0 | xargs -0 chmod 0755
find /var/www/html/ -type f -print0 | xargs -0 chmod 0644
```
You can check if the permissions have been applied using the following command.
```
stat -c "%a %n" /var/www/html/wordpress/*
```
## Configure Apache For Wordpress
**Step 1:** Create a new Apache configuration named wp-site.conf for the WordPress site.
```
sudo vi /etc/apache2/sites-available/wp-site.conf
```
Add the following configuration to the file and save it. Replace `yourdomain` with your custom domain name.
```
ServerAdmin admin@yourdomain.com
DocumentRoot /var/www/html/wordpress/
ServerName yourdomain.com
ServerAlias www.yourdomain.com
Options +FollowSymlinks
AllowOverride All
Require all granted
ErrorLog ${APACHE_LOG_DIR}/error.log
CustomLog ${APACHE_LOG_DIR}/access.log combined
```
**Step 2:** Enable wp-site.conf
```
sudo a2ensite wp-site.conf
```
**Step 3:** Enable the Apache rewrite module.
```
sudo a2enmod rewrite
```
**Step 4:** Restart the Apache server.
```
sudo systemctl restart apache2
```
## Configure Wordpress Application
**Step 1:** Rename the default `wp-config-sample.php` to `wp-config.php`
```
sudo mv /var/www/html/wordpress/wp-config-sample.php /var/www/html/wordpress/wp-config.php
```
**Step 2:** Open the wp-config.php file
```
sudo vi /var/www/html/wordpress/wp-config.php
```
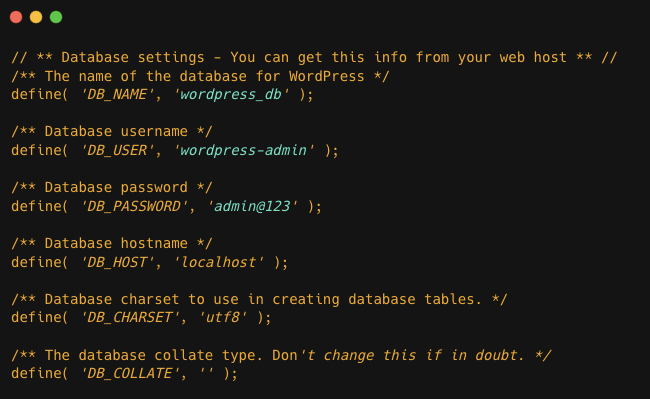
Replace the values highlighted in the image below with the database, user, and password generated in the previous steps.
**Step 3:** Now you have configured your site details on the wp-site.conf file, try to access WordPress by browsing the domain name you used on the wp-site.conf file.
Make sure your server is mapped to the domain name you configured in the wp-site.conf file.
```
http://your-domain-name.com
```
If you haven't configured a domain name, you can access the installed WordPress with
```
http:///wordpress
```
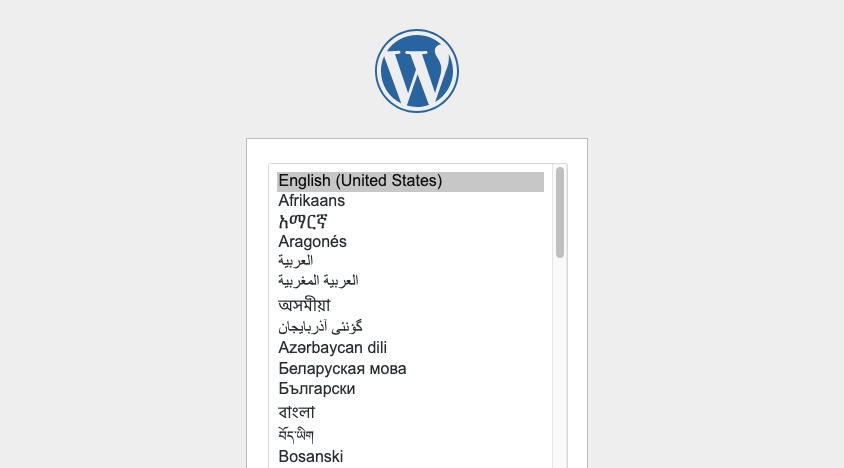
**Step 4:** Select the preferred language and fill up the details in the configuration wizard.
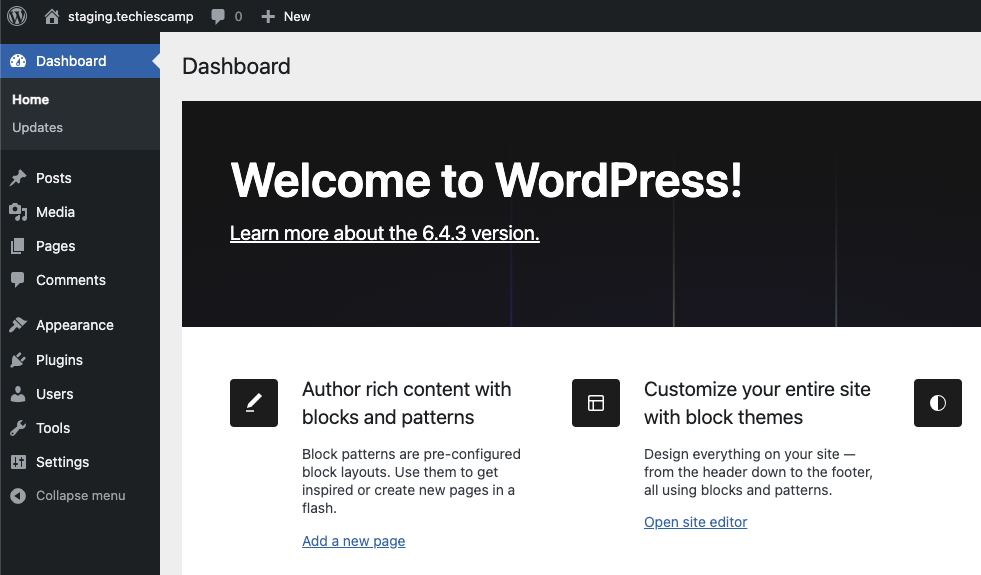
**Step 5:** Once WordPress is installed, you can access the dashboard using the username and password.
## Conclusion
Setting up Wordpress is not a complex setup if you have some Linux technical background. However, managing it long term is the complex part.
If you are setting up Wordpress for your organization, you can try managed wordpres cloud hosting like [Cloudways](https://devopscube.com/cloudways-review/).
If you are on a budget, you can get started with managed wordpress on Bluehost. It offer deep discounts up to 65% on its plans. Checkout the [Bluehost Coupon](https://devopscube.com/bluehost-coupon-code/) page to get the latest discounts.